
This guide describes how to configure the MonoSign Mail Notification Channel. Before proceeding, ensure that a valid license has been applied and that your MonoSign Management Portal is properly configured.
MonoSign supports multiple notification channels — including Mail, SMS, Web Notification, and Push Notification — to deliver notifications to users.
📘 Instructions
This configuration guide consists of three required steps and two optional steps.
-
Log in to the Management Portal using the root account.
-
Navigate to System → Configurations from the left-hand menu.
-
Select the Notification section from the side panel.
-
Click the Mail tab.
-
-
Complete the Mail Notification Channel configuration as described in the steps below.
Only users with Administrator privileges can modify Notification settings.
Step 2 — Navigating to Mail Notification Channel Settings
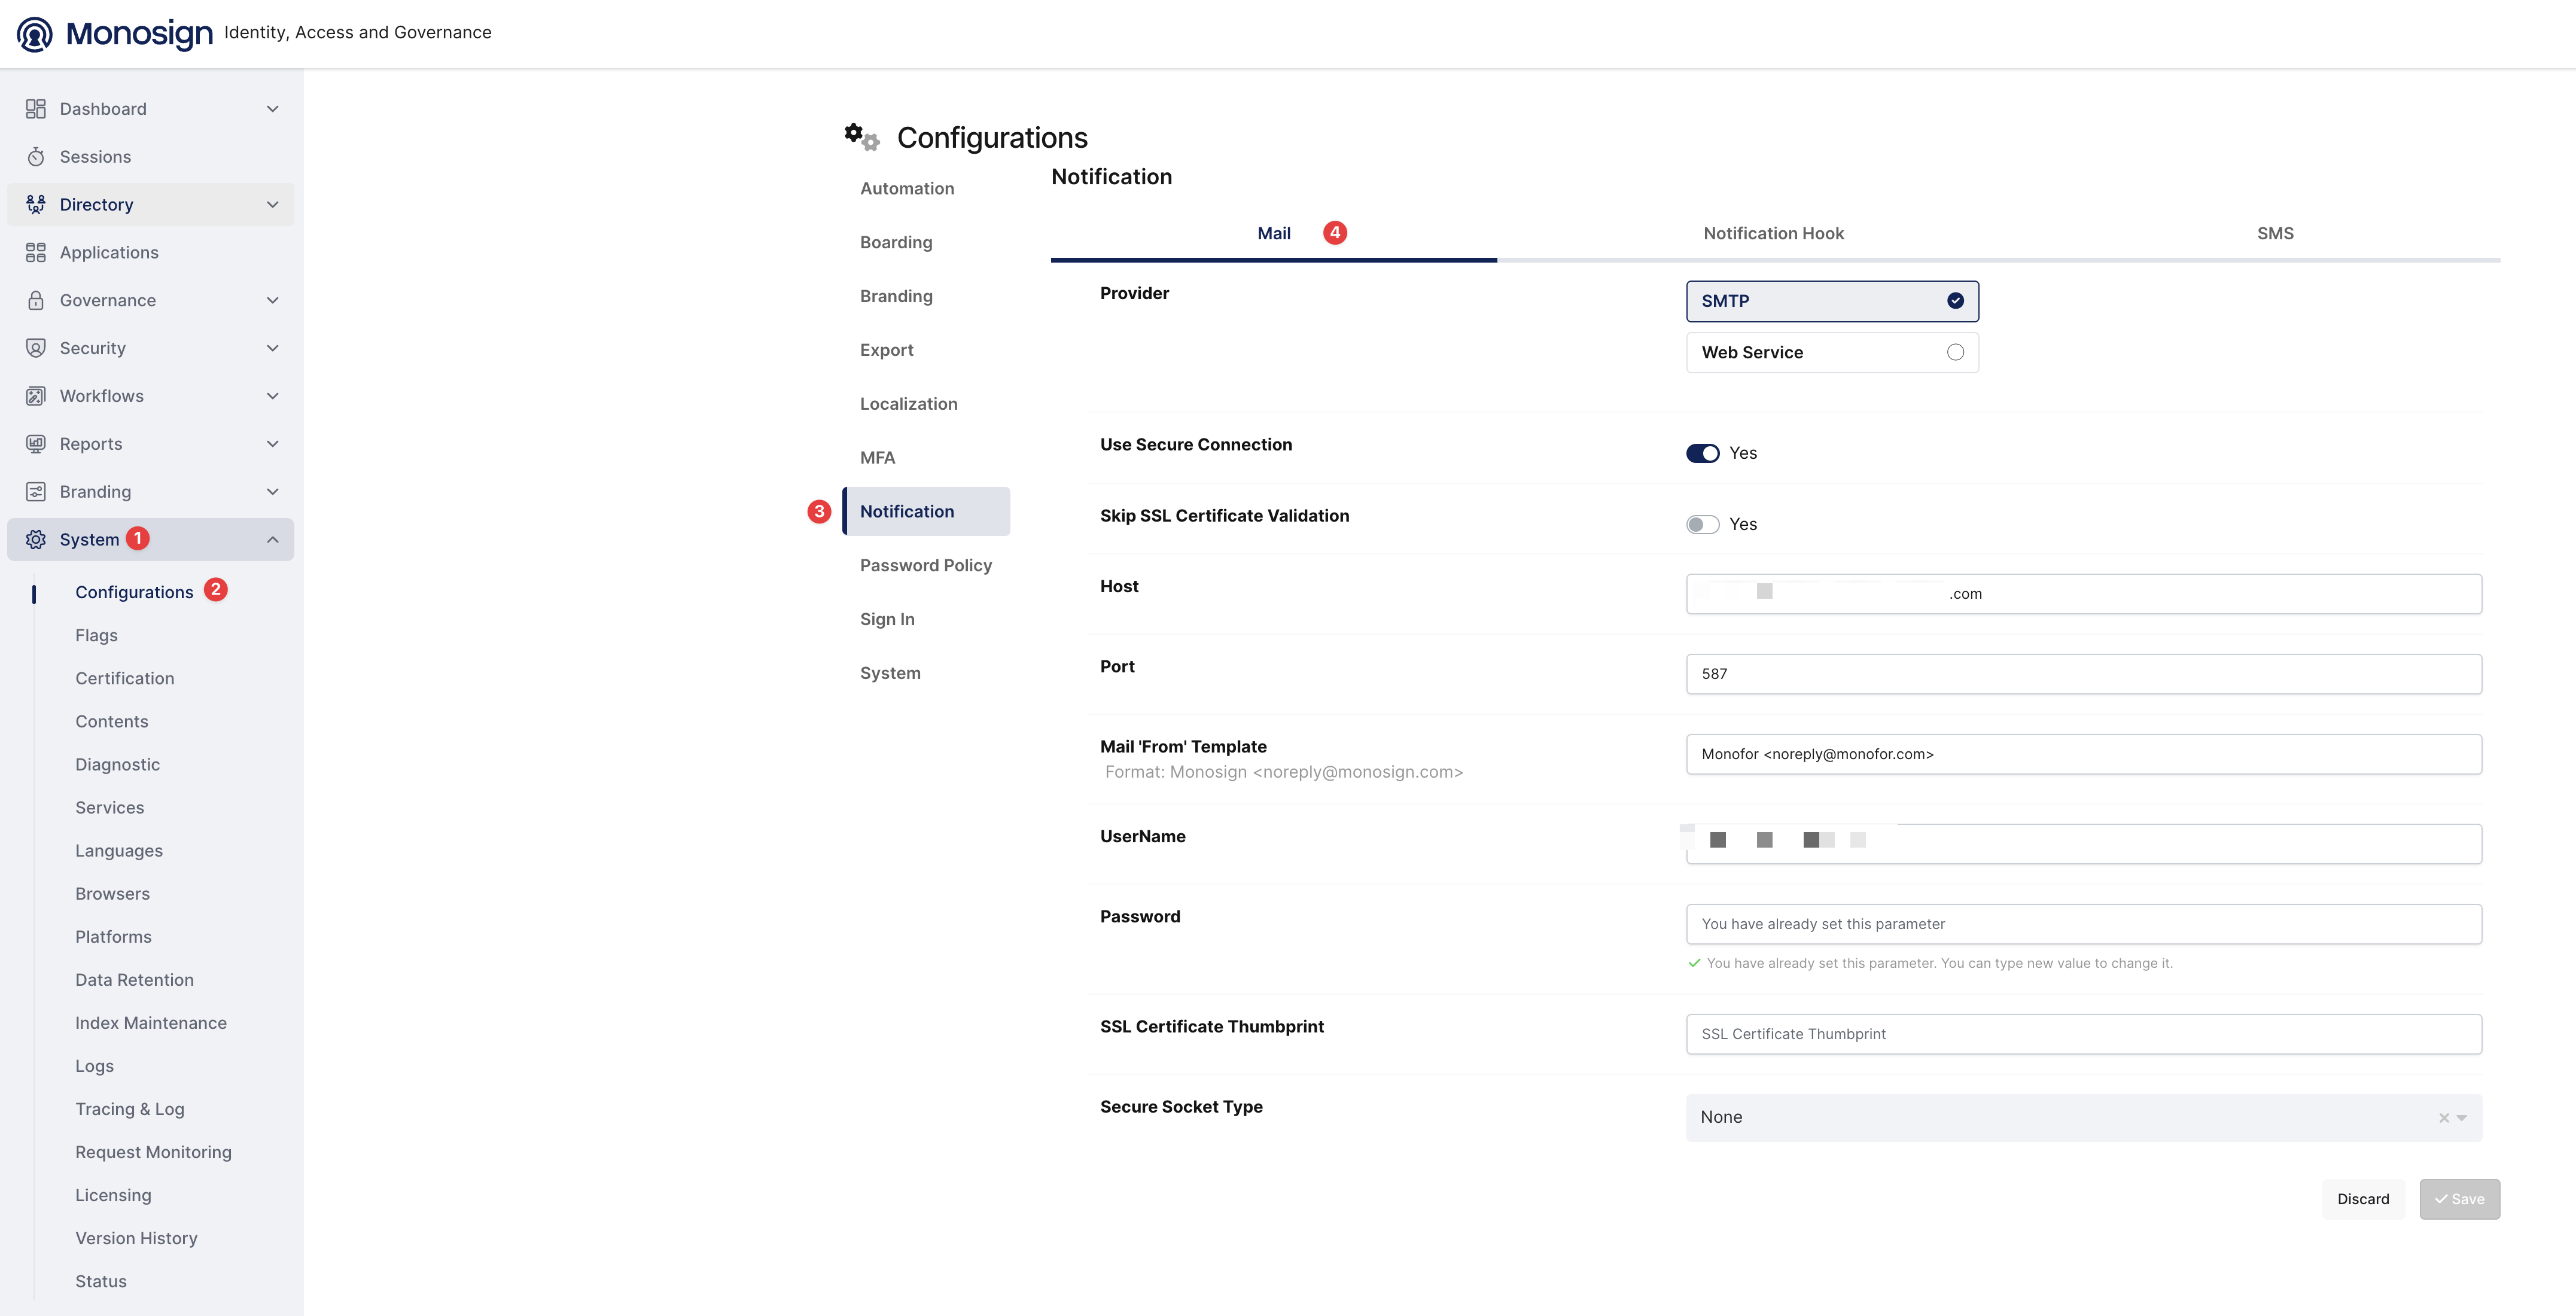
Step 3 — Configure the Mail Notification Channel
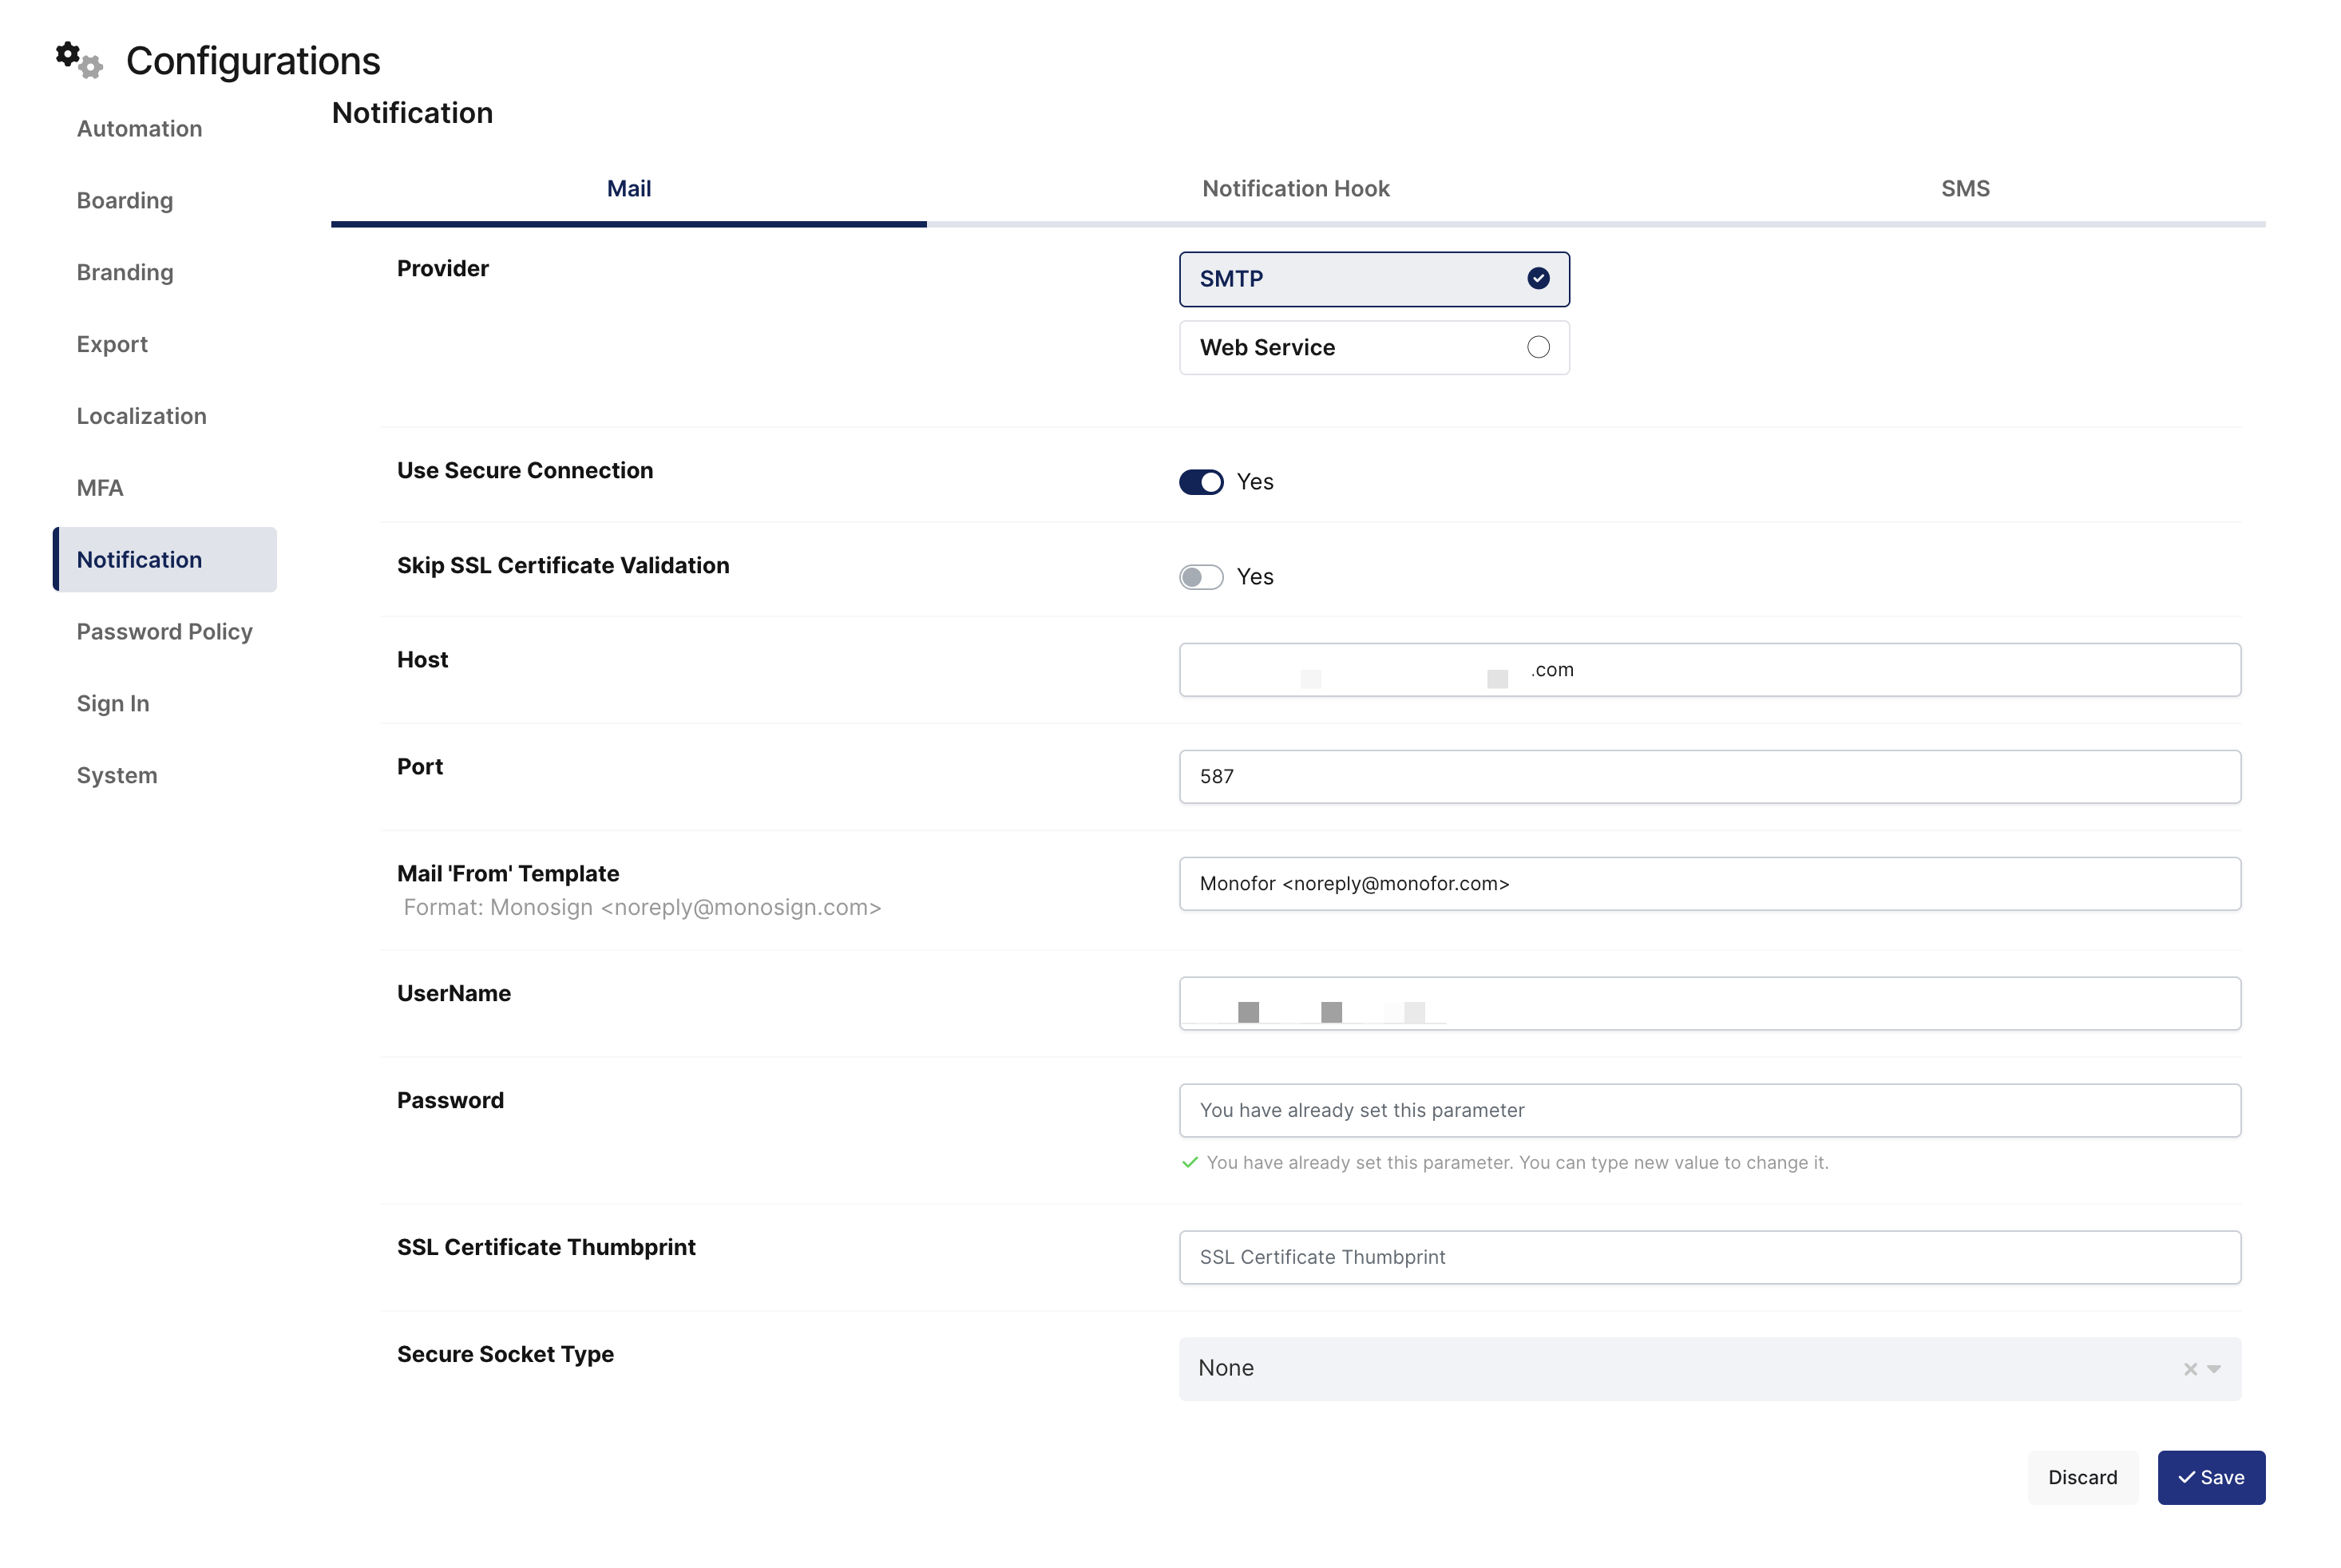
A mail server must be configured to enable MonoSign to deliver email notifications to users. Fill in all required fields according to your mail server settings, as illustrated below.
|
Field |
Description |
|---|---|
|
Use Secure Connection |
Enables an encrypted (secure) connection between MonoSign and the mail server. |
|
Skip SSL Certificate Validation |
When enabled, SSL certificate verification is bypassed during the connection. |
|
Host |
The hostname or IP address of the mail server. |
|
Port |
The port number used to connect to the mail server. |
|
Mail 'From' Template |
Defines the display name and address shown in the "From" field of outgoing emails. |
|
Username |
The username used to authenticate with the mail server. |
|
Password |
The password used to authenticate with the mail server. |
|
SSL Certificate Thumbprint |
The thumbprint of the SSL certificate presented by the mail server, used for validation. |
|
Secure Socket Type |
Specifies the secure socket protocol to use when connecting to the mail server. Available options: None, Auto, SSL on Connect, StartTLS, StartTLS When Available |
Step 4 — Enable Mail Authenticator on MonoSign (Optional)
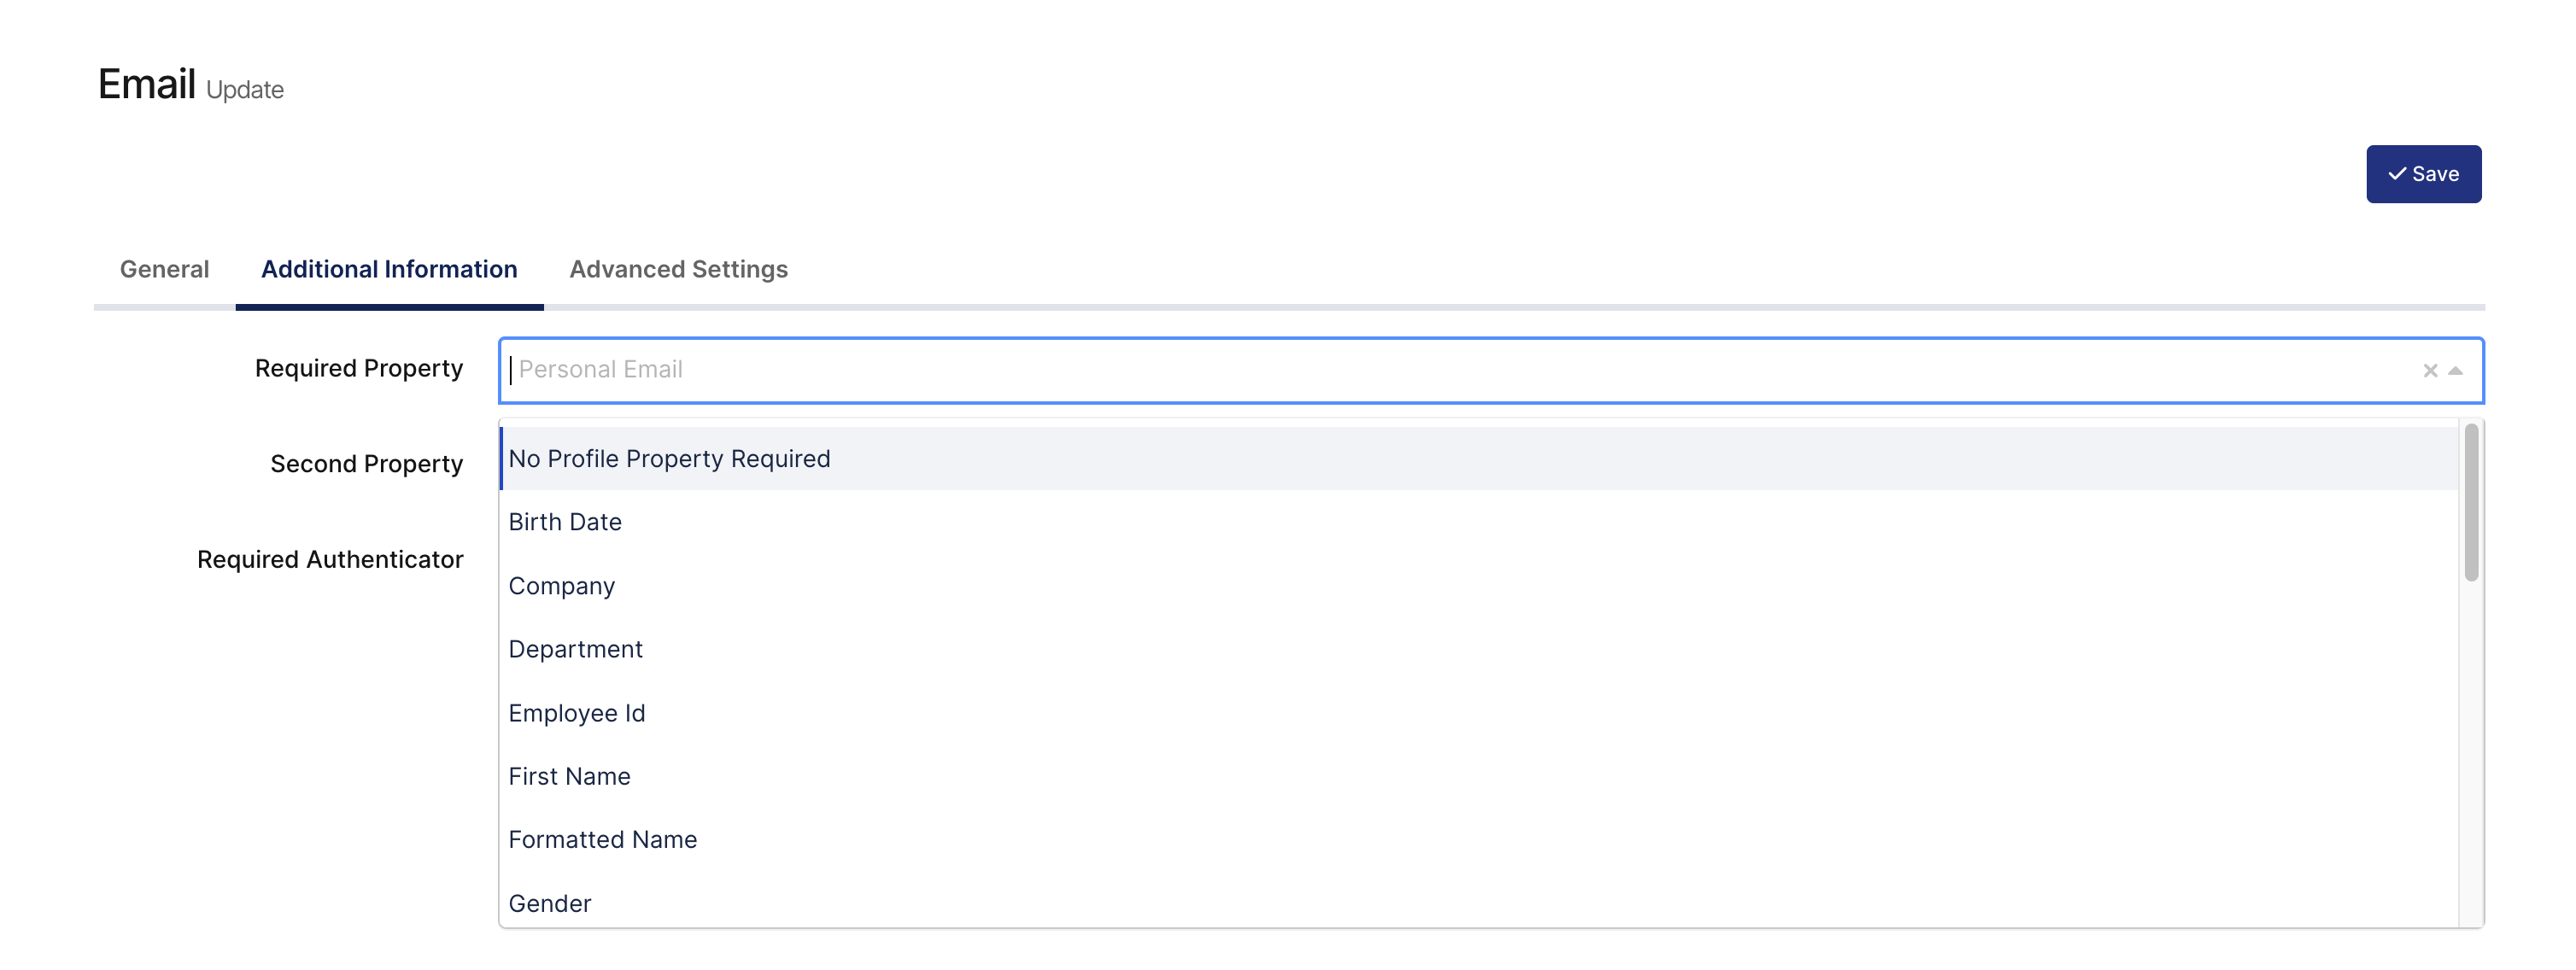
To make Email MFA available as an authentication option, the administrator must navigate to the Authenticators page and enable the Email Authenticator.
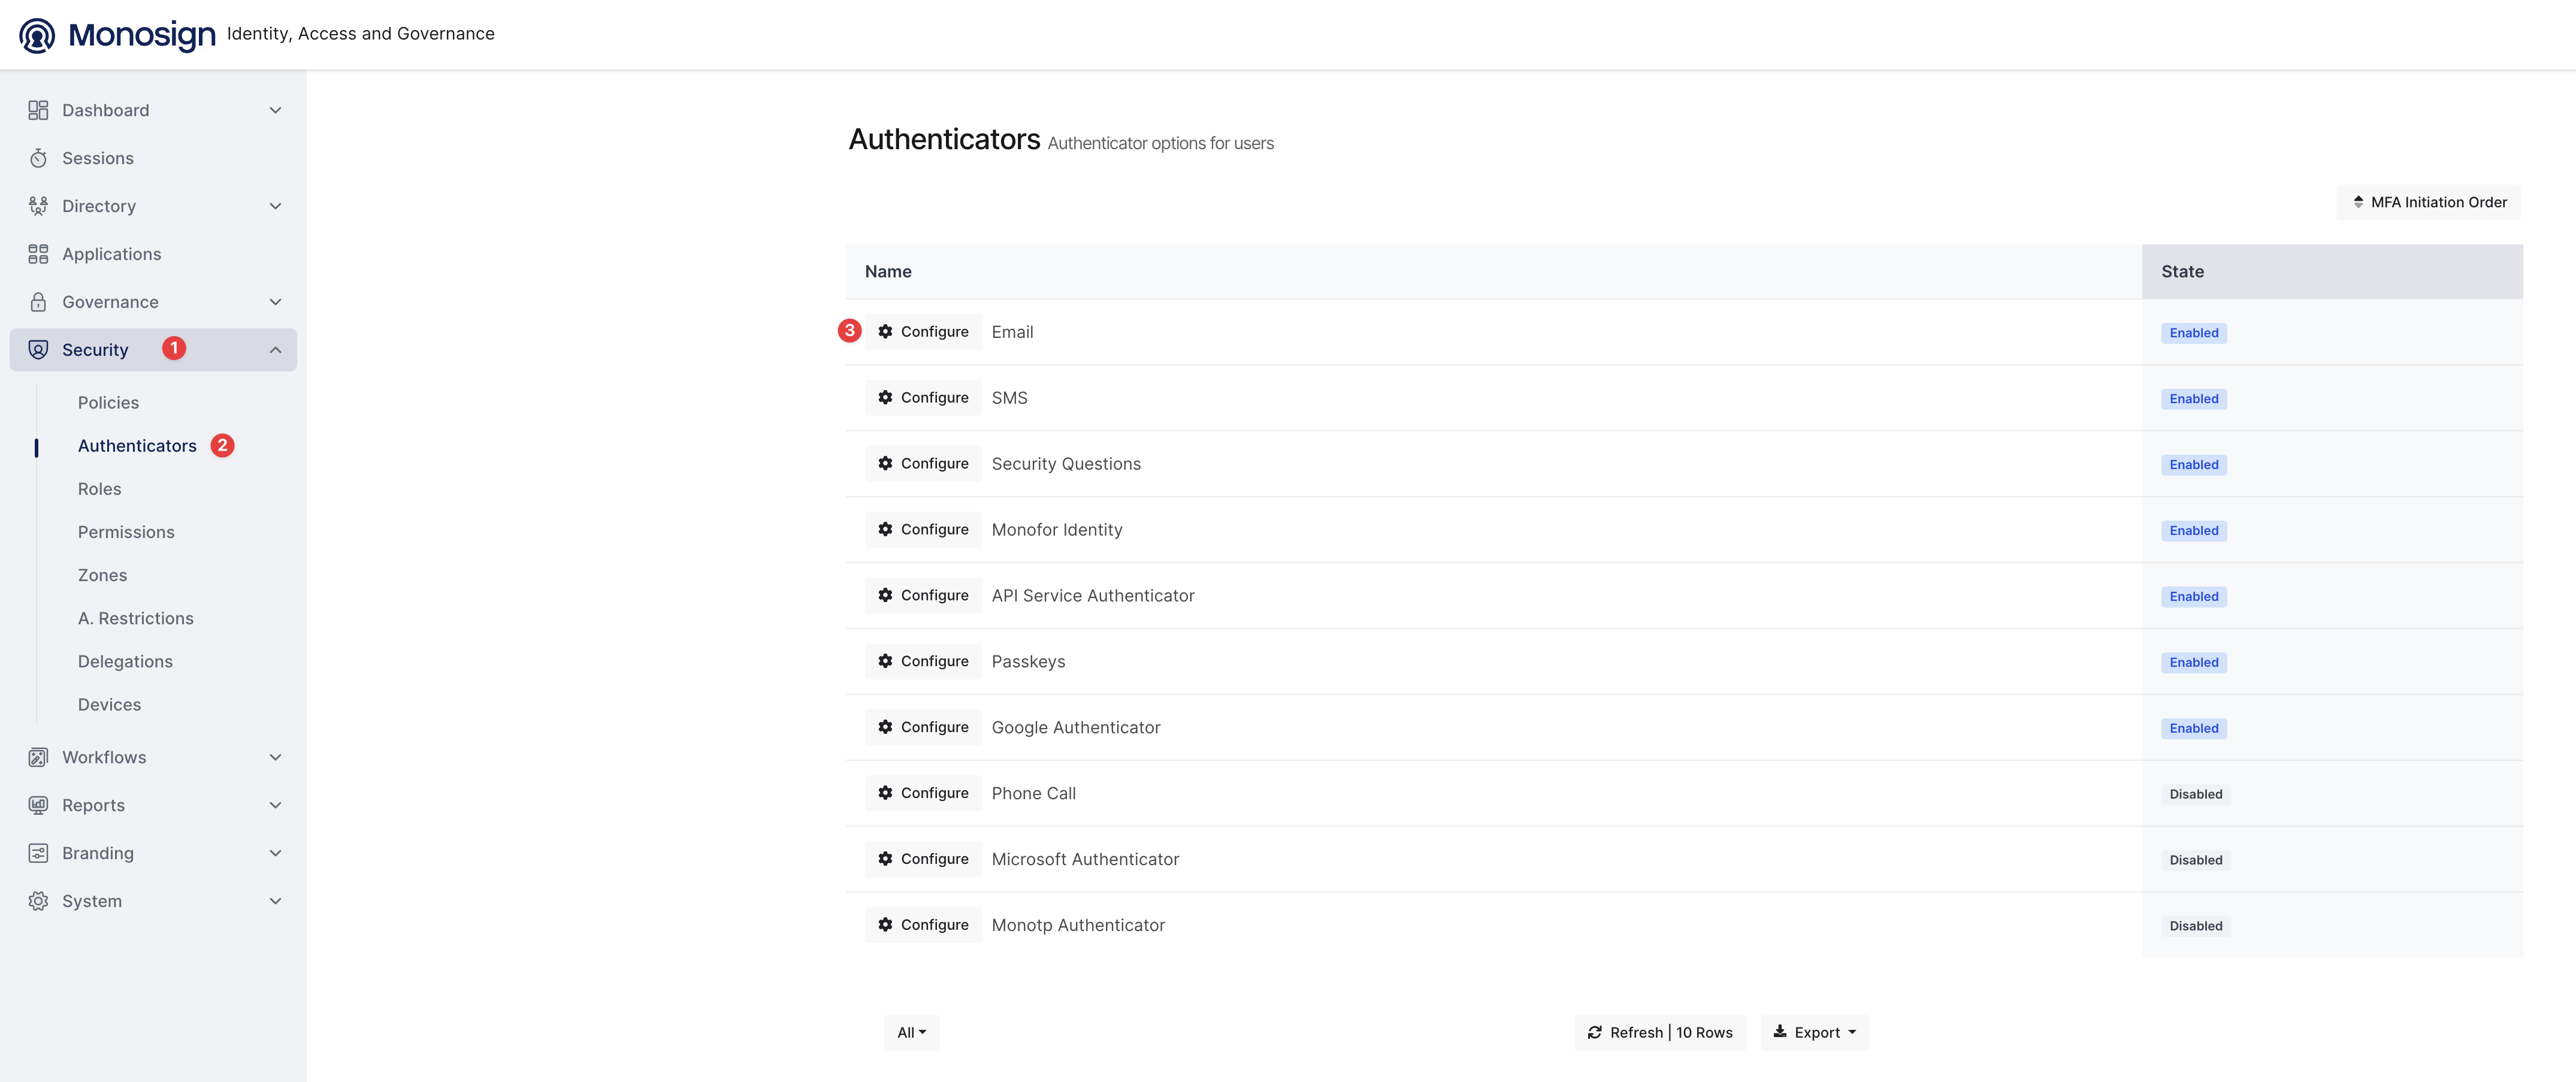
Enabling the Email Authenticator makes Email MFA available system-wide as an option. It does not automatically assign Email MFA to all users.
Select the Enable option to activate Email MFA at the system level.
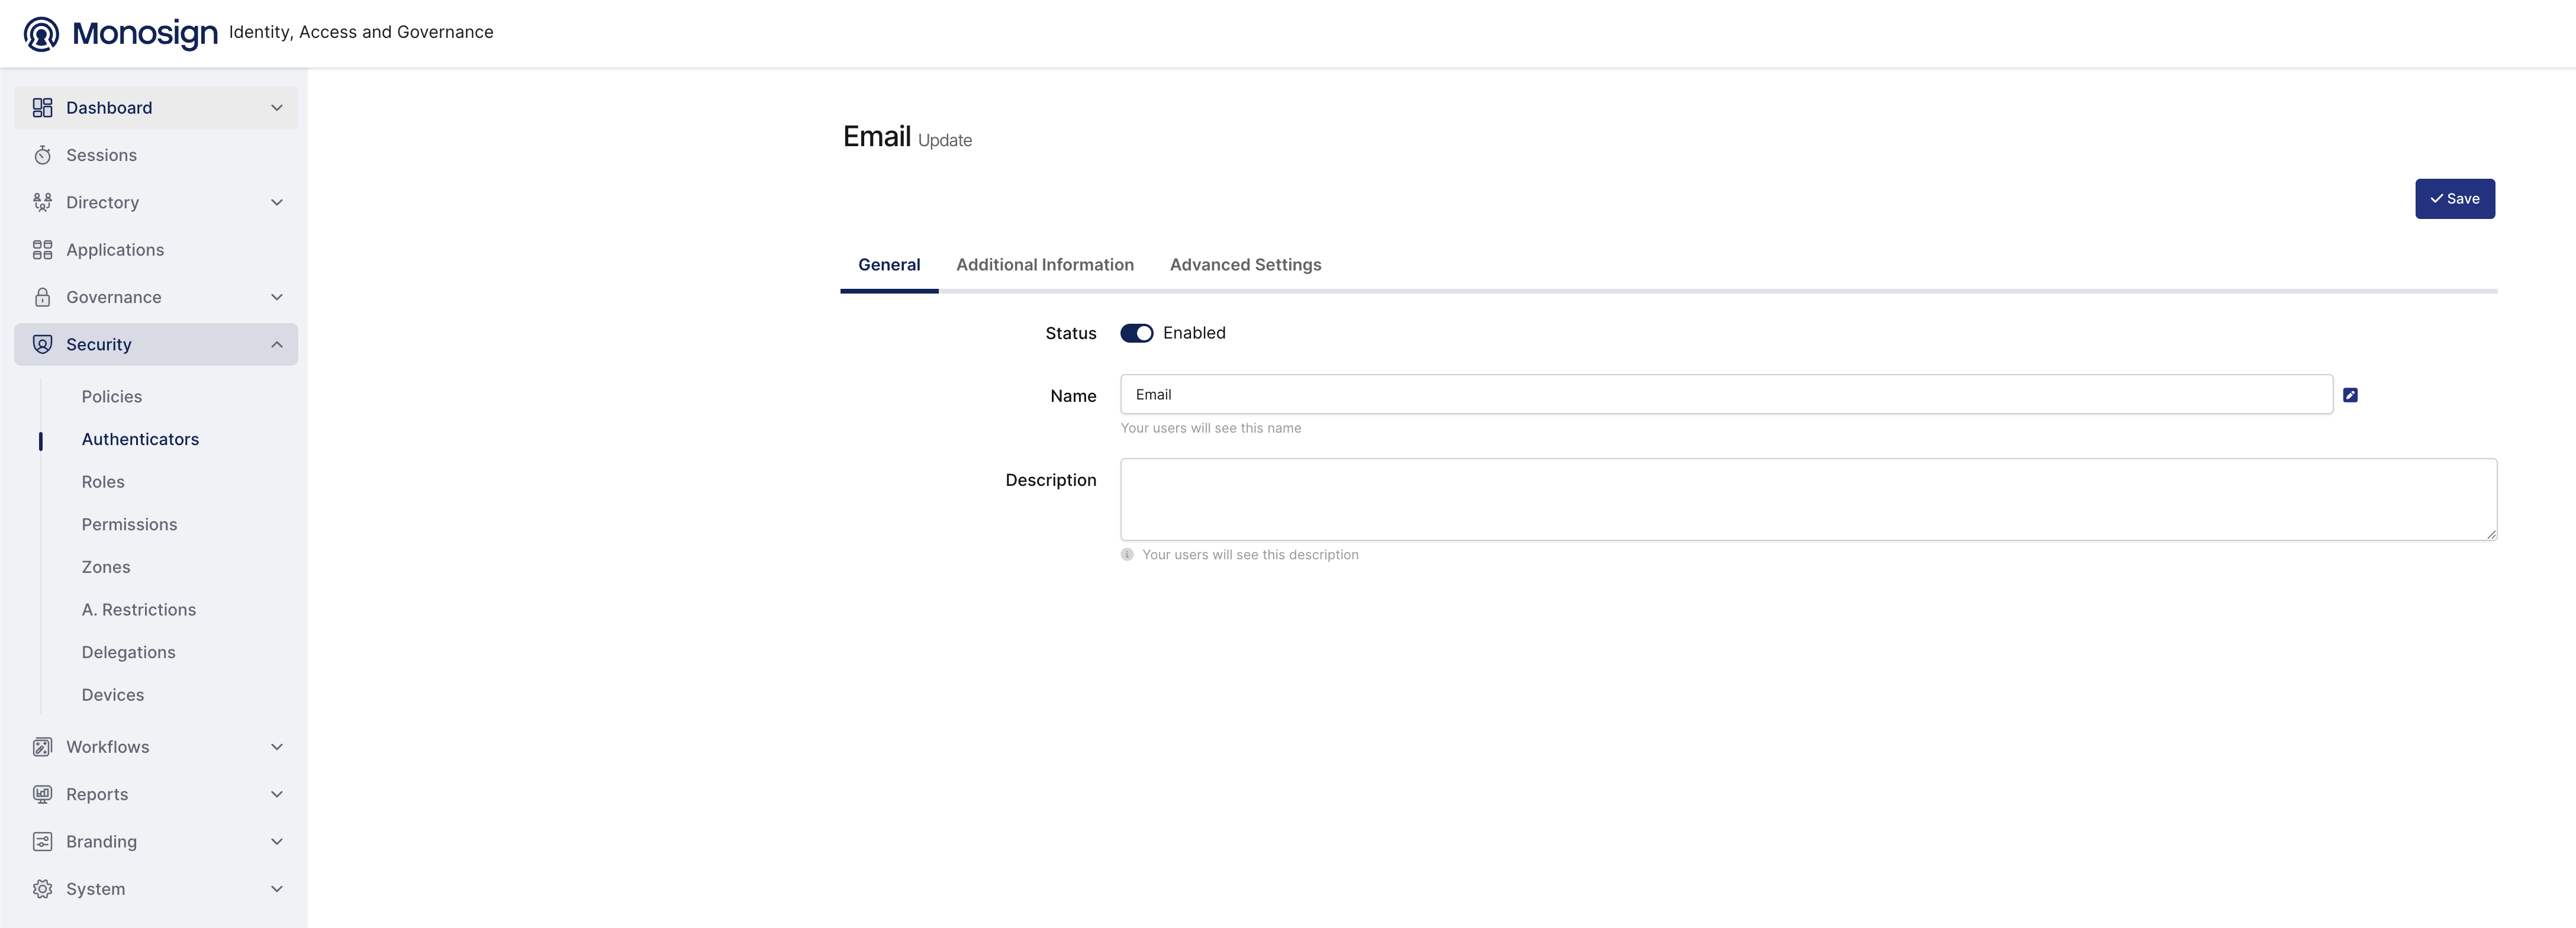
By default, the Email MFA option uses the user's personal email address stored in their profile. Other profile attributes can be configured as the email source if required.
Step 5 — Assign the Mail Authenticator to Users (Optional)
There are two methods for assigning the Email MFA authenticator to users.
Option 1 — Manual Assignment
An administrator can assign the Email MFA authenticator to a specific user directly from the user's detail page by following these steps:
-
Navigate to Directory → Users from the left-hand menu.
-
Locate the user by searching for their first name, last name, username, or email address.
-
Click the username, or select View Details from the three-dot menu on the right.
-
Open the Authenticators tab within the user details page.
-
Click Add New Authenticator.
-
Search for and select the Email MFA option.
-
Follow the steps shown in the image below to complete the assignment.
-
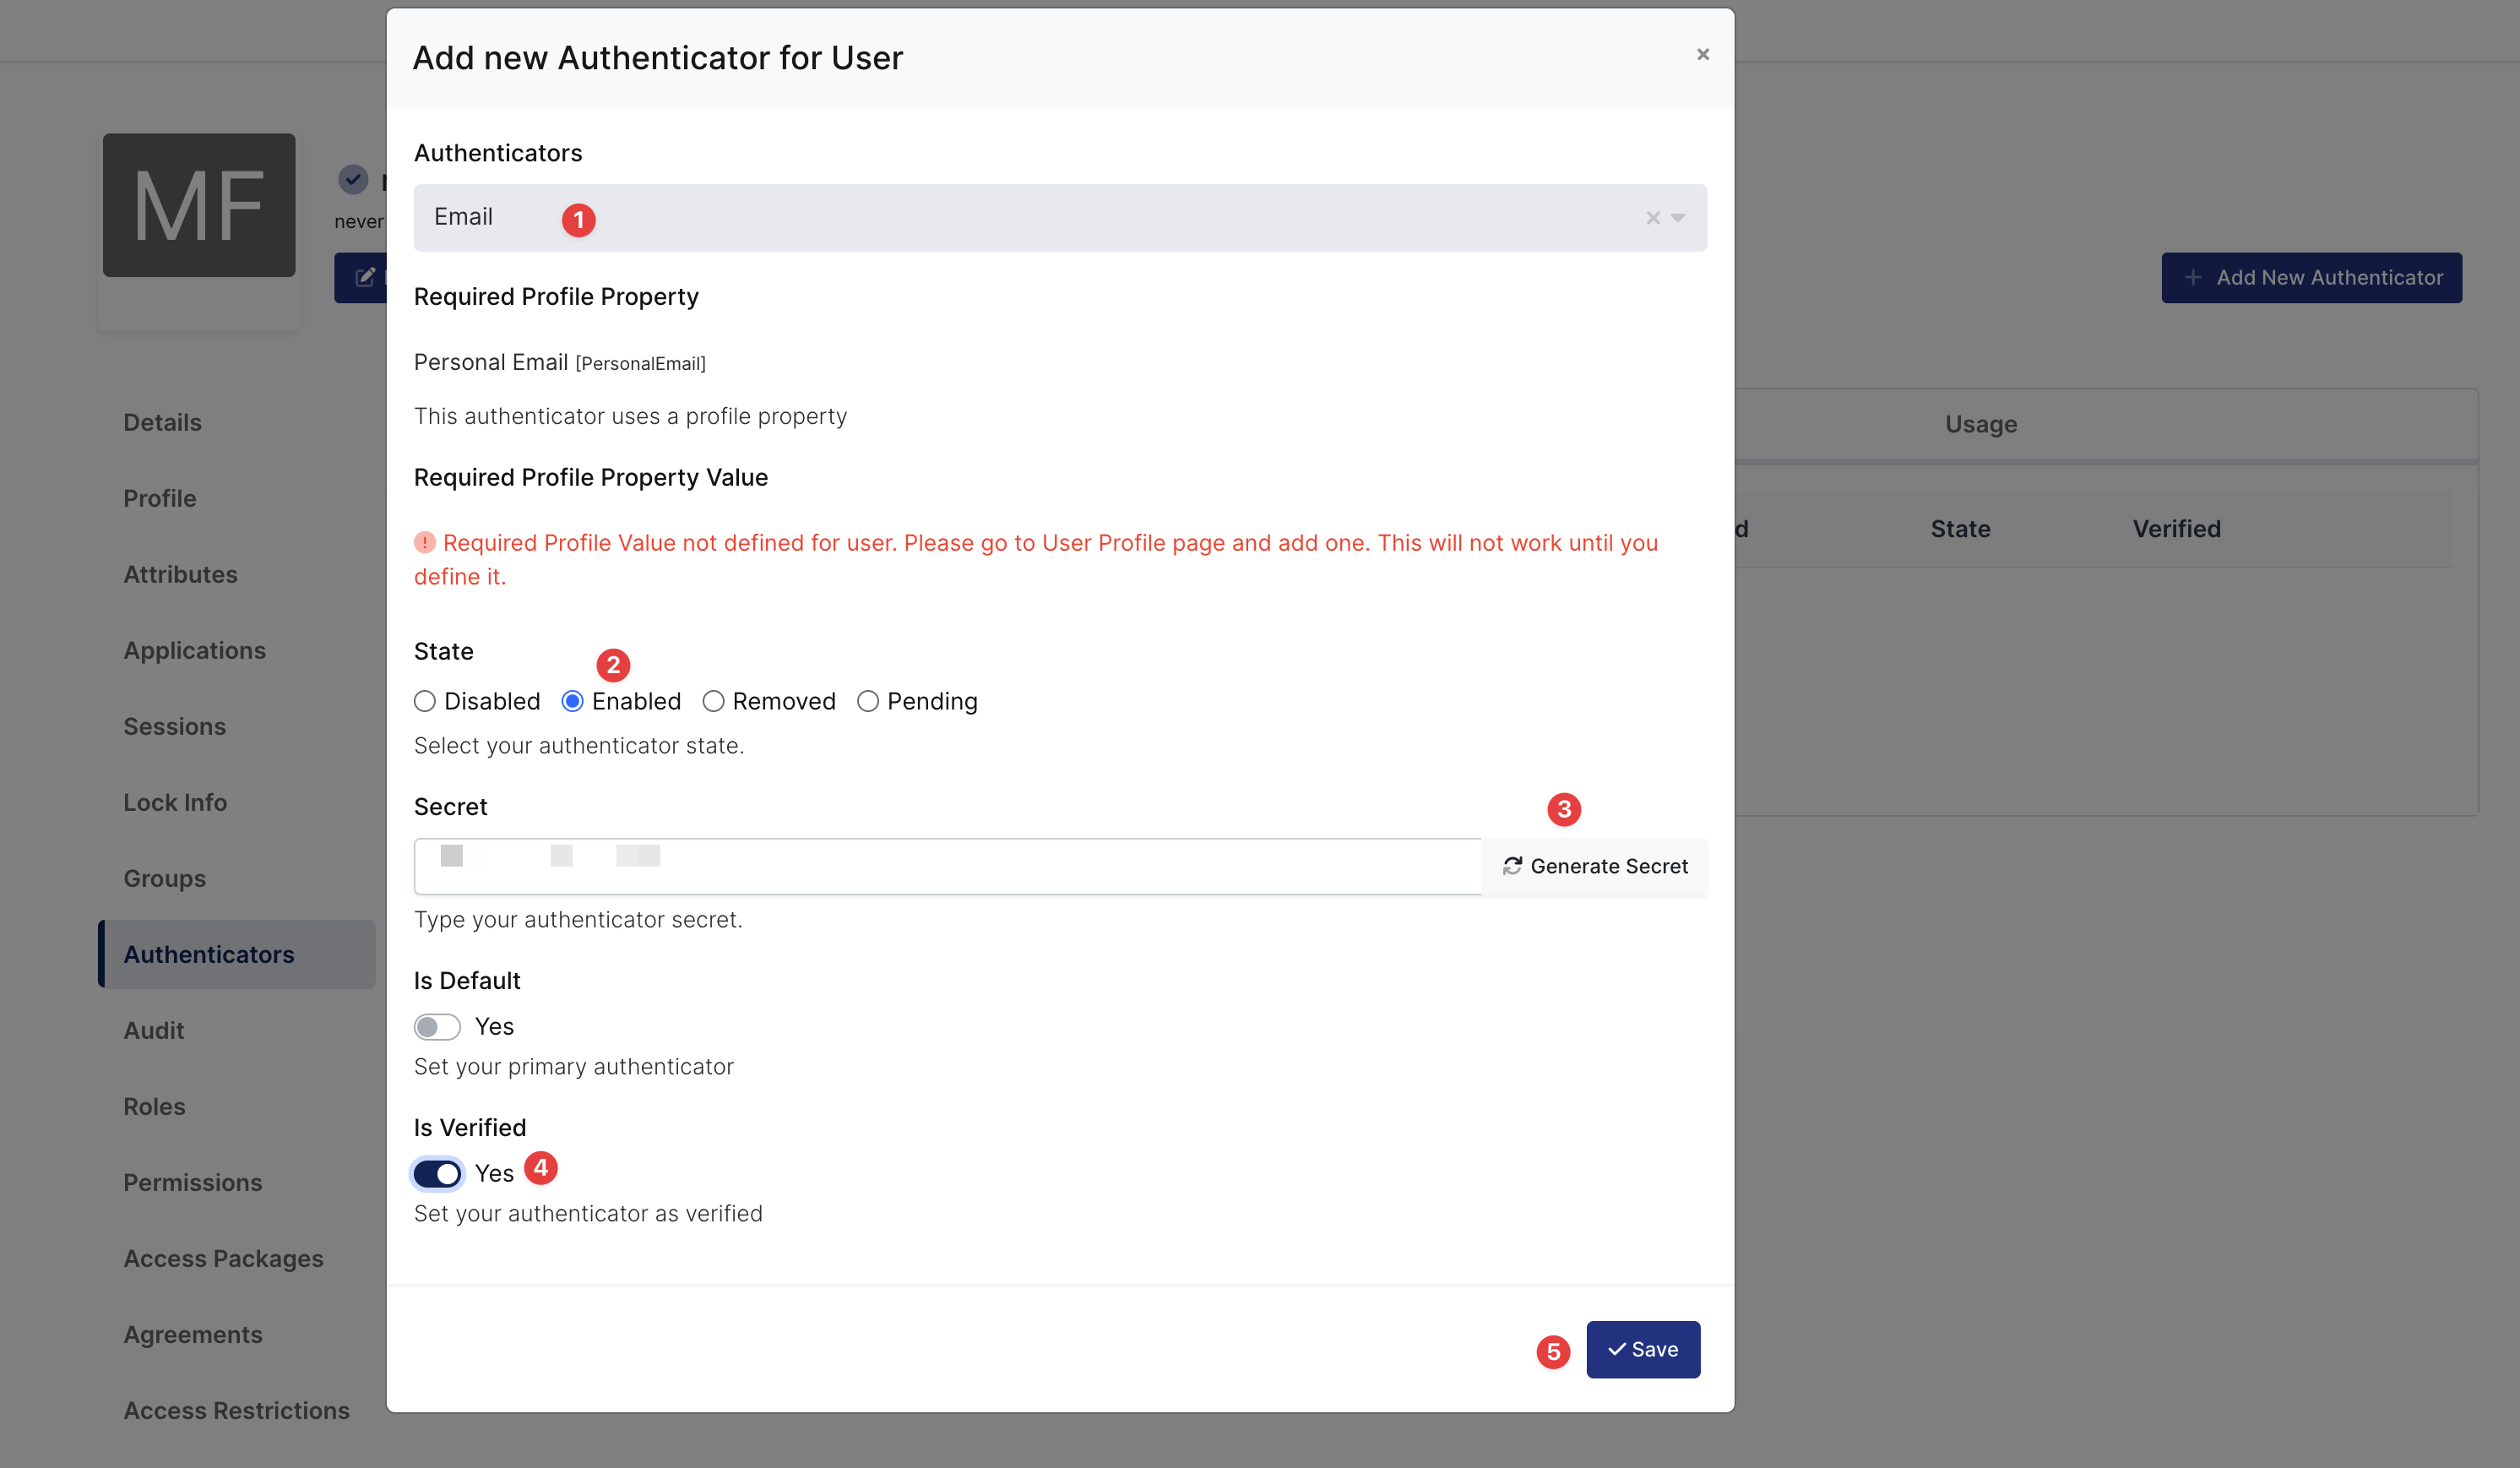
Once the Email MFA authenticator is assigned, it will appear in the user's authenticator list.
Option 2 — Automated Assignment
Administrators can create an automation rule to assign Email MFA to a defined set of users automatically. Follow the steps below:
-
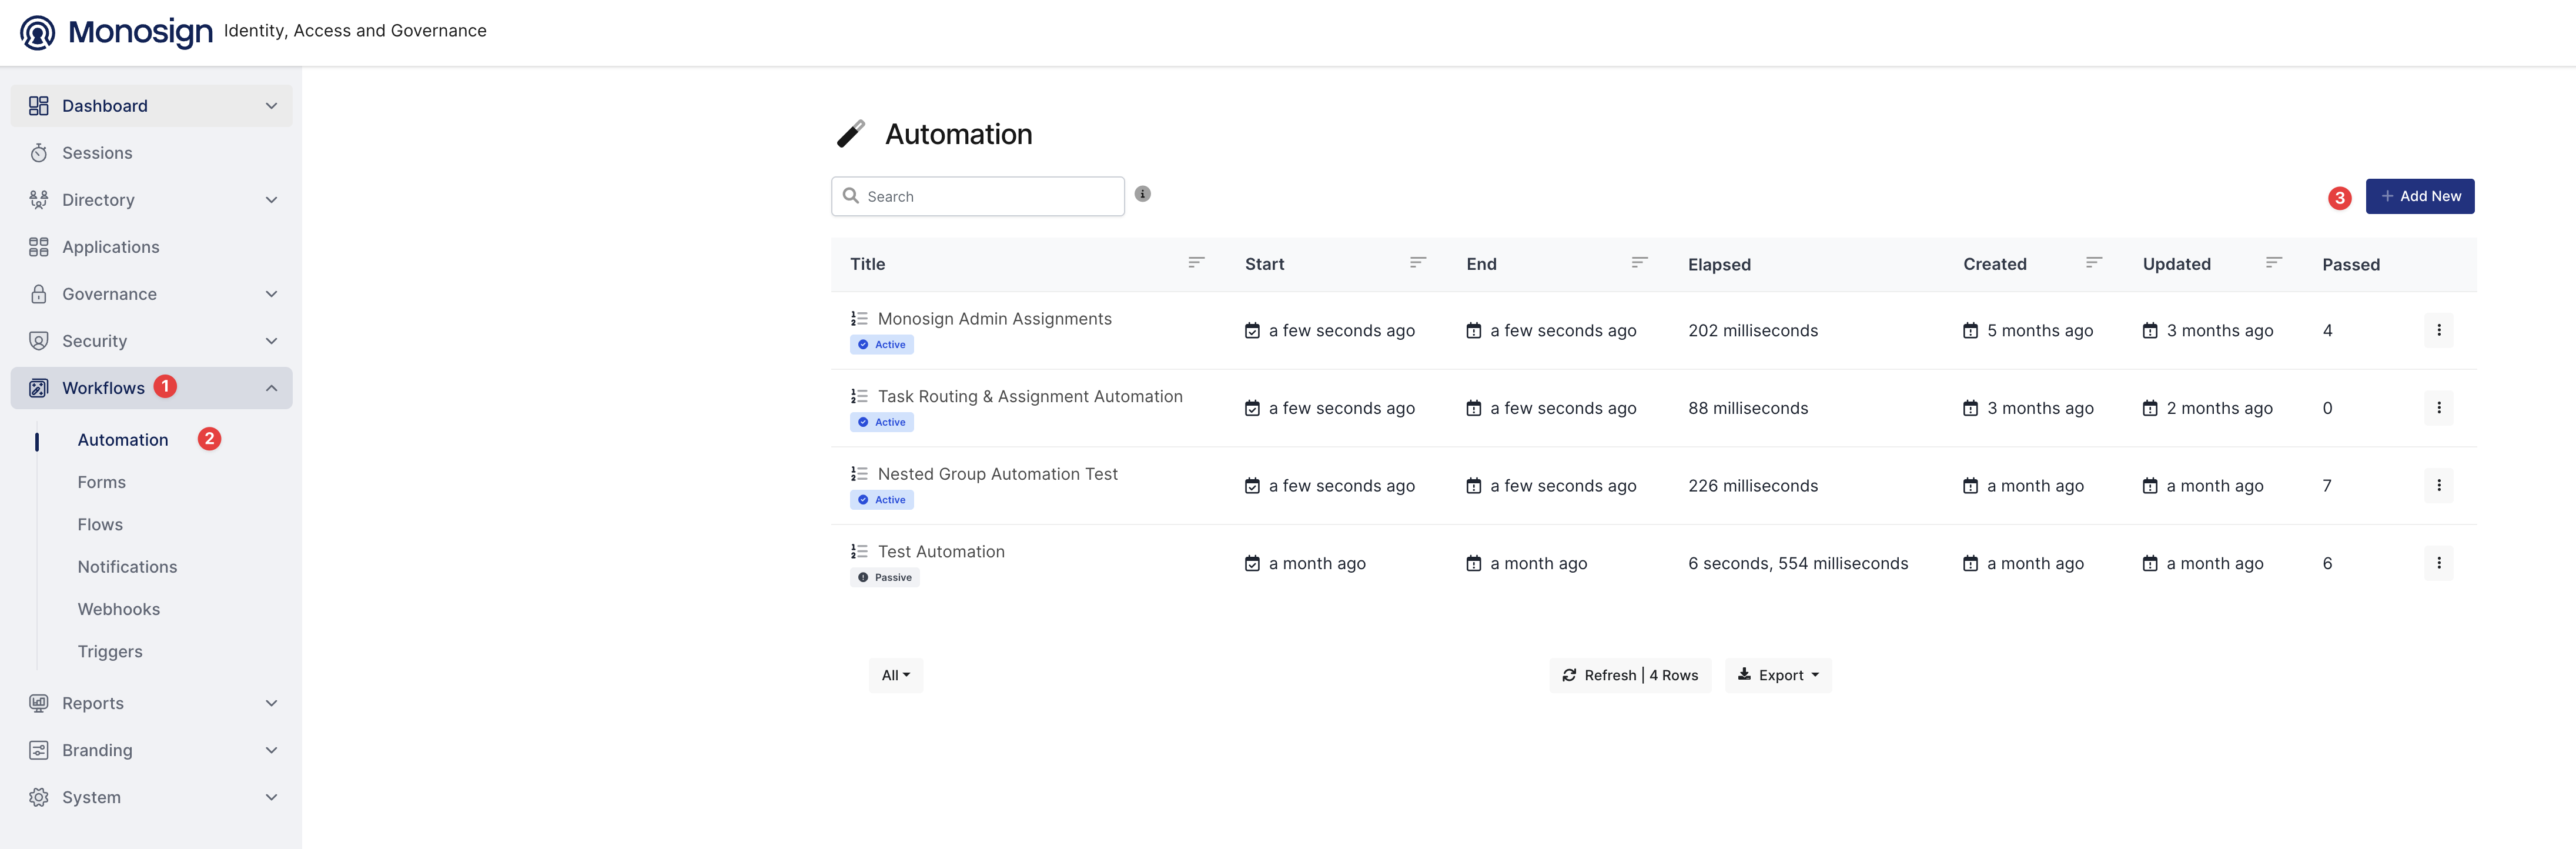
Navigate to Workflow → Automation from the left-hand menu.
-
Click Add New to create a new automation.
-
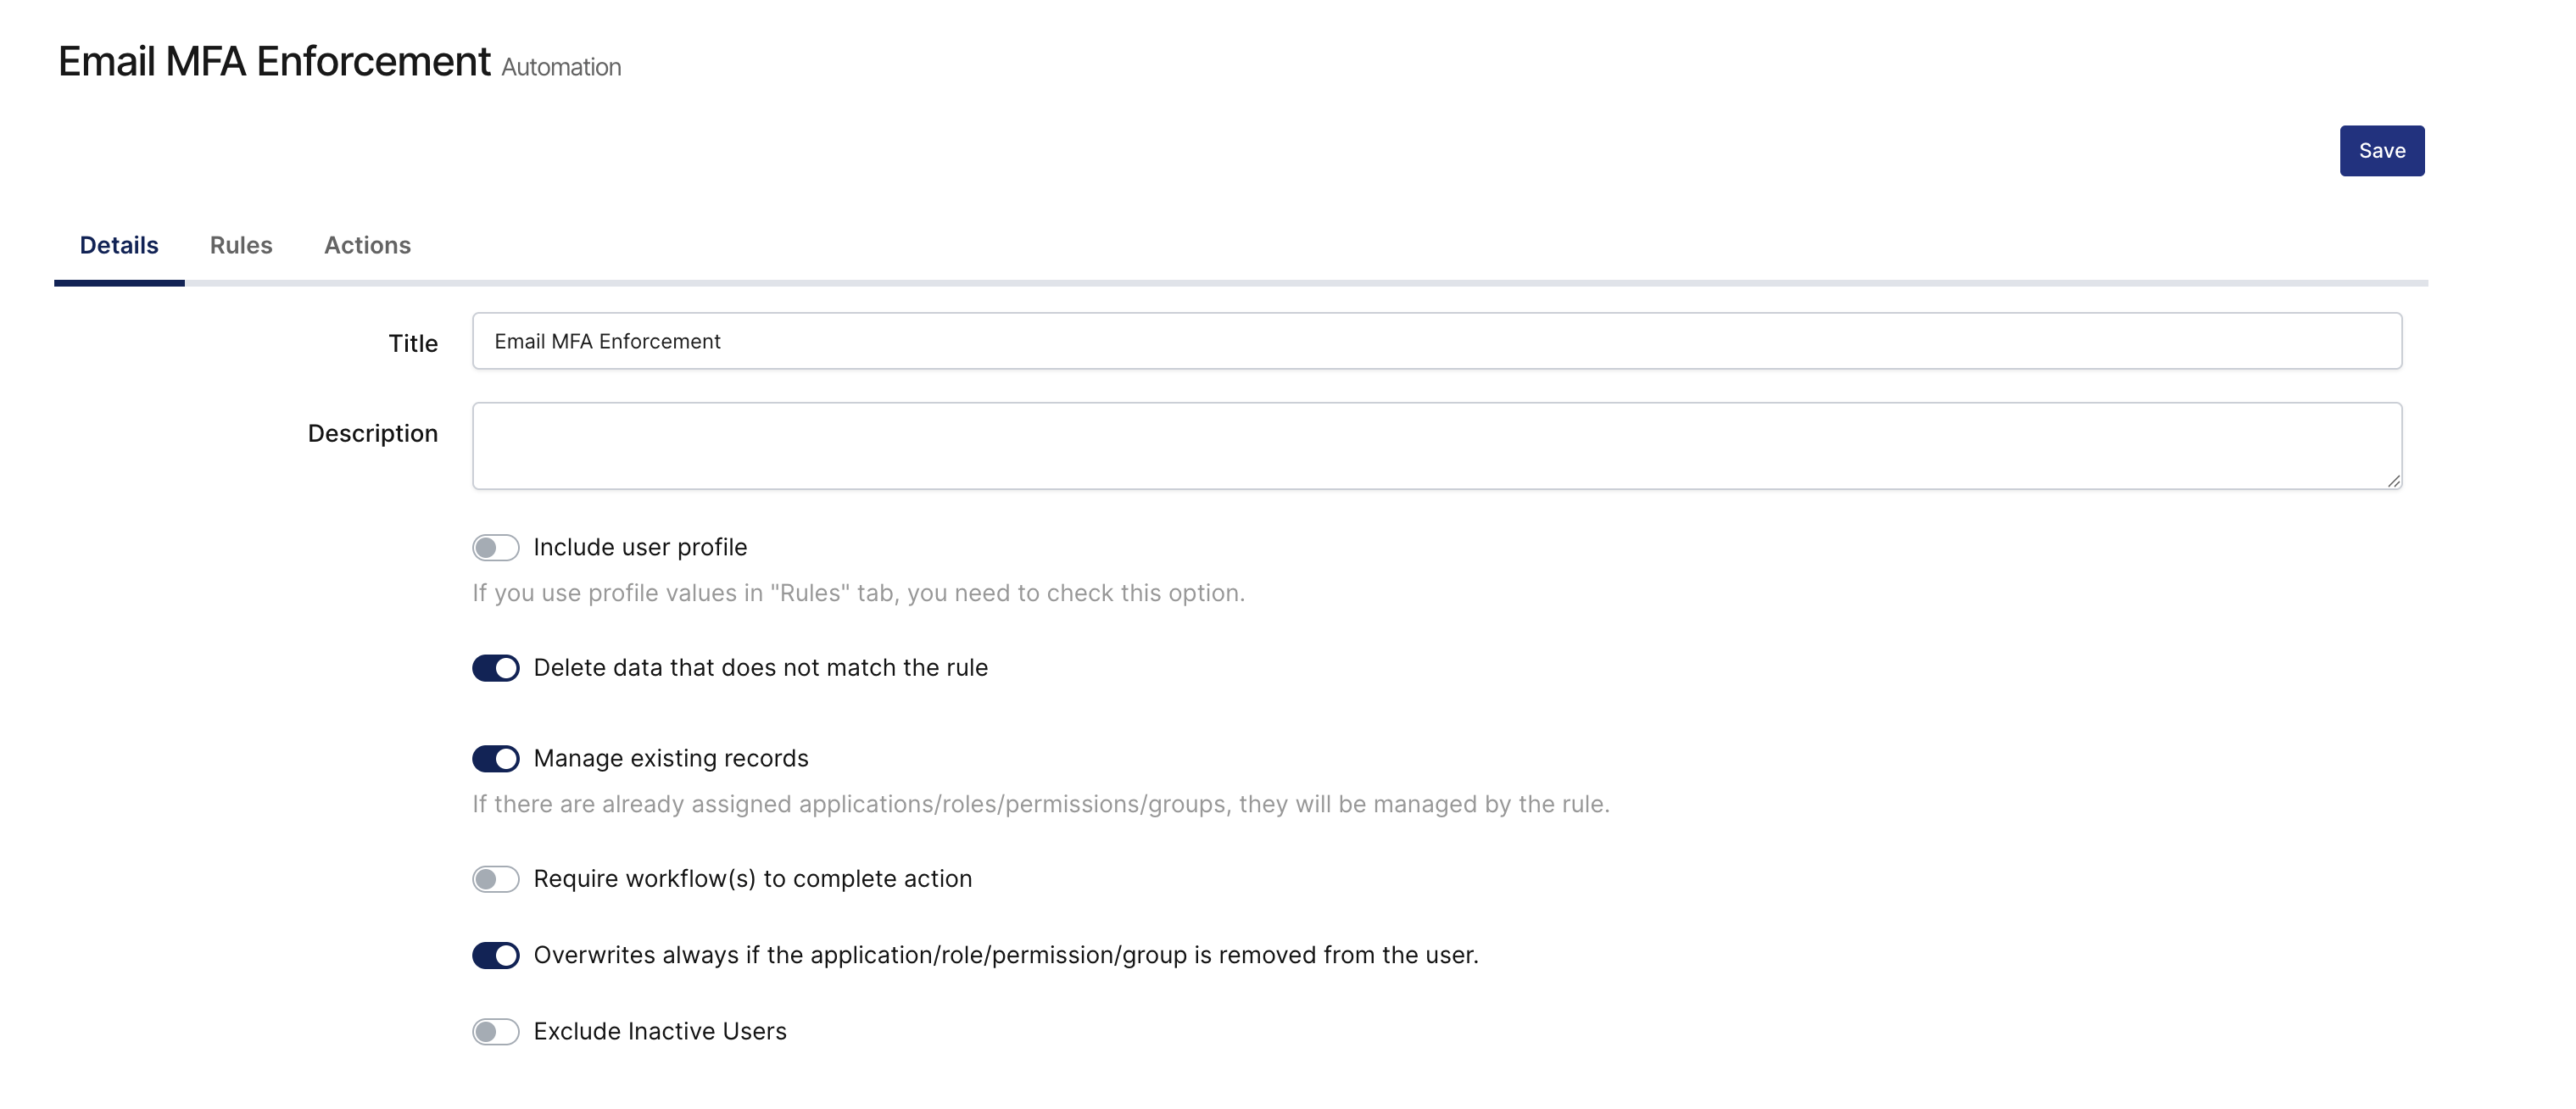
Configure the Details tab as shown in the image below.
-
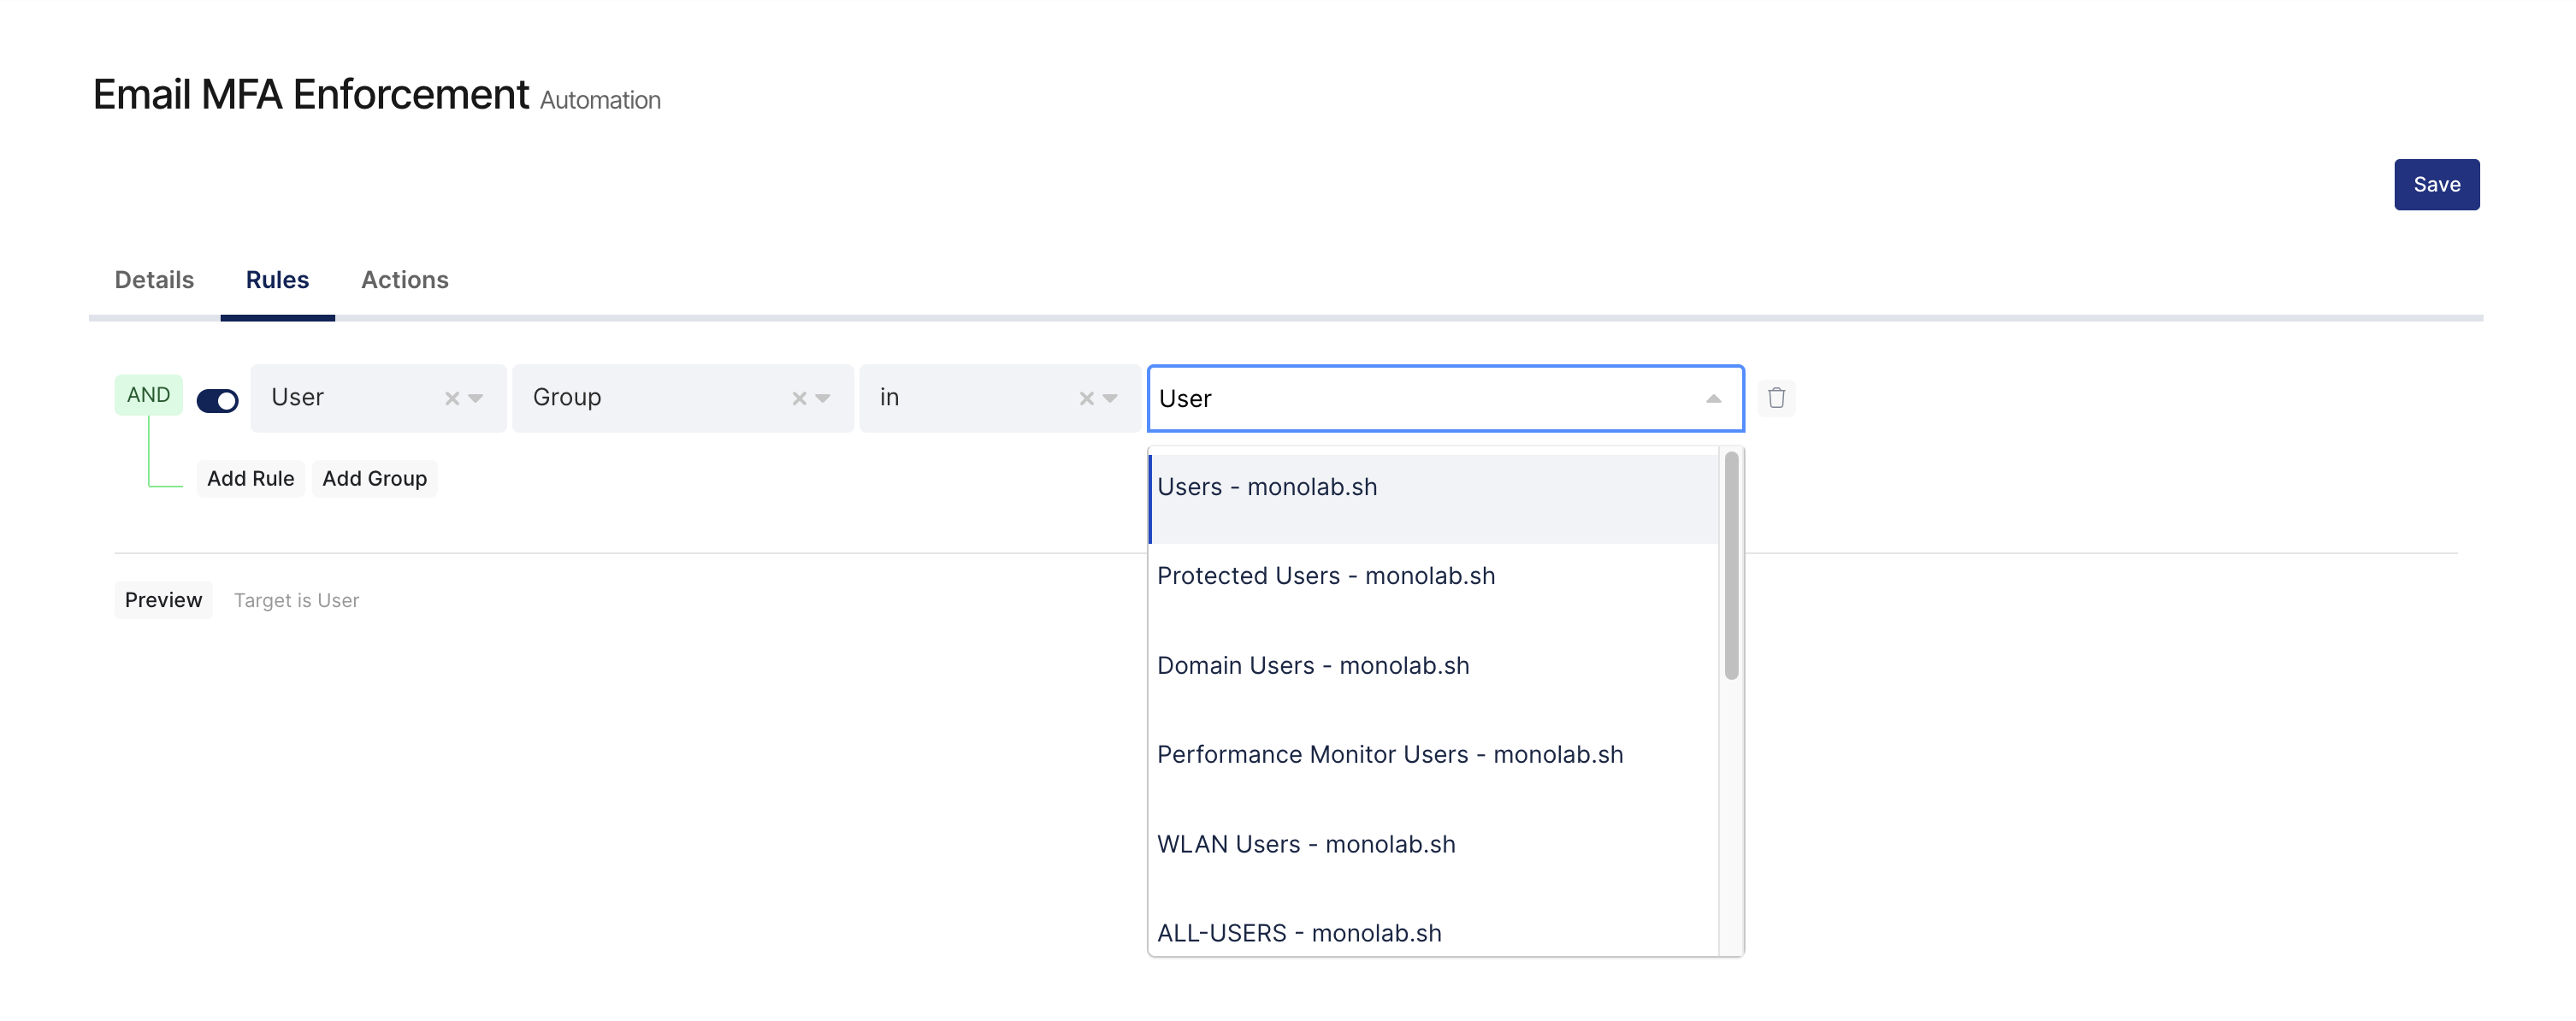
Define the rule set to determine which users will be assigned the Email MFA authenticator.
-
Configure the action to assign the Email MFA authenticator to the targeted users.
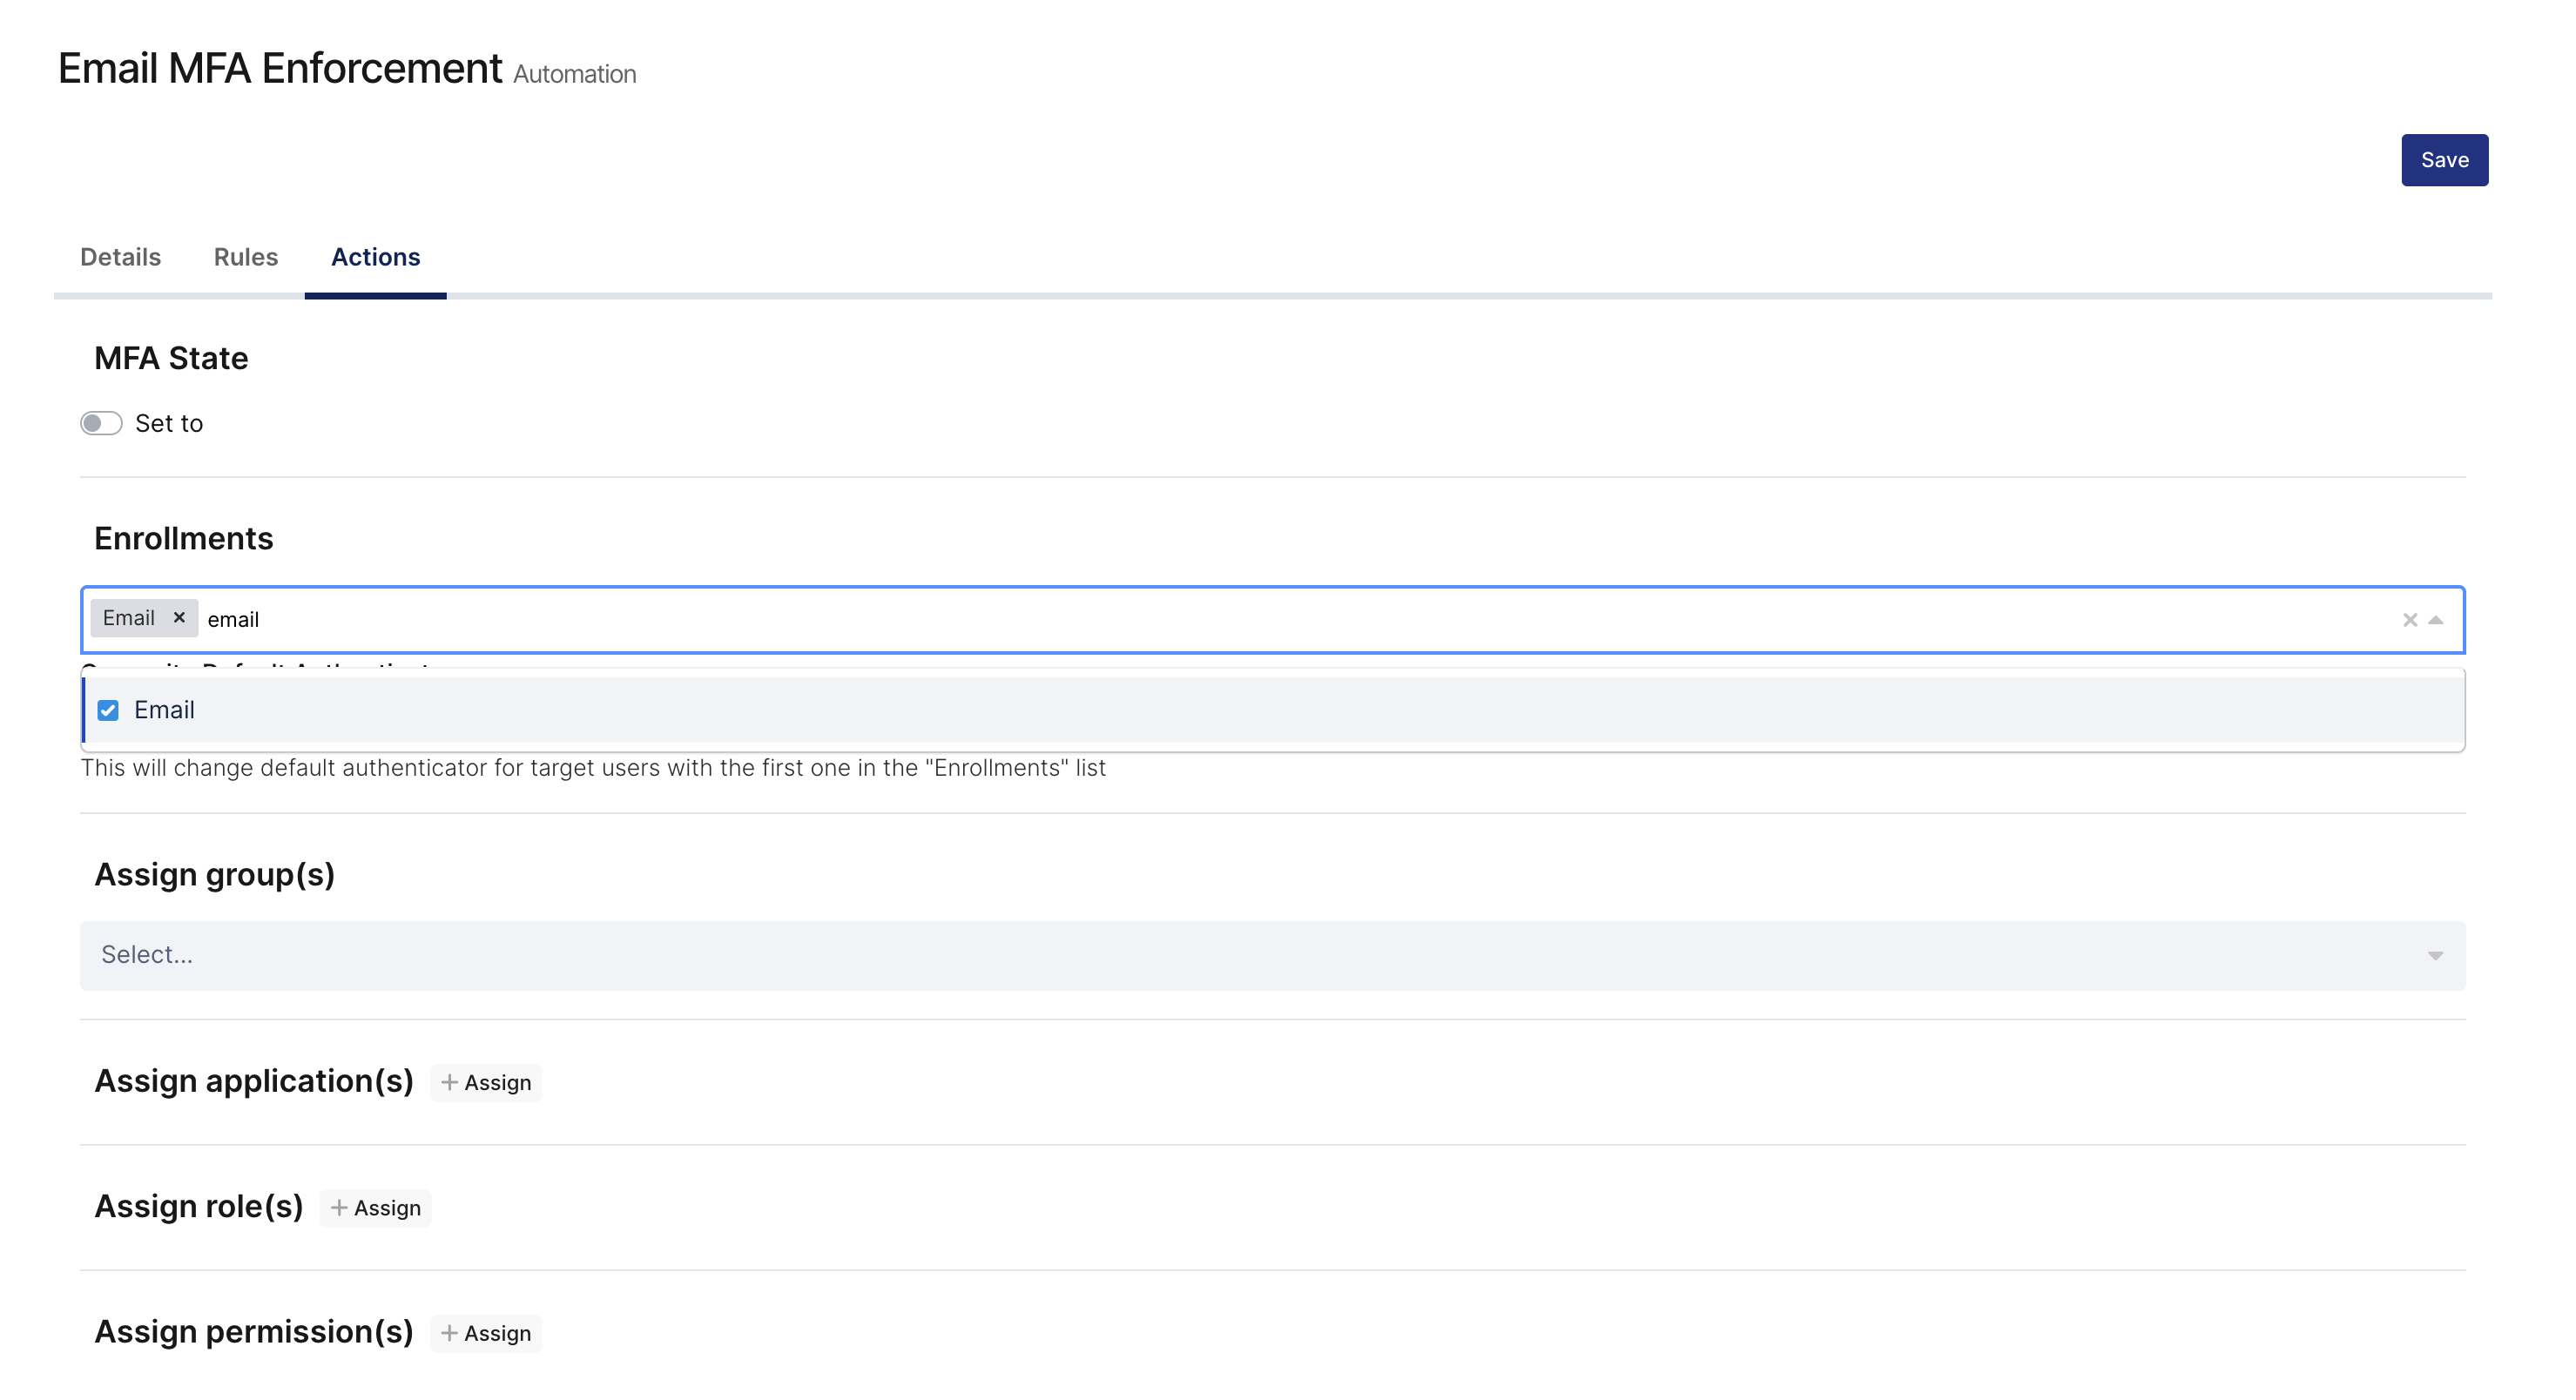
After completing the workflow configuration, click Save and then Activate to apply the automation to the targeted users.