This document explains how to implement Monosign with a Custom Application. It covers the Single Sign-On.
📑 Instructions
This documentation contains 2 main steps for integration.
-
Creating an Application on Monosign
-
Configuration of the Single Sign-On for the Custom Application
1- Creating an Application on Monosign
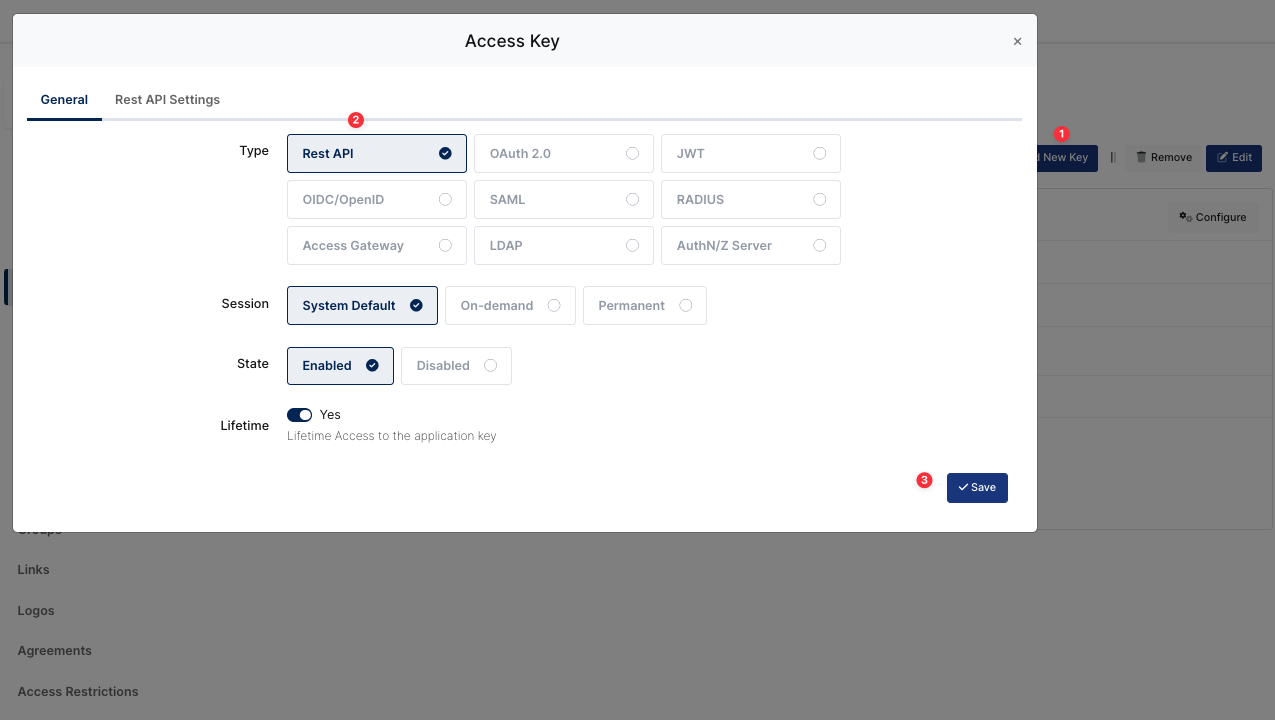
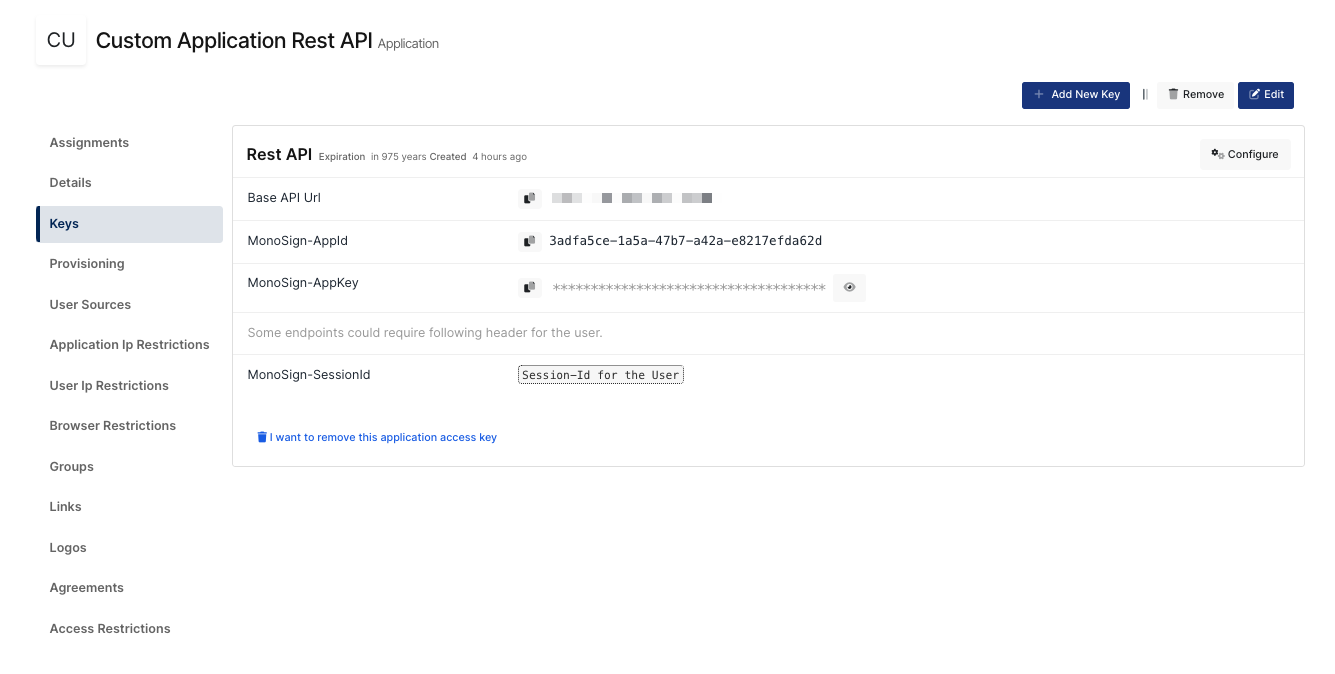
Create your application on Monosign and configure your access policy. Once you create, click “Keys” and add a new Access Key for REST API Key for access.
We will need this information for the Custom application’s sign-in integration.
|
Property |
Value |
Description |
|---|---|---|
|
Base API URL |
|
Monosign API Service URL in the “Rest API Information“ image as shown. |
|
MonoSign-AppId |
3adfa5ce-1a5a-47b7-a42a-e8217efda62d |
MonoSign-AppId for API Integration in the “Rest API Information“ image as shown. |
|
Monosign-AppKey |
a0ca9849-42ff-47be-af6f-28eecb1e5017 |
MonoSign-AppKey for API Integration in the “Rest API Information“ image as shown. |
The information shown above is an example. This information will change based on your domain
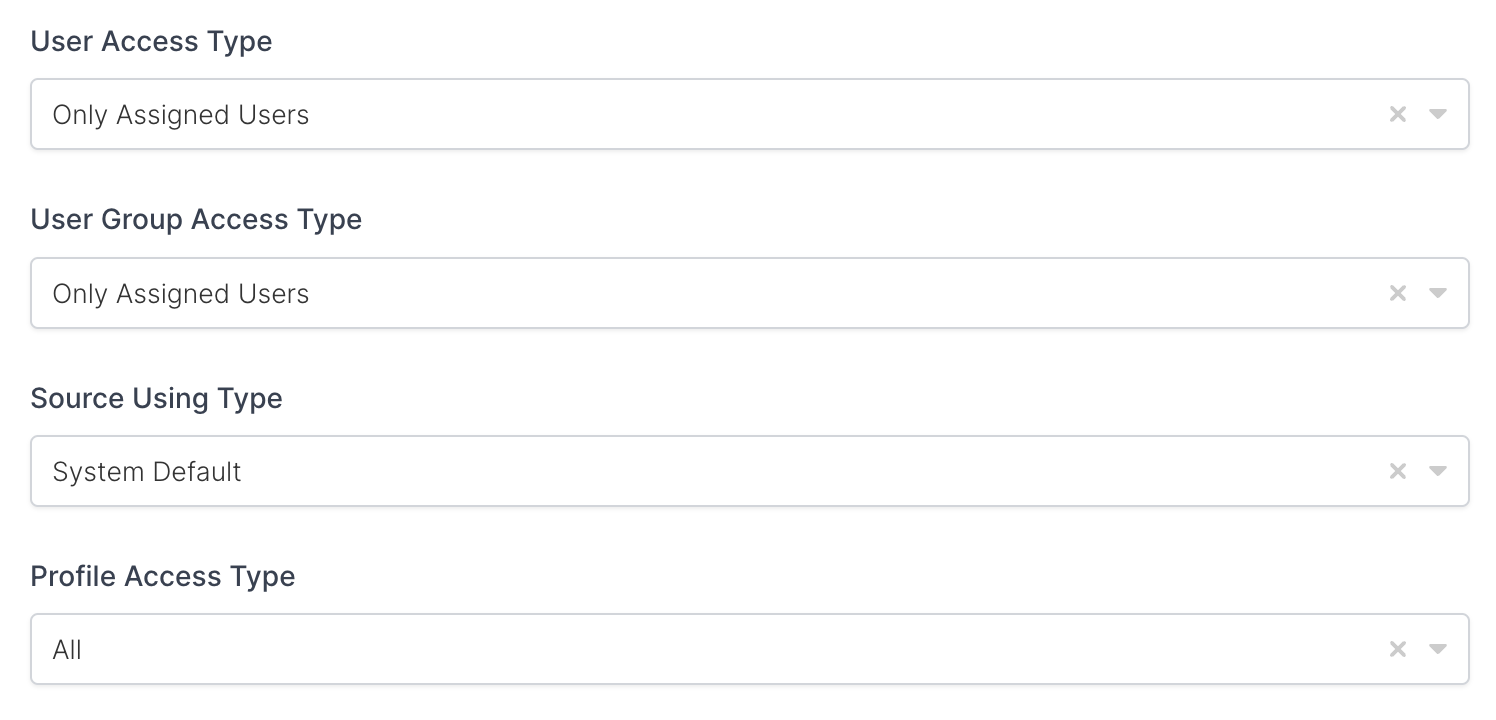
The application needs to have access to groups. If it is not configured yet, the application can be edited by going to the “Source, Provider and Profile” tab and configuring User Group Access Type “Assigned Users and Defined Sources”. It means this application can access users’ groups when they are signed in.
|
Property |
Description |
Options |
|---|---|---|
|
User Access Type |
Defines which Users will access this application. |
Only Assigned Users
|
|
User Group Access Type |
Defines the application’s user group access |
Only Assigned Users
|
|
Profile Access Type |
Defines Application’s user’s profile access |
Restricted - Only restricted user profile attributes
|
2- Configuration Single Sign-On on Custom Application
You must add your Rest API methods to your API and Frontend application.
The following information is needed for your configuration file or environment file.
-
POST User SignIn to Monosign
-
GET User SignIn information
-
POST User Logout from Custom application and Monosign
2.1 - POST SignIn Method
Monosign Rest API is supporting SigIn operation with the information below. So when the users try the login custom application with https://custom-app-url you need to use the below API to get “LoginUrl” from Monosign Rest API and redirect the user Login to Monosign.
|
Property |
Values |
|---|---|
|
Type |
POST |
|
URL |
|
|
Header |
MonoSign-AppId: MonoSign-AppKey:
Content-Type: application/json |
|
Body(Raw:Json) |
JSON
|
Example :
You can call API with your programming language. The below cURL example shows what the output of the Rest API request is.
curl --location --request POST 'https://api.monofor.com/v1.3/signin' \
--header 'MonoSign-AppId: 3adfa5ce-1a5a-47b7-a42a-e8217efda62d' \
--header 'MonoSign-AppKey: a0ca9849-42ff-47be-af6f-28eecb1e5017' \
--header 'Content-Type: application/json' \
--data-raw '{
  "callbackUrl": "https://custom-application-url",
  "type": 1
}'
The output of the request.
{
    "Code": 1,
    "Data": {
        "LoginUrl": "https://api.monofor.com/login/ea6955a6-7e0d-4768-a1a9-975a8003458a",
        "RegisterUrl": "https://api.monofor.com/register/ea6955a6-7e0d-4768-a1a9-975a8003458a",
        "ForgettenPasswordUrl": "https://api.monofor.com/passwordrecovery/ea6955a6-7e0d-4768-a1a9-975a8003458a",
        "LogoutUrl": "https://api.monofor.com/logout/ea6955a6-7e0d-4768-a1a9-975a8003458a",
        "AuthToken": "ea6955a6-7e0d-4768-a1a9-975a8003458a"
    },
    "Success": true
}
Request returns below information.
|
Property |
Value |
|---|---|
|
LoginUrl |
|
|
RegisterUrl |
|
|
ForgettenPasswordUrl |
|
|
LogoutUrl |
|
|
AuthToken |
|
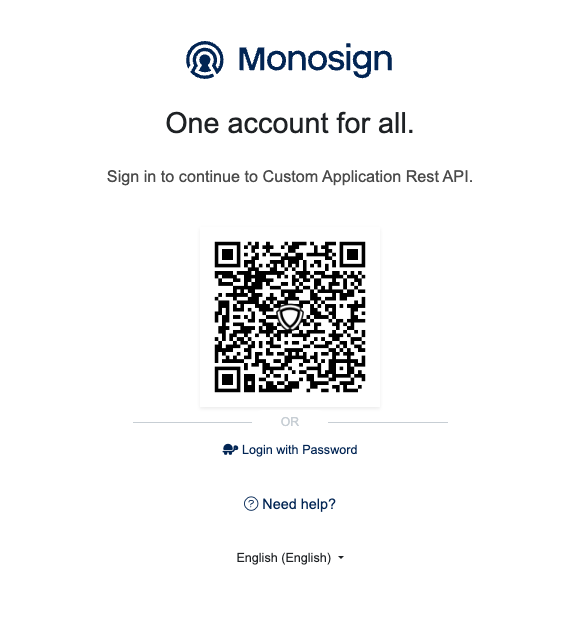
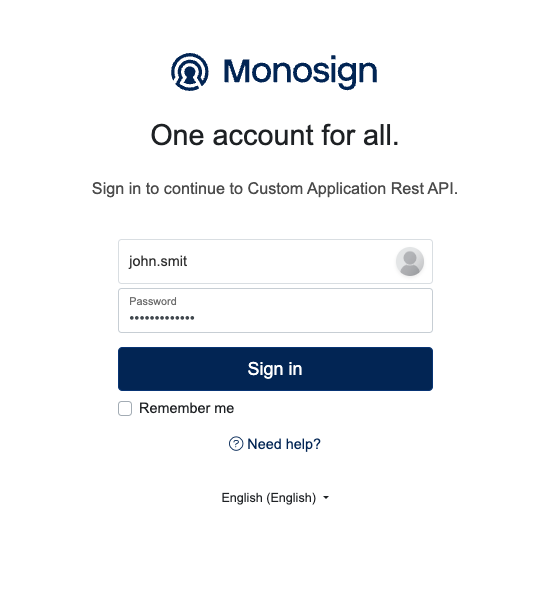
Now you can redirect users' Login requests to “LoginUrl”. Users will see the below page when redirected.
After successfully signing in, the user will be redirected to your custom application URL with the authentication token as shown.
https://custom-application-url?auth_token=6212baac-51b4-4285-8ea2-324f3ceda201
The authentication token sent in the URL will be used to get users information.
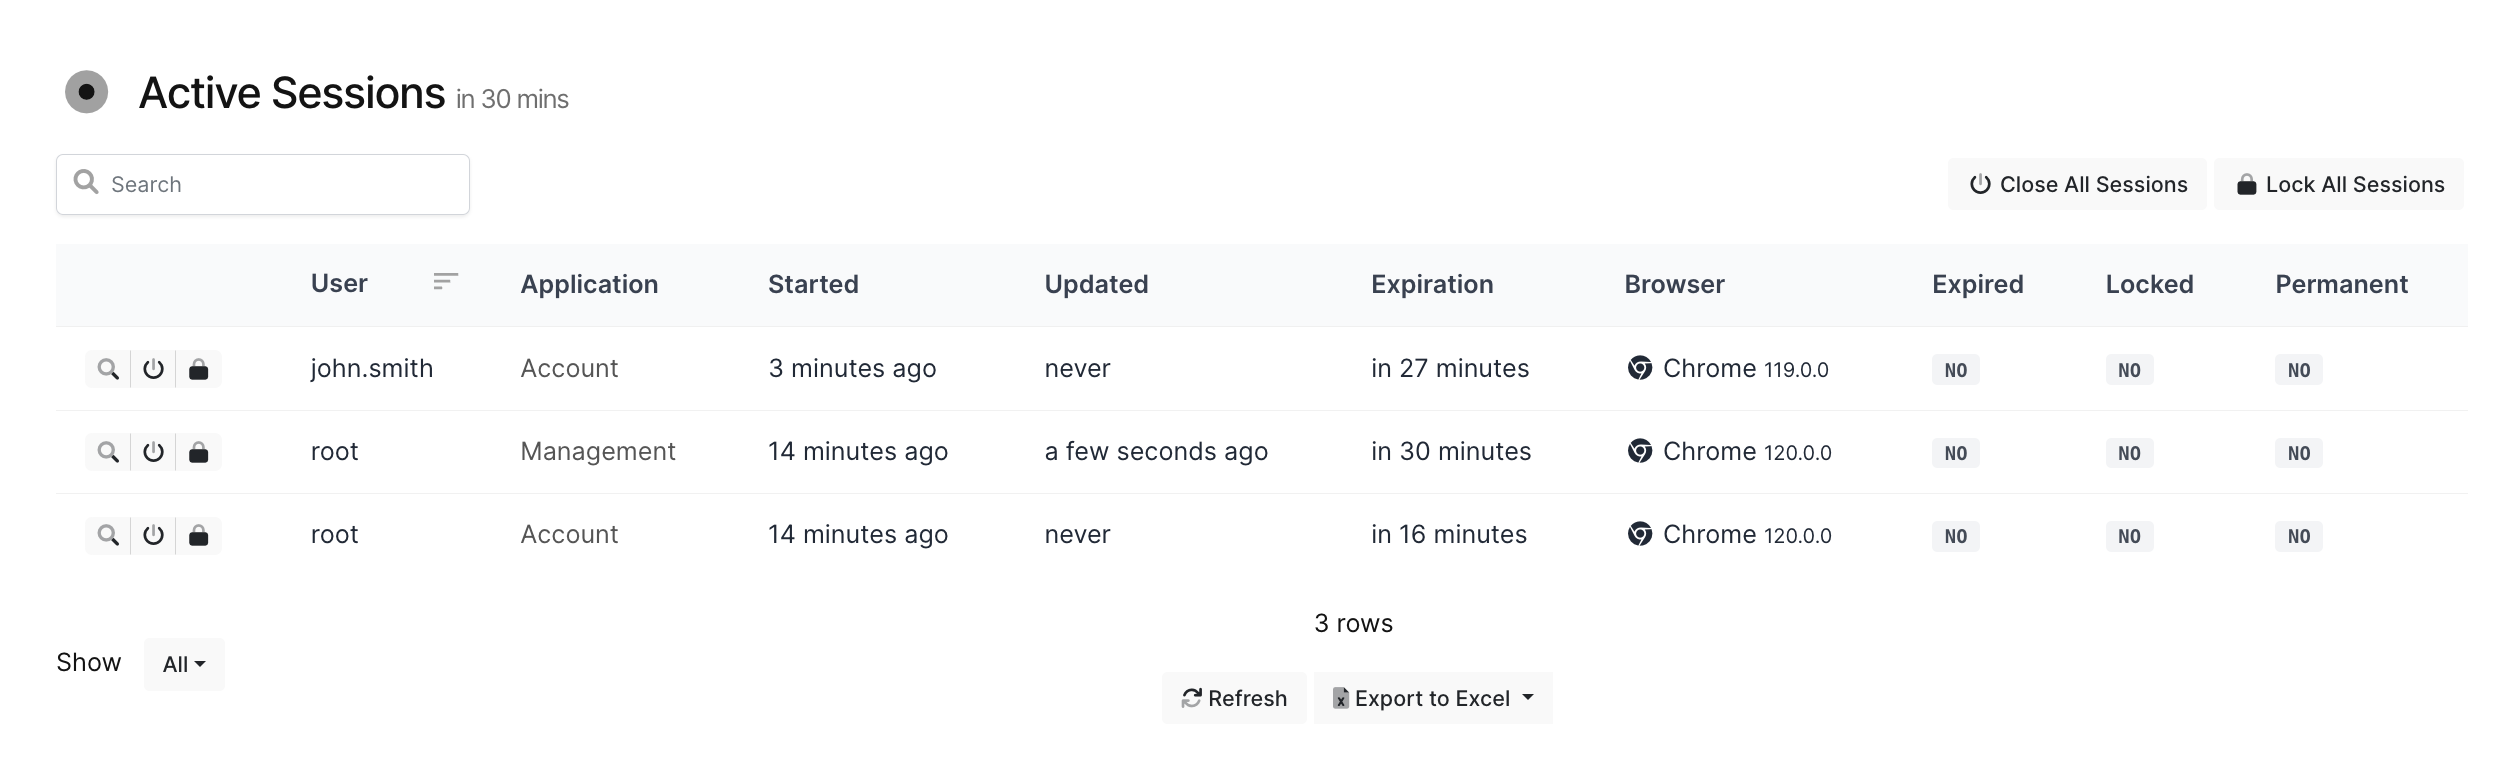
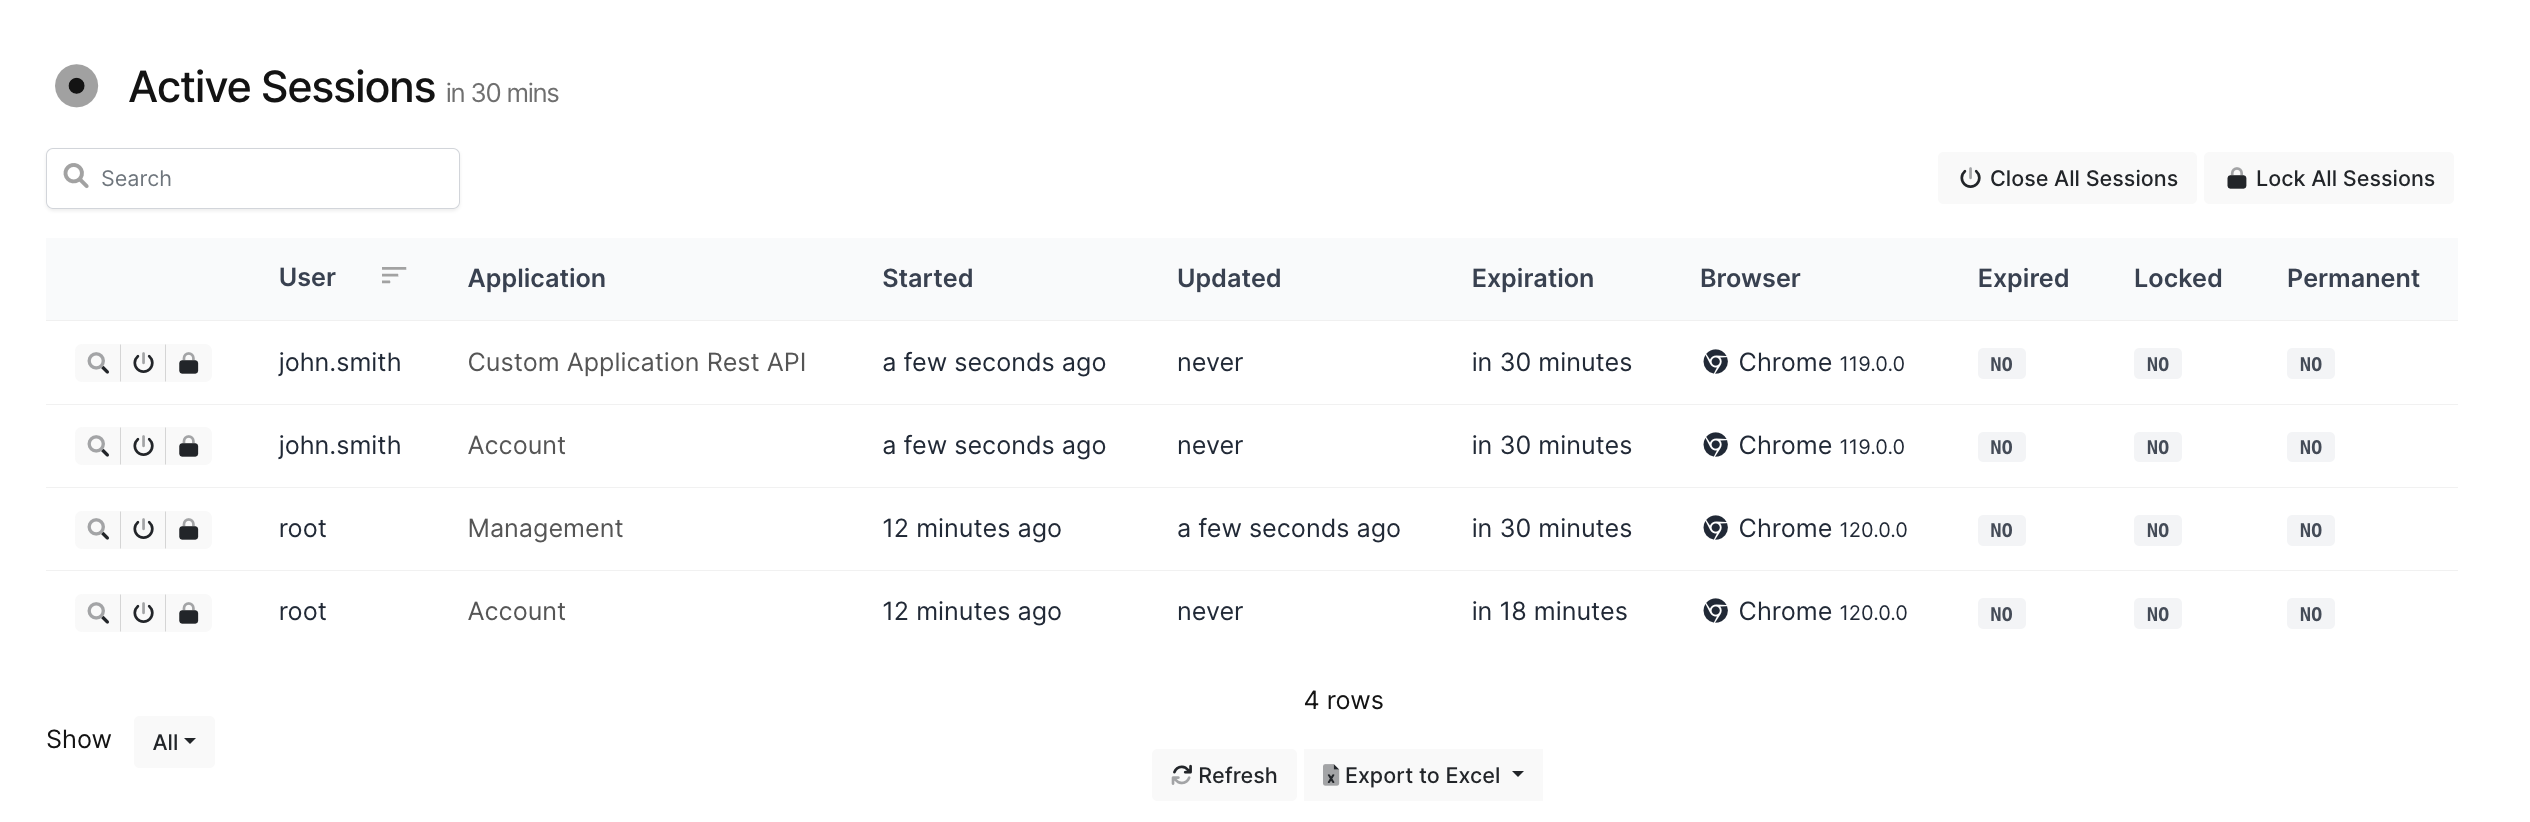
When the user signs into the application, the system will create a session on the SSO application and the Custom application as shown.
2.2 - GET SignIn Method
Monosign sign-in API gives details about details users' sessions and profile information after successfully signing in. In addition, you can find the details about GET SignIn methods.
|
Property |
Values |
|---|---|
|
Type |
GET |
|
URL |
The authentication token is provided when signin method is triggered |
|
Header |
MonoSign-AppId: MonoSign-AppKey:
Content-Type: application/json |
Example :
You can call API with your programming language. The below cURL example shows what the output of the Rest API request is.
curl --location --request POST 'https://api.monofor.com/v1.3/signin/{{authenticationToken}}' \
--header 'MonoSign-AppId: 3adfa5ce-1a5a-47b7-a42a-e8217efda62d' \
--header 'MonoSign-AppKey: a0ca9849-42ff-47be-af6f-28eecb1e5017' \
--header 'Content-Type: application/json' \
--data-raw ''
The output of the Request
{
    "Code": 1,
    "Data": {
        "UserId": "bbce41c7-f363-4724-999e-16c3d2293f78",
        "ApplicationUserId": "4a89376b-5294-4284-bc66-83c17ba74d25",
        "UserName": "john.smith",
        "Email": "john.smith@monofor.com",
        "Session": {
            "SessionId": "0b12a388-e60e-4a78-ba2b-7b5abe4dba94",
            "UserId": "bbce41c7-f363-4724-999e-16c3d2293f78",
            "ApplicationUserId": "4a89376b-5294-4284-bc66-83c17ba74d25",
            "StartDate": "2022-10-09T18:56:50.9208496",
            "UpdatedDate": "2022-10-09T19:03:45.6591353Z",
            "ApplicationId": "00000000-0000-0000-0000-000000000000",
            "Application": null,
            "ExpirationDate": "2022-10-09T19:33:45.6591343Z",
            "IsLocked": false,
            "LockMessage": "",
            "LogoutUrl": null,
            "IsMfaVerified": false,
            "IsExpired": false,
            "BrowserName": null,
            "BrowserVersion": null,
            "OperatingSystem": null,
            "DeviceType": 0,
            "DeviceBrand": null,
            "DeviceModel": null,
            "DeviceName": null,
            "Location": null,
            "User": null,
            "IsTwoFactorVerified": false,
            "IsTwoFactorRequired": false,
            "LocationInfo": null,
            "UserIp": null
        },
        "Profile": {
            "ProfileId": "6a2790f2-a02a-413b-9535-2c3b0aab8fa1",
            "IsRequireUpdate": false,
            "Values": {
                "Title": "IAM Engineer",
                "Department": "Identity Access and Management",
                "FormattedName": "John Smith [MonoFor.Dev]",
                "LastName": "Smith",
                "FirstName": "John",
                "Company": "MonoFor"
            }
        },
        "Groups": [
            {
                "Id": "2dc714cb-9361-465f-bc2a-666c6e3315b0",
                "Name": "Monosign MonoDev",
                "Title": "MonoSign MonoDev",
                "Source": "monofor"
            },
            {
                "Id": "48a9f8f8-ece4-4473-948f-f3a32fcd4b79",
                "Name": "Monosign VPN Users",
                "Title": "MonoSign VPN Users",
                "Source": "monofor"
            },
            {
                "Id": "d3778d58-b333-4ac1-a6ca-9e00f95891c5",
                "Name": "Domain Users",
                "Title": "Domain Users",
                "Source": "monofor"
            },
            {
                "Id": "faf816a1-5194-4d07-b99c-d439b2afb5b7",
                "Name": "Monosign SAML Users",
                "Title": "MonoSign SAML Users",
                "Source": "monofor"
            },
            {
                "Id": "9628b54c-2c35-4439-8e25-c518876c641a",
                "Name": "Splunk Admins",
                "Title": "Splunk Admins",
                "Source": "monofor"
            },
            {
                "Id": "38857477-e3b8-417e-8219-c3614fbd0602",
                "Name": "k8s Admins",
                "Title": "k8s Admins",
                "Source": "monofor"
            },
            {
                "Id": "631e3b0a-8589-45d4-913a-a034632bdc73",
                "Name": "Monosign Prod Admins",
                "Title": "Monosign Prod Admins",
                "Source": "monofor"
            },
            {
                "Id": "99758cc8-a14f-48f2-ae25-600420f81cb0",
                "Name": "OWA Users",
                "Title": "OWA Users",
                "Source": "monofor"
            }
        ],
        "SourceName": "monofor-dev",
        "SourceTitle": "MonoFor.Dev",
        "SourceUserName": "",
        "State": 1,
        "IsActive": true,
        "Culture": "en",
        "MfaRequired": false,
        "PasswordChangeRequired": false,
        "PasswordChangeType": 0,
        "TimeZone": "",
        "IsFavorite": false,
        "ApplicationId": "00000000-0000-0000-0000-000000000000",
        "ApplicationName": null,
        "ApplicationTitle": null,
        "CreatedDate": "0001-01-01T00:00:00",
        "ExpirationDate": "2023-10-09T18:55:42.353",
        "IsExpired": false
    },
    "Success": true
}
UserId, SessionId, ApplicationId, Profile and User Groups details can be found in this output.
Profile can be used to display user information in the custom application. User Groups can be used to give permissions based on the groups in the custom application.
UserId, SessionId and ApplicationId can be used for the Logout request.
2.3- POST Logout Method
MonoSign Rest API POST Logout method is used when the user logs out from a custom application and if you want users to log out from MonoSign.
You can find the details about GET SignIn methods.
|
Property |
Values |
|---|---|
|
Type |
POST |
|
URL |
|
|
Header |
MonoSign-AppId: MonoSign-AppKey:
Content-Type: application/json |
|
Body(Raw:Json) |
JSON
|
Example :
You can call API with your programming language. The below cURL example shows what the output of the Rest API request is.
curl --location --request POST 'https://api.monofor.com/v1.4/users/logout' \
--header 'MonoSign-AppId: 3adfa5ce-1a5a-47b7-a42a-e8217efda62d' \
--header 'MonoSign-AppKey: a0ca9849-42ff-47be-af6f-28eecb1e5017' \
--header 'Content-Type: application/json' \
--data-raw '{
  "sessionId": "0b12a388-e60e-4a78-ba2b-7b5abe4dba94",
  "applicationUserId": "4a89376b-5294-4284-bc66-83c17ba74d25",
  "userId": "bbce41c7-f363-4724-999e-16c3d2293f78"
}'
You can use one of the key value to logout user.
-
sessionId → It will logout the user using the specific session id. It will end the specific session in the application.
-
applicationUserId → It will logout the user using the user’s application id. It will end all sessions that the user has in the application.
-
userId → It will logout the user using the user’s id. It will end all sessions that the user has in the application.
The output of the Request
{
    "Message": "User logged out successfully.",
    "Code": 1,
    "Data": false,
    "Success": true
}
The user is now signed out from the Custom Application.
If the user sign-in request triggers with the same authentication token, the response will be as shown below.
{
    "Message": "Error",
    "InternalMessage": "This session is expired. Please login again.",
    "Code": 3,
    "Success": false
}
You can see session details in MonoSign below example.