This document explains how to implement MonoSign with Evernote. It covers Single Sign-On. Before you continue, it is better to start with Evernote’s Single Sign-On implementation page.
Creating an Application on MonoSign
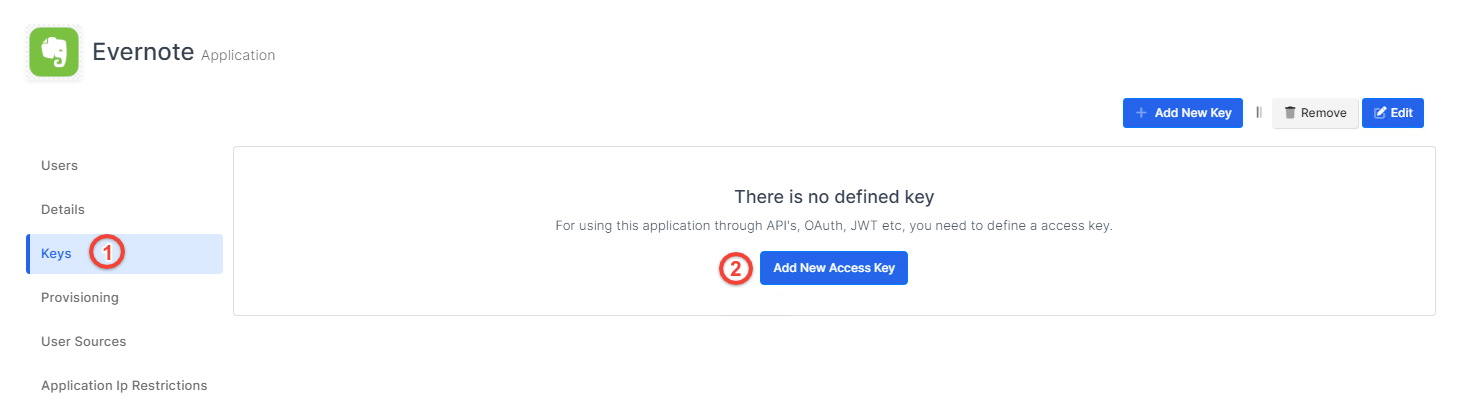
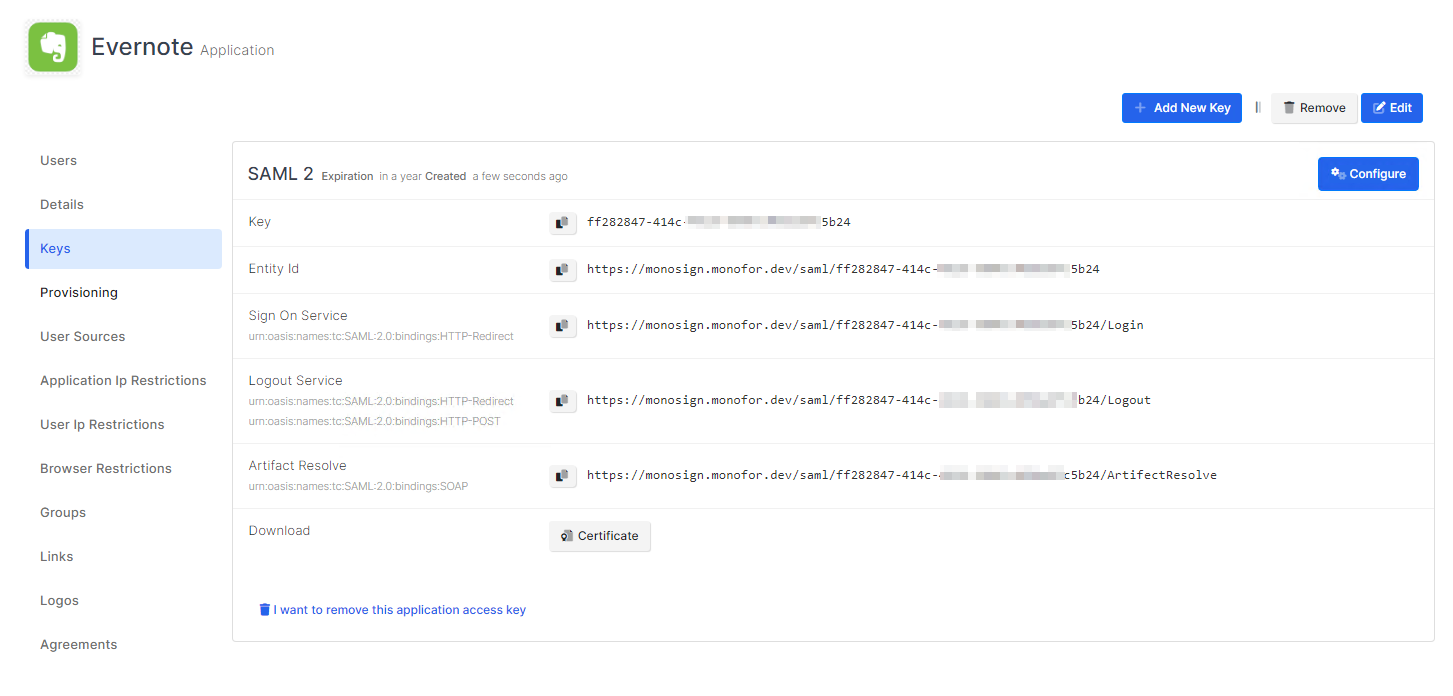
Create your application on MonoSign and configure your access policy. Once you create, click “Keys” and add a new Access Key for SAML Key for access.
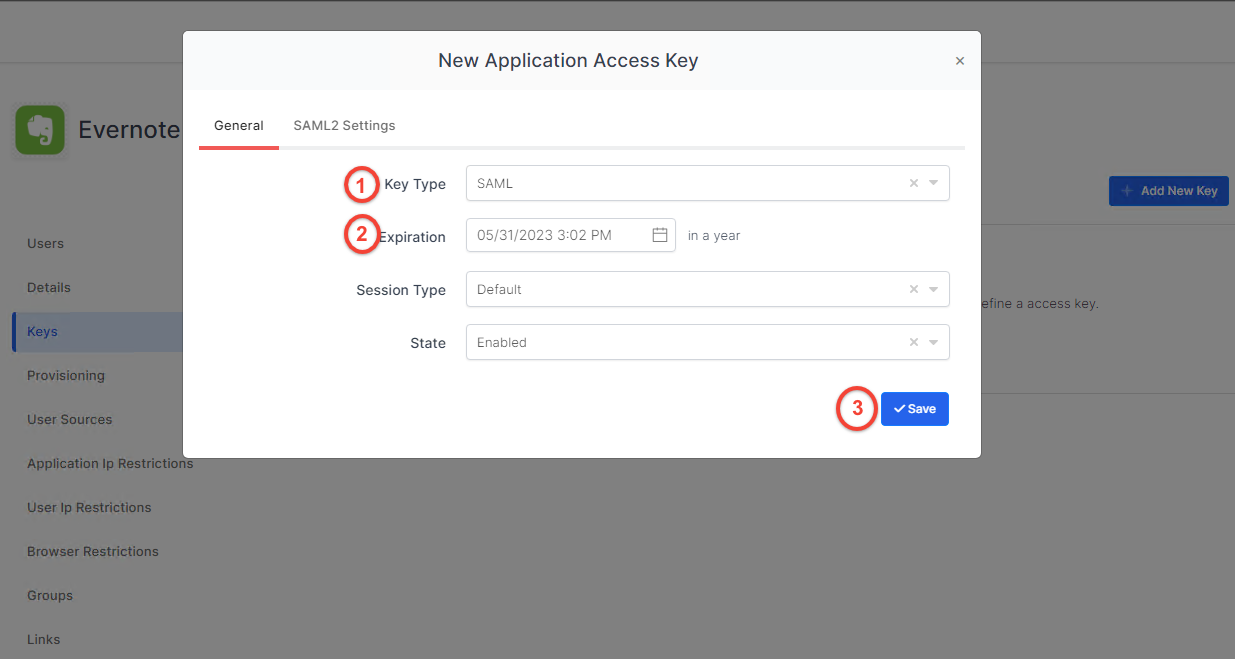
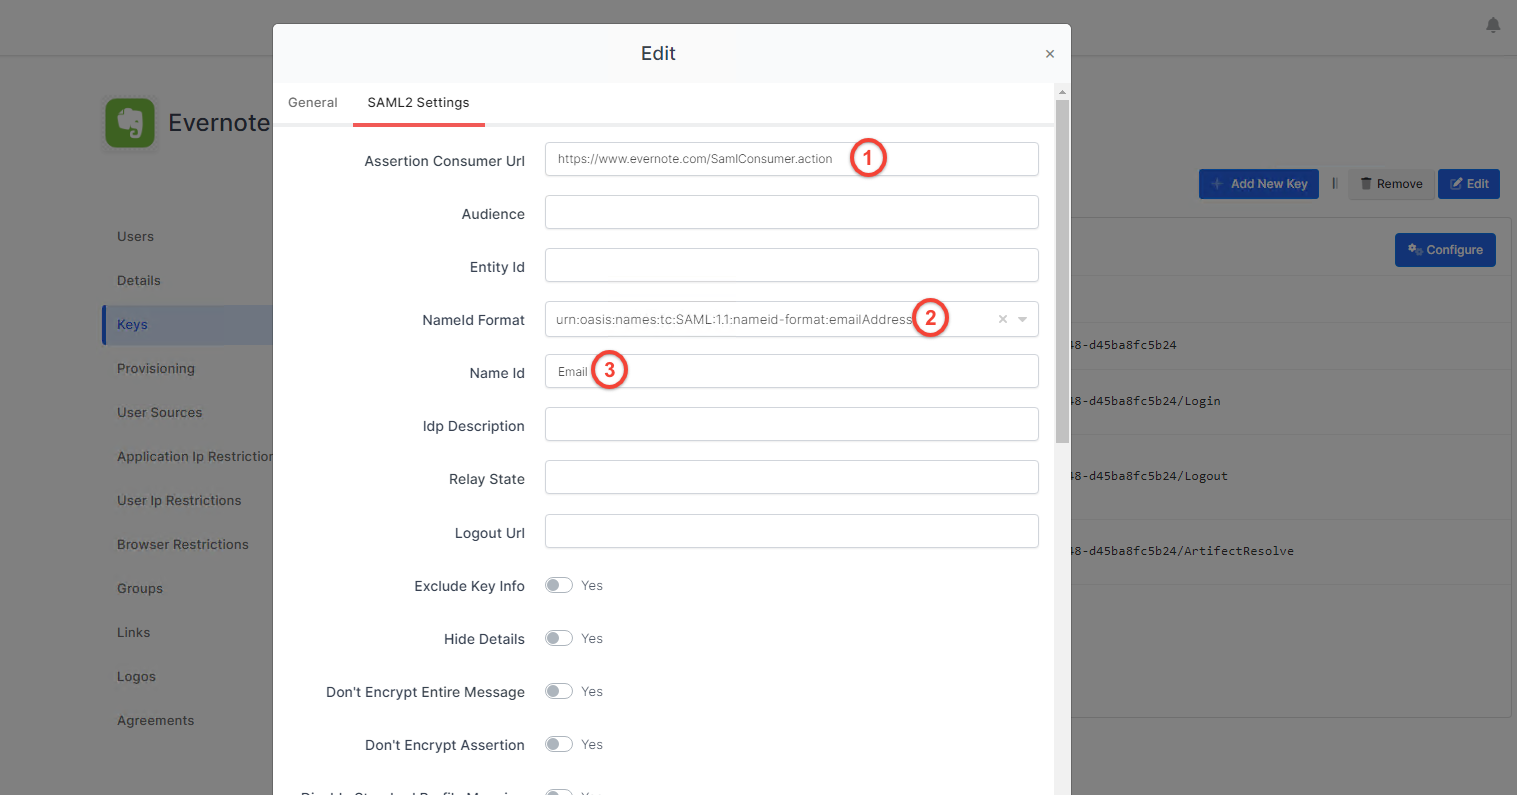
You should edit SAML settings that in the SAML2 Settings tab. Correspondings of the concepts are as below.
|
Setting |
Value |
|---|---|
|
Assertion Consumer Url |
https://www.evernote.com/SamlConsumer.action |
|
Nameld Format |
urn:oasis:names:tc:SAML:1.1:nameid-format:emailAddress |
|
Name Id |
|
The NameID must contain the user's email address, which must match the Evernote user's team email address
You are gonna see your configuration for your Evernote app as follows;
Configuration Single Sign-On for Evernote
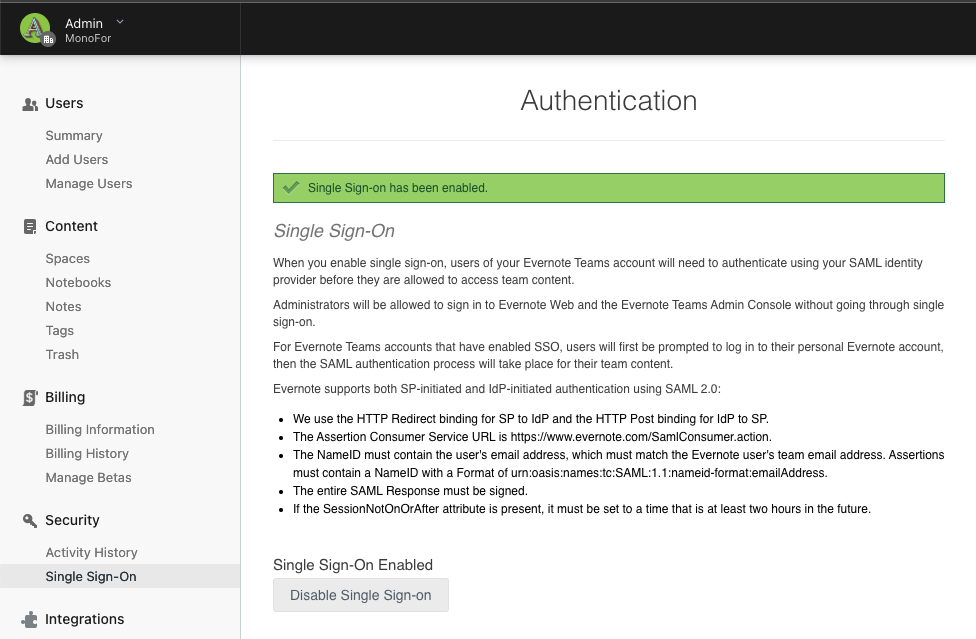
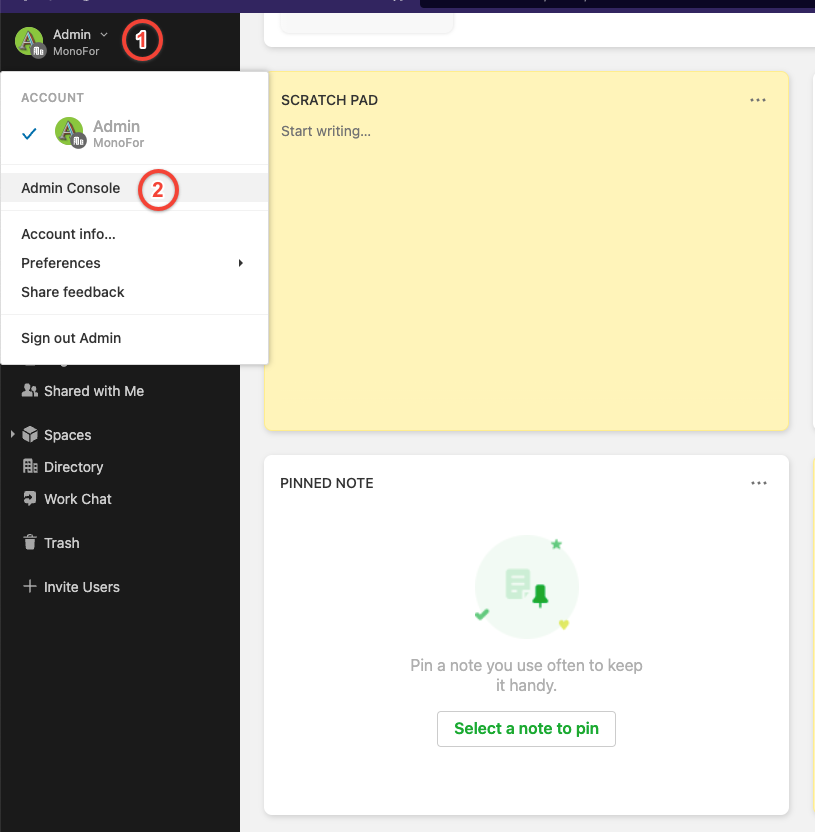
In order to activate SAML in Evernote, the organization needs to be upgraded to an Evernote TEAMS plan. In the top left corner of Evernote, click your profile photo, then click Admin Console.
To activate SAML, click Single Sign-On in the Security section of the sidebar.
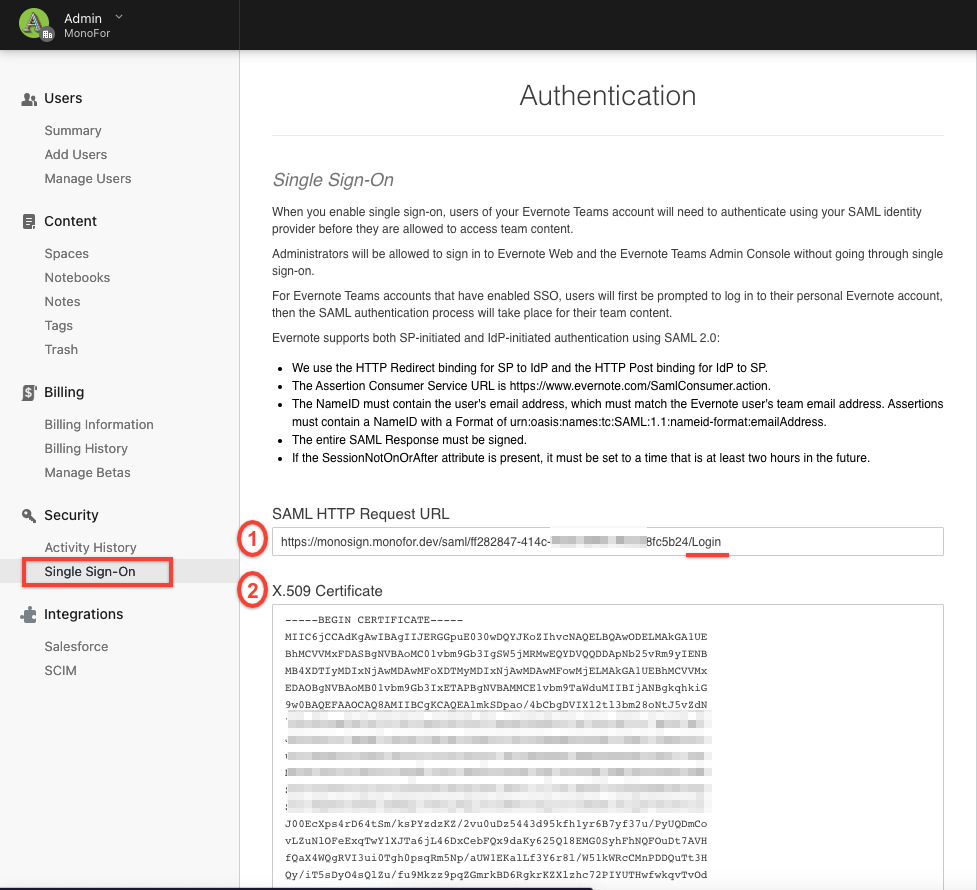
You should fill out the form according to SAML key information created in the second chapter.
-
SAML HTTP Request URL input corresponds to Sign On Service.
-
x.509 Certificate input corresponds to the x509 format of the issued certificate for your SAML key on MonoSign.

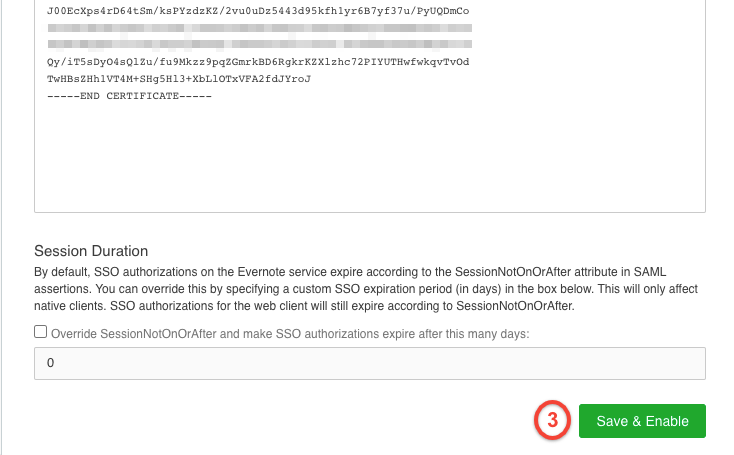
You can download the certificate by clicking the Certificate button at the end of SAML key information. You need to view your certificate in x509 format. in that case, we prefer using OpenSSL - “a robust, commercial-grade, full-featured toolkit for general-purpose cryptography and secure communication.” Use the command below to view the certificate.
openssl x509 -in {path of your certificate} -text
The output contains various information about the certificate. However, you should check encryption algorithms and the text starts with “-----BEGIN CERTIFICATE-----”. Fill the step 2 in the image above according to the output.
After filling the form click the Save & Enable button.
The button will redirect you to the MonoSign login page.
You will see the application name which the key is created for. In that case, this is Evernote. A successful login will redirect you to the Evernote settings page to activate SAML Single Sign-On on Evernote.