This article assumes that MonoSign RADIUS Server is configured properly. If you have any issue with RADIUS server, you can check this article.
This document explains how to implement MonoSign RADIUS Server with FortiGate.
Creating an Application and Access Key on MonoSign
Navigate to the application dedicated to RADIUS Server. Once you navigate, click Keys and Add New Key to create a RADIUS access key.
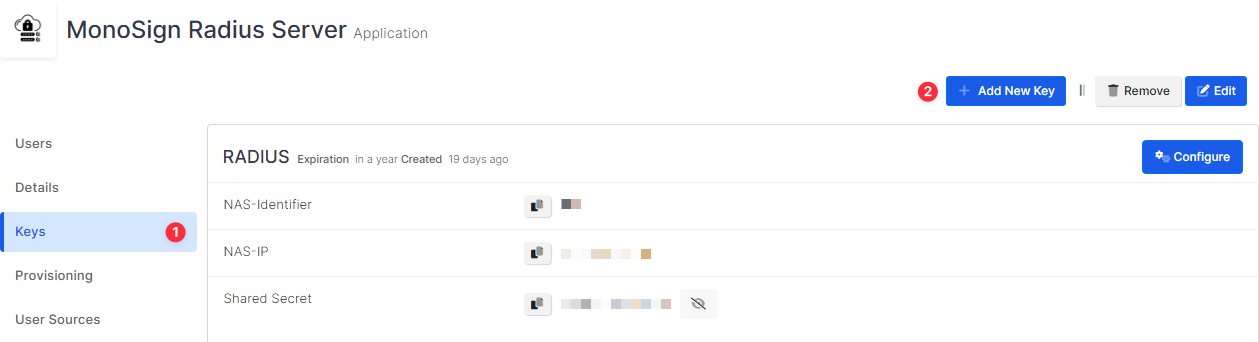
In the opened modal, choose RADIUS as Key Type and switch to RADIUS Settings. Fill in the necessary fields according to the information provided by FortiGate. Correspondings of the fields are as below.
|
Field |
Value |
|---|---|
|
NAS-Identifier |
Name of the device dedicated to RADIUS |
|
NAS-IP |
Name or IP address of the RADIUS Server |
|
Shared Secret |
Shared Secret defined on the RADIUS Server |
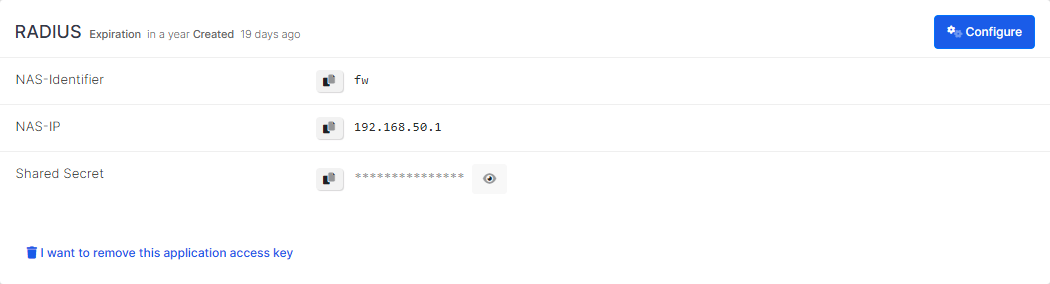
Click Save and you are gonna see your configuration for your access key as follows.
Configuration Single Sign-On for FortiGate
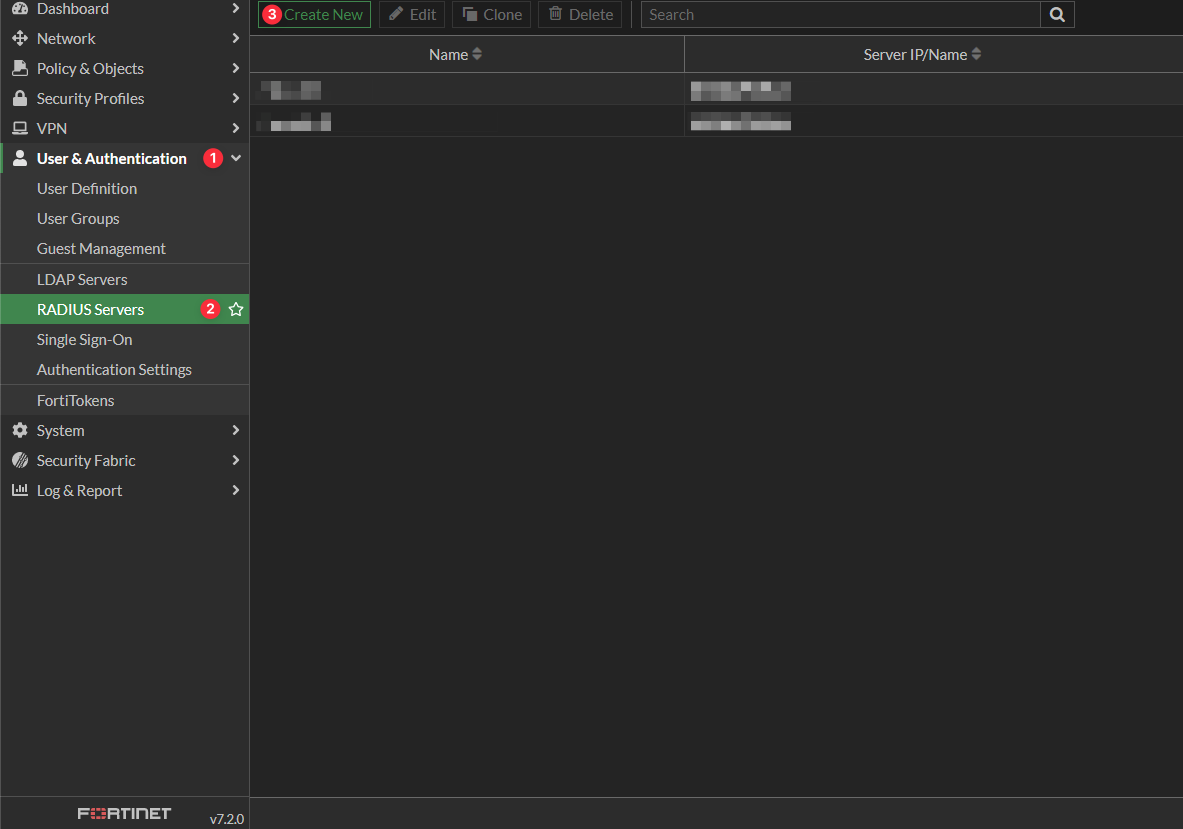
In order to configure the RADIUS Server on MonoSign for FortiGate SSO, create a RADIUS Server first. Navigate to User & Authentication > RADIUS Servers and click Create New.
Fill in the necessary fields according to the access key created on MonoSign. Correspondings of the fields are as below.
|
Field |
Value |
|---|---|
|
Authentication Method |
Deafult |
|
NAS IP |
Empty if NAS IP is not configured on RADIUS Server |
|
IP/Name |
Name or IP address of the RADIUS Server |
|
Secret |
Shared secret defined on the RADIUS Server |
Before going on, click Test Connectivity to make sure RADIUS Service information is valid. Also, the Test User Credentials section can be used to check both the server info and defined user authentication as well.
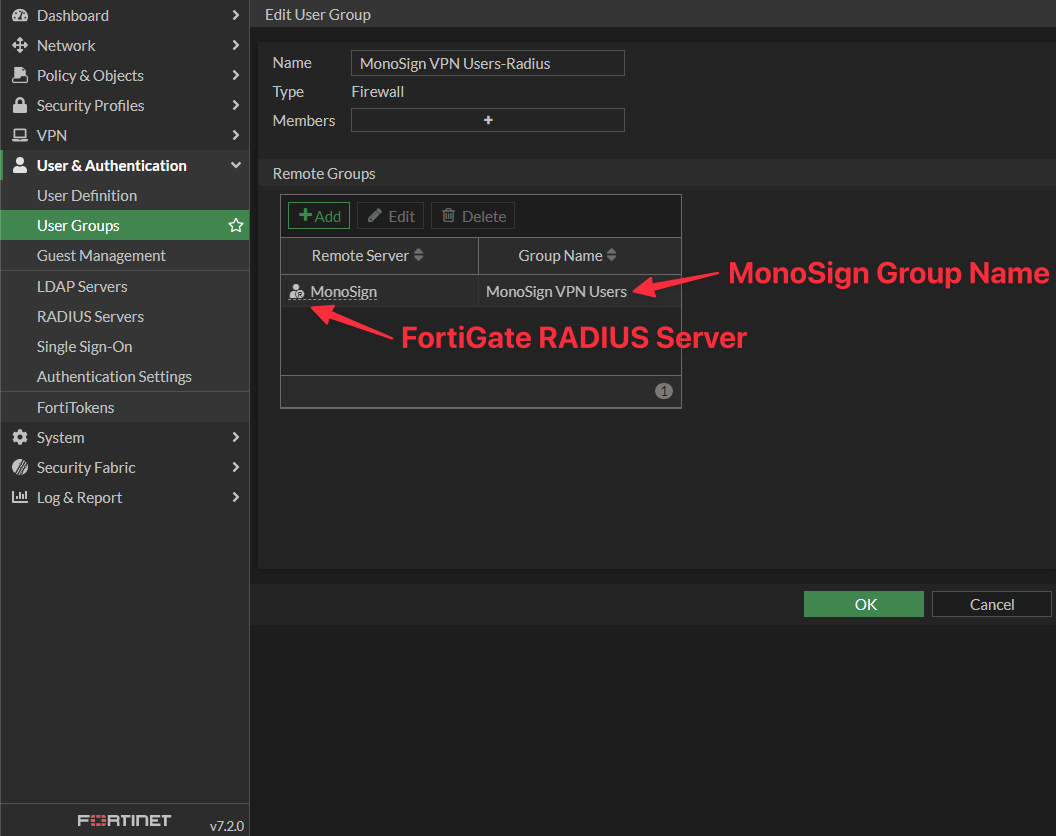
Next, create a User Group to associate created RADIUS Server with the MonoSign Group. Navigate to User & Authentication > User Groups and click Create New. Choose Type as Firewall and add Remote Group by choosing created RADIUS Server and specifying desired MonoSign Group. The form should look as follows.
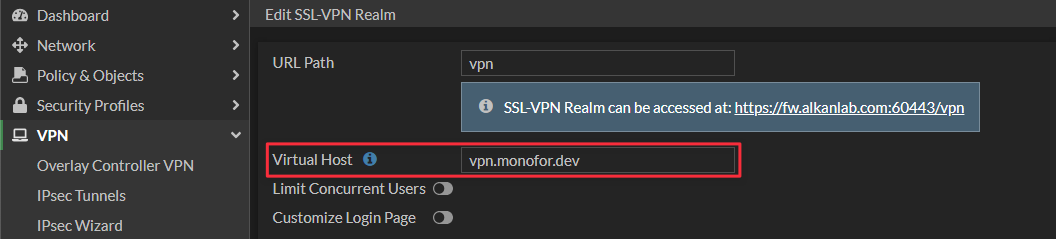
Next, create a new SSL-VPN Realm. Navigate to VPN > SSL-VPN Realms and click Create New. Type the Name and click OK. Open CLI Console located at the top right and execute the following commands to set Virtual Host.
config vpn ssl web realm
edit {realm-name}
set virtual-host {virtual-host-name}
end
If you check realms, you will see that Virtual Host is exposed on UI as follows so you can change it any time on the edit page.
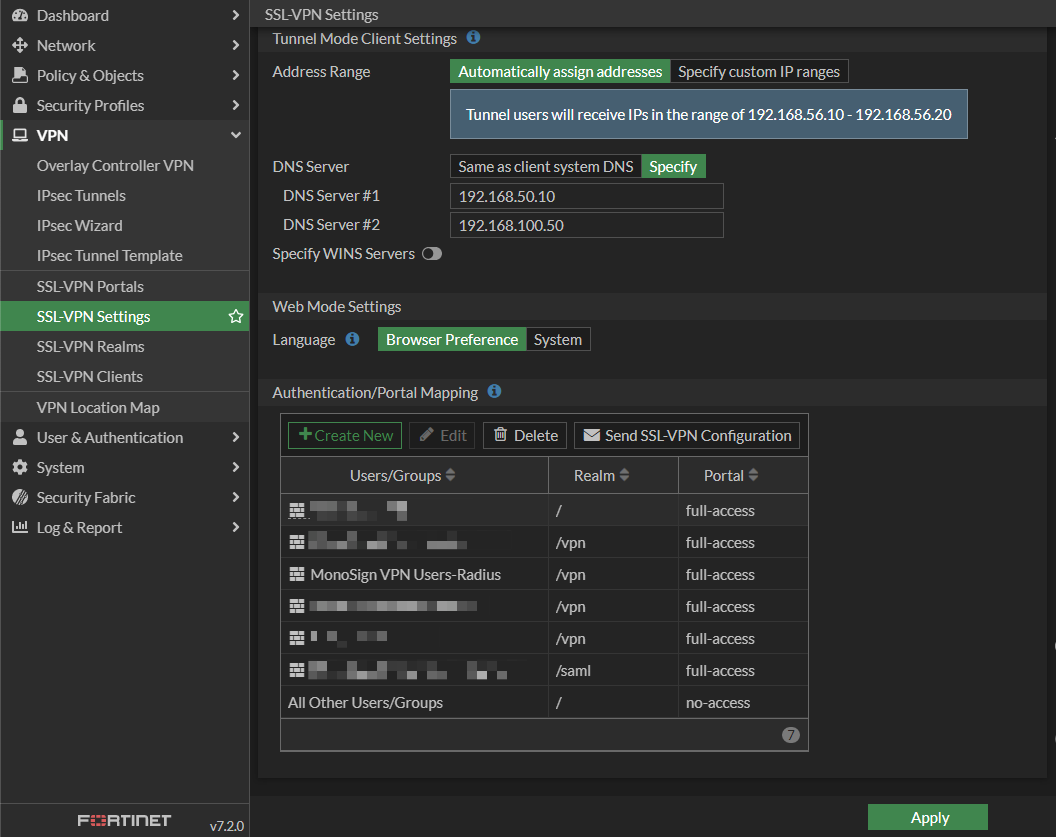
Next, add new Authentication/Portal Mapping to SSL-VPN Settings. Navigate to VPN > SSL-VPN Settings and scroll down. Authentication/portal mappings are located at the bottom of the page. Add new mapping by choosing created User Group and Realm and click OK.
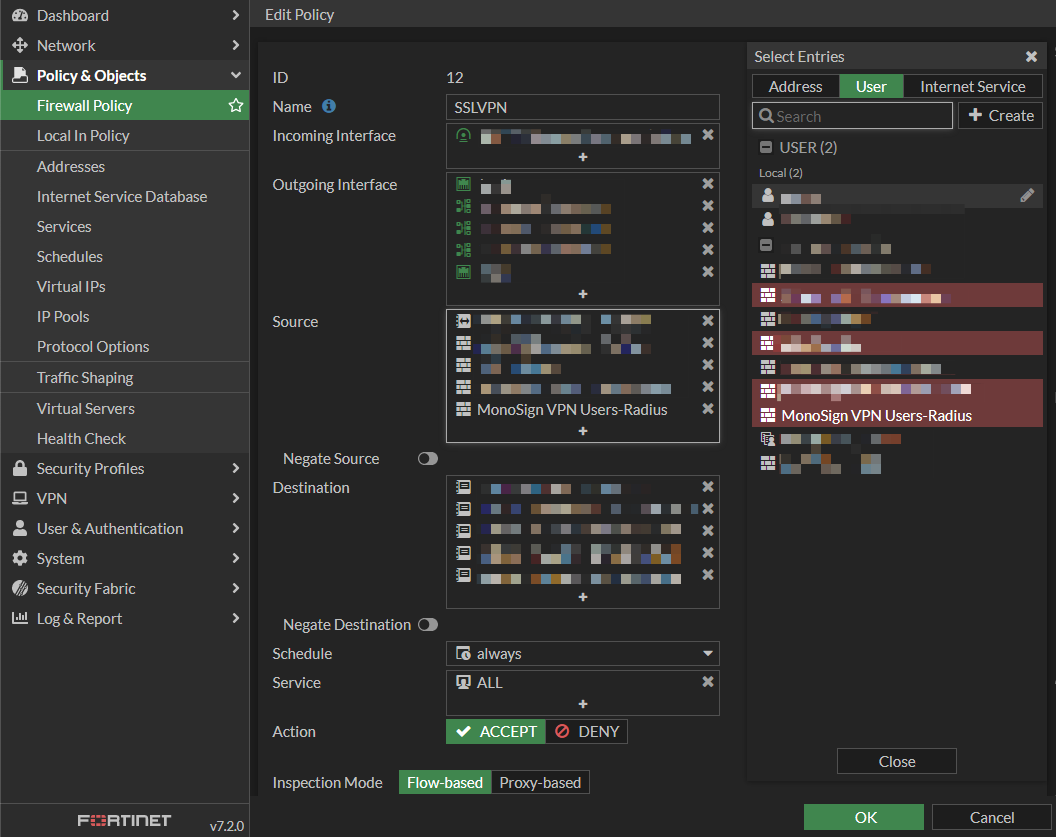
Next, create a new or edit the existing Firewall Policy. Navigate to Policy & Objects > Firewall Policy and choose one or click Create New. Add Created User Group to Source as follows.
VPN Connection
In order to establish a VPN connection using RADIUS, connect to the Virtual Host associated with RADIUS. Create a new or edit the existing connection and fill the necessary fields according to configurations made in chapter two. Correspondings of the fields are as below.
|
Field |
Value |
|---|---|
|
Remote Gateway |
Virtual host of created SSL-VPN Realm |
|
Port |
Port number specified in SSL-VPN Settings |
To connect, type your MonoSign credentials and the connection will start your MonoSign Authentication Flow.