Grafana OIDC Integration
This document explains how to implement Monosign with Grafana It covers Single Sign-On. Before you continue, it is better to start with Grafana's Single Sign-On in this page.
📑 Instructions
This documentation contains 4 main steps for integration.
Creating an Application on Monosign
Configuration Single Sign-On for Grafana
Assign a user to the Grafana application
Sign In Test
1- Creating an Application on Monosign
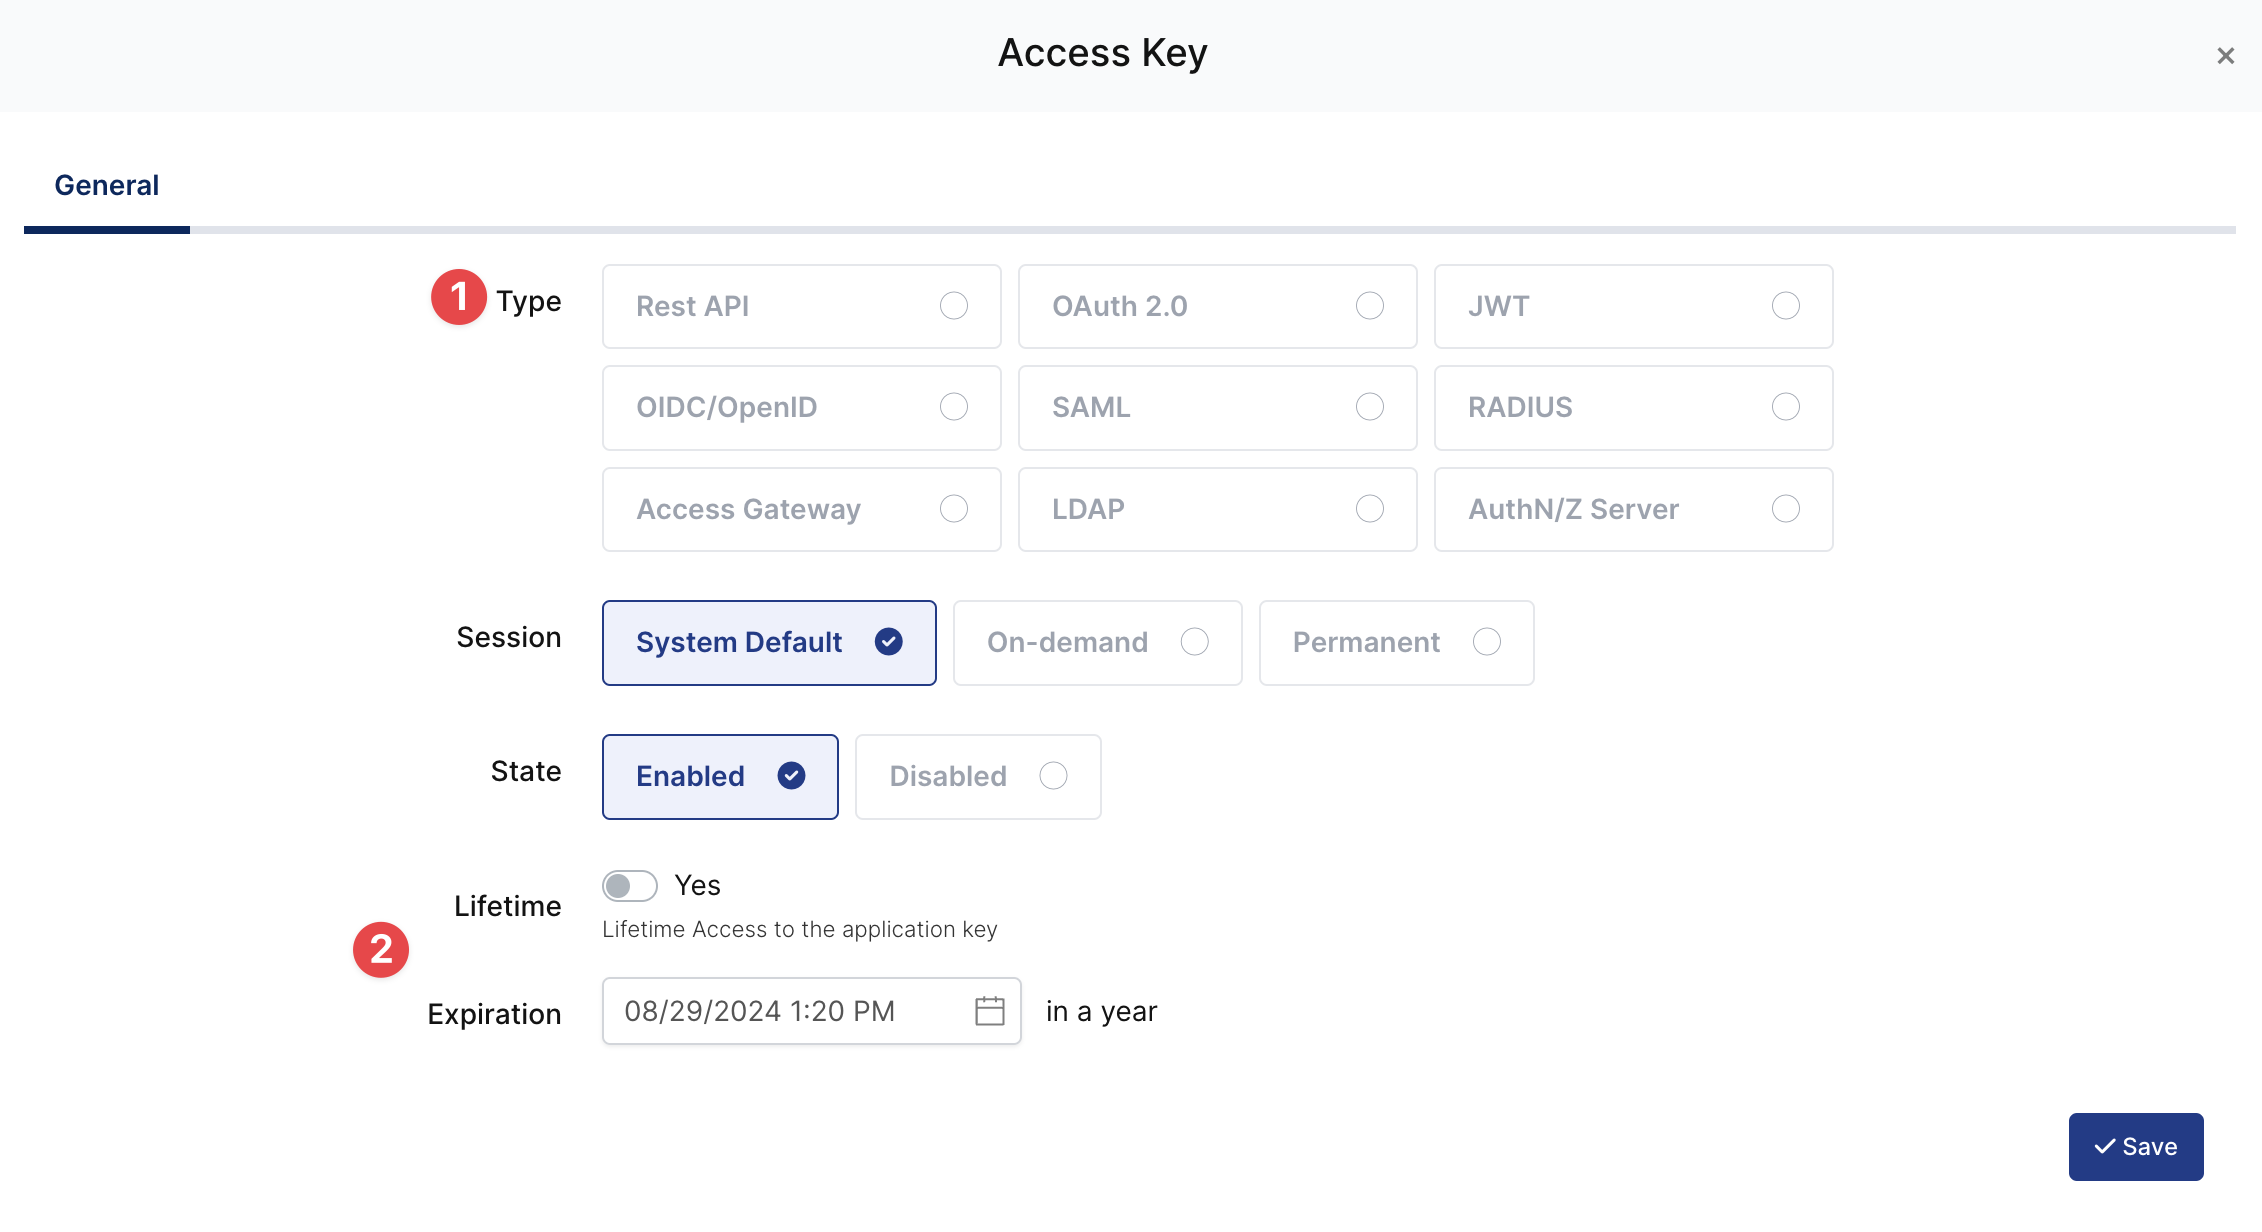
Create application on Monosign and configure your access policy. Once you create, click “Keys” and add a new Access Key for OIDC/OpenID Key for access.
This information will be necessary during the configuration of the application.

Property | Value | Options |
|---|---|---|
Key Type | OIDC/OpenId | Rest API, OAuth 2.0, JWT, OIDC/OpenID, SAML, RADIUS, Access Gateway, LDAP, AuthN/Z Server |
Expiration | Lifetime | Lifetime or Specific Date/Time - By Default Lifetime is Enabled. |
Configuration details for the Grafana application are provided as follows:
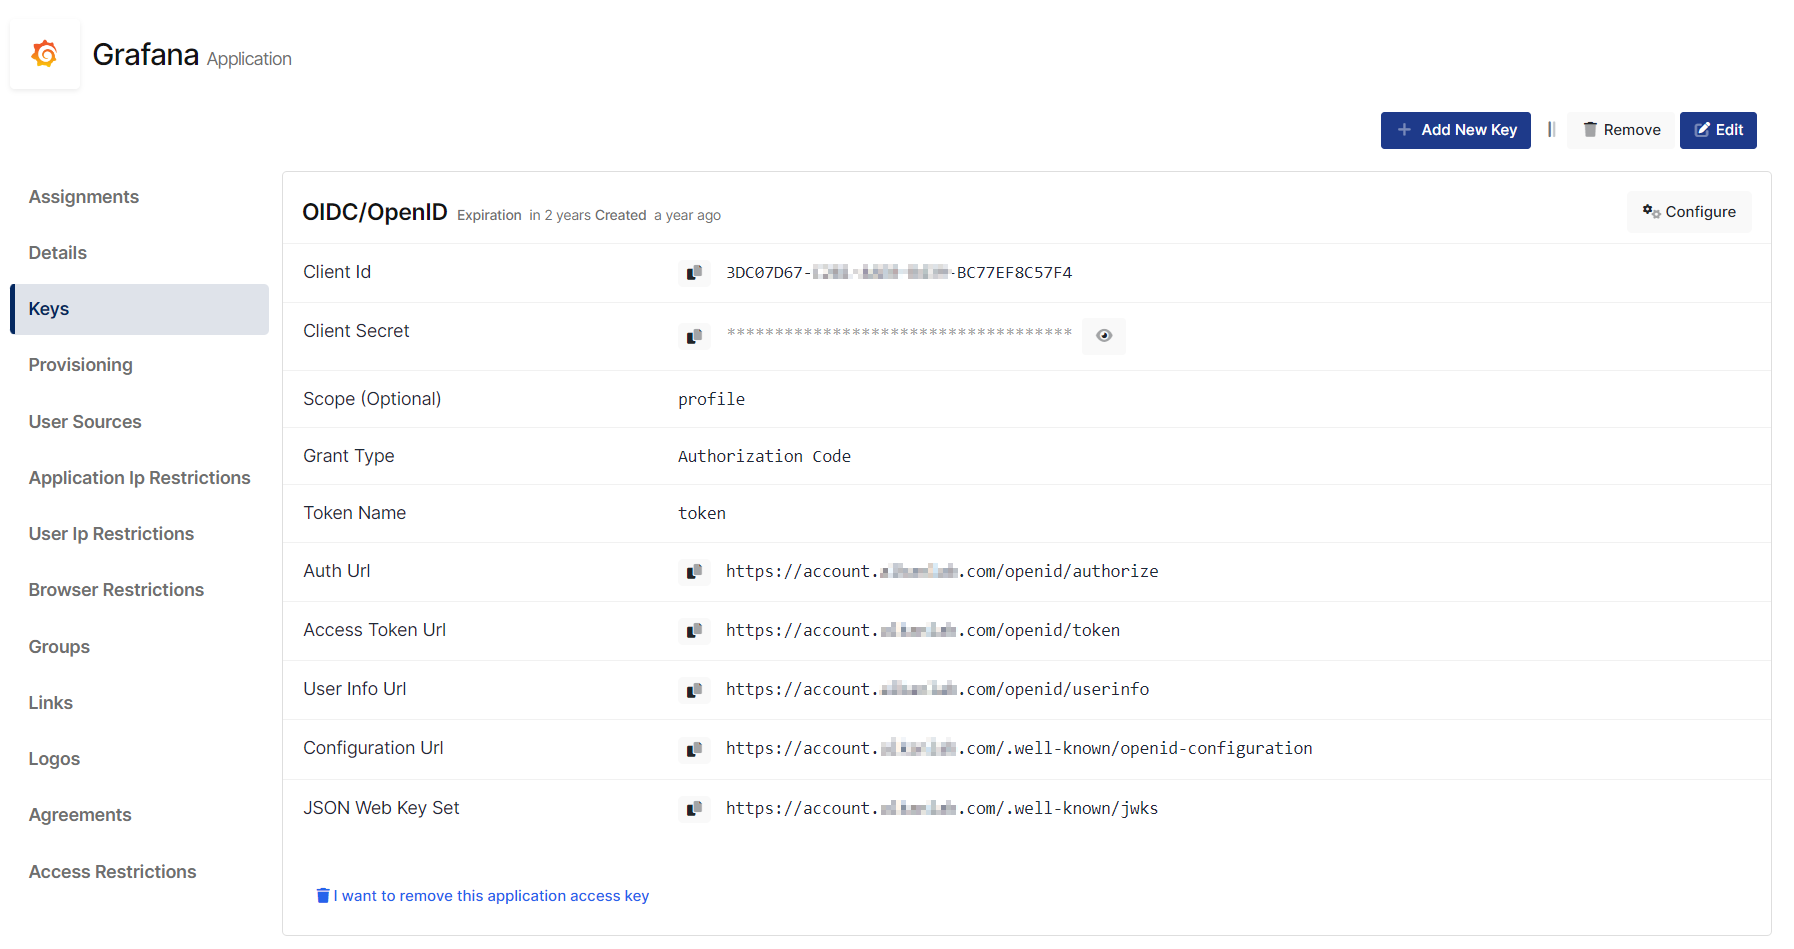

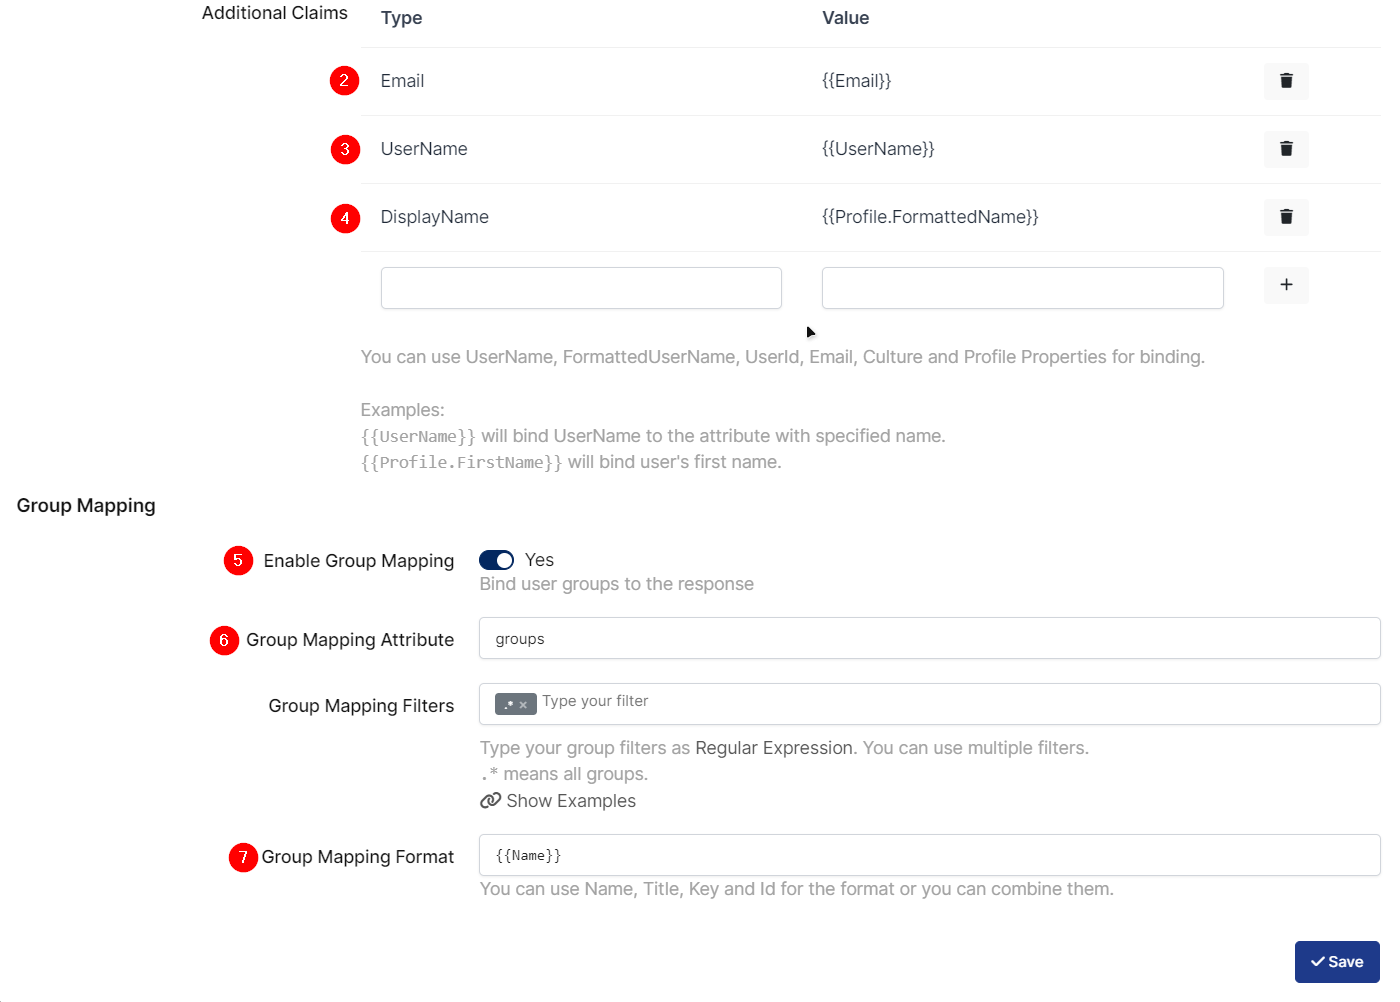
Change or add below values in the properties.
Property | Value |
|---|---|
UserName Format |
|
Additional Claims - Email |
|
Additional Claims - UserName |
|
Additional Claims - DisplayName |
|
Enable Group Mapping |
|
Group Mapping Attribute |
|
Group Mapping Format |
|
To ensure that the application has access to user groups, follow these steps:
If the application hasn't been configured yet, click the “Edit” option for the application.
In the application settings, navigate to the “Source, Provider, and Profile” tab.
Configure the “User Access Type“ and “User Group Access Type” as “Only Assigned Users.”
Configuring this setting will allow the application to access by user groups when users sign in.
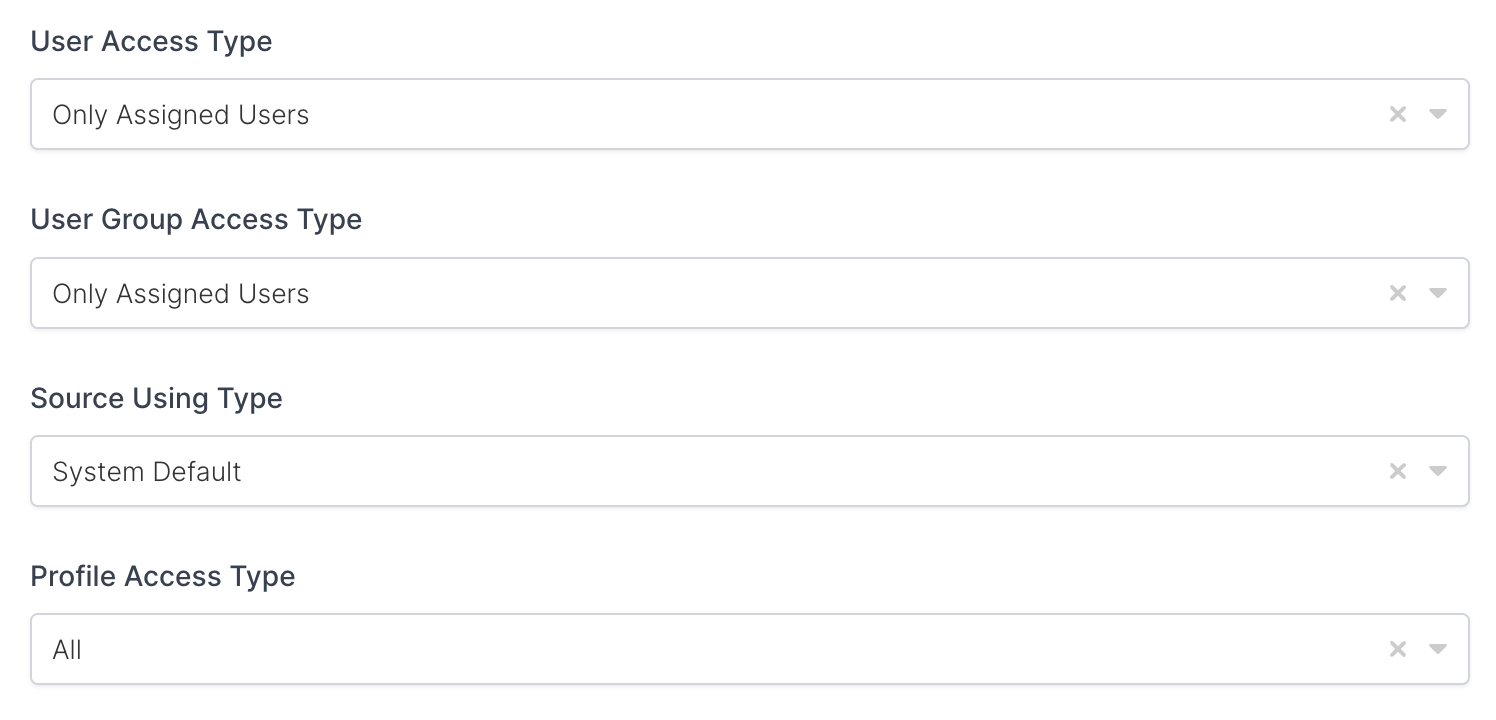
Property | Description | Options |
|---|---|---|
User Access Type | Defines which Users will access to this application. | Only Assigned Users |
User Group Access Type | Defines application’s user group access | Only Assigned Users |
Profile Access Type | Defines Application’s user’s profile access | Restricted - Only restricted user profile attributes |
2- Configuration Single Sign-On for Grafana
Grafana can be installed different types of method. In this document two different types of configuration provided. Standalone(configuration file) or docker(environment)
a- Configuration File
As it highlighted at the beginning of document, please check out the Grafana’s SSO configuration page first.
Please add your OIDC/OAuth2.0 settings to the application. The following information is needed for your configuration.
Grafana configuration file is located under /etc/grafana/grafana.ini. You need to change some values in this file to enable SSO.
Please change only below properties in grafana.ini file.
[auth] Section Properties
Property | Value |
|---|---|
|
|
|
|
disable_login_form option can be set false in the beginning. After SSO will work correctly than it can be set it to true.
[auth.generic_oauth] Section properties
Property | Value |
|---|---|
|
|
|
|
|
|
|
|
|
|
|
|
|
|
|
|
|
|
|
|
|
|
|
|
|
|
|
|
|
|
The file content will be as follows.
[auth]
...

# Set to true to disable (hide) the login form, useful if you use OAuth, defaults to false
disable_login_form = true

...

# Use email lookup in addition to the unique ID provided by the IdP
oauth_allow_insecure_email_lookup = true

...

#################################### Generic OAuth ##########################
[auth.generic_oauth]
enabled = true
name = Monosign
allow_sign_up = true
client_id = 8d4b5262-04e0-4463-bfe9-62eef8576ac7
client_secret = 9cedfbc5-39cb-4cca-a7ee-def288ca1bac
scopes = openid profile email
auth_url = https://account.monofor.com/openid/authorize
token_url = https://account.monofor.com/openid/token
api_url = https://account.monofor.com/openid/userinfo
email_attribute_name = Email
name_attribute_path = DisplayName
login_attribute_path = UserName
groups_attribute_path = groups
role_attribute_path = contains(groups[*], 'Grafana Super Admins') && 'GrafanaAdmin' || contains(groups[*], 'Grafana Admins') && 'Admin' || contains(groups[*], 'Grafana Editors') && 'Editor' || 'Viewer'
allow_assign_grafana_admin = true
;auto_login = false
;empty_scopes = false
;email_attribute_path =
;id_token_attribute_name =
;signout_redirect_url =
;teams_url =
;allowed_domains =
;team_ids =
;allowed_organizations =
;role_attribute_strict = false
;team_ids_attribute_path =
;tls_skip_verify_insecure = false
;tls_client_cert =
;tls_client_key =
;tls_client_ca =
;use_pkce = false
;auth_style =
Restart Grafana service to apply SSO configuration.
Now, go back to Monosign and give access to your users and try login.
b- Environment file
Grafana can be install in docker environment. If installed in the docker below environments can be used when docker container started.
Property | Value |
|---|---|
|
|
|
|
|
|
|
|
|
|
|
|
|
|
|
|
|
|
|
|
|
|
|
|
|
|
|
|
|
|
|
|
|
|
Environment format
environment:
  GF_AUTH_DISABLE_LOGIN_FORM="false"
  GF_AUTH_GENERIC_OAUTH_ENABLED="true"
  GF_AUTH_GENERIC_OAUTH_NAME="MonoSign"
  GF_AUTH_GENERIC_OAUTH_ALLOW_SIGN_UP="true"
  GF_AUTH_GENERIC_OAUTH_CLIENT_ID="3dc07d67-c281-4ae0-b439-bc77ef8c57f4"
  GF_AUTH_GENERIC_OAUTH_CLIENT_SECRET="bbf5d71d-37fa-4819-991f-ef441c280423"
  GF_AUTH_GENERIC_OAUTH_SCOPES="openid profile email"
  GF_AUTH_GENERIC_OAUTH_AUTH_URL="https=//account.alkanlab.com/openid/authorize"
  GF_AUTH_GENERIC_OAUTH_TOKEN_URL="https=//account.alkanlab.com/openid/token"
  GF_AUTH_GENERIC_OAUTH_API_URL="https=//account.alkanlab.com/openid/userinfo"
  GF_AUTH_GENERIC_OAUTH_EMAIL_ATTRIBUTE_NAME="Email"
  GF_AUTH_GENERIC_OAUTH_NAME_ATTRIBUTE_PATH="DisplayName"
  GF_AUTH_GENERIC_OAUTH_LOGIN_ATTRIBUTE_PATH="UserName"
  GF_AUTH_GENERIC_OAUTH_GROUPS_ATTRIBUTE_PATH="groups"
  GF_AUTH_GENERIC_OAUTH_ROLE_ATTRIBUTE_PATH="contains(groups[*], 'Grafana Super Admins') && 'GrafanaAdmin' || contains(groups[*], 'Grafana Admins') && 'Admin' || contains(groups[*], 'Grafana Editors') && 'Editor' || 'Viewer'"
  GF_AUTH_GENERIC_OAUTH_ALLOW_ASSIGN_GRAFANA_ADMIN="true"
  GF_AUTH_OAUTH_ALLOW_INSECURE_EMAIL_LOOKUP="true"
3- Assign a user to the Grafana application
Please follow below instructions on how to assign a user to the Grafana application. In this example john.smith will assign to the application access.


4- Sign In Test
Now try login. Navigate to the Grafana application login page.
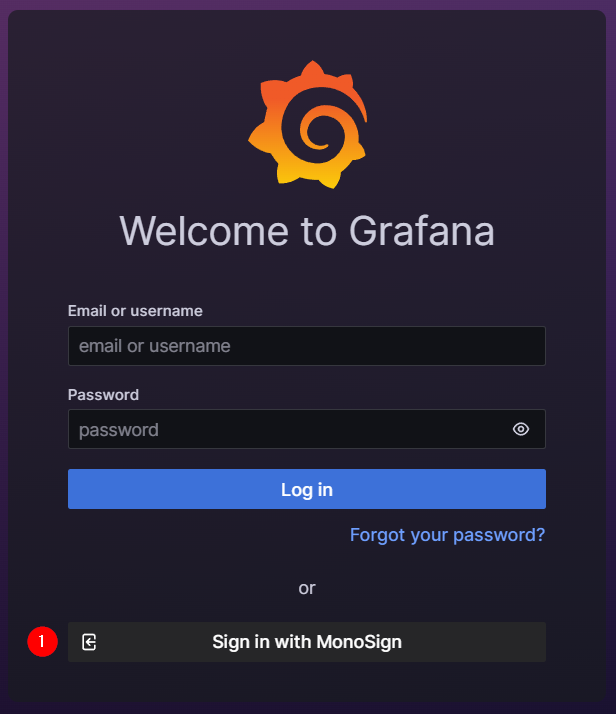
Click Sign in with Monosign button.
If everything is well configured, the page will be redirected to Monosign’s login page. It can be log in passwordless with QR code or type username and password.
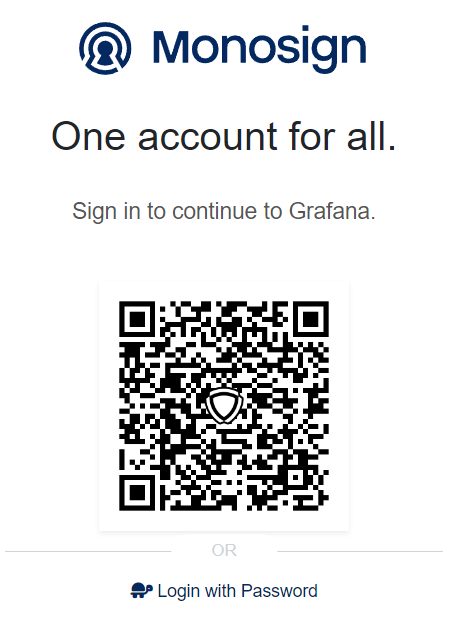
When the user logged in, the page will be redirected to the Grafana page.
