
This document explains how to implement MonoSign with Grammarly. It covers Single Sign-On. Before you continue, it is better to start with Grammarly’s Single Sign-On implementation page.
Creating an Application on MonoSign
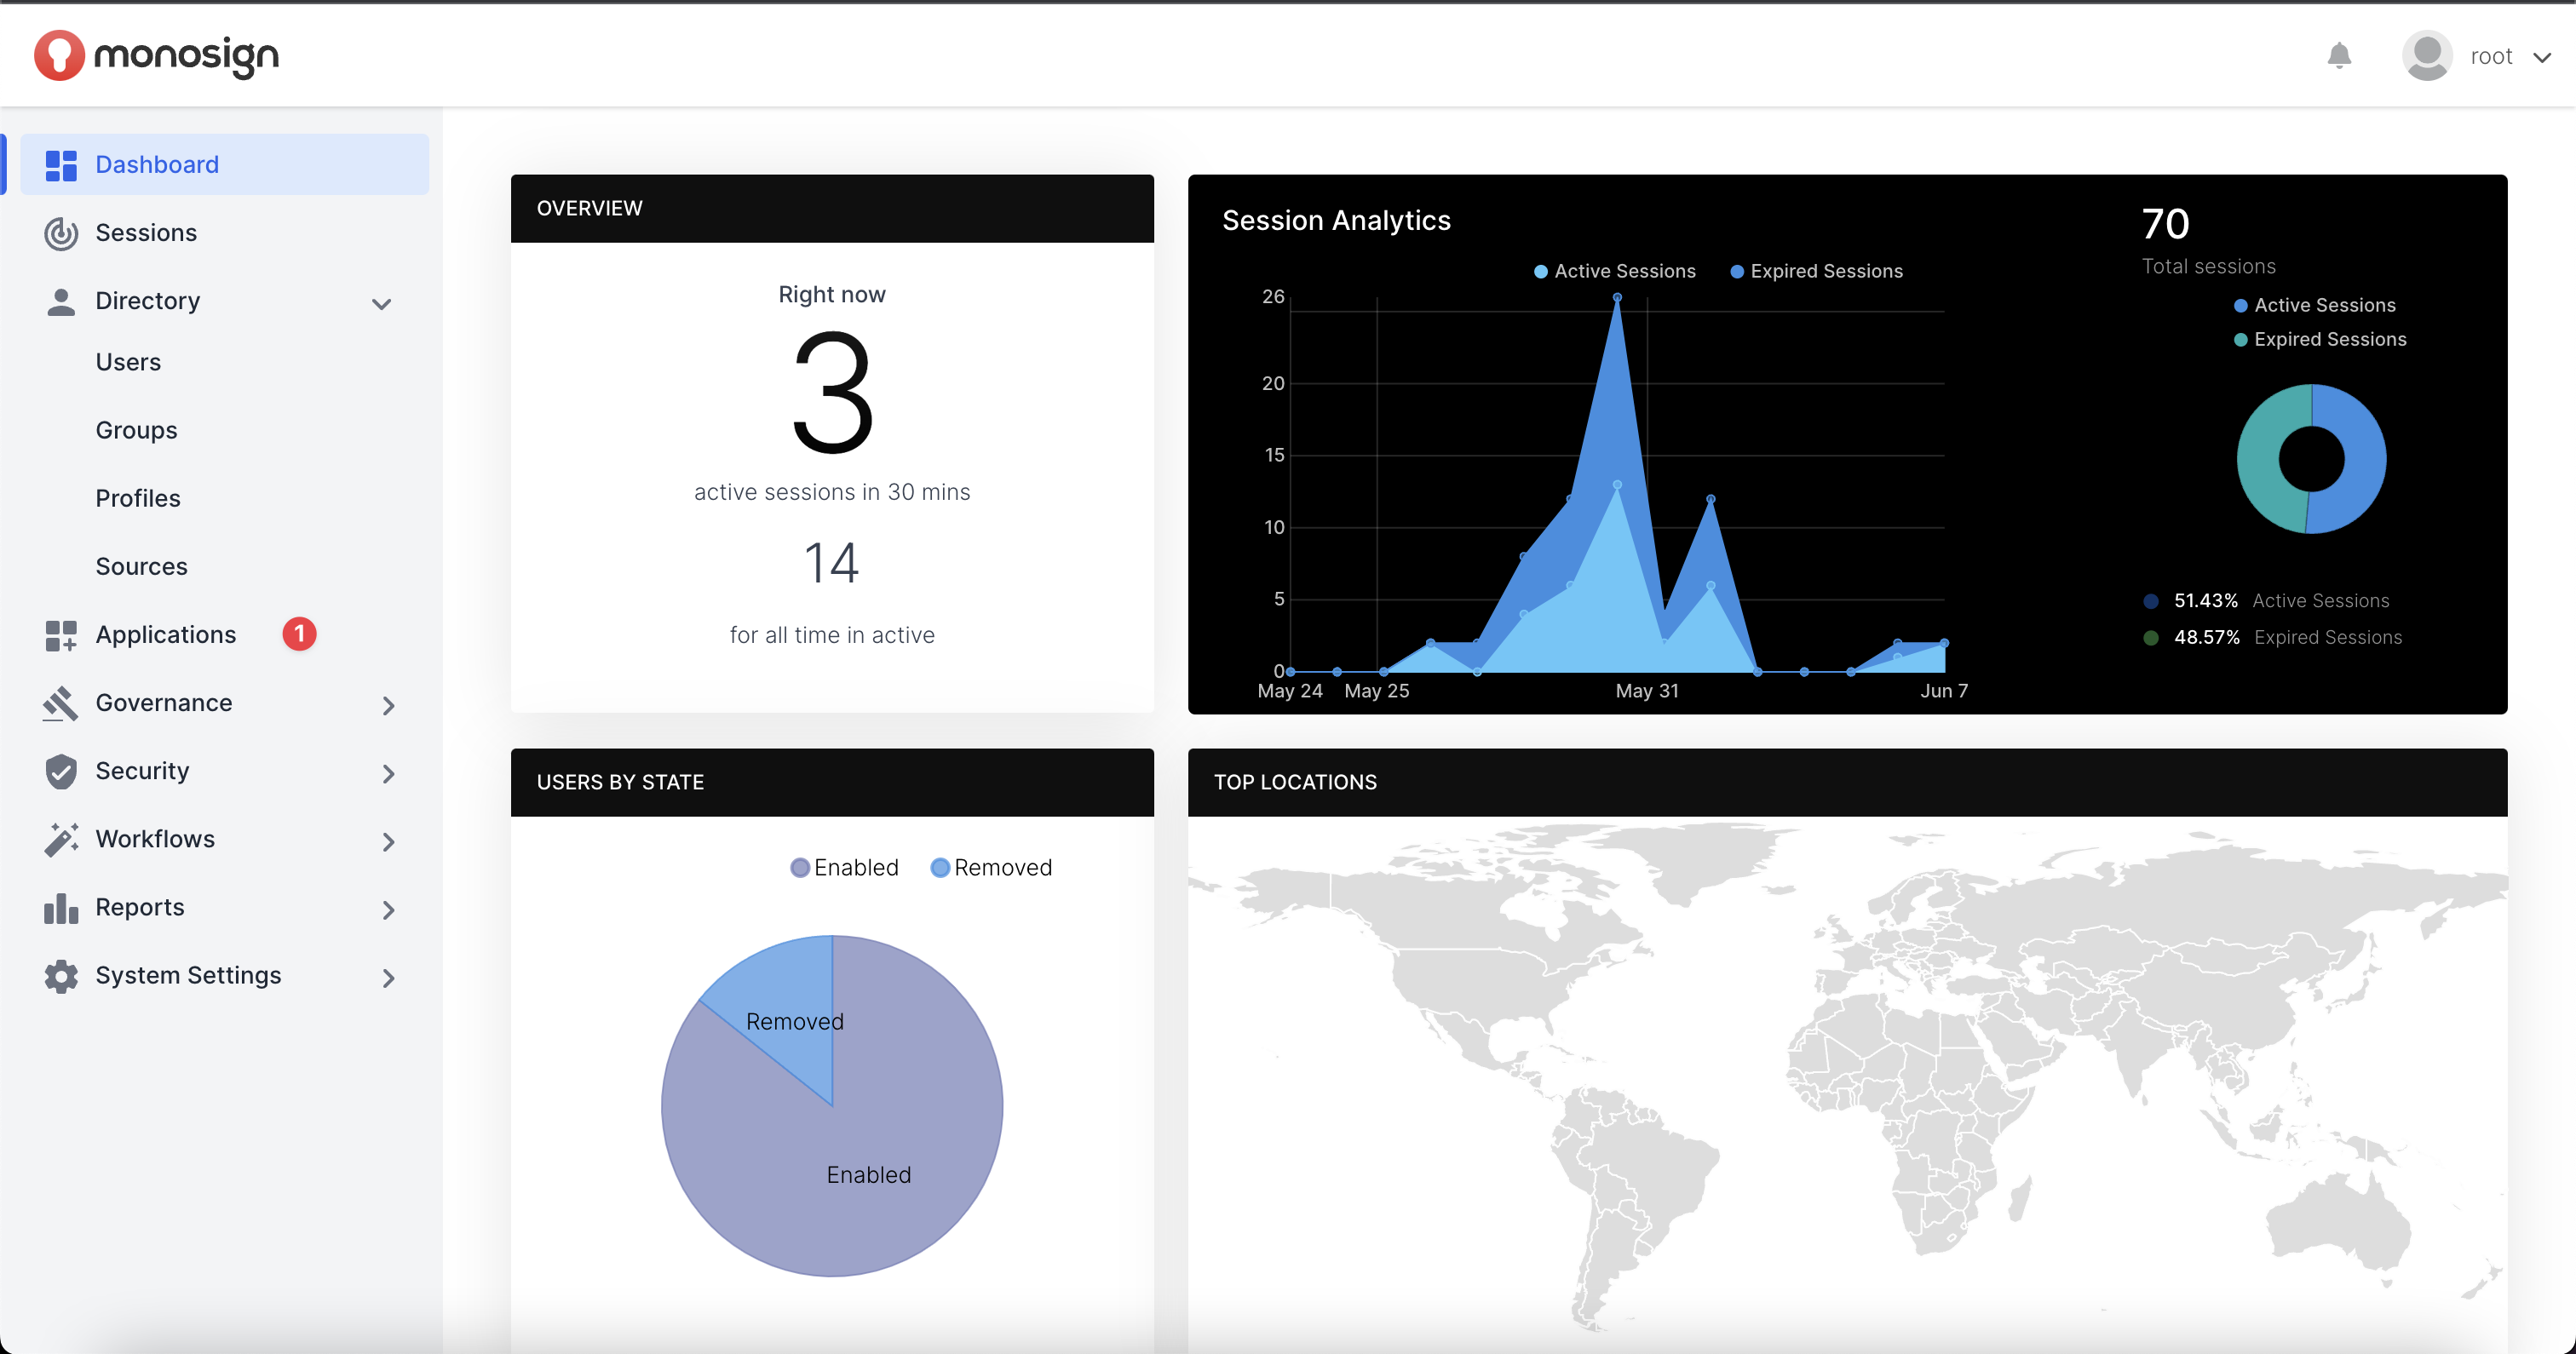
Navigate to Applications page by clicking Applications button on the navigation bar. To create a new application, please click the “Add New“ button. “Add New“ button navigate you to Application Create Page.
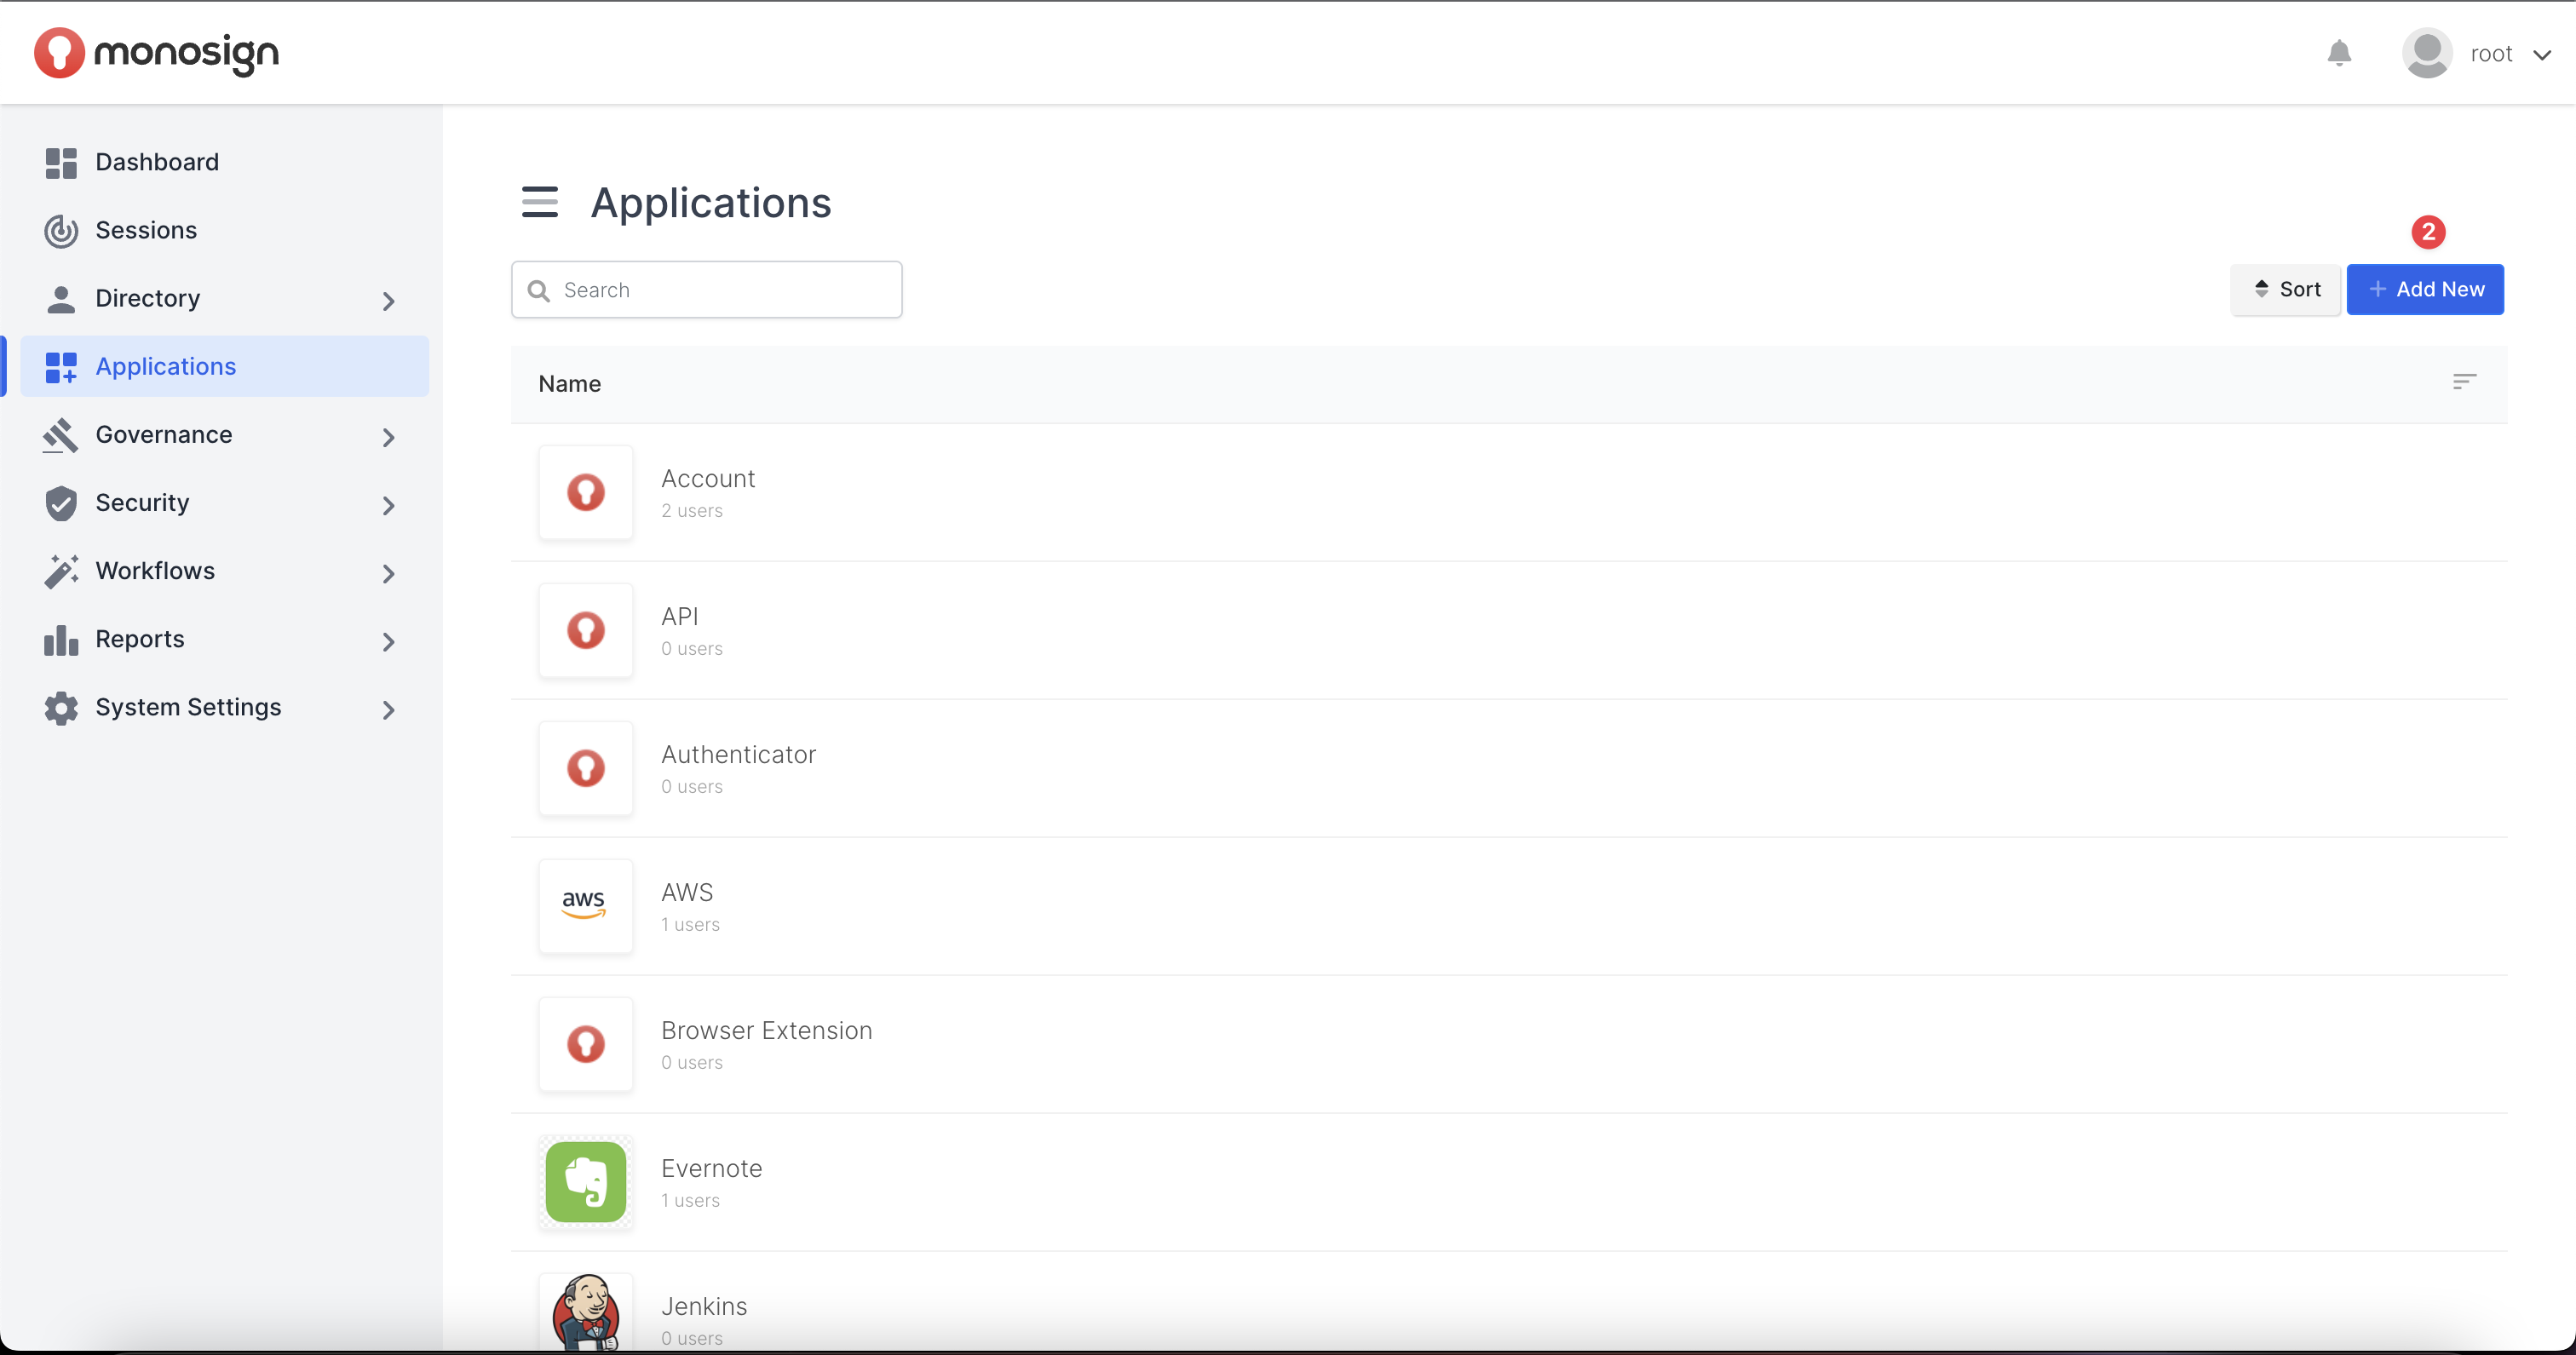
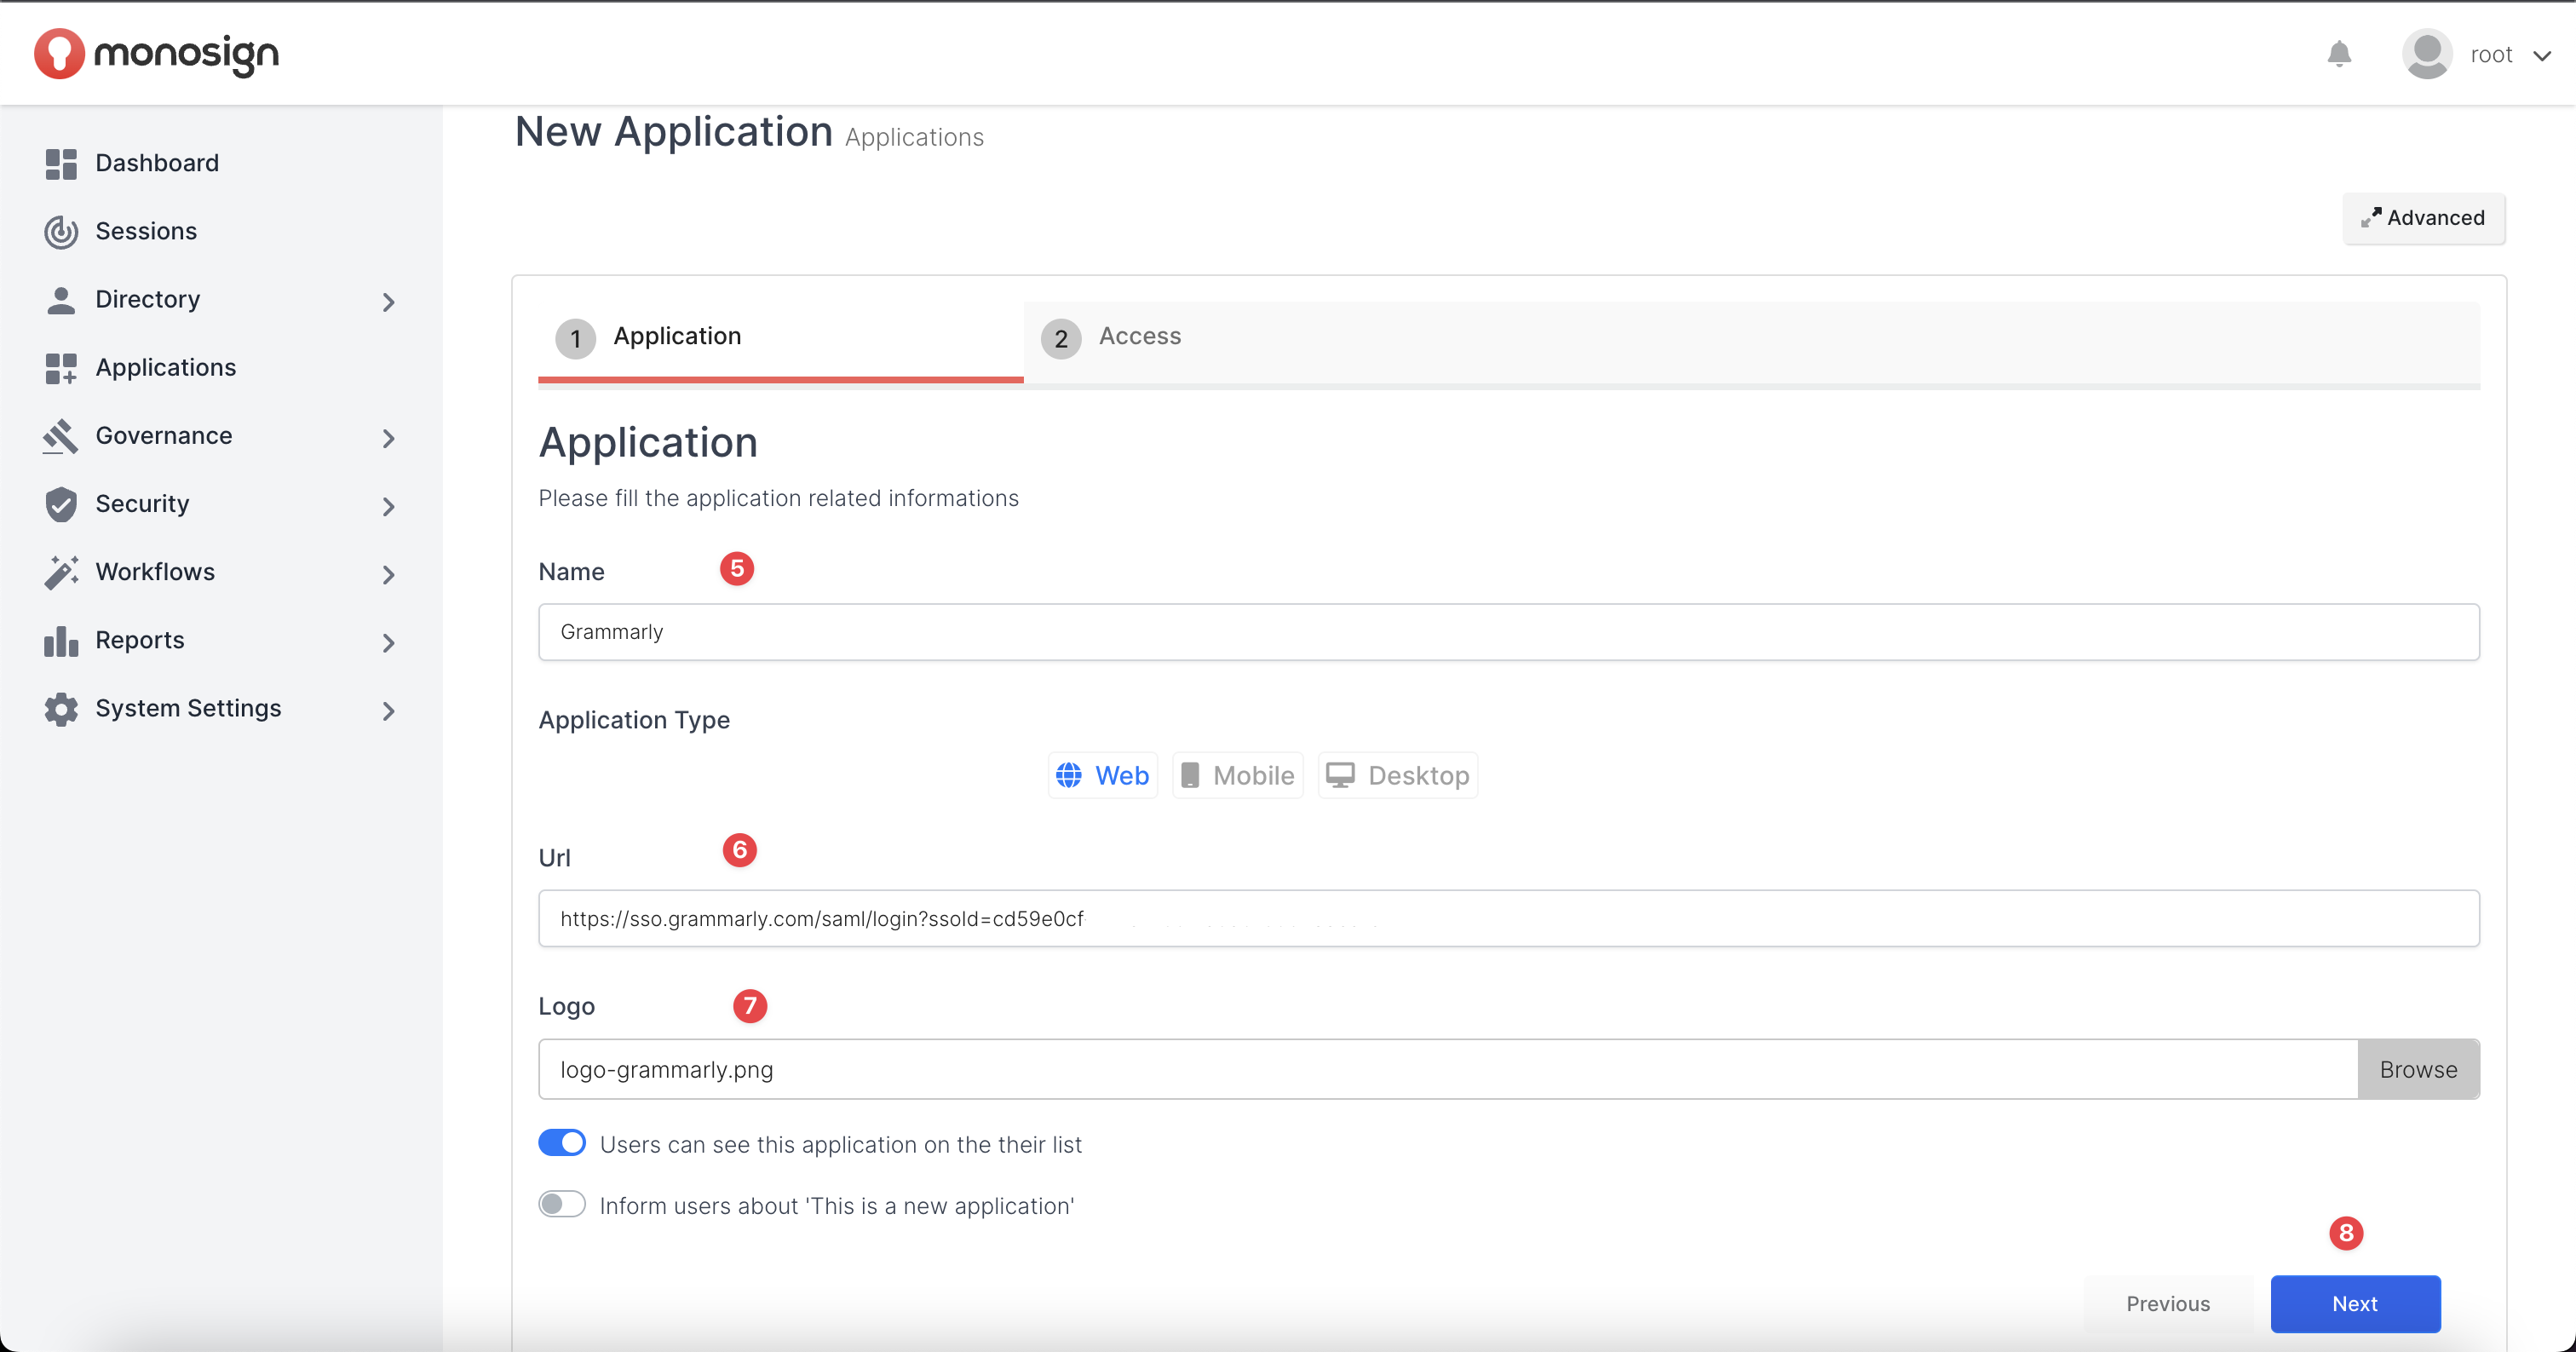
Firstly, let’s start setting up the Application Name, Application URL and Application Logo on Application Create Page. Application URL must be the one that “Grammarly“ will give us while configuring SAML Authentication method.
To configure the SAML authentication method on Grammarly, admin user needs to navigate to Administration Authentication page and click the configure button.
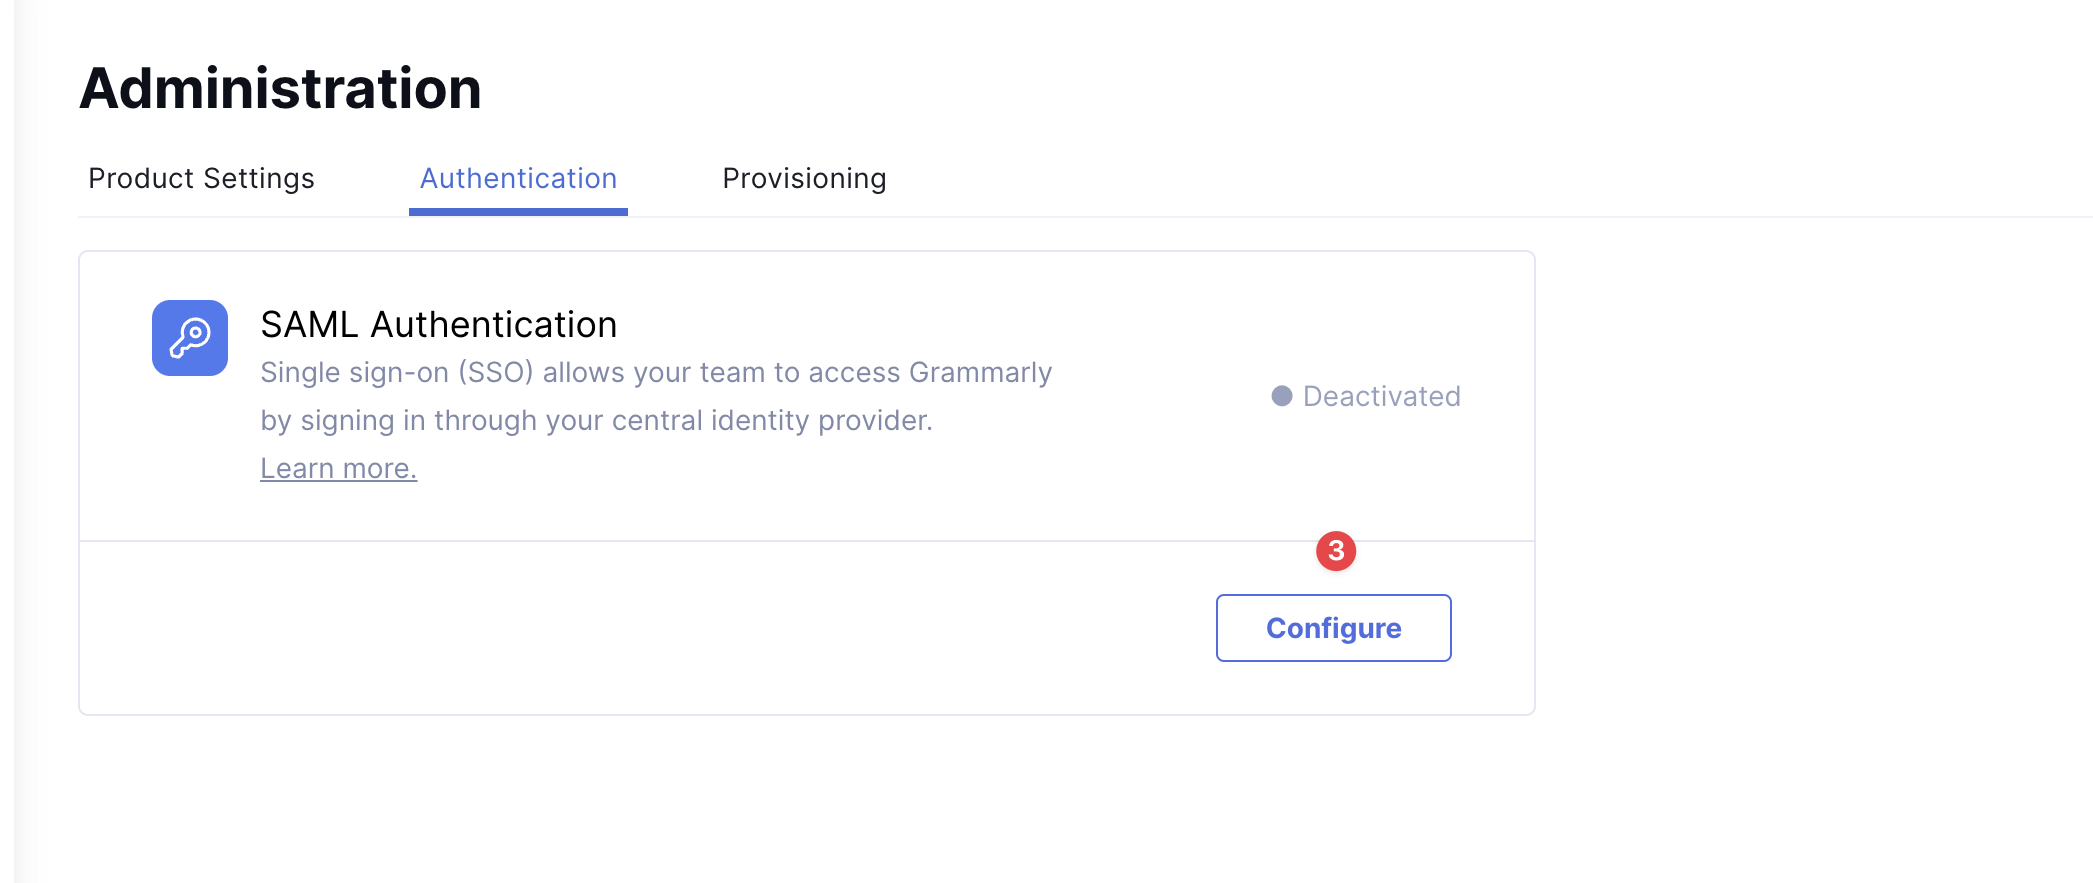
Admin user will see a “Copy Link“ to get SSO Sign-in URL. When “Copy Link“ clicked, it will copy the URL to clipboard.
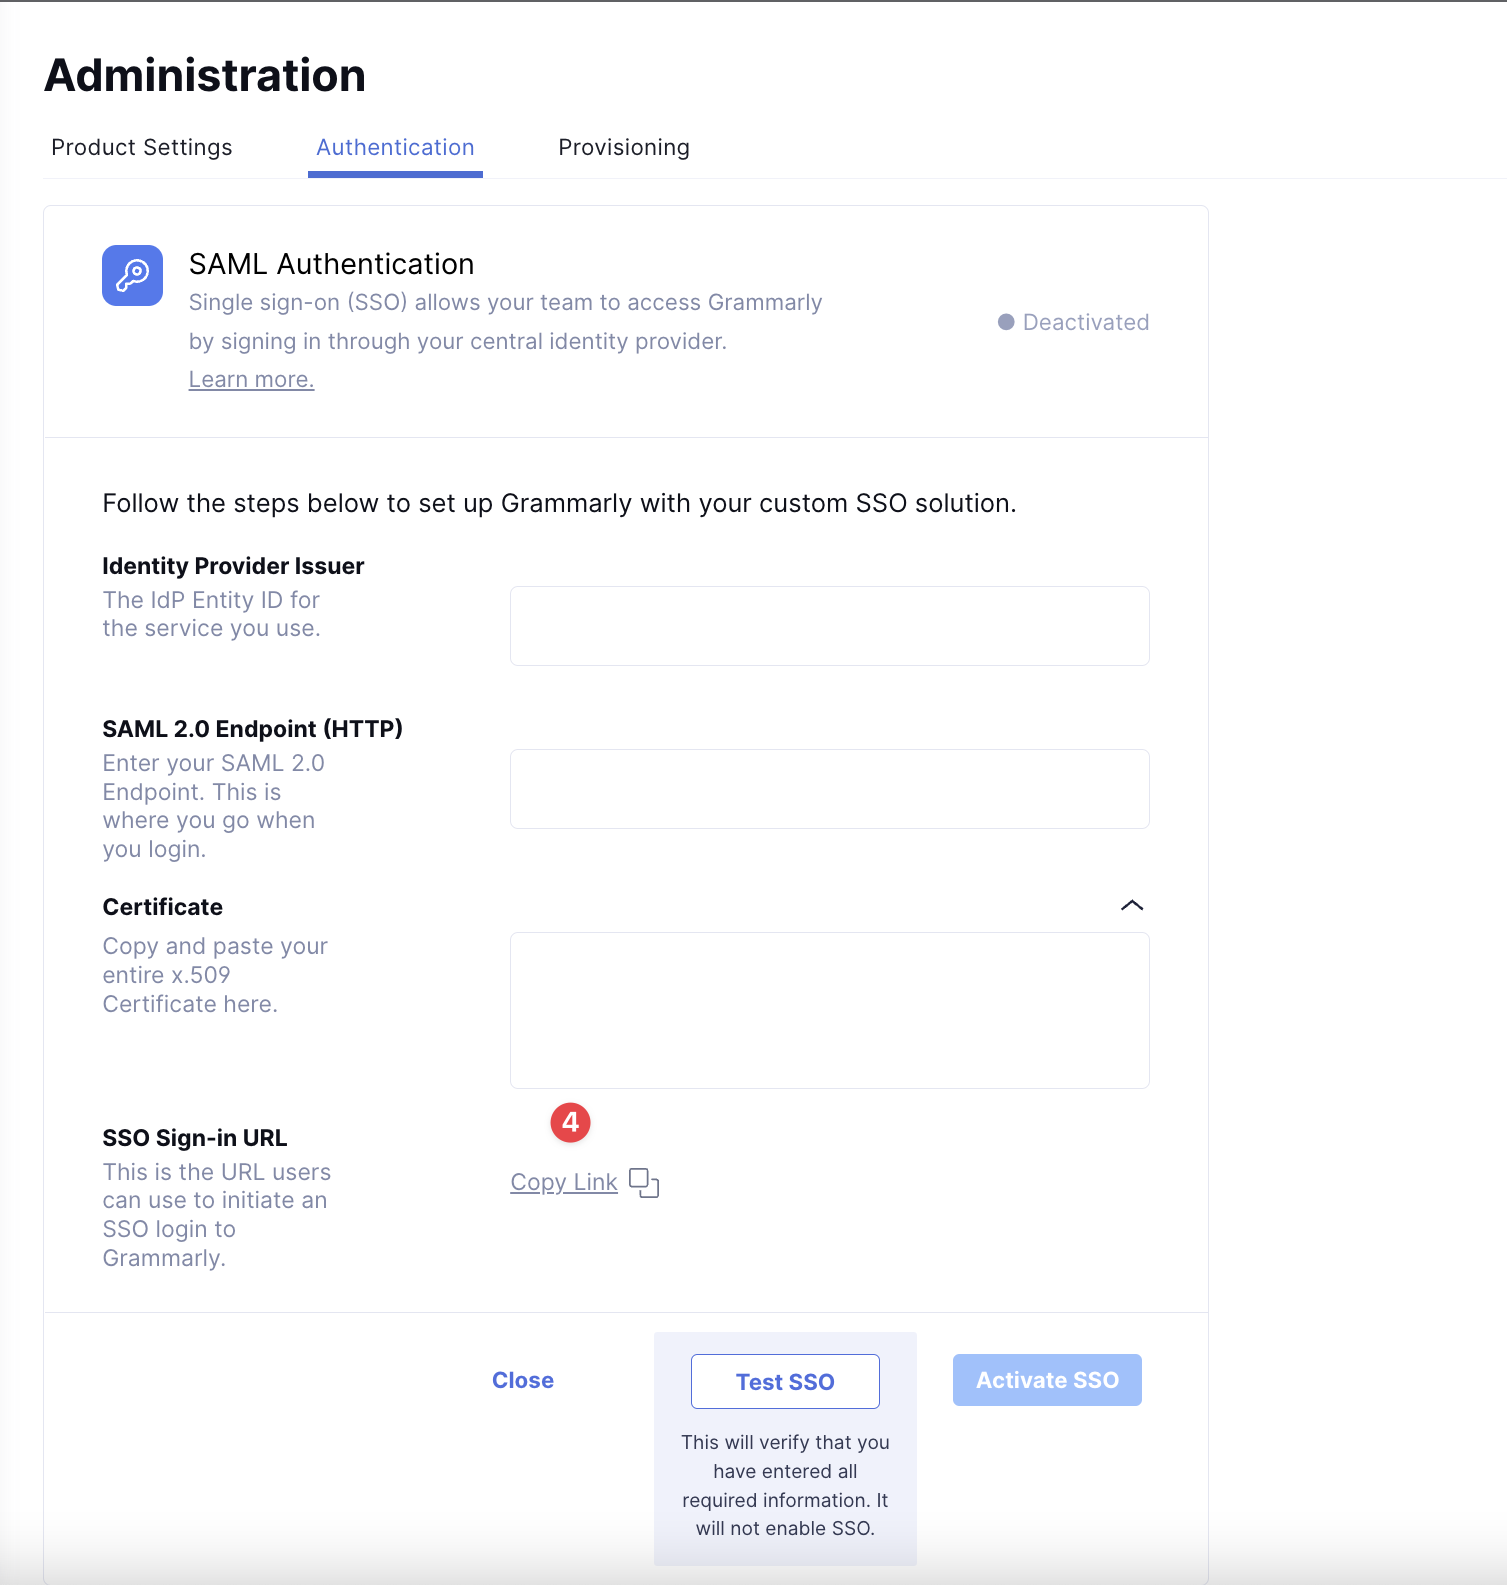
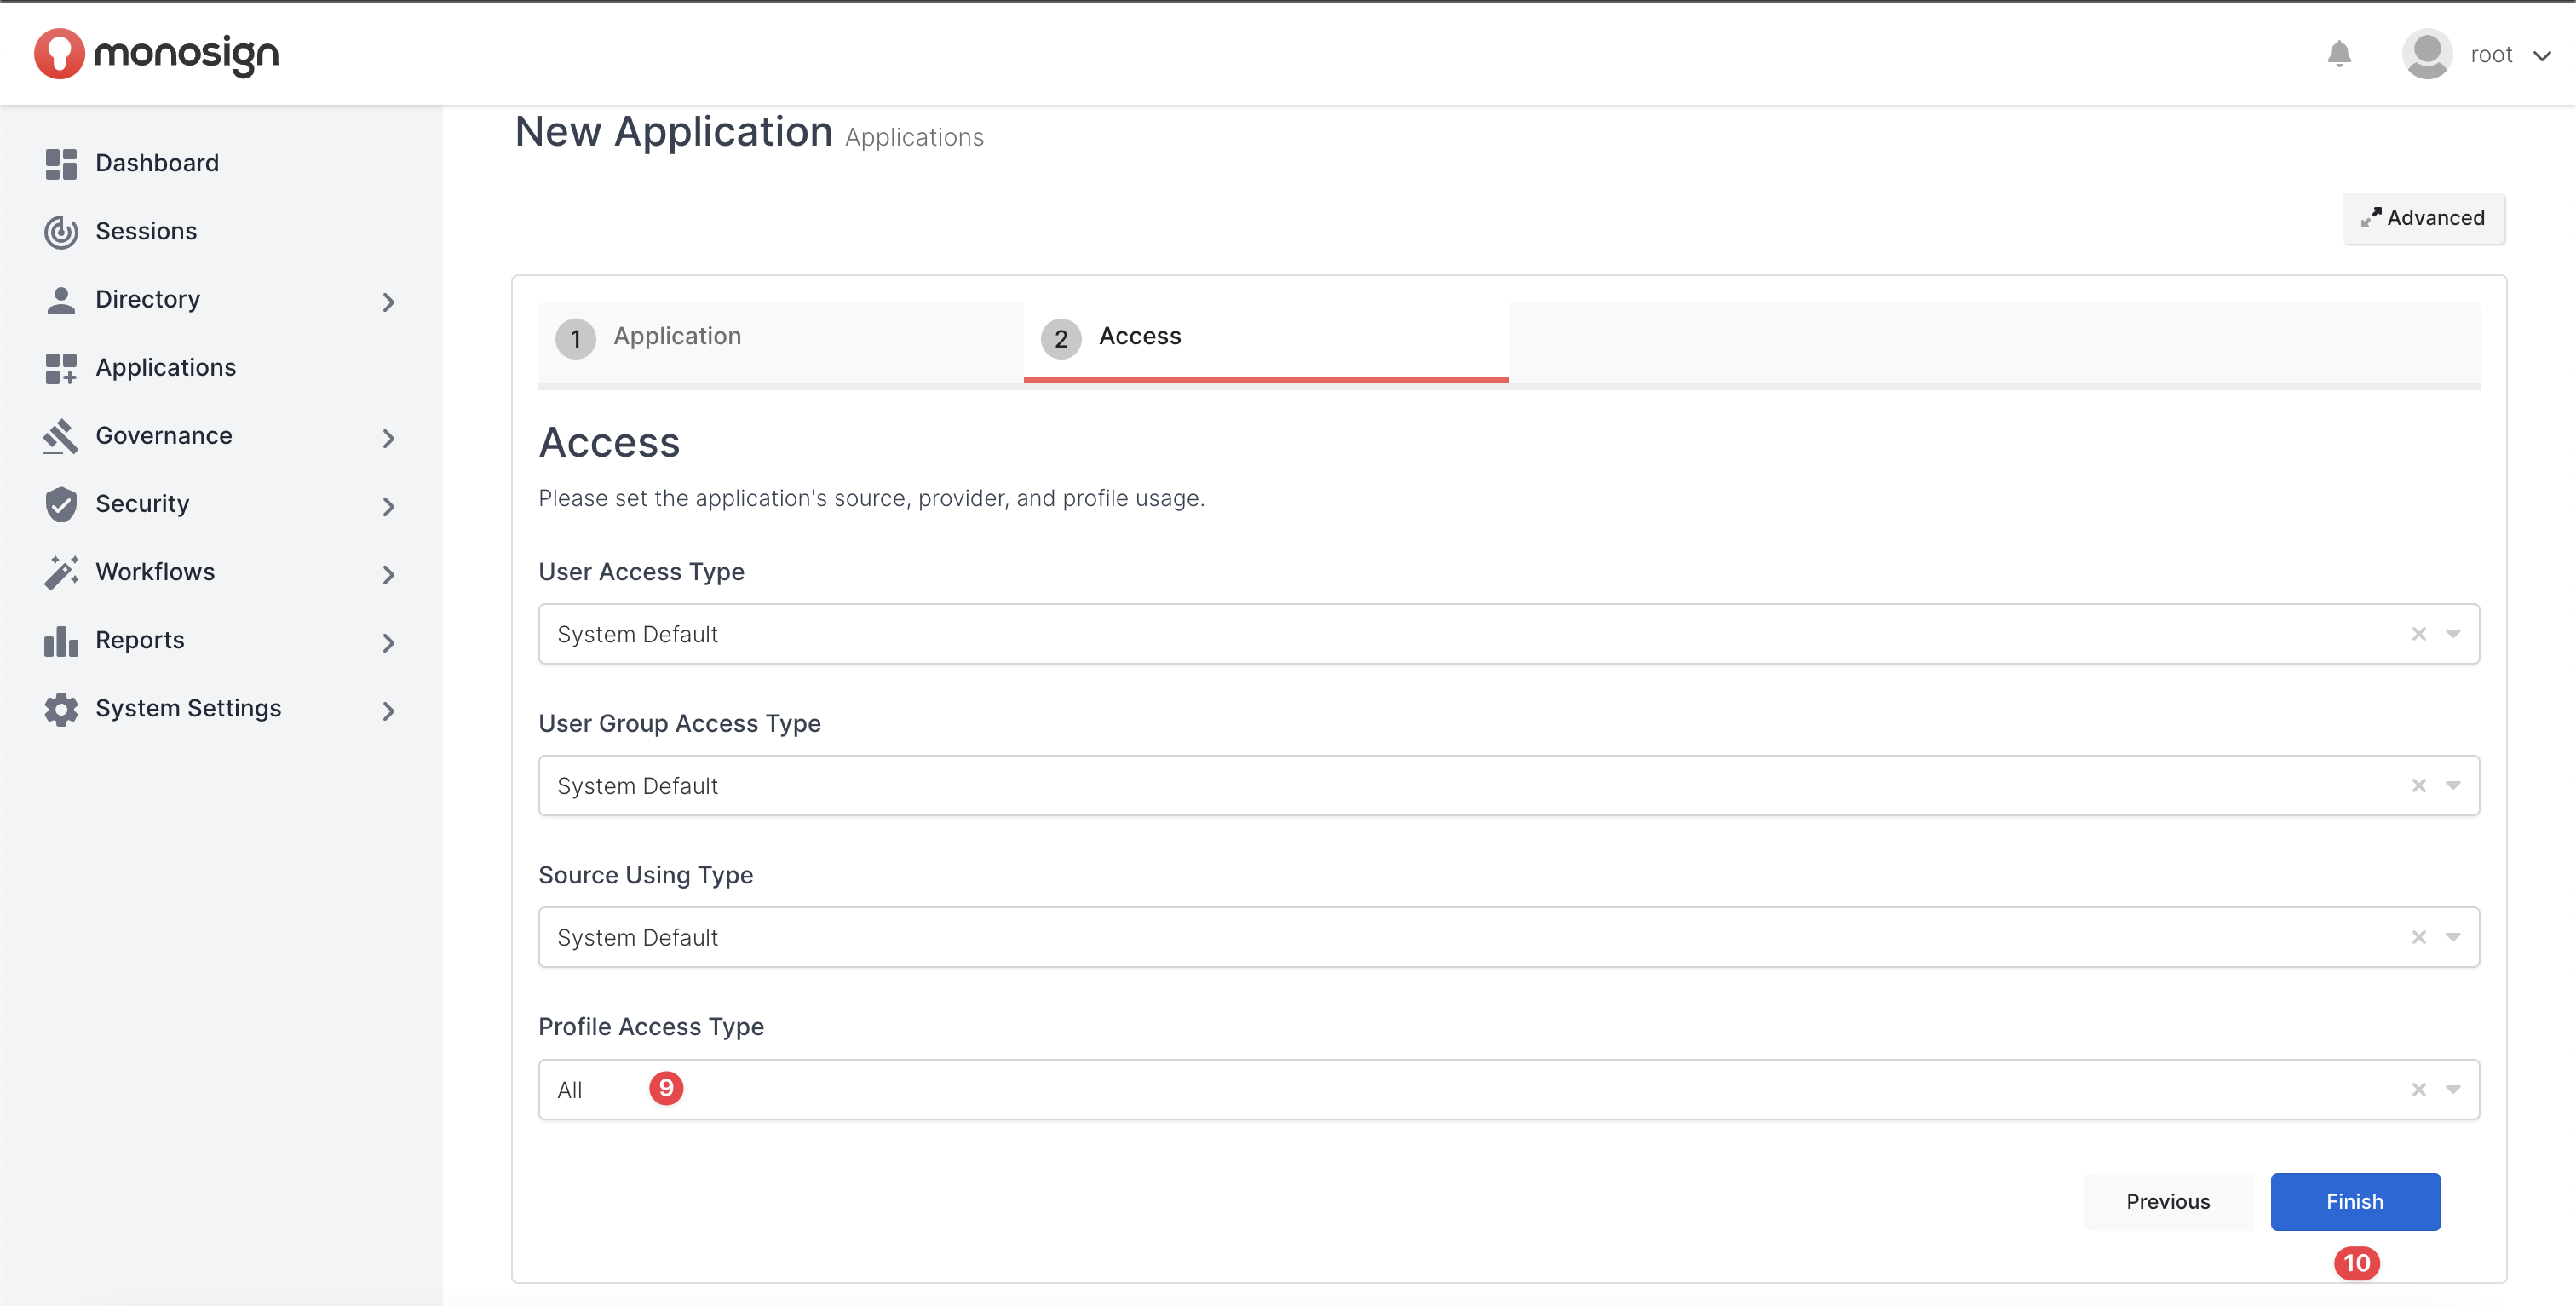
Once SSO URL copied to clipboard, please go to MonoSign Management “Application Create“ page, fill in the inputs as shown and click the “Finish“ button.
|
Fields |
Description |
|---|---|
|
Name |
Application Name that will be displayed applications page |
|
URL |
Application URL that copied from “Grammarly“ application SSO SAML authentication configuration page |
|
Logo |
Application Logo that will be displayed applications page |
|
Profile Access Type |
User Profile Information that “Grammarly“ application needs to be mapped |
Once application is created successfully, system will navigate you to Application Detail page.
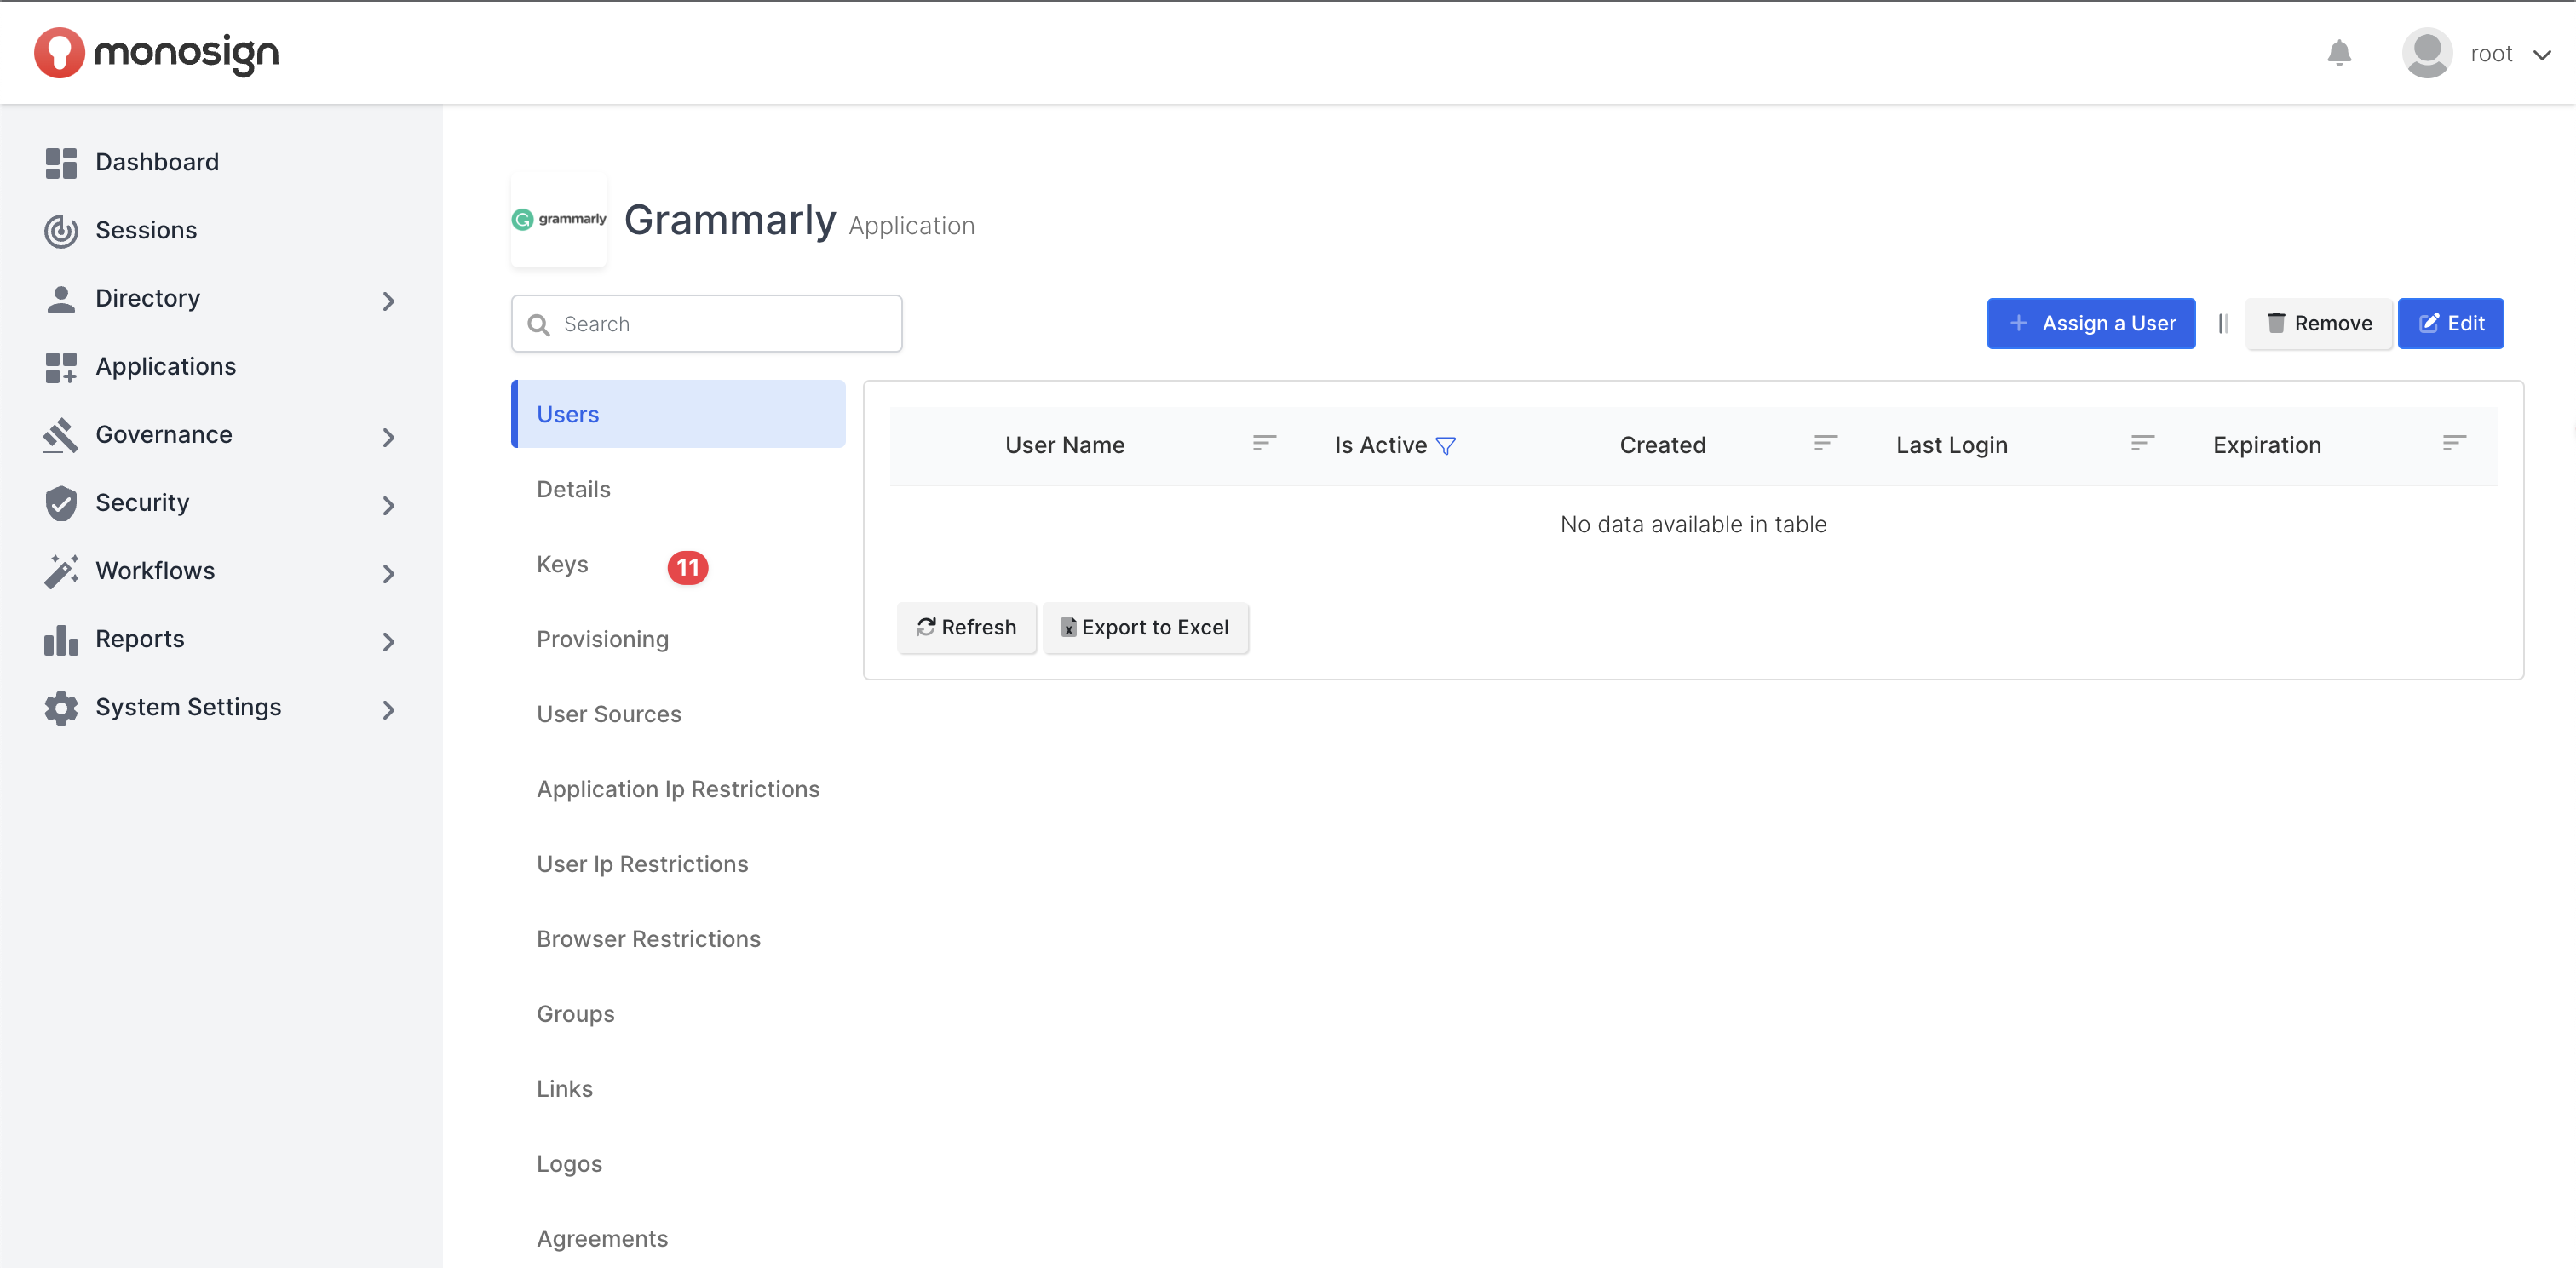
Click the “Keys“ tab on Application Detail Page and then click the “Add New Access Key“ to add a SAML access key to the “Grammarly” Application.
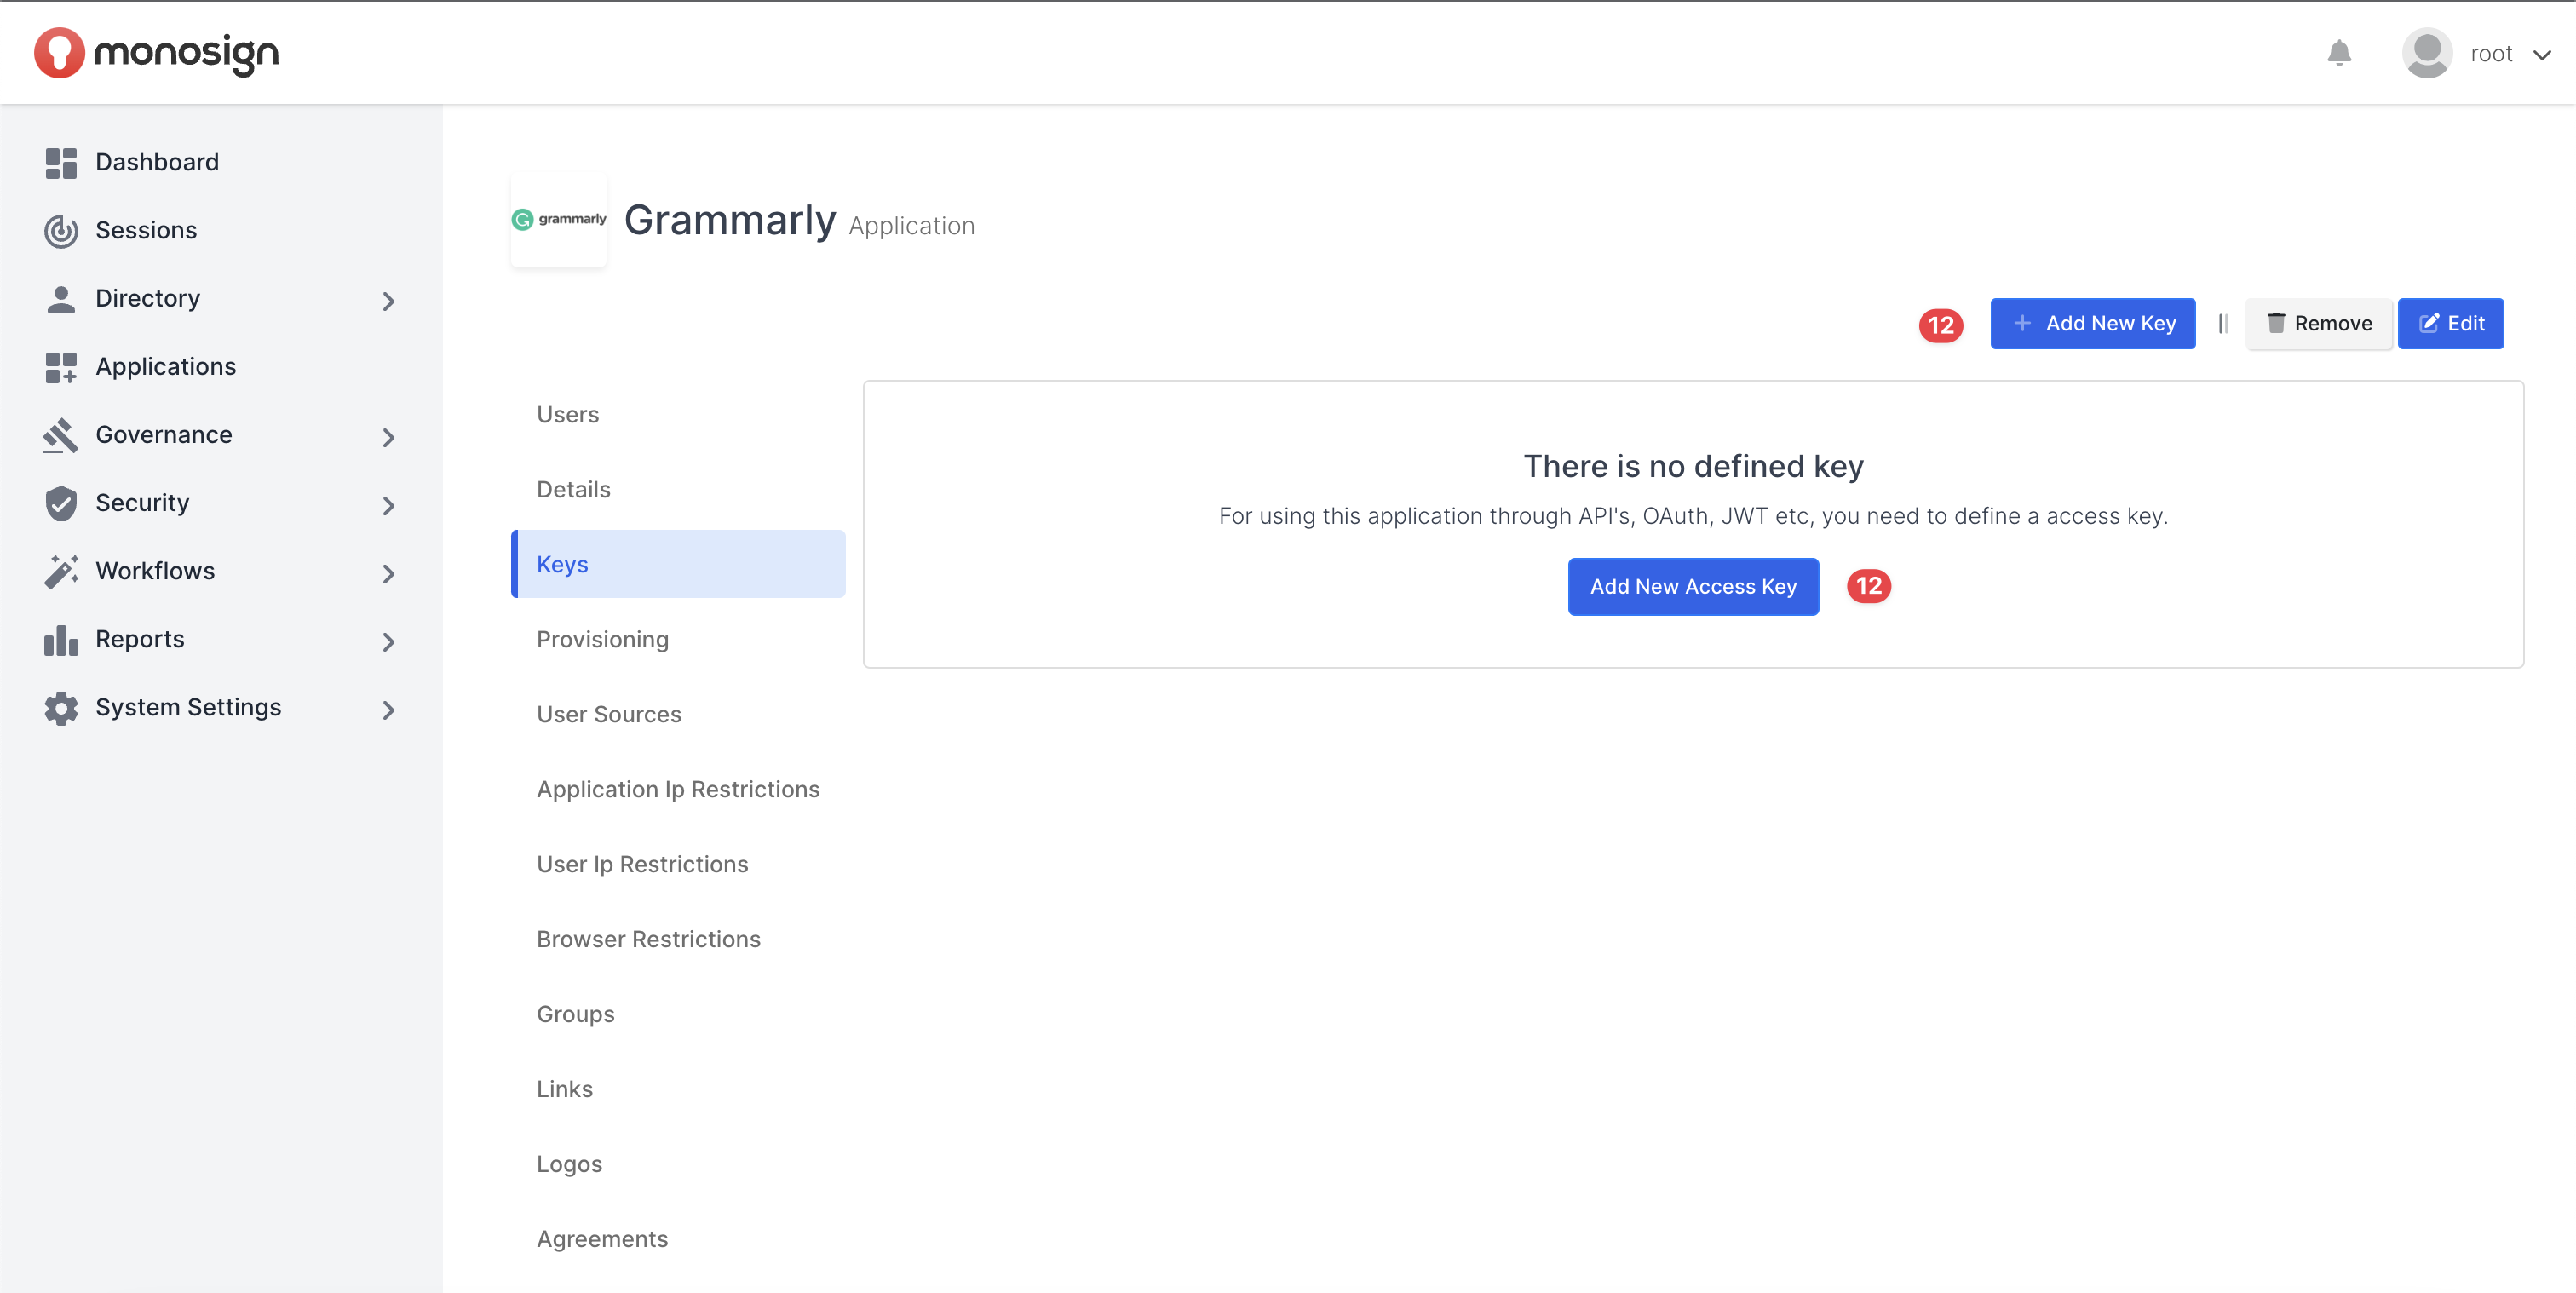
A modal will open when the button clicked. SAML2 Settings tab will be generated when you select “SAML” key type on the modal.
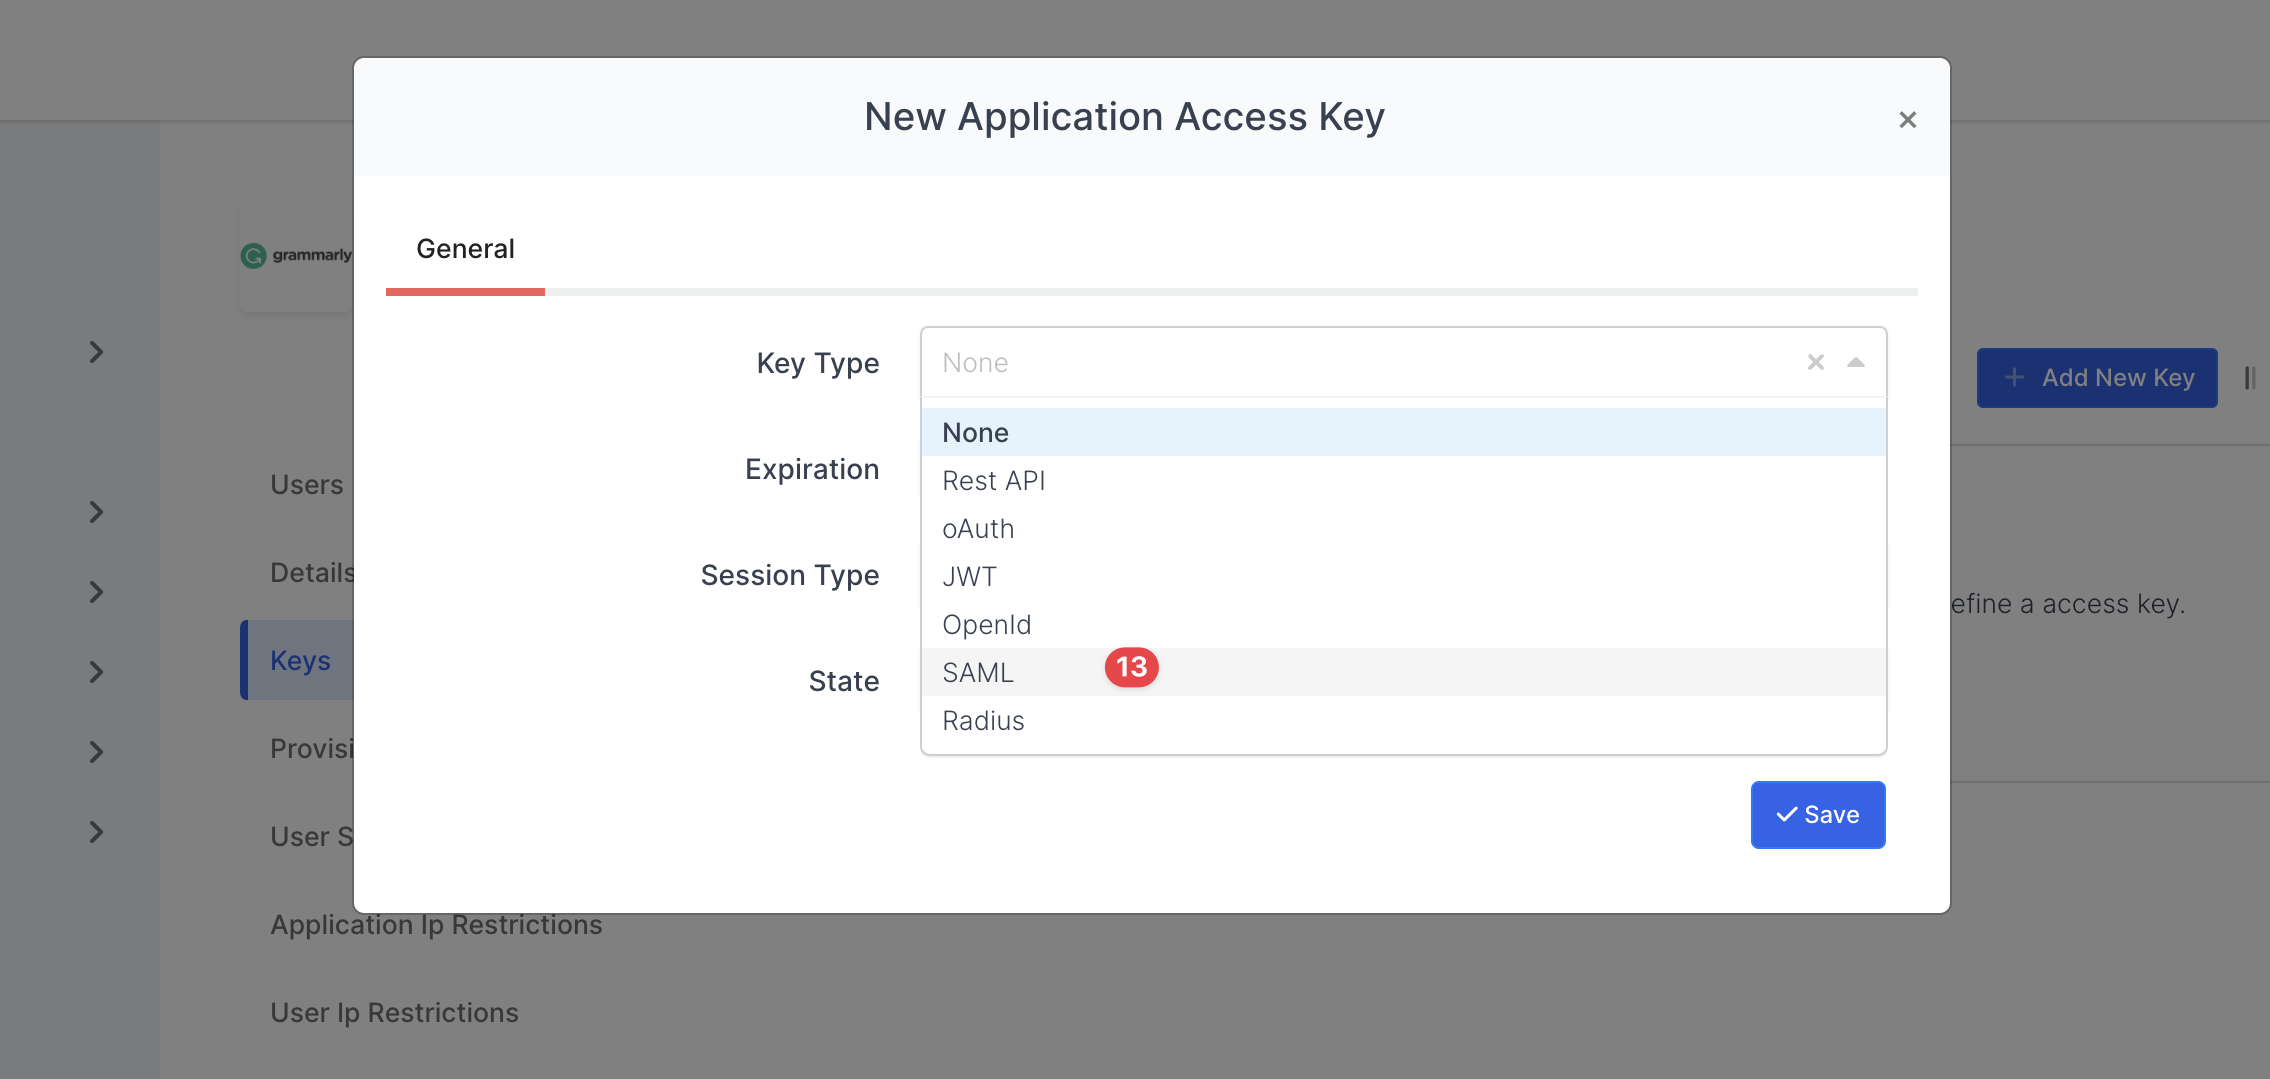
You need to follow the instructions on the IdP(Identity Provider) configure page and you need to fill in the inputs SAML2 Settings tab as shown.
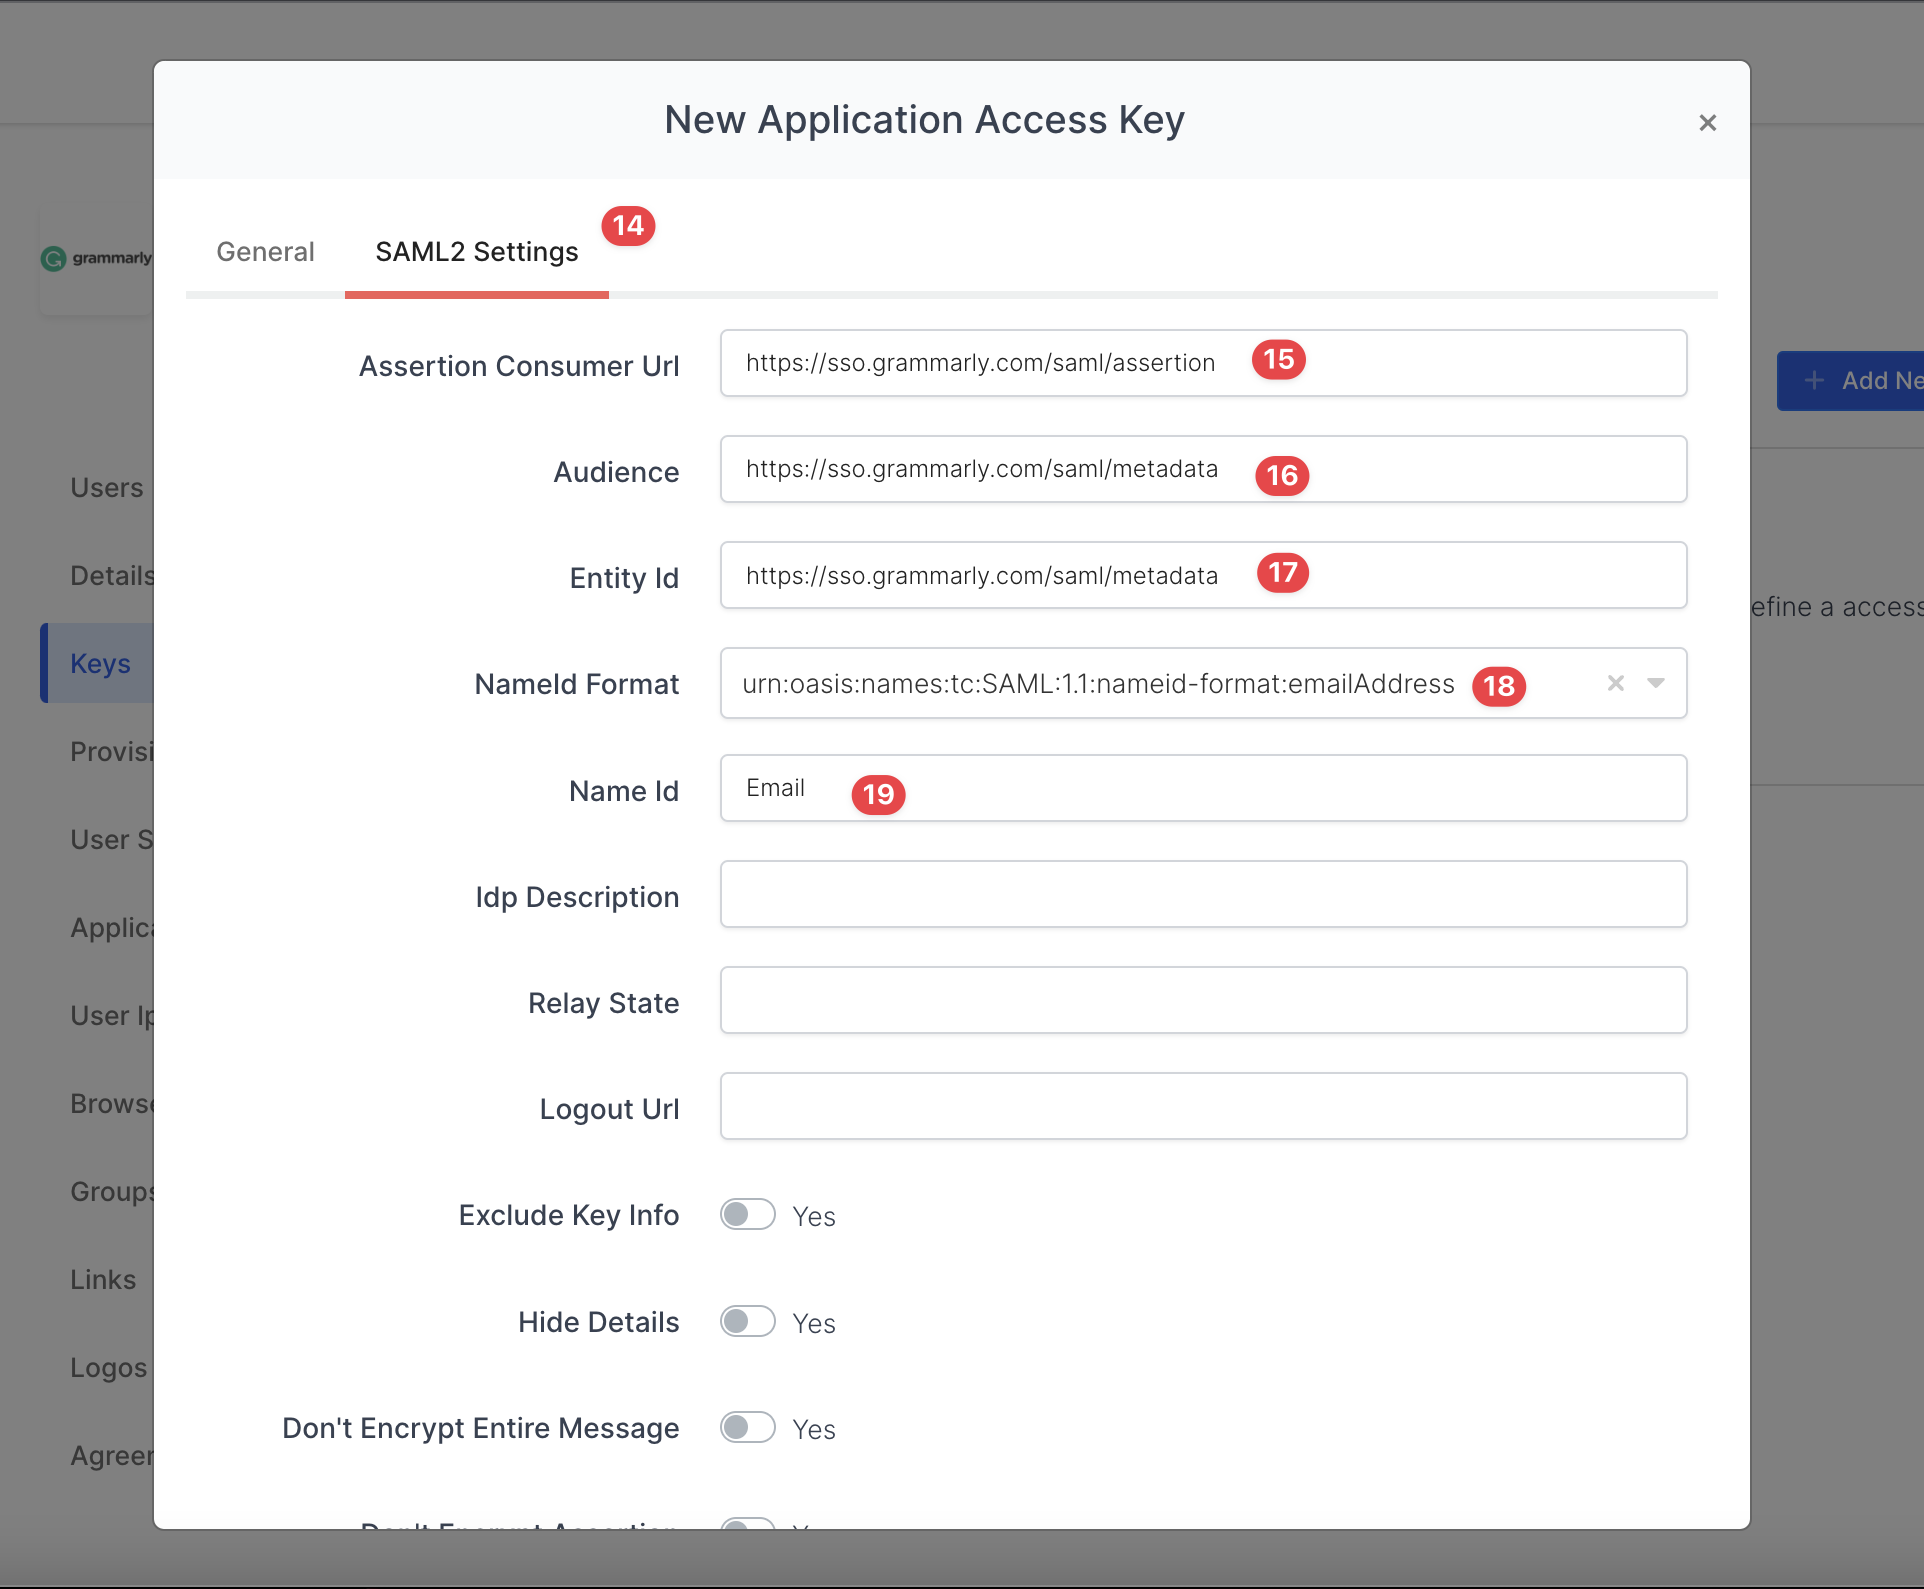
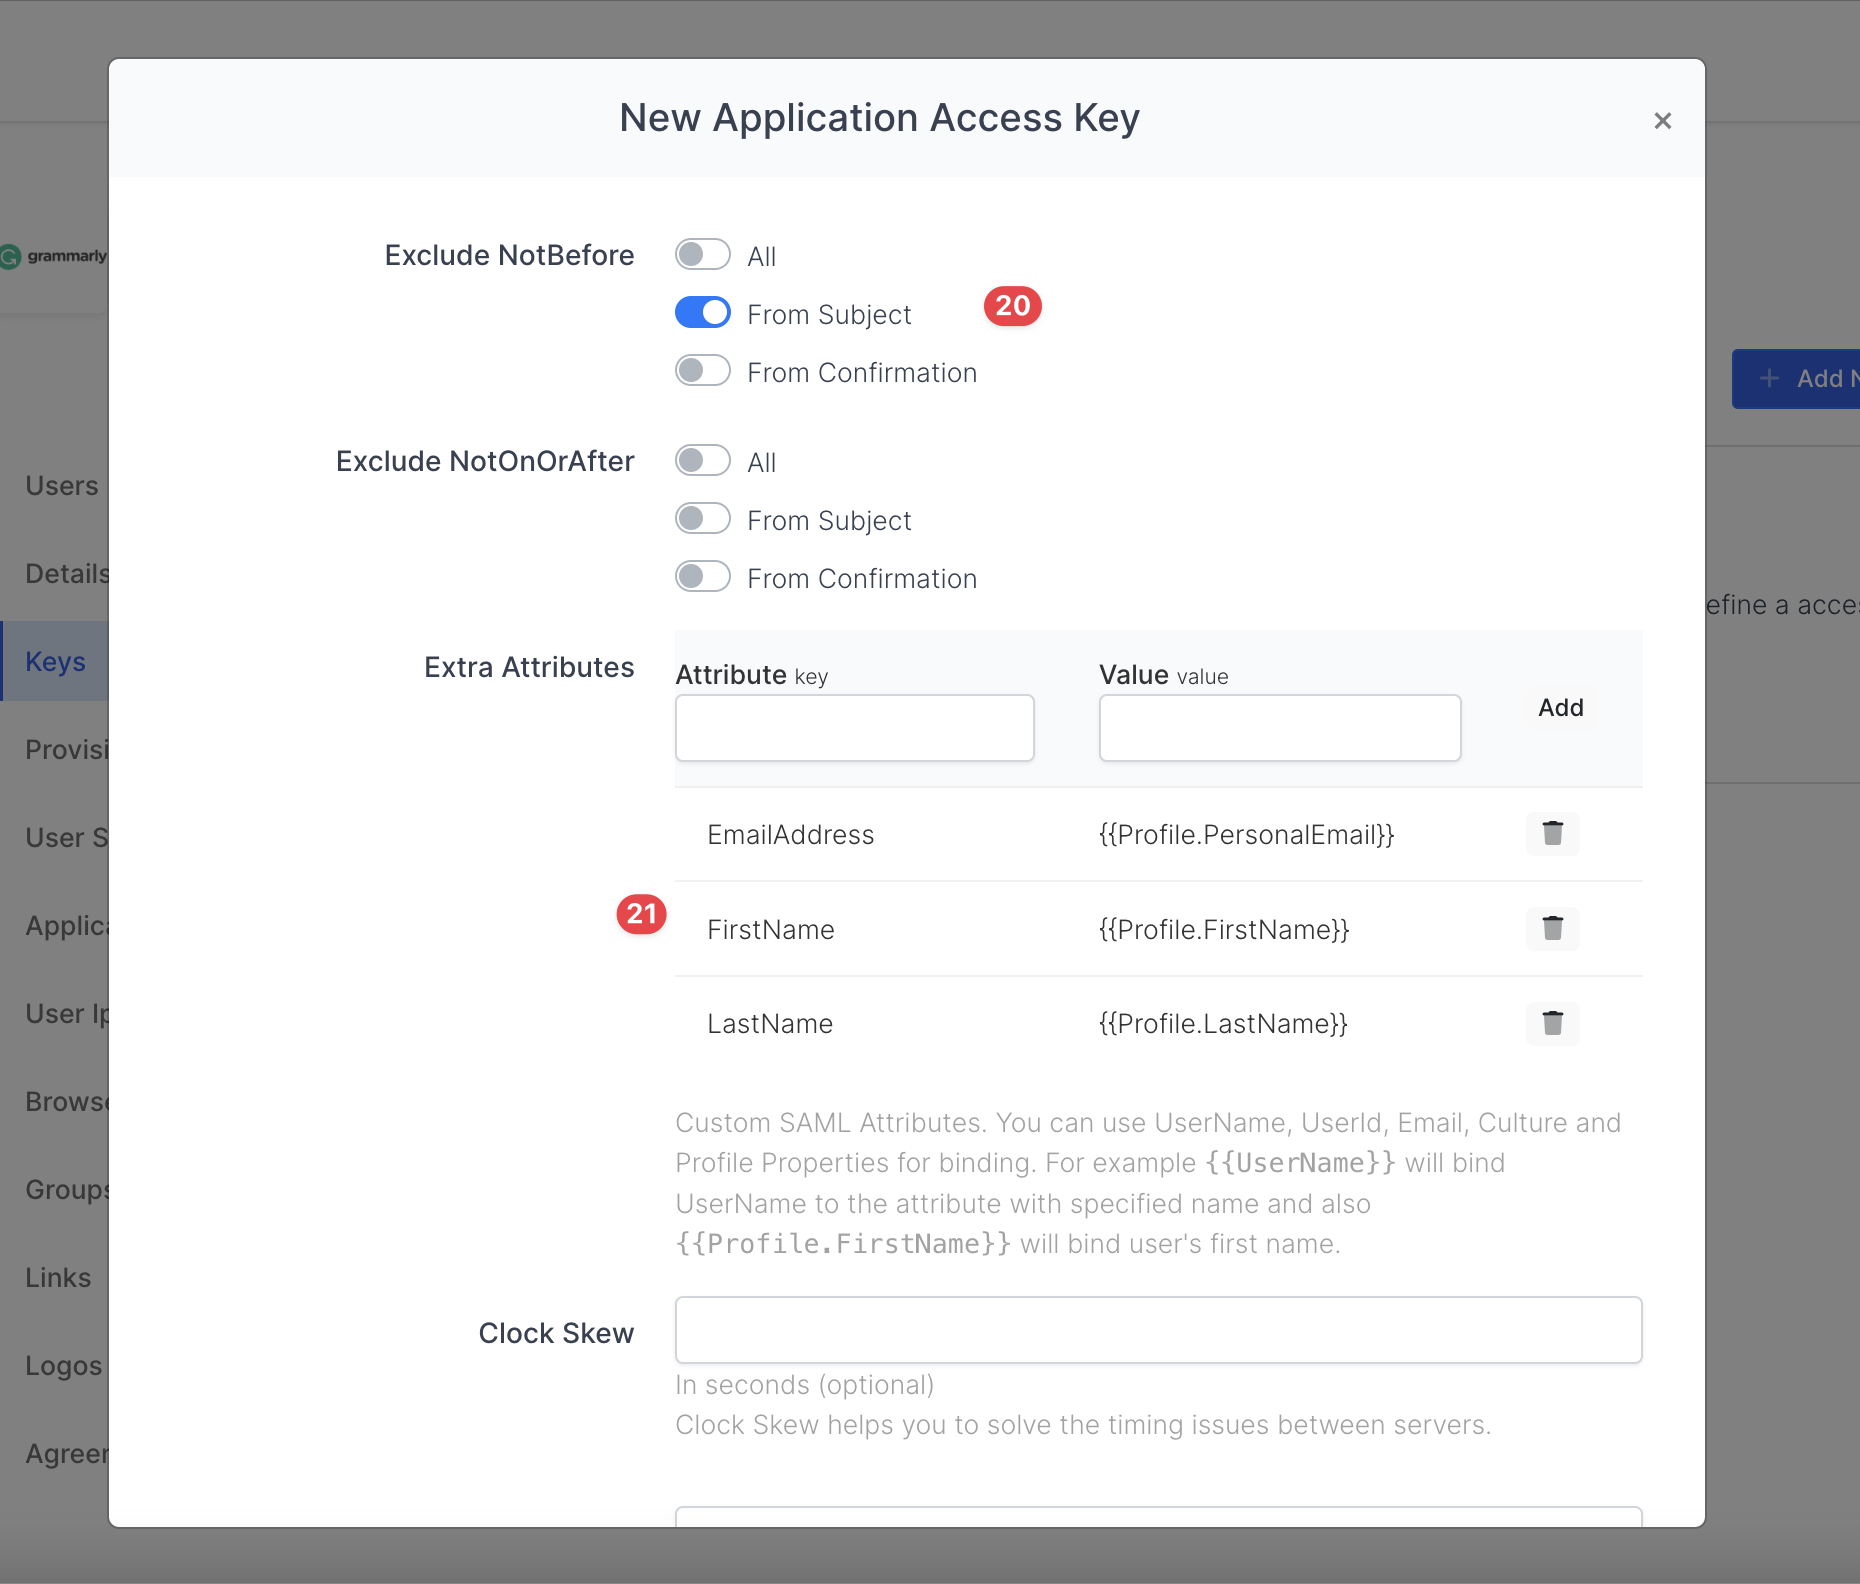
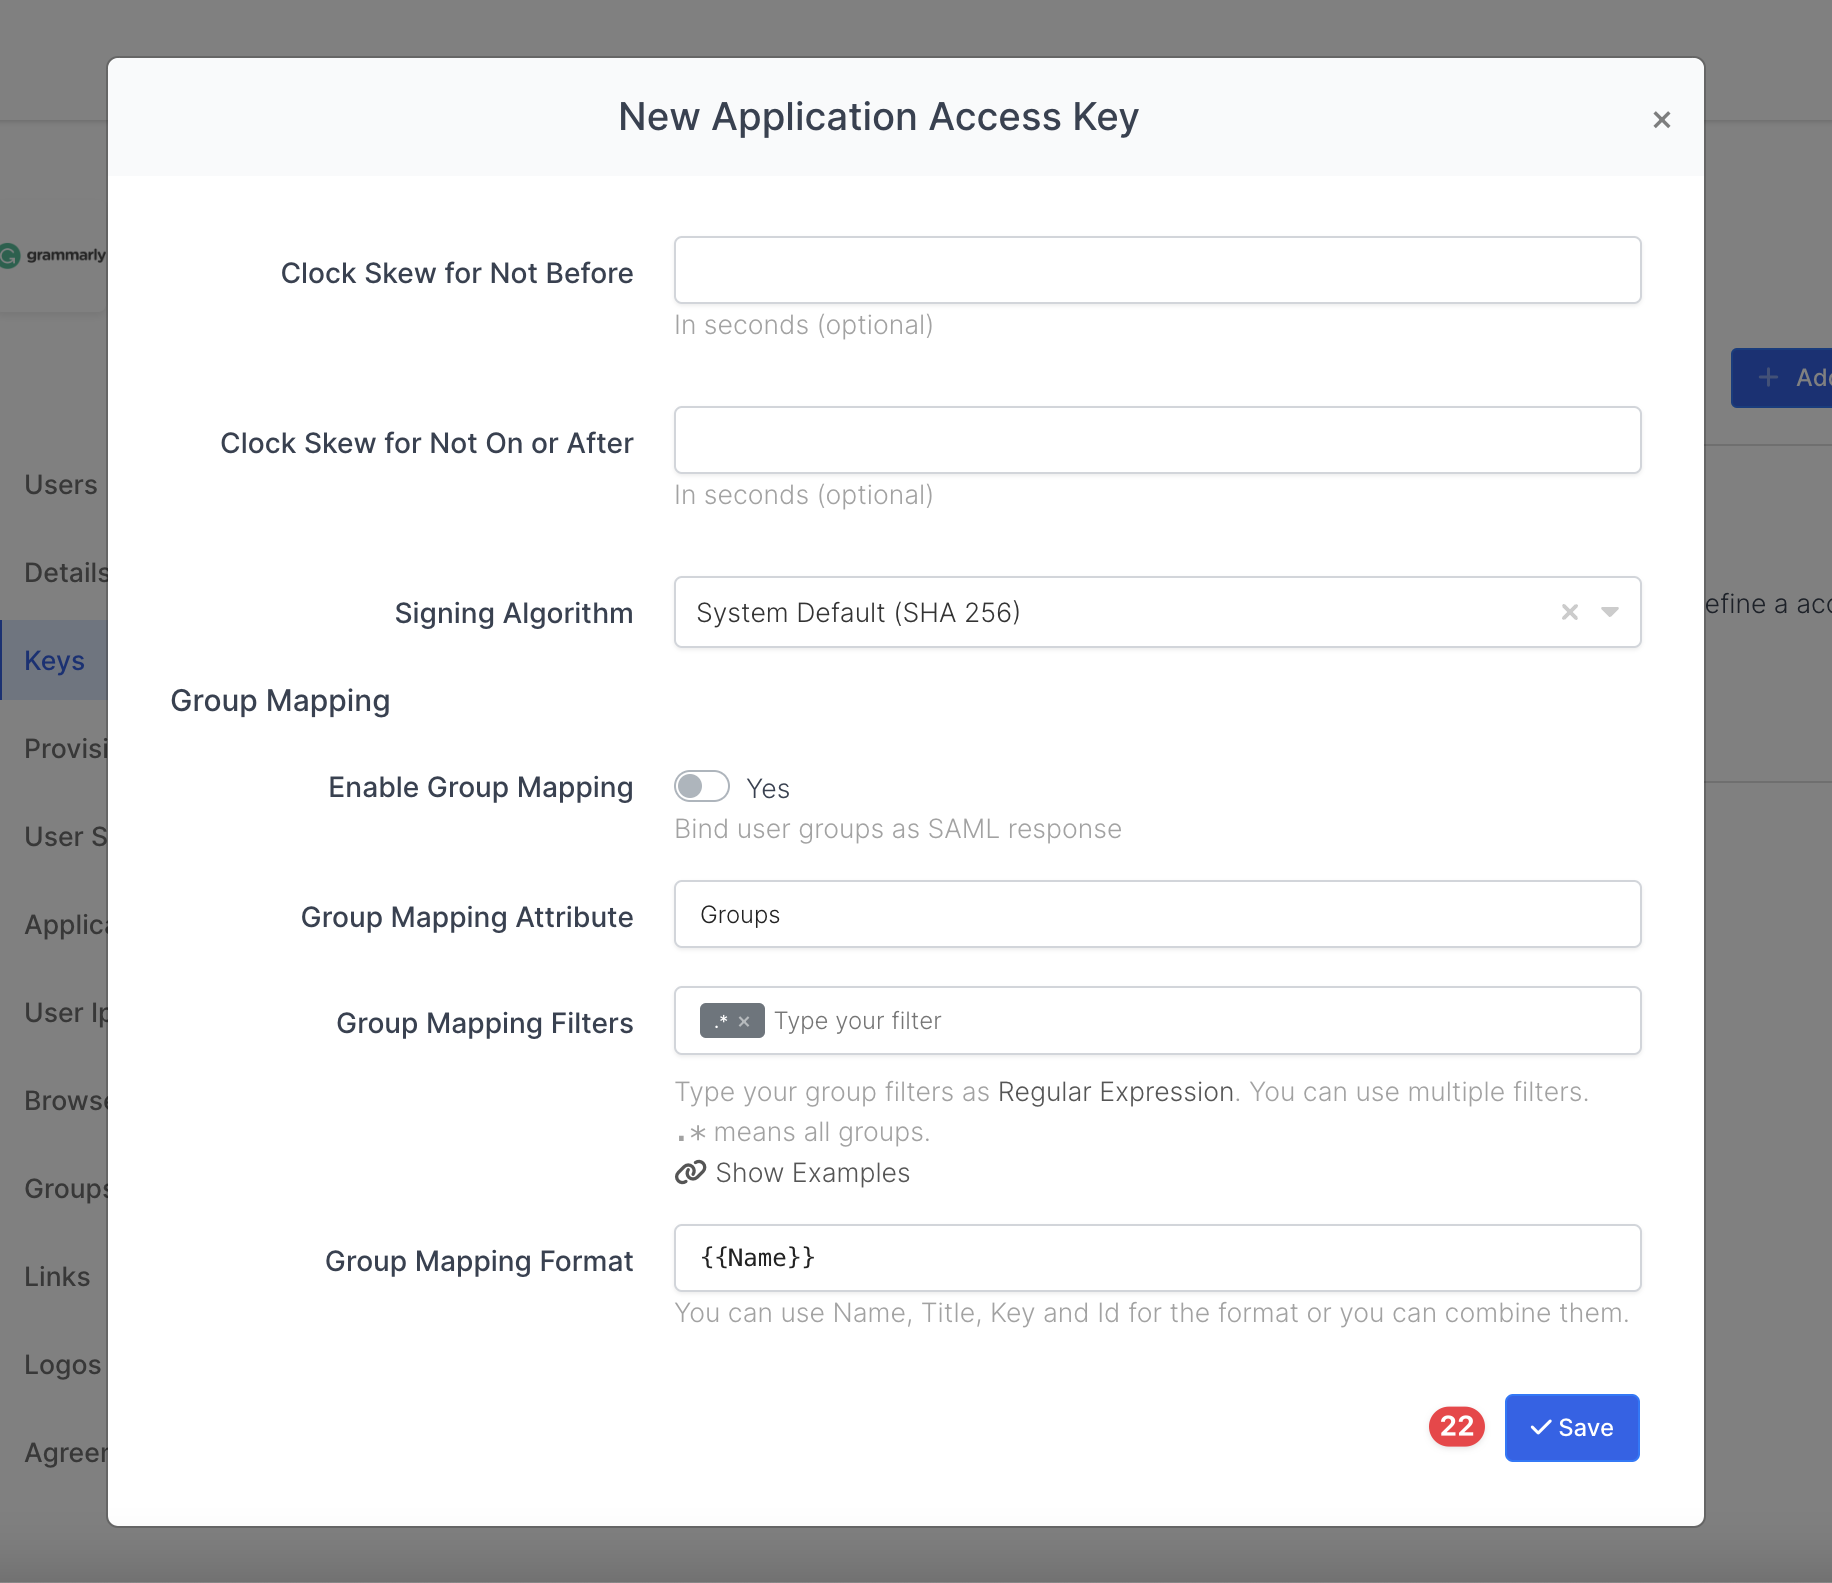
It’s so important that you fill in the inputs correctly. Otherwise SAML authentication will not be performed.
|
SAML2 Settings |
Value |
|---|---|
|
Assertion Consumer Url |
|
|
Audience |
|
|
Entity Id |
|
|
NameId Format |
urn:oasis:names:tc:SAML:1.1:nameid-format:emailAddress |
|
Name Id |
|
|
Exclude NotBefore |
From Subject → Active |
|
Extra Attributes |
Mappings: EmailAddress → {{Profile.PersonalEmail}} FirstName → {{Profile.FirstName}} LastName → {{Profie.LastName}} |
When all the inputs are filled, please click the “Save“ button. The SAML application key will be generated as shown.
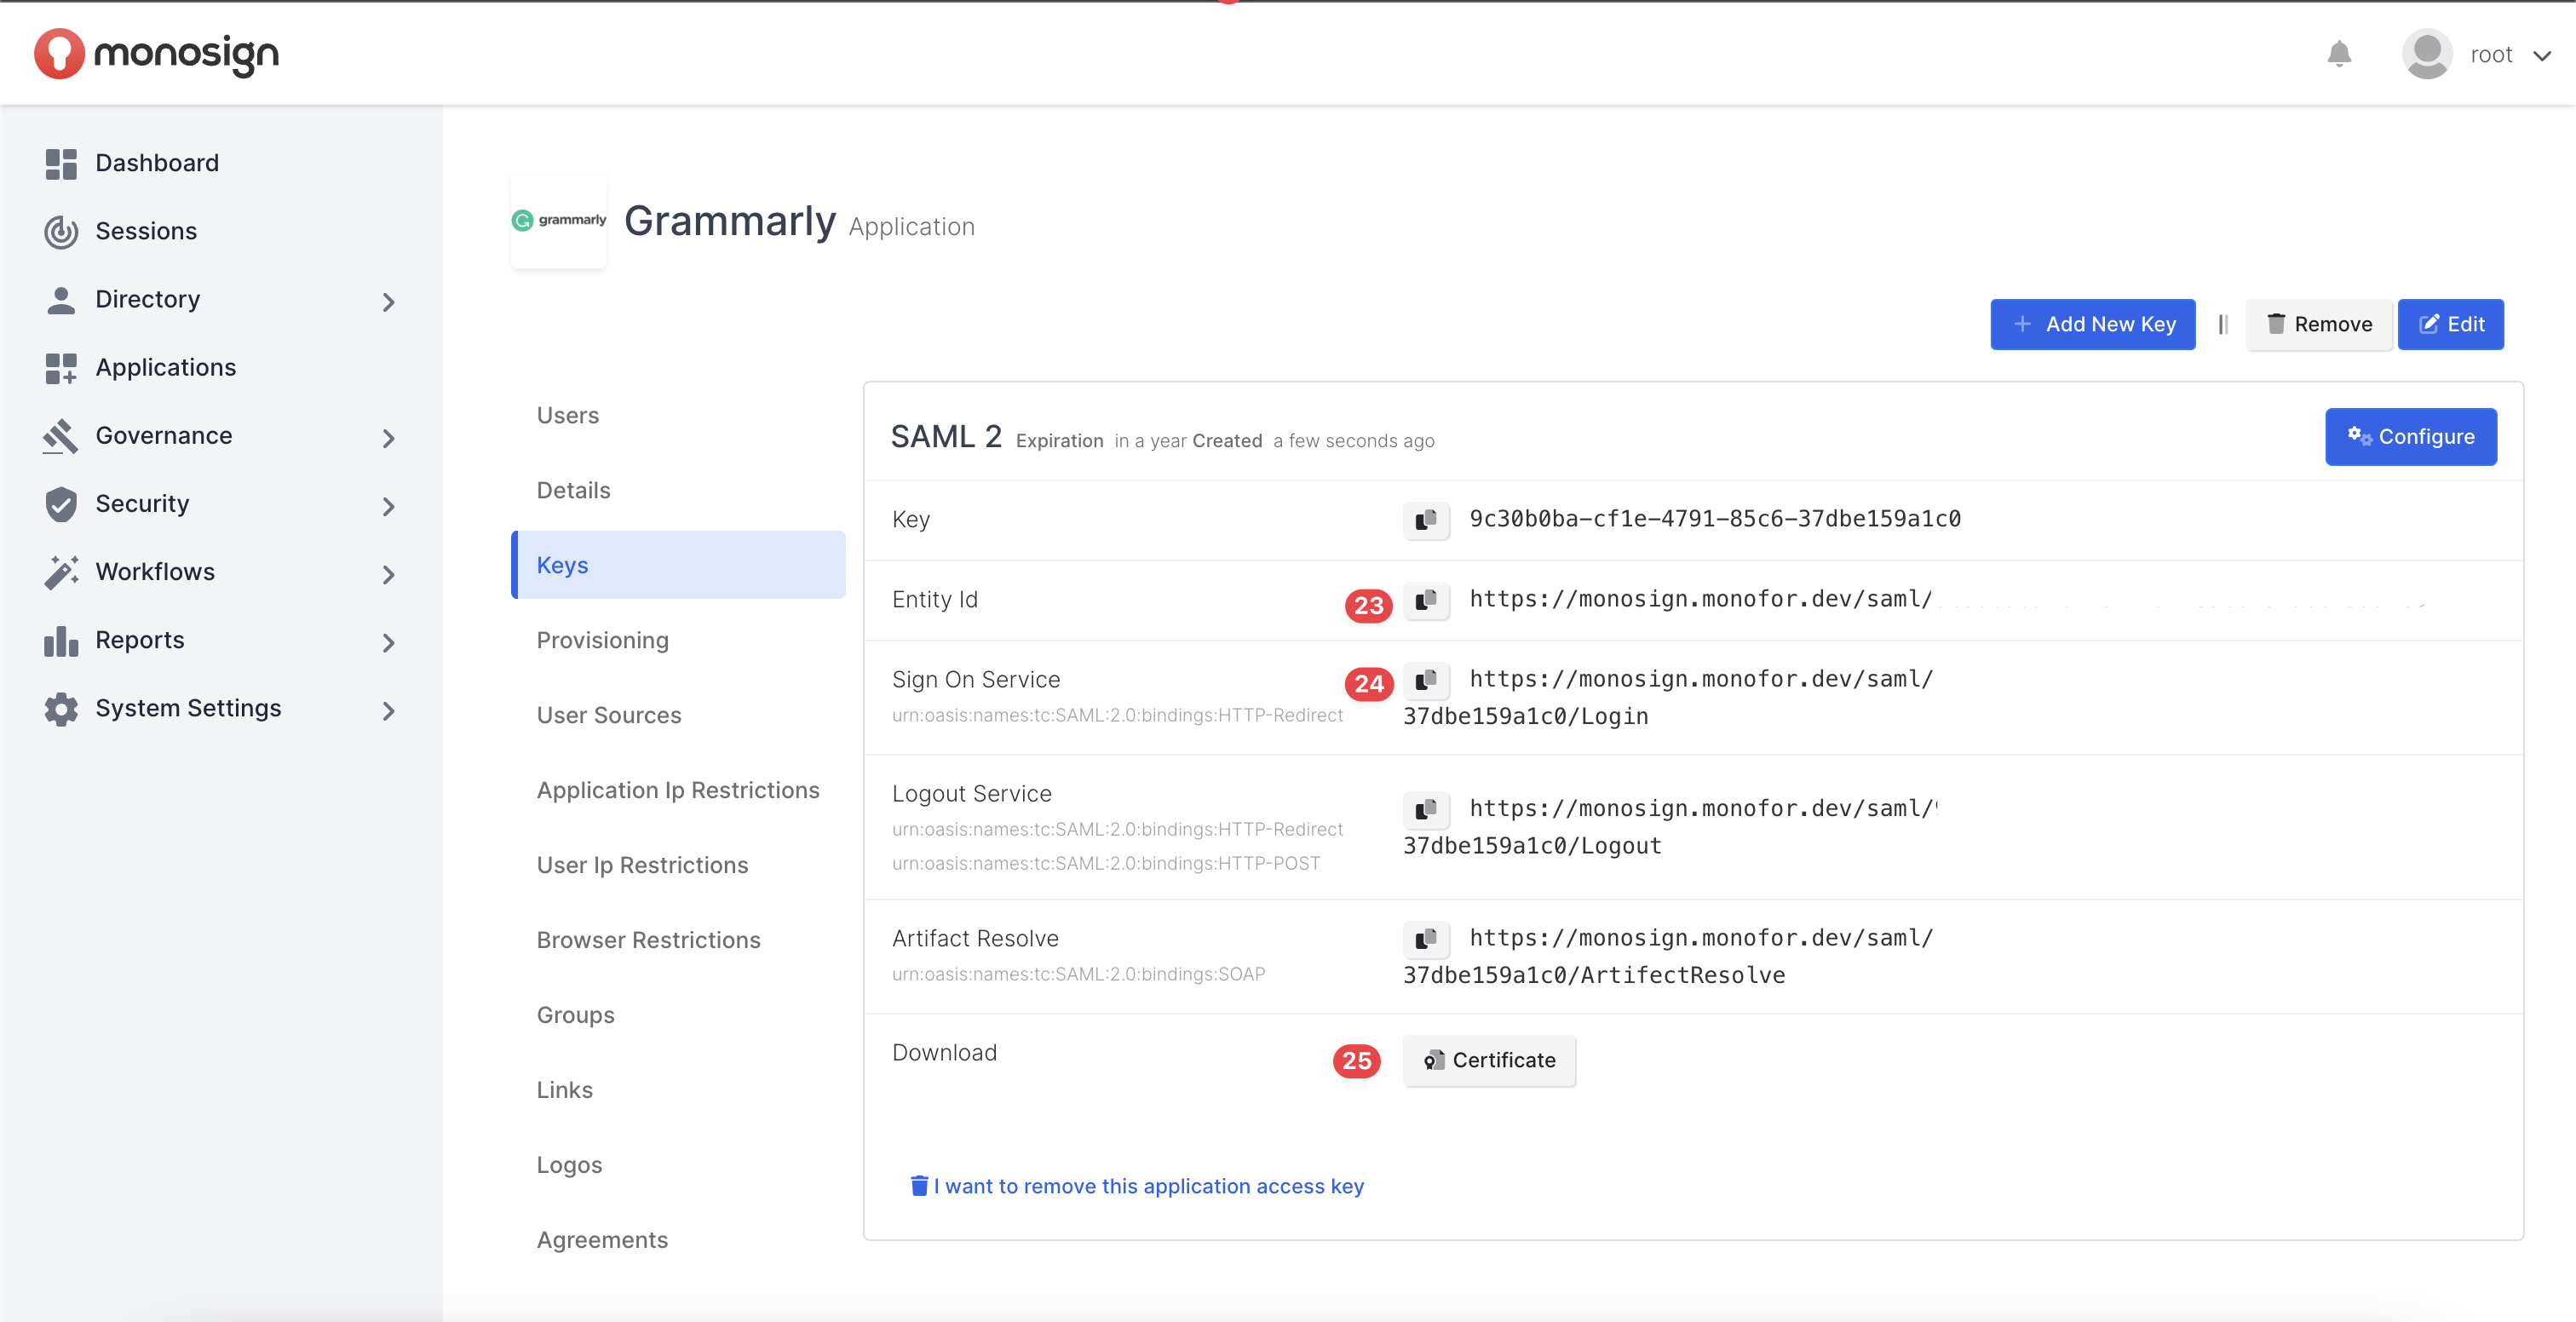
Certificate input corresponds to the x509 format of the issued certificate for your SAML key on MonoSign.
You need to view your certificate in x509 format. in that case, we prefer using OpenSSL - “a robust, commercial-grade, full-featured toolkit for general-purpose cryptography and secure communication.”
Use the command below to view the certificate.
openssl x509 -in {path of your certificate} -text
The output contains various information about the certificate. However, you should check encryption algorithms and the text starts with “-----BEGIN CERTIFICATE-----” and ends with “-----END CERTIFICATE-----“.
Now you can open the “Grammarly“ authentication page to configure SAML SSO configurations as shown.
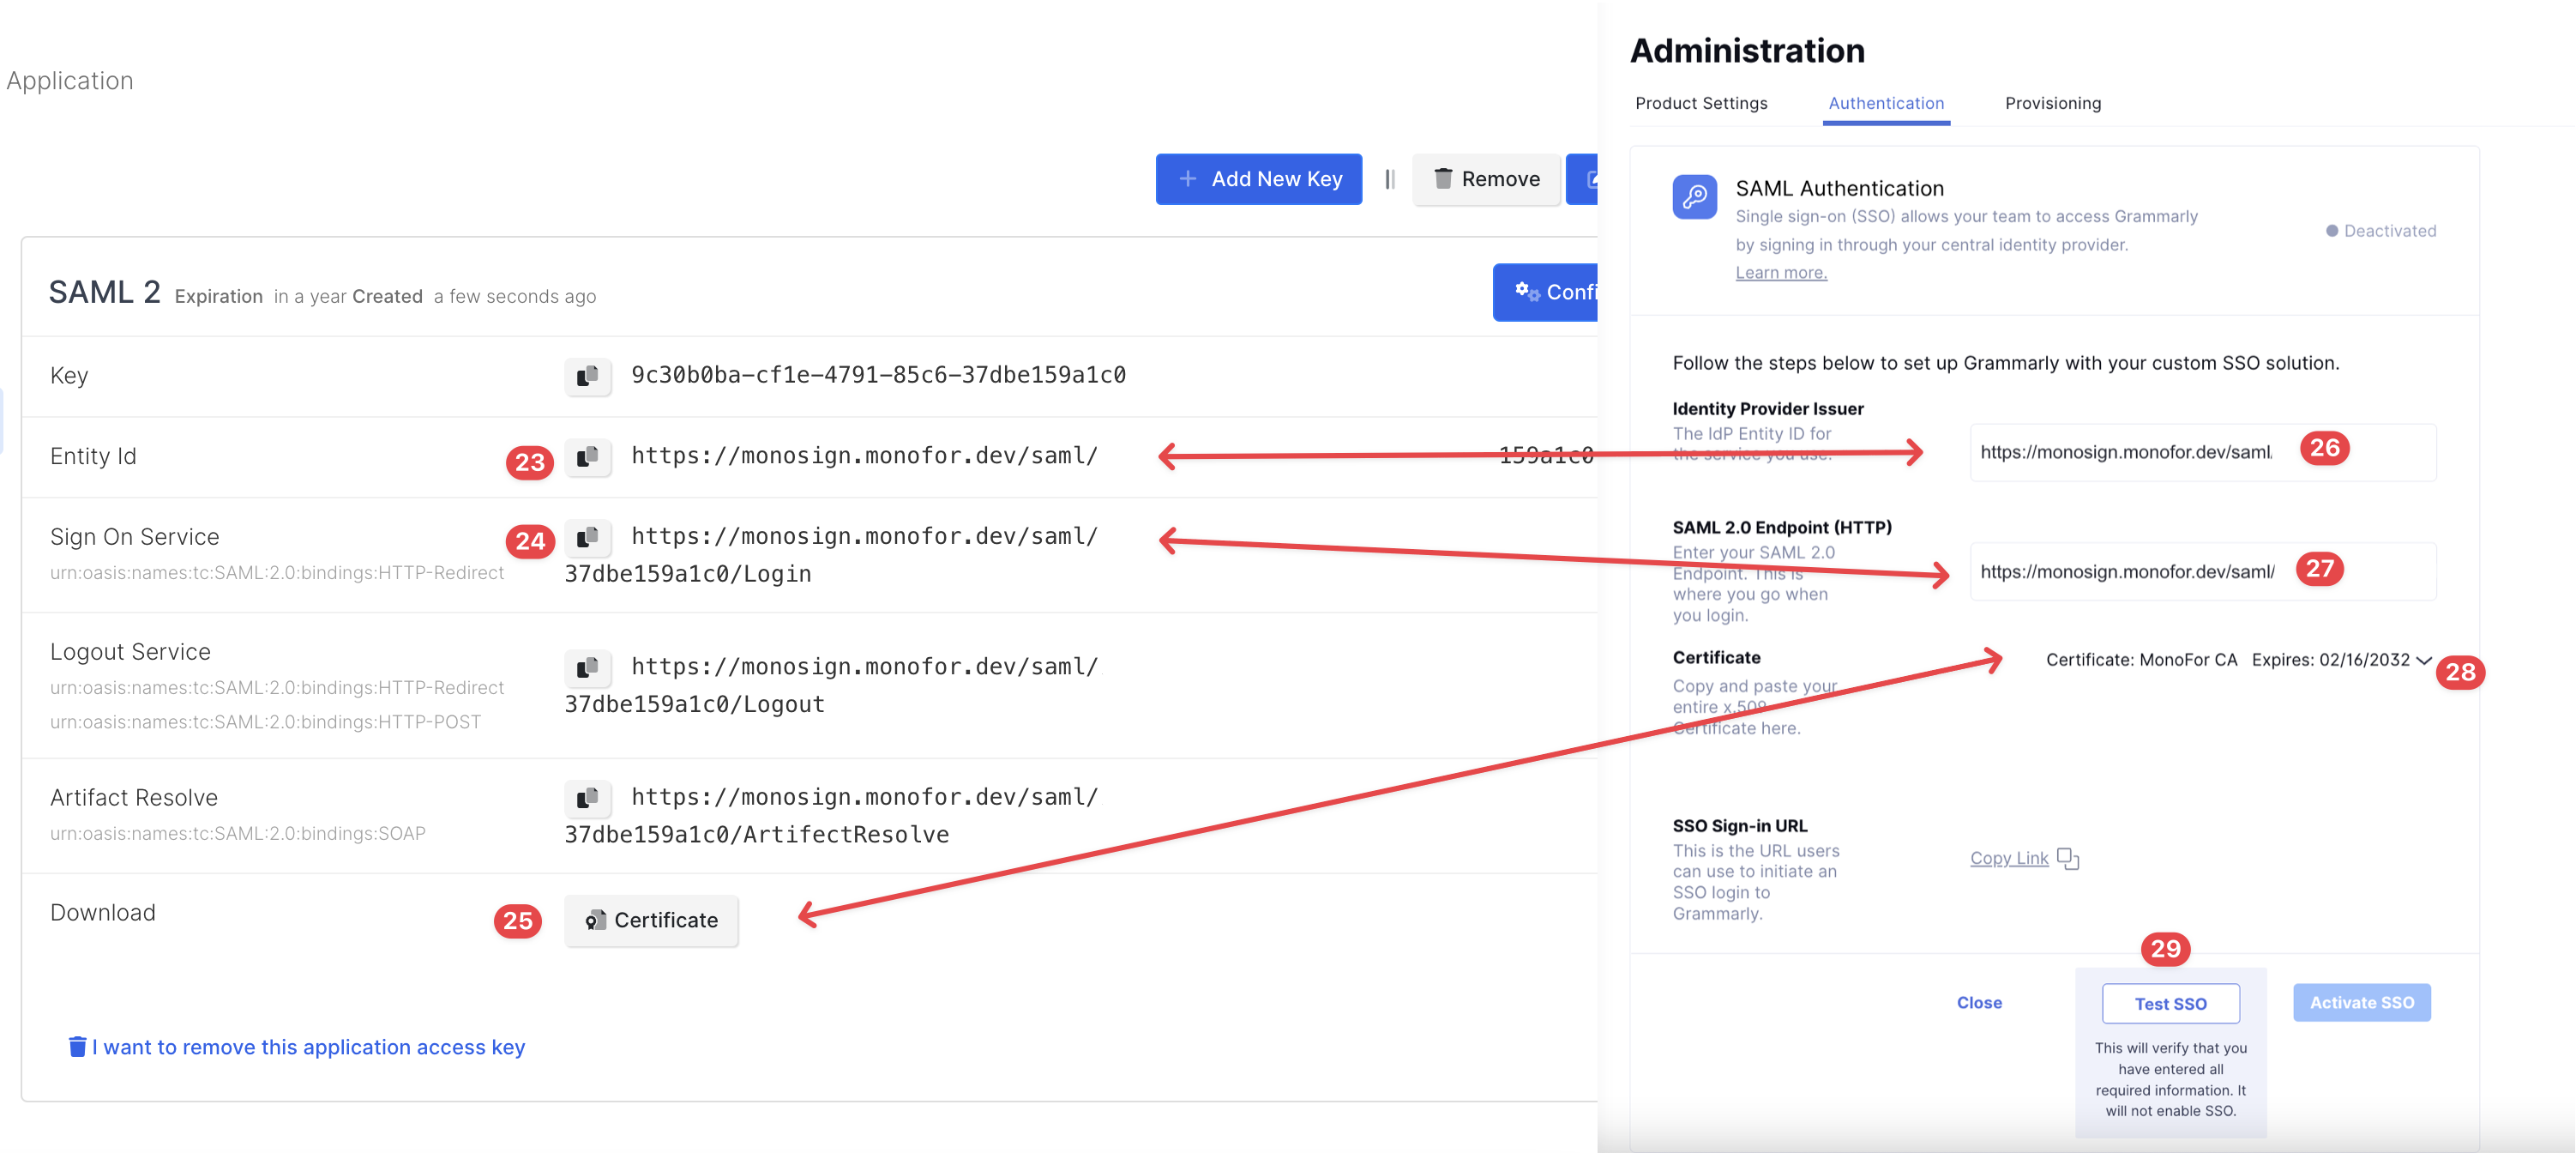
Configurations are completed on MonoSign Grammarly Application Key page and Grammarly Authentication Configuration page. Now you can click the “Test SSO“ button to make sure everything is done correctly and to navigate MonoSign Grammarly Application.
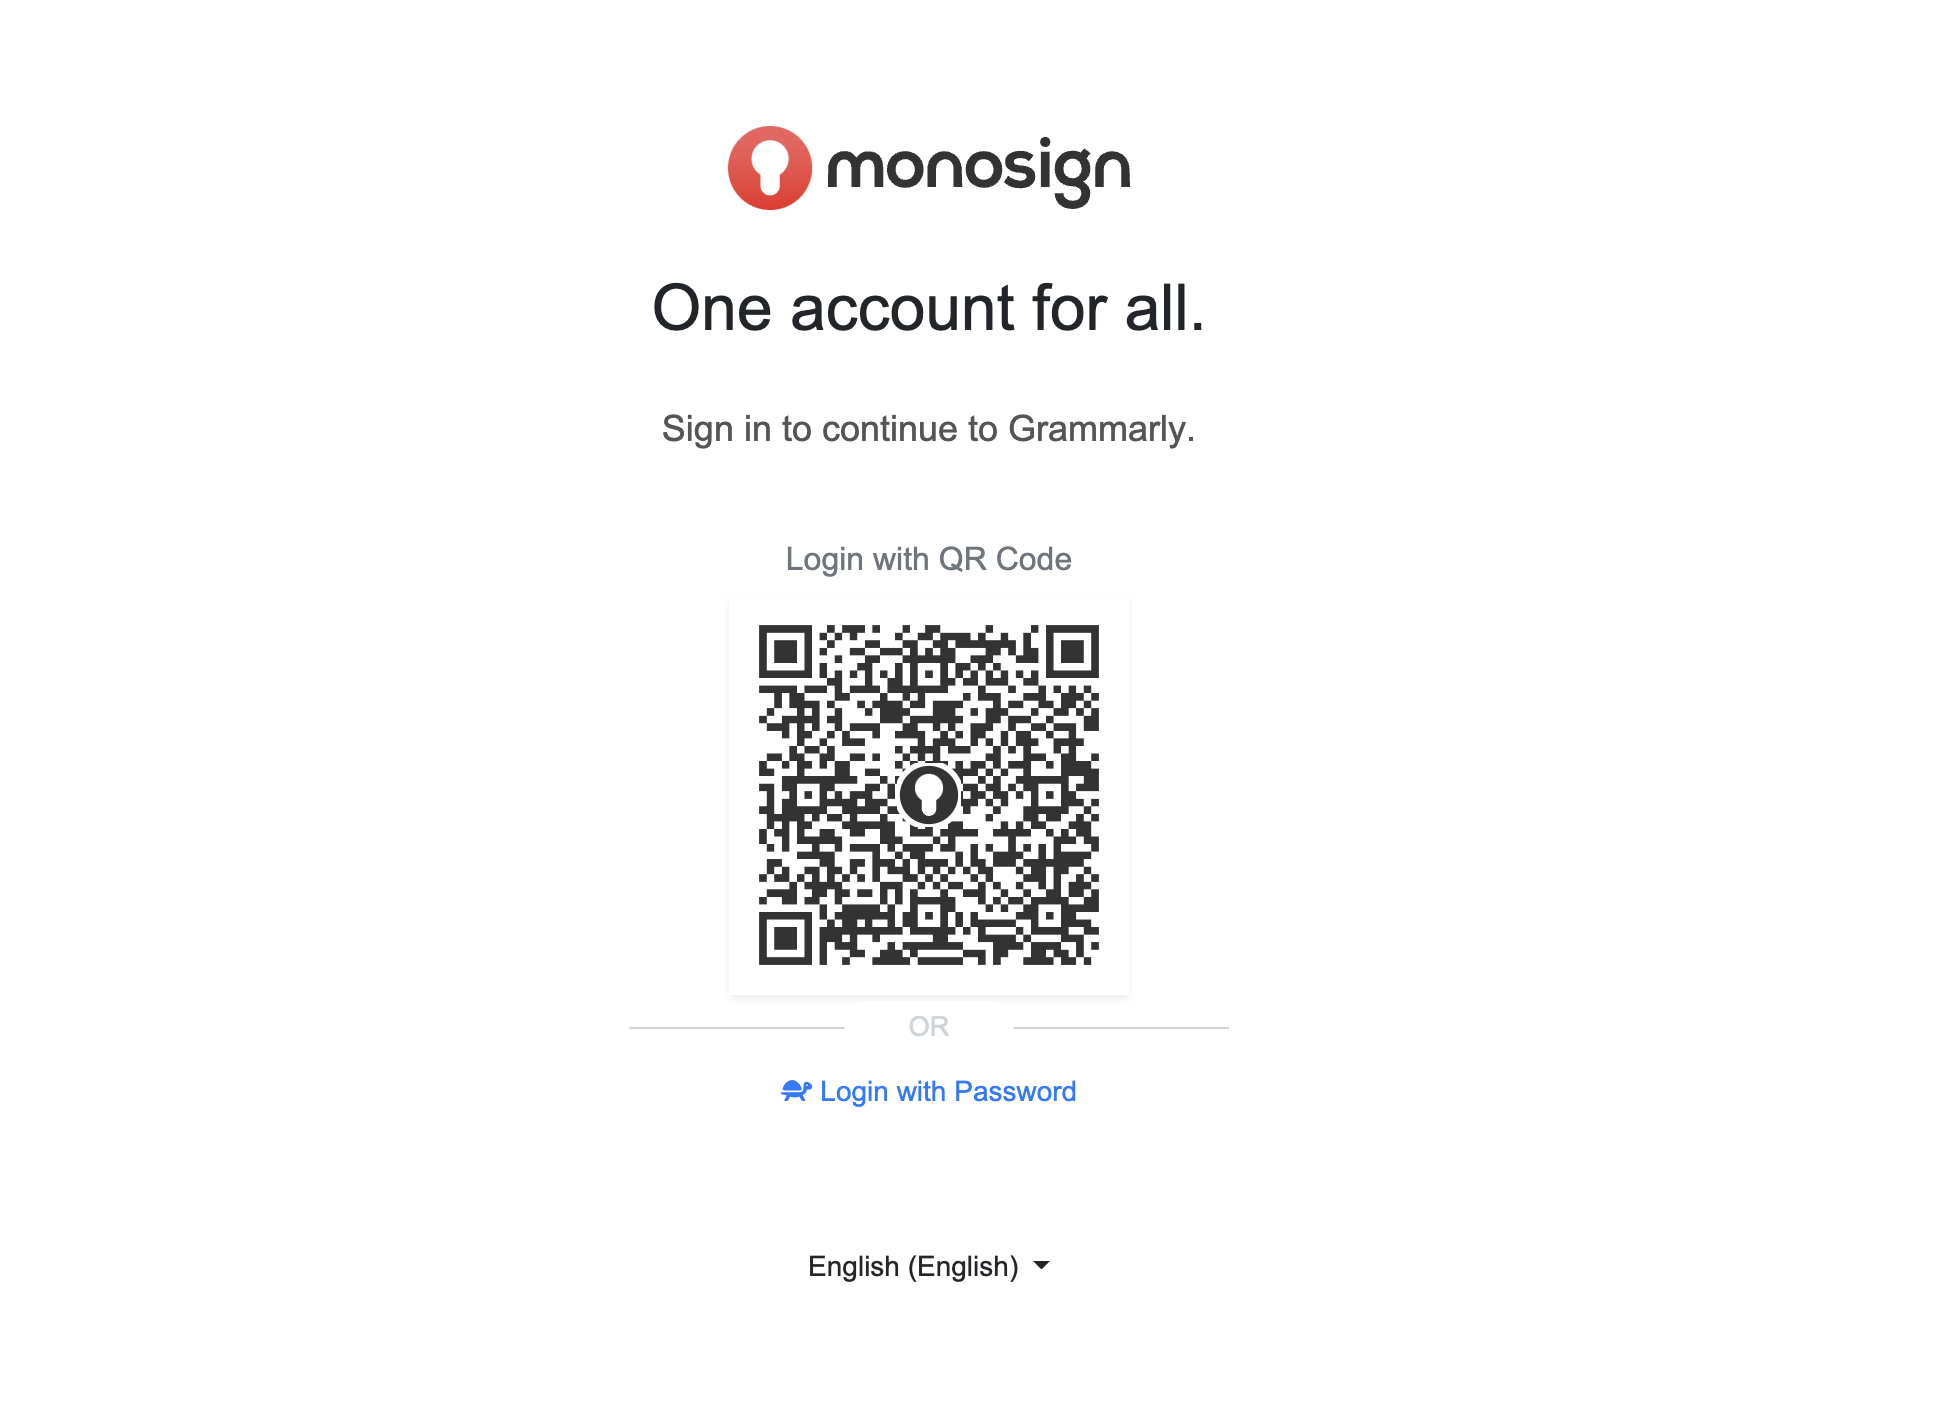
If you type your MonoSign username and password, you will authenticate to Grammarly application.
If you see “Info Message“ as shown, it means the test is successful and everything is to activate SAML SSO authentication on Grammarly.
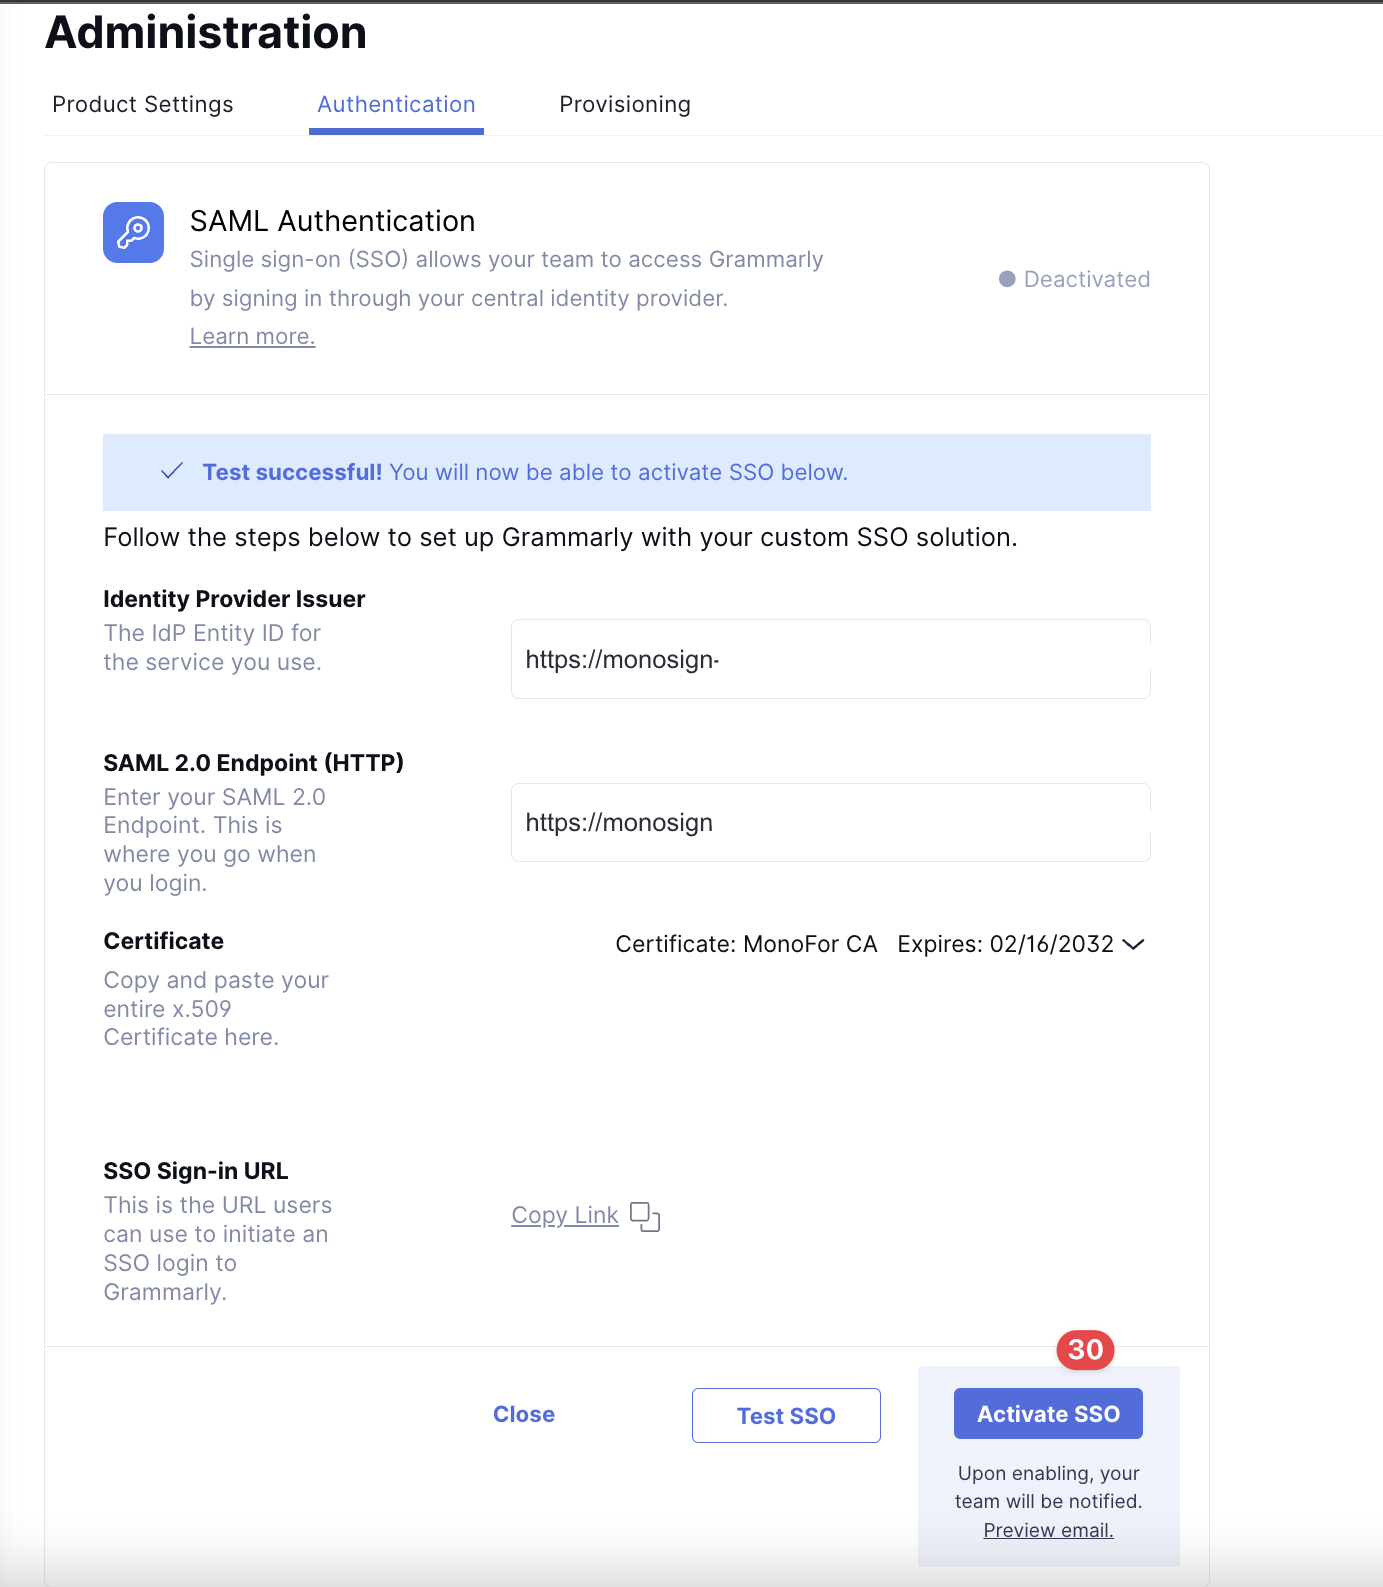
Please click to “Active SSO“ button to enable SAML SSO authentication method on Grammarly.
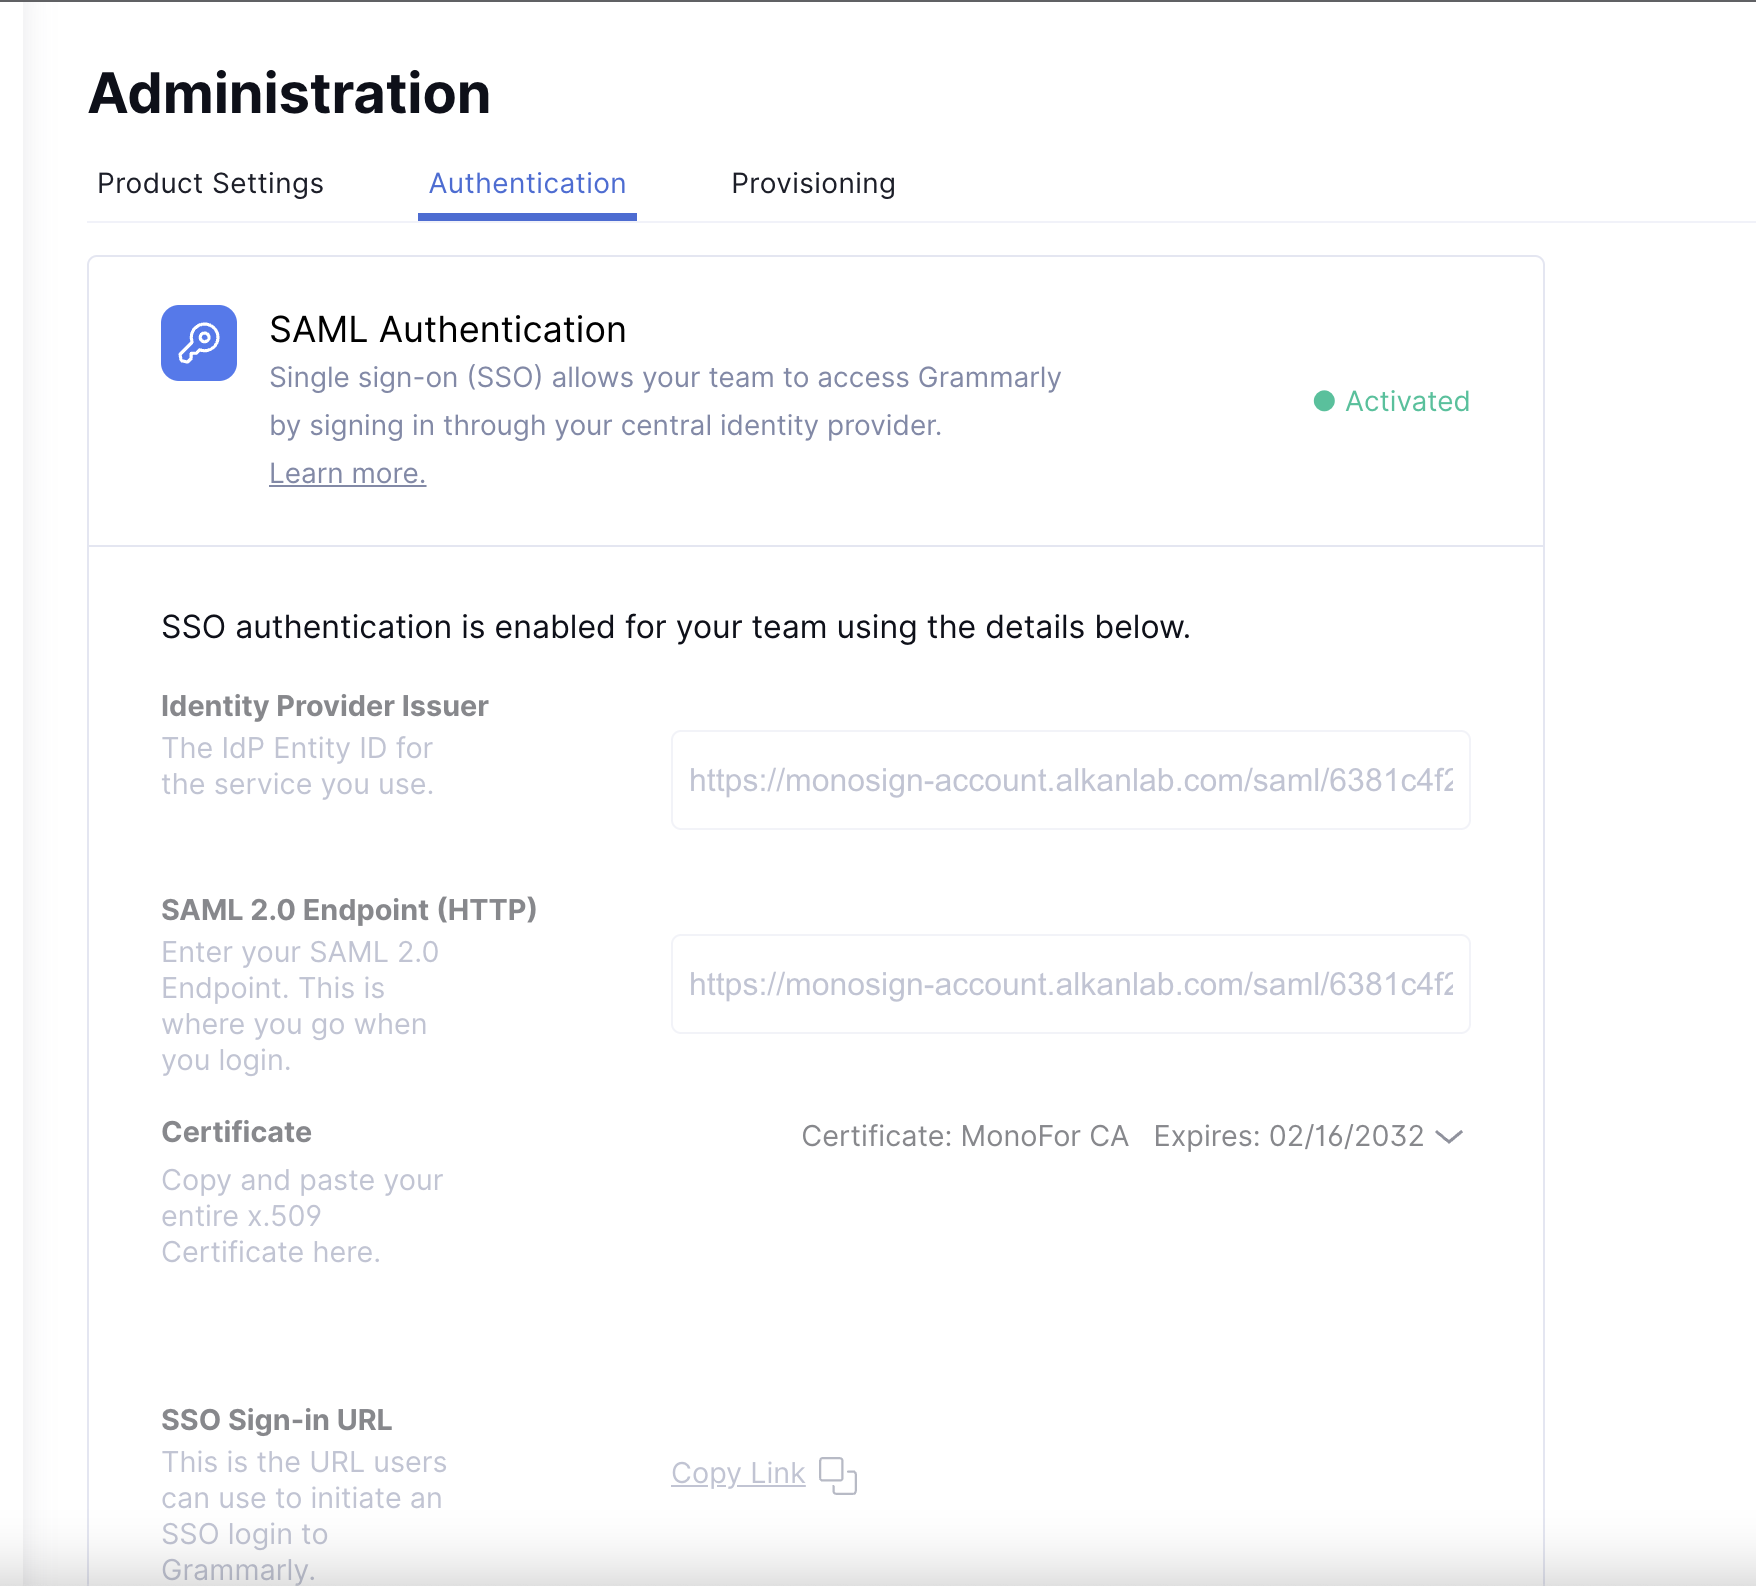
If you see that SAML Authentication is activated, it means everything seems perfect.
You can invite your coworkers to Grammarly on the members section. The members on Grammarly can access to Grammarly application via MonoSign SSO.