This document explains how to implement Monosign with Ivanti Connect Secure It covers Single Sign-On. Before you continue, it is better to start with Ivanti Connect Secure(formerly Pulse Secure) Single Sign-On implementation page
📑 Instructions
This documentation contains 4 main steps for integration.
-
Creating an Application on Monosign
-
Configuration Single Sign-On for Ivanti Connect Secure
-
Assign a user to the Ivanti Connect Secure app
-
Sign In Test
-
Role Mapping
This method can be used for SSLVPN connection and admin authentication.
1- Creating an Application on Monosign
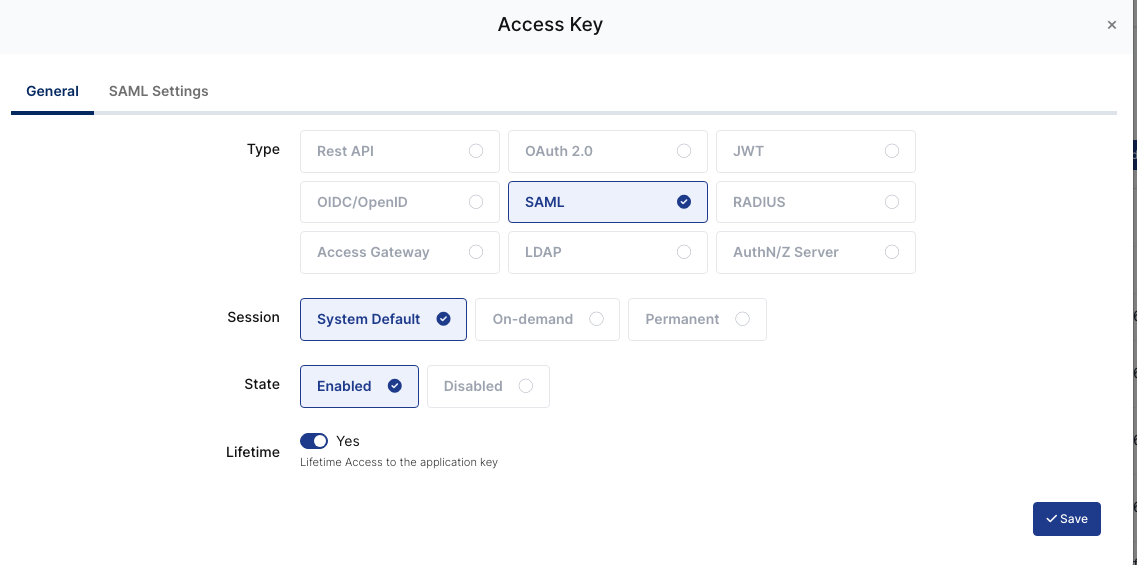
Create your application on Monosign and configure your access policy. Once you create, click “Keys” and add a new Access Key for SAML 2.0 Key for access.
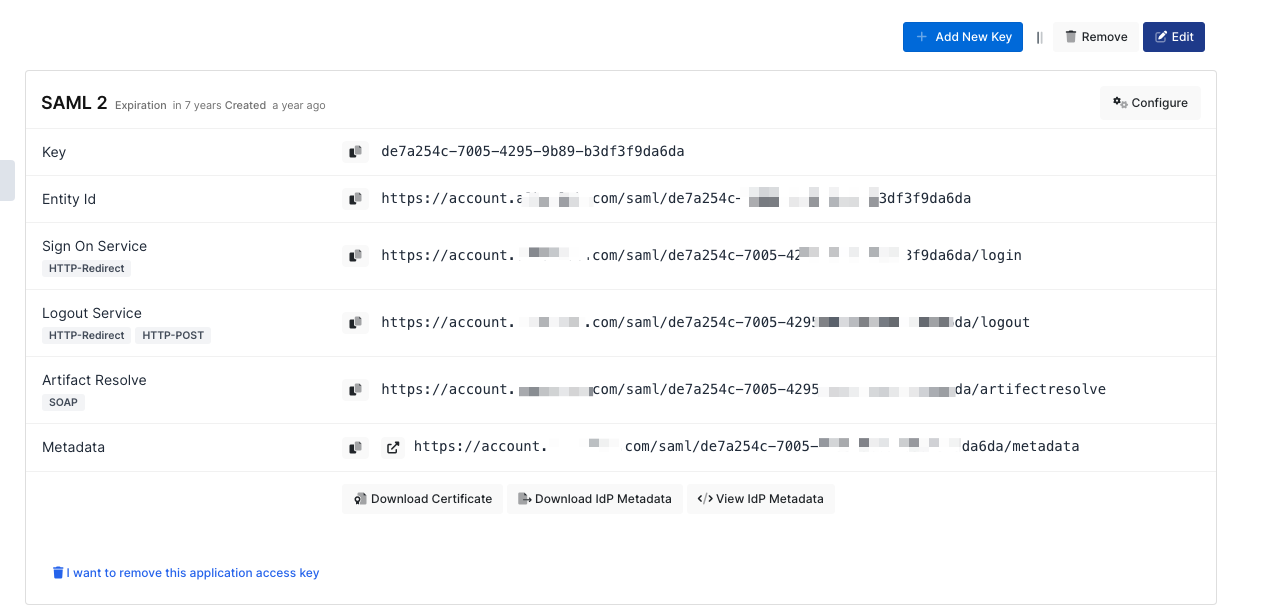
We will need this information while we configure the Ivanti Connect Secure app.

|
Property |
Value |
Options |
|---|---|---|
|
Key Type |
SAML |
Rest API, OAuth 2.0, JWT, OIDC/OpenID, SAML, RADIUS, Access Gateway, LDAP, AuthN/Z Server |
|
Expiration |
Lifetime |
Lifetime or Specific Date/Time - By Default Lifetime is Enabled. |
You are gonna see your configuration for your Ivanti Connect Secure app as follows;
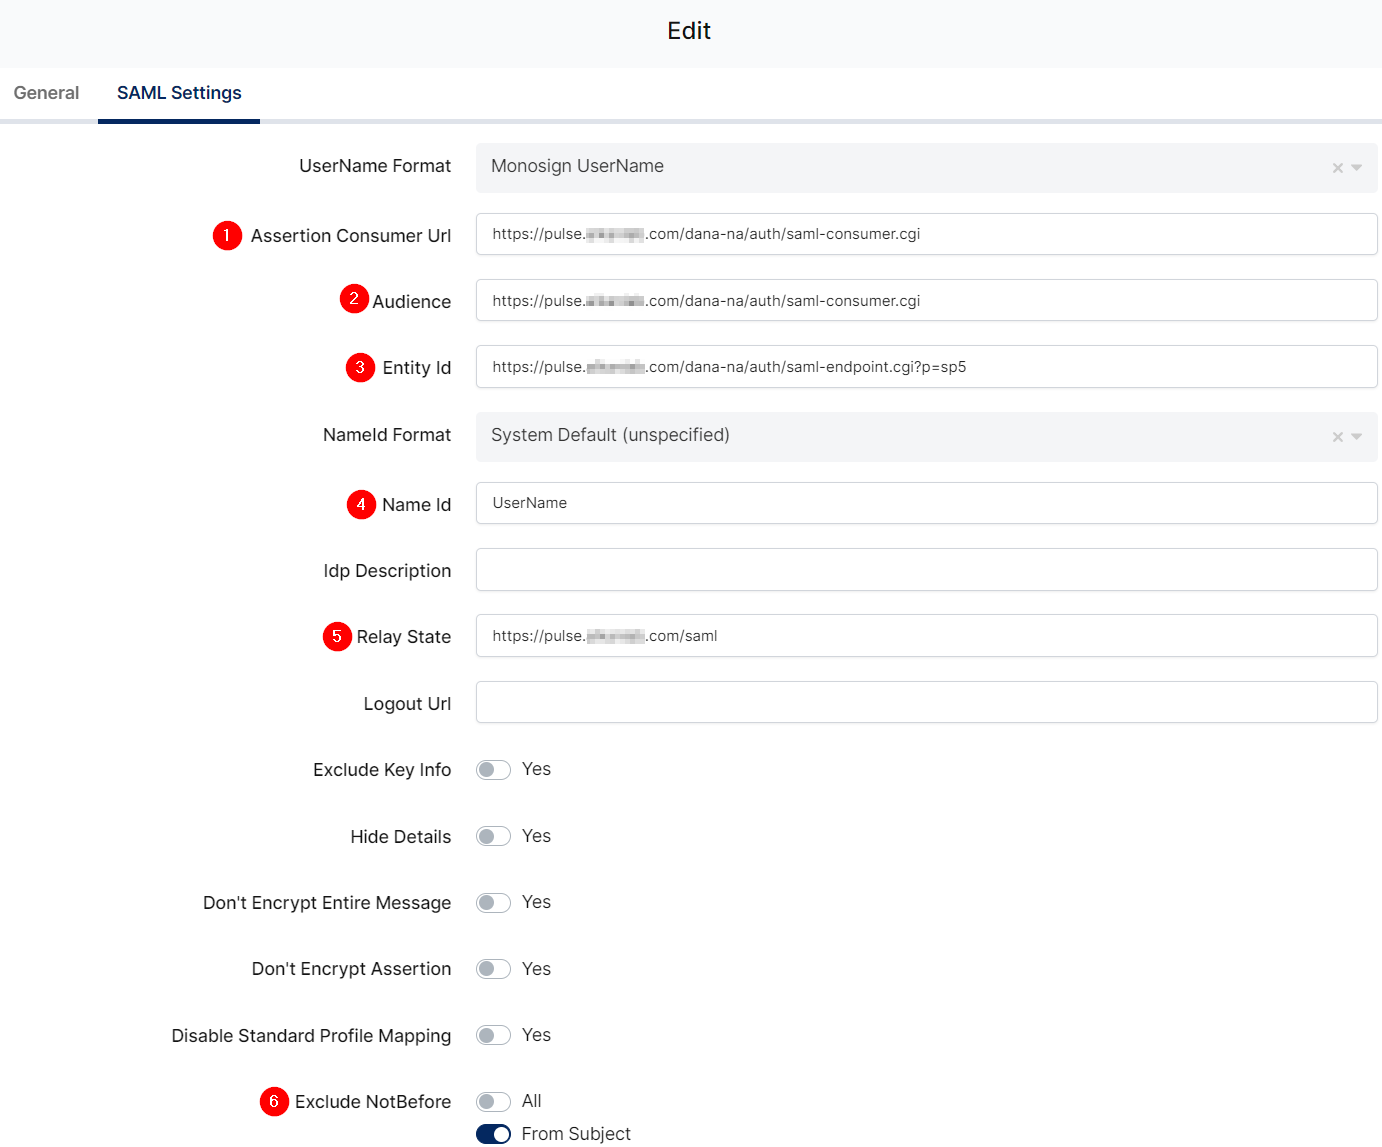
Change ACS(Assertion Consumer Url), Audience, Entity Id, Name Id, Relay State, Exclude NotBefore and Group Mapping.
|
Property |
Value |
|---|---|
|
Assertion Consumer Url |
|
|
Audience |
|
|
Entity Id |
|
|
Name Id |
|
|
Relay State |
|
|
Exclude NotBefore |
|
|
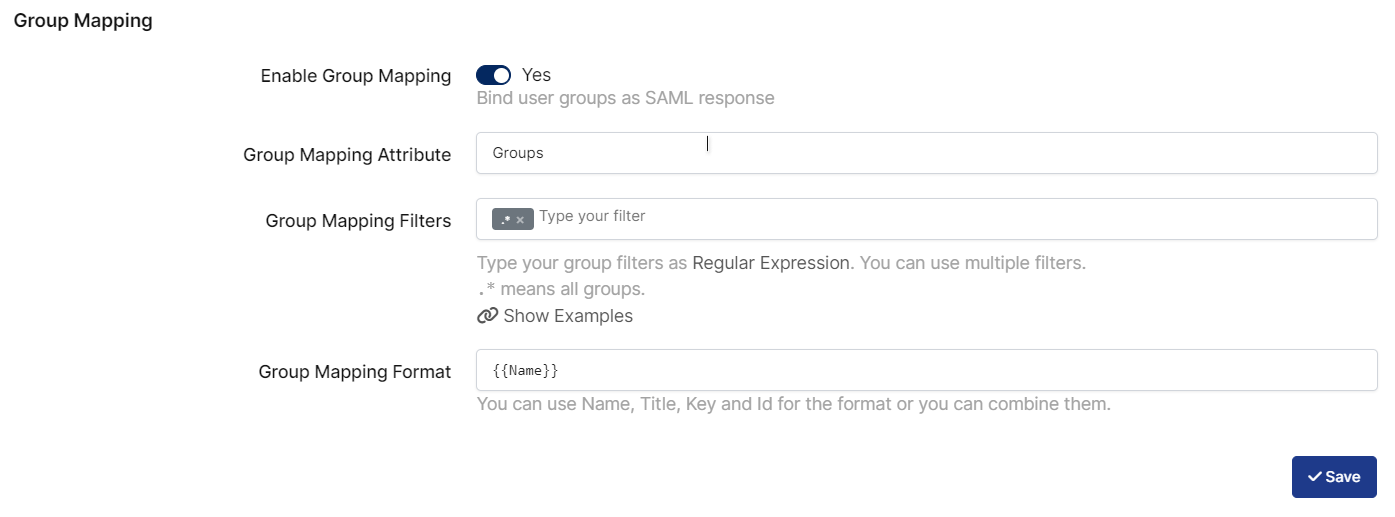
Group Mapping |
|
To ensure that the application has access to user groups, follow these steps:
-
If the application hasn't been configured yet, click the “Edit” option for the application.
-
In the application settings, navigate to the “Source, Provider, and Profile” tab.
-
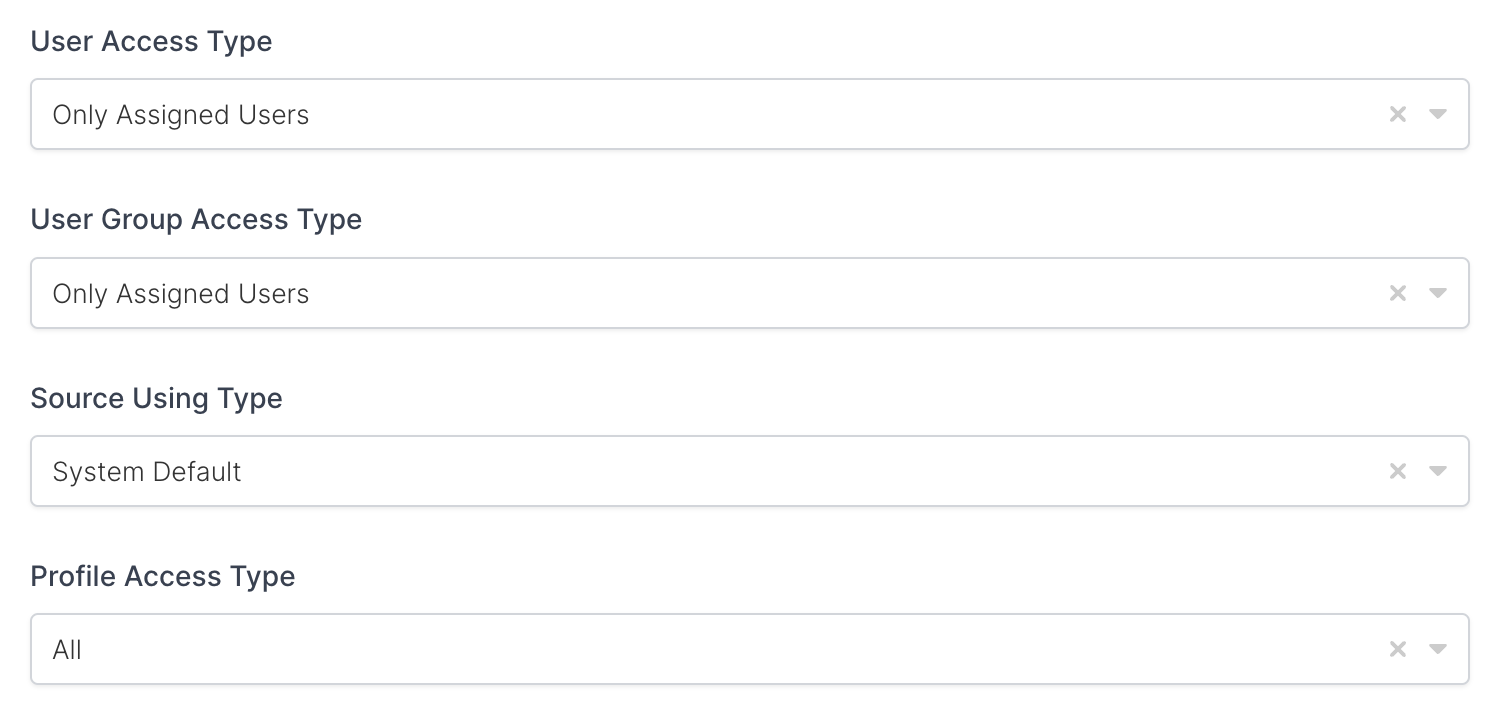
Configure the “User Access Type“ and “User Group Access Type” as “Only Assigned Users.”
Configuring this setting will allow the application to access by user groups when users sign in.
|
Property |
Description |
Options |
|---|---|---|
|
User Access Type |
Defines which Users will access to this application. |
Only Assigned Users
|
|
User Group Access Type |
Defines application’s user group access |
Only Assigned Users
|
|
Profile Access Type |
Defines Application’s user’s profile access |
Restricted - Only restricted user profile attributes
|
2- Configuration Single Sign-On for Ivanti Connect Secure
As mentioned at the start, please check out the Ivanti Connect Secure SSO configuration page first.
This section describes tasks to configure Ivanti Connect Secure SAML settings.
-
Configuring Global SAML Settings
-
Managing SAML Metadata Files
-
Configuring Ivanti Connect Secure as a SAML 2.0 Service Provider
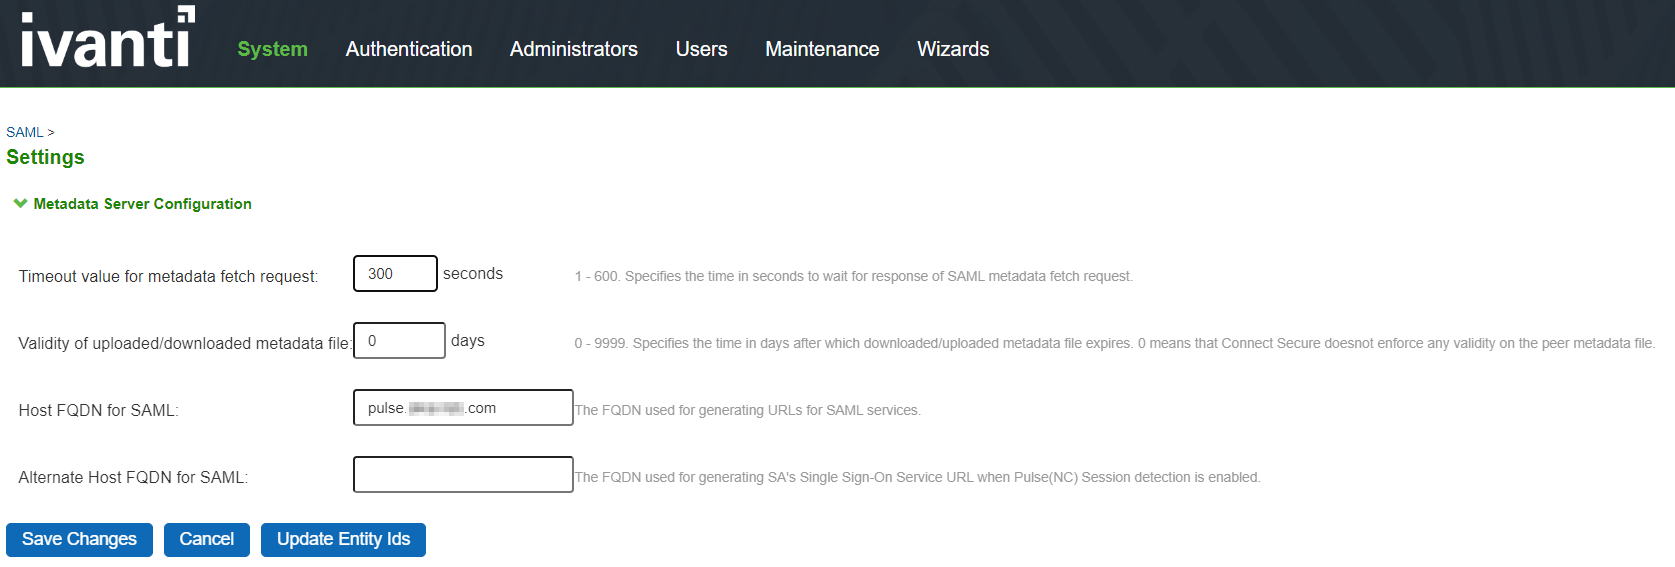
Configuring Global SAML Settings
-
Select System > Configuration > SAML.
-
Click the Settings button to display the configuration page.
-
Complete the settings described in the following image.
-
Click Save Changes.
-
Click Update Entity Ids
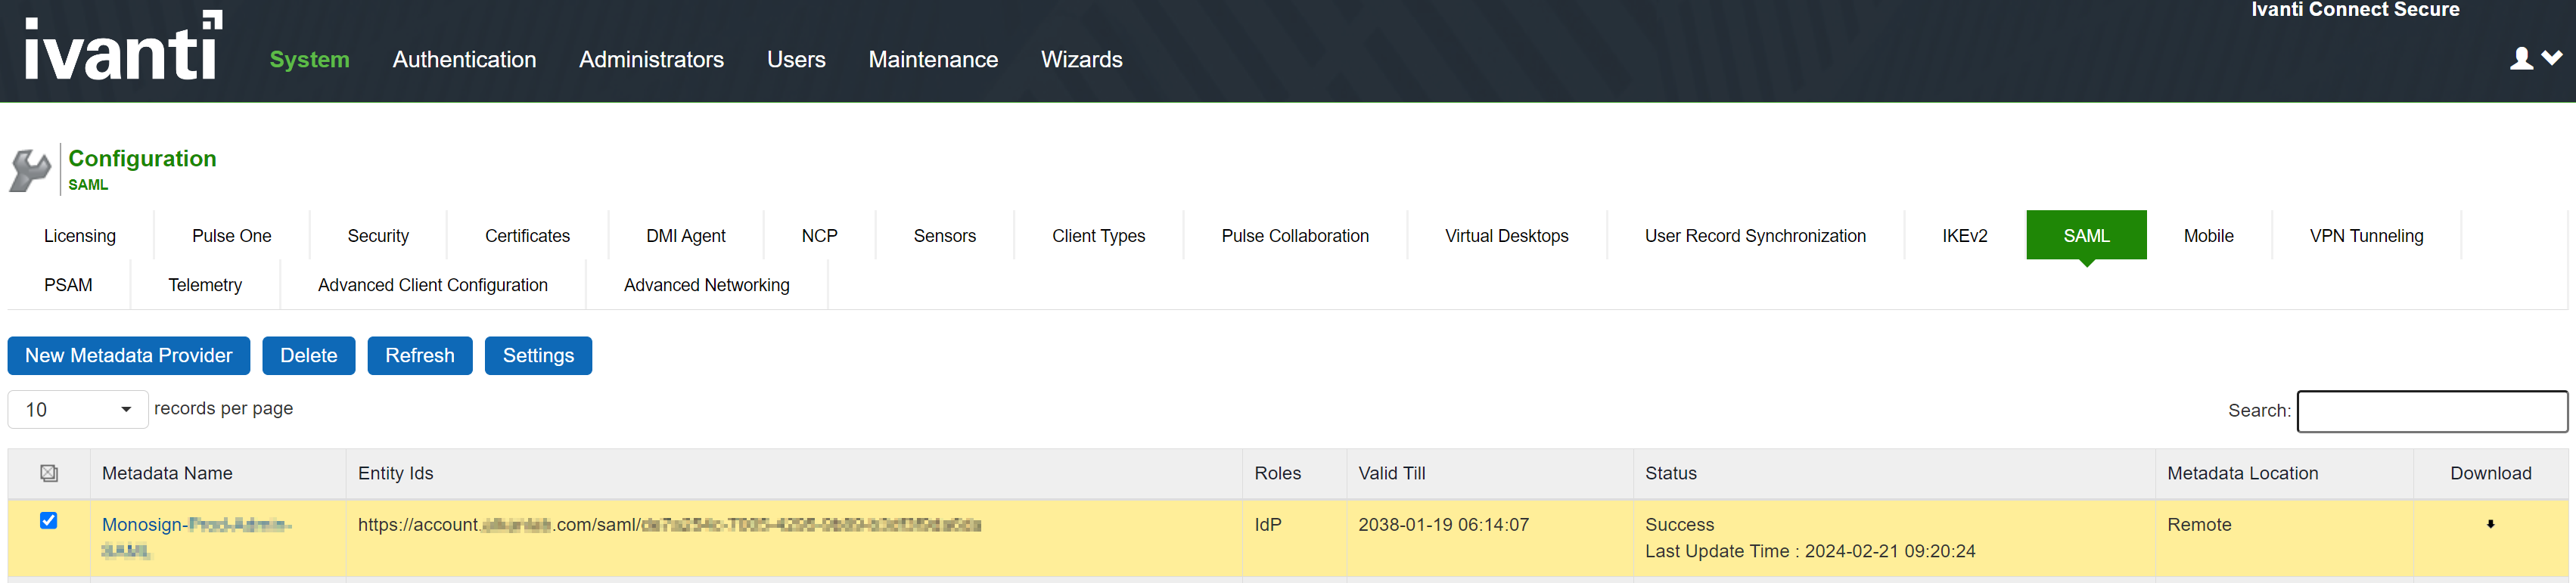
Managing SAML Metadata Files
-
Select System > Configuration > SAML.
-
Click New Metadata Provider to display the configuration page.
-
Complete the settings described in the following image.
-
Save the configuration.

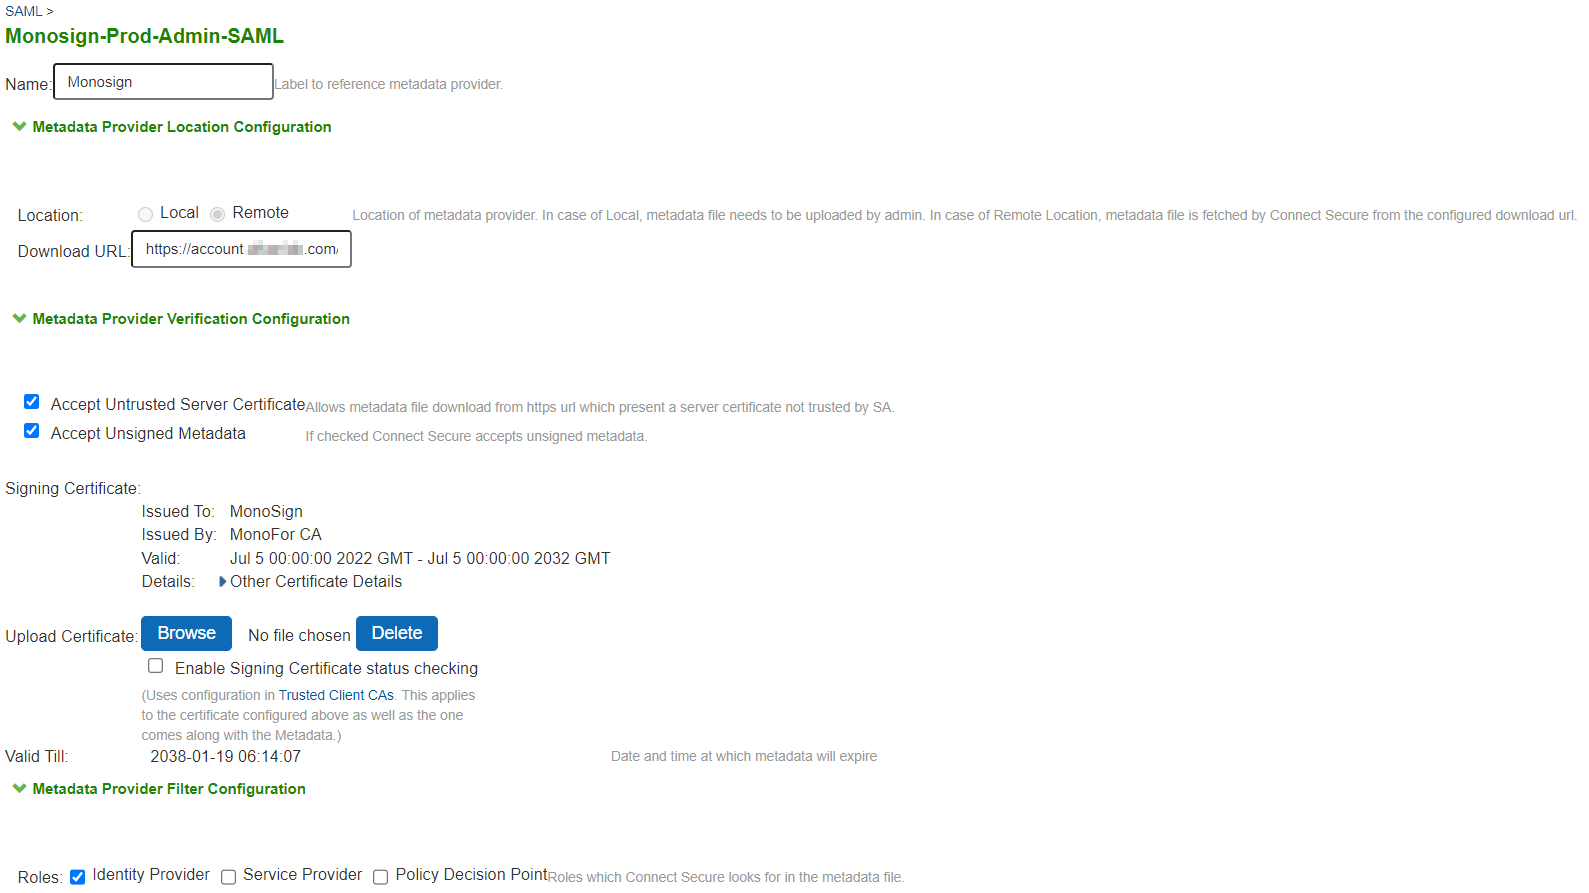
Configuration detail
|
Property |
Value |
|---|---|
|
Name |
Give IdP name here Example: |
|
Location |
Local : IdP Metadata file needed. It can be download from Monosign application key detail. Remote: IdP Metadata file can be downloaded by Ivanti Connect Secure from Monosign. |
|
Accept Untrusted Server Certificate |
|
|
Accept Unsigned Metadata |
|
|
Signing Certificate |
It can be download from Monosign application key detail and upload here |
|
Roles |
|
To refresh a metadata file:
-
Select System > Configuration > SAML.
-
Select the metadata file to refresh and click Refresh.
Configuring Ivanti Connect Secure as a SAML 2.0 Service Provider
To configure the system as a SAML service provider:
-
Select Authentication > Auth. Servers.
-
Select SAML Server from the New list and then click New Server to display the configuration page.
-
Complete the settings as described in the image
-
Save the configuration.
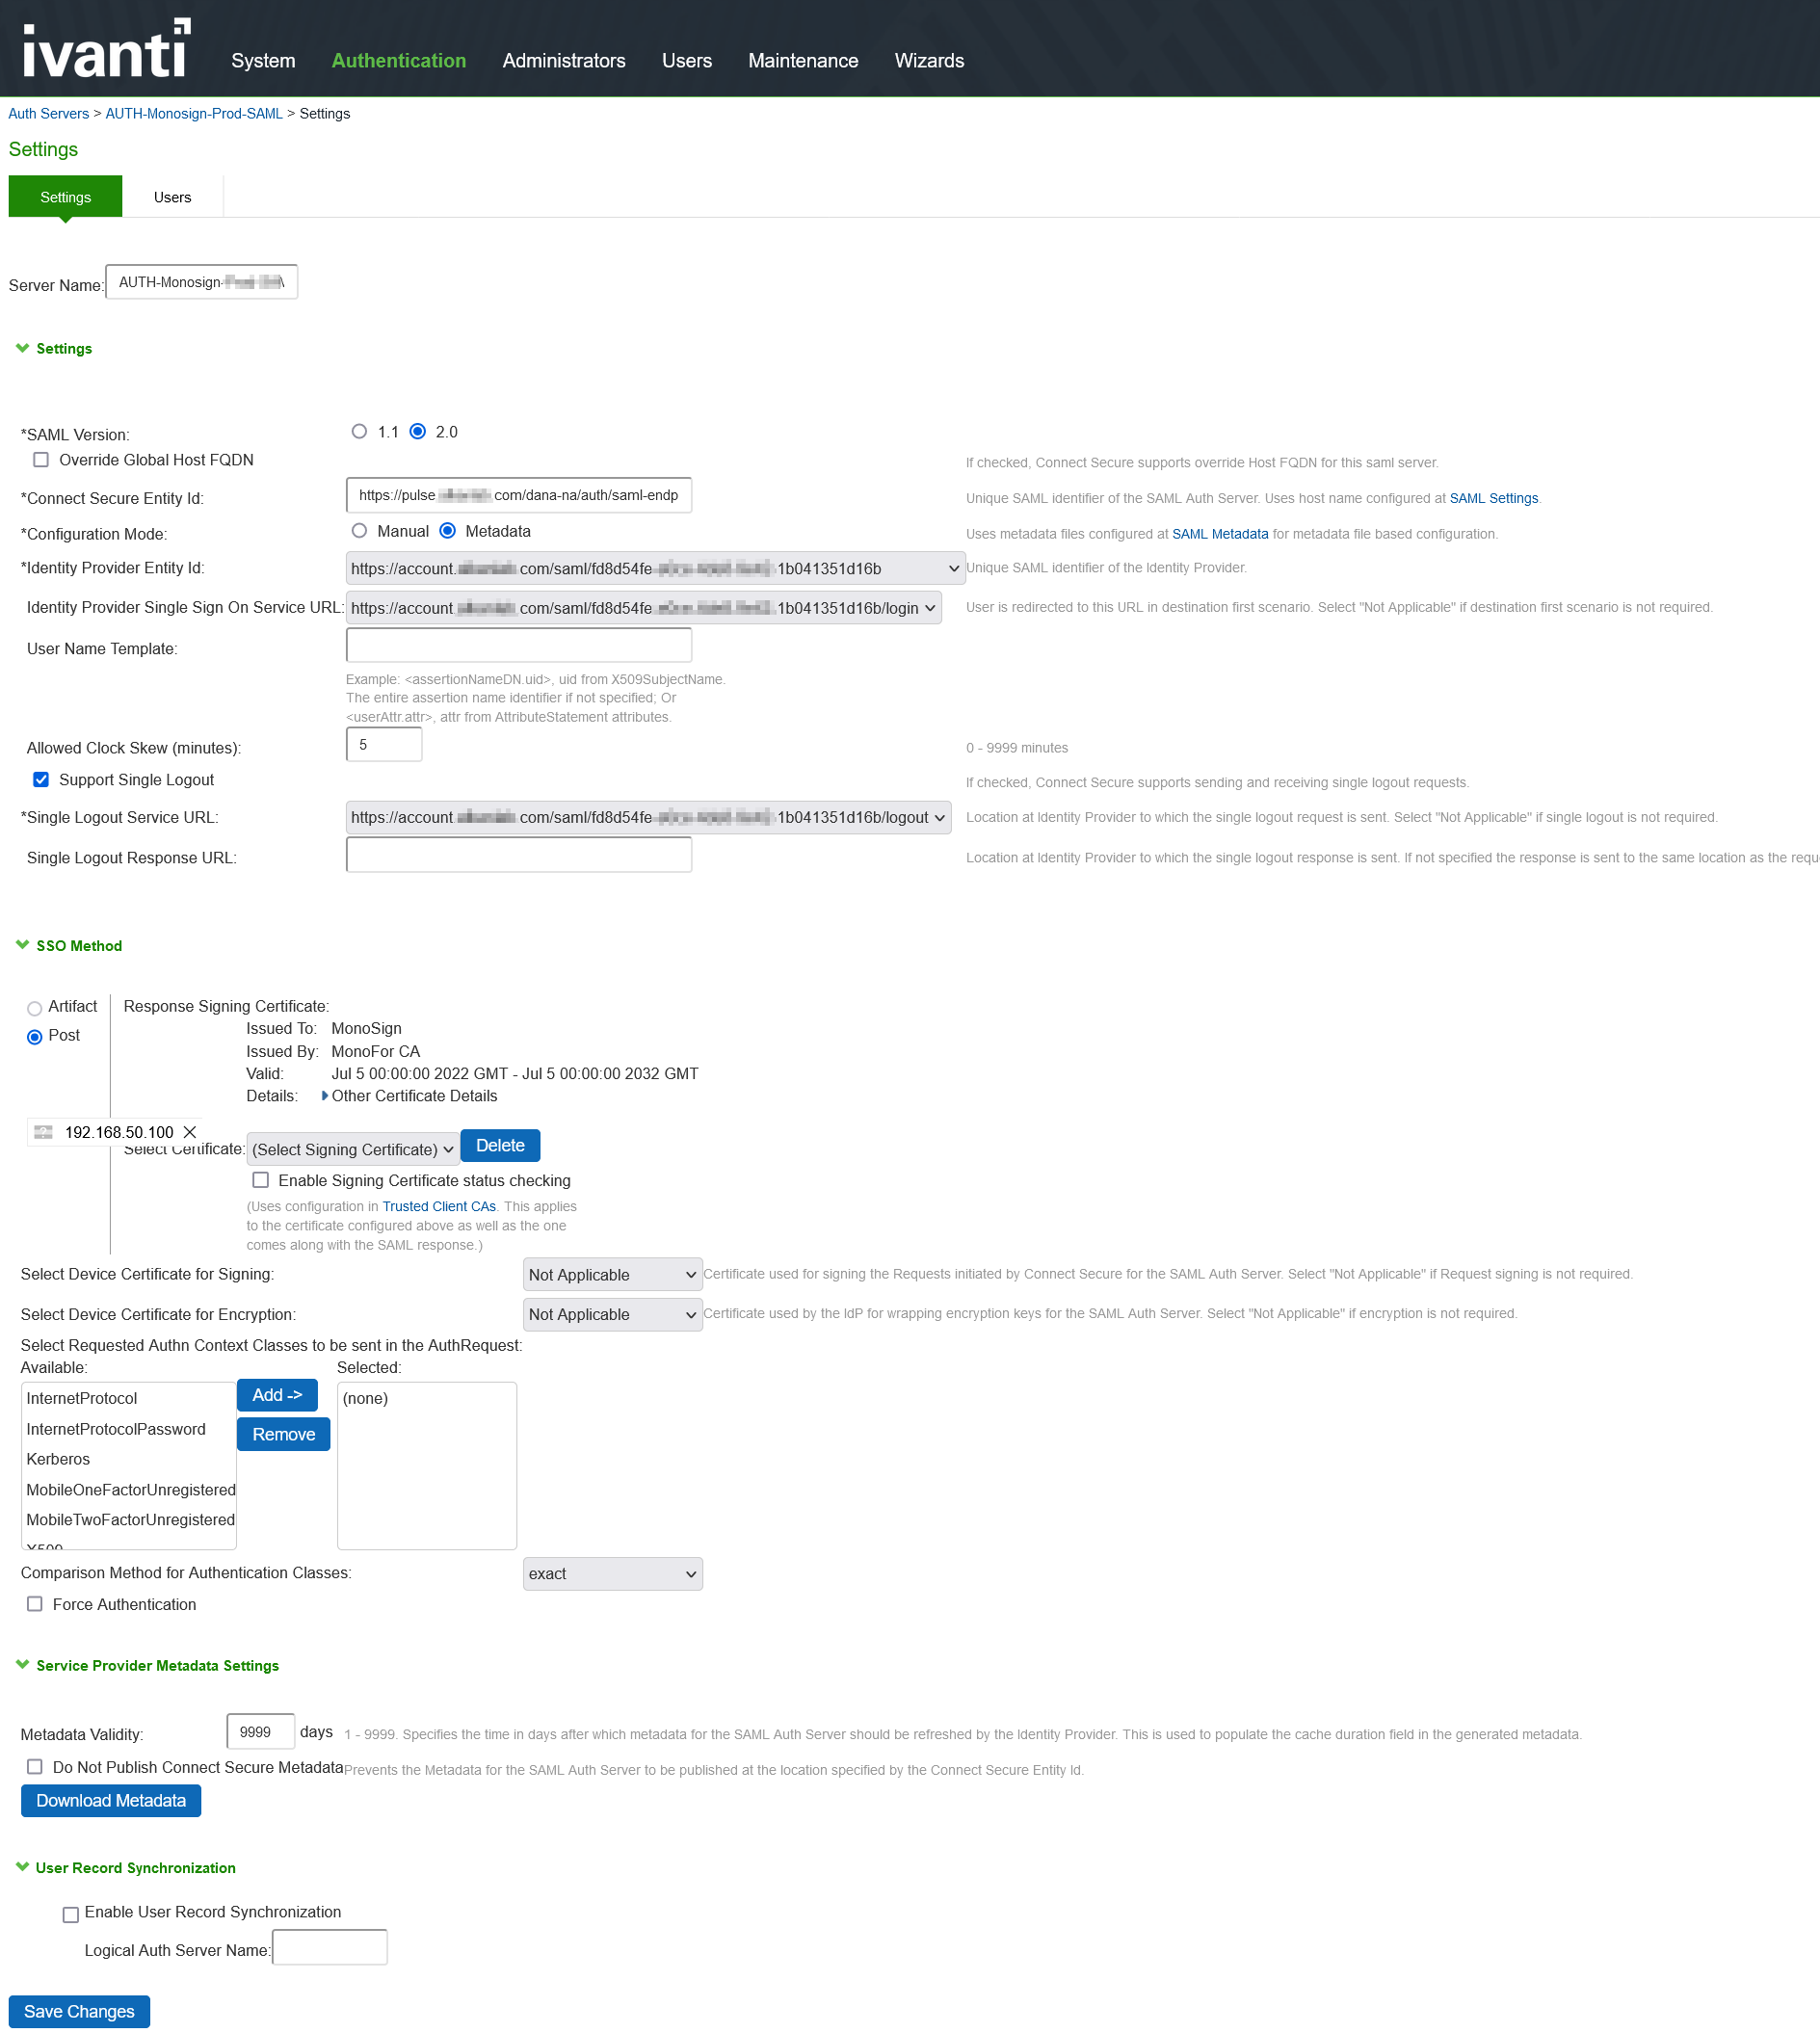
Now this Authentication Server can be used in User Realms and SignIn URL in Ivanti Connect Secure.
Now, go back to Monosign and give access to your users and try login.
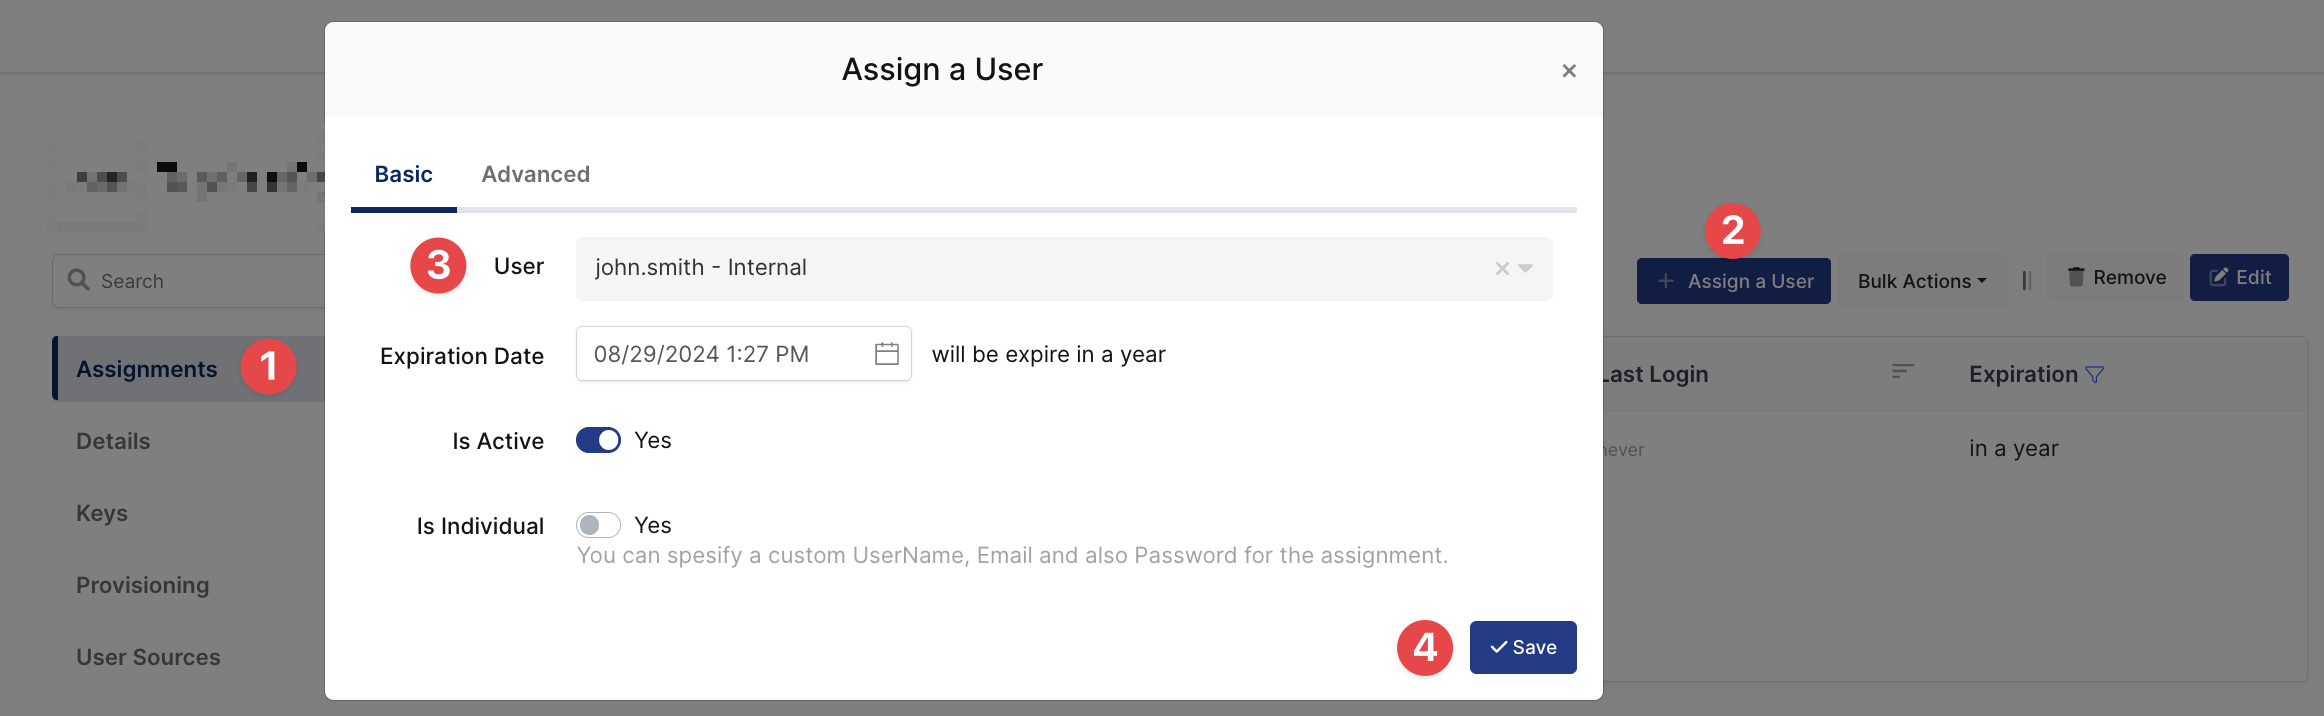
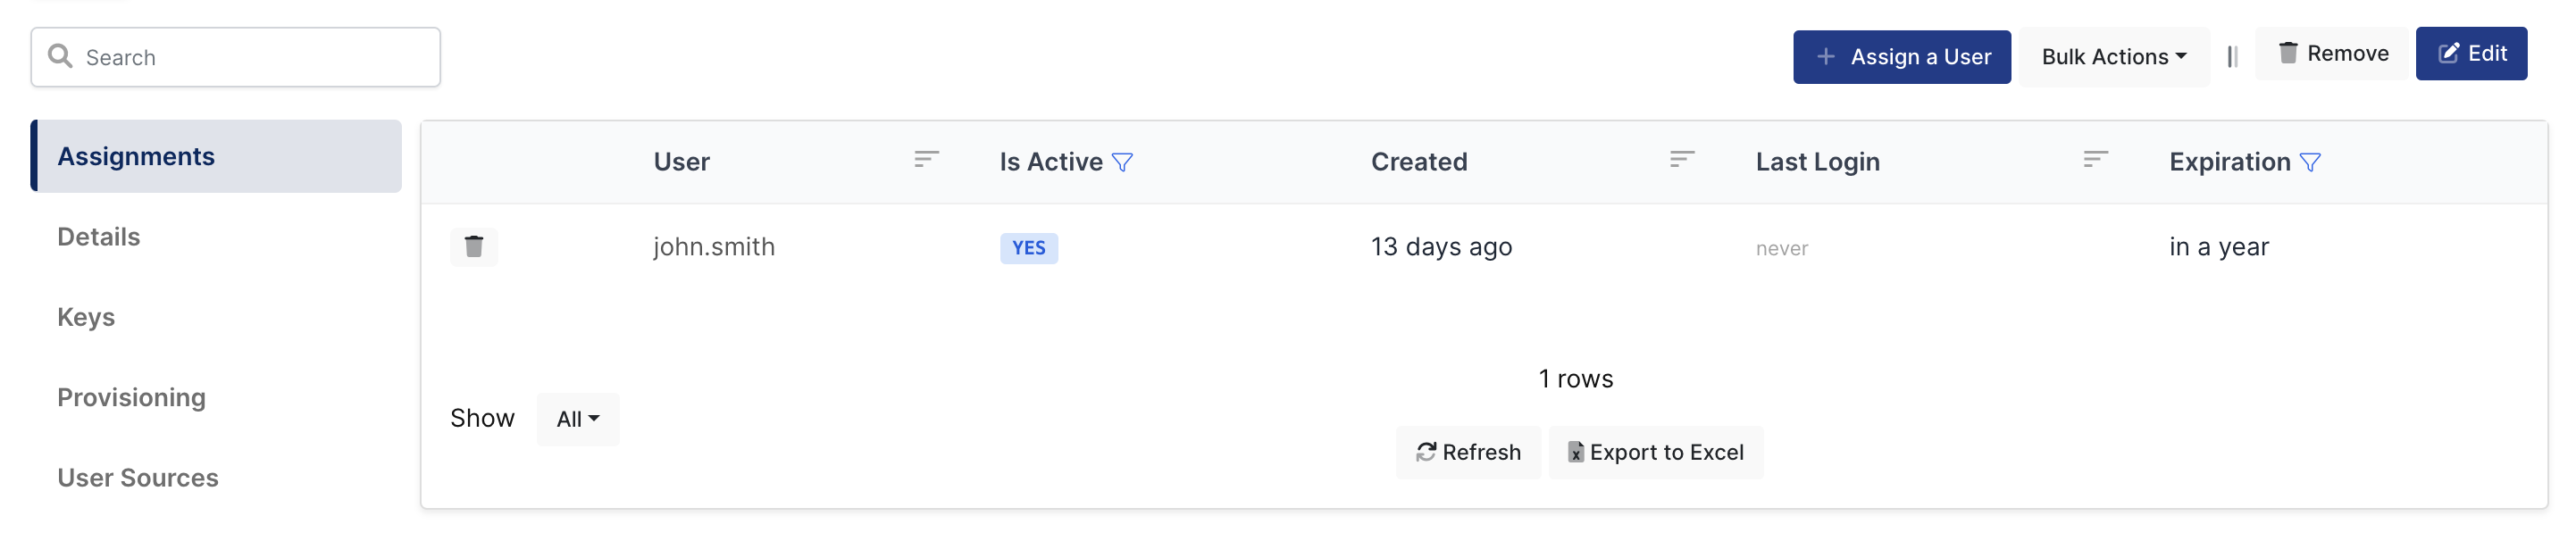
3- Assign a user to the Ivanti Connect Secure app
I am gonna give permission to “john.smith” who is my user on Monosign.
You can find the details here how to user can be assign to the application.
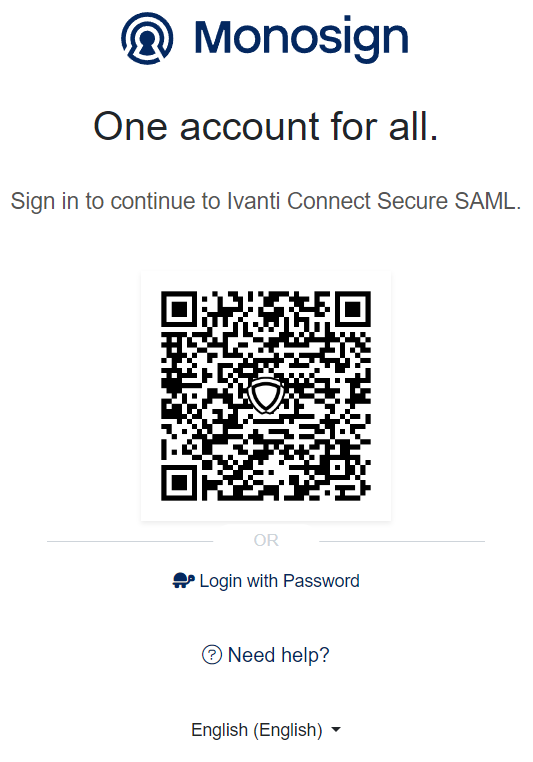
4- Sign In Test
If everything is well configured, you will be redirected to Monosign’s login page. You can log in passwordless with your QR code or you can type your user name and password.
When you logged, you are gonna be redirected to the Ivanti Connect Secure SSLVPN Portal as which role assigned in the user realm.
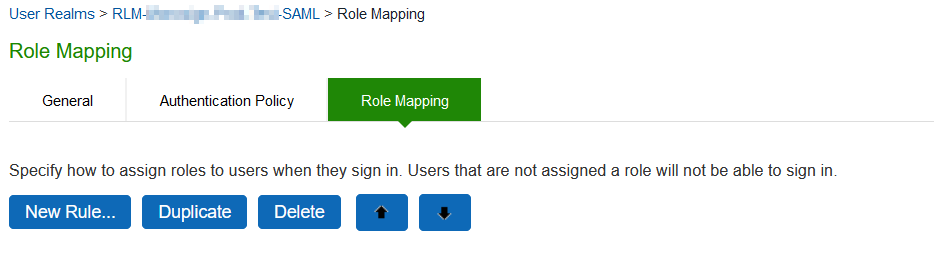
5- Role Mapping
Ivanti Connect Secure is supporting Role Mapping with specific SAML attributes. There are 3 attributes supported;
-
Username
-
Certificate
-
Custom Expressions
Username Mapping
-
Select Users > Users Realms and choose realms you want to configure.
-
Go to Role Mapping then click New Rule
|
Property |
Value |
|---|---|
|
Rule Based on |
Username |
|
Name |
Type any name in here. |
|
Rule: if username |
Choose operator : Type Username. |
|
then assign these roles |
Choose correct role for particular users. |
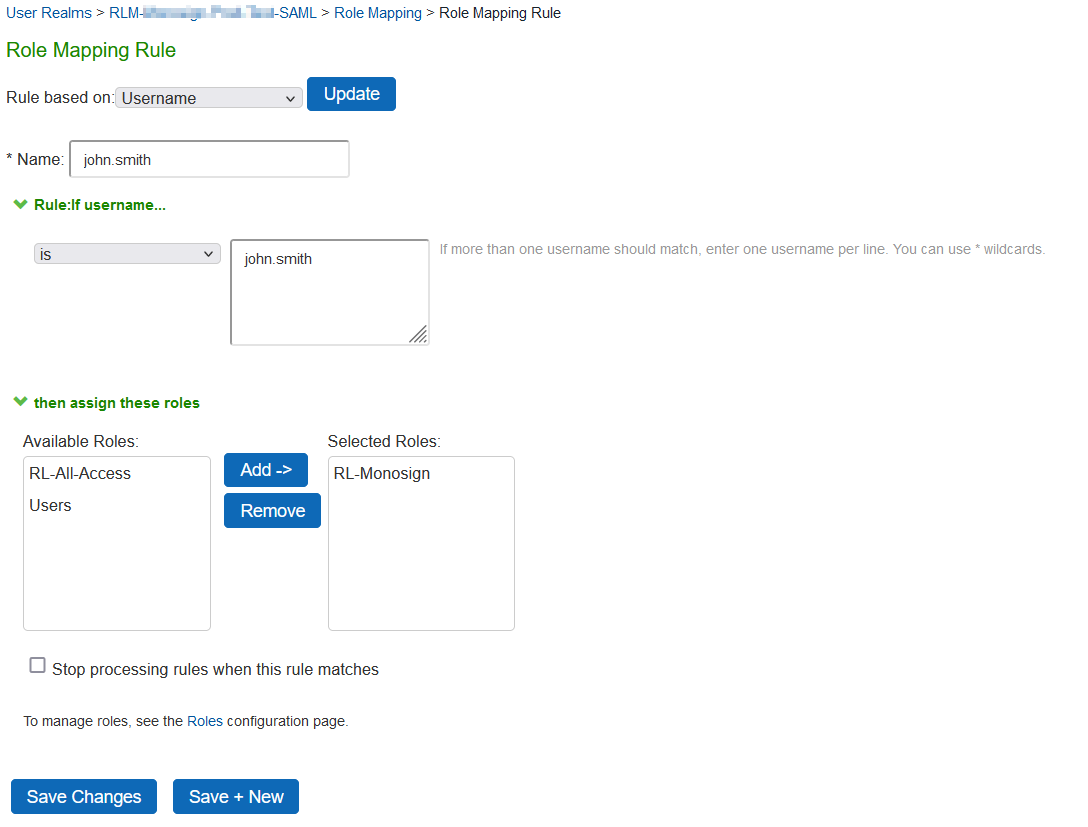
-
Then configure setting and click Save.
Now try to login Ivanti Connect Secure and verify correct role mapped to user(s).
Example User : john.smith
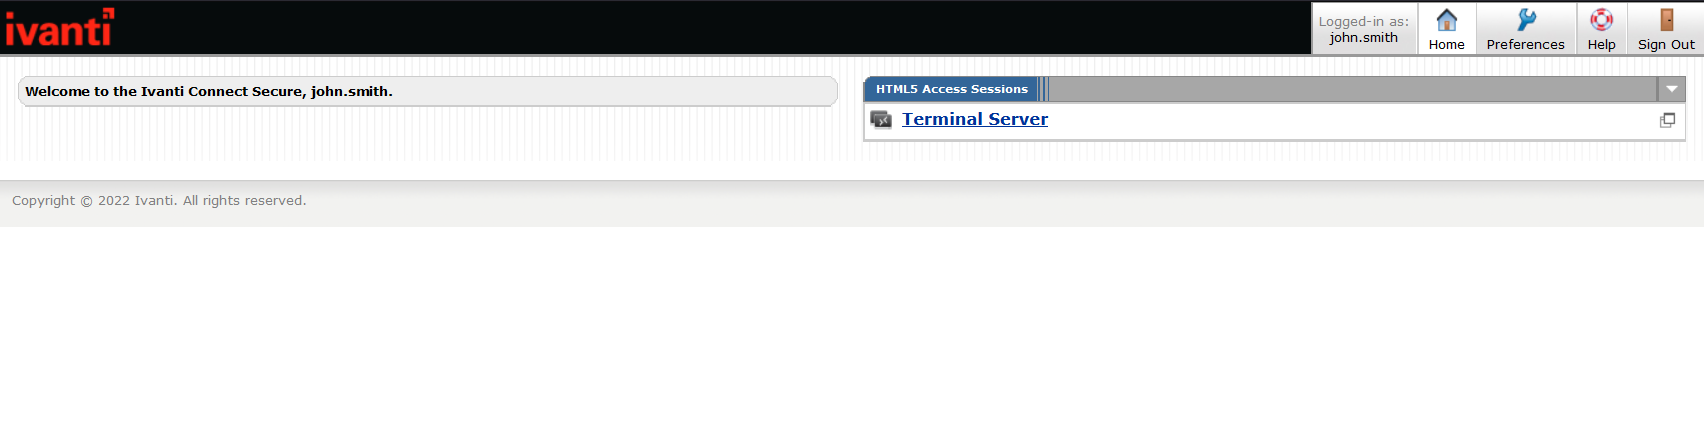
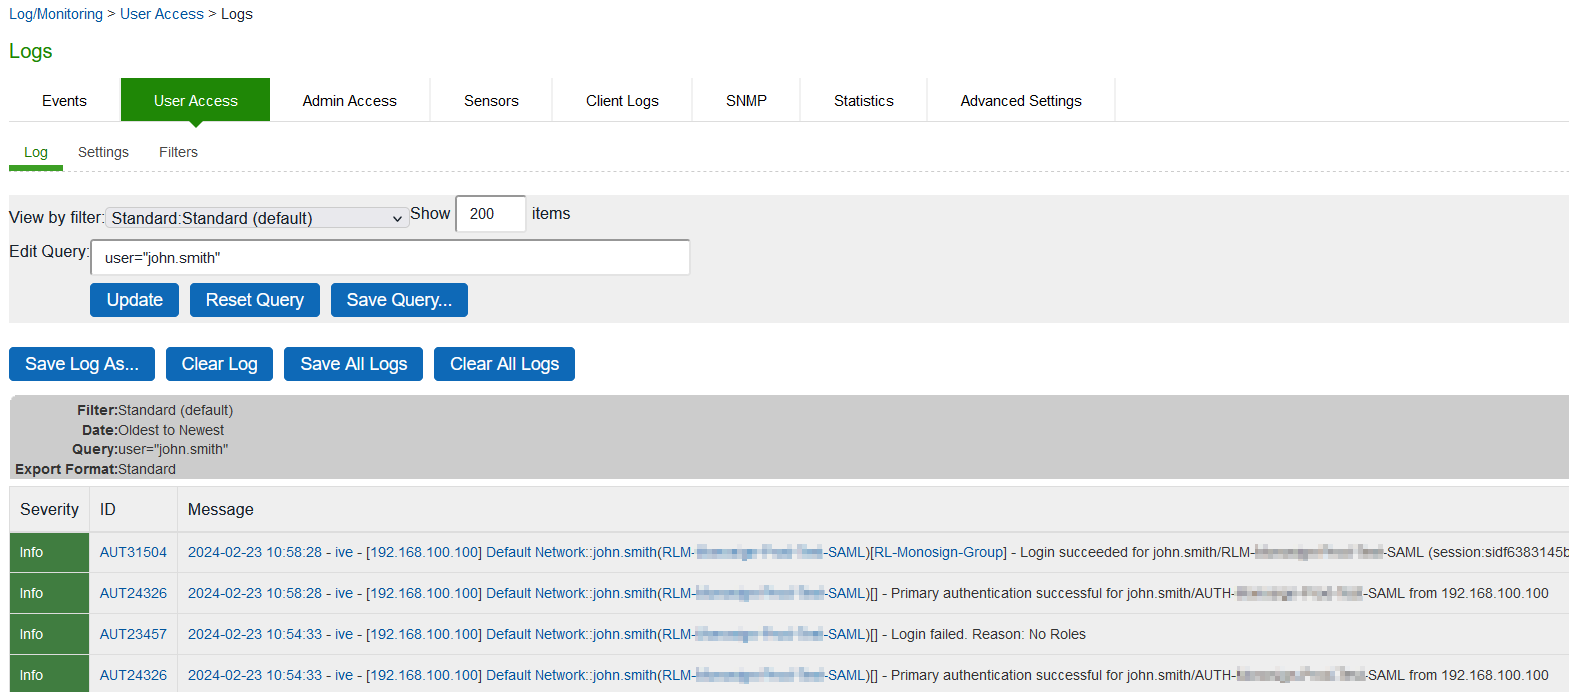
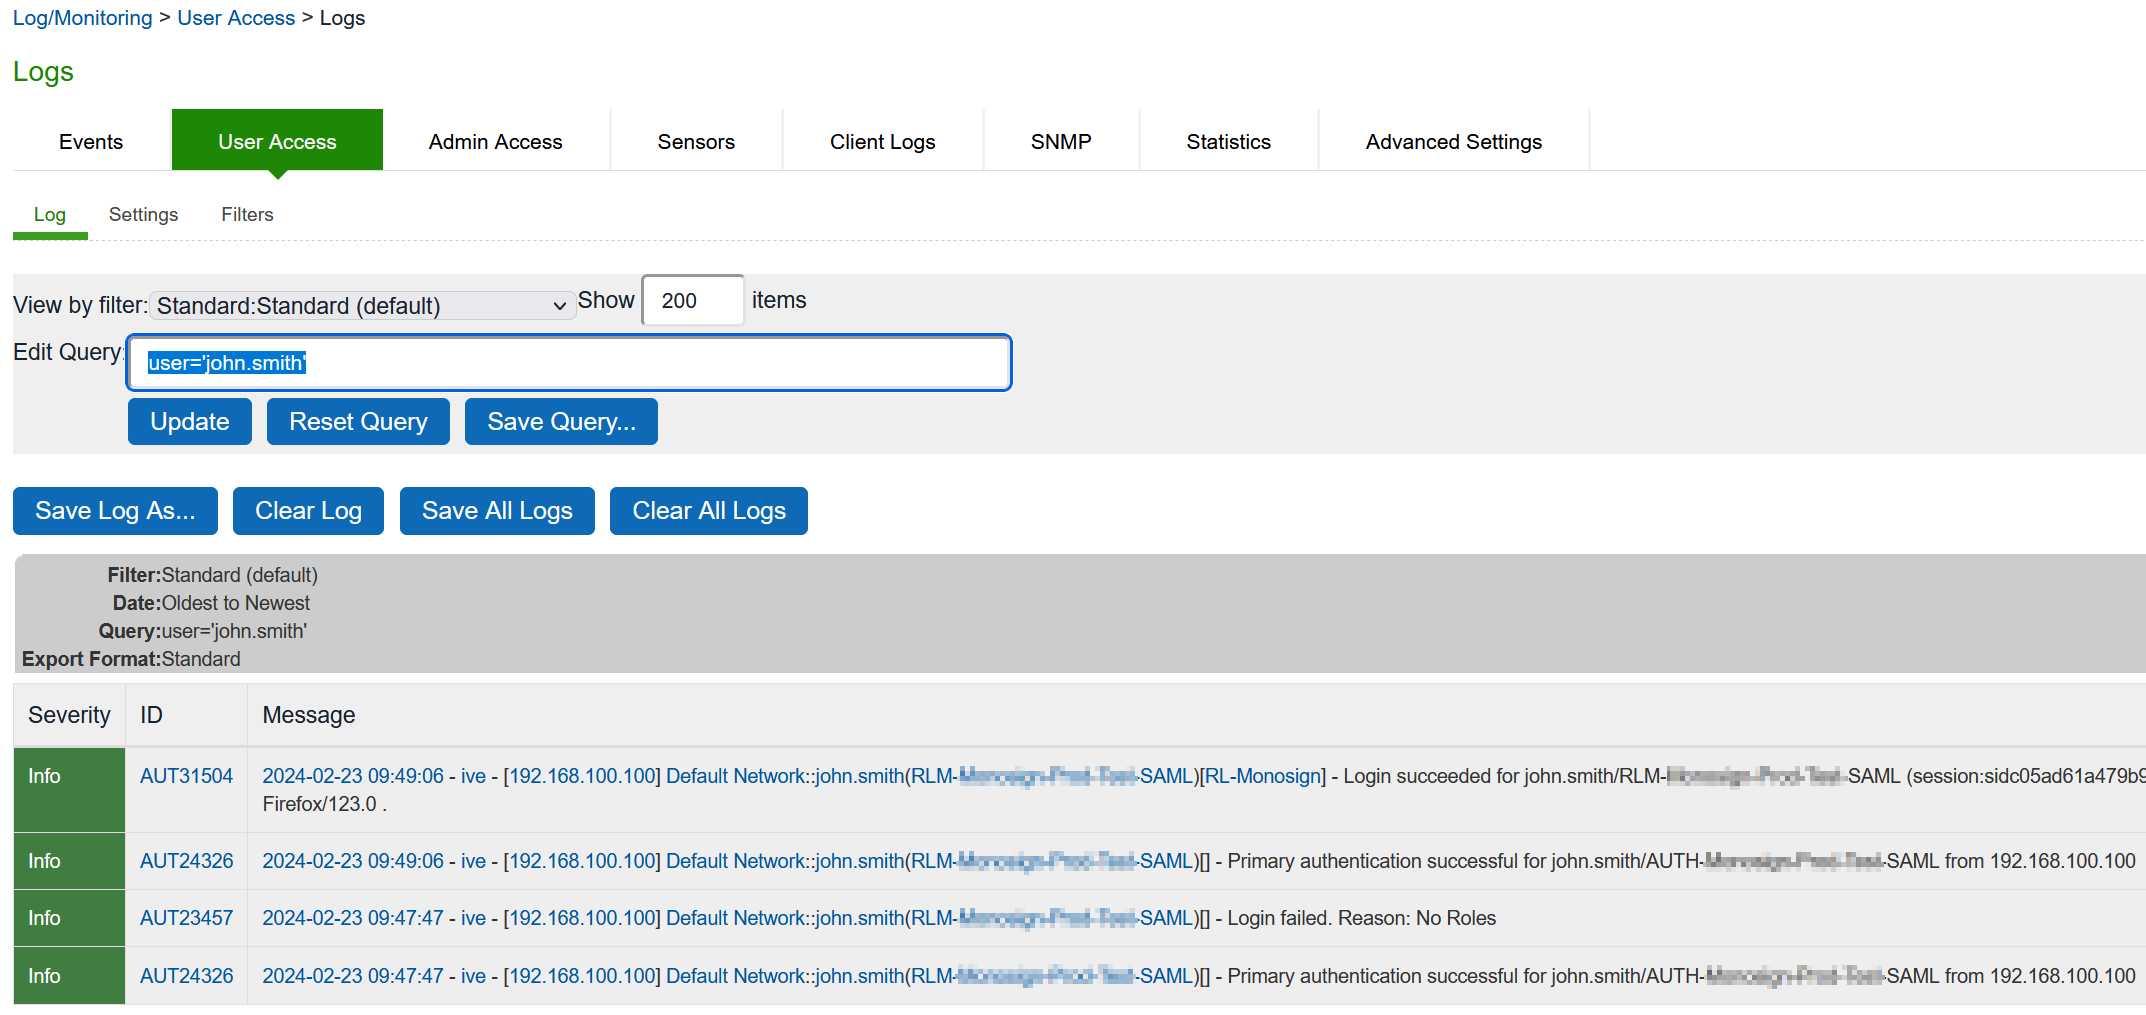
Also it can be verified in the Ivanti Connect Secure User Access logs.
Select System > Log/Monitoring > User Access
Type username in Edit Query and click update
Query Example : user="john.smith"
As shown in the logs first login attempt is not continue because of user has no role.
Second attempt is successfully logged-in and correct role is assigned to the user.
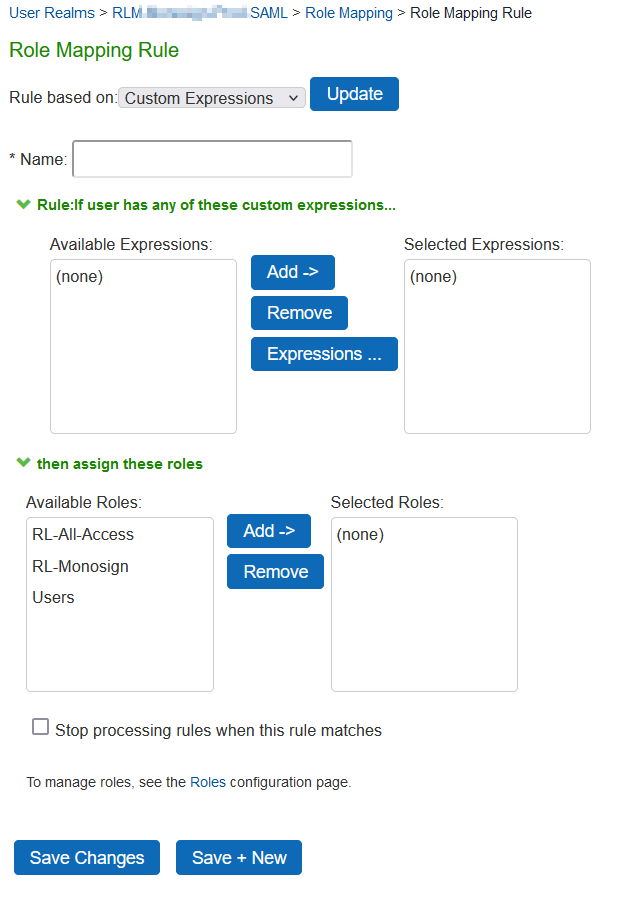
Group Mapping
-
Select Users > Users Realms and choose realms you want to configure.
-
Go to Role Mapping then click New Rule
-
Choose Custom Expressions under Rule based on setting and click Update
-
Open Expressions … settings
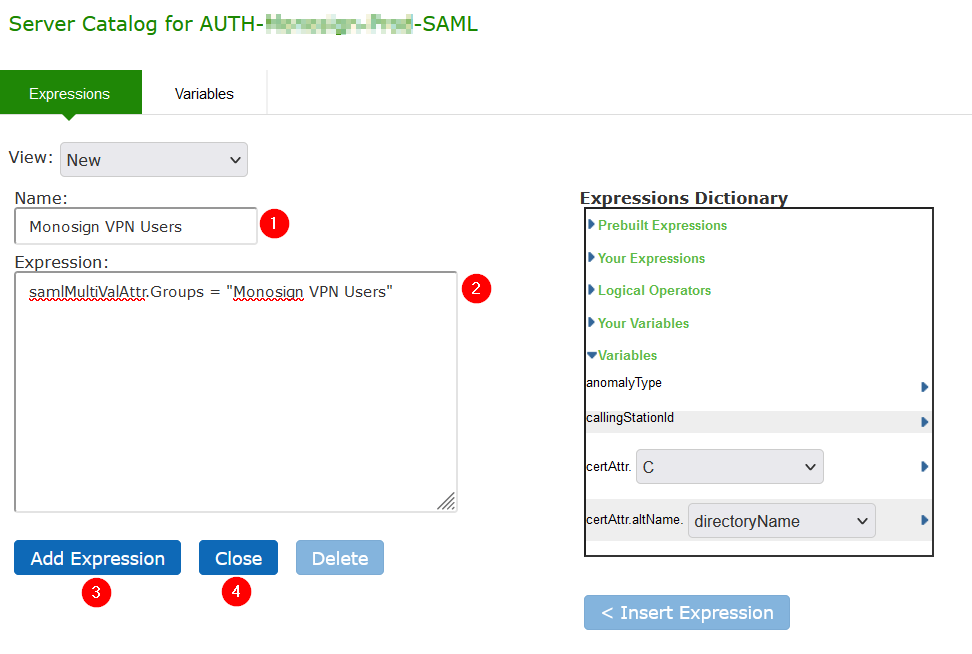
|
Property |
Value |
|---|---|
|
View |
New |
|
Name |
Type any name in here. Suggested name is Group Name.
|
|
Expression |
|
Click Add Expression and configuration will be saved then click Close
Now check role assignment configuration page and it will be look like in the below
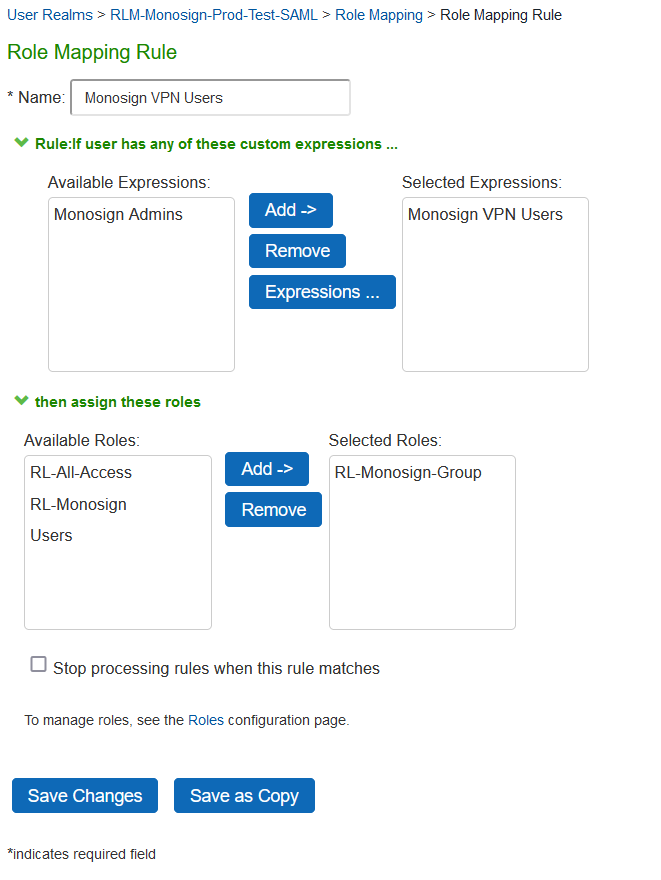
Now try to login Ivanti Connect Secure and verify correct role mapped to user(s).
Also it can be verified in the Ivanti Connect Secure User Access logs.
Select System > Log/Monitoring > User Access
Type username in Edit Query and click update
Query Example : user="john.smith"
As shown in the logs first login attempt is not continue because of user has no role.
Second attempt is successfully logged-in and correct role is assigned to the user.