Jenkins SAML Integration
This document explains how to implement MonoSign with Jenkins. It covers Single Sign-On. Before you continue, it is better to start with Jenkins SAML Plugin Single Sign-On implementation page.
Install Jenkins SAML Plugin
In order to configure the SAML key on MonoSign for Jenkins SSO, you need to have various information provided by Jenkins.
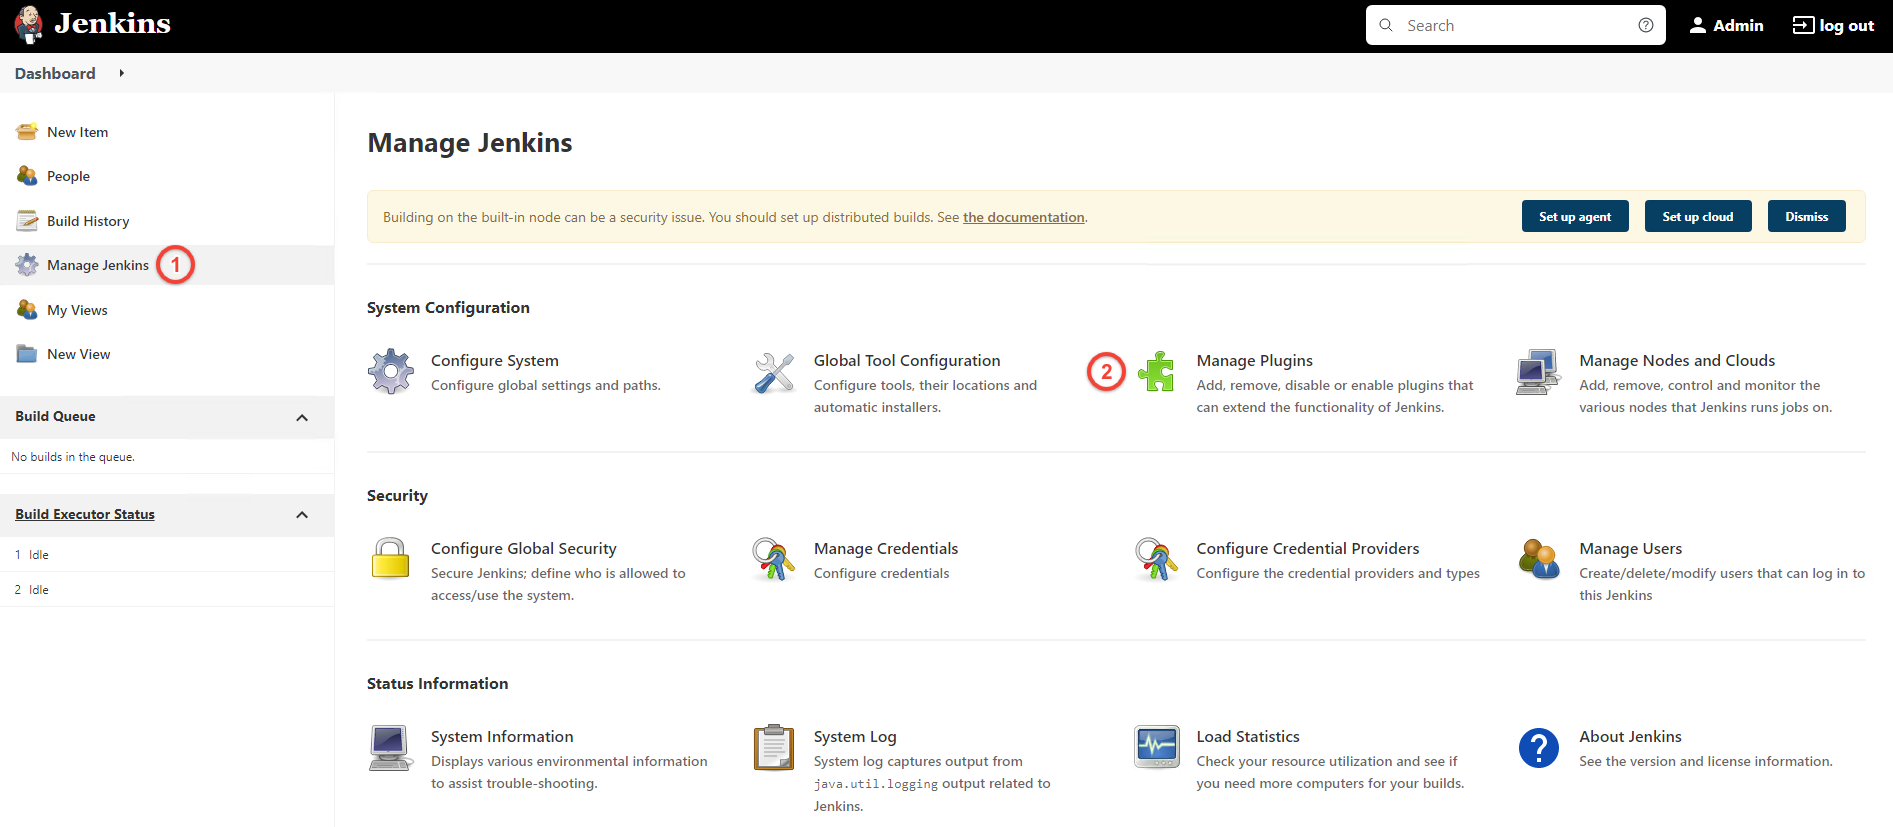
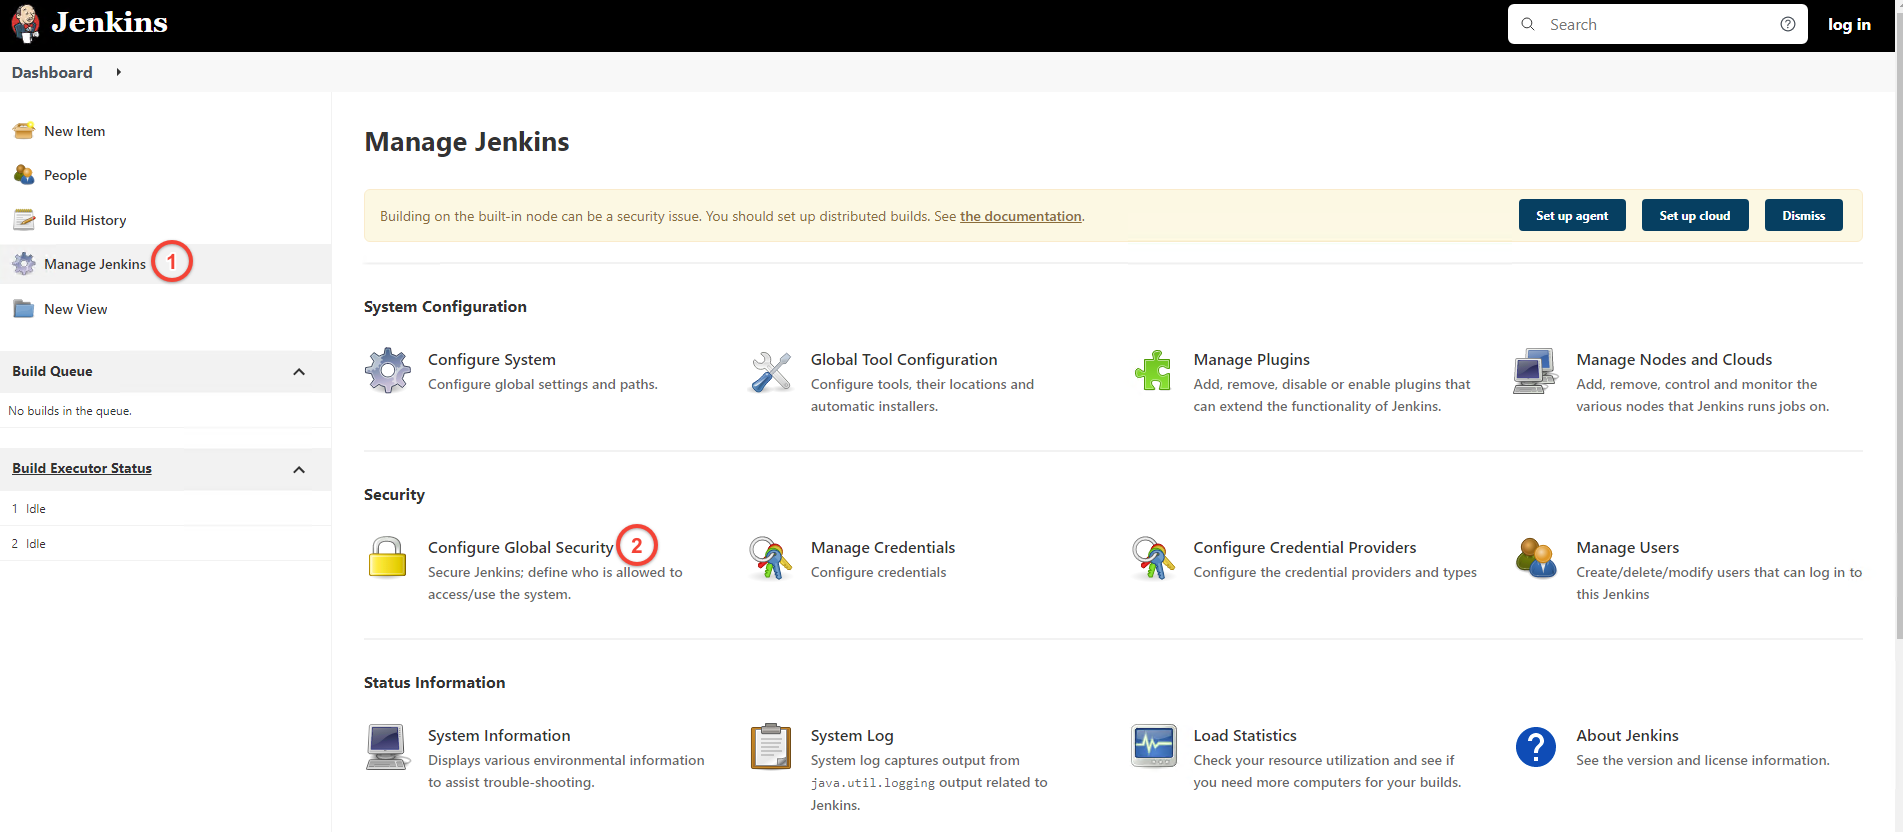
First you need to install SAML plugin, navigate to Manage Jenkins > Manage Plugins.
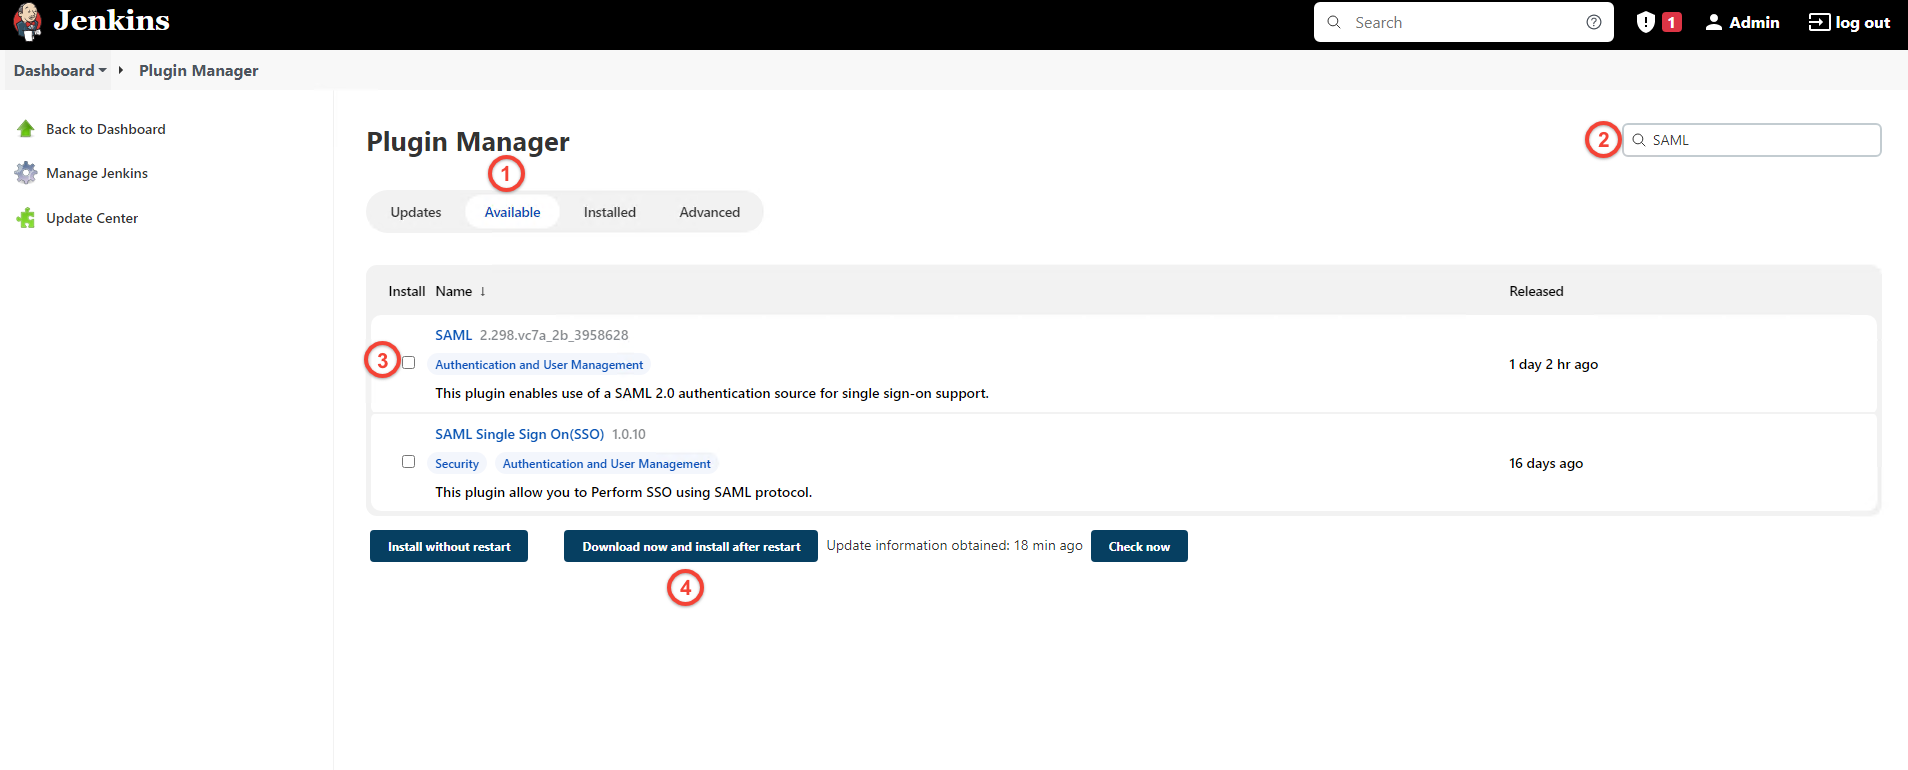
Next click Available tab, search for SAML plugin then install plugin and restart Jenkins.
For now, we will stop here on the Jenkins side and create a MonoSign application and related SAML key.
Creating an Application and Access Key on MonoSign
Create your application on MonoSign and make sure you typed Jenkins URL to URL input.
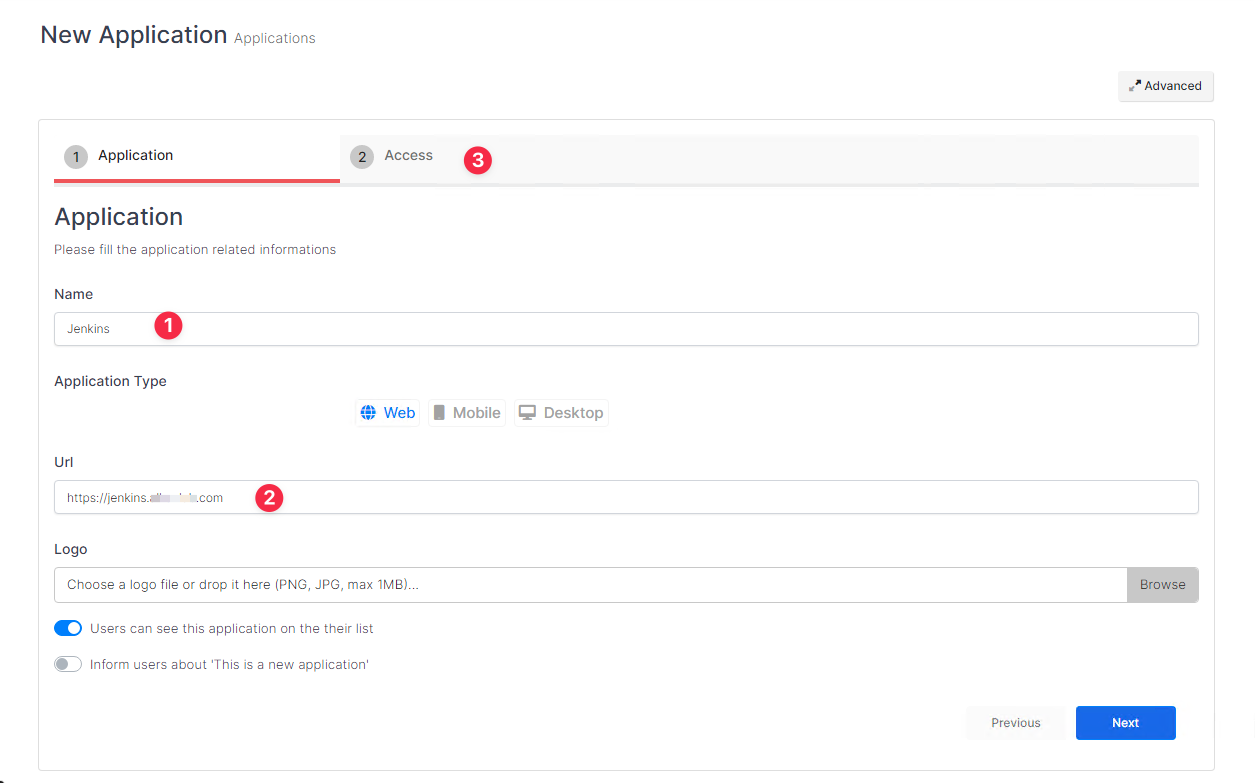
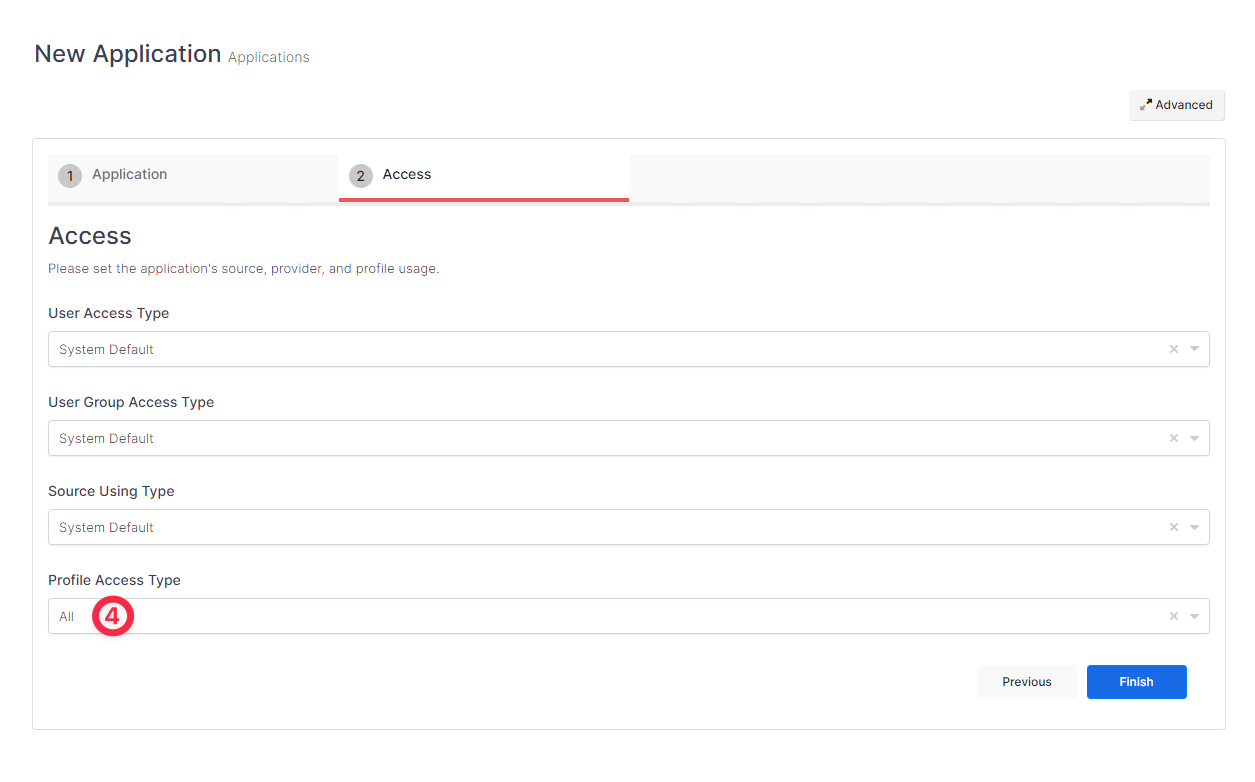
Next switch to Access tab and select Profile Access Type value as All.
Once you created the application and navigated to the detail page, click Keys and Add New Key to create a SAML access key.
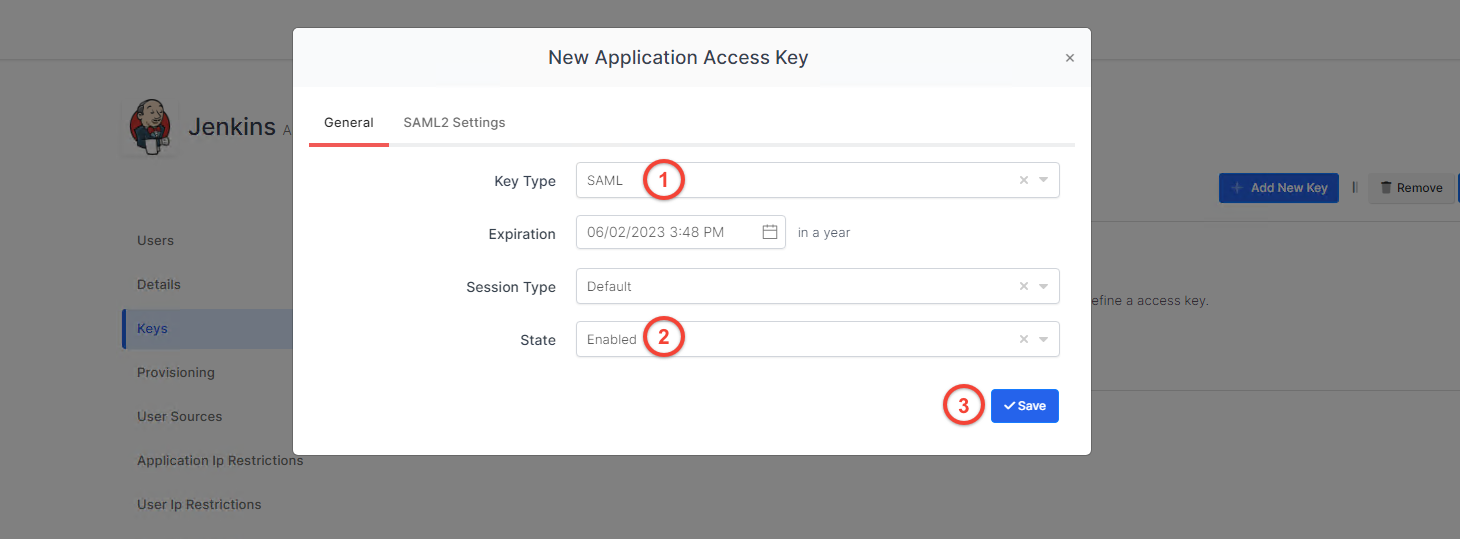
In the opened modal, choose SAML as Key Type and switch to SAML2 Settings.
Fill in the necessary fields and add some Extra Attributes according to the information provided by Jenkins. Correspondings of the fields are as below.
Field | Value |
|---|---|
Assertion Consumer Url | https://<your.jenkins.url>/securityRealm/finishLogin |
Entity Id | https://<your.jenkins.url>securityRealm/finishLogin |
Name Id | UserName |
Relay State | https://<your.jenkins.url> |
Logout Url | https://<your.jenkins.url>/securityRealm/finishLogin?logoutendpoint=true |
Exclude Not Before From Subject | Active |
Enable Group Mapping | Active |
Extra Attributes | |
|---|---|
username | {{UserName}} |
{{Email}} |
Click Save and you are gonna see your configuration for your access key as follows;
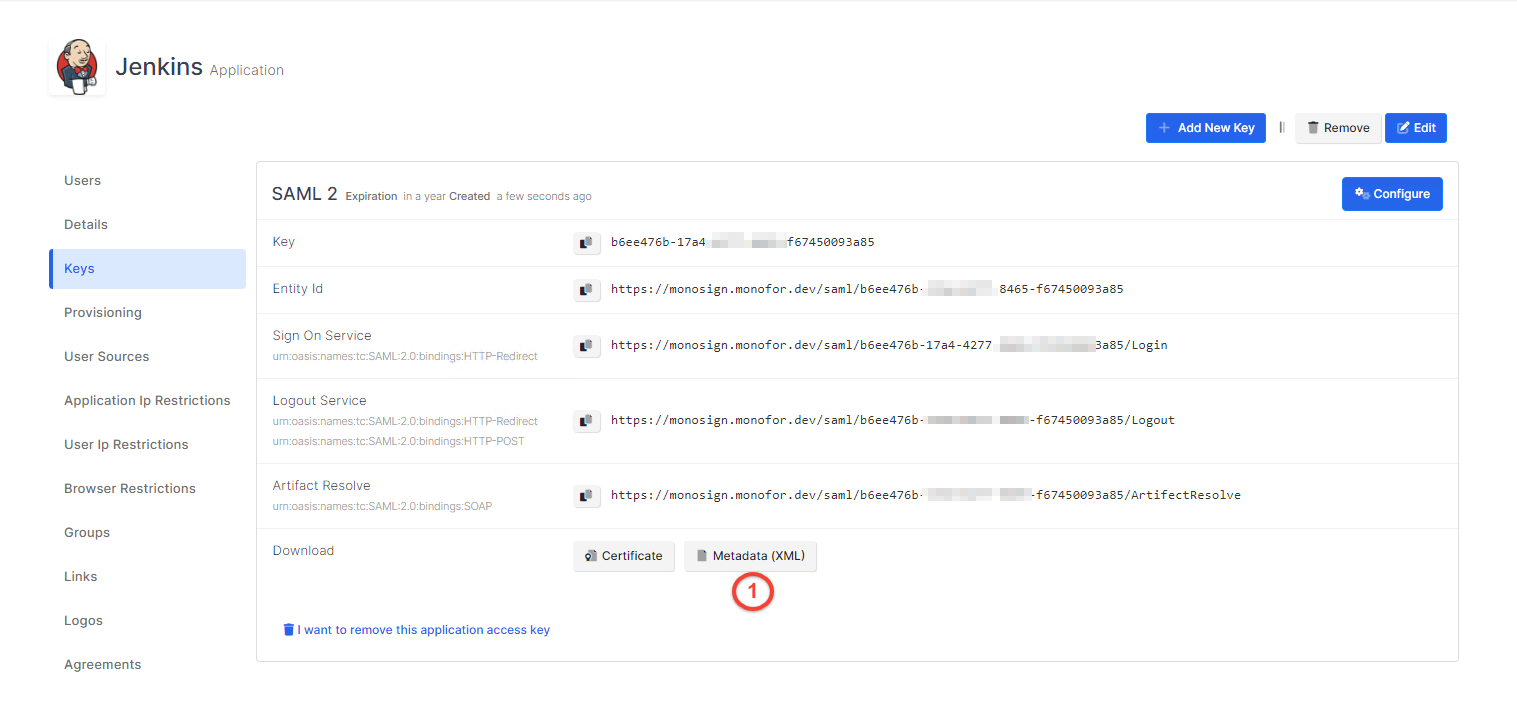
Configuration Single Sign-On for Jenkins
We are gonna move on to where we left off on the Jenkins Configure Global Security page.
Select SAML 2.0 option as Security Realm type.
Paste the content of the XML file you downloaded from the Keys page of the application you defined in MonoSign.
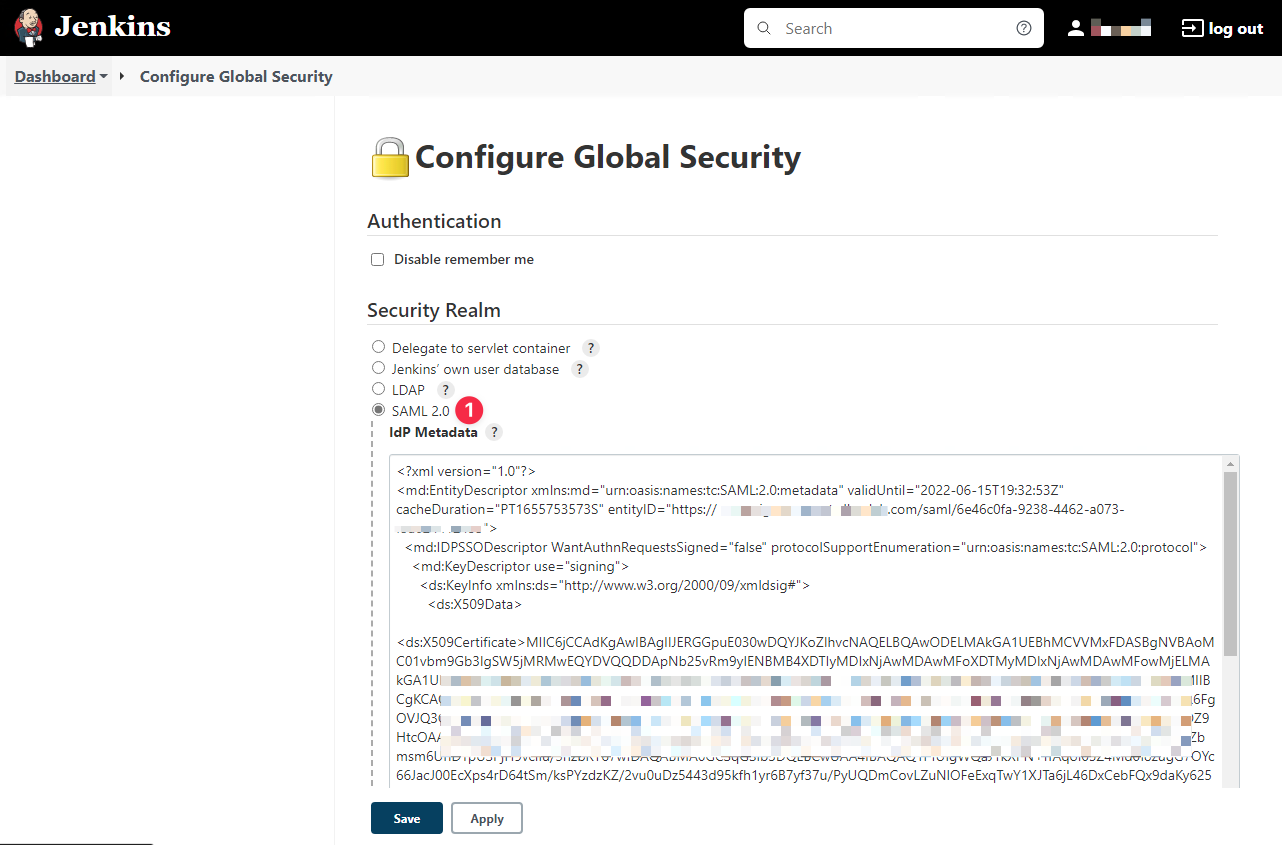
And fill the UserName and Email attribute fields.
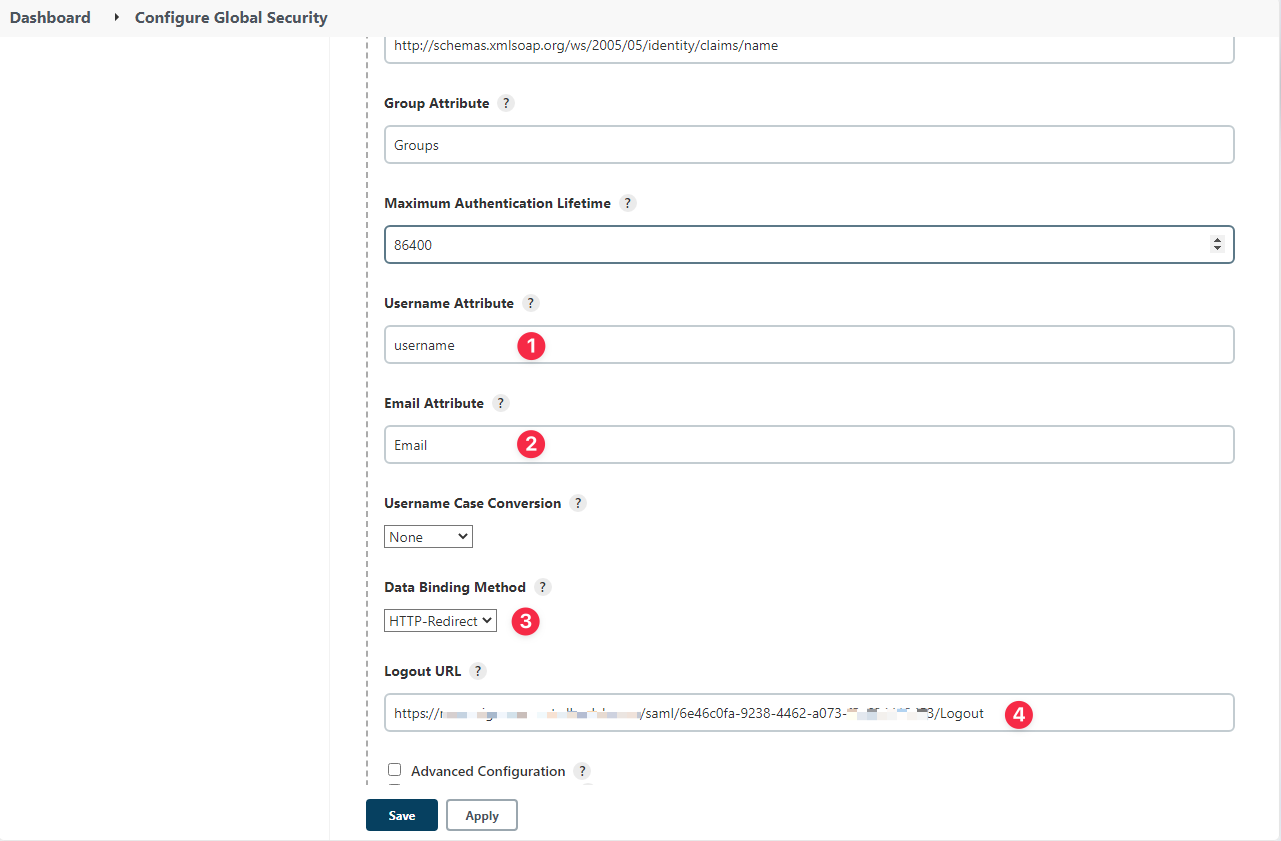
Click Save.
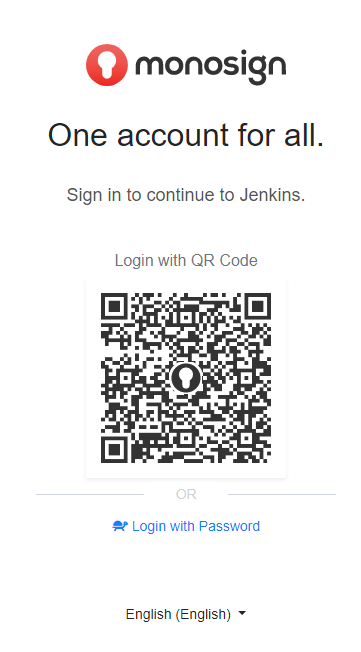
Now you can go to Jenkins Login page and test the SSO settings, Jenkins will direct you to MonoSign login page like as below.
If any error occurs while processing, please contact support.
