This document explains how to implement Monosign with Jira. It covers Single Sign-On. Before you continue, it is better to start with Jira’s Single Sign-On page.
📑 Instructions
This documentation contains 4 main steps for integration.
-
Creating an Application on Monosign
-
Configuration Single Sign-On for Jira
-
Assign a user to the Jira application
-
(Optional) Sync Users and Groups Using SCIM (System for Cross-Domain Identity Management) protocol
-
Sign-In Test
1- Creating an Application on Monosign
Create application on Monosign and configure your access policy.
While creating the Application, please click the Access tab and do the configurations as shown based on your use cases.
|
Property |
Description |
Options |
|---|---|---|
|
User Access Type |
Defines which Users will access to this application. |
Only Assigned Users
|
|
User Group Access Type |
Defines application’s user group access |
Only Assigned Users
|
|
Profile Access Type |
Defines Application’s user’s profile access |
Restricted - Only restricted user profile attributes
|
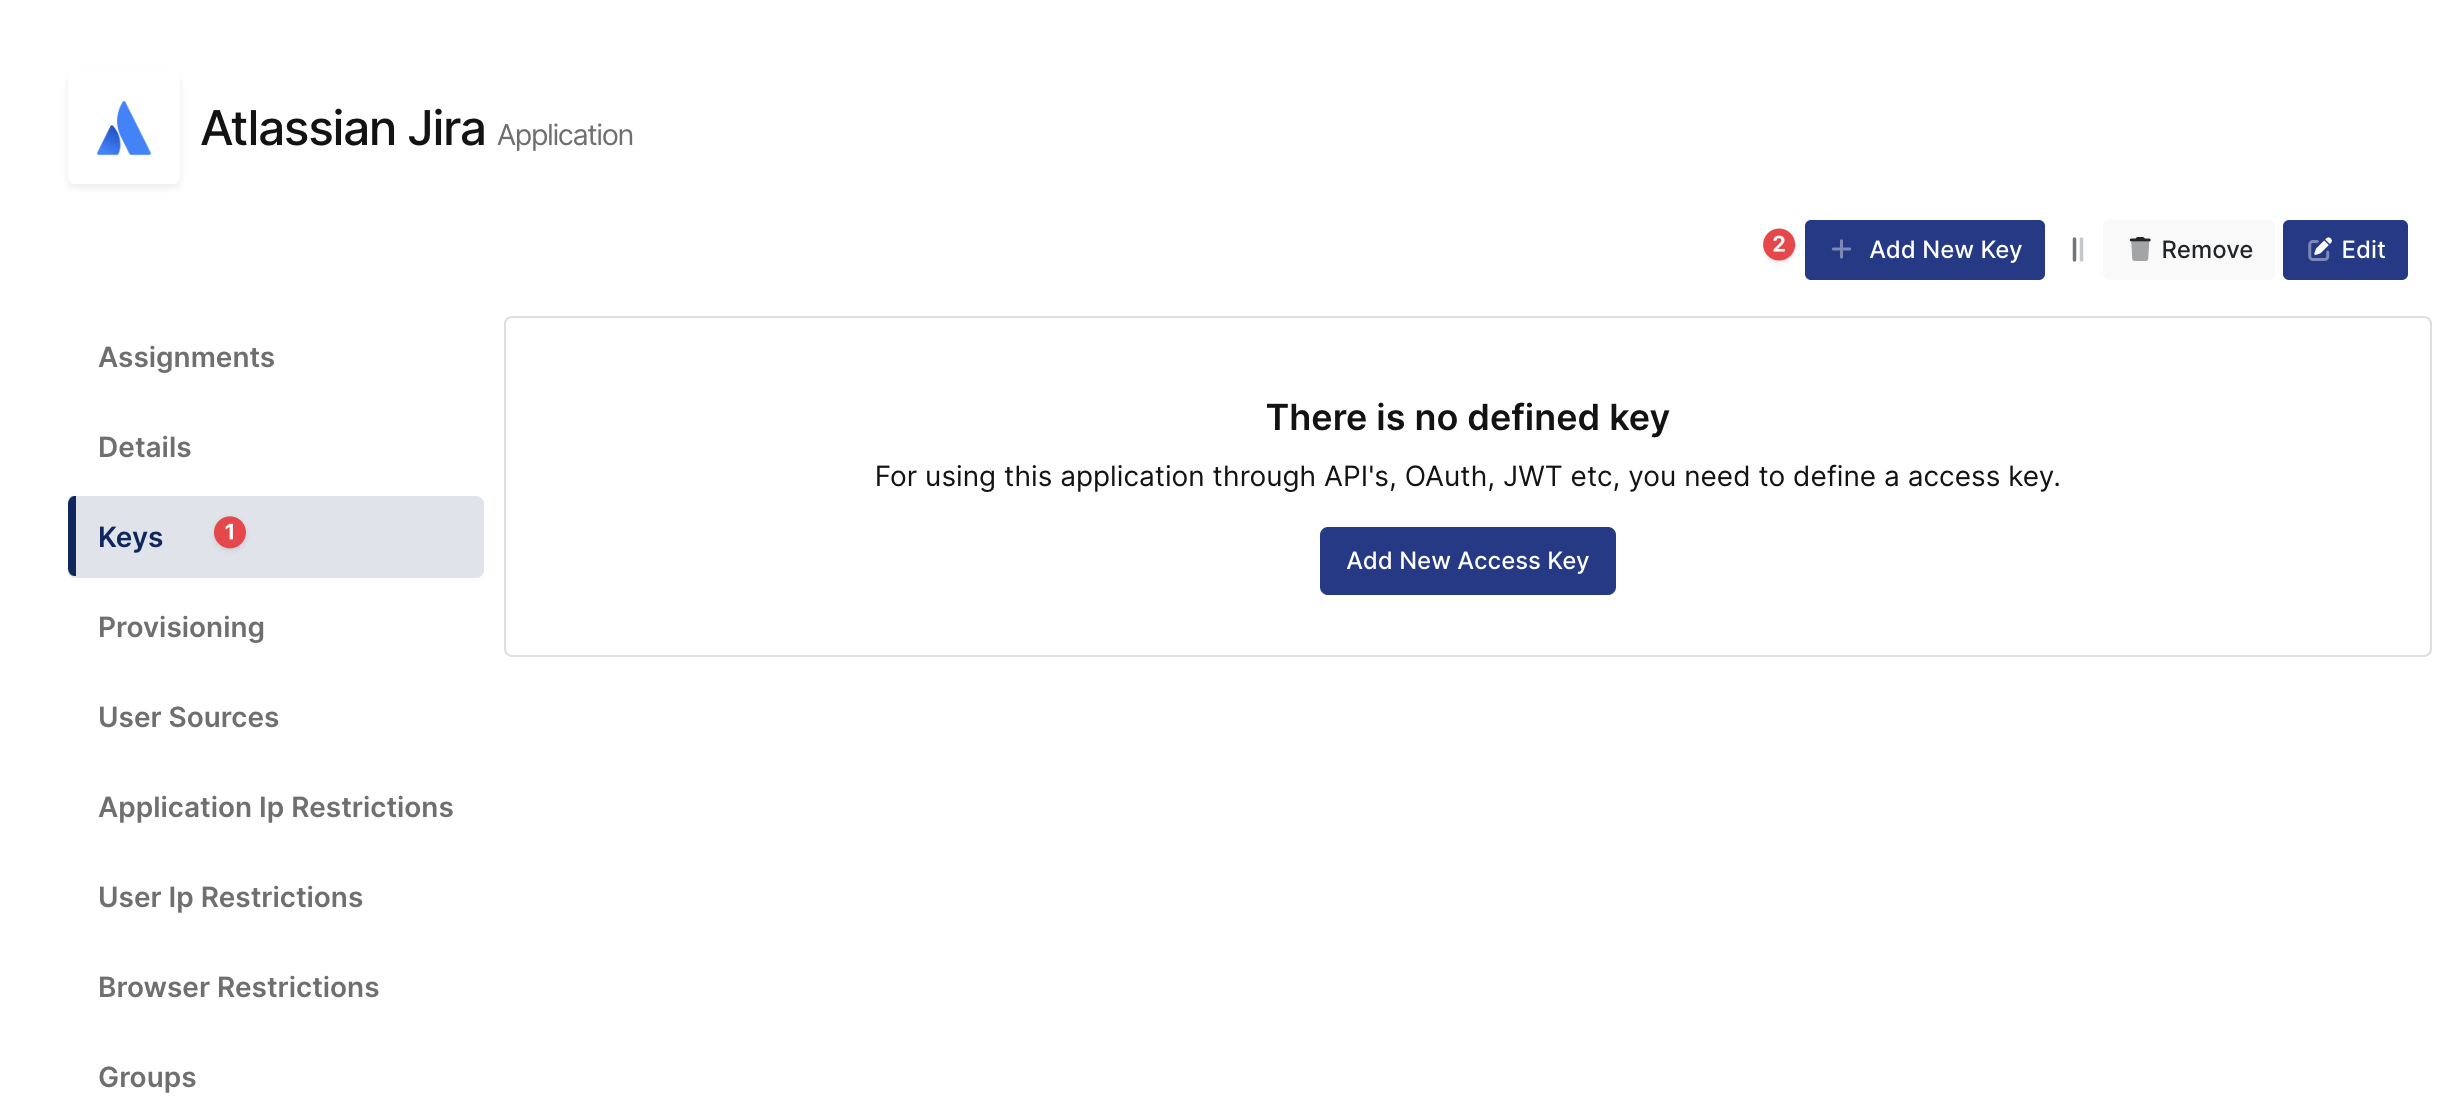
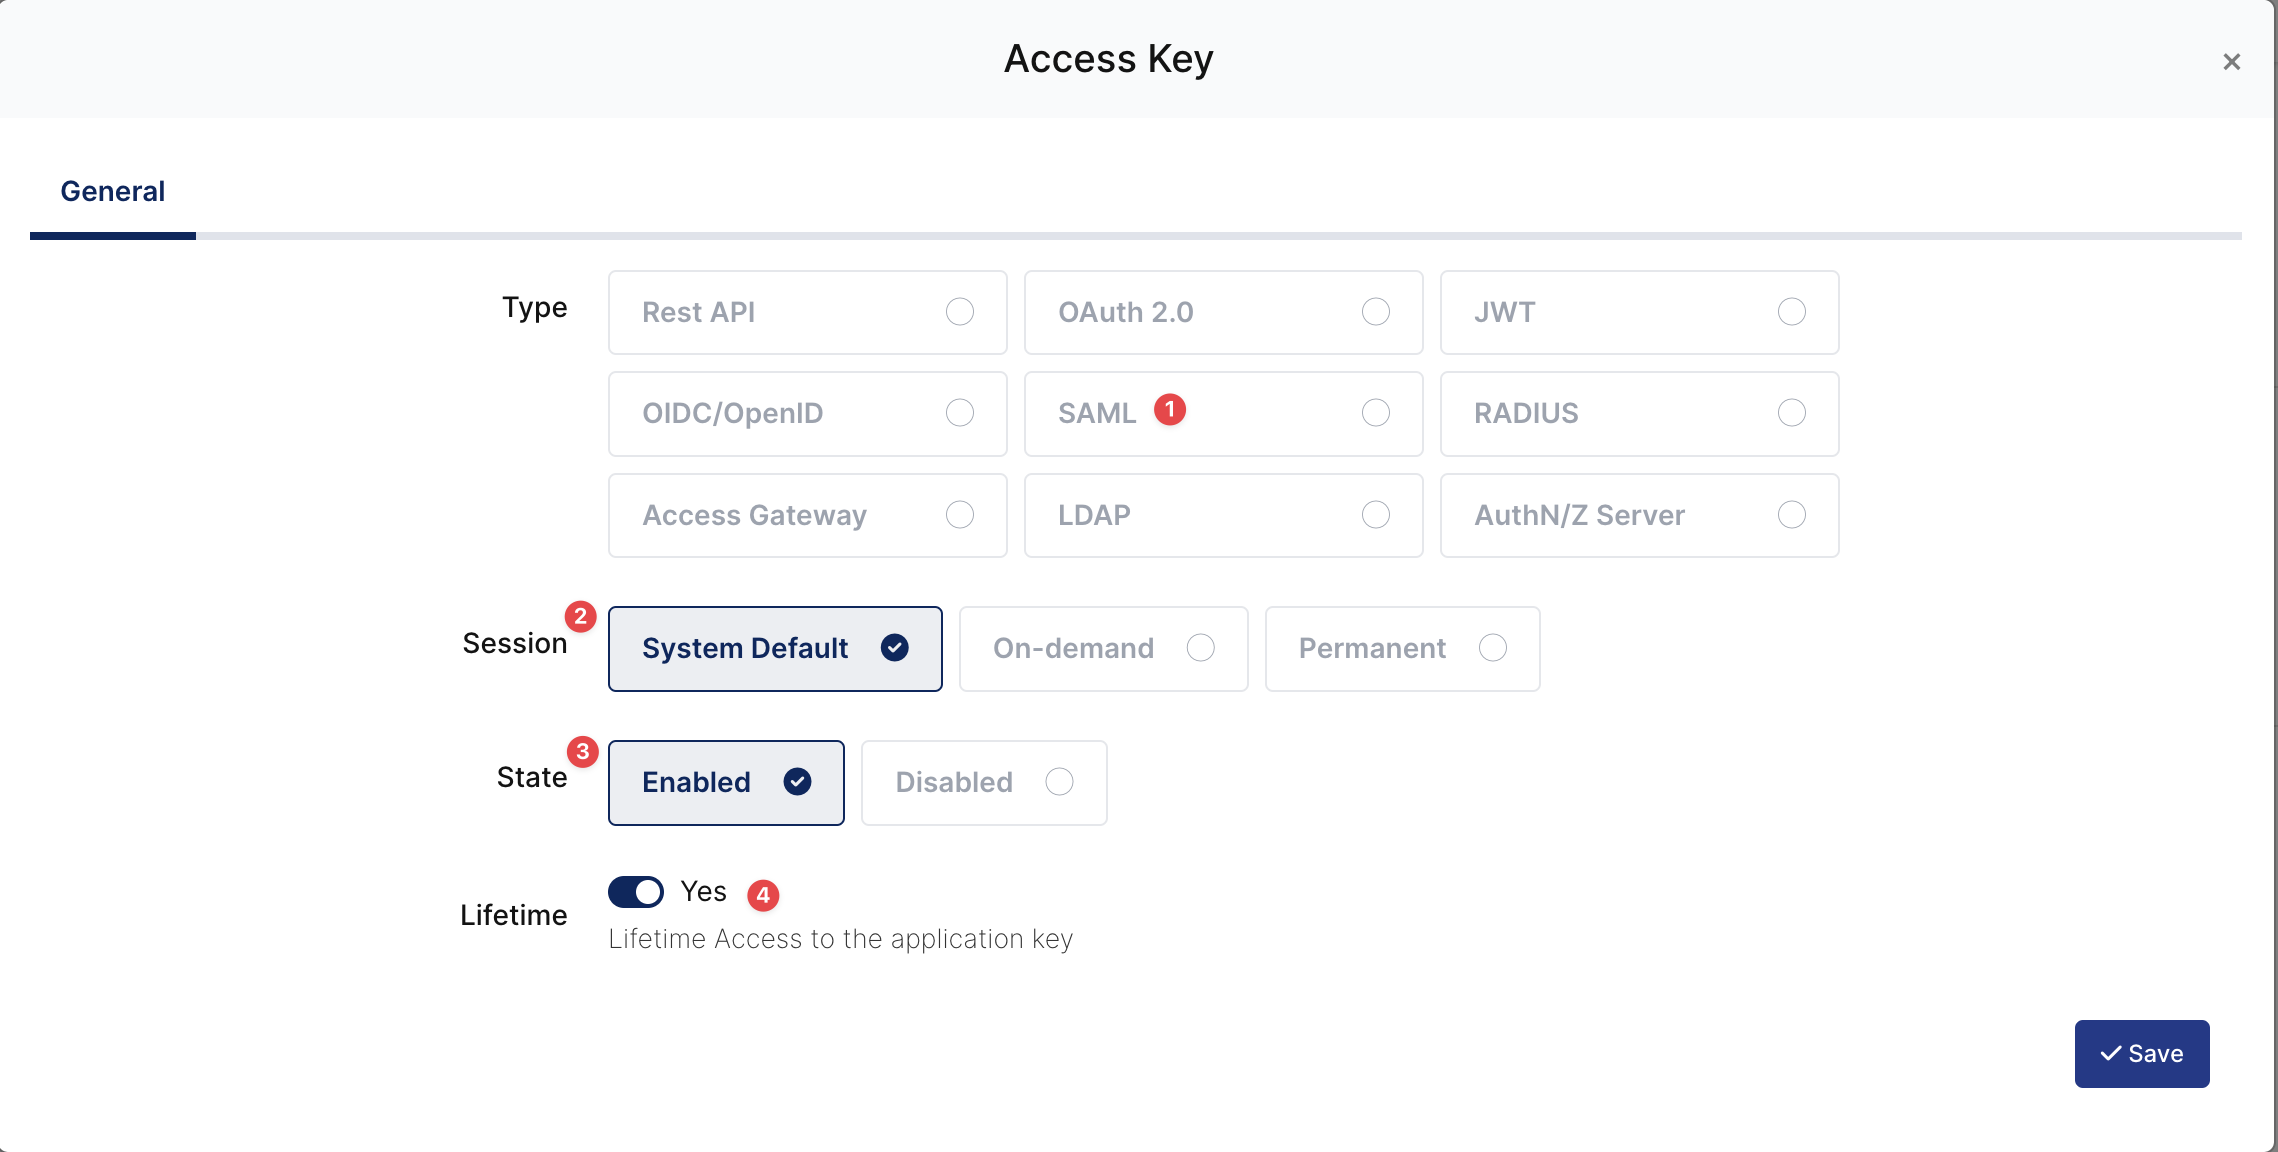
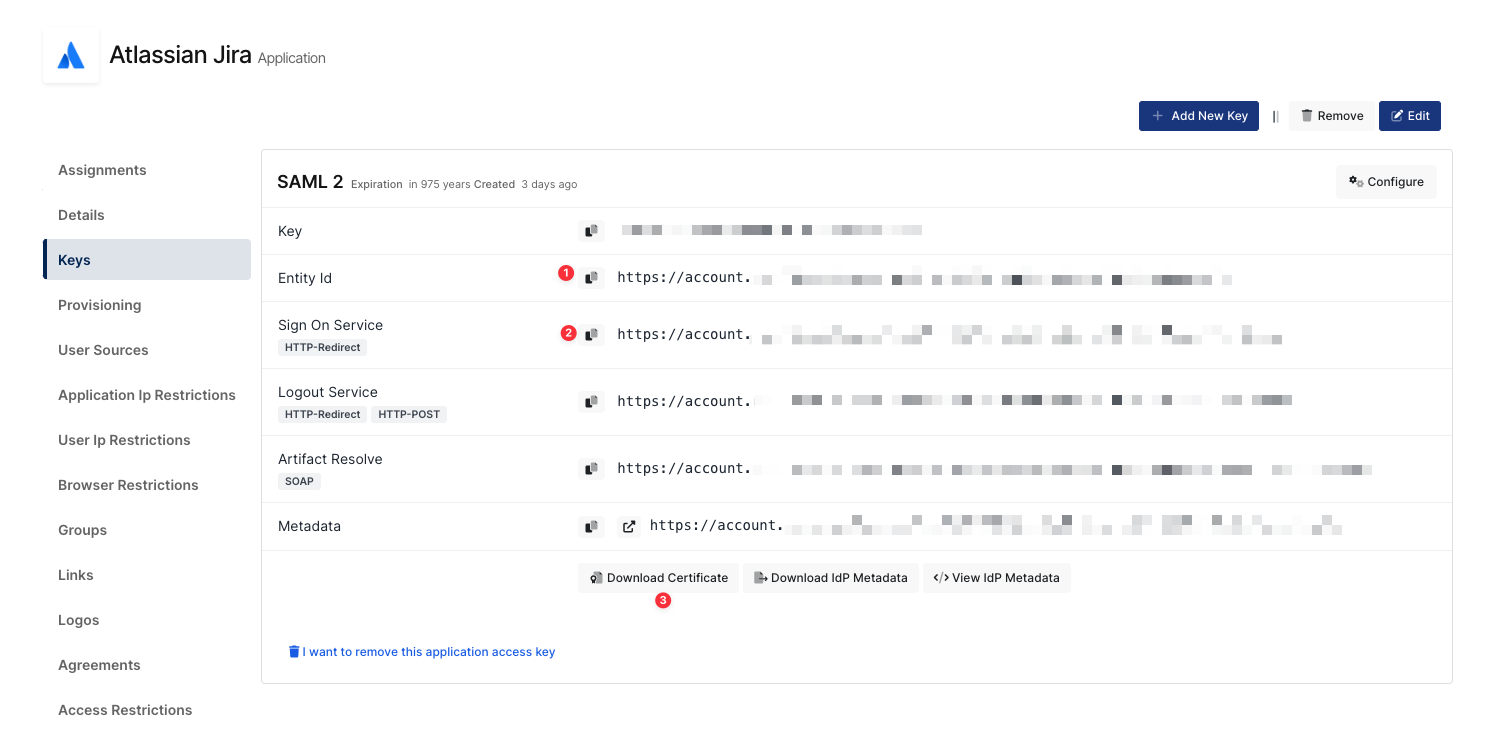
Once you create, click “Keys” and add a new Access Key for SAML Key for access.
This information will be necessary during the configuration of the Jira Application.
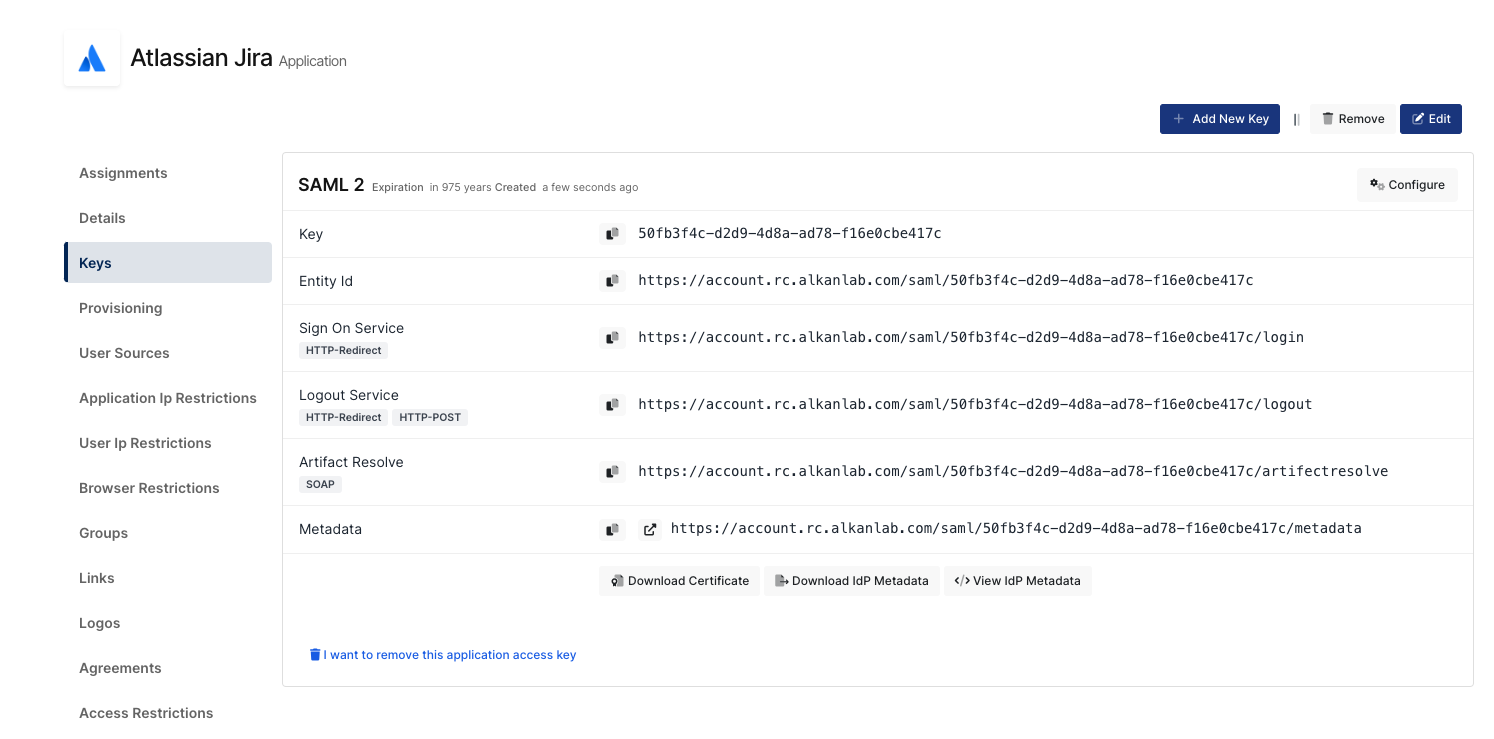
You are gonna see your configuration for your Jira application as follows;
2- Configuration Single Sign-On for Jira
As it highlighted at the beginning of document, please check out the Jira’s SSO configuration page first.
Please add your SAML settings to the application. The following information is needed for your configuration.
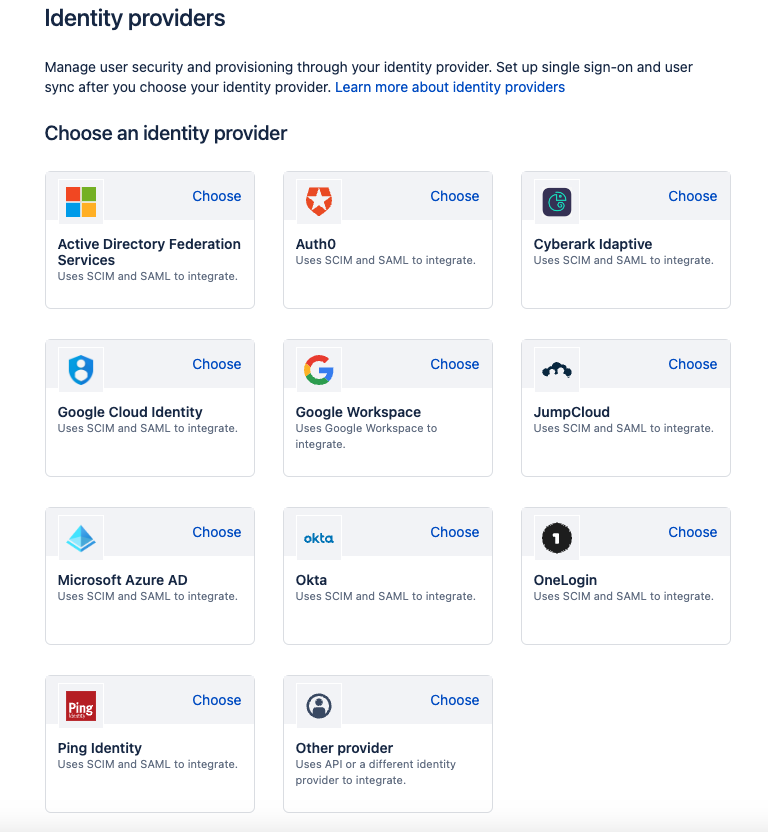
Go to admin page and select your organization if you have more than one. Navigate to Security > Identity providers and select identity provider Directory.
For Monosign SAML SSO please select the “Other Provider“ to configure your SAML Settings.
On the next step, please define the “Directory“. Select Set up SAML single sign-on and add SAML details.
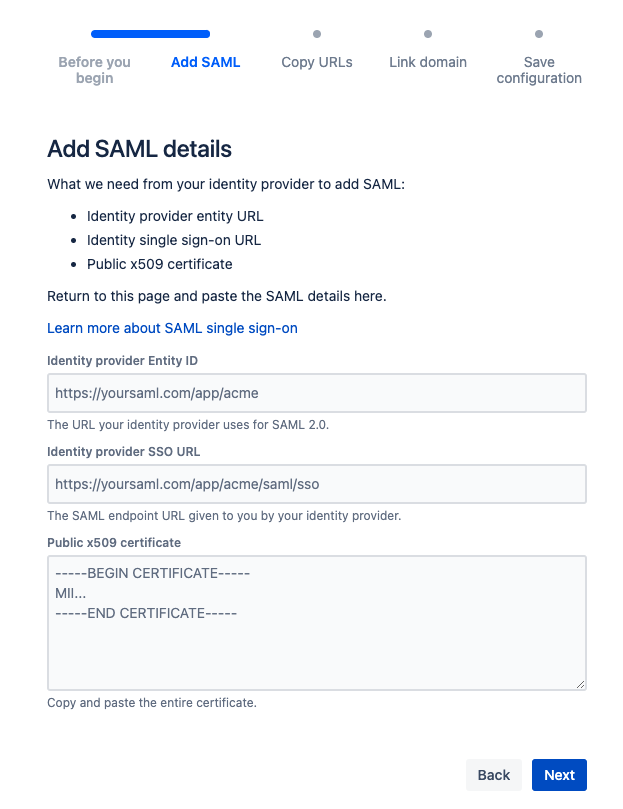
You need to map the property values from Monosign SAML to Jira SAML.
|
Jira Property |
Monosign Property |
Description |
|---|---|---|
|
Identity provider Entity ID |
Entity Id |
This value is the URL for the identity provider where your product will accept authentication requests. |
|
Identity provider SSO URL |
Sign On Service |
This value defines the URL your users will be redirected to when logging in. |
|
Public x509 Certificate |
Download Certificate |
This value begins with '-----BEGIN CERTIFICATE-----'. This certificate contains the public key we'll use to verify that your identity provider has issued all received SAML authentication requests. You can download the Certificate from Monosign. Open the file with the text editor and copy the certificate thumbprint. Please copy that value to Jira Certificate part. |
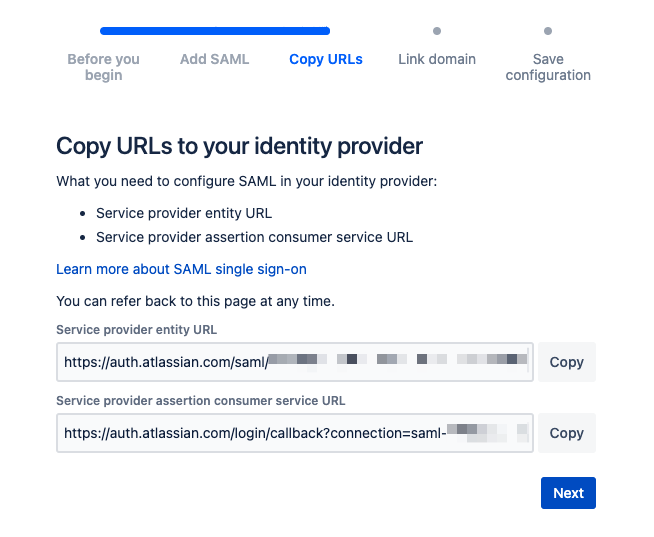
Go back to Monosign and configure the created SAML access key according to the information given by Jira. Correspondings of the fields on Monosign SAML configuration are as follows.

If you’d like to provision users with SAML Just-In-Time, you should send the extra attributes by adding them as shown above in the “Extra Attributes“ part. Just-in-time provisioning will not map the User groups to Jira.
|
Jira SAML Property |
Monosign SAML Property |
Description |
|---|---|---|
|
Service provider entity URL |
Audience |
The Audience value copied from Jira. |
|
Service provider assertion consumer service URL |
Assertion Consumer Url |
The Assertion Consumer Url value copied from Jira. |
Lastly, give access to your users and try logging in.
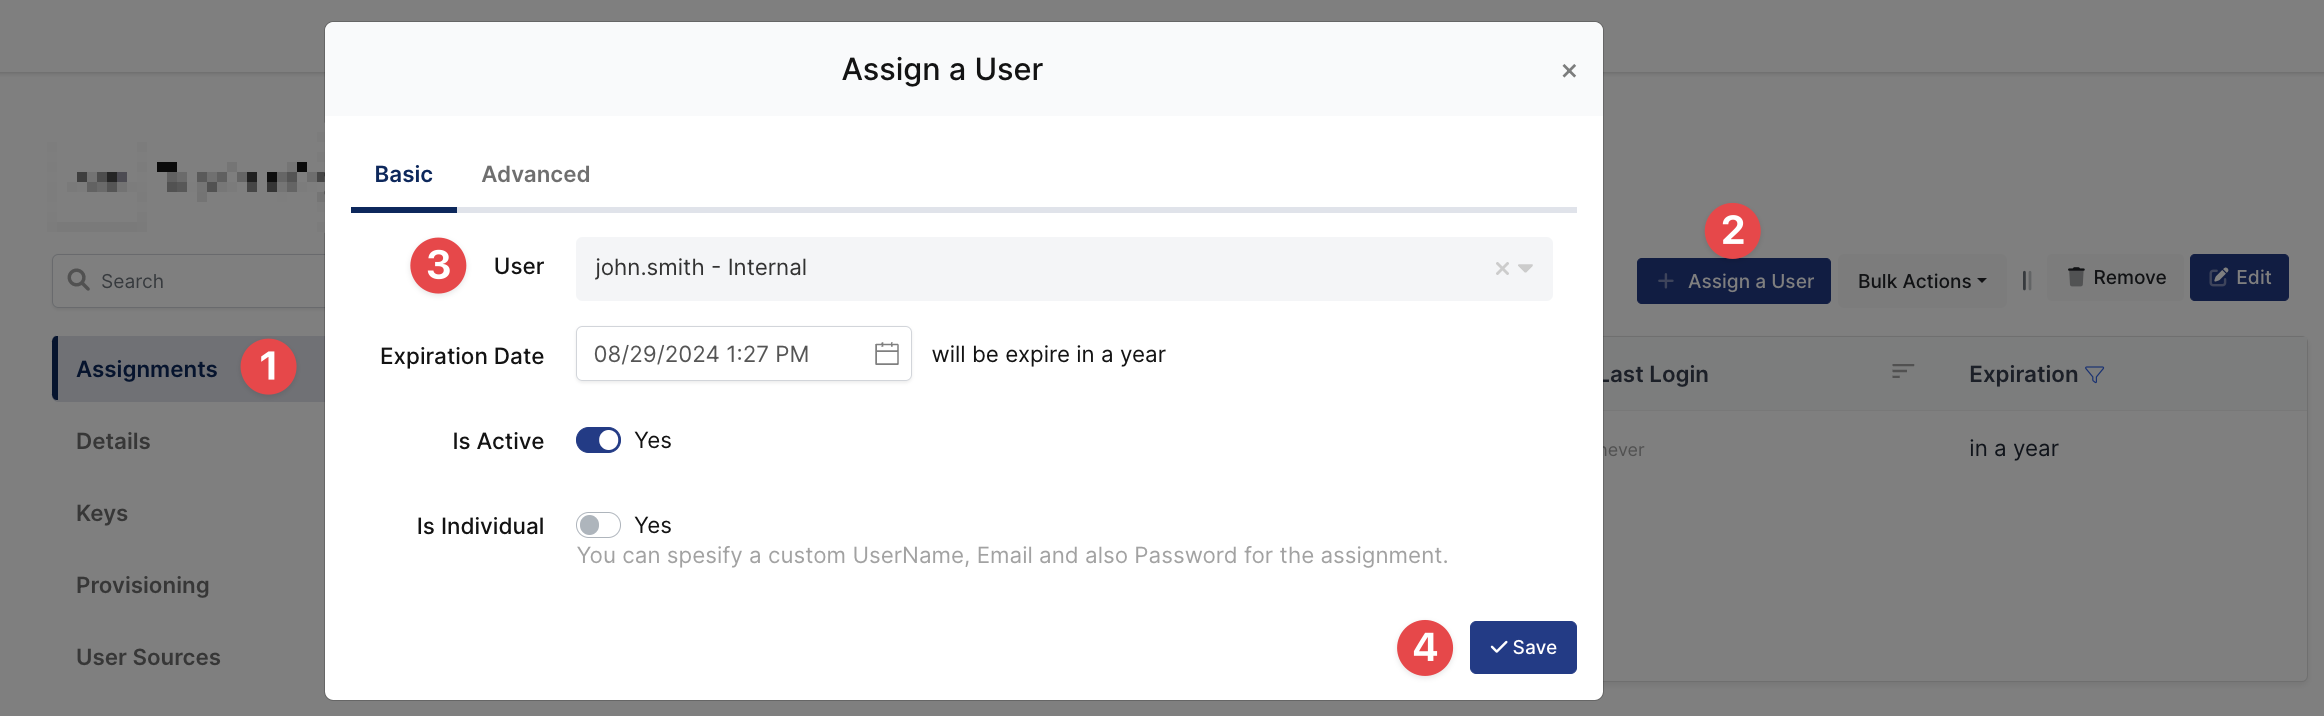
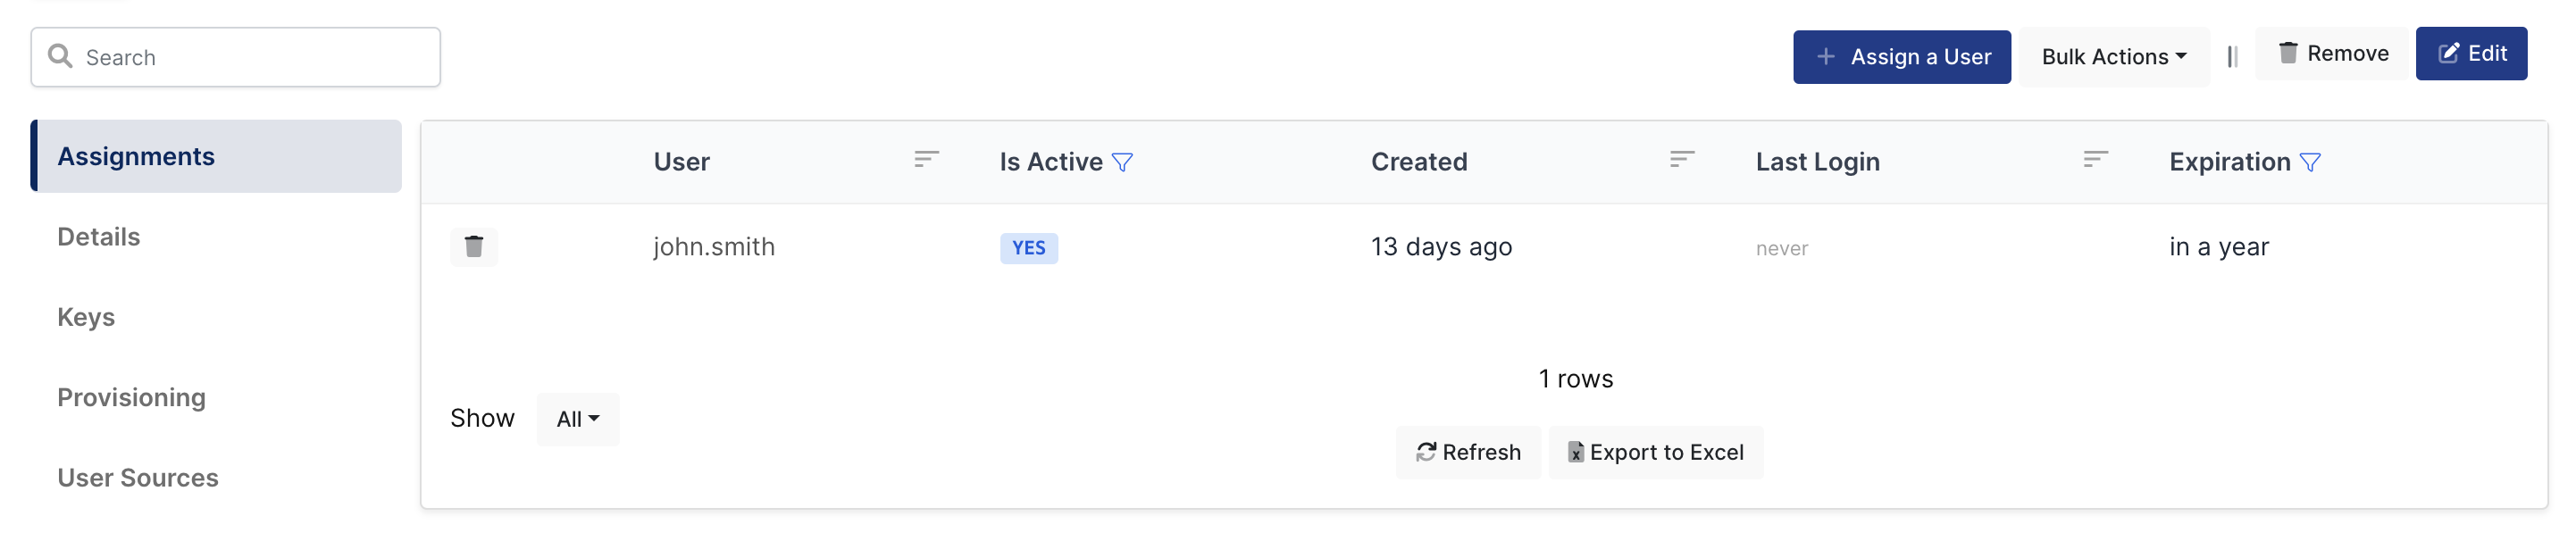
3- Assign a user to Jira application
Please follow the below instructions on how to assign a user to the Jira application. In this example john.smith will assign to the application access.
4 - (Optional) Sync Users and Groups Using SCIM
Users and Groups can be synced to the Jira using SCIM Protocol. To do that please go to the admin page and select your organization if you have more than one. Navigate to Security > Identity Providers and select the Identity Provider.
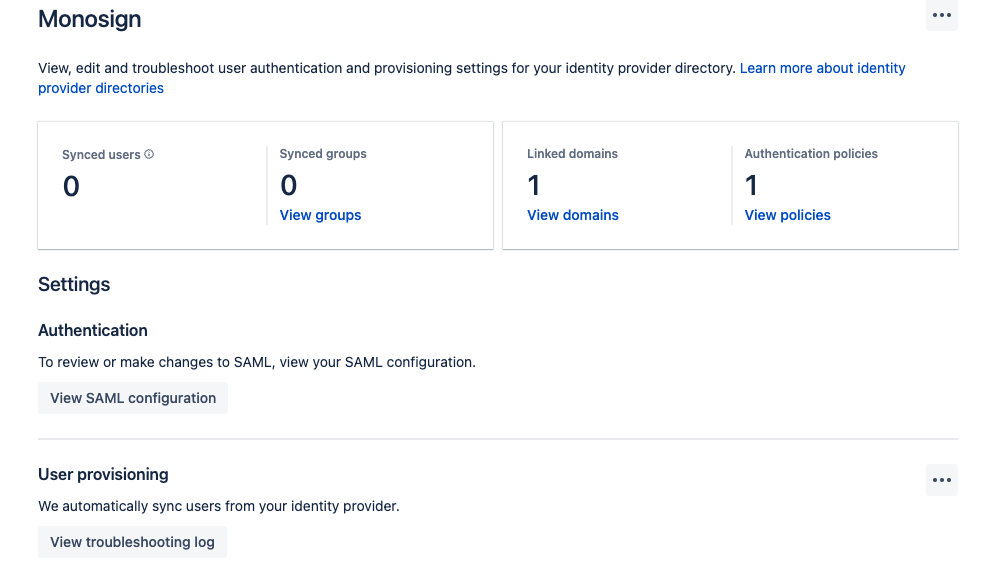
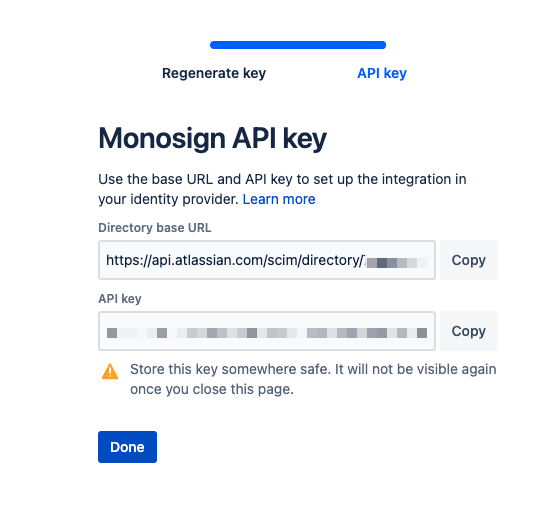
On the “User Provisioning“ part, please click the three dots and click the “Regenerate API Key“ button.
5 - Sign In Test
Now try login. Navigate to the Jira application. Click Monosign on the UI.
If everything is well configured, the page will be redirected to Monosign’s login page. It can be log in passwordless with QR code or type username and password.
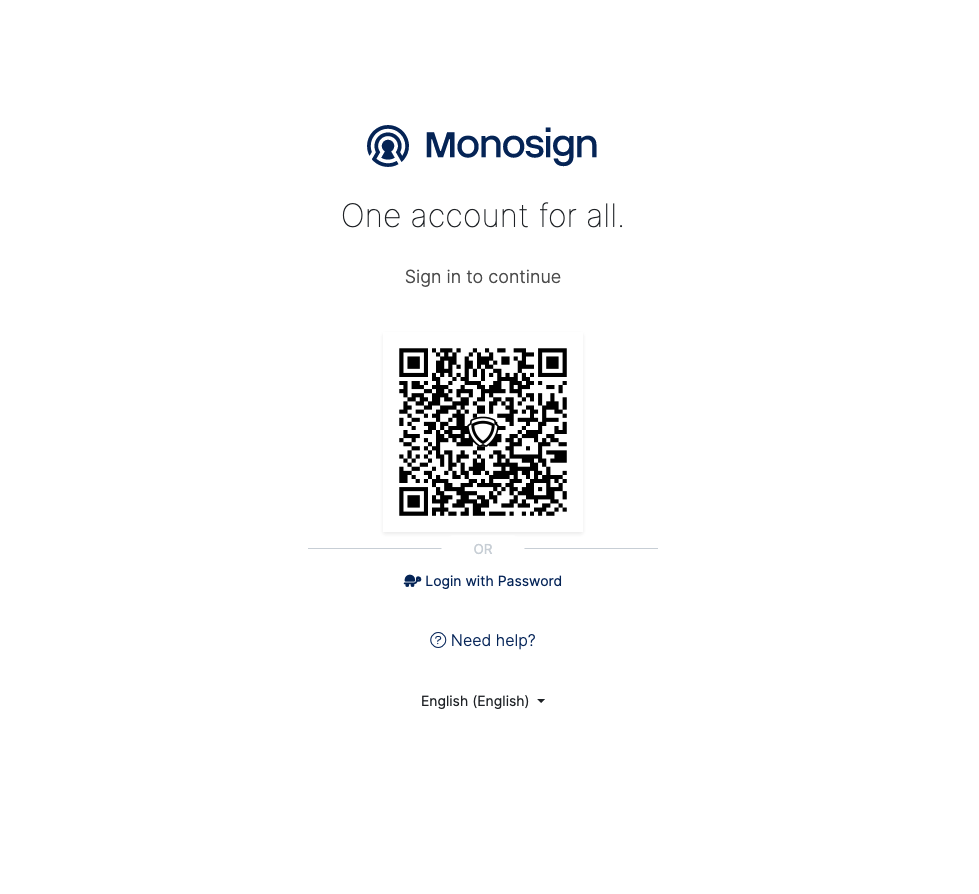
When the user logs in, the page will be redirected to Jira’s home page.