This integration will help you to integrate Monosign with Office 365. Following these steps will change your current authentication method on Microsoft/Office 365 Applications such as Mail, Calendar, Teams, etc. You can revert these settings with just one command if you are unsatisfied with the result.
This will help you add your IdP (your Identity Provider) to your Microsoft/Office 365 Applications such as Mail, Calendar, Teams etc., and secure them with SSO and Multi-Factor Authentication.
📘 Instructions
This documentation will contain 5 main steps for integration.
-
Creating an App Registration on Azure Portal for your Office 365 integration.
-
Sign in to Your Office 365 Account
-
Create App Registration for Provisioning
-
-
Creating an Application on Monosign for Office 365.
-
Disable MFA on Azure Portal.
-
Disable MFA on MFA Settings
-
Disable Password Reset and Registration
1. Creating an App Registration on Azure Portal
a. Sign in to your Office 365 Account
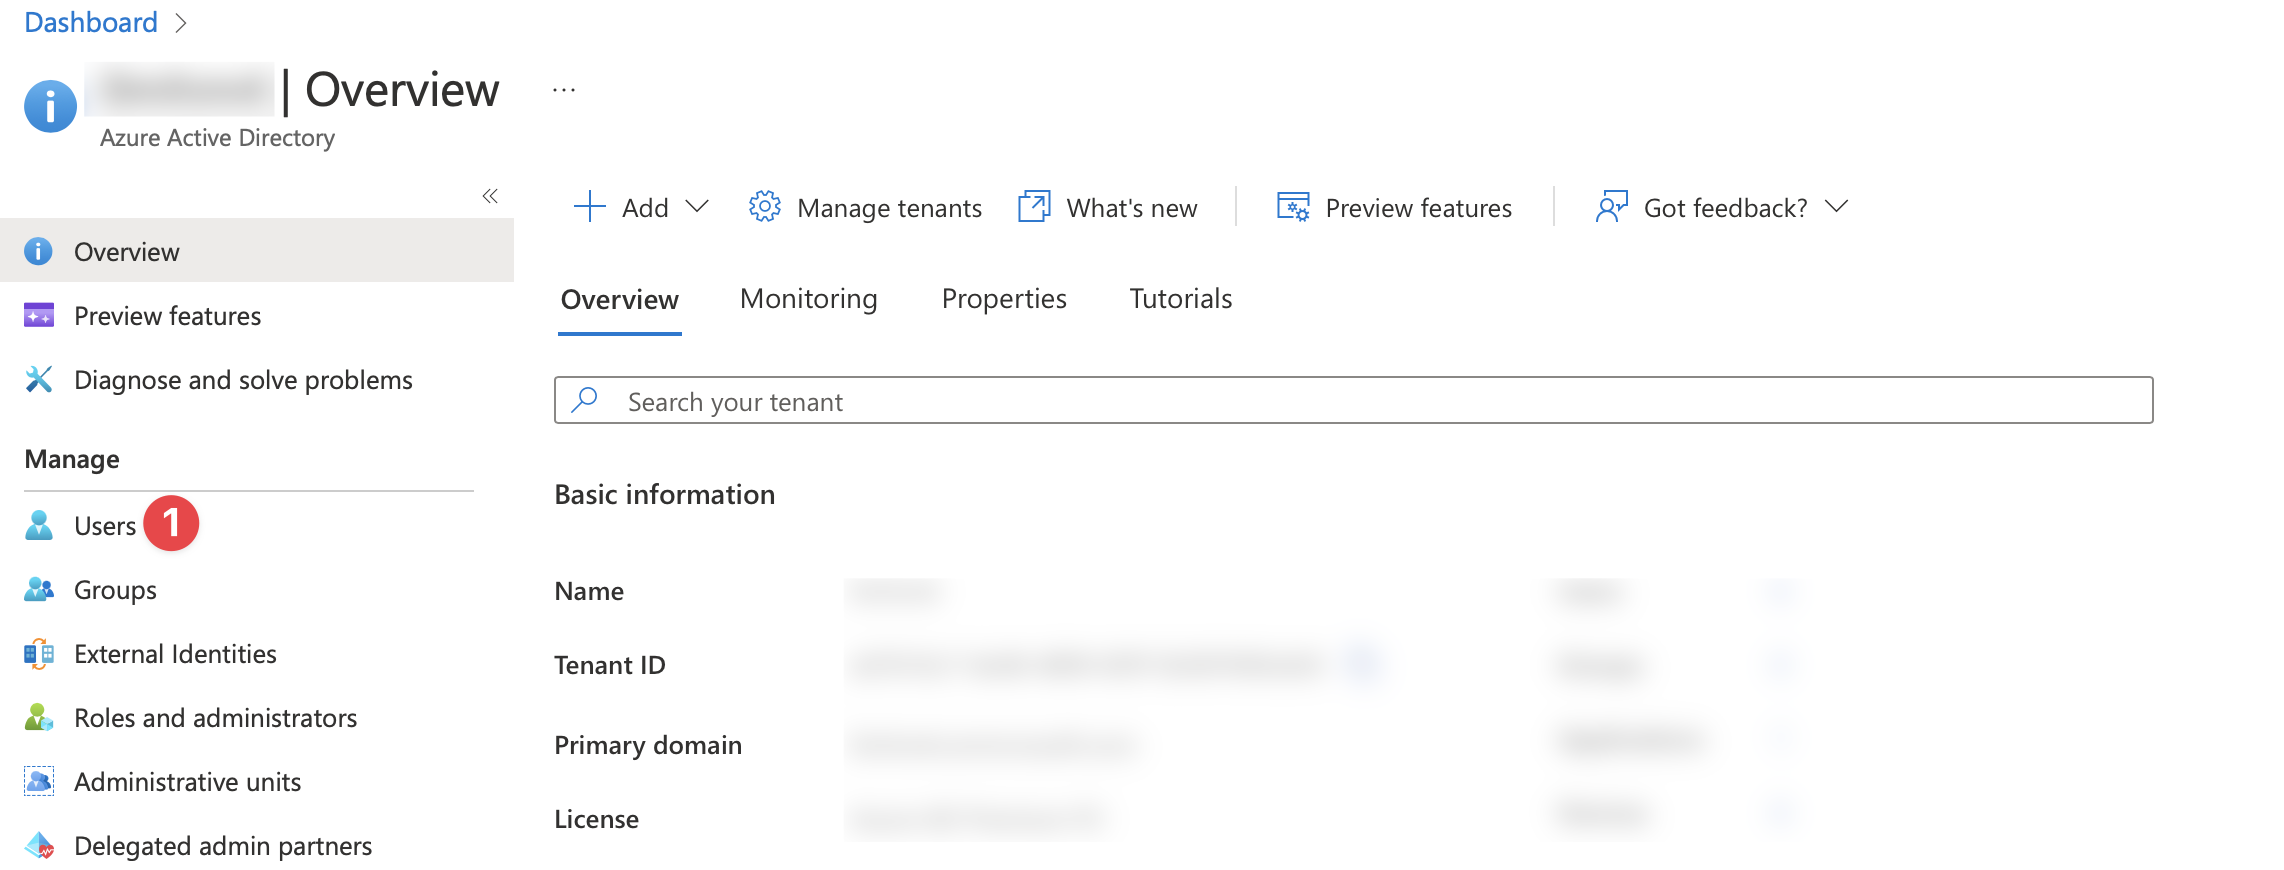
Go to Microsoft Entra admin center (formerly Office 365 Admin) and sign in.
Navigate to Setup then click Domains.
Your Microsoft (Office) 365 domain name should be listed here. If you don’t have one, you need to set it up before you continue.
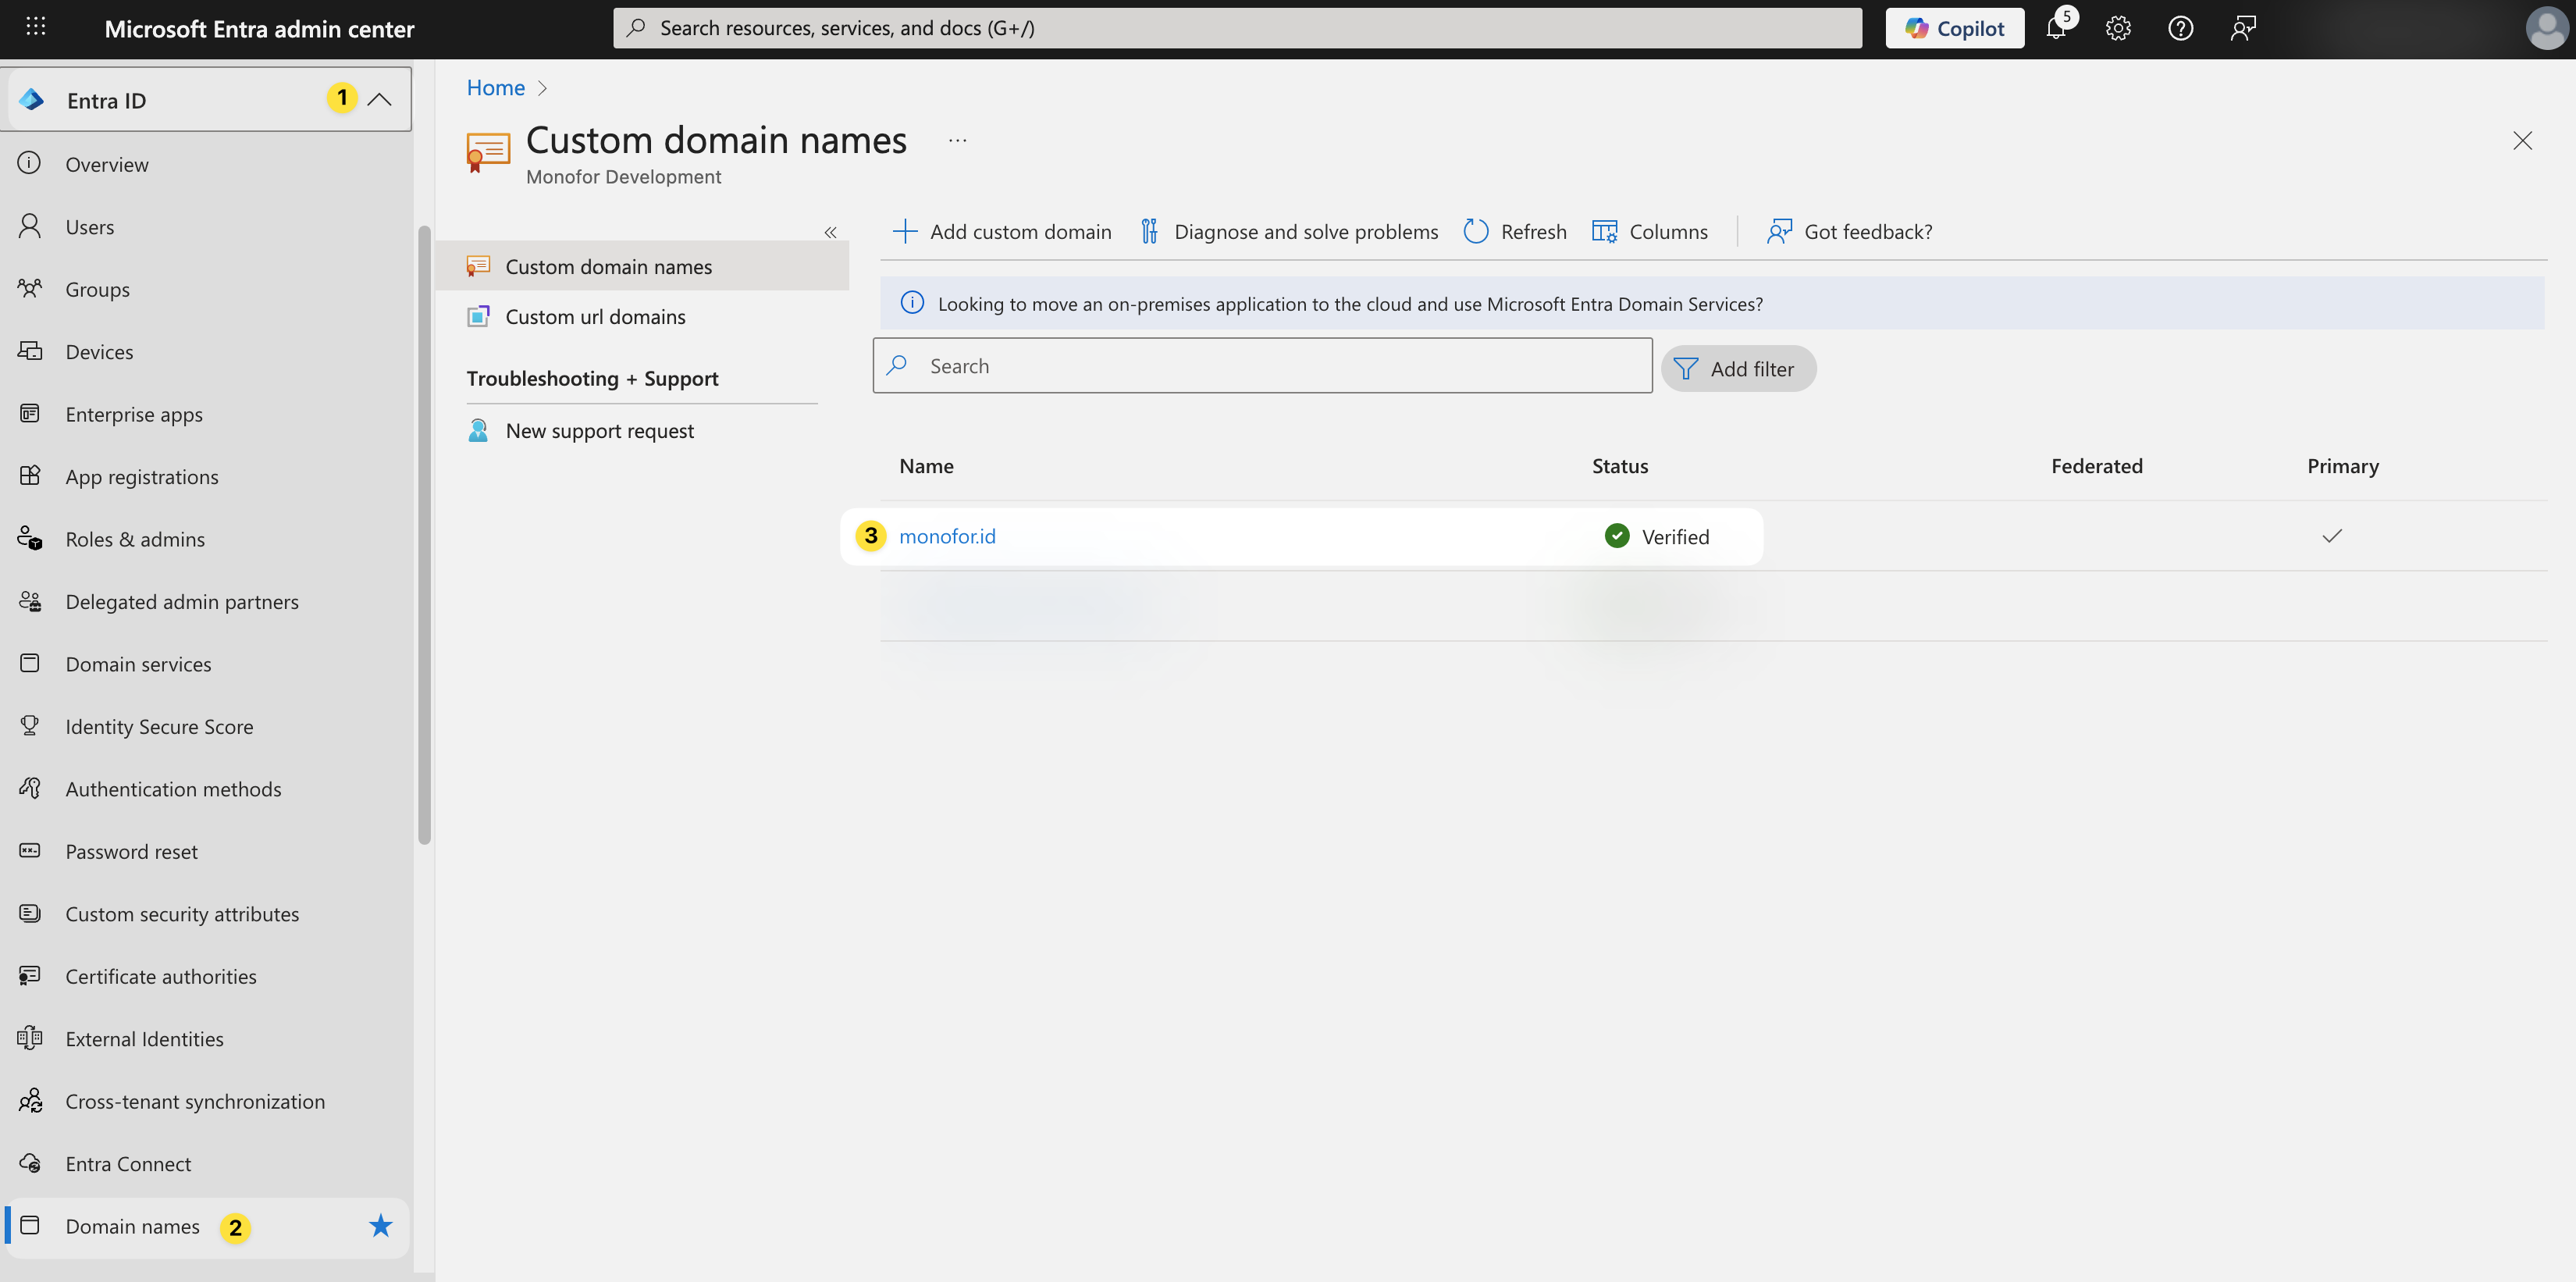
Your domain name and tenant name should be noted. For this example;
monofor.id is my Domain Name and Monofor is my tenant name.
When you validate your domain name, you will be able to download and run PowerShell Script on your computer and apply settings to your Microsoft (Office) 365 tenant.
From now on, we are gonna need to create an Application on Azure to talk with (for Provisioning and Updating User Profiles) Azure Active Directory for Microsoft 365 Applications.
b. Create “App Registration” for Provisioning
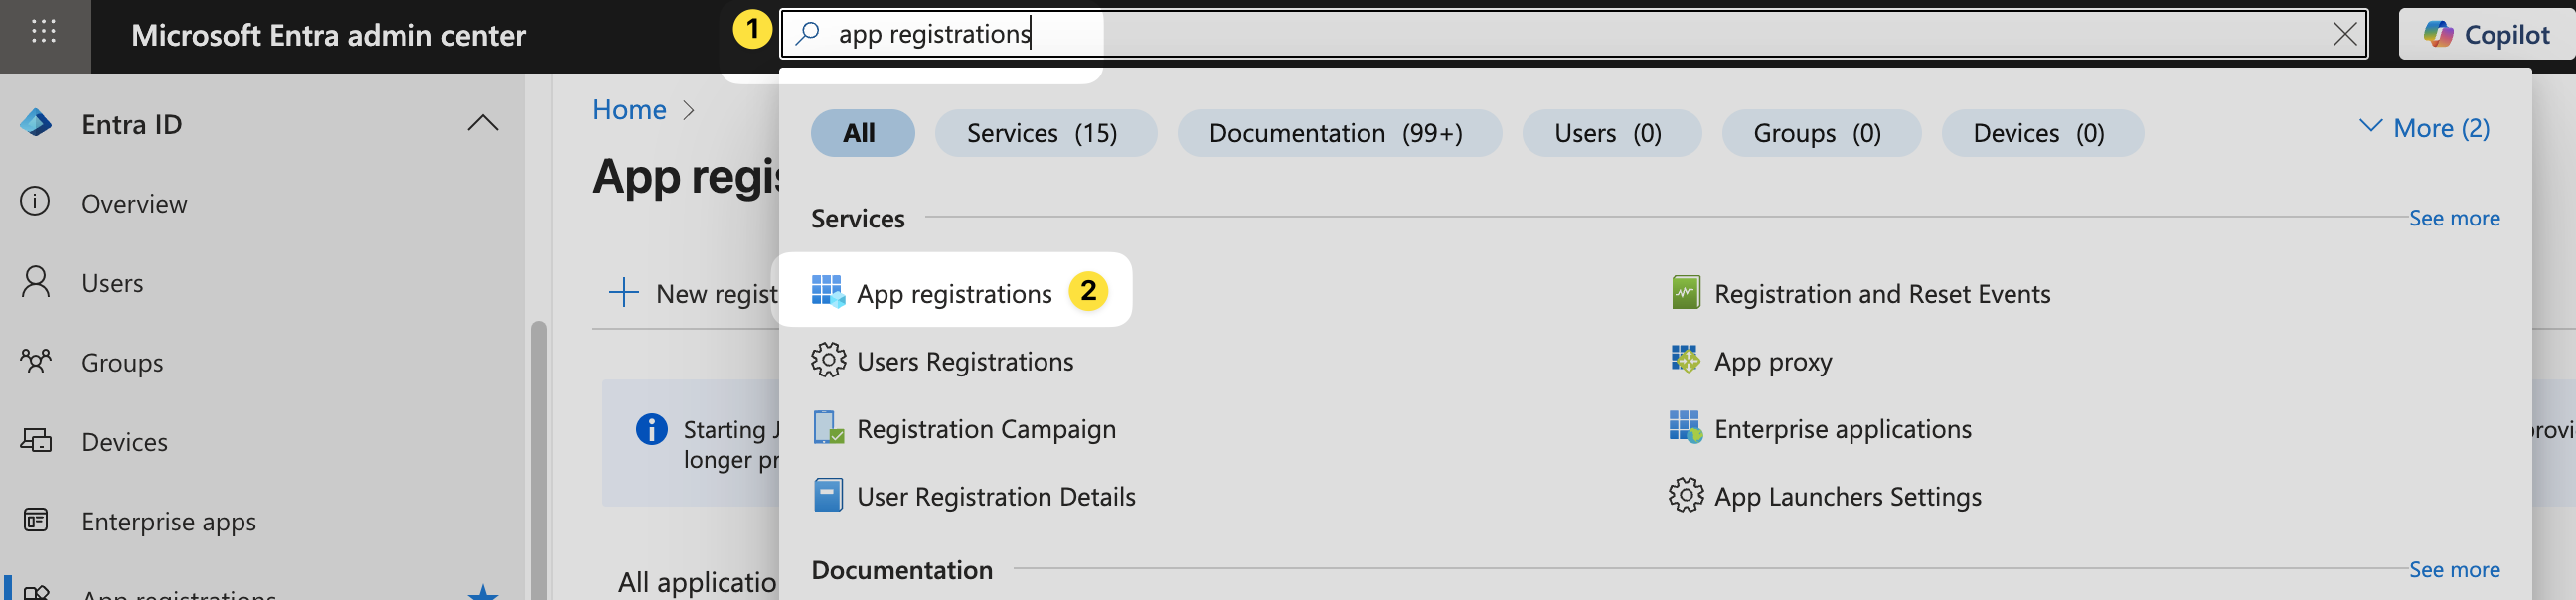
Once you have applied your settings, you also need to create an App registration on Microsoft Entra admin center. We will need Tenant Id, Client Id, and Secret after the App registration.
Navigate to Microsoft Entra admin center again and, click search, and type “App registrations” (or click App registrations under the Entra ID menu) then click the first option.
Click the New Registration button and fill in the following settings.
And then click Register.
After that, you also need to create “Secrets” for the application and also need to add “API permission” to that. Let’s create “Secret” first. Click “Certificates & Secrets” and then “New client secret”.
Type the following settings;
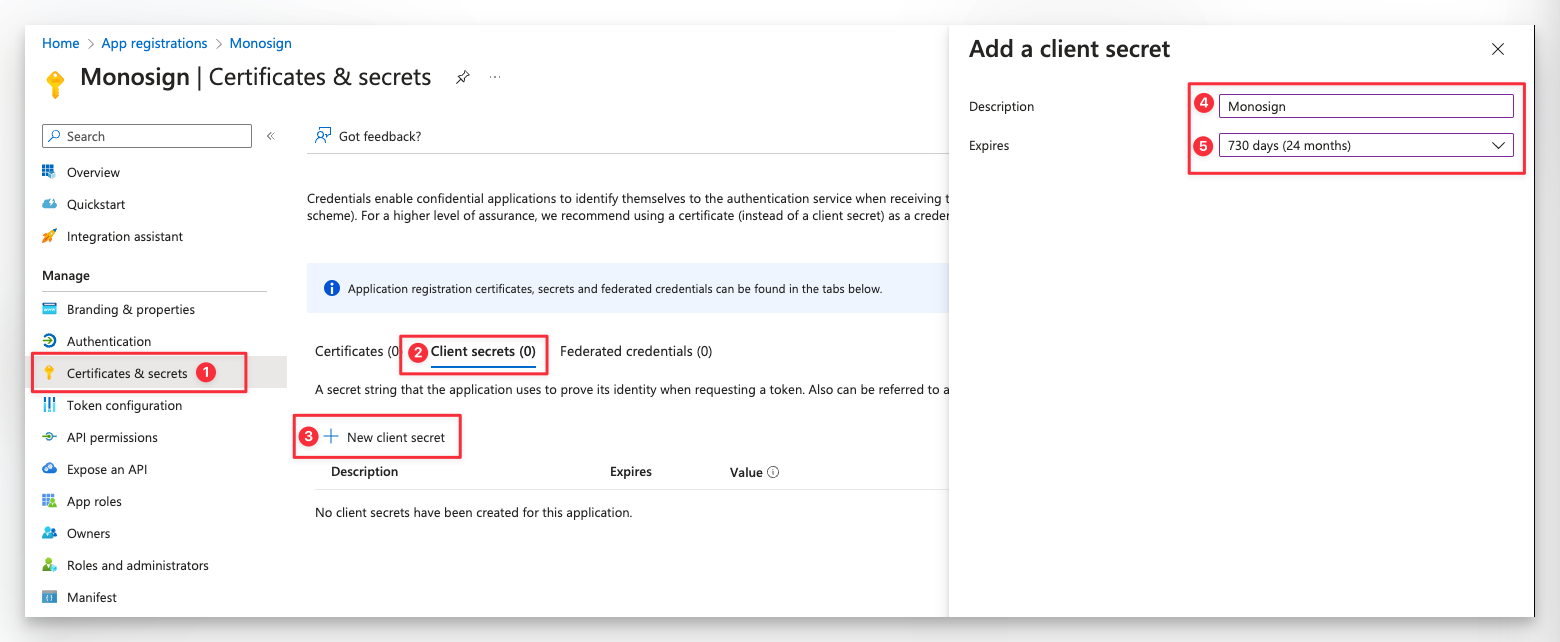
And click “Add”. You need to copy “Secret Value”. We will add this information to the Monosign later. Once you have seen this value, you wont be able to see it again. If you lost it, or need it again, you need to create a new one and use that value in Monosign.

Go to the Overview and copy the Application (client) ID and Directory (tenant) ID from the Overview Page.
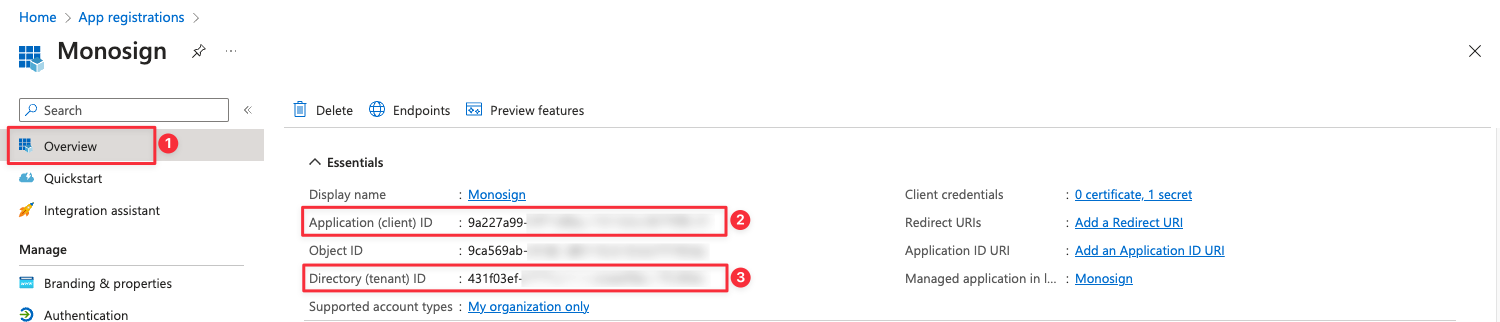
Now, we have 3 different informations;
-
Directory (tenant) ID
-
Application (client) ID
-
Secret Value
We will add API permissions. Click “API Permissions” to do that. And click “Add a permission”.
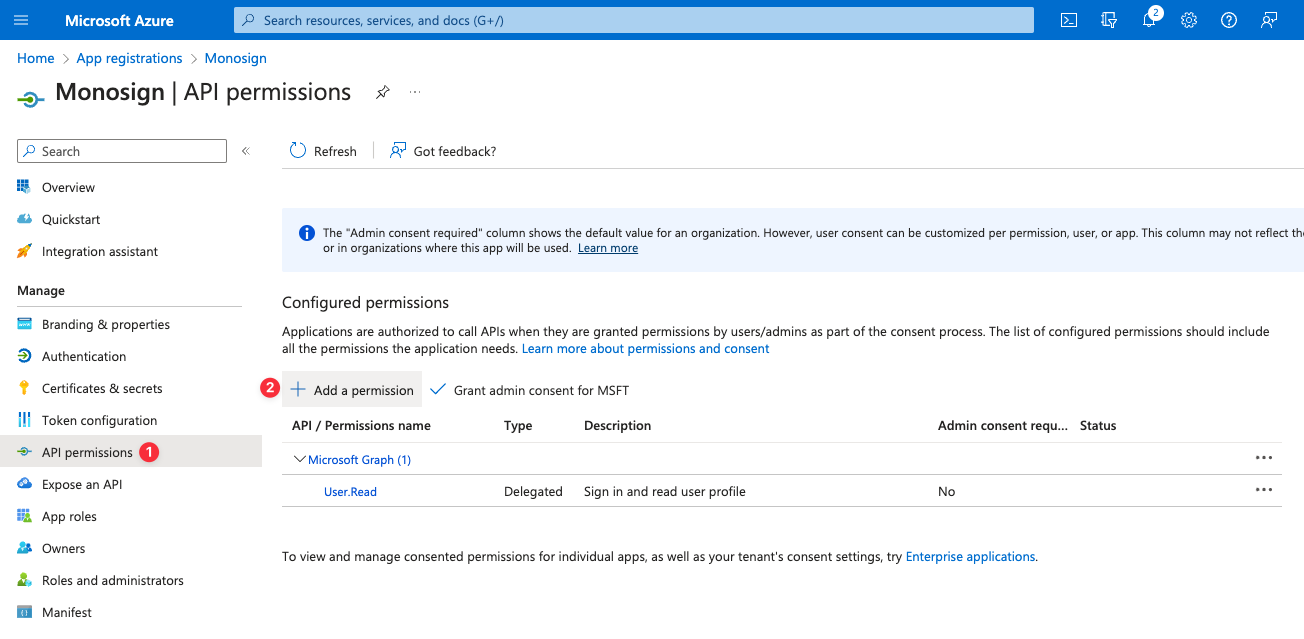
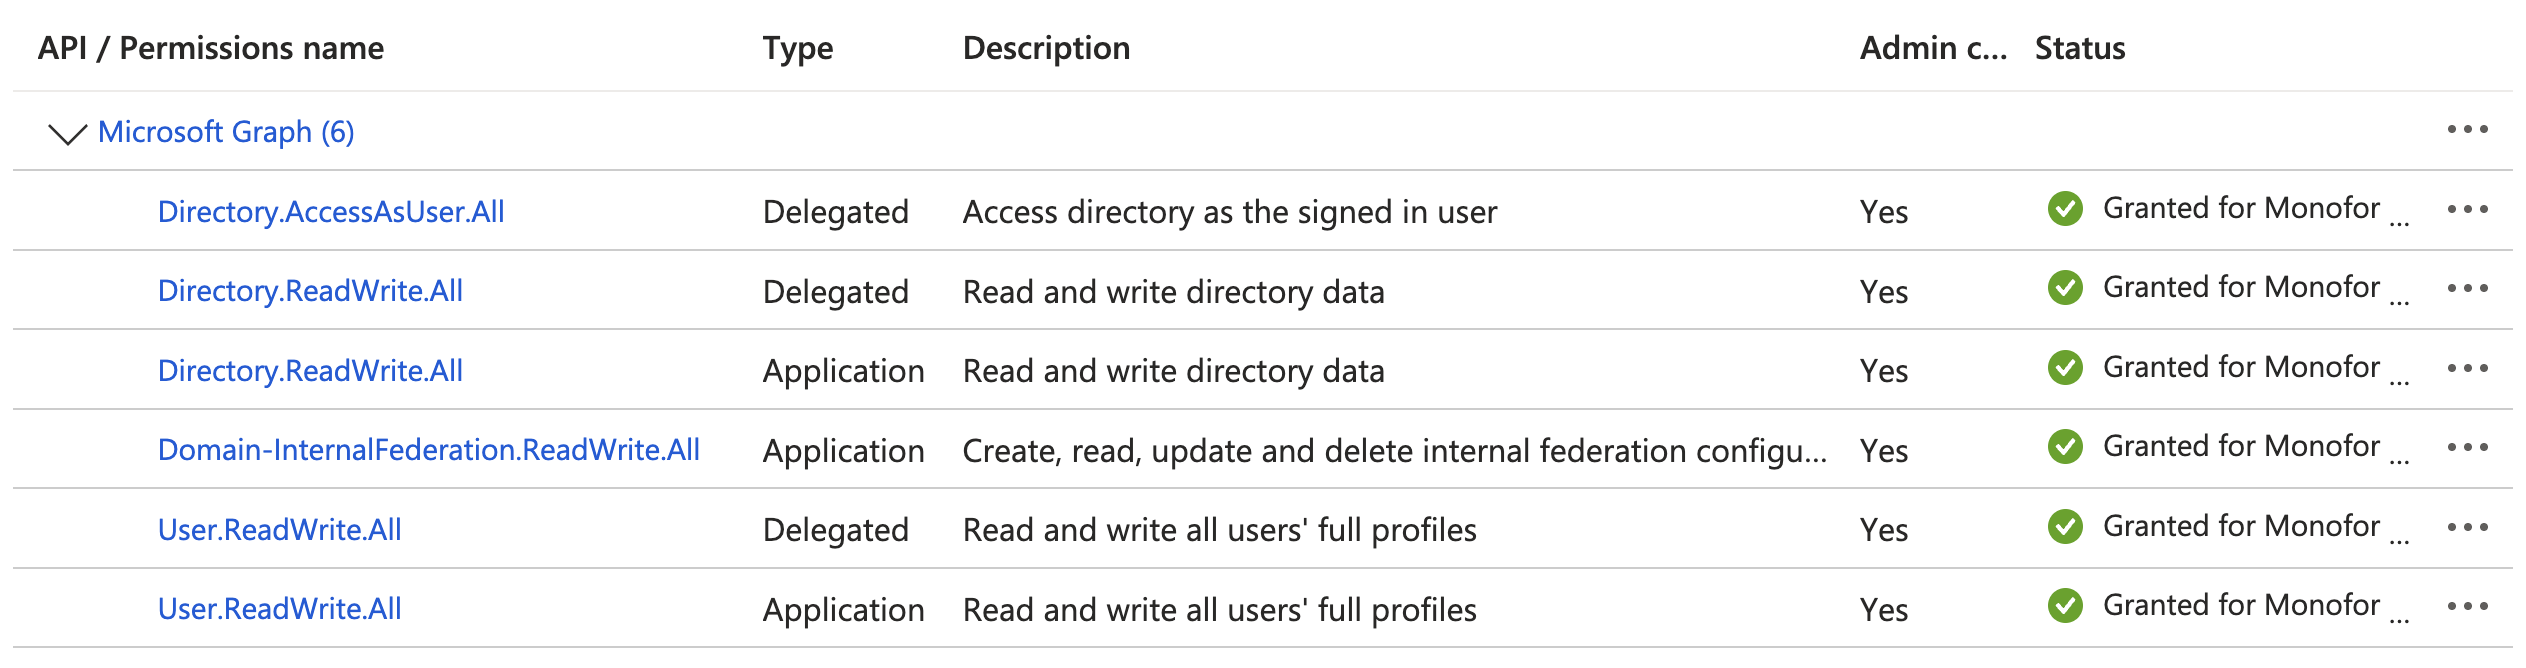
Select “Microsoft Graph”. There will be 2 different types, Delegated Permissions and Application Permissions. Following permissions must be added for by it’s type;
|
Type |
Permission |
|---|---|
|
Delegated |
|
|
Delegated |
|
|
Delegated |
|
|
Application |
|
|
Application |
|
|
Application |
|
And now, you need to select permission and click “Grant admin consent for …” and “Yes”.

After you have granted for permissions, the result page should be the following;
2. Creating an Application on Monosign for Microsoft (Office) 365
We will now create an application to Sync Users, Licenses, Policies, and Profiles to Office 365 from Monosign.
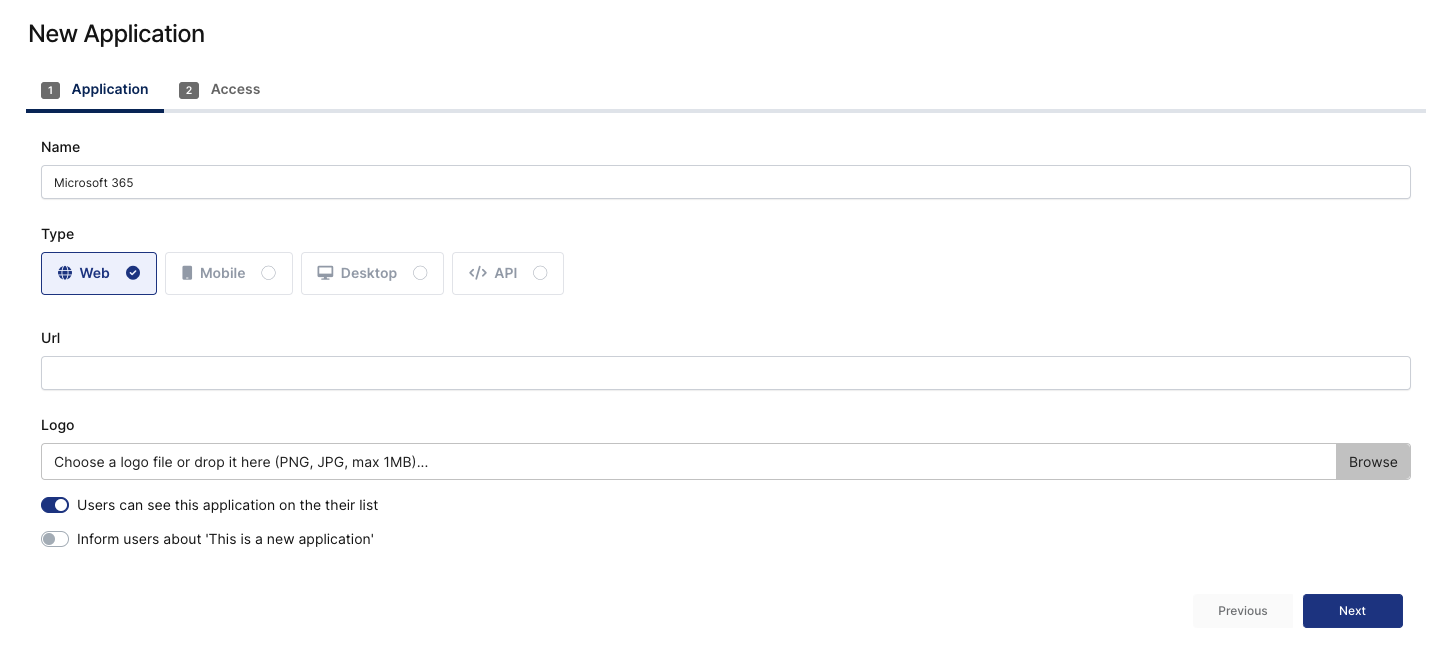
Sign in to your Monosign Instance (like tenant-name.monofor.com).
Go to the Management portal (direct URL is http://tenant-name-mng.monofor.com) and click Applications. Give your application a name and click “Next”.
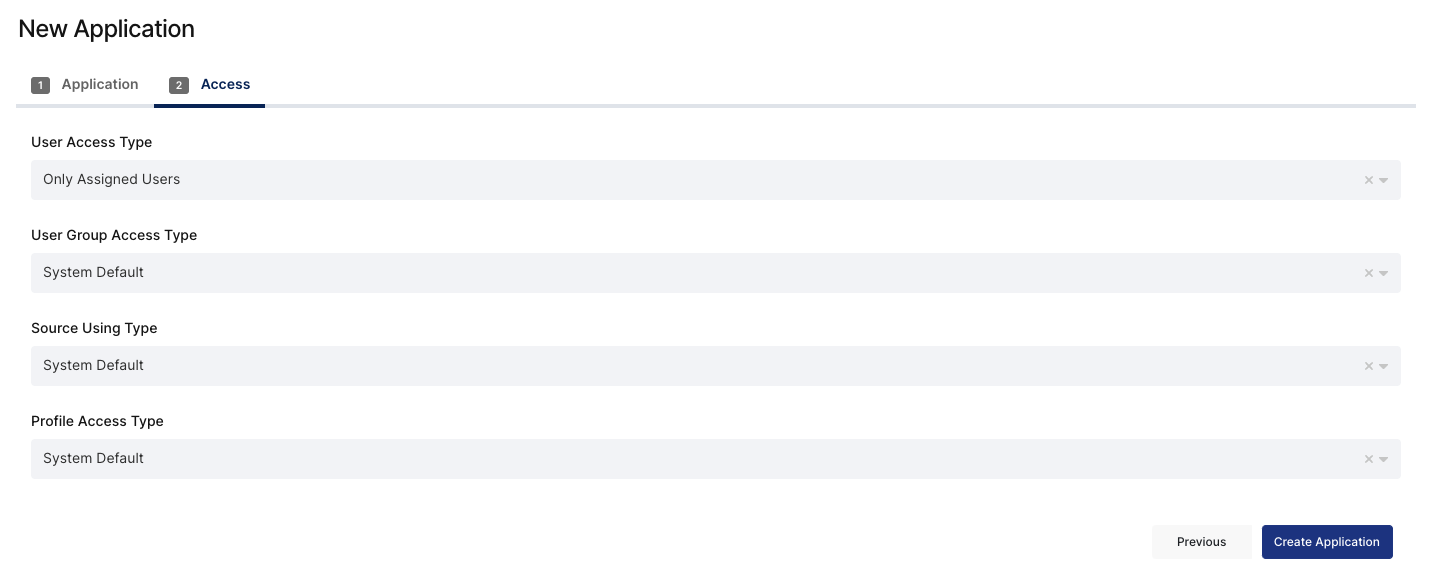
Select your User Access Type and click Finish.
You will be navigated to the Application User Assignments. On the left menu, click “Provisioning” and click “Microsoft (Office) 365” to expand options.
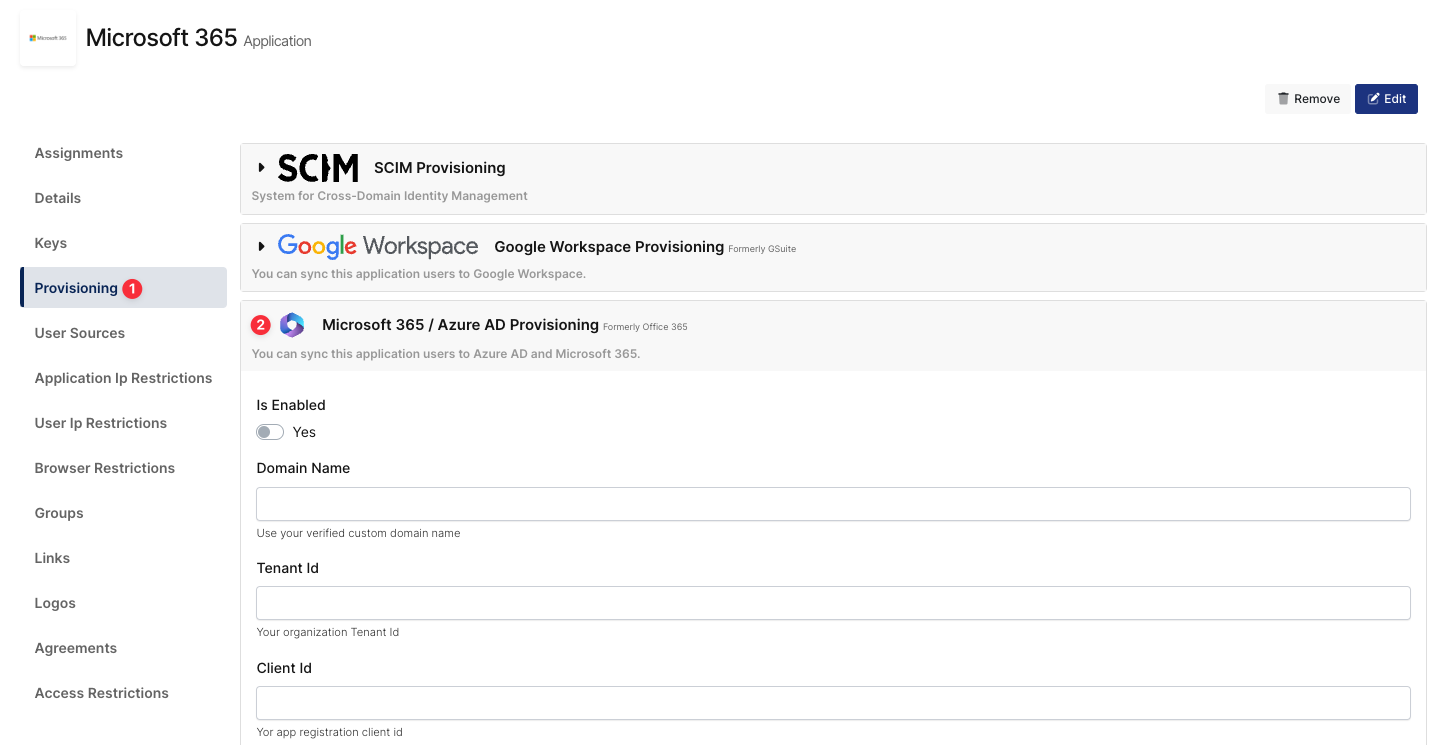
Fill in your settings.
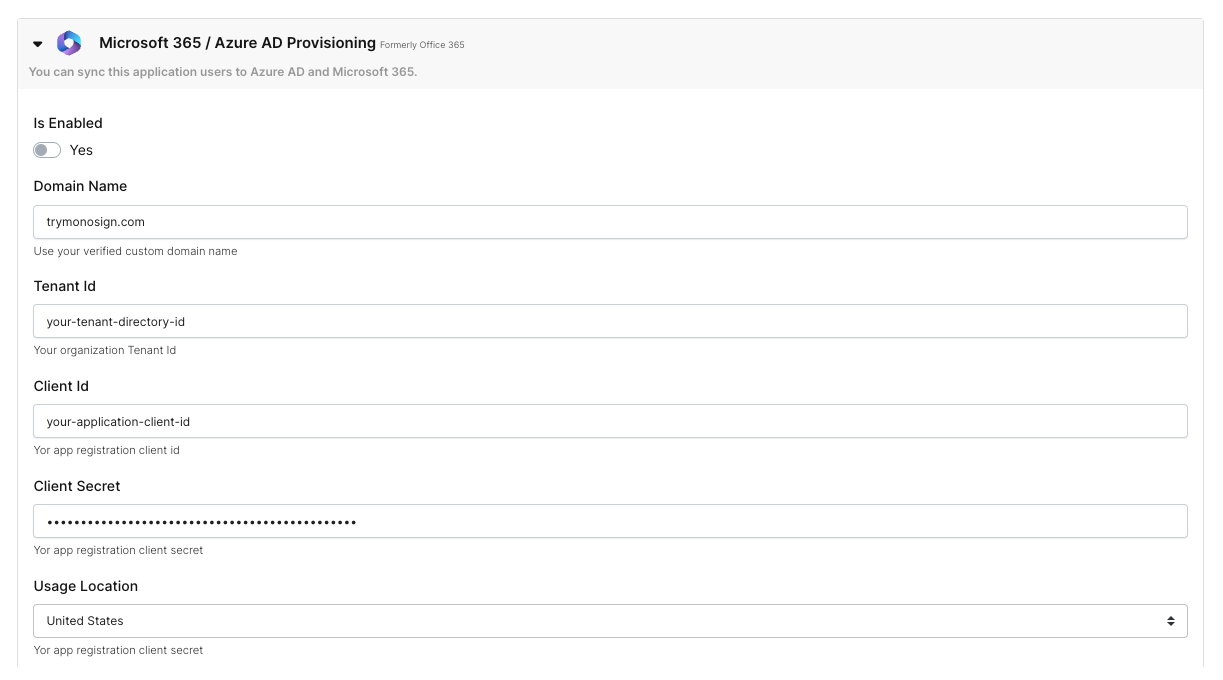
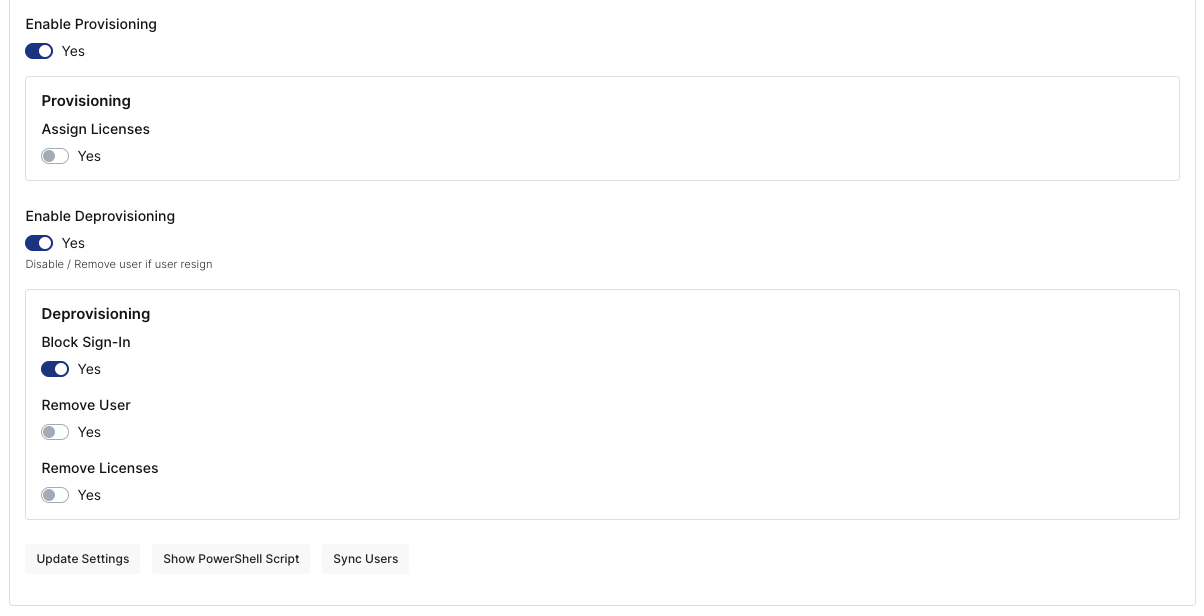
License section will be loaded after you click Update Settings. Click Update Settings and validate that everything works fine.
Following settings also shows you that you can modify the action you want to take on Azure Active Directory for certain actions. Like Assigning also licenses, Block Sign-in when you have removed user from assignment etc.
Sync Users button also helps you to match your Assigned users with the current settings. You don’t need it if you don’t have users already on your tenant.
When you are finished, you can assign a user to Microsoft (Office) 365 and Monosign will sync that user to Microsoft 365 and Azure AD to log in indirectly. But before that, we need to enable federated login on your custom domain name.
Click the “Show PowerShell Script” button and follow the instructions.
After that, you will now be redirected to your Monosign Login page when you try to log in to your Microsoft (Office) 365 Account.
3. Disable “MFA” on Azure Portal
If you are using MFA on Monosign, you need to disable security requirements on Azure Portal. If you don’t, It will require additional security steps for your users.
To do that, follow these steps;
-
Go to the Azure Portal.
-
Search “Azure Active Directory” and navigate it
-
Click “Properties” on the left menu
-
Scroll down to the bottom of the page and click “Manage security defaults”
-
Switch Enable security defaults "Yes" to "No"
4. Disable “MFA” on MFA Settings
IMPORTANT!
This is required if you already set MFA Enabled for per user on Azure Active Directory.
# Sets the MFA requirement state
function Set-MfaState {
    [CmdletBinding()]
    param(
        [Parameter(ValueFromPipelineByPropertyName=$True)]
        $ObjectId,
        [Parameter(ValueFromPipelineByPropertyName=$True)]
        $UserPrincipalName,
        [ValidateSet("Disabled","Enabled","Enforced")]
        $State
    )
    Process {
        Write-Verbose ("Setting MFA state for user '{0}' to '{1}'." -f $ObjectId, $State)
        $Requirements = @()
        if ($State -ne "Disabled") {
            $Requirement =
                [Microsoft.Online.Administration.StrongAuthenticationRequirement]::new()
            $Requirement.RelyingParty = "*"
            $Requirement.State = $State
            $Requirements += $Requirement
        }
        Set-MsolUser -ObjectId $ObjectId -UserPrincipalName $UserPrincipalName `
                     -StrongAuthenticationRequirements $Requirements
    }
}
# Disable MFA for all users
Get-MsolUser -All | Set-MfaState -State Disabled
5. Disable Password Reset and Registration Settings
IMPORTANT
This is required if you already enabled Self Service Password Reset(SSPR) and Registration options on Azure Active Directory.
These steps turn off SSPR and Registration options on Azure Active Directory.
-
Go to https://portal.azure.com
-
Choose Users and select Password Reset
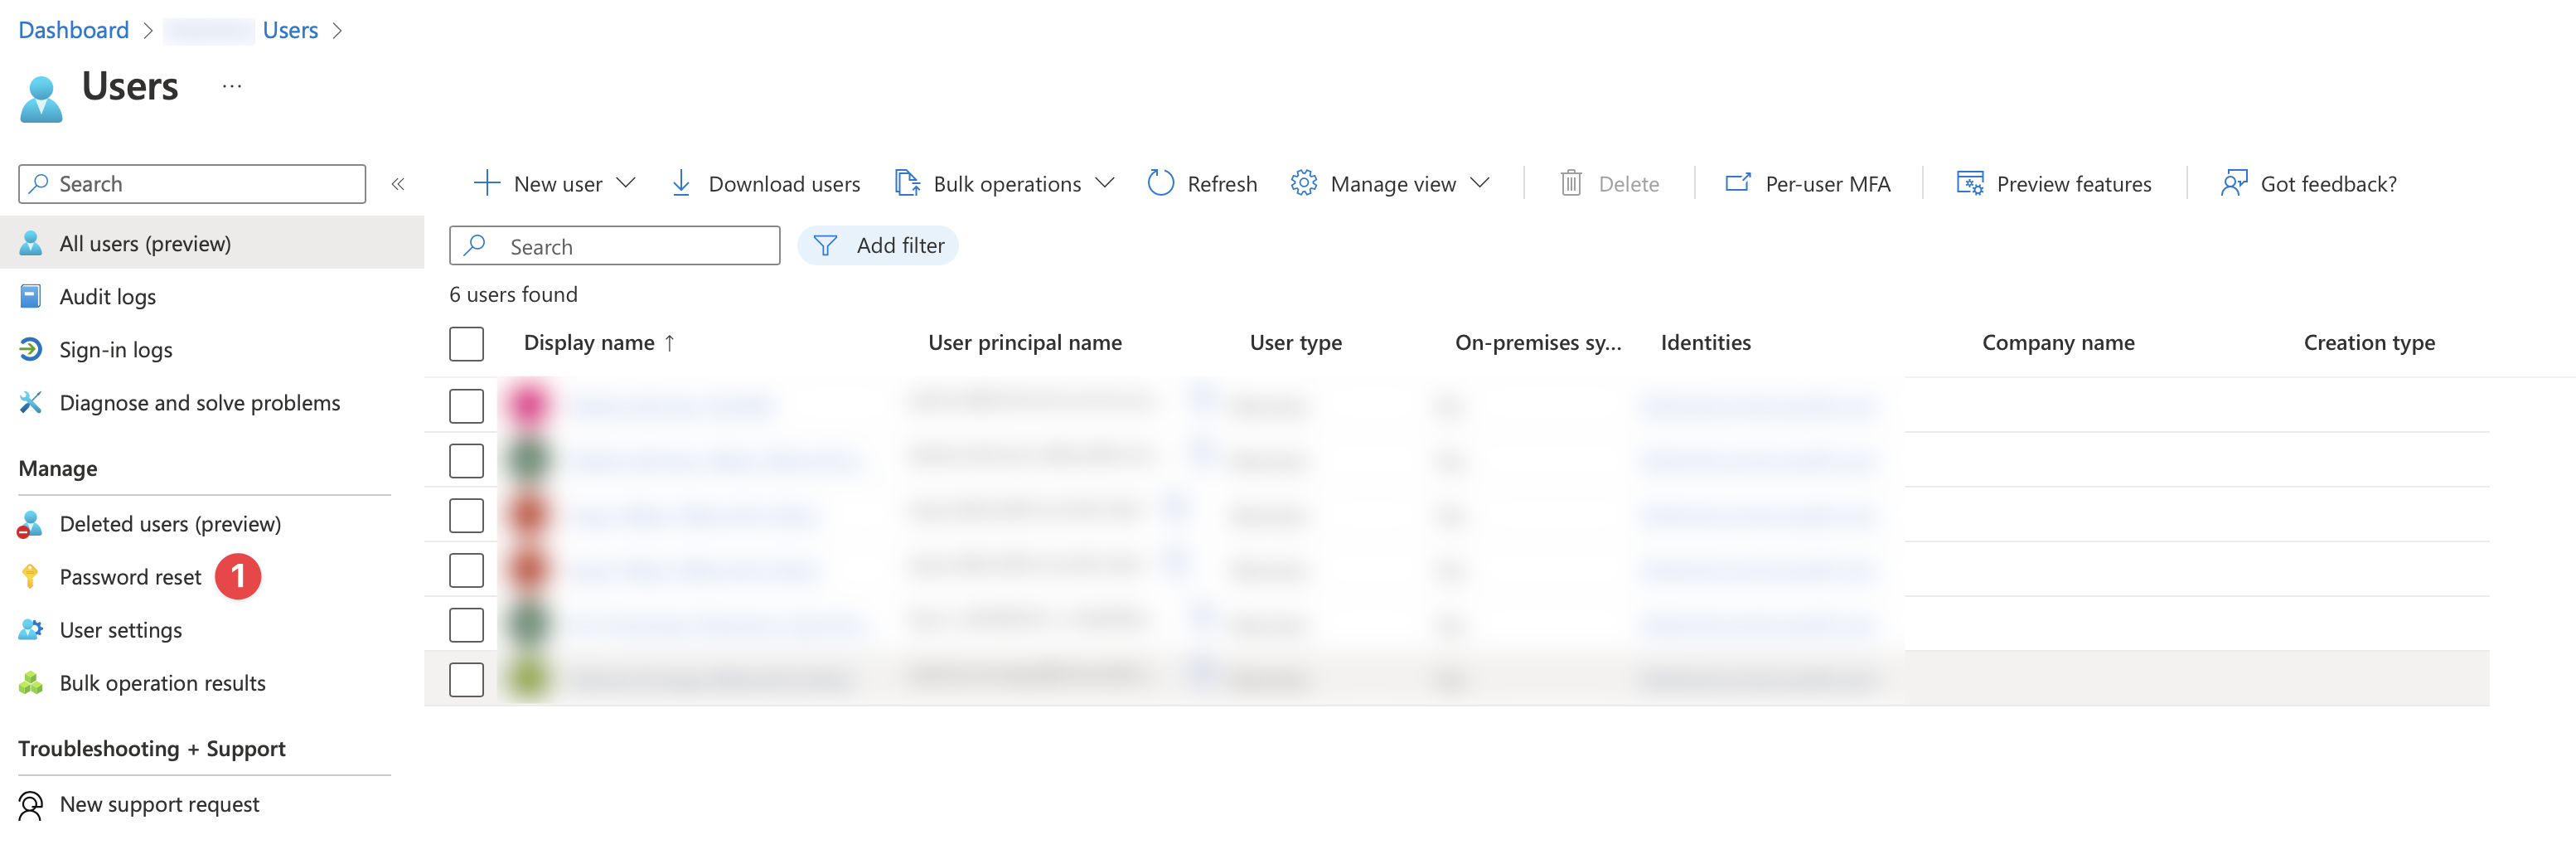
-
On the Properties page select None, then select Save.
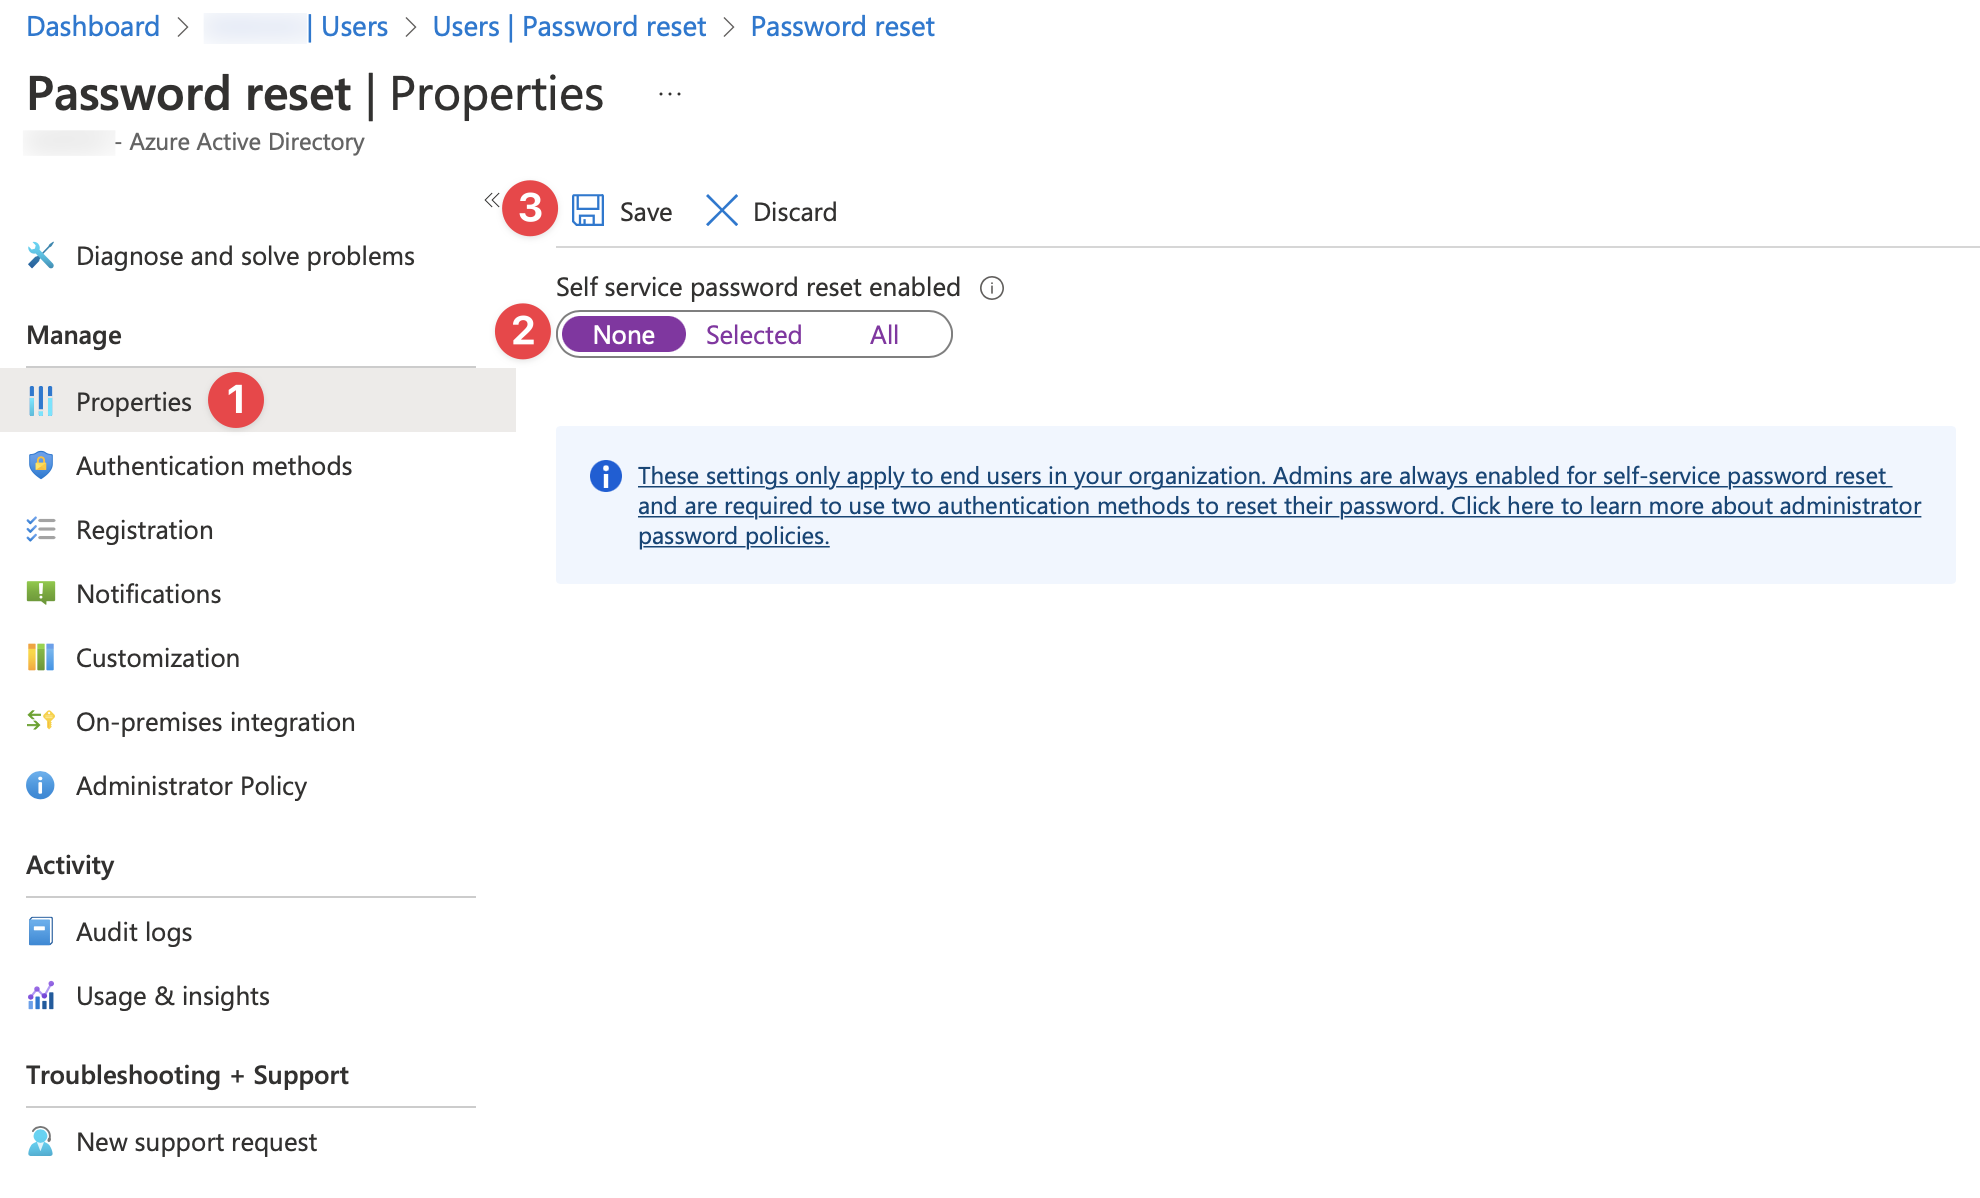
-
Under the Password Reset page select Registration choose No then select Save

It will take 1 hour to effect this kind of configuration on Microsoft Office 365 tenant. Please be patient.
Firewall Settings for On-Premise Tenants
Your tenant should have access to the following URL’s over HTTPS.
-
*.microsoftonline.com
-
*.office.com
-
*.office365.com
-
*.outlook.office365.com
-
*.azure.com