This document explains how to implement MonoSign with OpenVPN. It covers Single Sign-On. Before you continue, it is better to start with OpenVPN’s Single Sign-On implementation page.
View OpenVPN SAML Metadata
In order to configure the SAML key on MonoSign for OpenVPN SSO, you need to have various information provided by OpenVPN. First, navigate to Settings > User Authentication from the sidebar and click Edit.
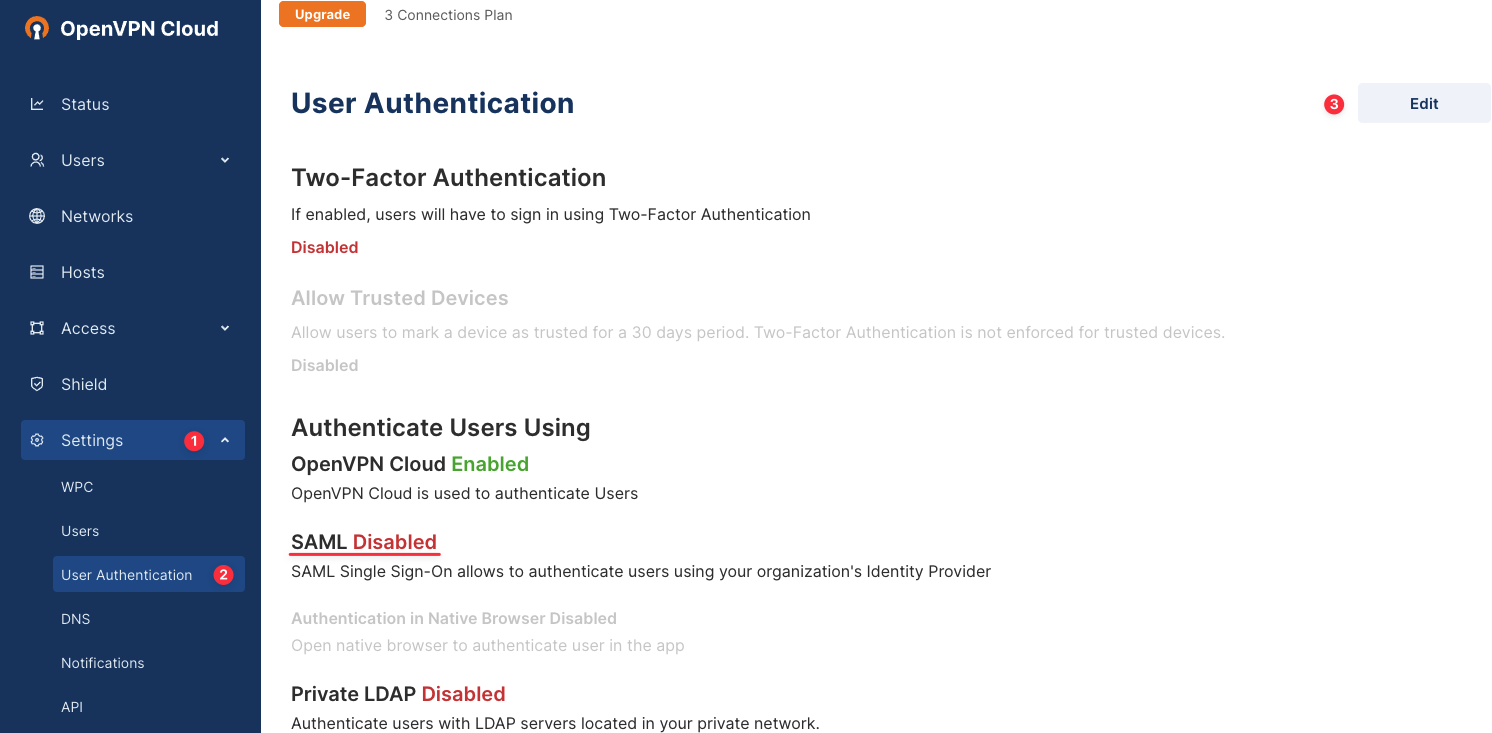
SAML option will be disabled by default since it is not configured. Click Configure button under the option. On the opening page, you will view OpenVPN SAML metadata.
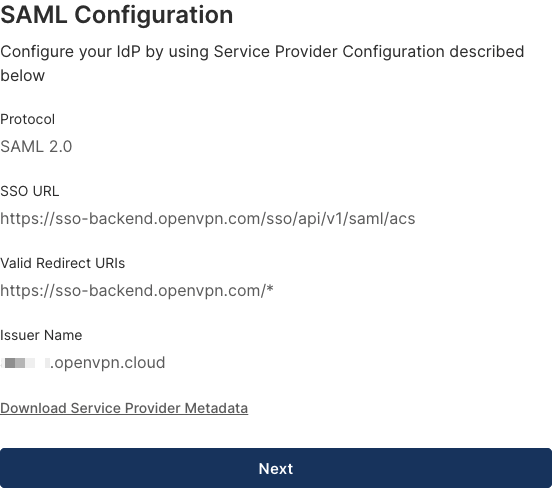
For now, we will stop here on the OpenVPN side and create a MonoSign application and related SAML key by using the information provided by OpenVPN.
Creating an Application and Access Key on MonoSign
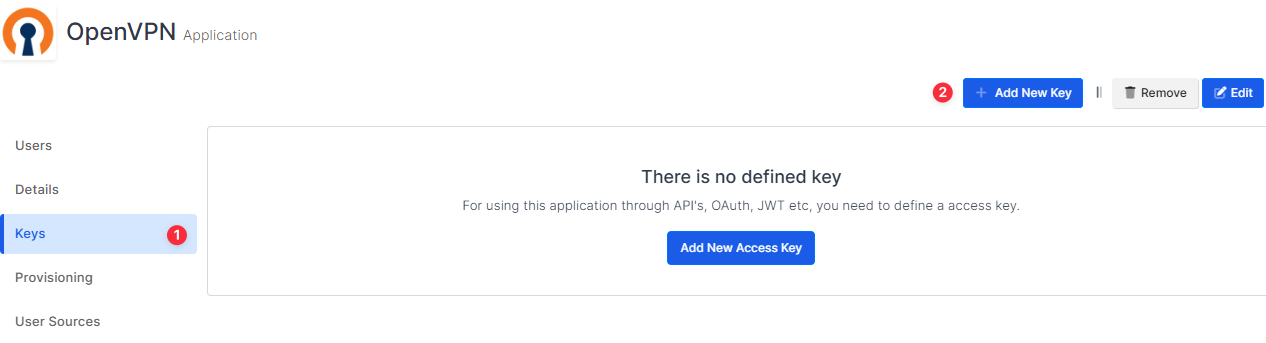
Create your application on MonoSign and configure your access policy. Once you create, click Keys and Add New Key to create a SAML access key.
In the opened modal, choose SAML as Key Type and switch to SAML2 Settings. Fill in the necessary fields according to the information provided by OpenVPN. Correspondings of the fields are as below.
|
Field |
Value |
|---|---|
|
Assertion Consumer Url |
SSO URL from SAML Configuration |
|
Entity Id |
Issuer Name from SAML Configuration |
|
NameId Format |
urn:oasis:names:tc:SAML:1.1:nameid-format:emailAddress |
|
Name Id |
|
Click Save and you are gonna see your configuration for your access key as follows;
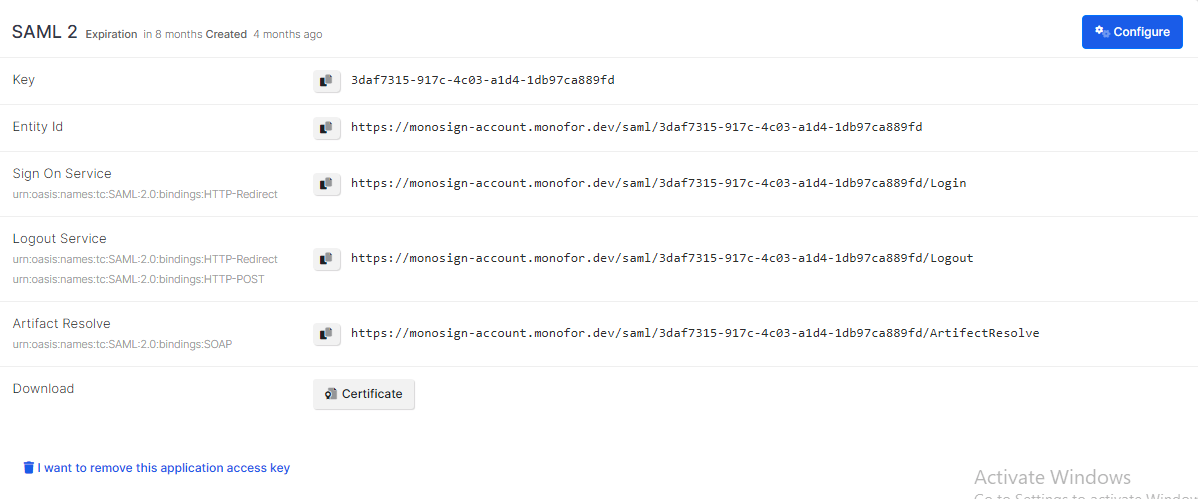
Configuration Single Sign-On for OpenVPN
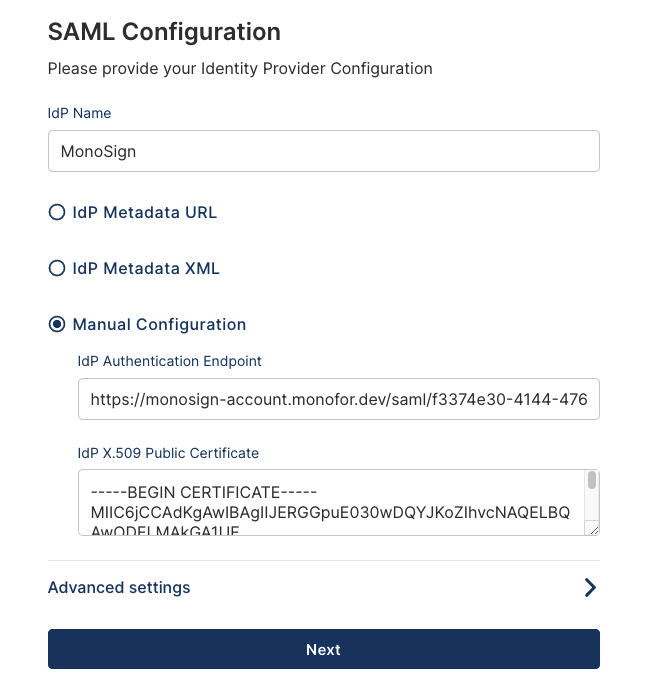
We are gonna move on to where we left off on the SAML Configuration page which is mentioned in the first chapter. Click Next and Choose Manual Configuration. Fill in the necessary fields according to the access key created on MonoSign. Correspondings of the fields are as below.
|
Field |
Value |
|---|---|
|
IdP Authentication Endpoint |
Sign On Service from the application SAML key |
|
IdP Name |
MonoSign |
|
IdP X.509 Public Certificate |
X509 format of the certificate issued to access key - can be downloadable from the key detail. |
You need to view your certificate in x509 format. in that case, we prefer using OpenSSL - “a robust, commercial-grade, full-featured toolkit for general-purpose cryptography and secure communication.”
Use the command below to view the certificate.
openssl x509 -in {path of your certificate} -text
The output contains various information about the certificate. However, you should check the text starts with “-----BEGIN CERTIFICATE-----”. At the end your form should look as follows;
Click Next and review your configurations. By clicking Finish you will be redirected to the User Authentication page. Click Edit and the SAML option will be enabled. Choose it and click Update. You can check if SAML is enabled on the page.