Palo Alto Administrator Access RADIUS Integration
This document explains how to implement Monosign with Palo Alto Administrator Access. Before you continue, it is better to start with Palo Alto’s Radius documentation.
Monofor has no responsibility to do Palo Alto configurations. If you need support please contact Palo Alto Support Services.
📑 Instructions
This documentation contains 5 main steps for integration.
Creating an Application on Monosign
Configuration Radius for Palo Alto
Assign a user to the Palo Alto application
Sign In Test
1- Creating an Application on Monosign
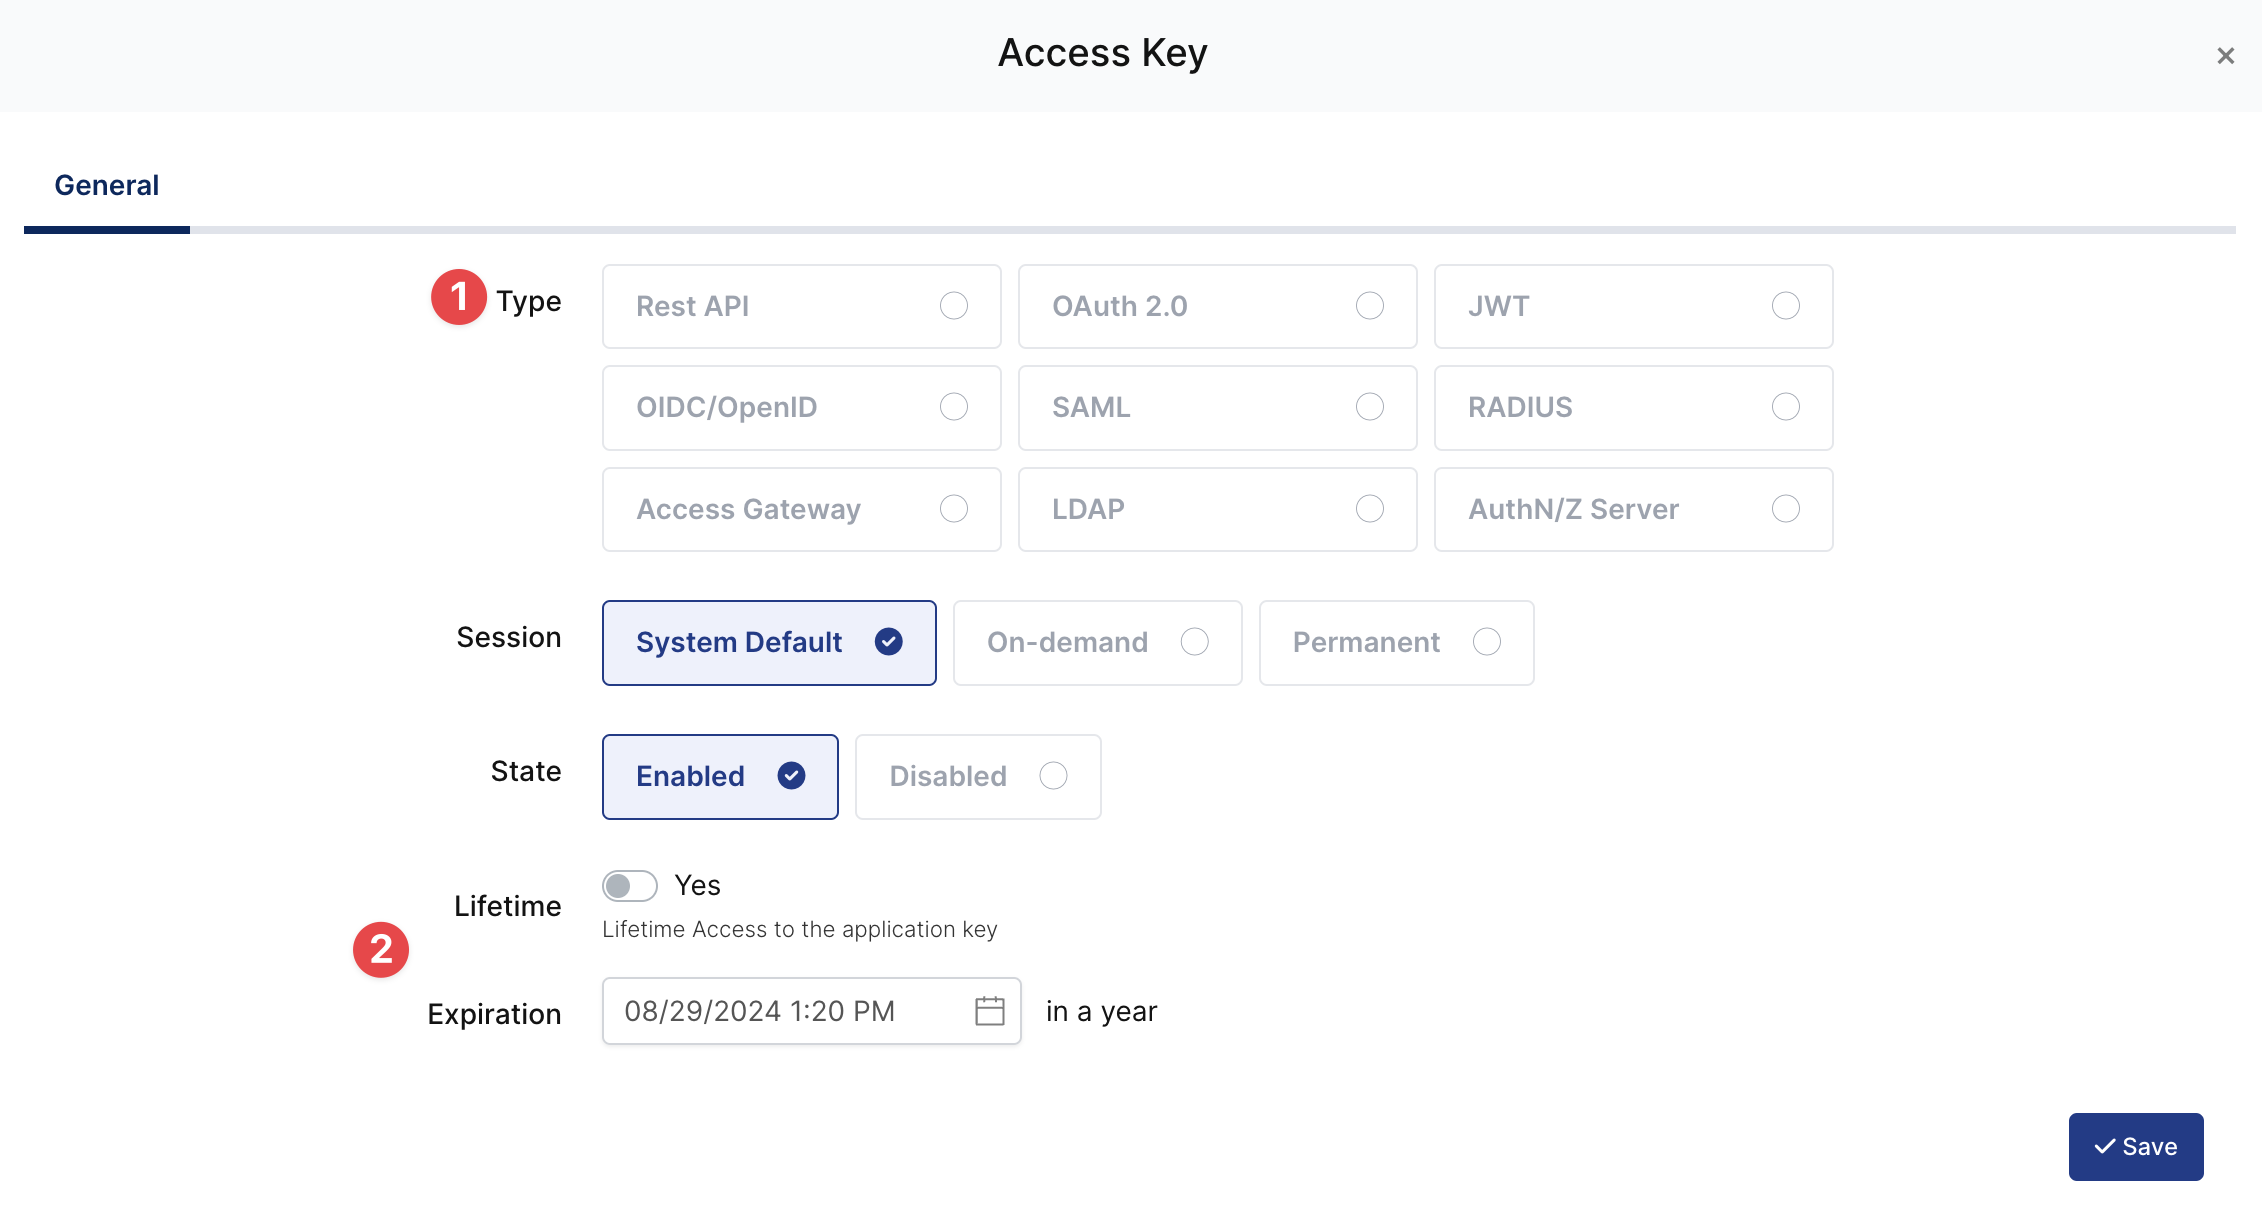
Create application on Monosign and configure your access policy. Once you create, click “Keys” and add a new Access Key for Radius Key for access.
This information will be necessary during the configuration of the Palo Alto application.

Property | Value | Options |
|---|---|---|
Key Type | RADIUS | Rest API, OAuth 2.0, JWT, OIDC/OpenID, SAML, RADIUS, Access Gateway, LDAP, AuthN/Z Server |
Expiration | Lifetime | Lifetime or Specific Date/Time - By Default Lifetime is Enabled. |
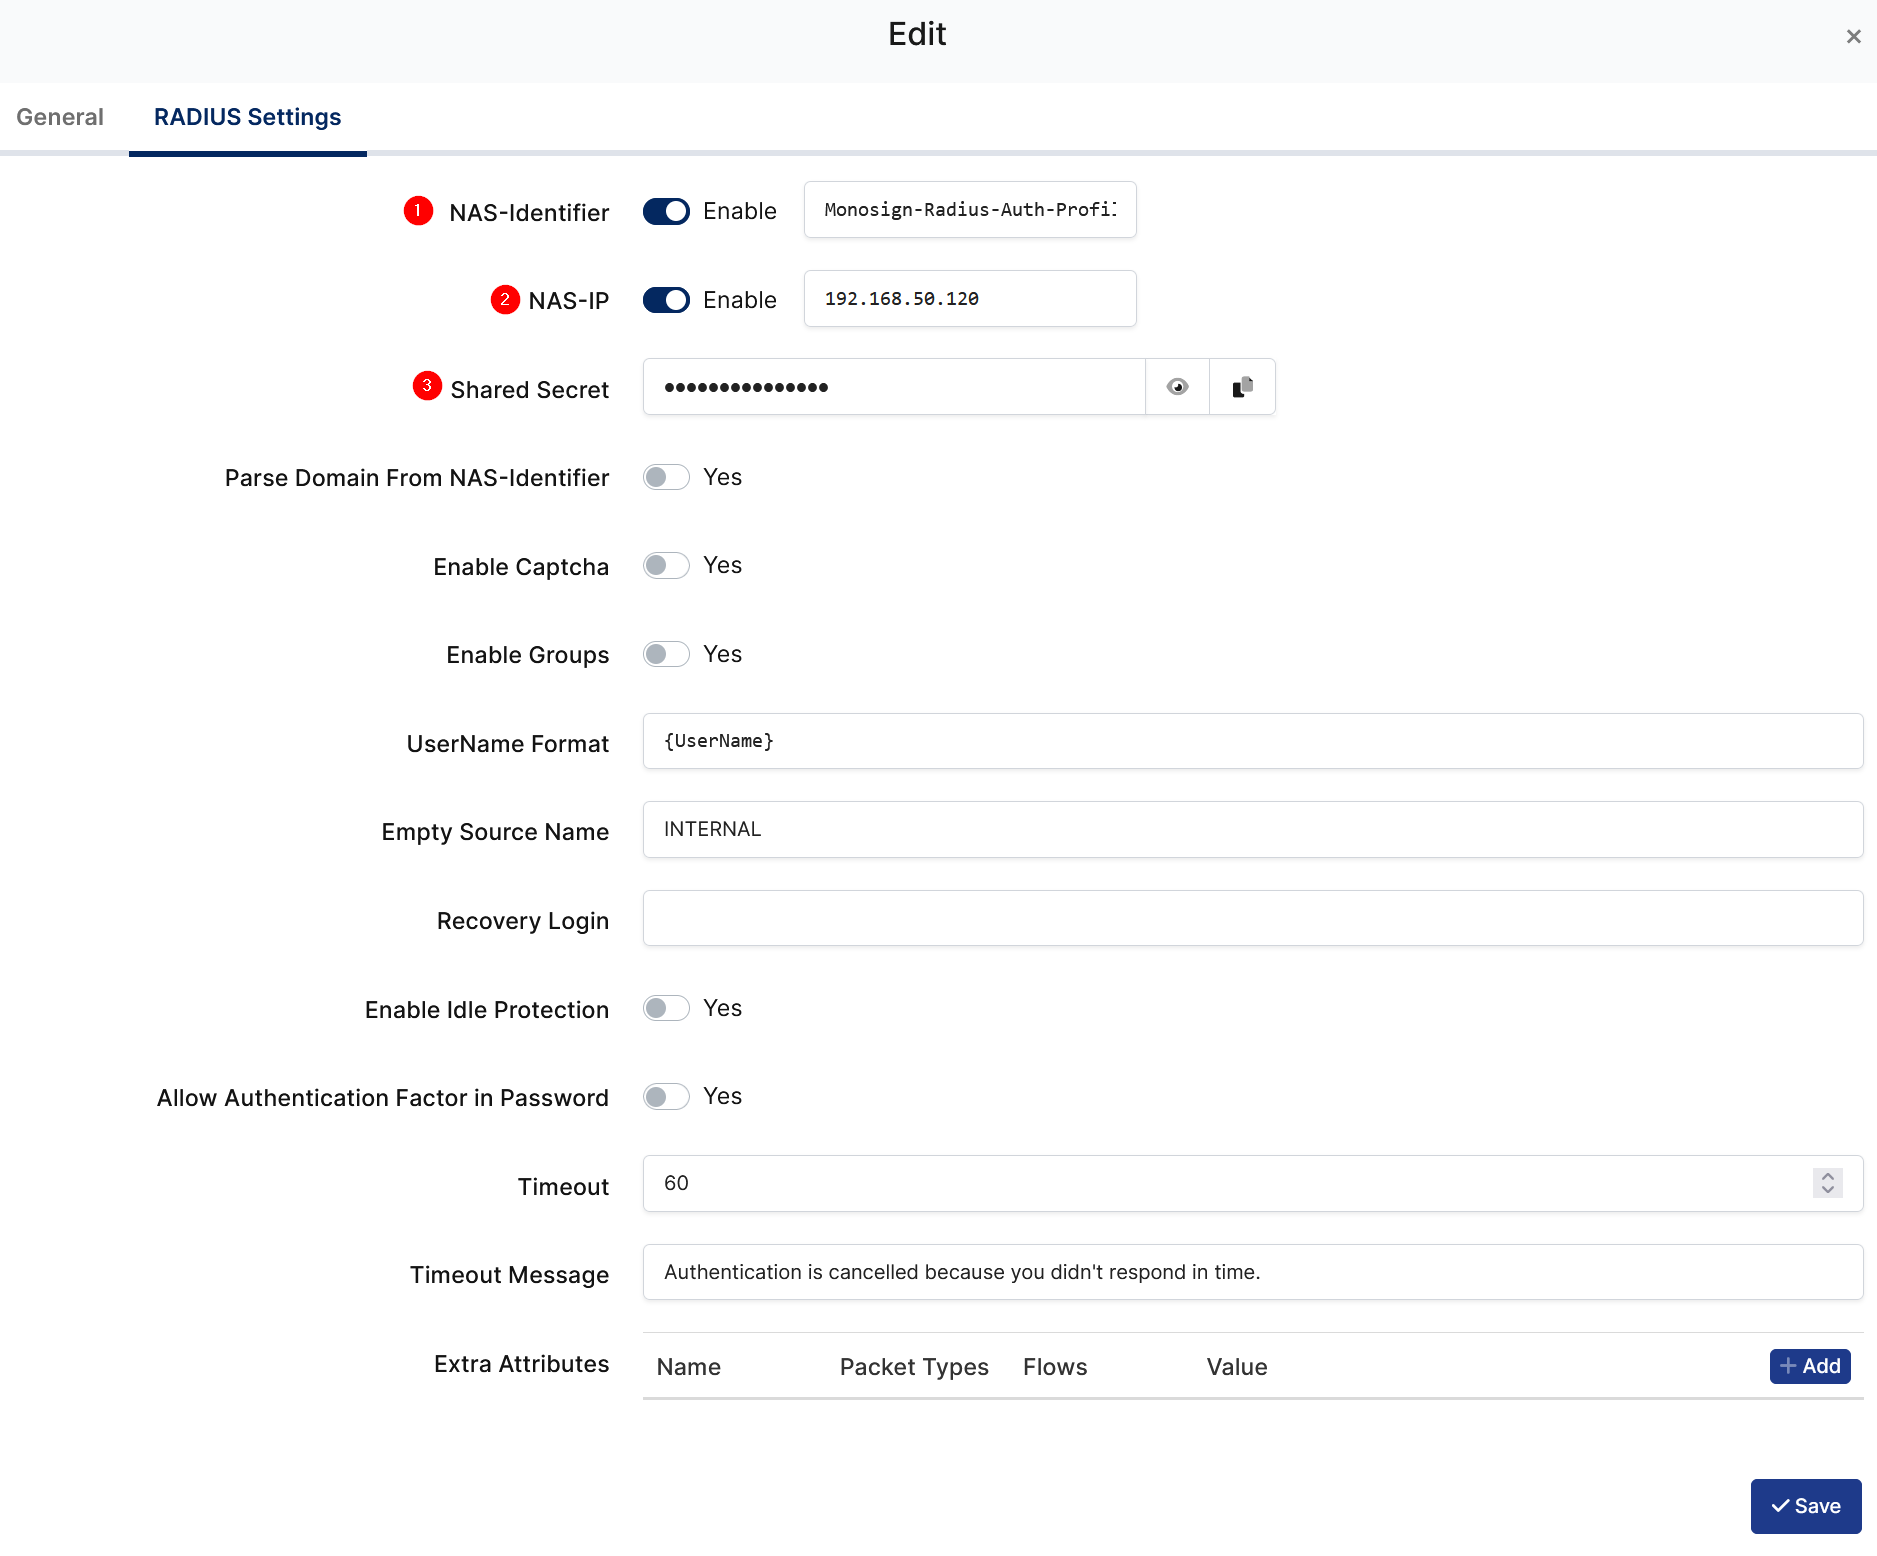
Configuration details for the Palo Alto application are provided as follows:
Property | Value | Description |
|---|---|---|
NAS-Identifier |
| Palo Alto Networks devices use the |
NAS-IP |
| NAS-IP of the Palo Alto Networks devices. |
Shared Secret |
| Shared secret it will configure on the Palo Alto Networks devices. |
To ensure that the application has access to user groups, follow these steps:
If the application hasn't been configured yet, click the “Edit” option for the application.
In the application settings, navigate to the “Source, Provider, and Profile” tab.
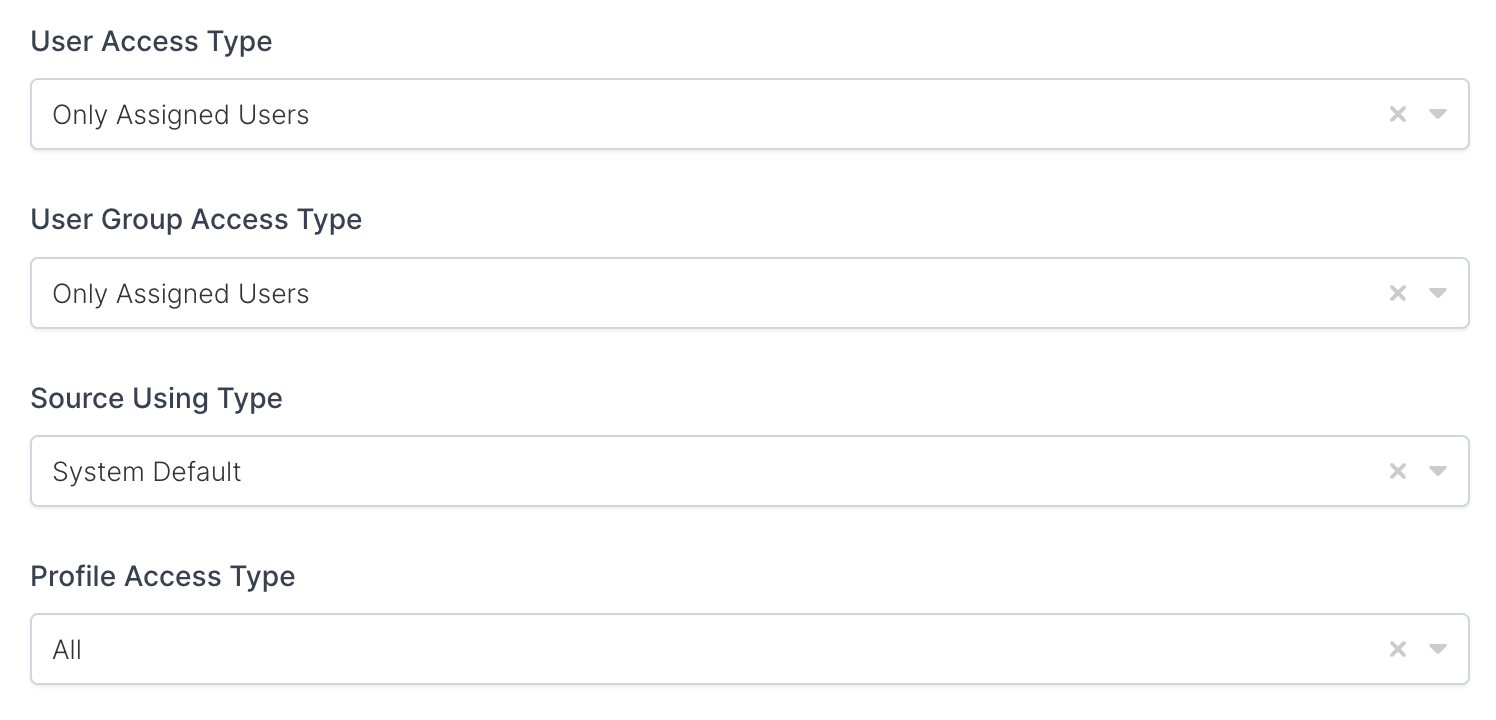
Configure the “User Access Type“ and “User Group Access Type” as “Only Assigned Users.”
Configuring this setting will allow the application to access by user groups when users sign in.
Property | Description | Options |
|---|---|---|
User Access Type | Defines which Users will access to this application. | Only Assigned Users |
User Group Access Type | Defines application’s user group access | Only Assigned Users |
Profile Access Type | Defines Application’s user’s profile access | Restricted - Only restricted user profile attributes |
2- Configuration RADIUS for Palo Alto SSL-VPN
As it highlighted at the beginning of document, please check out the Palo Alto’s RADIUS configuration page first.
Please add your RADIUS settings to the application. The following information is needed for your configuration.
a. RADIUS Server Profile
Go to Device → Server Profiles → RADIUS on the Palo Alto Network devices management UI.
Click Add.
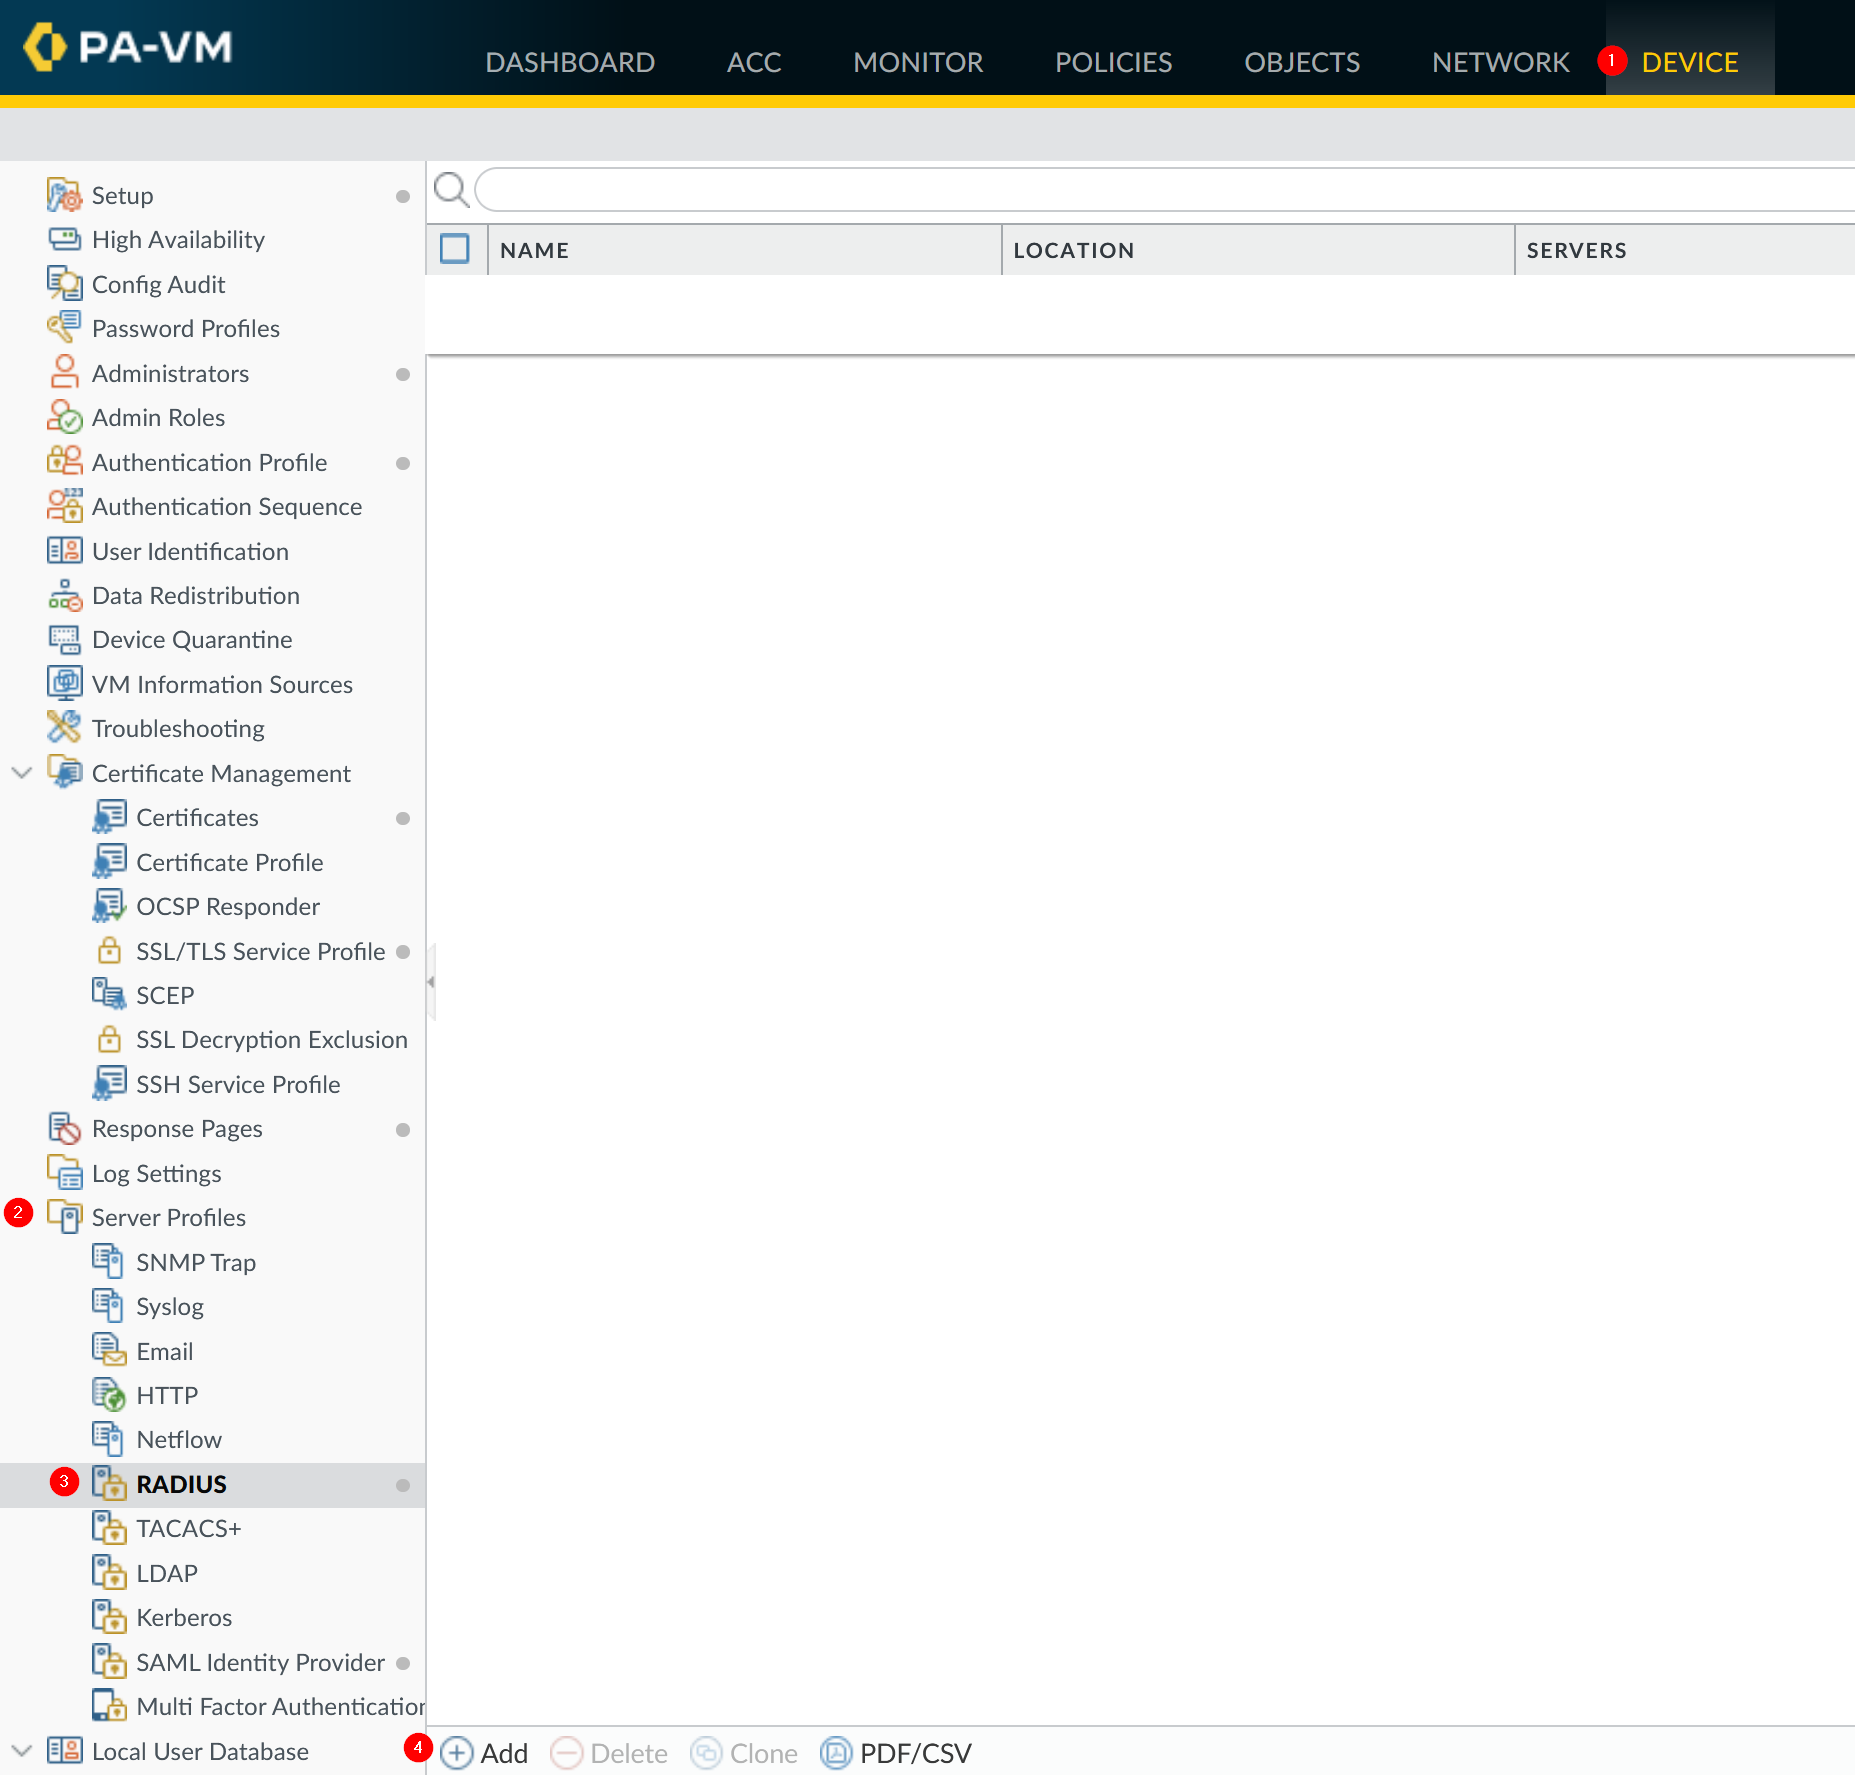
Fill below values
Property | Value | Description |
|---|---|---|
Profile Name |
| Name of the Radius Profile. |
Timeout |
| Radius Timeout |
Retries |
|
|
Authentication Protocol |
| Monosign Radius Server only support PAP |
In the servers provide below values
Property | Value | Description |
|---|---|---|
NAME |
| Name of the Radius Server |
RADIUS SERVER |
| Monosign Radius Server FQDN or IP Address |
SECRET |
| Shared secret which is already configured in the Monosign Application Radius Key. |
PORT |
| Monosign Radius Server only support PAP |
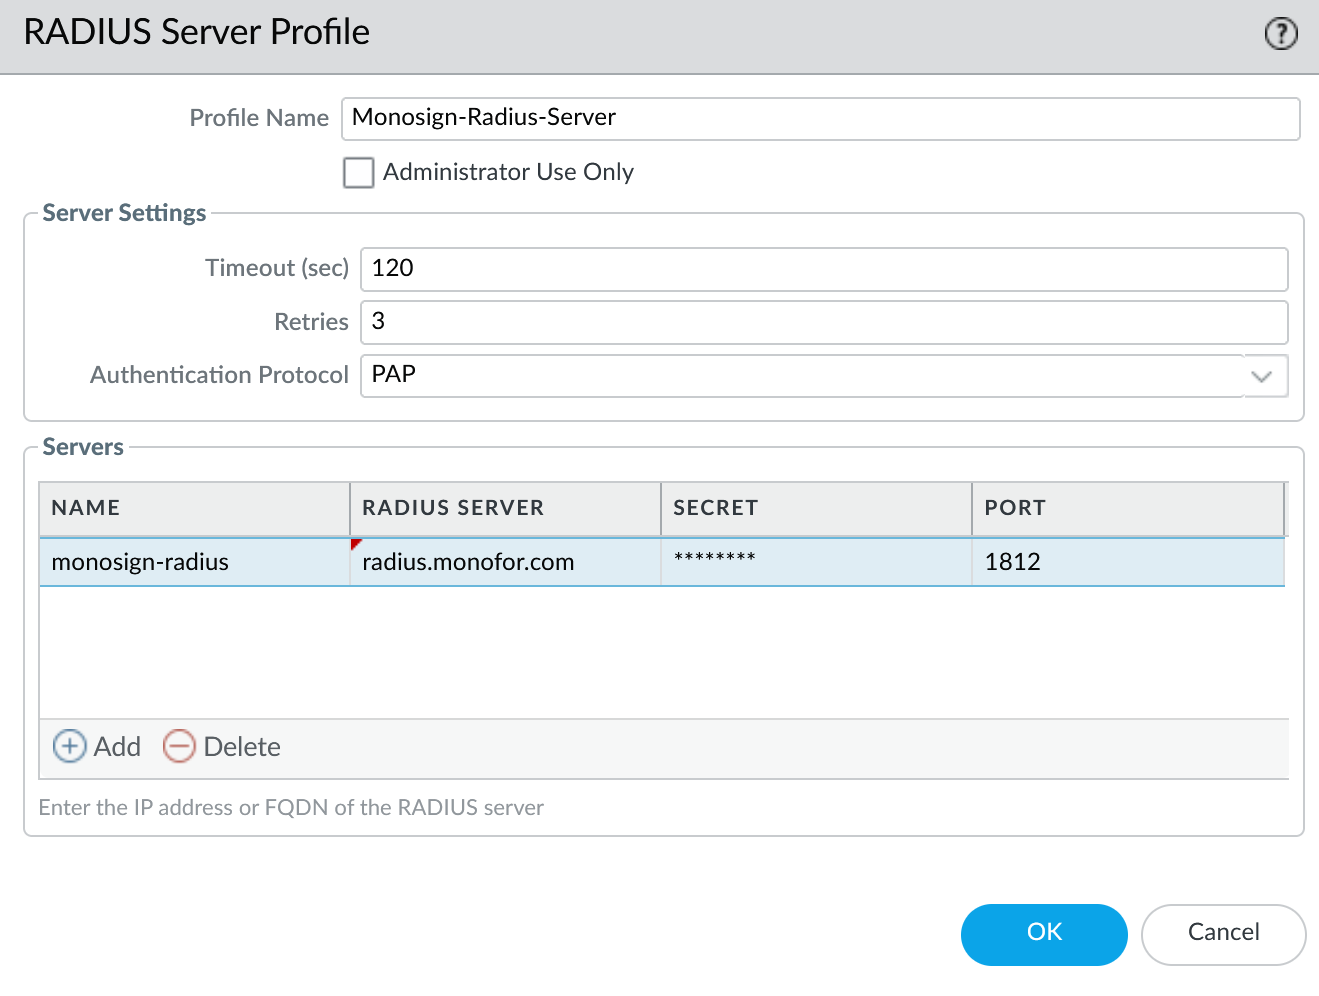
Click OK.
b. Authentication Profile
Go to Device → Authentication Profile on the Palo Alto Network devices management UI.
Click Add.
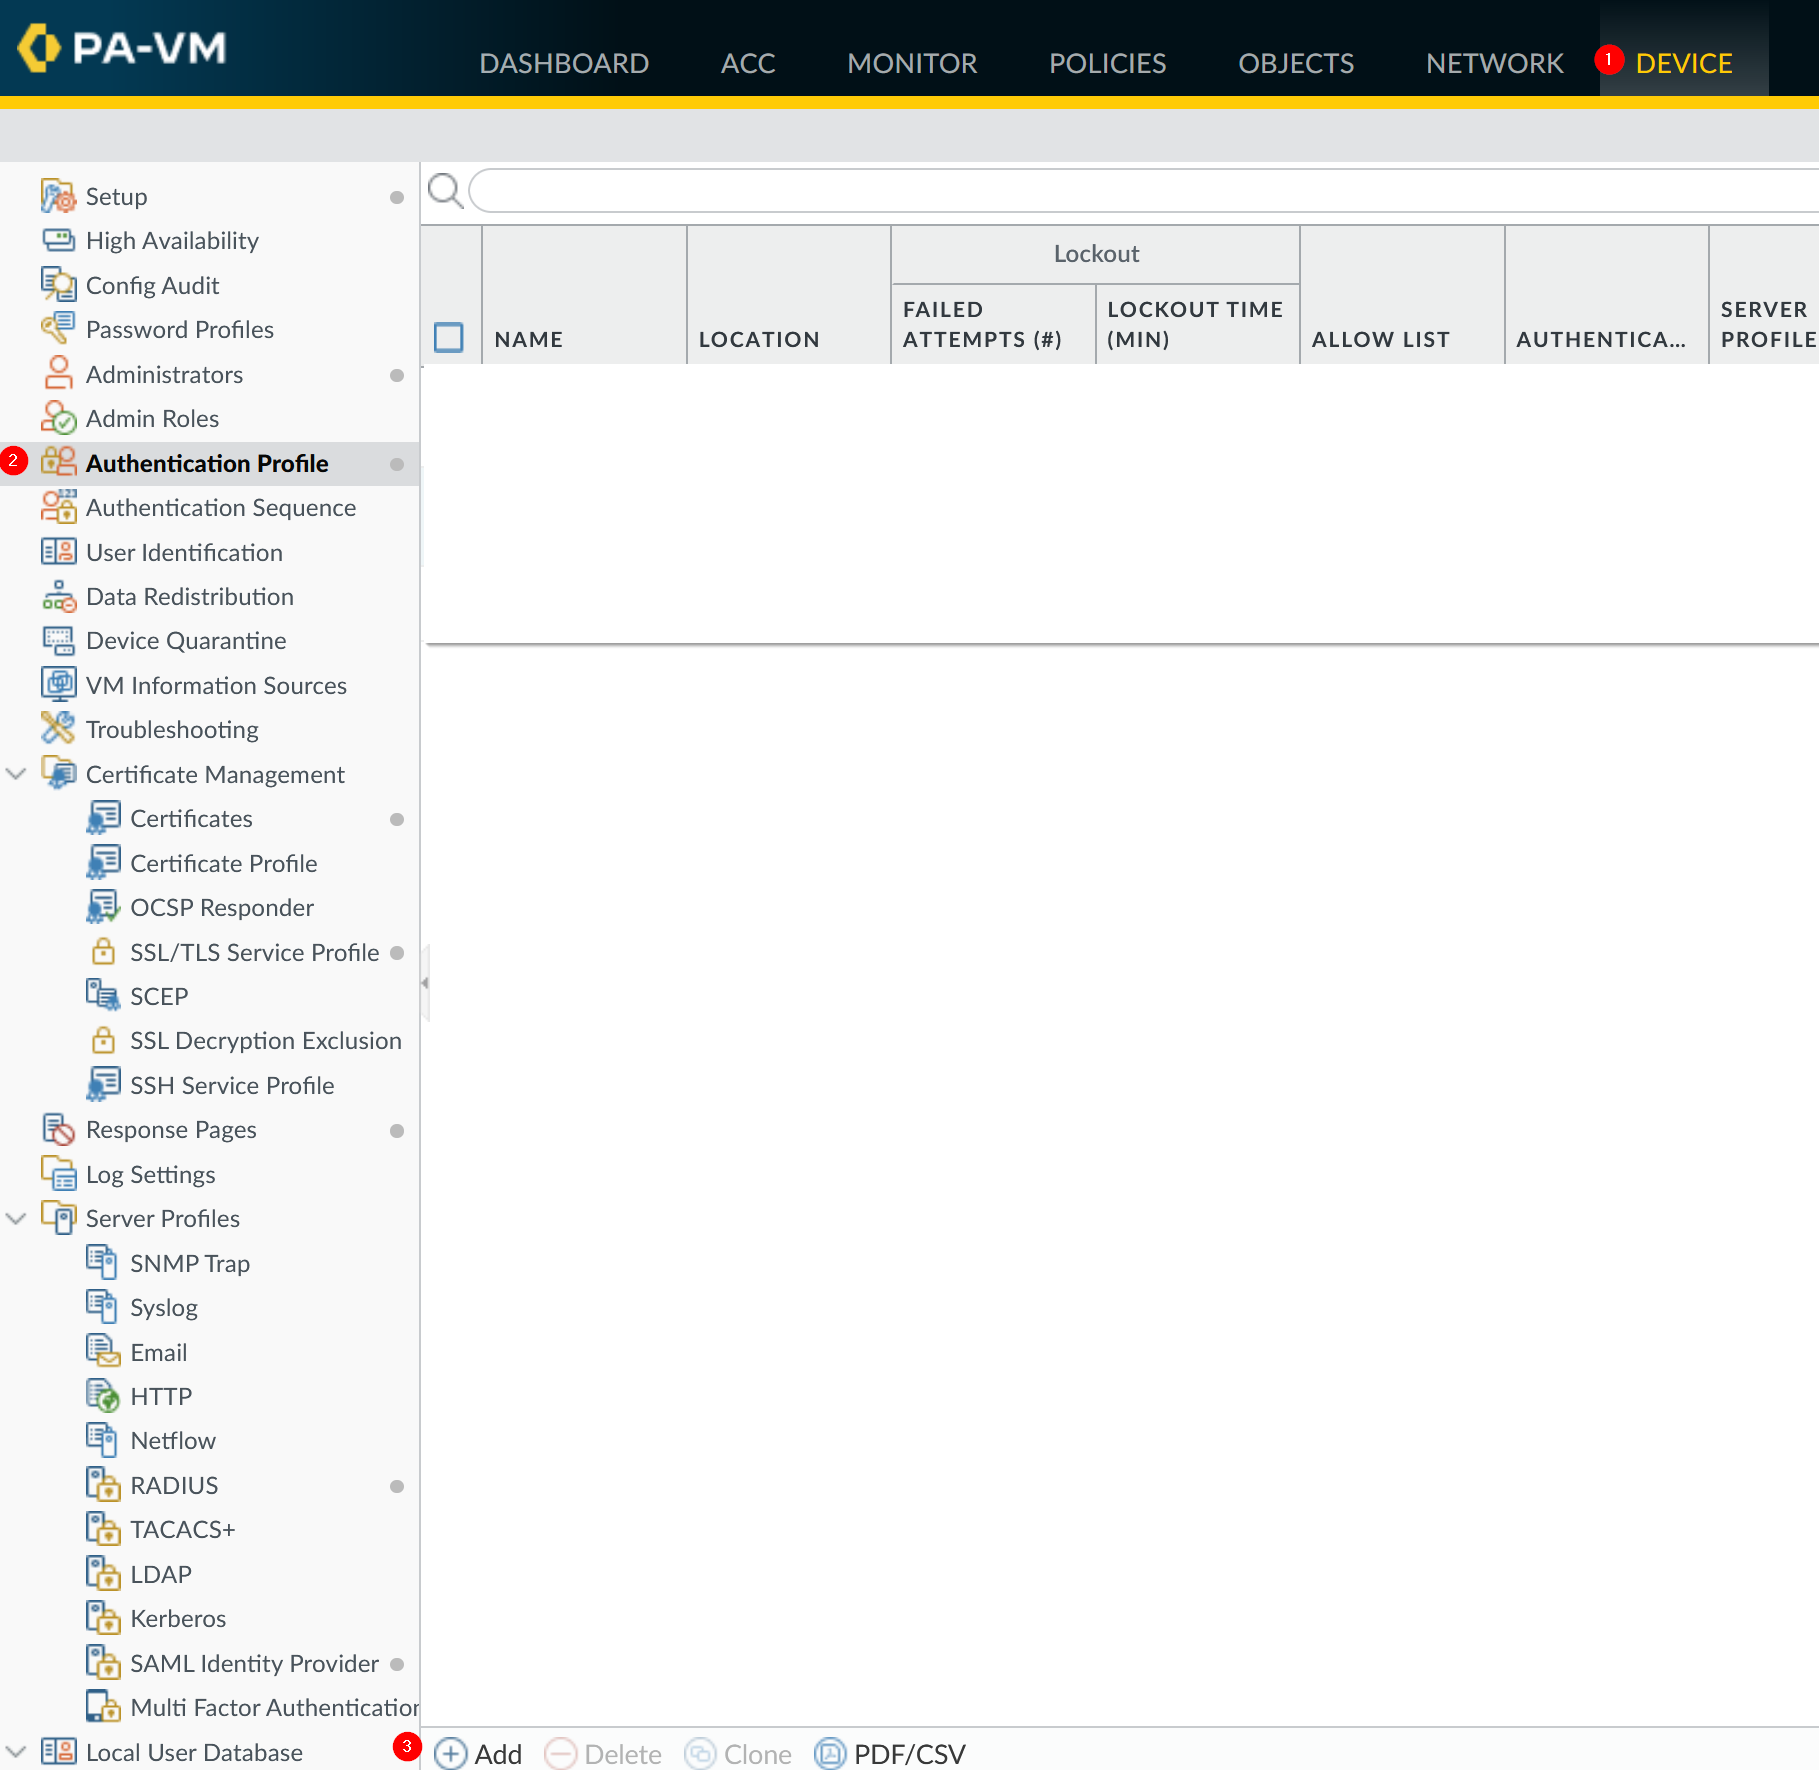
Fill below values
General
Property | Value | Description |
|---|---|---|
Name |
| This name used as a NAS-Identifier |
Authentication
Property | Value | Description |
|---|---|---|
Type |
|
|
Server Profile |
|
|
Advanced
Property | Value | Description |
|---|---|---|
Allow List |
|
|
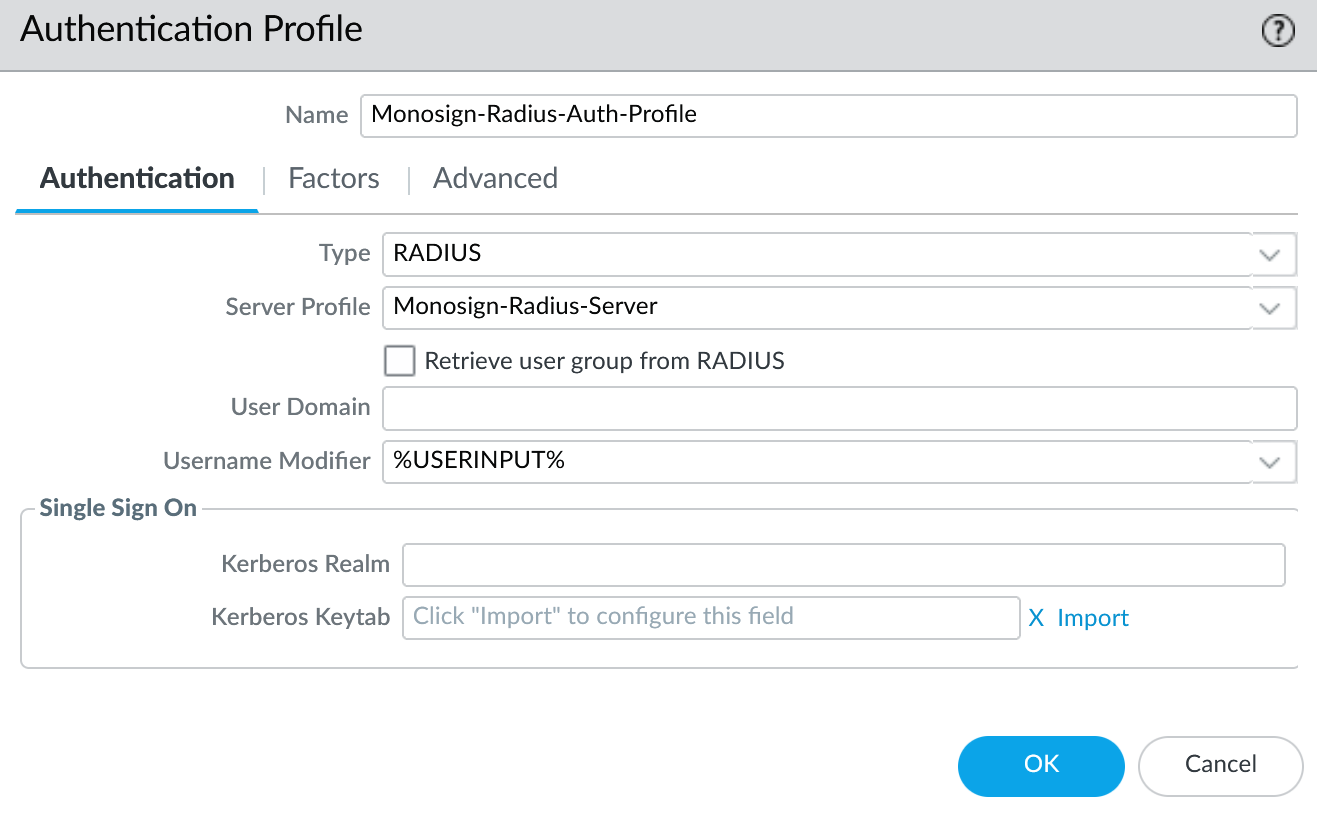
Authentication Profile - Authentication
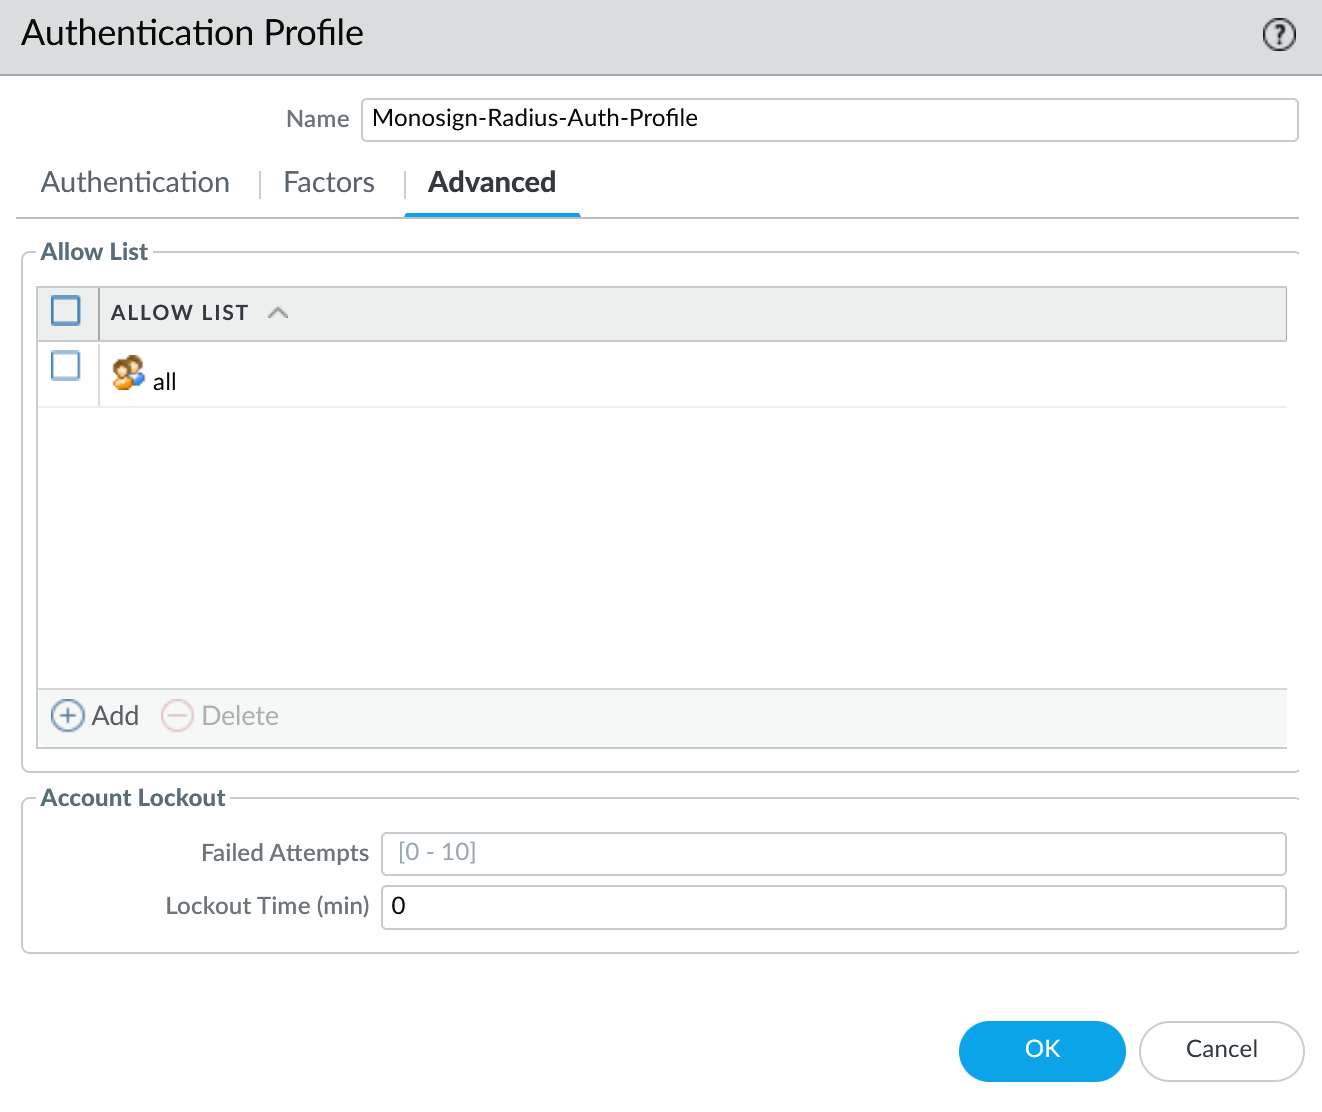
Authentication Profile - Advanced
Click OK.
c. Changing the Authentication Method
Two methods can be used for authentication.
User Base
Go to your firewall admin page and click Device → Administrators → Add
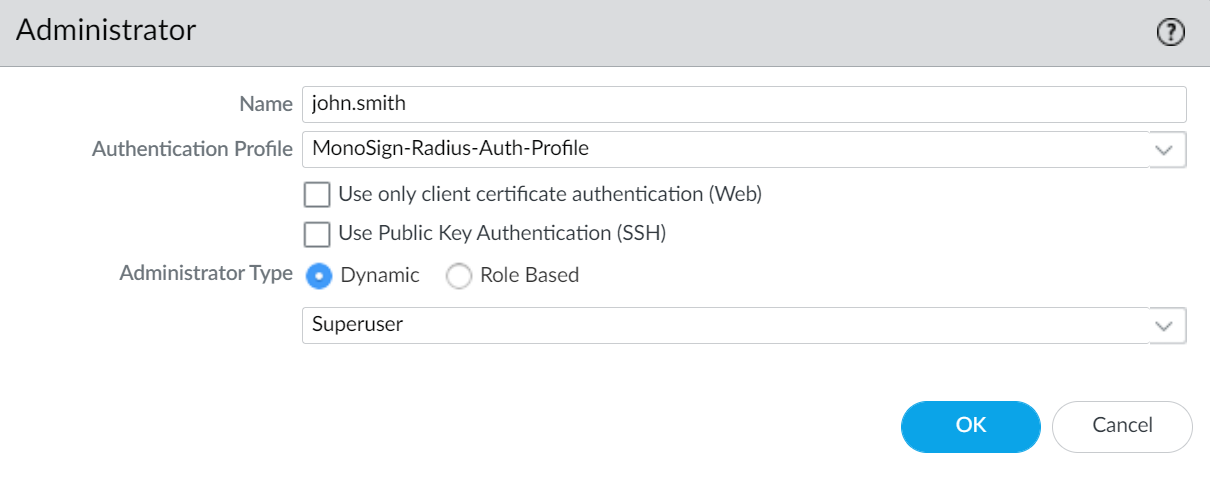
If you want to change the existing user authentication profile, click the username on the firewall and change Authentication Profile.
Global Authentication
After the Radius configuration, authentication can be changed globally in the device configuration.
Go to Palo Alto admin web GUI and click Device → Setup → Management → Authentication Settings and choose the Radius profile created in the previous steps.
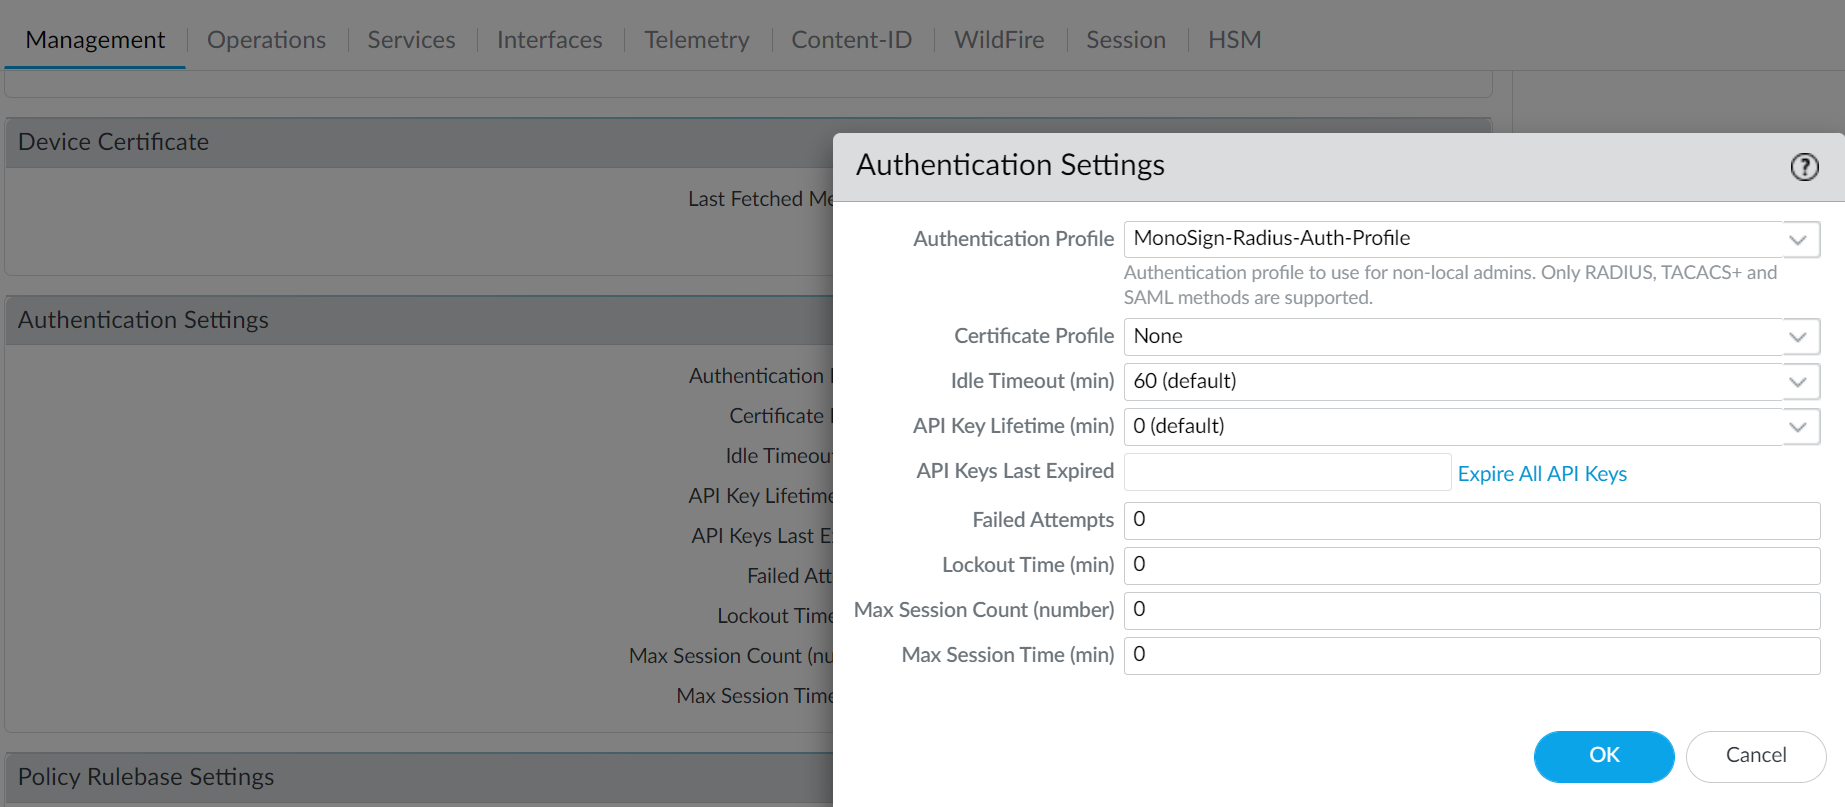
Click OK, then Commit to save the changes.
3- Assign a user to the Palo Alto application
Please follow below instructions on how to assign a user to the Palo Alto application. In this example john.smith will assign to the application access.


4- Sign In Test
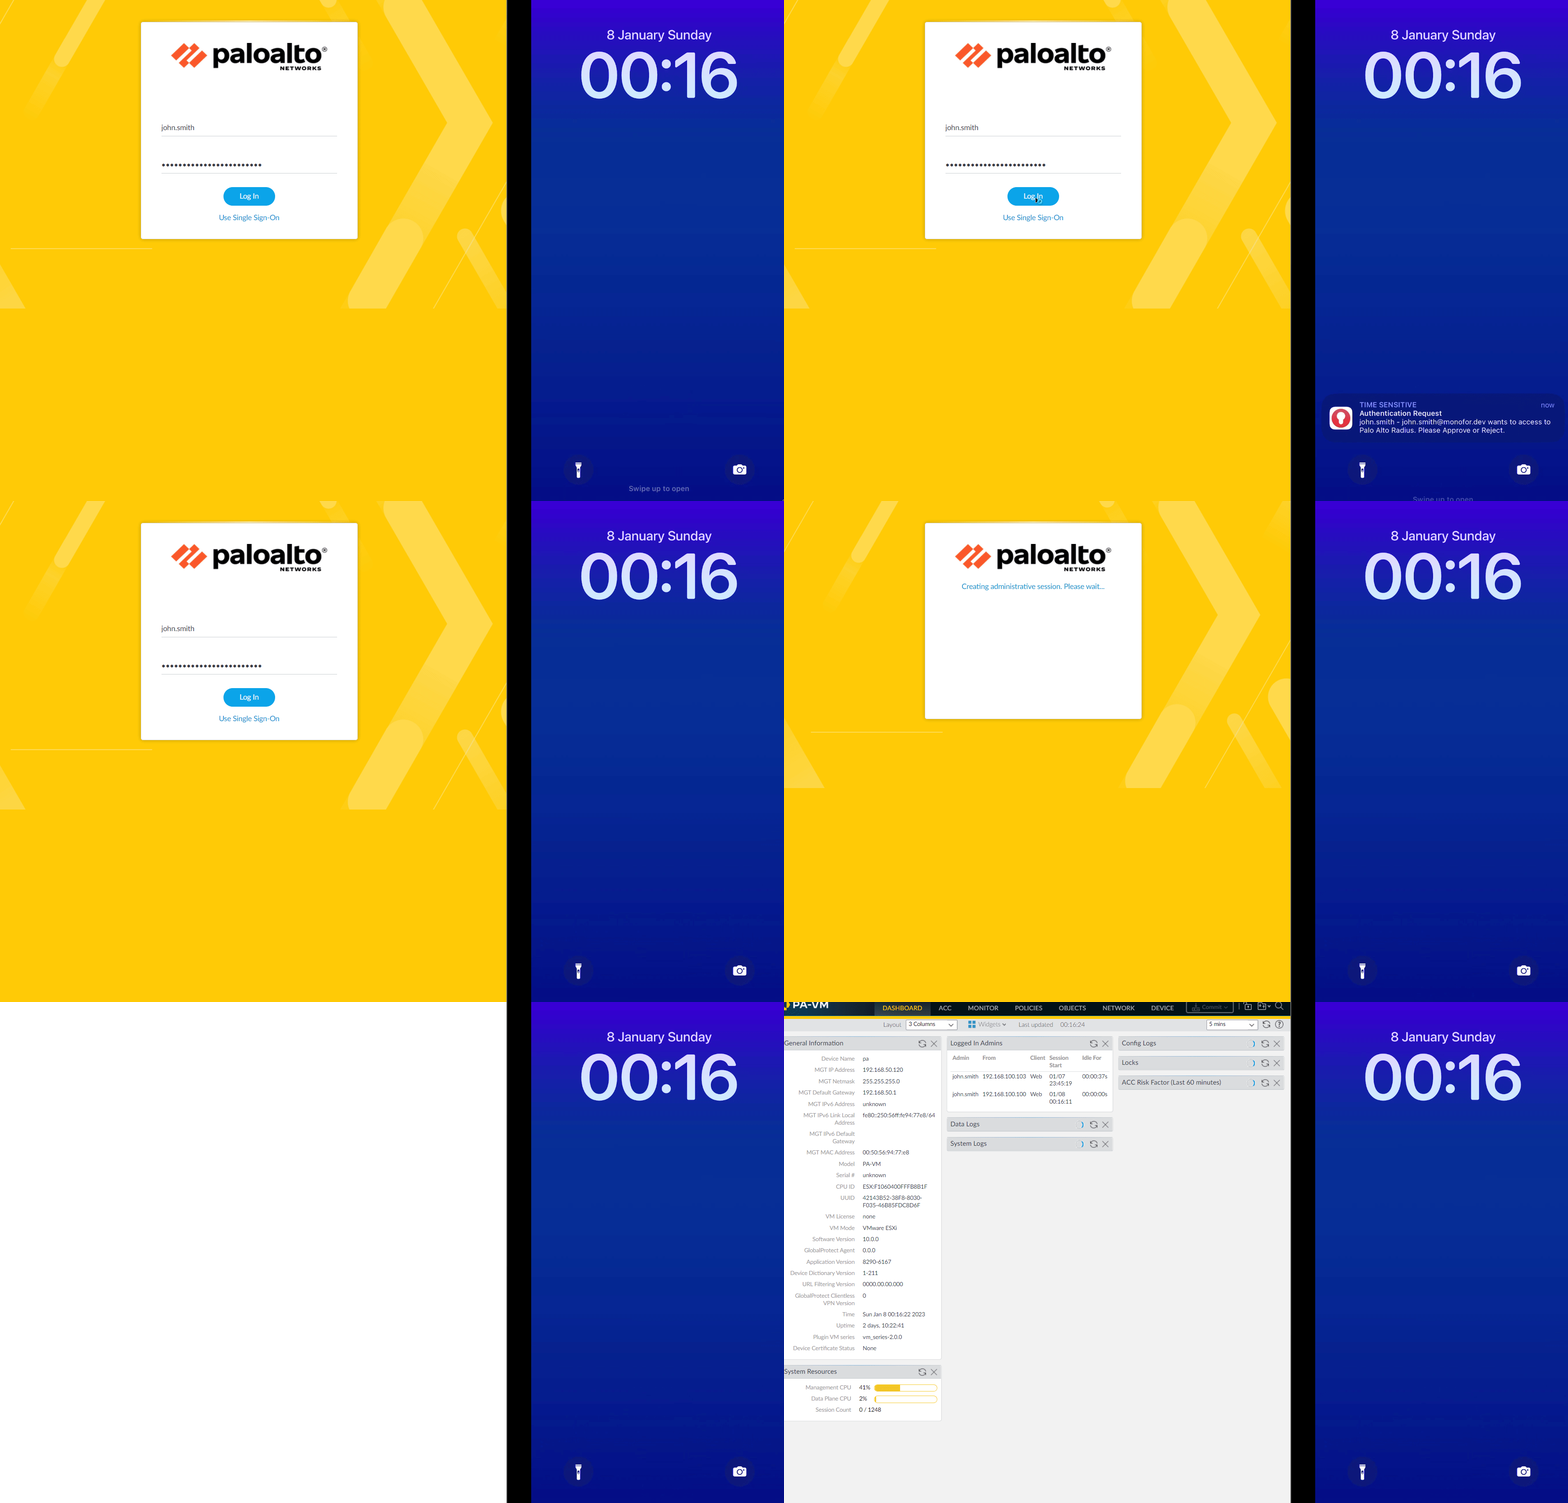
It’s done. Now you can test to log in to your Palo Alto firewall via Web GUI.
