SharePoint 2019 - On-Premise - SAML / WS-Federation Integration
This document explains how to implement Monosign with Microsoft SharePoint It covers Single Sign-On. Before you continue, it is better to start with Microsoft SharePoint’s Single Sign-On https://learn.microsoft.com/en-us/sharepoint/security-for-sharepoint-server/authentication-overview
Monofor has no responsibility to do Microsoft SharePoint configurations. If you need support please contact Microsoft SharePoint Support Services.
📑 Instructions
This documentation contains 4 main steps for integration.
Creating an Application on Monosign
Configuration Single Sign-On for Microsoft SharePoint
Assign a user to the Microsoft SharePoint application
Sign In Test
1- Creating an Application on Monosign
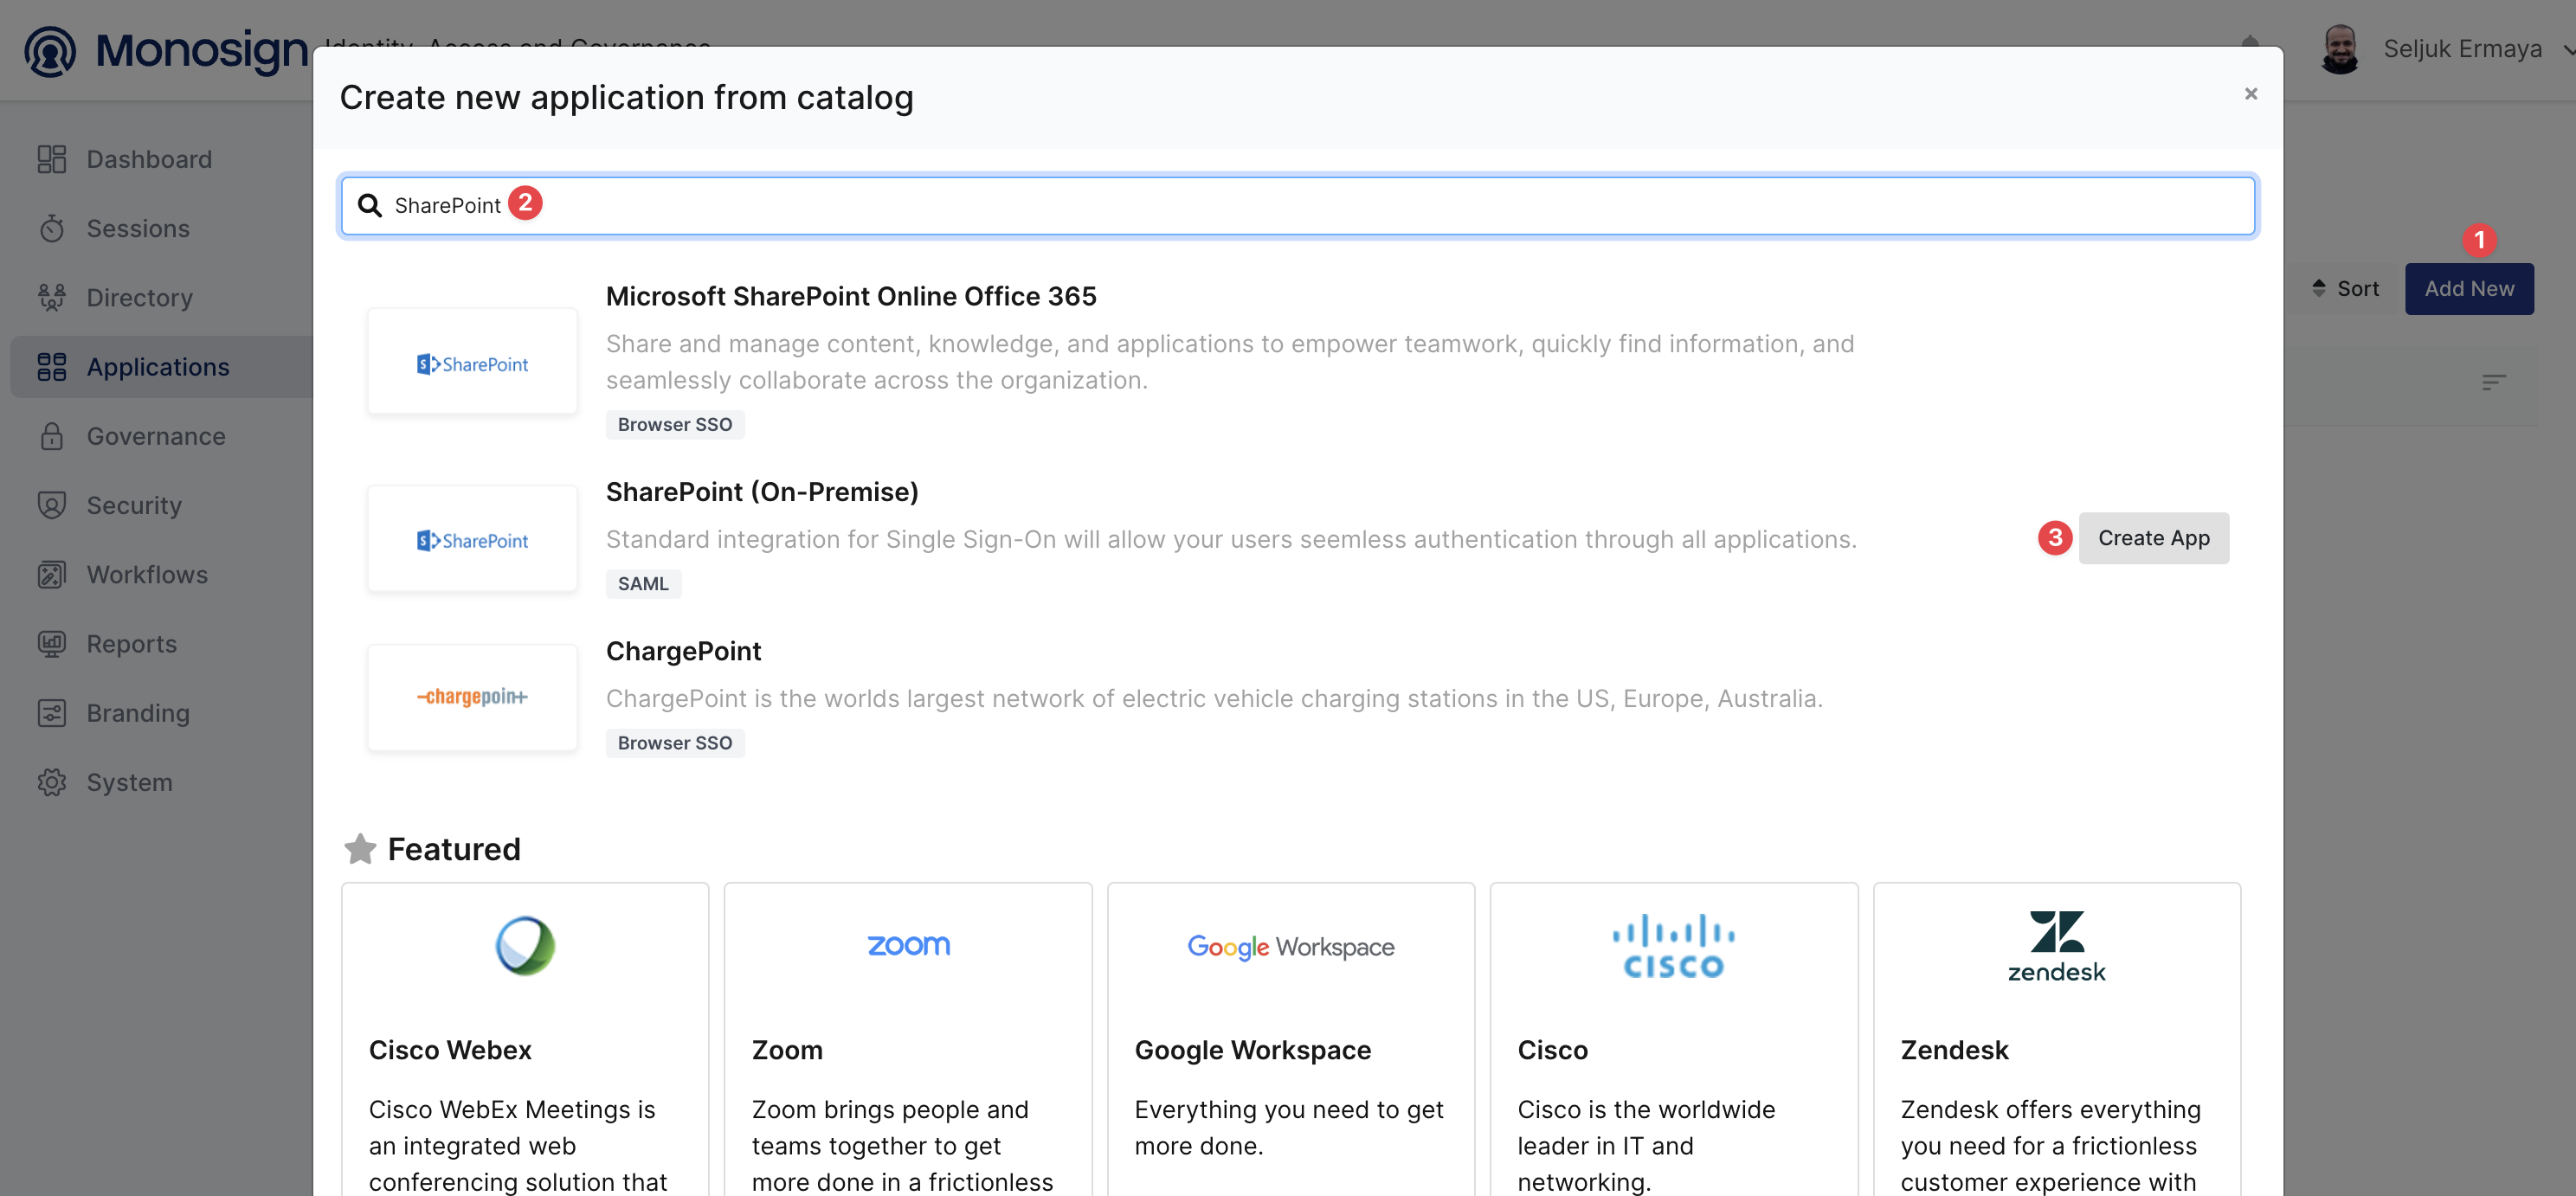
Go to the Applications on the Management Portal, click Add New, and type SharePoint. Select SharePoint (On-Premise) and click Create App.
It will create automatically the required Keys to connect to your SharePoint application.
After your app has been created, you need to click the Keys section and click Configure to do some additional configurations.
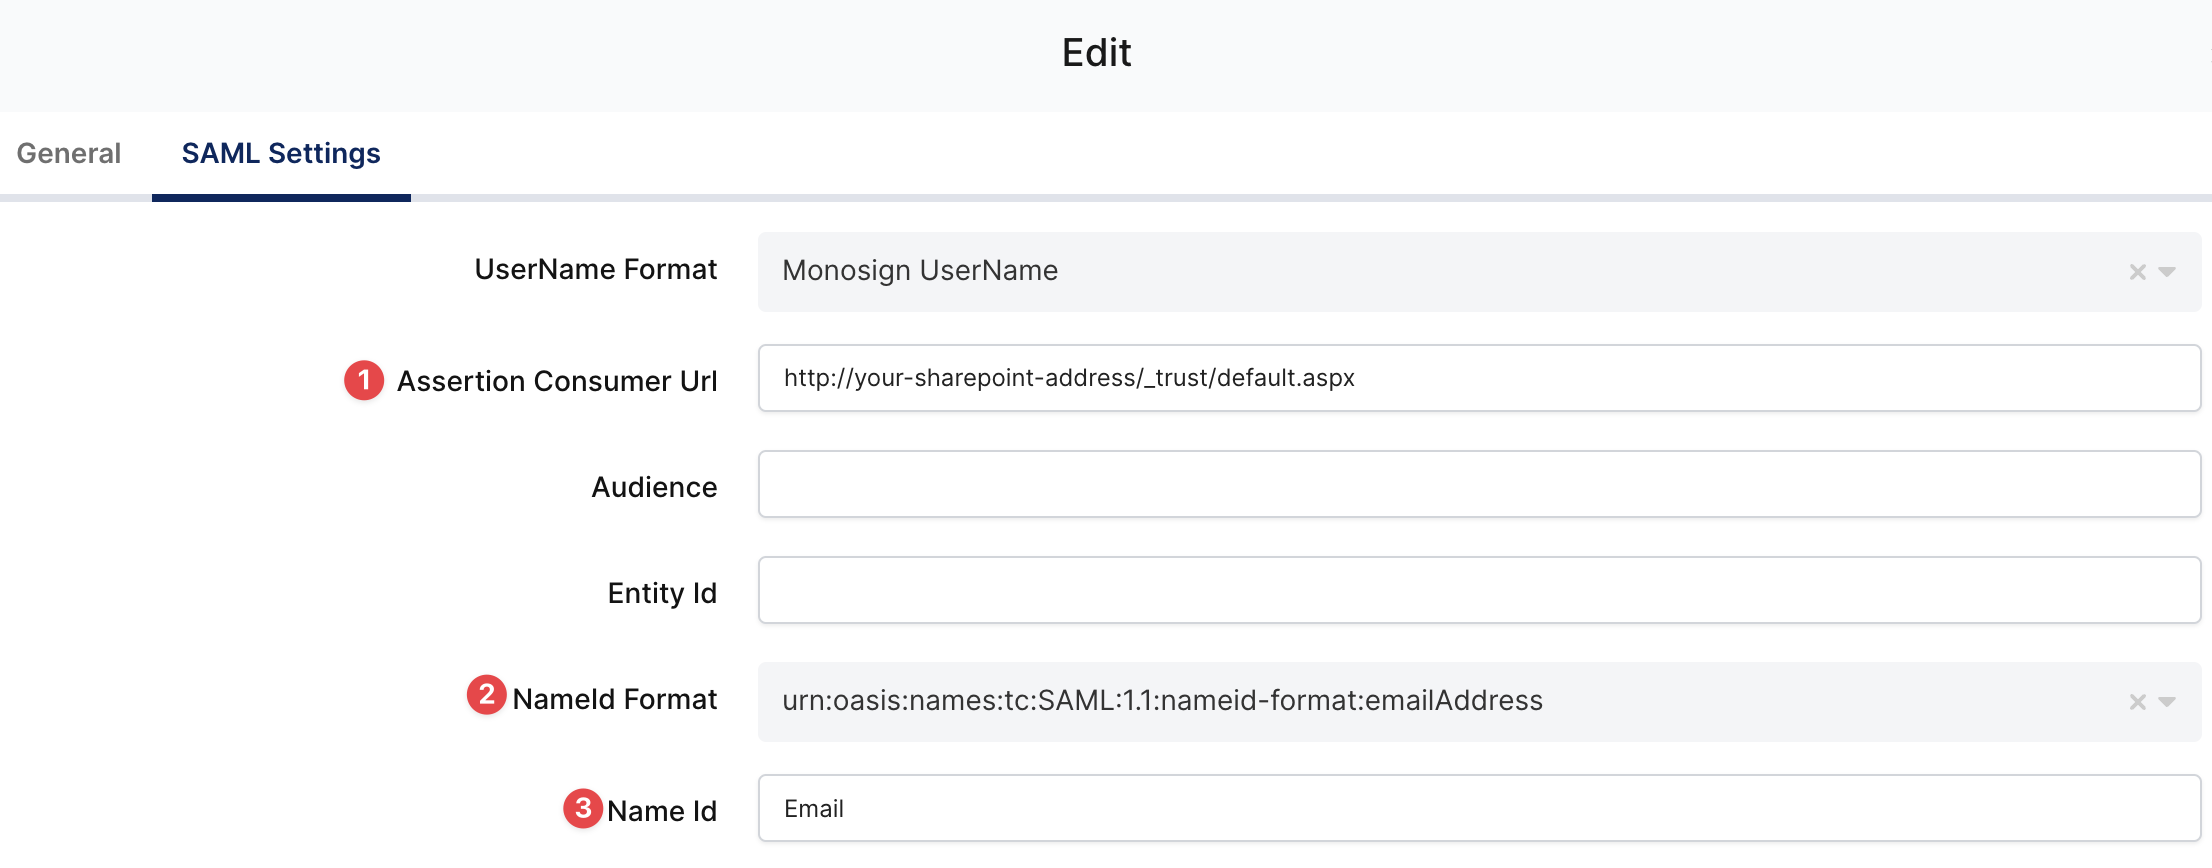
In SAML Settings, you need to type your Assertion Consumer URL like the following;
https://your-sharepoint-url:port/_trust/default.aspxPlease change only the https://your-sharepoint-url:port (:port is not necessary if you are already using 80 or 443 directly).
Your NameId format should be selected as urn:oasis:names:tc:SAML:1.1:nameid-format:emailAddress and Name Id should be Email.
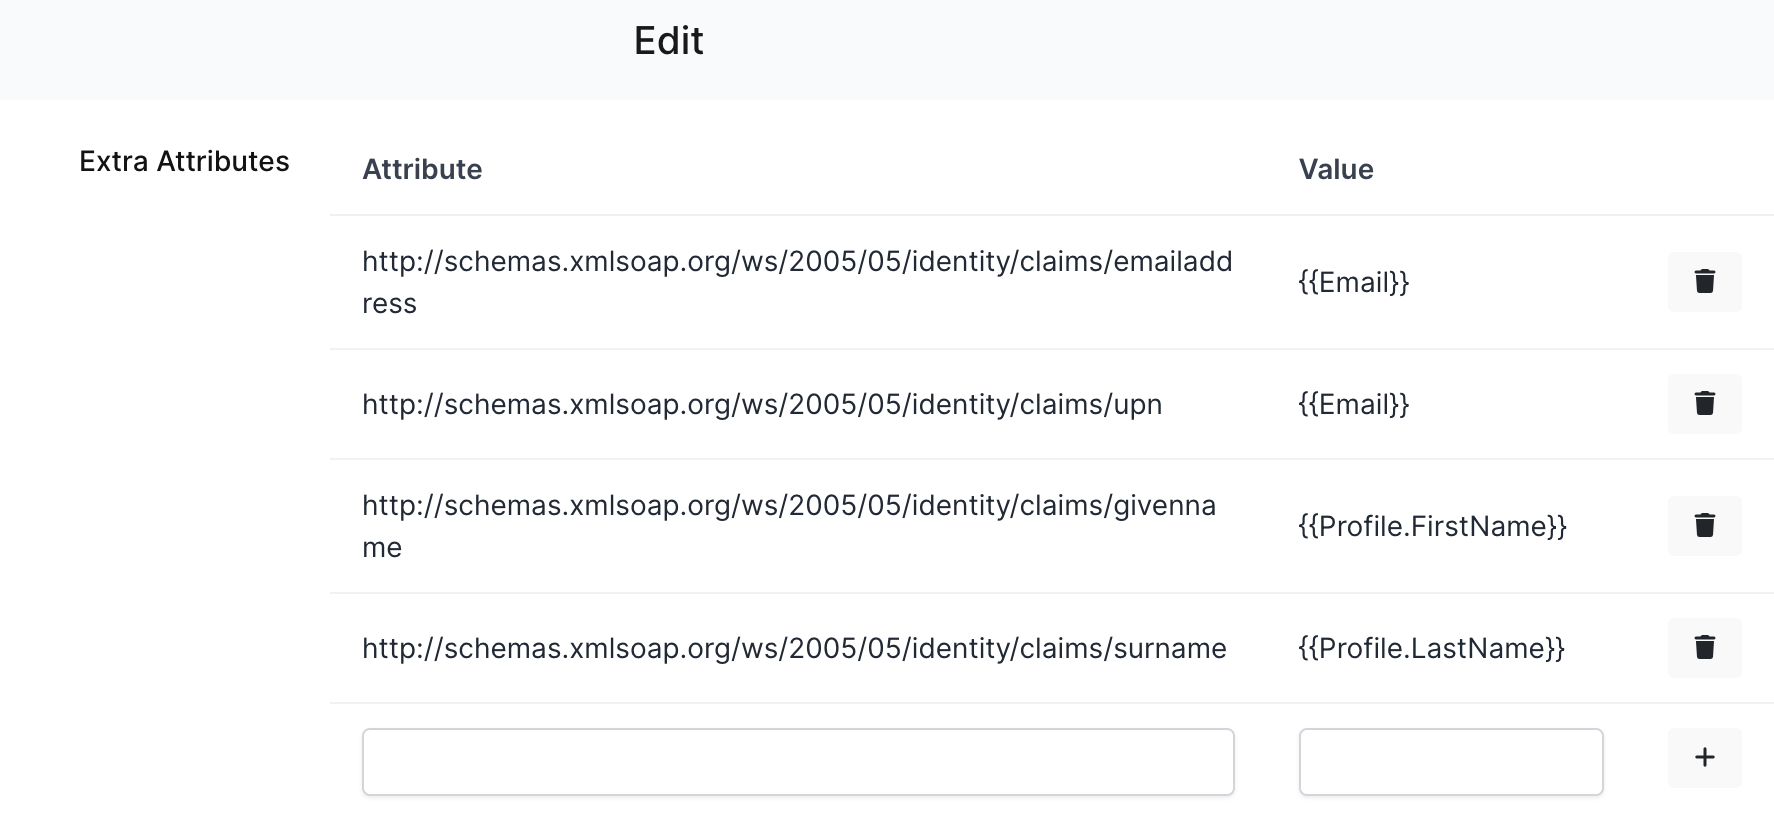
In the extra attributes section, we need to add the following attributes.
Attribute | Value |
|---|---|
|
|
|
|
|
|
|
|
This is the final overview after you add attributes;
If you also want to add Group Mapping, you can go to the Group Mapping section and type Group Mapping Attribute as http://schemas.microsoft.com/ws/2008/06/identity/claims/role and Group Mapping Format as {{Title}}.

To ensure that the application has access to user groups, follow these steps:
If the application hasn't been configured yet, click the “Edit” option for the application.
In the application settings, navigate to the “Source, Provider, and Profile” tab.
Configure the “User Access Type“ and “User Group Access Type” as “Only Assigned Users.”
Configuring this setting will allow the application to be accessed by user groups when users sign in.
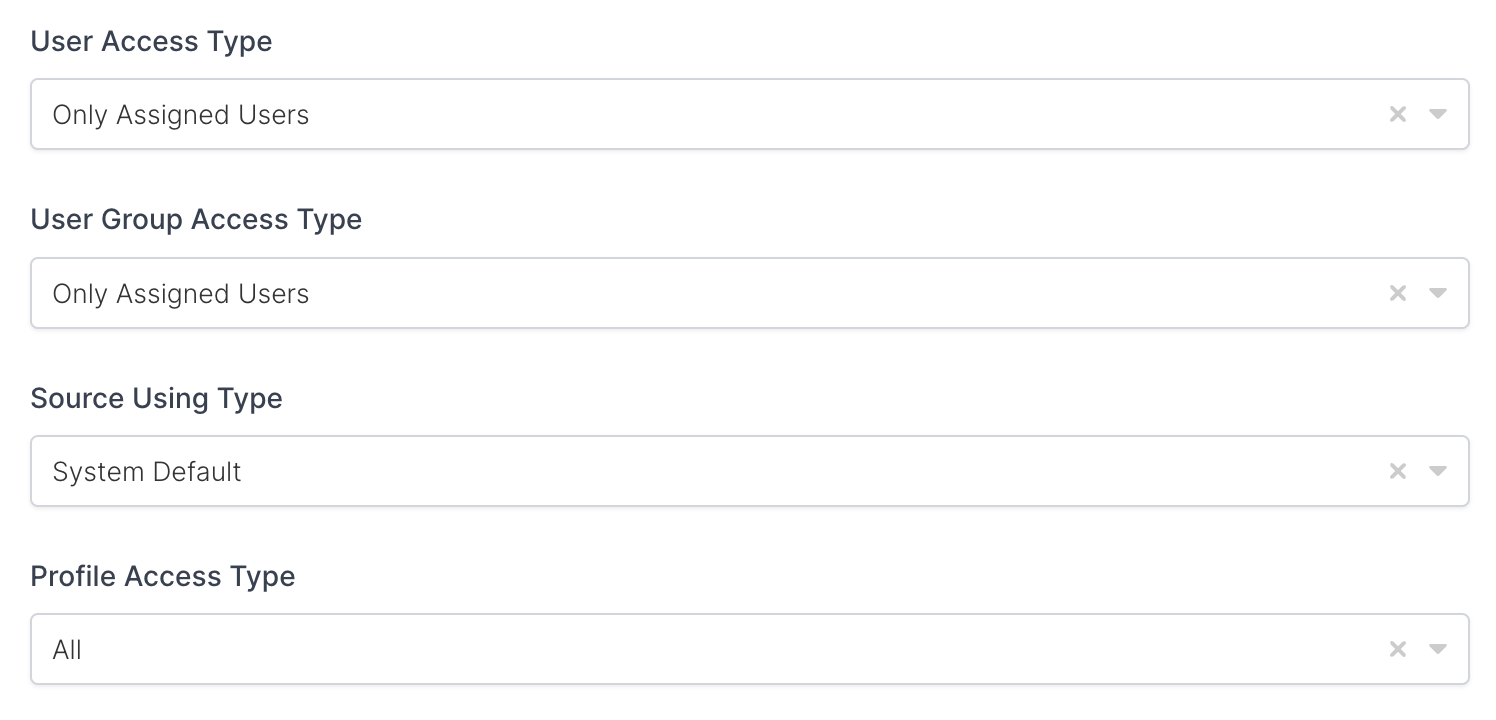
Property | Description | Options |
|---|---|---|
User Access Type | Defines which Users will access to this application. | Only Assigned Users |
User Group Access Type | Defines application’s user group access | Only Assigned Users |
Profile Access Type | Defines Application’s user’s profile access | Restricted - Only restricted user profile attributes |
2- Configuration Single Sign-On for Microsoft SharePoint
You have completed the Monosign part of the integration, but we need more steps to do for Microsoft SharePoint.
We need 2 files to move on;
Monosign Sign-In Certificate for SAML
Powershell Script for Configuration
First, you need to download the certificate from the Keys section. Click Download Certificate. Also, you are gonna need the Sign On Service URL.
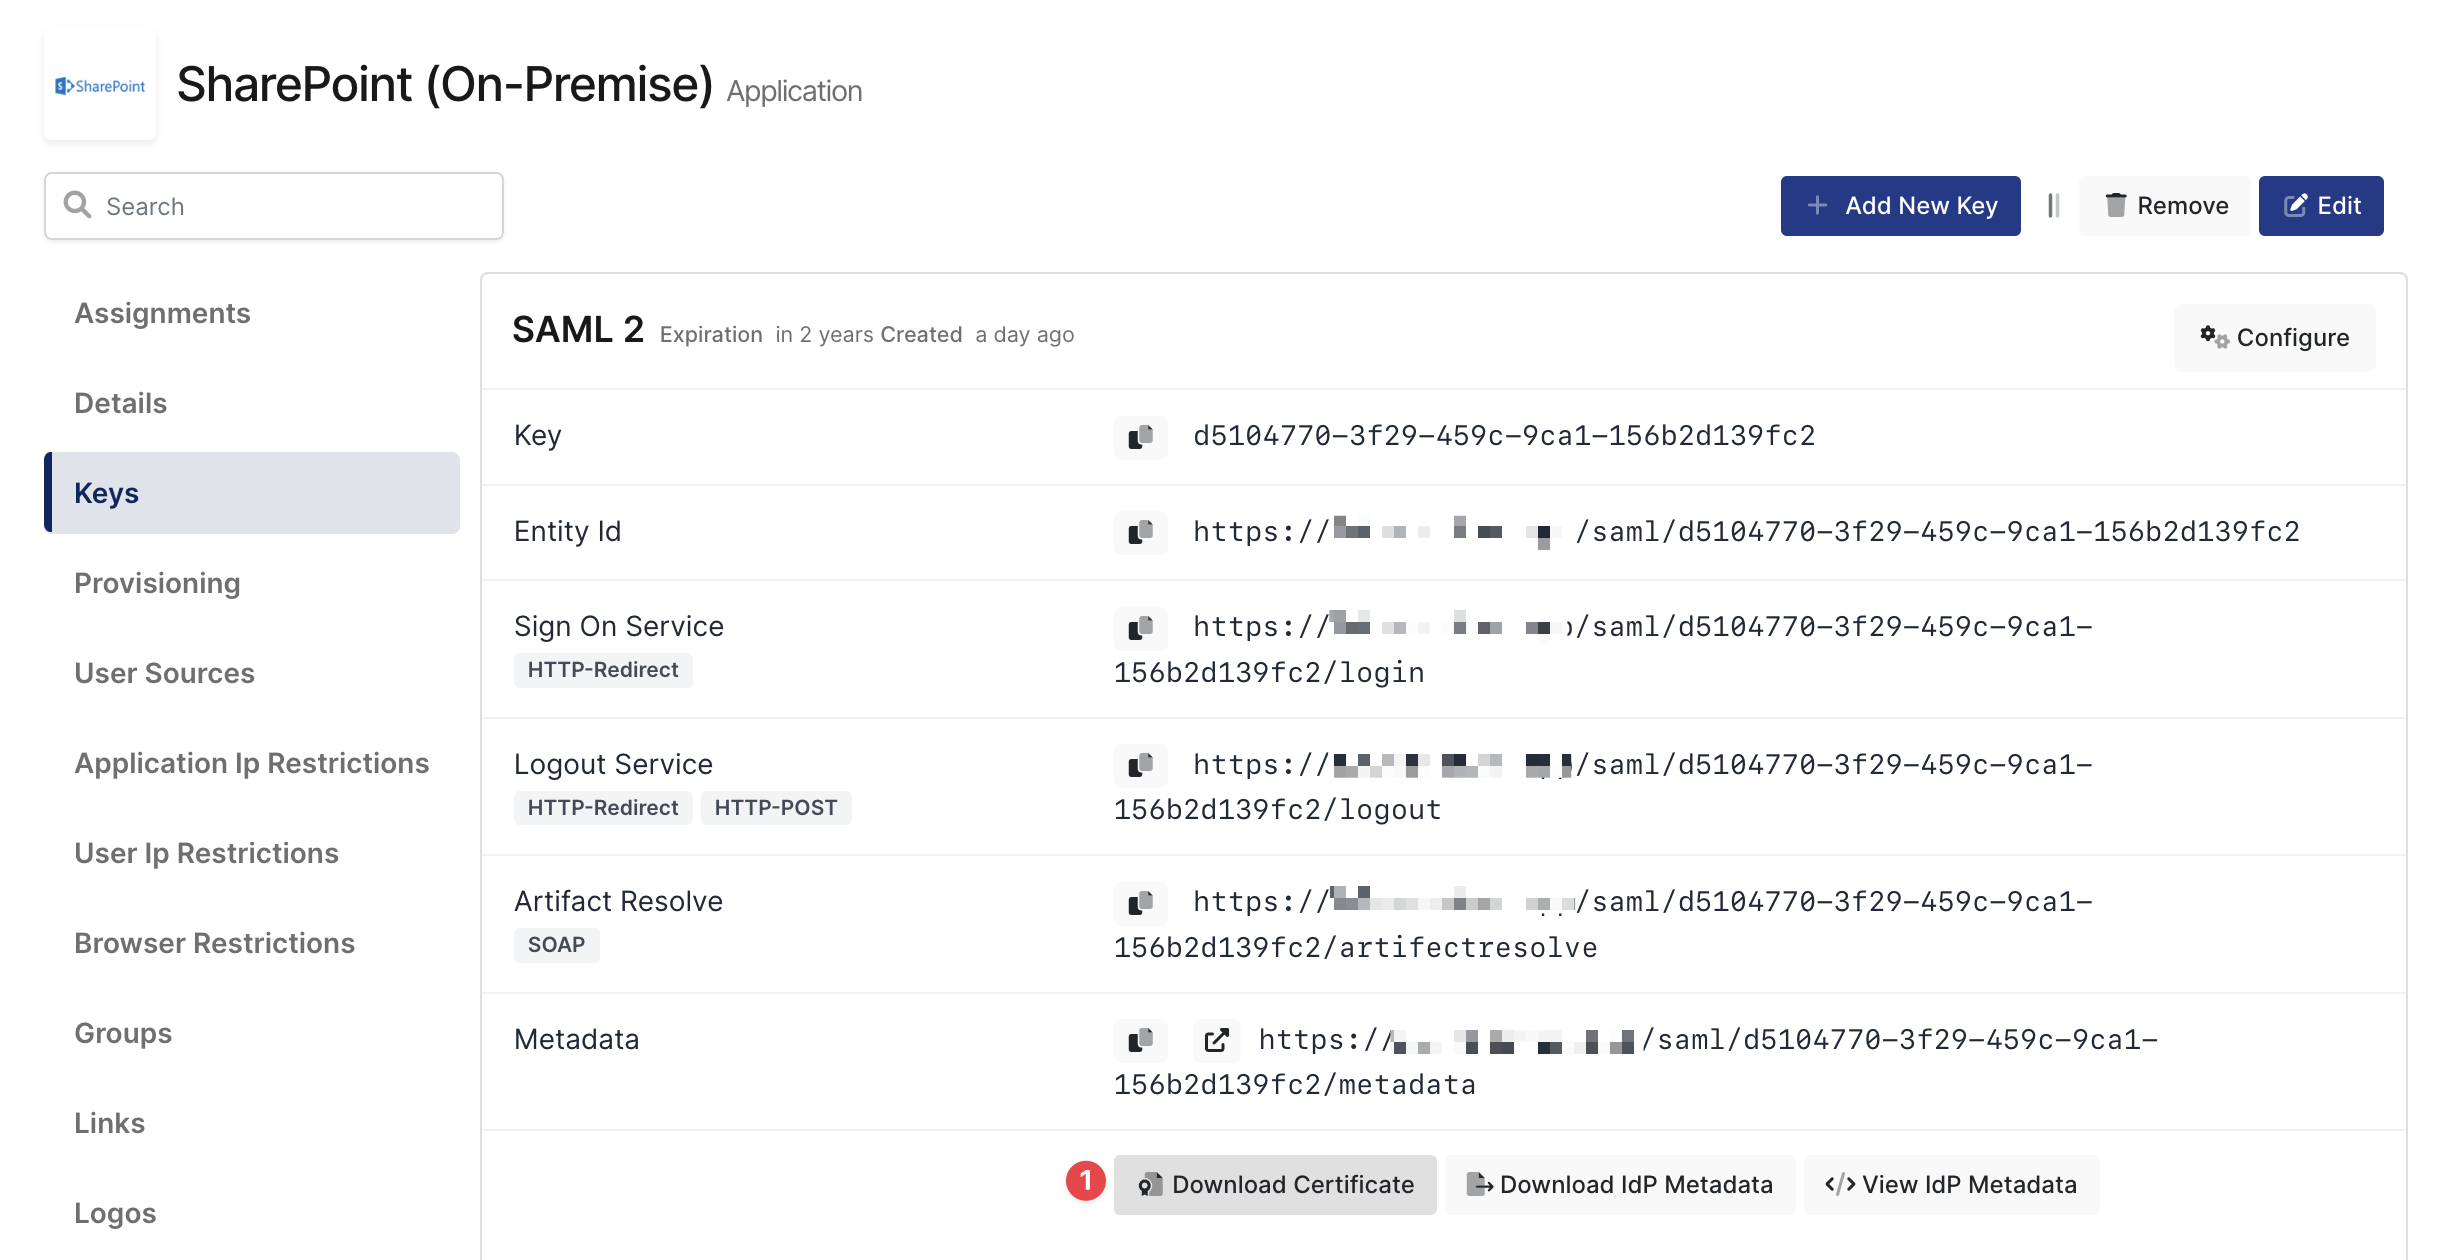
Monosign Sign-In Certificate
And then, click Download Powershell Script to continue.
Connect to the SharePoint Server and copy all files under your main hard drive directory such as C:\. (For example, I have copied my all files under C:\Scripts.
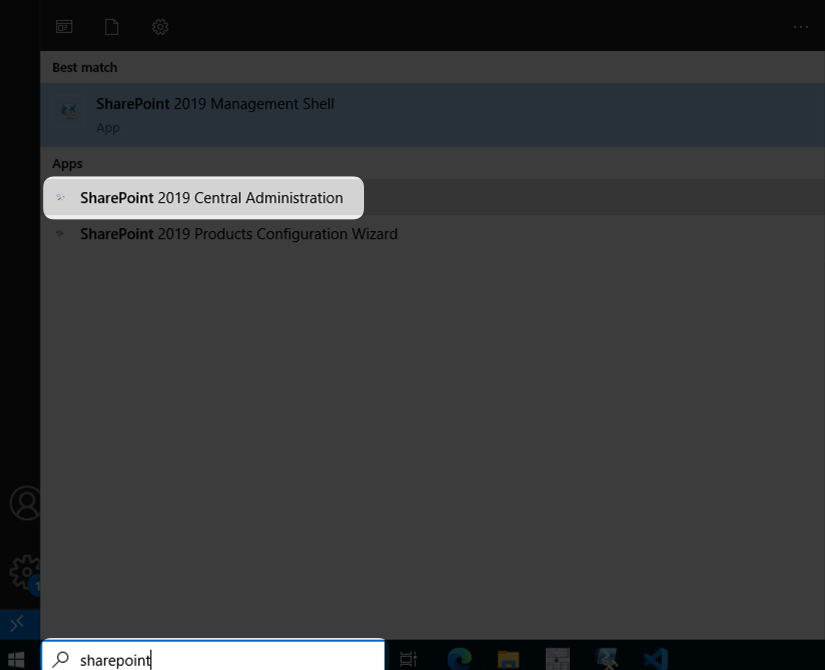
Open SharePoint Management Shell.
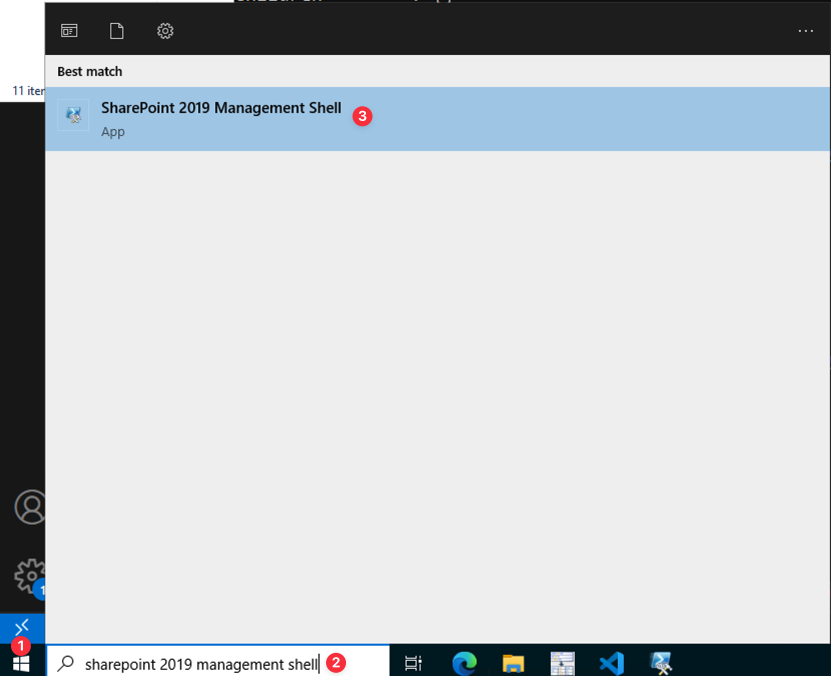
Run the copied script like the following. Please change {{Paste-Sign-On-Service-Url}}, {{your-sharepoint-url}} and {{Your-Certificate-Path}}.
.\AddIdentityProvider.ps1 -ProviderName Monosign -SignInUrl {{Paste-Sign-On-Service-Url}} -Realm https://{{your-sharepoint-url}}/_trust/default.aspx -CertificatePath {{Your-Certificate-Path}}After you have successfully executed the script, navigate to the Administrator Portal of SharePoint.
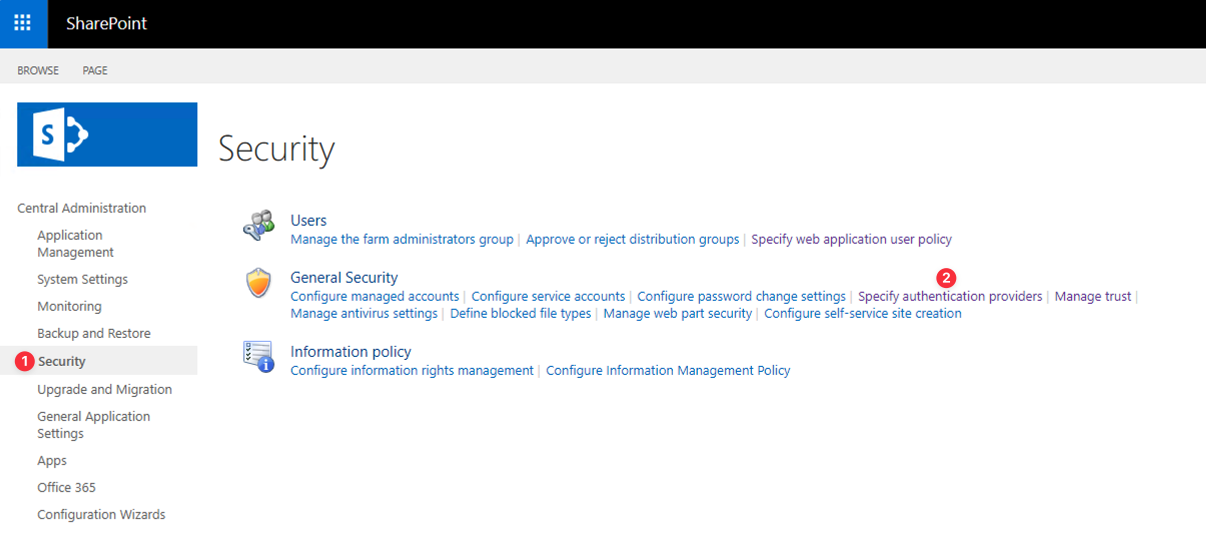
Click Security and then Specify authentication providers.
Click Default and you will see the Trusted Identity Provider section and the option for Monosign. Enable them and click Save.
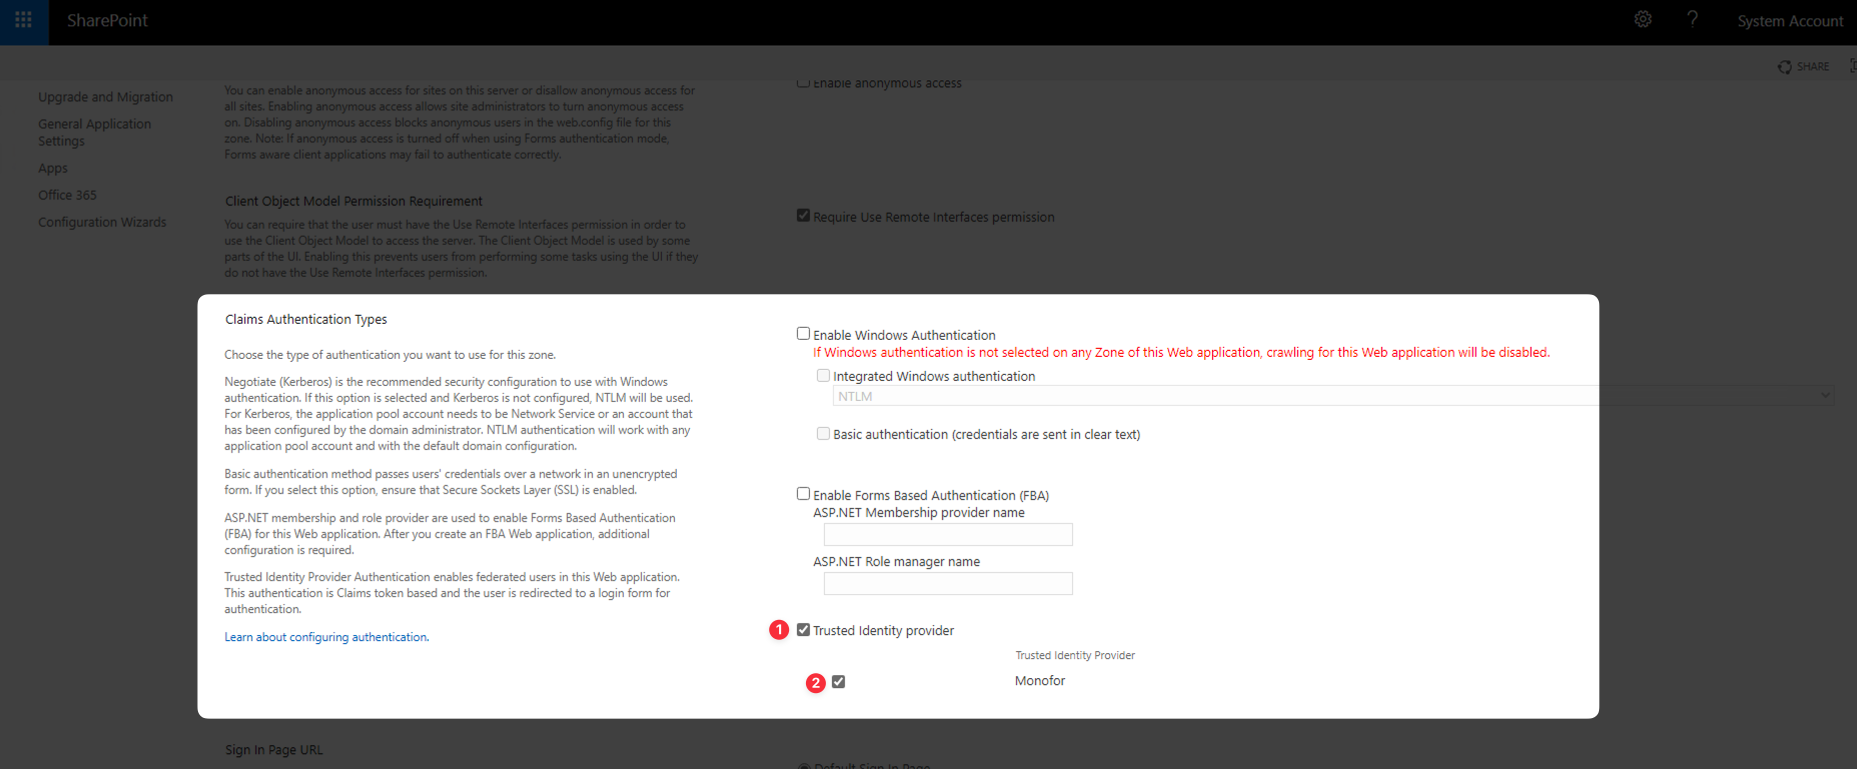
Now, let’s Specify the web application policy. Once again, click Security, and now, click Specify web application user policy.
Make sure you have selected the correct application. Now click Add Users. Select the Zone you want to add and click Next.
In the Choose Users section, click the little book button on the right.
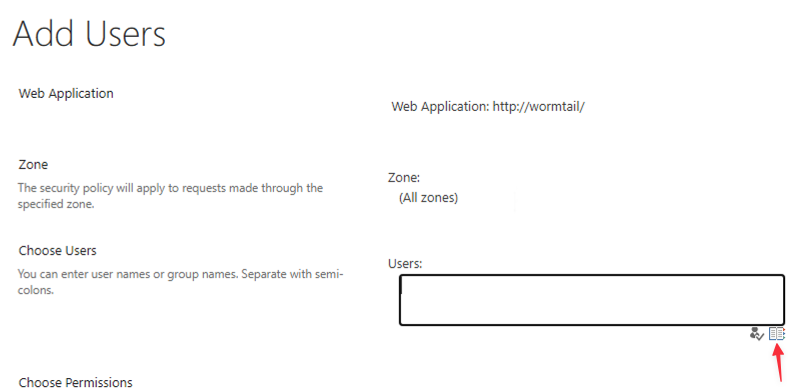
And specify your policy. For example, I’m gonna use Role to specify users' permission for this application. Whether they are admin or normal users.
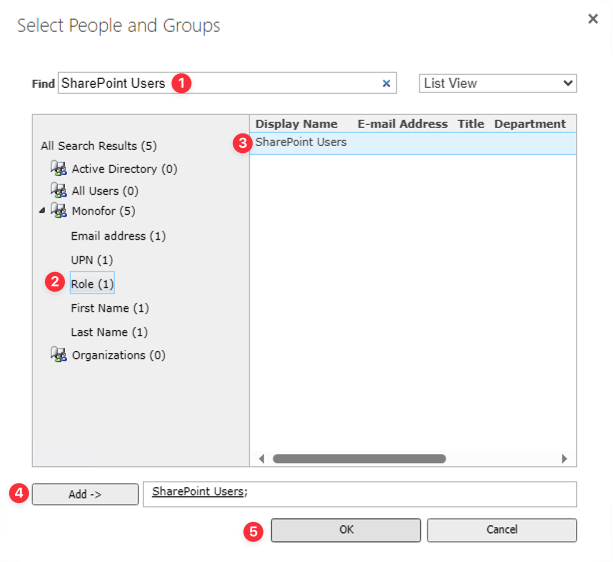
Specify your permission and click Finish.
Now I can assign my user and test my configuration.
3- Assign a user to the Microsoft SharePoint application
Please follow the below instructions on how to assign a user to the application. In this example john.smith will assign to the application access.


4- Sign In Test
Now try login. Navigate to the Microsoft SharePoint application. Click Monosign on the UI.
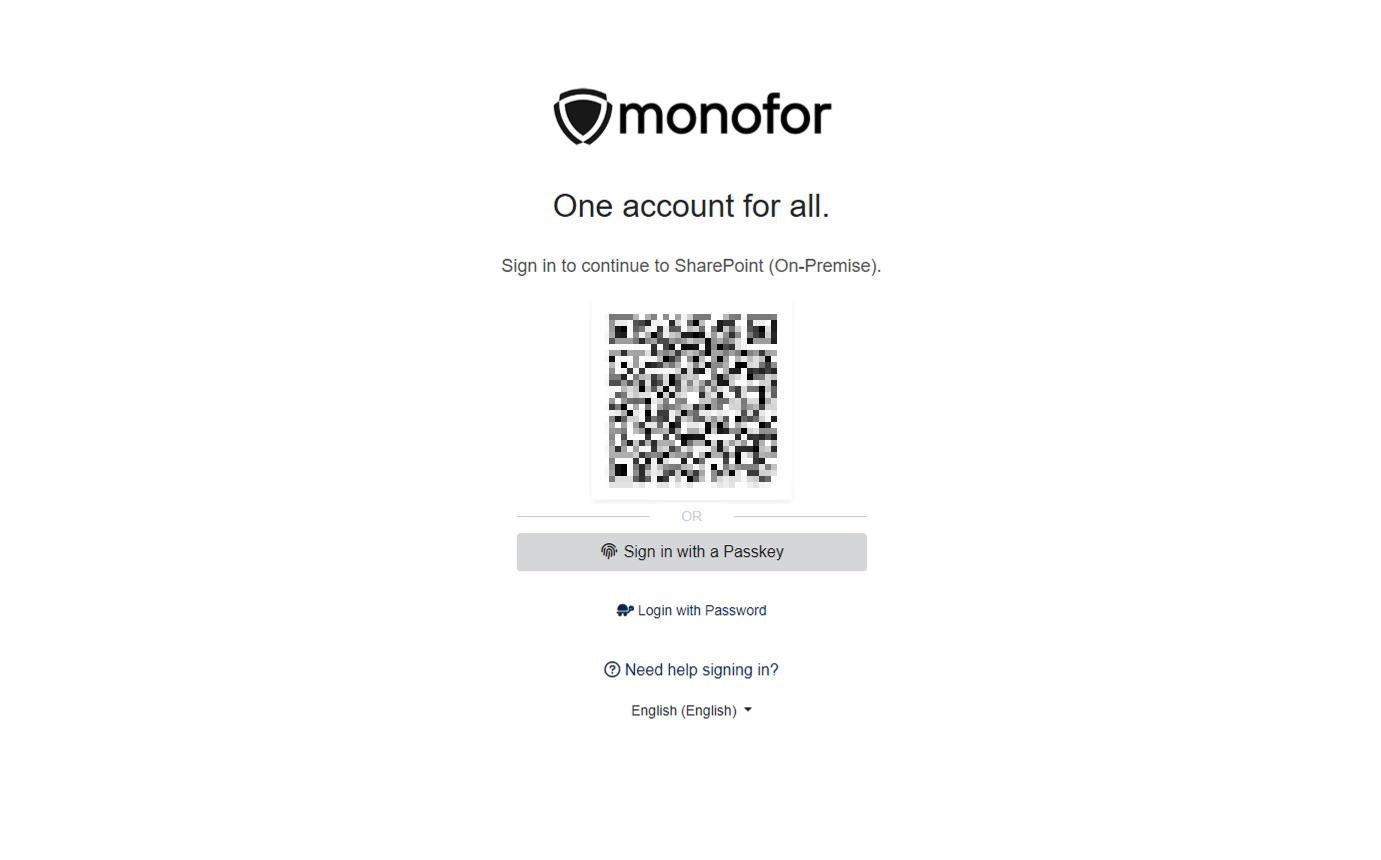
If everything is well configured, the page will be redirected to Monosign’s login page. It can be logged in passwordless with a QR code or type username and password.
When the user logs in, the page will be redirected to the Microsoft SharePoint page.
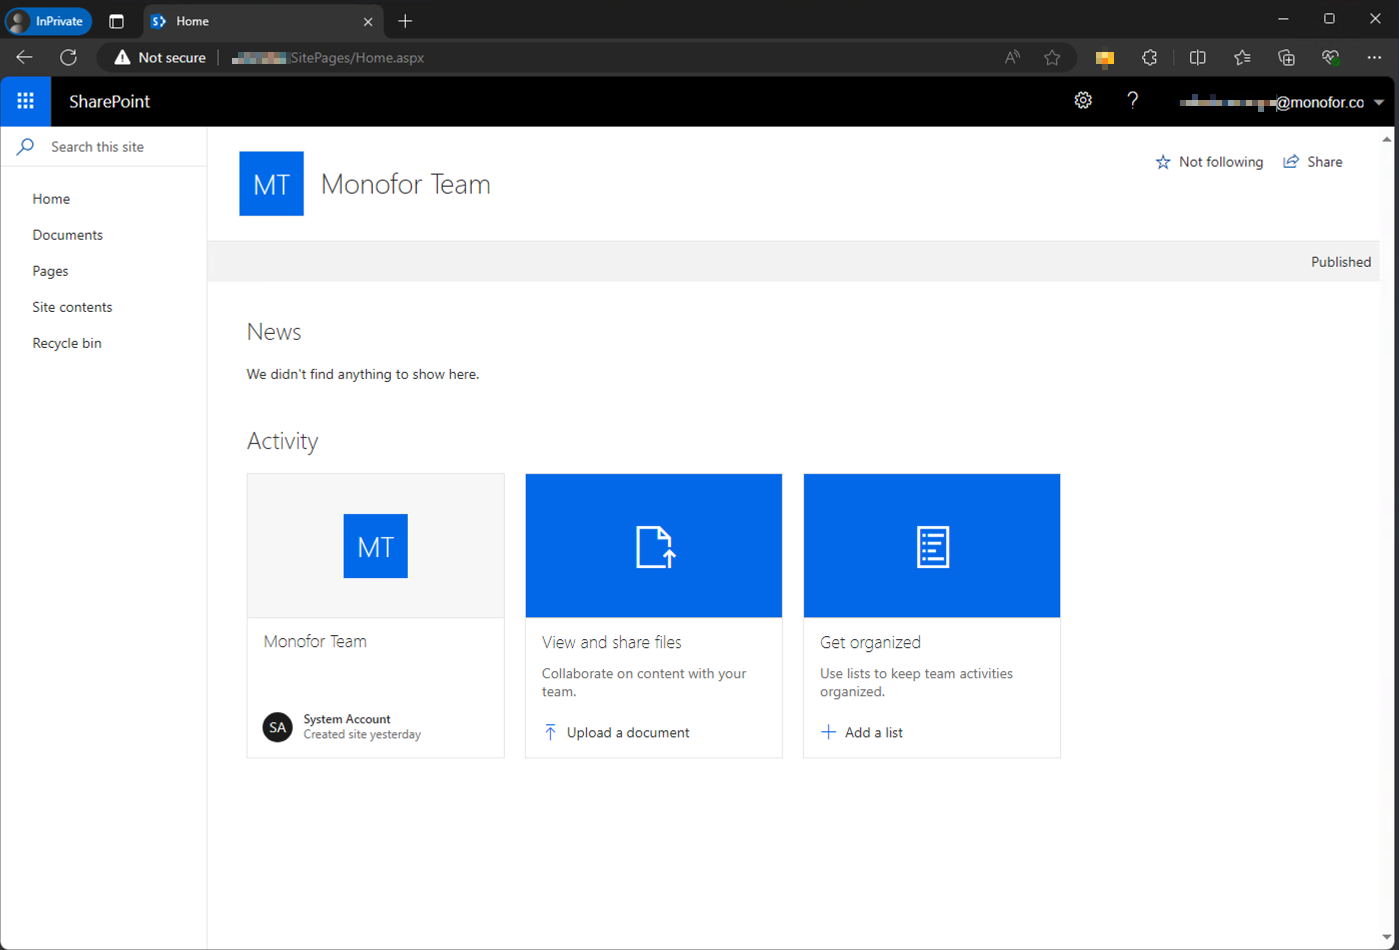
LDAPCP for Better Claim Mapping and People Picker (Recommended)
Because of the limitation of SharePoint Custom Identity Issuer (Such as ADFS, Monosign, etc.) People Picker won’t work as expected. To resolve this issue in a better way, we highly recommend you use LDAPCP.
Instructions for https://www.ldapcp.com/
If you installed the LDAPCP, you can easily configure it with Monosign as follows.
$idp = Get-SPTrustedIdentityTokenIssuer -Identity "Monofor"
$idp.ClaimProviderName = "LDAPCPSE"
$idp.Update()
Troubleshooting
Common issues that you can face while configuring SharePoint with Monosign.
[CryptographicException: ID6018: Digest verification failed for reference '#ID_{GUID}'.]
This error could happen if the XML Result size is bigger than expected.
If you enabled Group Mapping and the User has lots of groups, the result XML could be bigger than expected. You can easily disable or modify which groups should be sent.
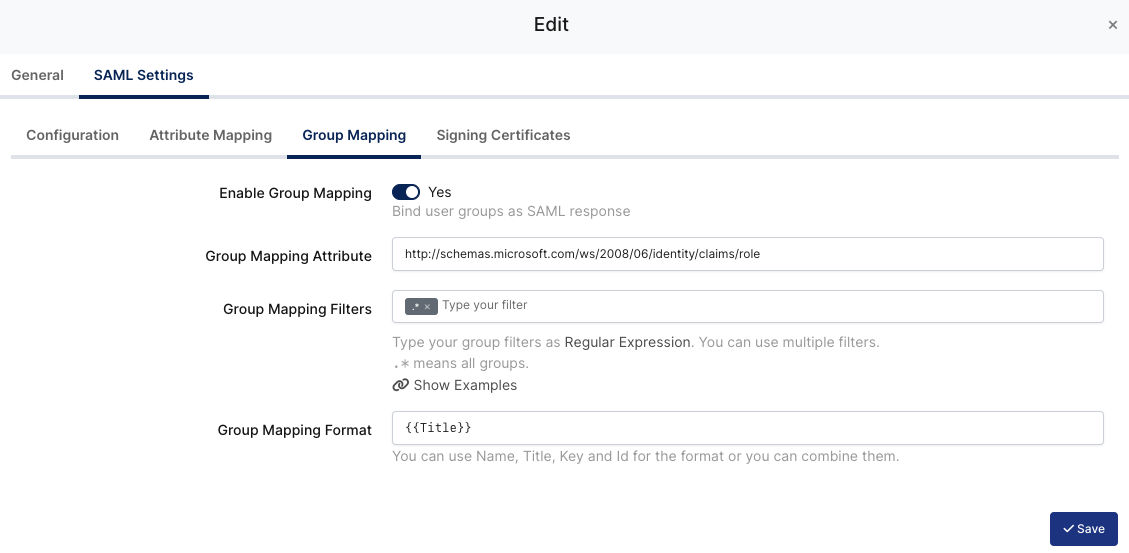
You can type your Group filter in Group Mapping Filters.
