This document explains how to implement Monosign with Trellix ePO. Formerly know McAfee ePO. It covers Single Sign-On. Before you continue, it is better to start with Trellix’s Single Sign-On integration guide.
📑 Instructions
This documentation contains 4 main steps for integration.
-
Creating an Application on Monosign
-
Configuration Single Sign-On for Trellix
-
Assign a user to the Trellix app
-
Sign In Test
1- Creating an Application on Monosign
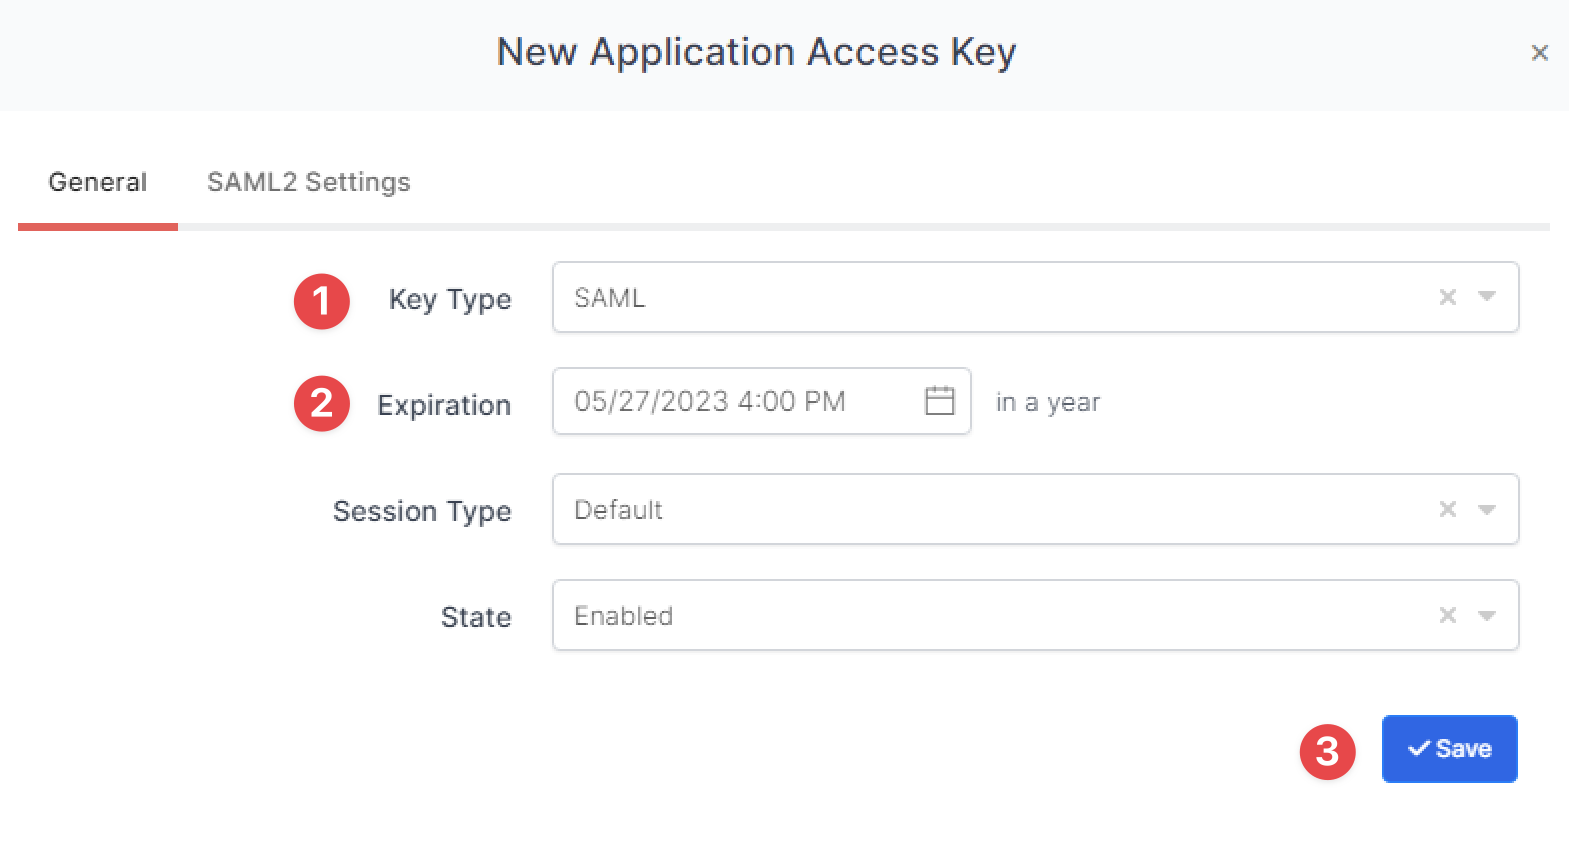
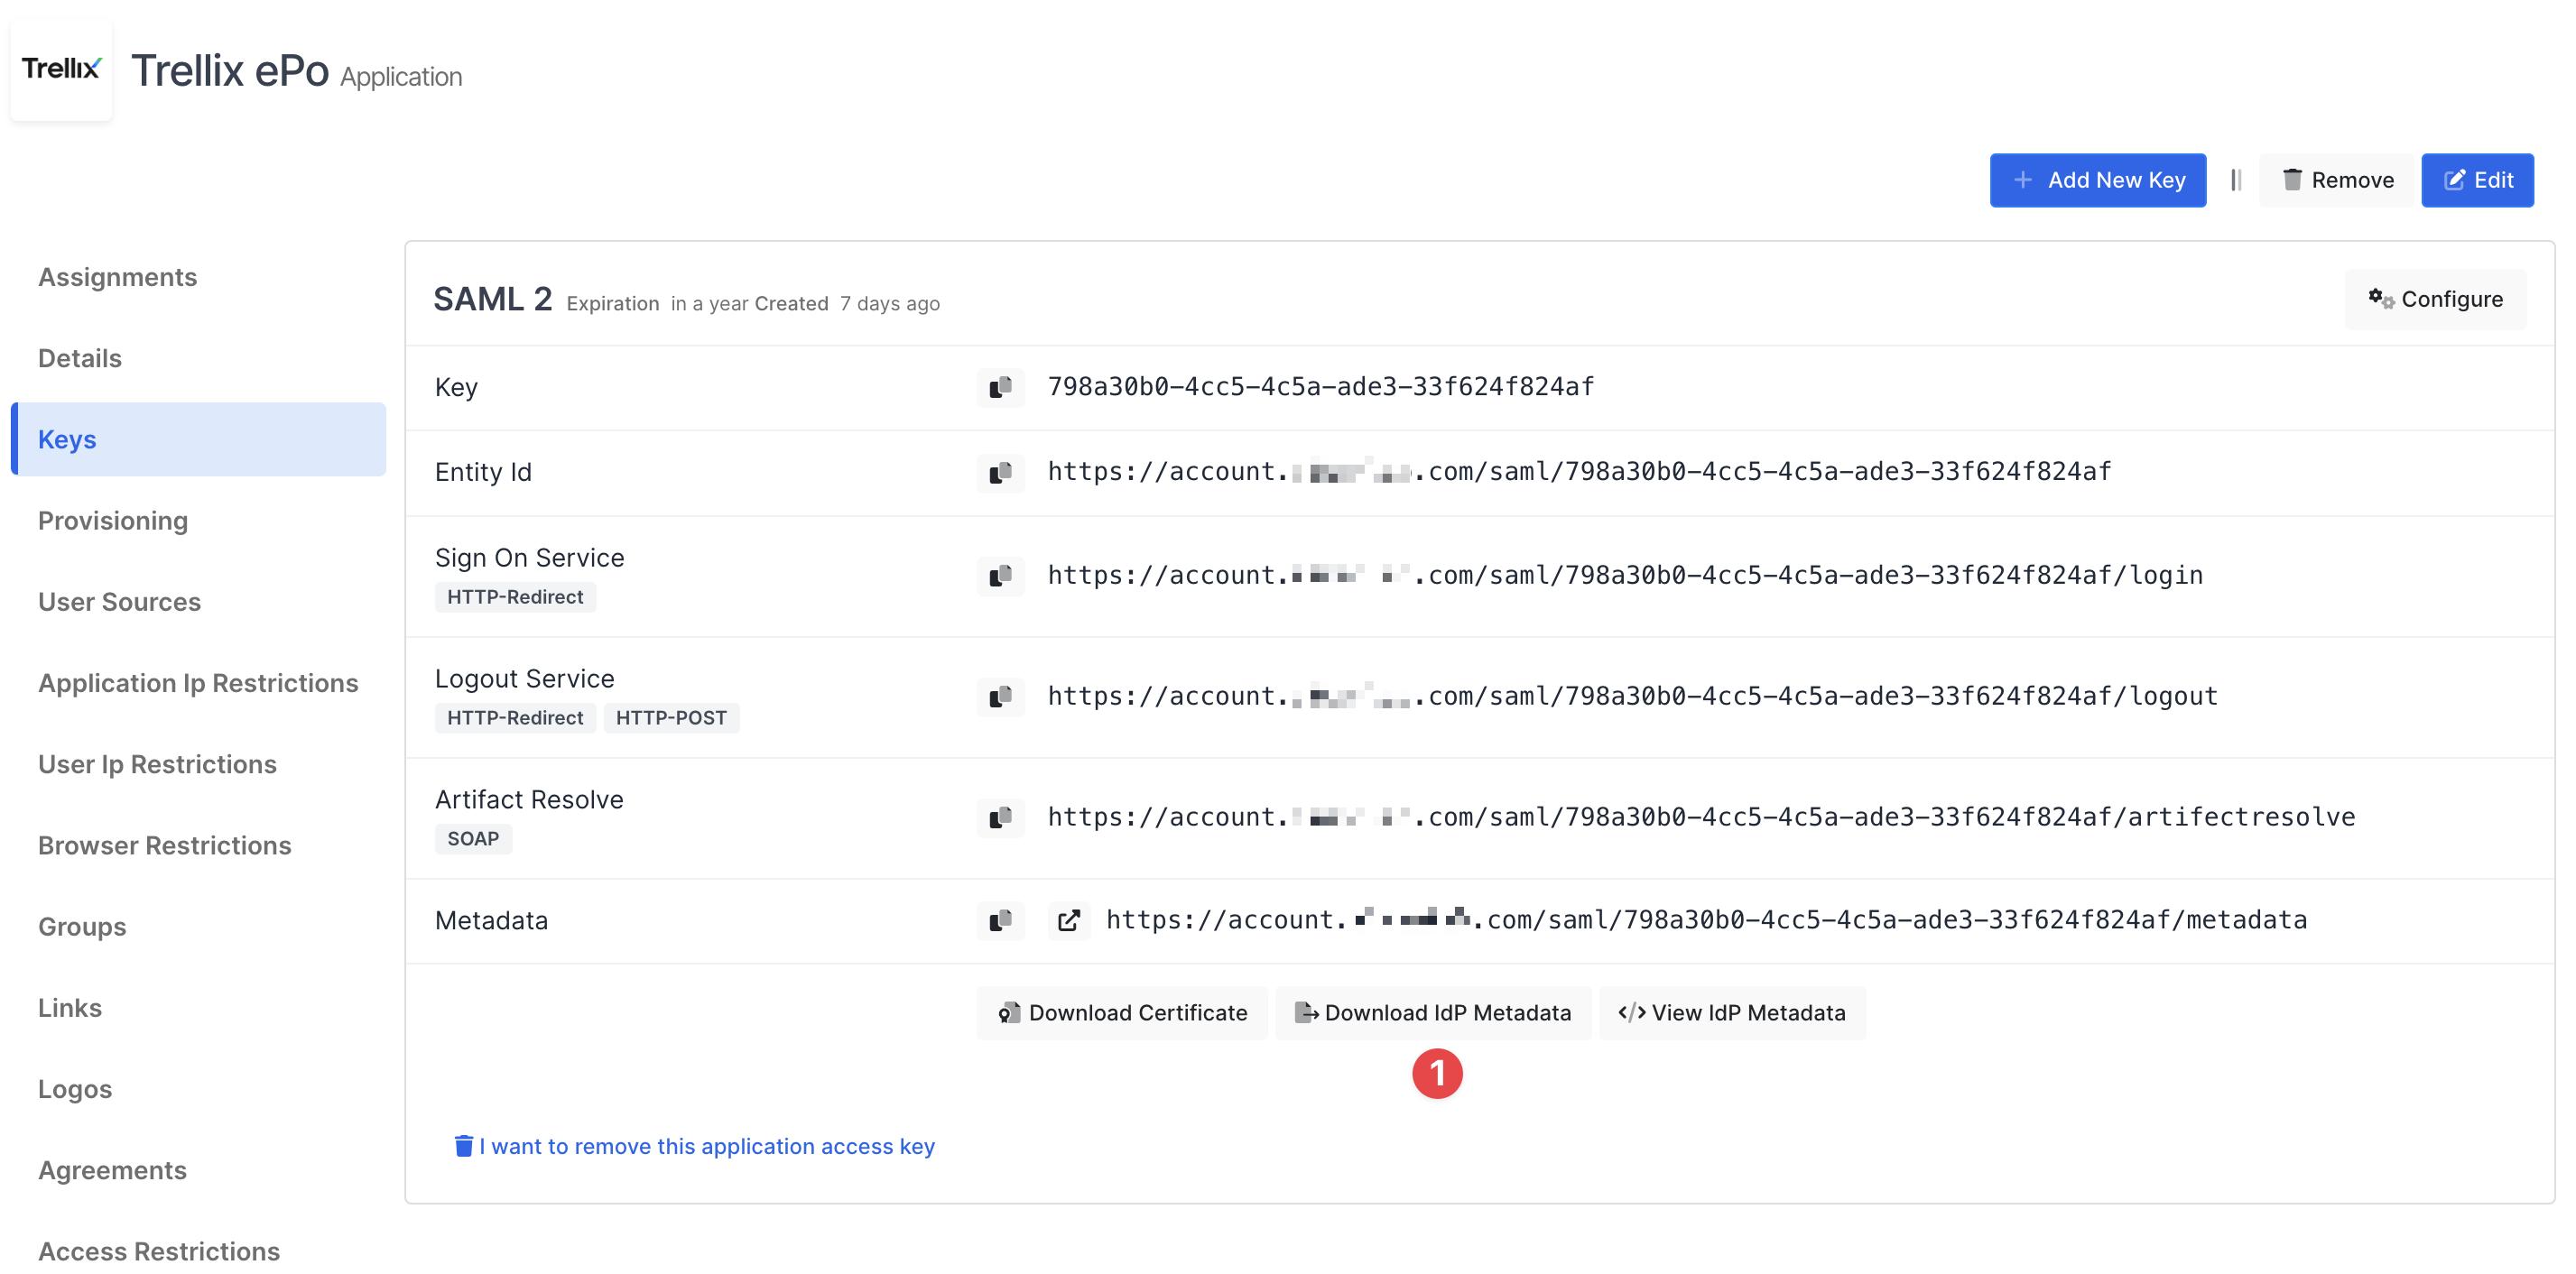
Create your application on Monosign and configure your access policy. Once you create, click “Keys” and add a new Access Key for SAML Key for access.
We will need this information while we configure the Trellix ePO app.

You are gonna see your configuration for your Trellix ePO app as follows;
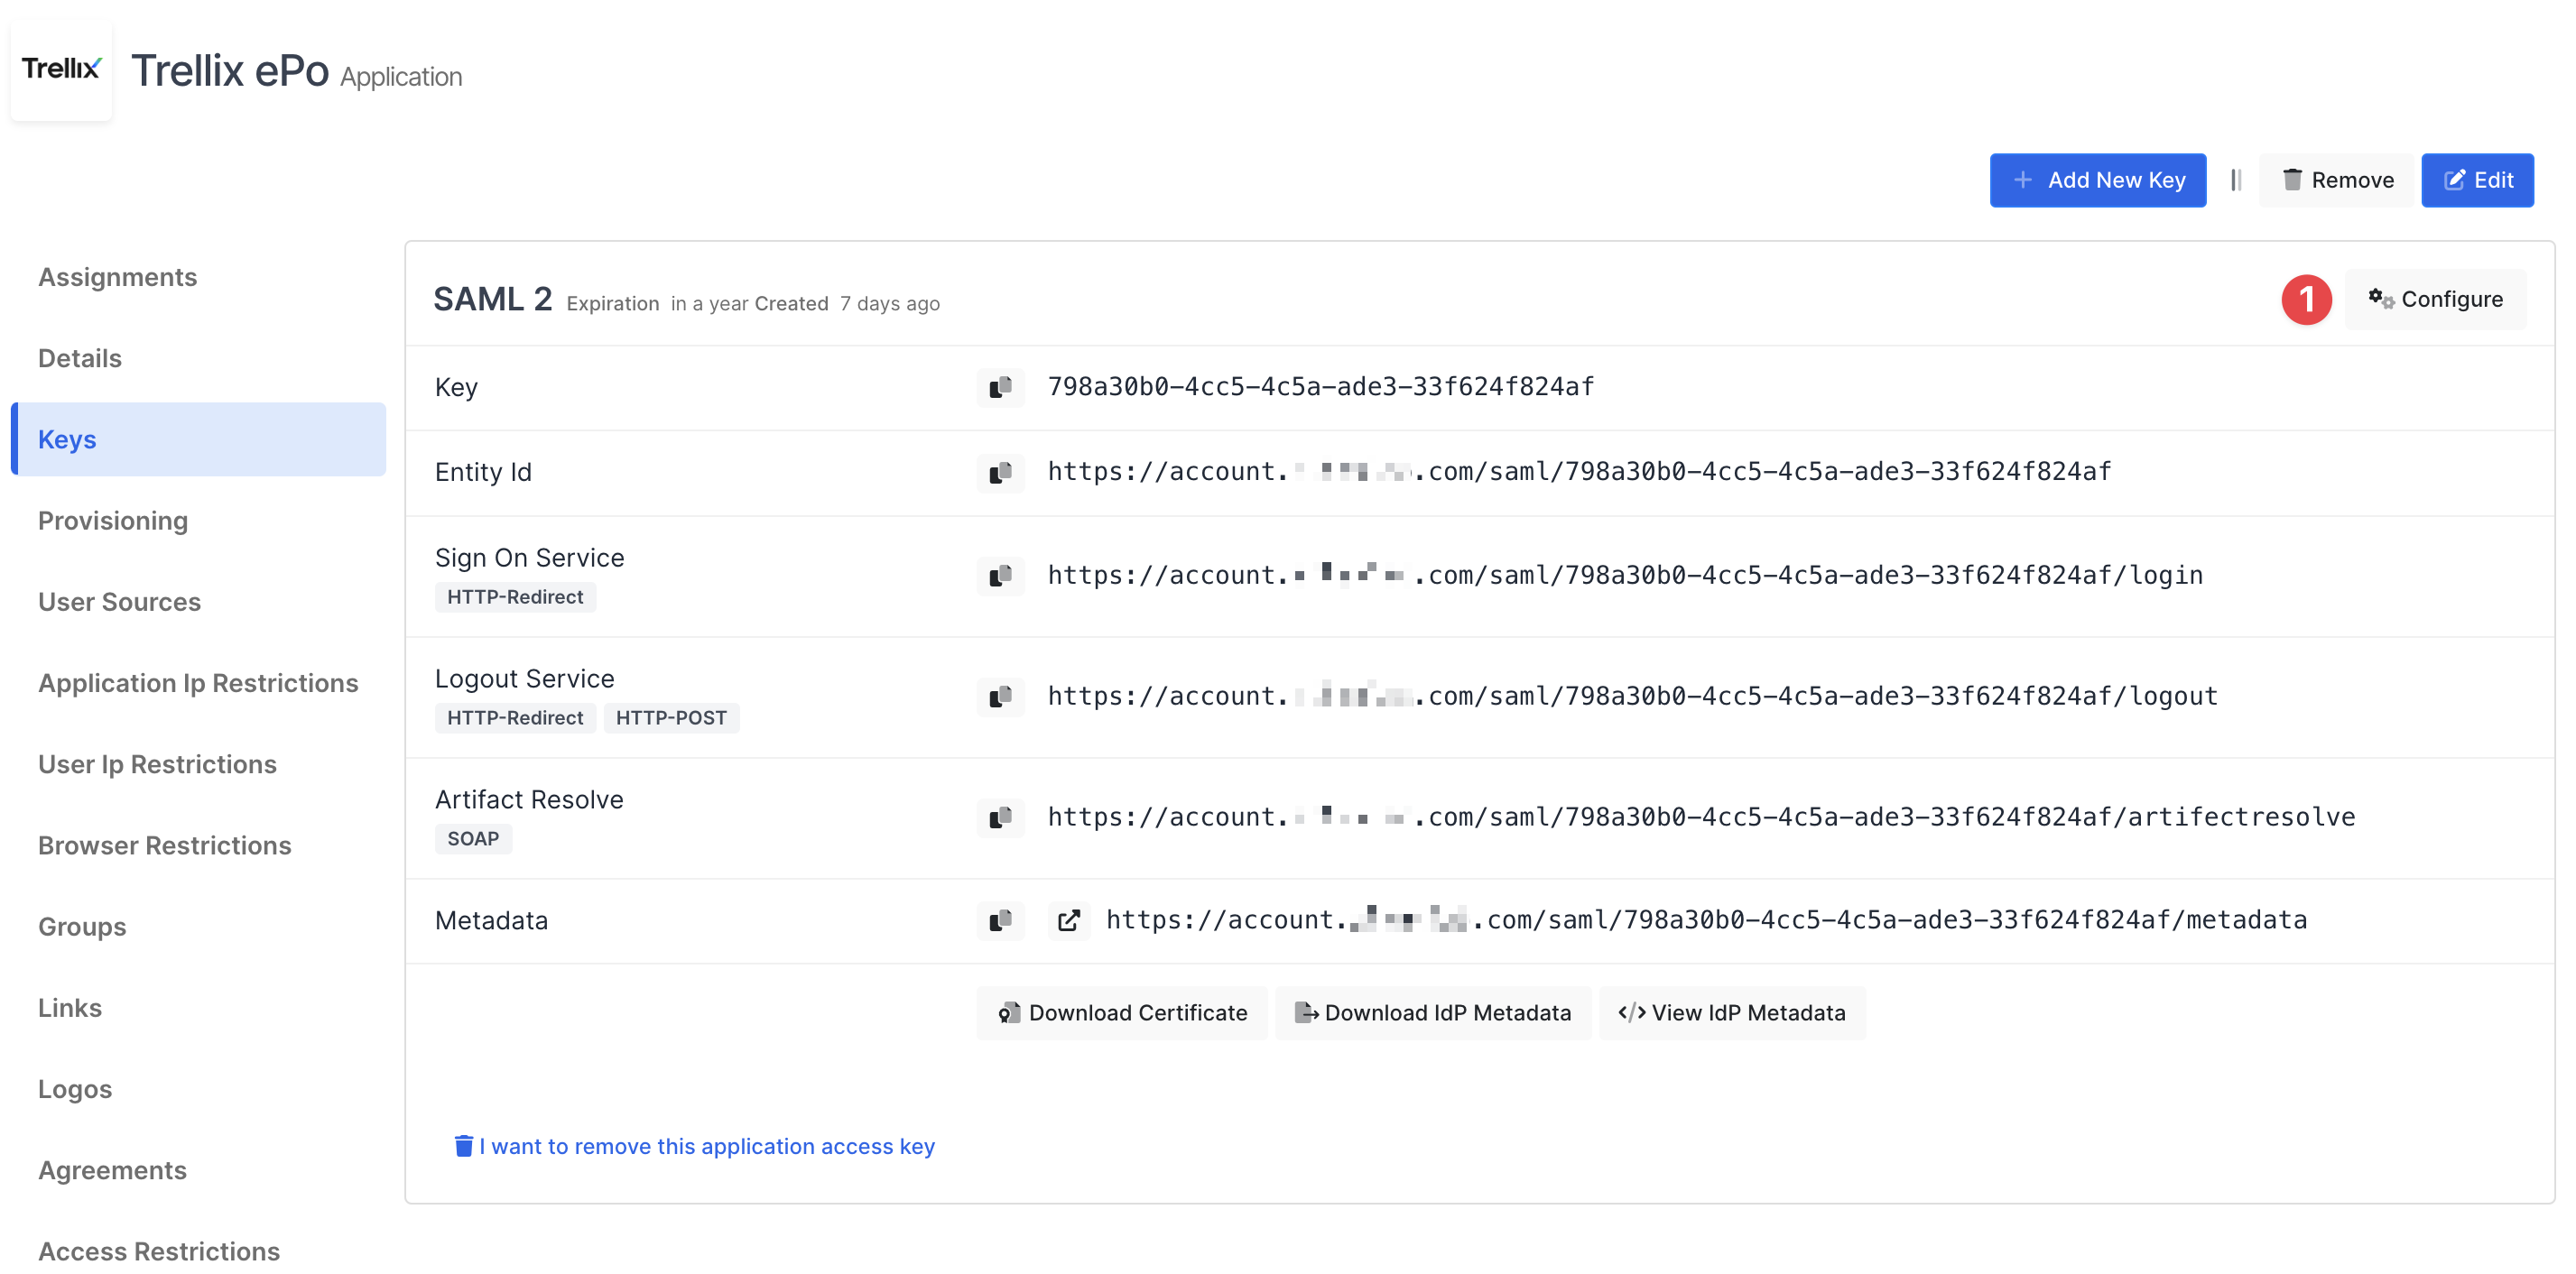
Click Configure and configure additional settings.
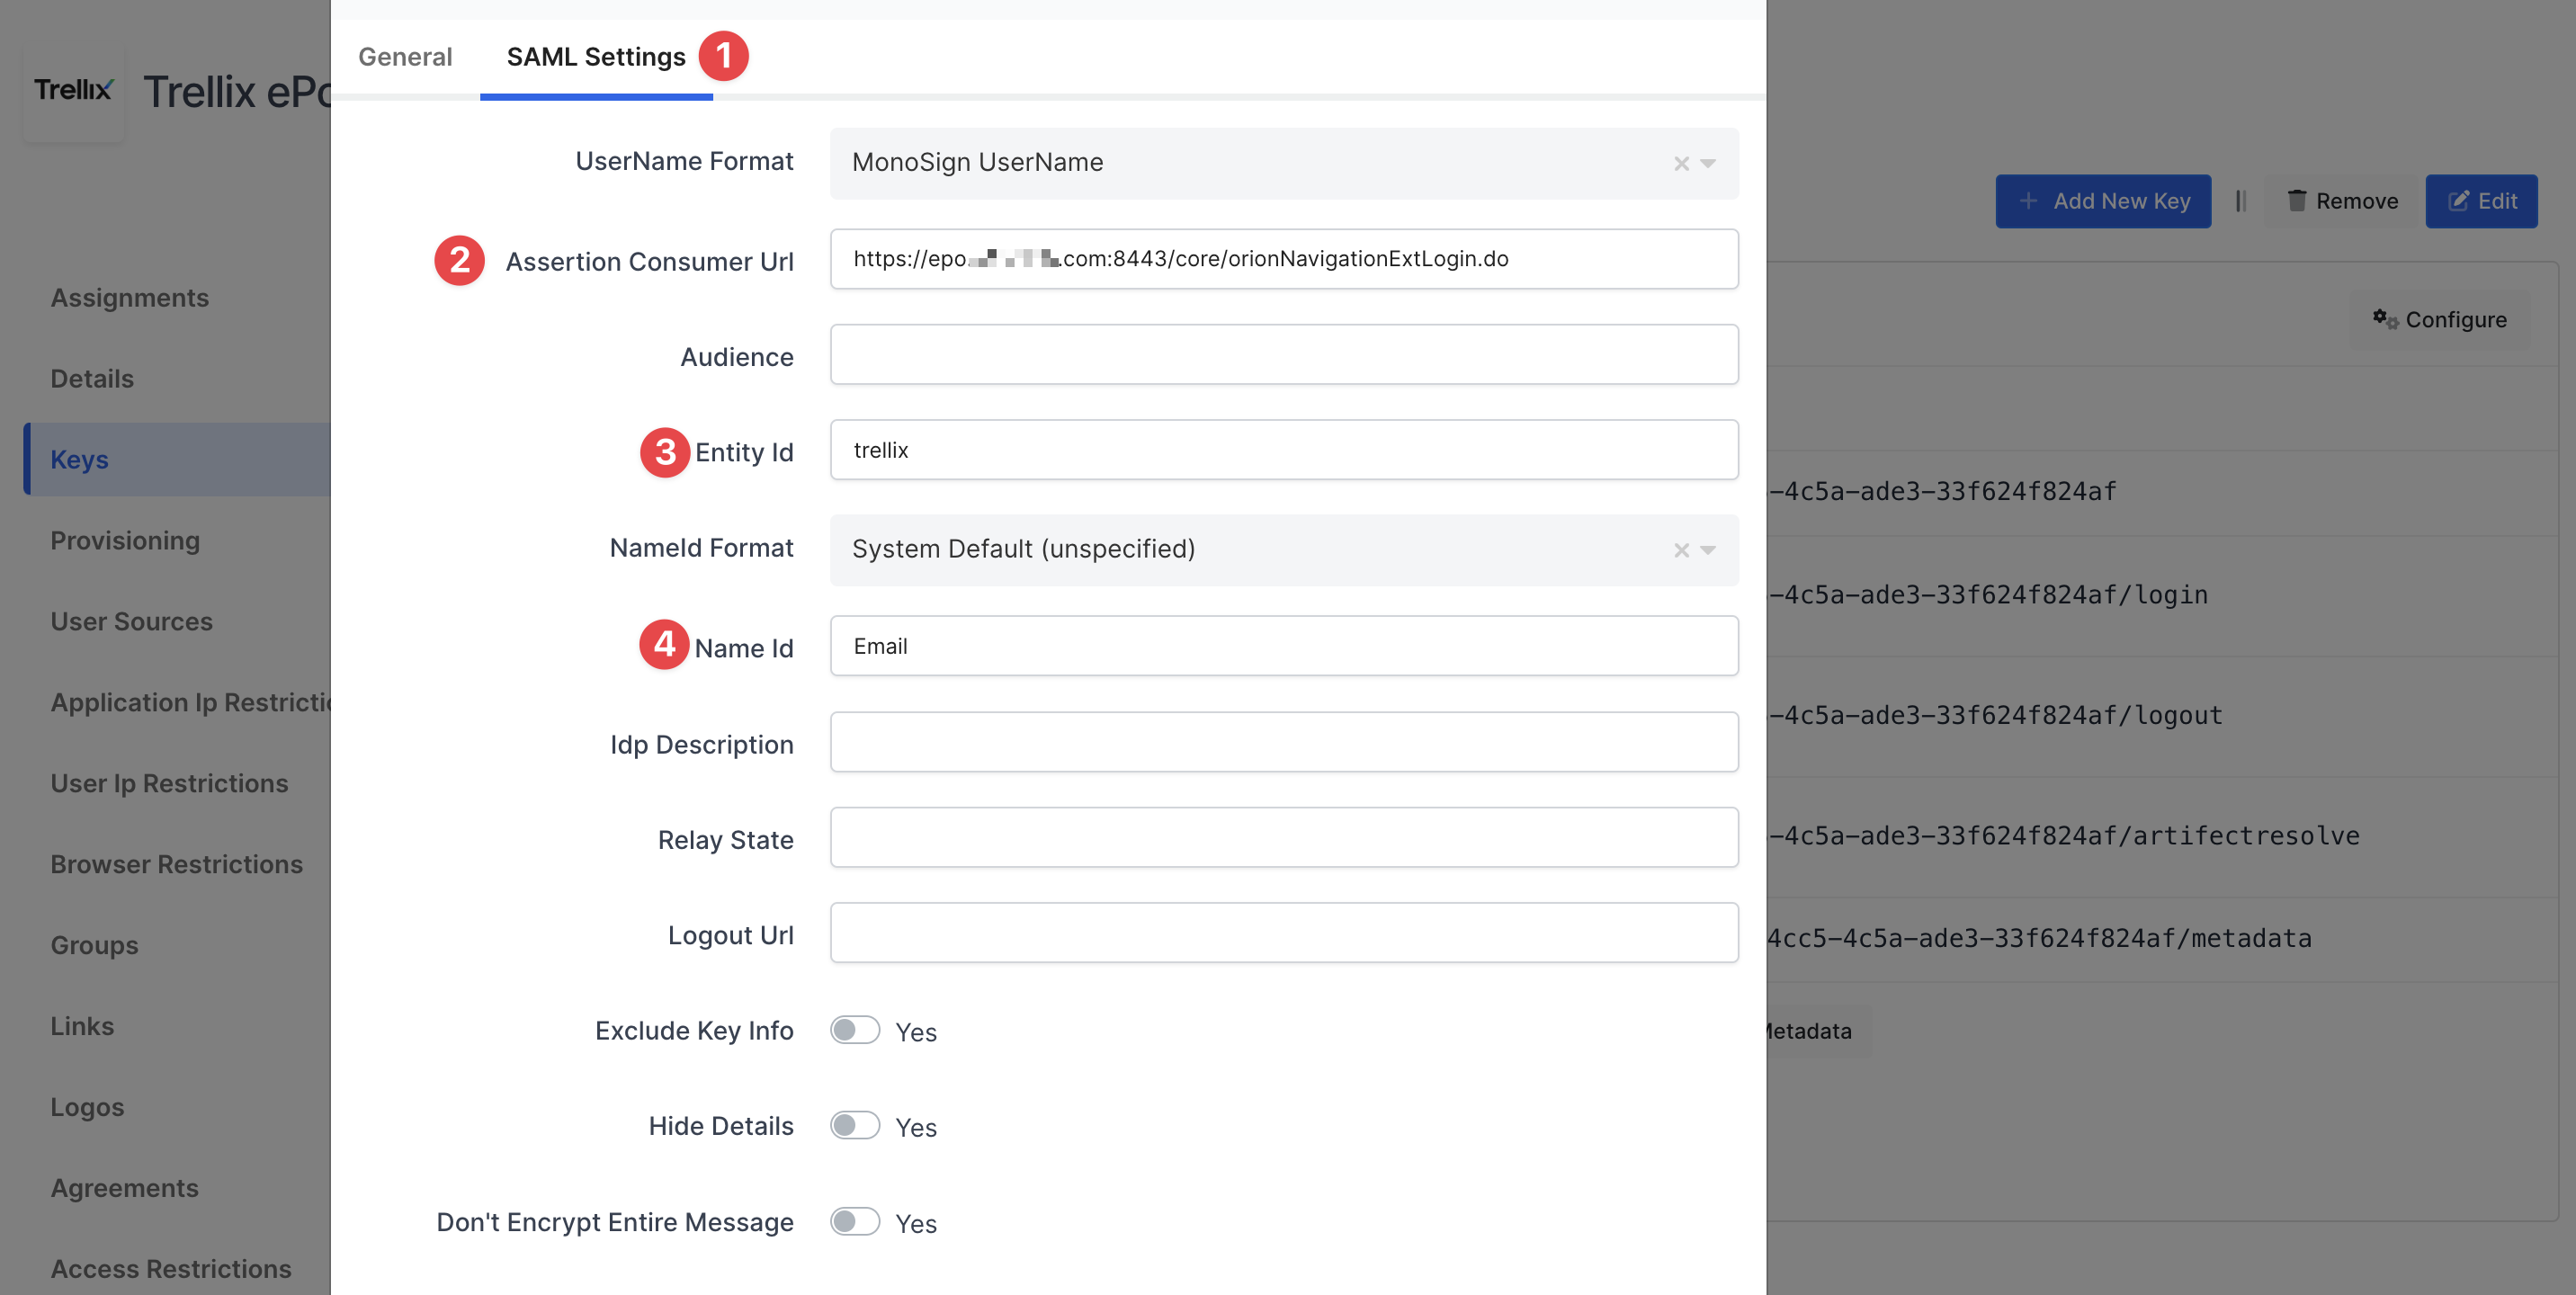
Change ACS(Assertion Consumer Url), Entity Id and Name Id
|
Property |
Value |
|---|---|
|
Assertion Consumer Url |
https://<ePO_SERVER_URL>/core/orionNavigationExtLogin.do |
|
Entity Id |
Type any keyword Example: |
|
Name Id |
|
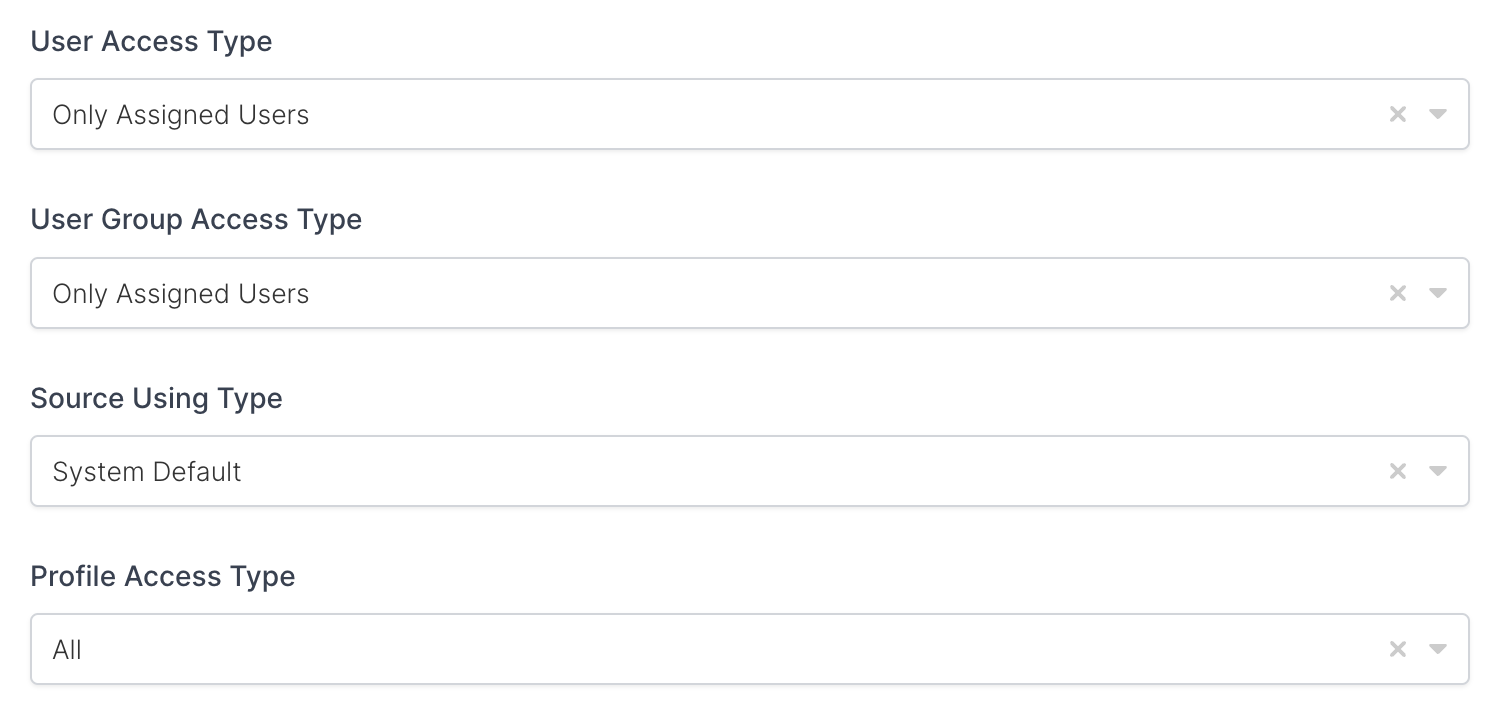
Your application need to have an access to groups. If you are configured it yet, you can Edit your application, and go to the “Source, Provider and Profile” tab, and configure User Group Access Type “Assigned Users and Defined Sources”. It means this application can access user’s group when they signed in.
|
Property |
Description |
Options |
|---|---|---|
|
User Access Type |
Defines which Users will access to this application. |
Only Assigned Users
|
|
User Group Access Type |
Defines application’s user group access |
Only Assigned Users
|
|
Profile Access Type |
Defines Application’s user’s profile access |
Restricted - Only restricted user profile attributes
|
2- Configuration Single Sign-On for Trellix ePO
As mentioned at the start, please check out the Trellix ePO’s SSO configuration page first.
This configuration is tested in below Trellix version
|
Product |
Version |
|---|---|
|
Trellix ePO Version |
5.10 |
|
Trellix ePO Update |
Update 11 or later |
|
ePOSingleSignOn_release |
1.0.0.1461 or later |
Before configure Trellix ePO go to application key and download IdP Metadata.
Open Trellix ePO configure IDP SAML Settings page under Server Settings.
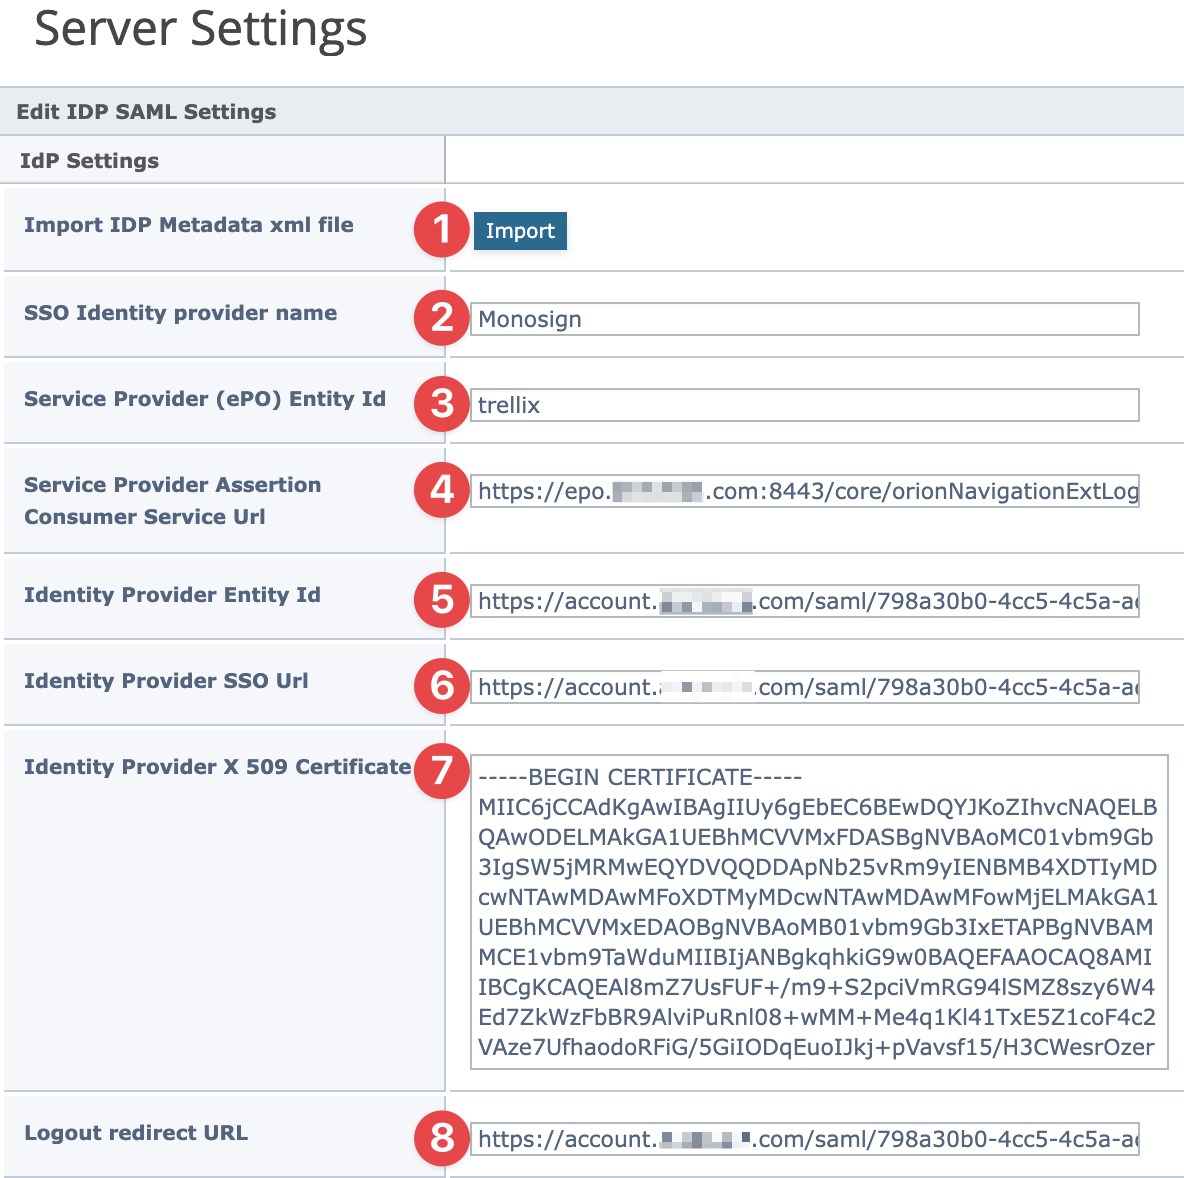
Click Import and choose downloaded IdP metadata from Monosign.
Other Property must be configured shown in the table below. After IdP metadata import please verify all settings are configured properly.
|
Property |
Value |
|---|---|
|
SSO Identity Provider |
|
|
Service Provider (ePO) Entity Id |
|
|
Service Provider Assertion Consumer Service Url |
|
|
Identity Provide Entity Id |
|
|
Identity Provide SSO URL |
|
|
Identity Provider X 509 Certificate |
The certificate automatically filled when IdP metadata imported or can be downloadable from the key detail in Monosign. |
|
Logout redirect URL |
|
After that click Save button on Trellix ePO.
Now, go back to Monosign and give access to your users and try login.
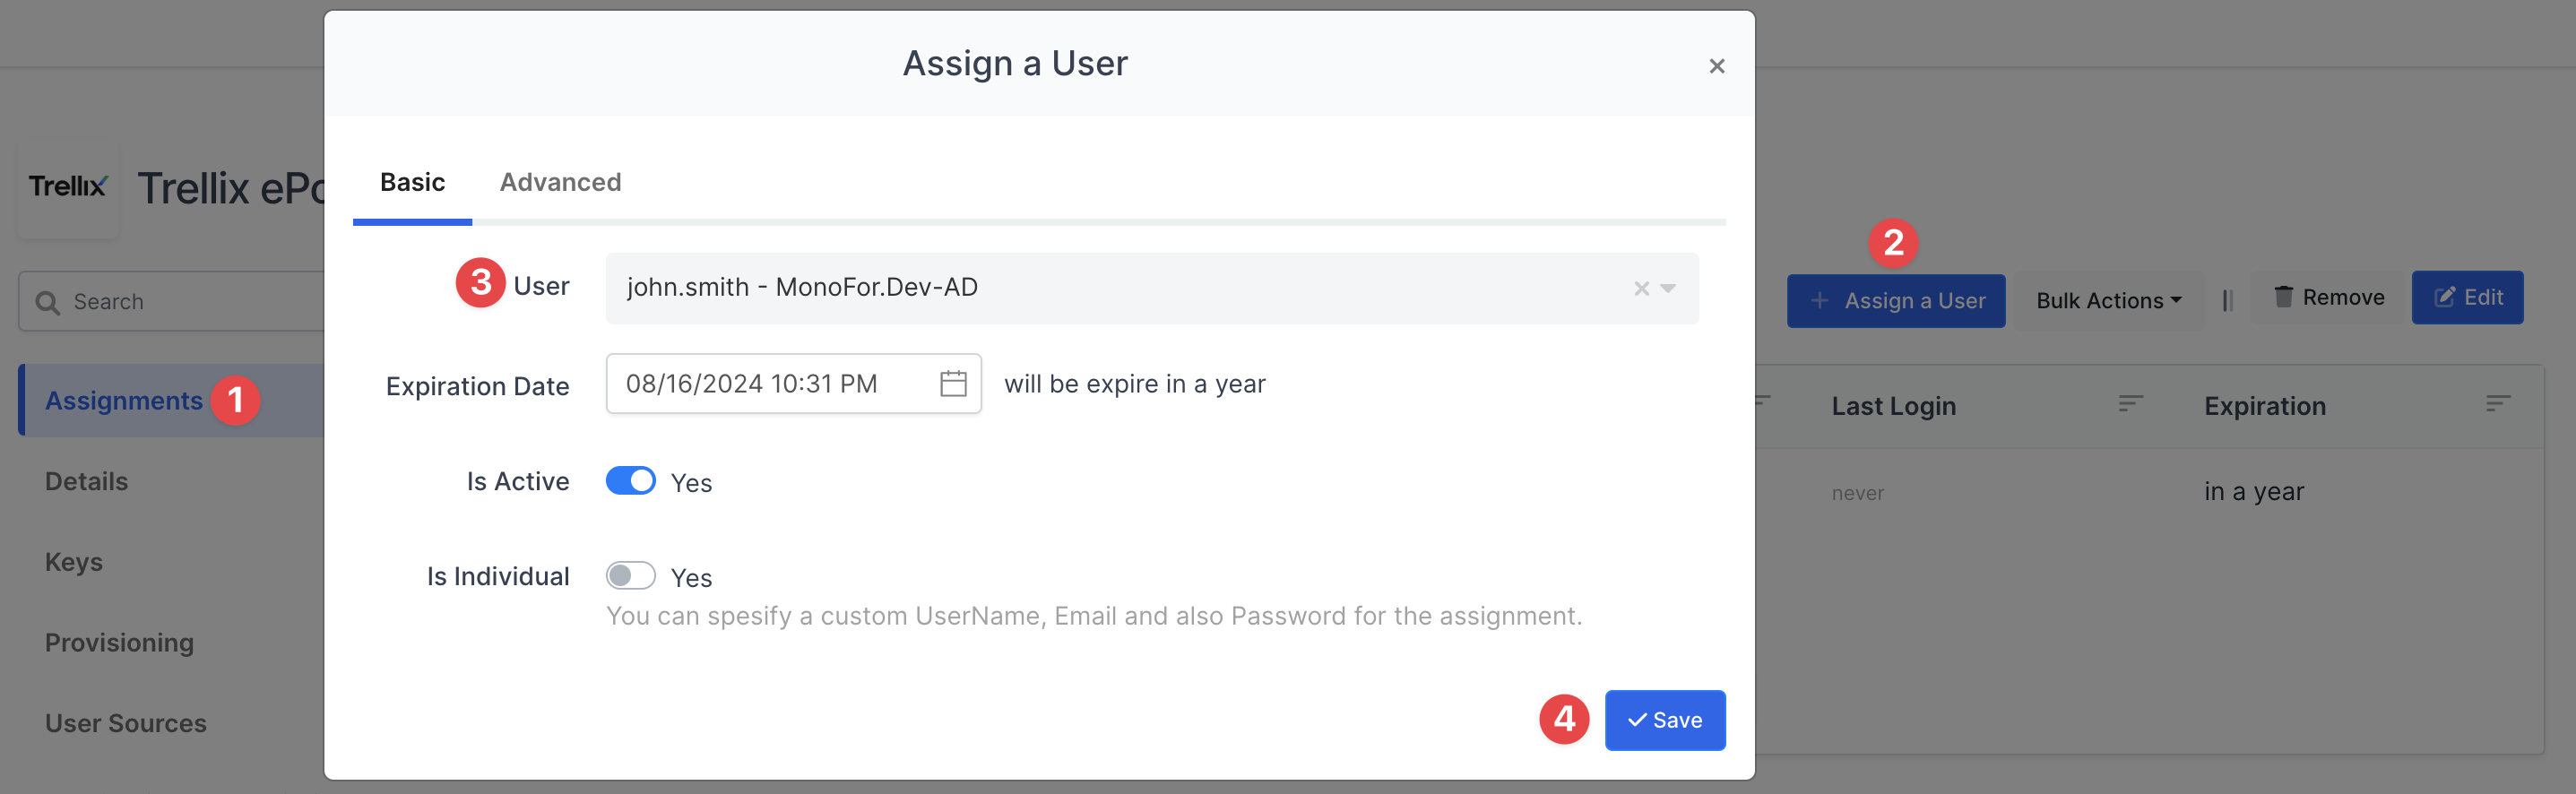
3- Assign a user to the Trellix ePO app
Now give permission to your user who needs to access your Trellix ePO.
You can find the details here how to user can be assign to the application.
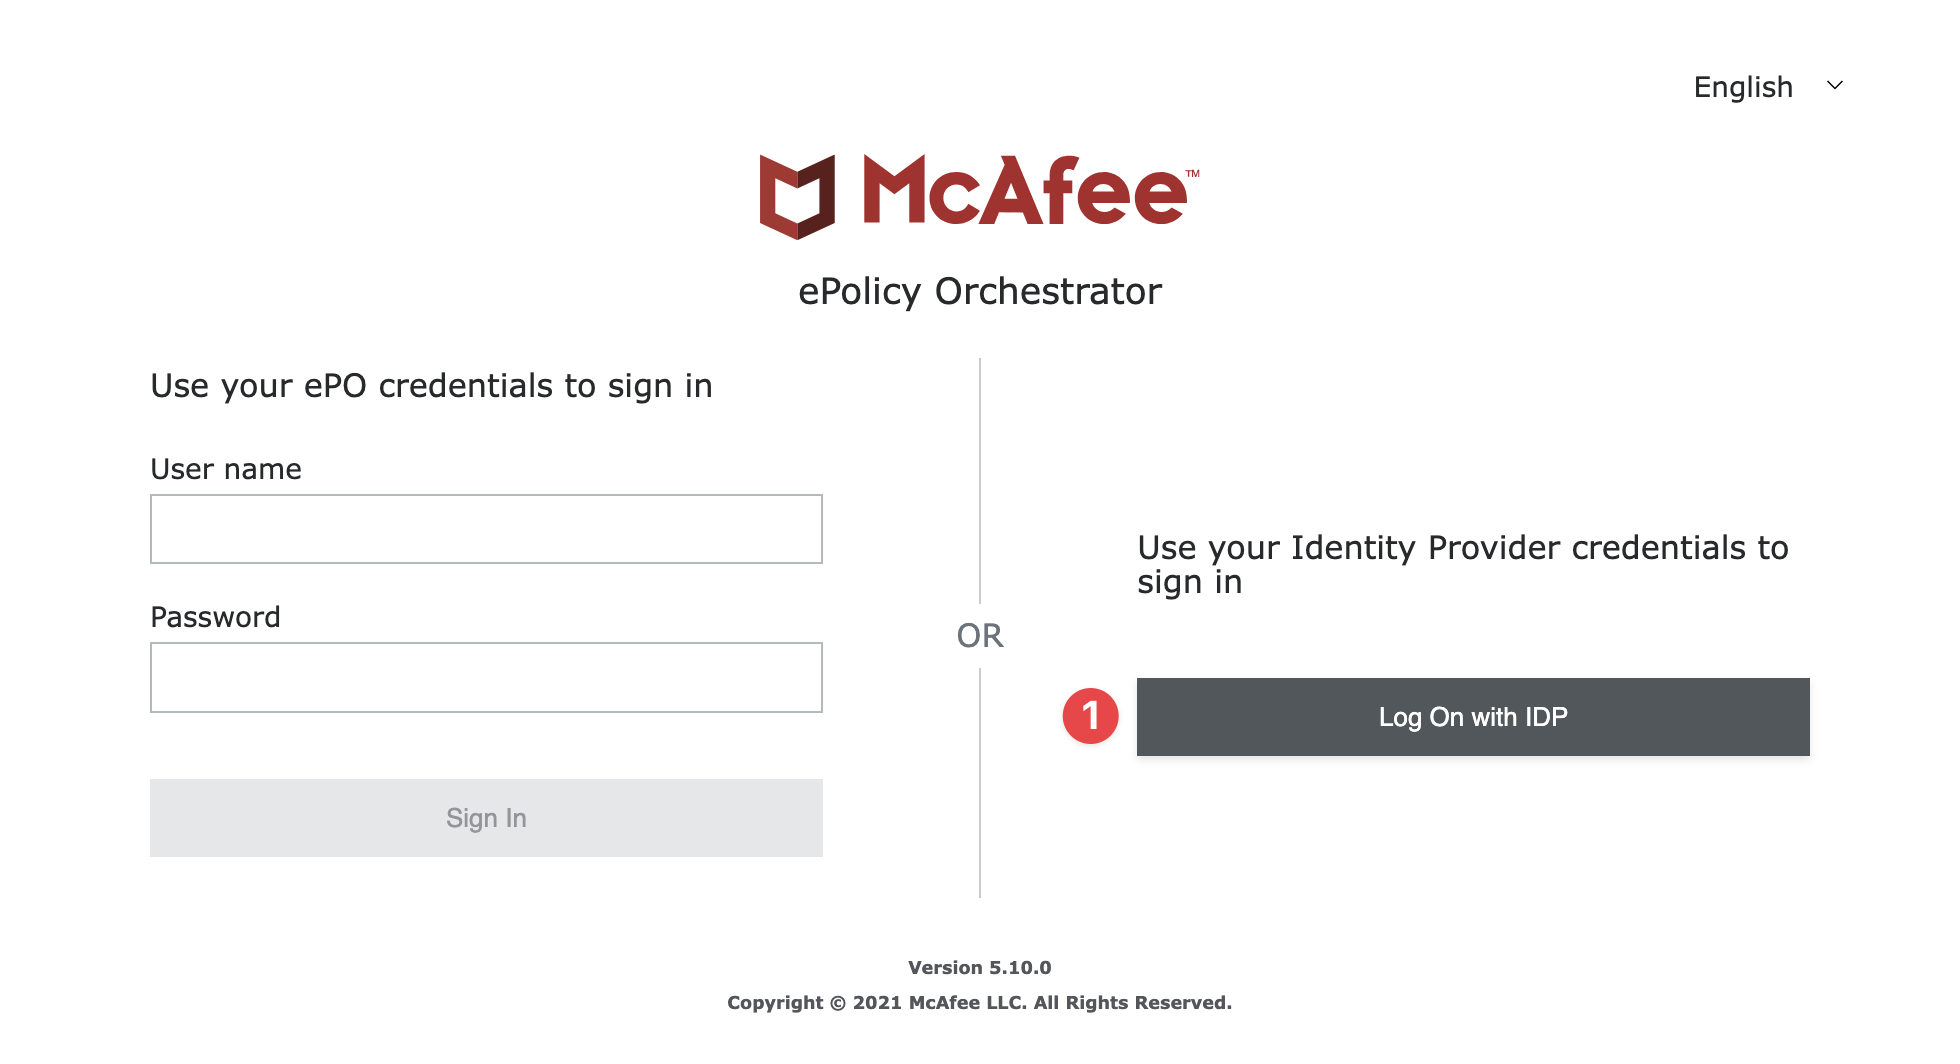
4- Sign In Test
Now try login. Navigate to the Trellix ePO login page. Click Log On with IDP on the Trellix ePO login page.
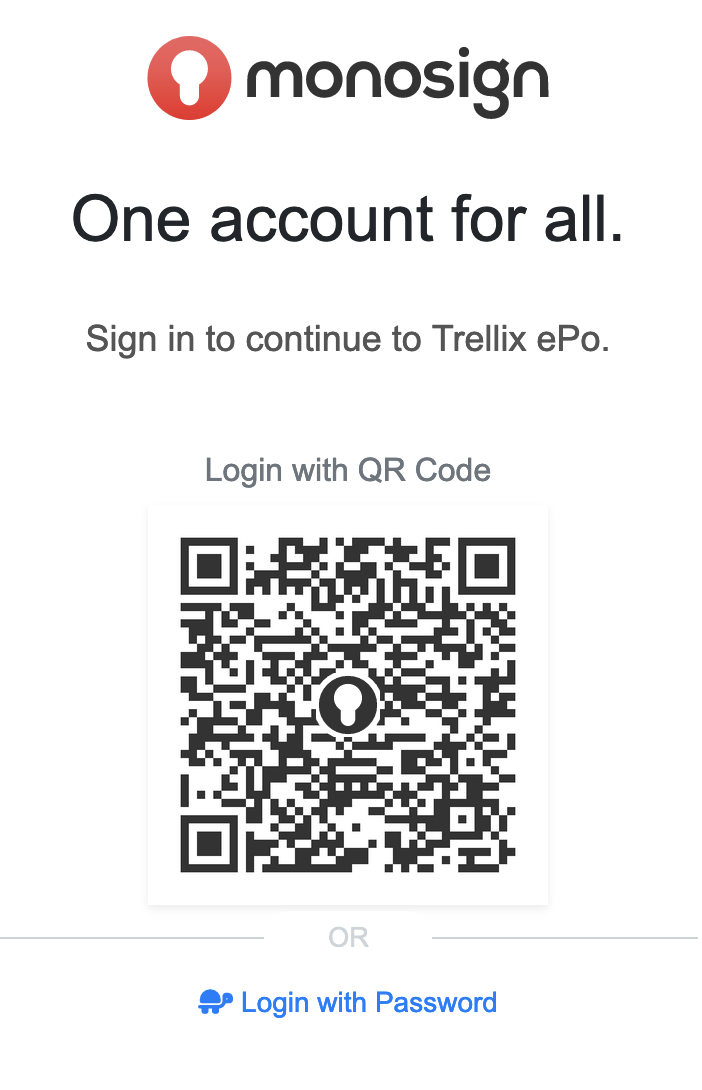
If everything is well configured, you will be redirected to Monosign’s login page. You can log in passwordless with your QR code or you can type your user name and password.
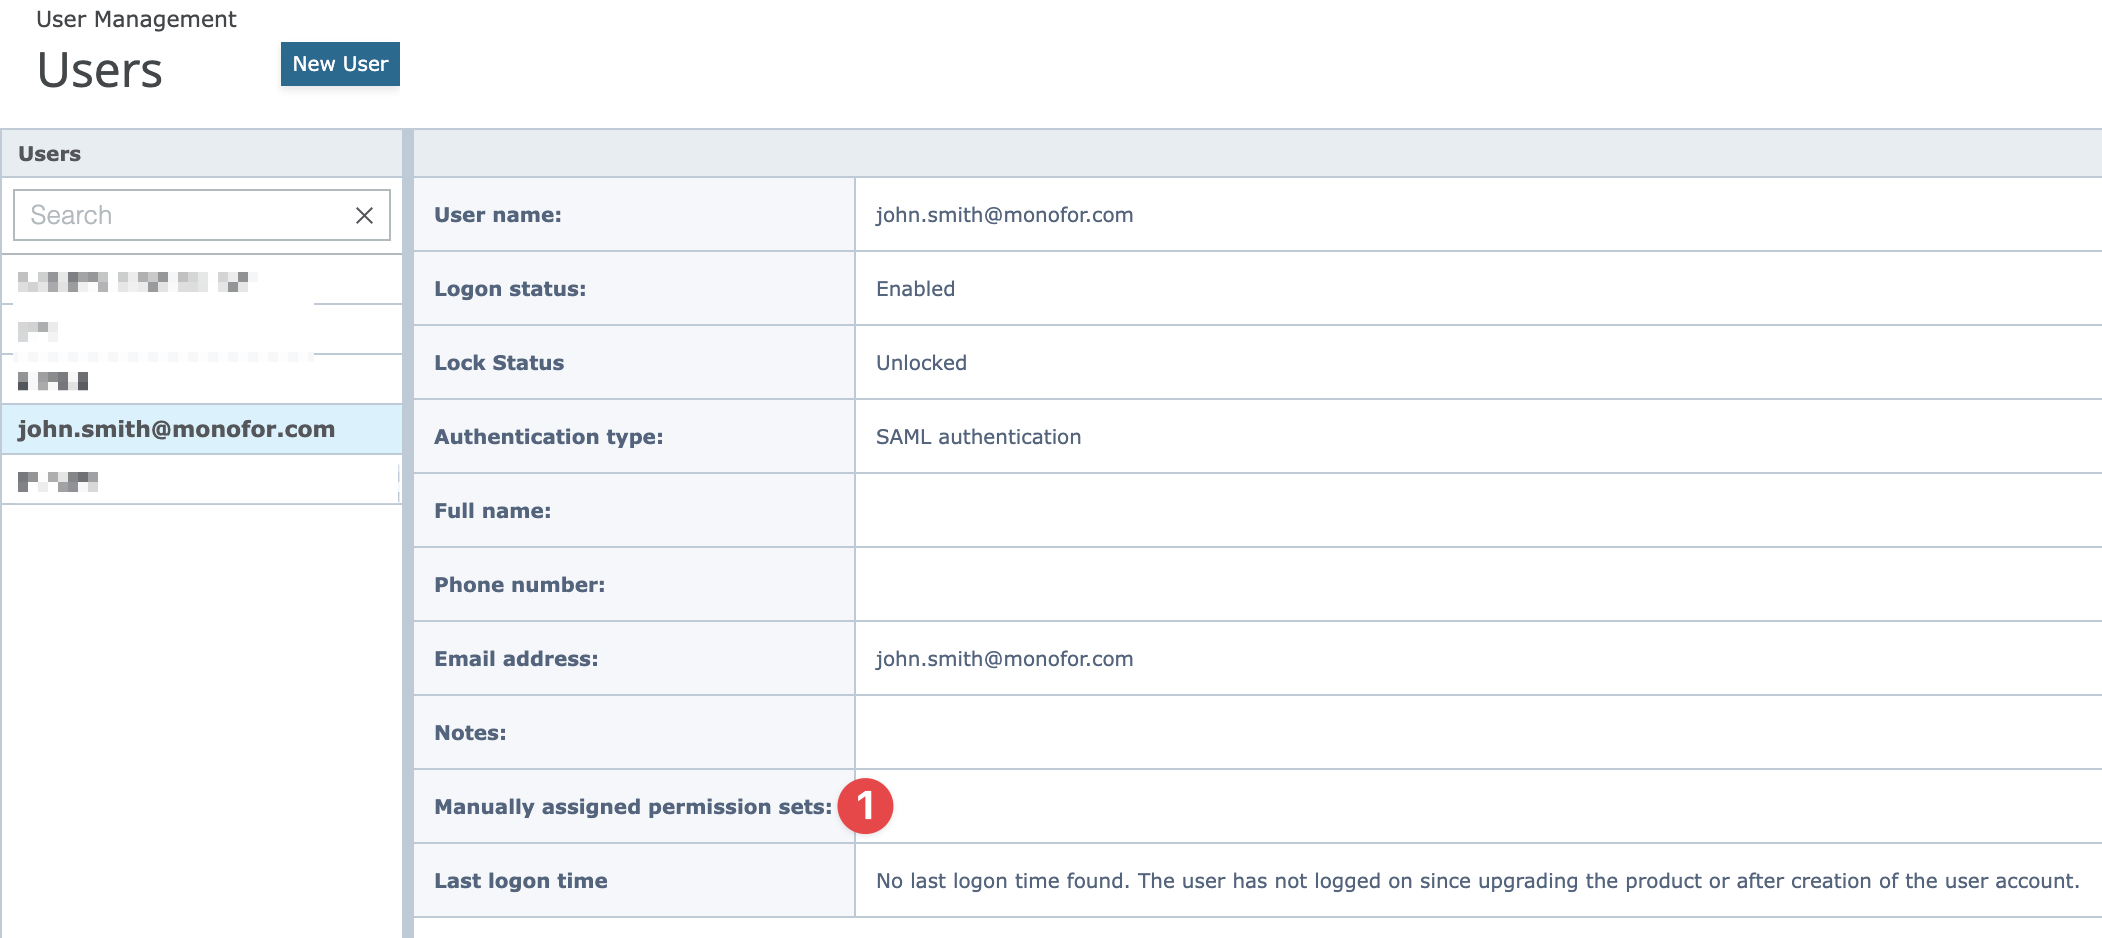
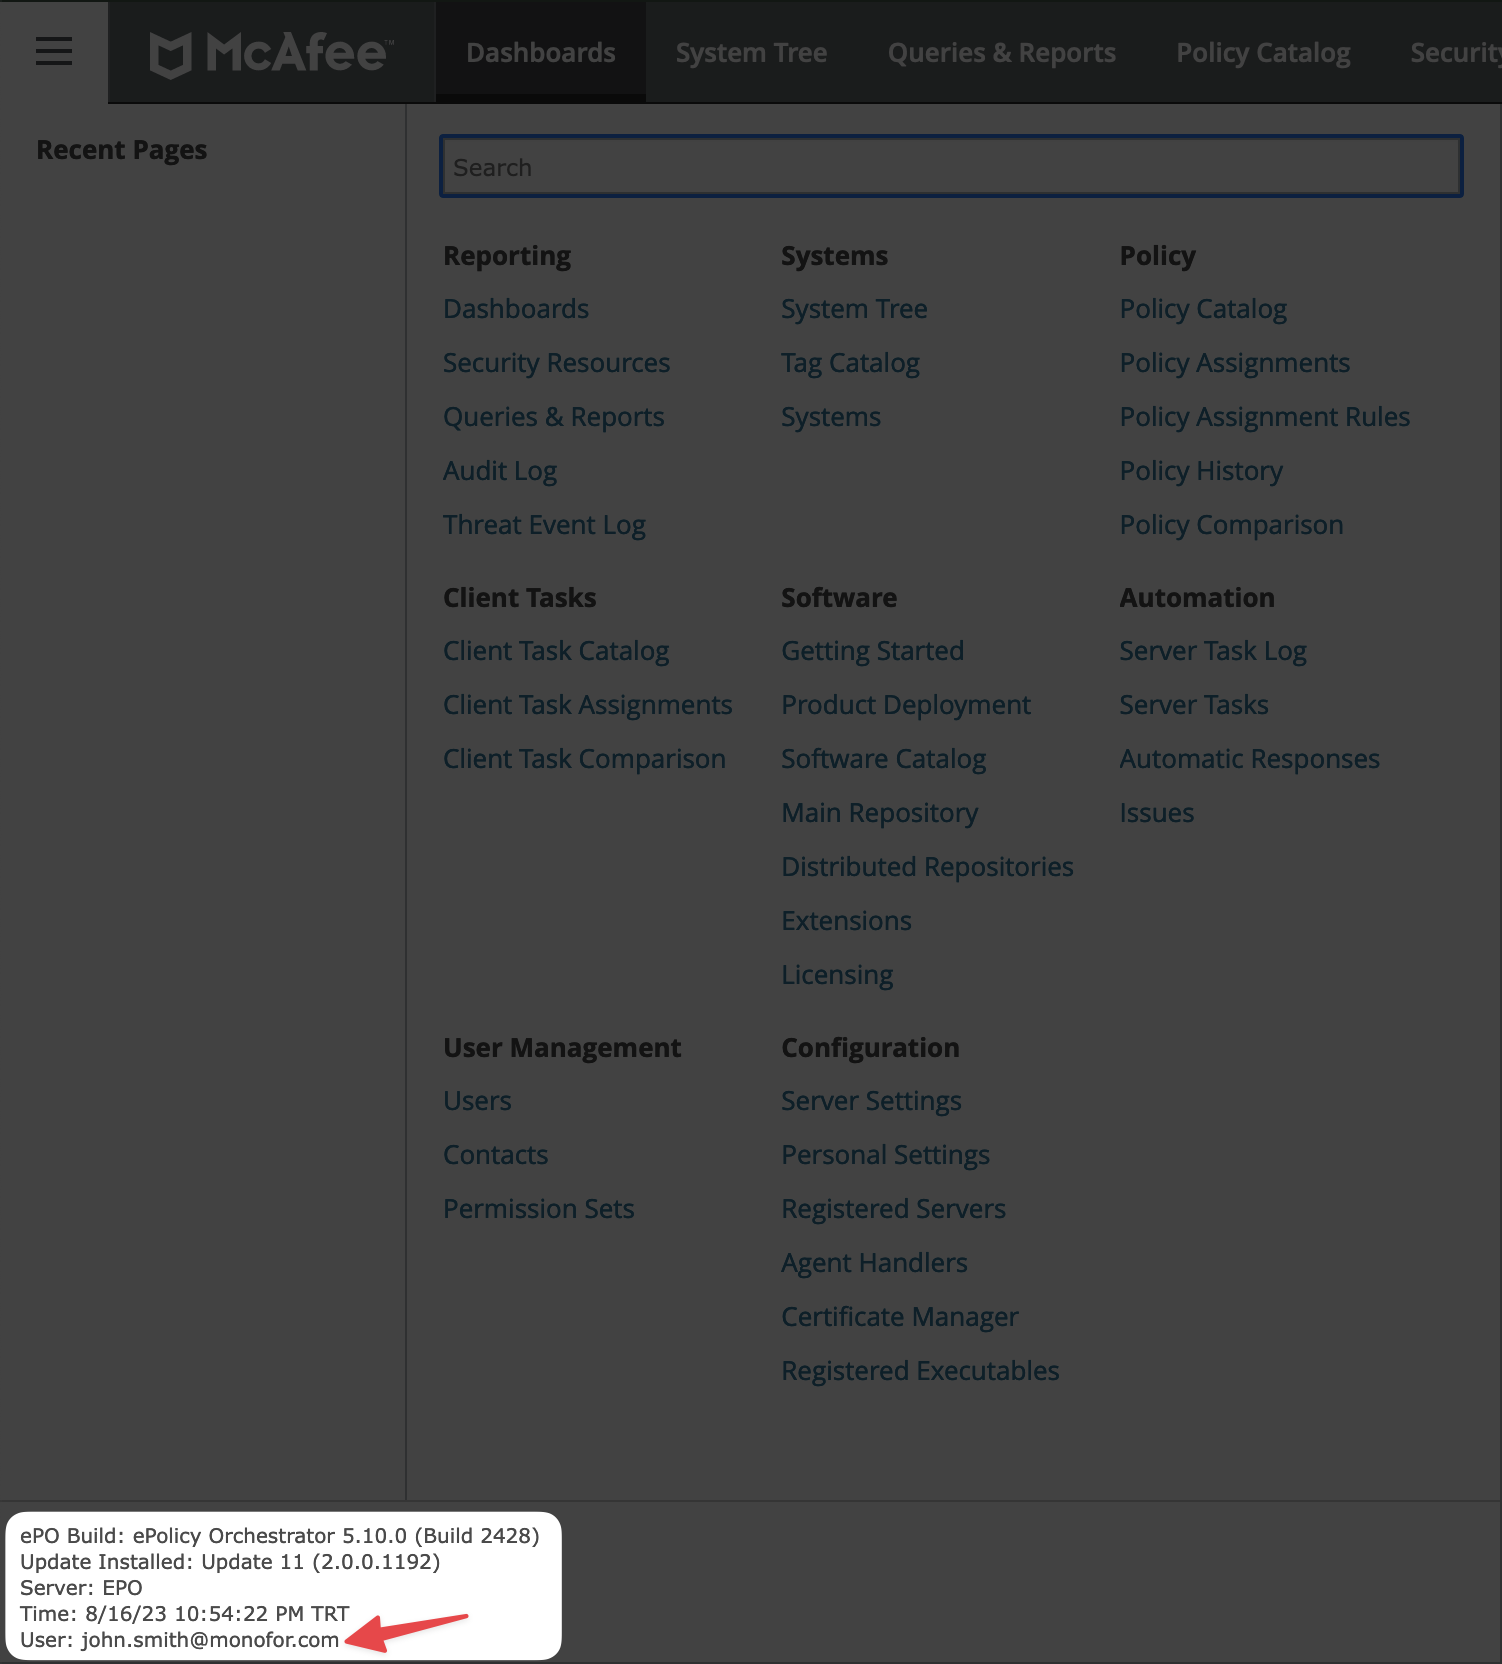
When you logged, you are gonna be redirected to the Trellix ePO admin page you will see below message if integration configured properly.

-
You need to request the Trellix ePO - On-prem administrator to grant the required permissions.
-
A new user is created in Trellix ePO - On-prem with a user name which is similar to the email address used in your IdP application, the authentication type is set to SAML authentication and no permission sets are assigned.
-
An administrator has to log on to the Trellix ePO - On-prem console and assign the required permissions to the newly created (IdP) user.
Please check details in Trellix documentation.
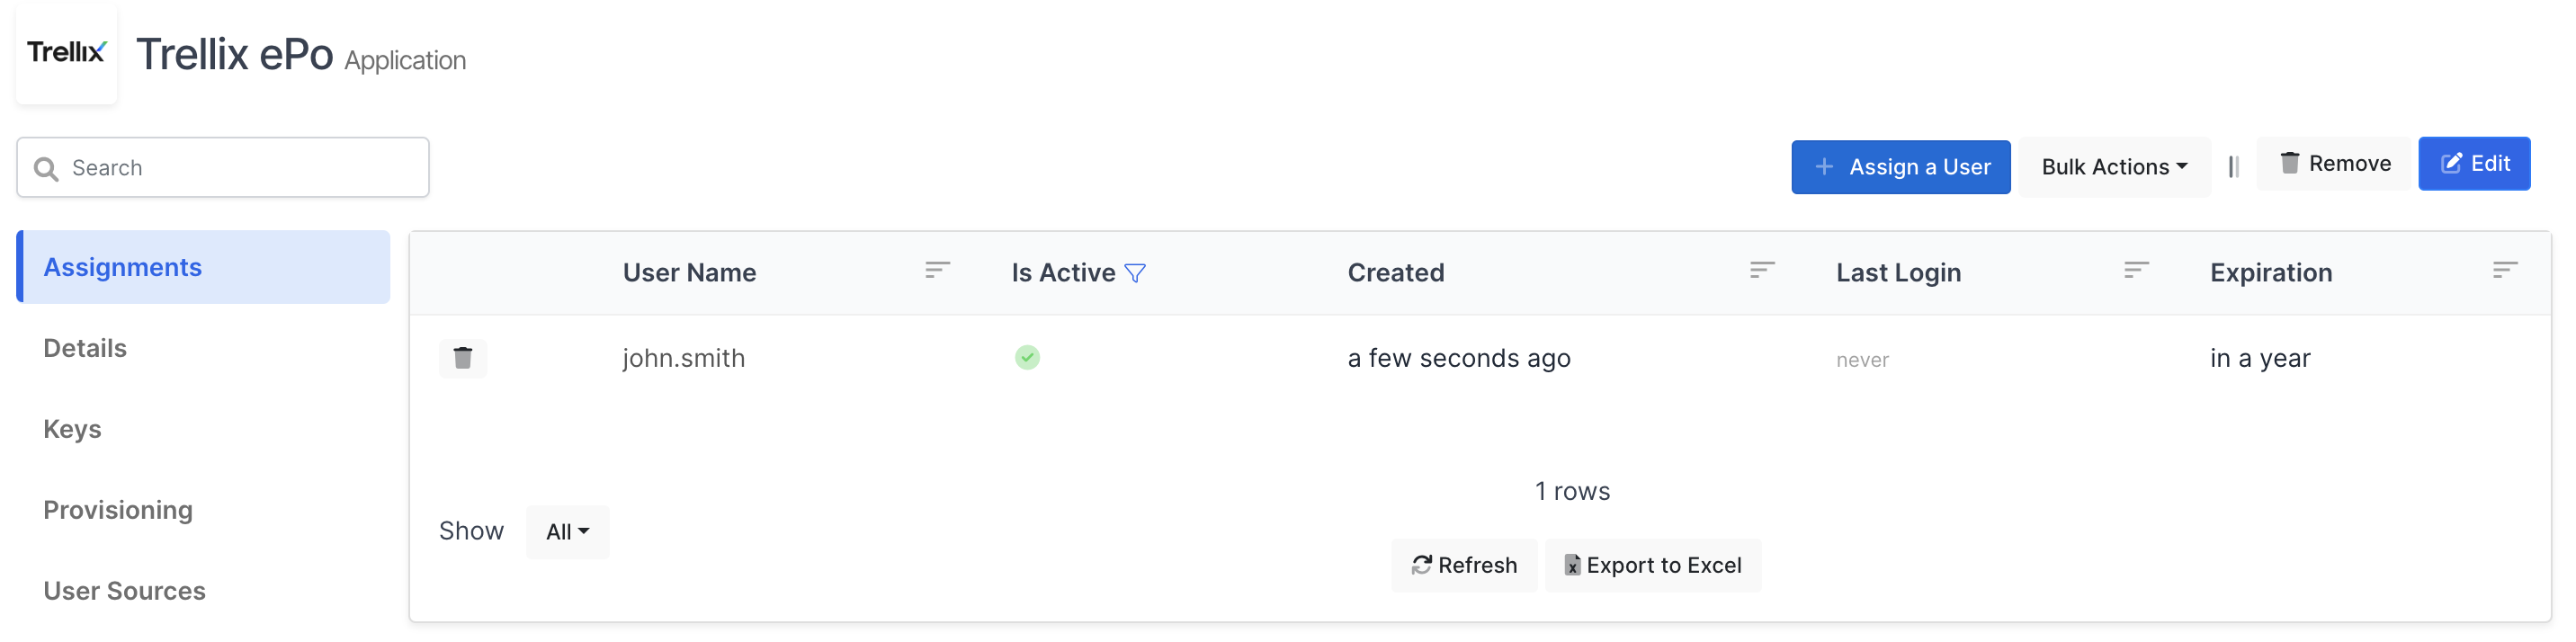
In below it can be seen new user automatically created in the Trellix ePO and there are no permission assigned to user. After permission(s) assigned to the user, will able to login and see exact pages.