This document explains how to implement Monosync with a Exchange server.
📘 Instructions
This documentation contains 2 main steps for integration.
-
Service User Permissions
-
Active Directory Delegation
-
PowerShell Remoting
-
Issues
1. Service User Permission
When trying to create a PowerShell session with a remote computer as a non-privileged user account (Enter-PSSession exch01.monofor.com) an access error occurs:
Enter-PSSession : Connecting to remote server exch01.monofor.com failed with the following error message : Access is denied.
Type Get-PSSessionConfiguration command on the exchange server via powershell to verify which users can run remote powershell commands.
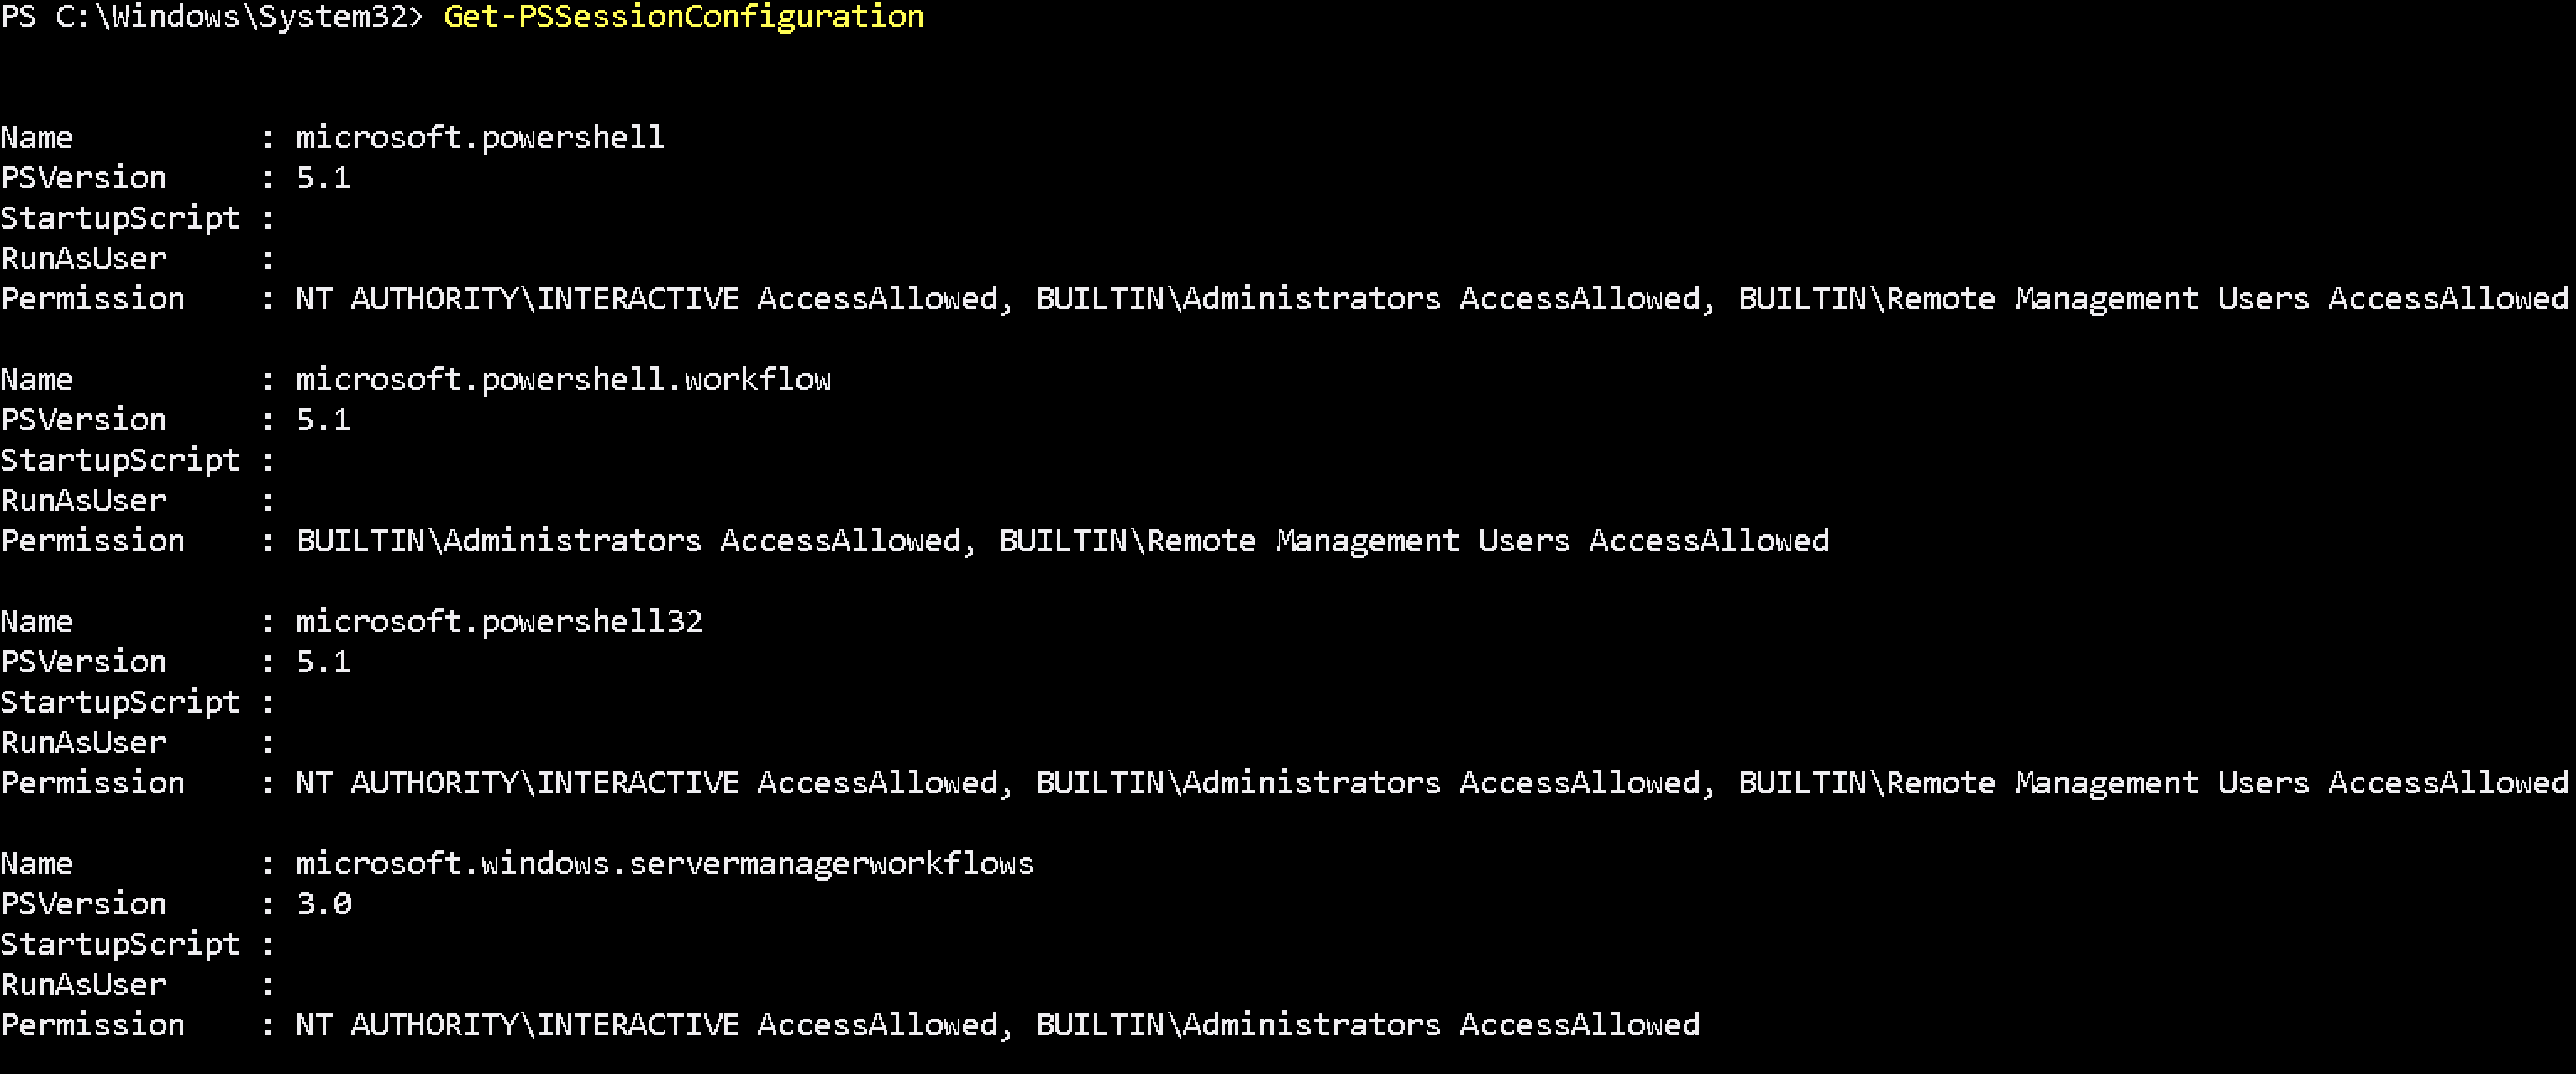
As you can see, the access is allowed for the following built-in groups:
-
BUILTIN\Administrators — AccessAllowed,
-
BUILTIN\Remote Management Users — AccessAllowed
So, to let a user connect to a remote machine through WinRM, it’s enough to be a member of the built-in local group of Administrators or Remote Management Users security group (this group is created by default starting from PowerShell 4.0). This group also has access to WMI resources via management protocols (e.g., WS-Management)
A user can be added to the group using Computer Management :
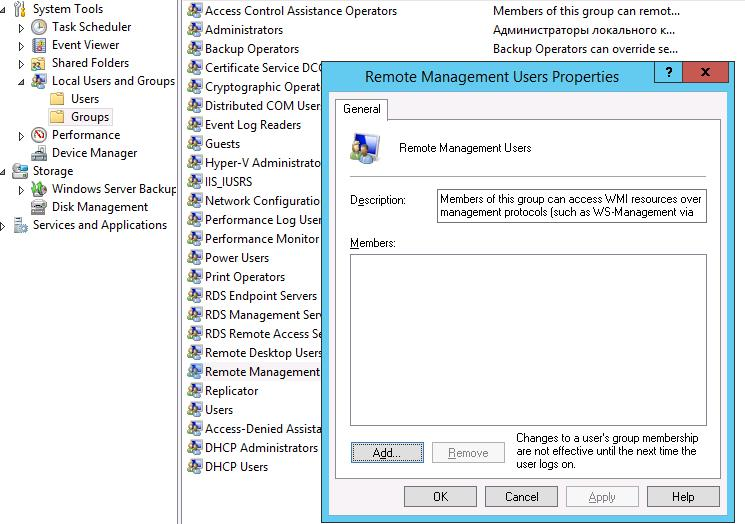
Or using command :
net localgroup "Remote Management Users" /add monosync_svc
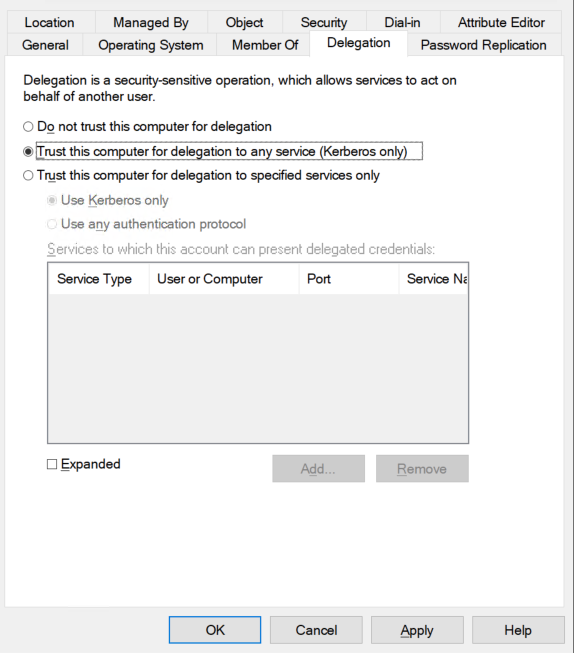
2. Active Directory Delegation
Monosync has opening two(2) different connection to exchange server via PowerShell. After first connection established second connection is using Kerberos Authentication. For supporting Kerberos authentication “TrustedForDelegation” set to be true in the Active Directory.
Via PowerShell Command :
Set-ADAccountControl -Identity "CN=EXCH01,CN=Computers,DC=monofor,DC=com" -TrustedForDelegation $true
Via Active Directory Users and Computers :
Find Exchange server computer object in the Active Directory right click and choose
Properties → Delegation → Trust this computer for delegation to any service (Kerberos only)
Via PowerShell
Only TrustedDelegation
Get-ADComputer -Identity "<ComputerName>" -Properties * | Format-List -Property TrustedForDelegation
Get all delegation attributes
Get-ADComputer -Identity "<ComputerName>" -Properties * | Format-List -Property *delegat*,msDS-AllowedToActOnBehalfOfOtherIdentity
3. PowerShell Remoting
3.1. Enable PowerShell Remoting
Follow below instructions to enable and configure PowerShell Remoting Options.
Please run the below command to enable PowerShell Remoting
Enable-PSRemoting -SkipNetworkProfileCheck
Check WinRM service is running or not :
Get-Service WinRM
If it is running below response will be return

If NOT it can be run below command to enable with default configuration :
winrm quickconfig
3.2. WinRM Listener Configuration
Verify WinRM listener configuration
Get-Item WSMan:\localhost\listener\*

If command returns HTTPS listener, check certificate assigned correctly.
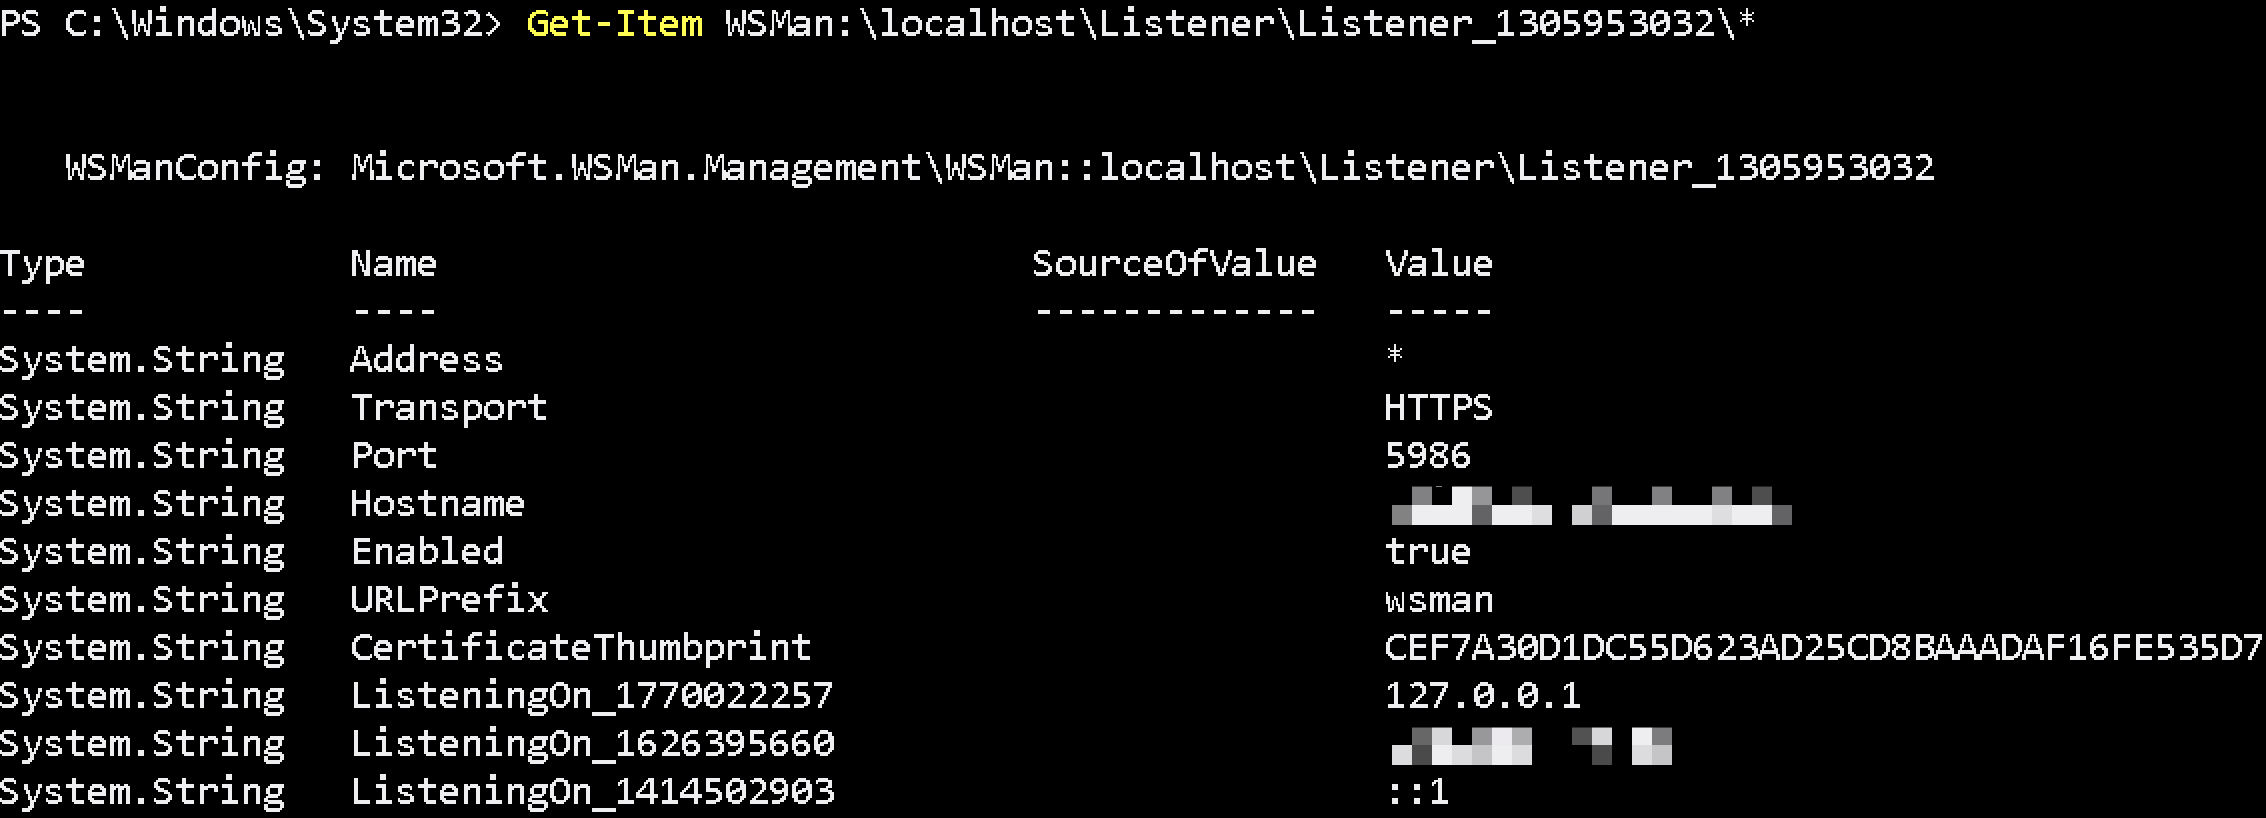
Get-Item WSMan:\localhost\listener\Listener_1305953032\*
3.3. WinRM HTTPS Listener
If HTTPS listener not configured it can be done with below steps:
Generate certificate to use in the HTTPS listener. Please type your full FQDN of the exchange machine with -DnsName like exch01.monofor.com.
New-SelfSignedCertificate -DnsName "exch01.monofor.com" -CertStoreLocation Cert:\LocalMachine\My
This command will create certificate and return the certificate information. Thumbprint will be used while creating HTTPS listener.

After certificate generated successfully HTTPS listener will be created with below command. In this command we need 2 arguments Hostname and Certificate Thumbprint.
winrm create winrm/config/Listener?Address=*+Transport=HTTPS '@{Hostname="exch01.monofor.com"; CertificateThumbprint="6A8D7E5537D441190FD72C7C2E879A064072CE0F"}'
Now HTTPS Listener is created successfully.
3.3.1. Add New Certificate to Existing HTTPS Listener
If exchange certificate is expired and add new certificate to existing HTTPS_Listener please follow below steps.
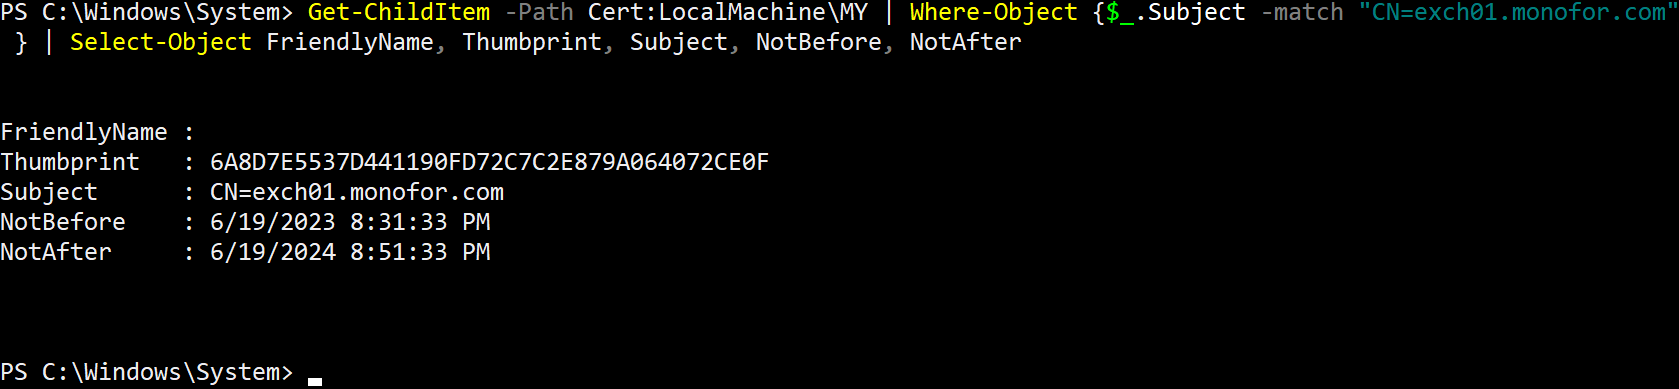
Check new certificate is installed on the machine and verify information. Please change CN=exch01.monofor.com value with your certificate CN.
Get-ChildItem -Path Cert:LocalMachine\MY | Where-Object {$_.Subject -match "CN=exch01.monofor.com" } | Select-Object FriendlyName, Thumbprint, Subject, NotBefore, NotAfter
Copy Thumprint of the certificate then check HTTPS_Listener name.
Get-Item WSMan:\localhost\listener\*
Set new Thumbprint for HTTPS_Listener
Set-Item WSMan:\localhost\Listener\Listener_1305953032\CertificateThumbprint -Value 6A8D7E5537D441190FD72C7C2E879A064072CE0F
And verify new certificate is assign to the HTTPS_Listener
Get-Item WSMan:\localhost\Listener\Listener_1305953032\*
3.4. WinRM Authentication Settings
Please set WinRM Service Authentication CBTHardeningLevel to None with below command.
Set-Item WSMan:\localhost\Service\Auth\CbtHardeningLevel -Value None
Check WinRM Service Authentication CBTHardeningLevel was set or not with below command.
Get-Item WSMan:\localhost\Service\Auth\*

3.5. WinRM Trusted Host Configuration
Last point is setting up the TrustedHost. TrustedHost means which computer or IP can access via Remote PowerShell
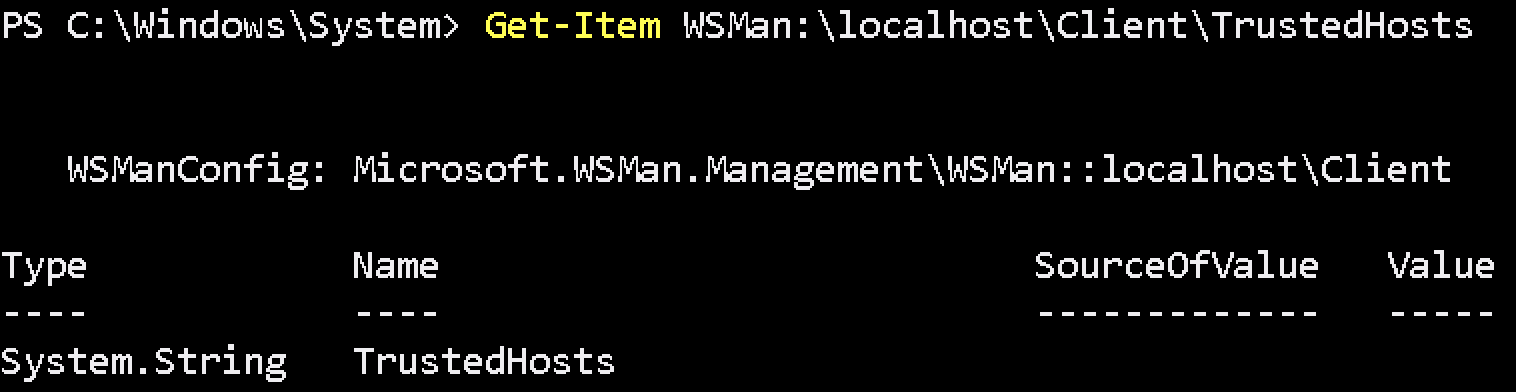
Check TrustedHost settings:
Get-Item WSMan:\localhost\Client\TrustedHosts
Set to Any PC
Set-Item WSMan:\localhost\Client\TrustedHosts -Value *
Set to Any pc in the Domain
Set-Item WSMan:\localhost\Client\TrustedHosts *.yourdomain.com
Set to Specific computer with the IP address
Set-Item WSMan:\localhost\Client\TrustedHosts -Value '192.168.50.10,192.168.100.100'
Verify TrustedHost with below command.
Get-Item WSMan:\localhost\Client\TrustedHosts

Finally Monosync will be communicate with the Exchange server via PowerShell. If multiple exchange server has in the infrastructure please do all steps for all Exchange servers.
Firewall port needs to be open between Monosync Servers to Exchange Servers.
|
Source |
Destination |
Port |
|---|---|---|
|
Monosync Servers |
Exchange Servers |
TCP/5986 |
4. Issues
4.1 Ipv6 Behaviour On Microsoft Servers
By default, Windows Server enables IPv6 and prioritizes it over IPv4 for name resolution and outbound connections. This behavior follows Microsoft’s implementation of the IP stack, where IPv6 is considered the preferred protocol whenever both IPv6 and IPv4 are available.
In practice, this means:
When a hostname or localhost is resolved, Windows will attempt to connect using the IPv6 address (for example ::1 or a link-local fe80:: address) before falling back to an IPv4 address (127.0.0.1 or 192.168.x.x).
If a service, such as WinRM (Windows Remote Management), is only configured to listen on IPv4, connection attempts over IPv6 will fail.
In PowerShell Remoting, opening a session with Enter-PSSession or New-PSSession may therefore result in connection errors if the client resolves the target host to an IPv6 address that is not actively listened on by WinRM.
Example Scenario
An administrator attempts to open a remote session
Enter-PSSession -ComputerName SERVER01
If SERVER01 resolves first to an IPv6 address, the client attempts to connect via IPv6. Where WinRM is not listening on IPv6, the connection is rejected. This issue does not occur when explicitly connecting to the IPv4 address (e.g., 192.168.41.15) because WinRM is actively bound to IPv4.
Recommended Resolution
To avoid failures in environments where IPv6 is enabled but not configured for WinRM:
4.1.1 Adjust Prefix Policy
Modify the IPv6 prefix policy so that IPv4 is preferred over IPv6 for outbound connections. This ensures that when both protocol stacks are available, IPv4 is attempted first:
netsh interface ipv6 set prefixpolicy ::ffff:0:0/96 60 4
This raises the precedence of IPv4-mapped addresses above IPv6.
4.1.2 Alternative Approaches
-
Explicitly connect using IPv4 addresses instead of hostnames.
-
Configure WinRM to listen only IPv4 if IPv6 usage is not required.
-
Apply the prefix policy adjustment via a startup script or Group Policy for persistence across reboots.
Configure winrm to listen only IPv4
winrm set winrm/config/service @{IPv6Filter=""}
Microsoft’s Official Recommendation: Do Not Disable IPv6, Use the “Prefer IPv4 over IPv6” Setting
Microsoft recommends prioritizing IPv4 over IPv6 rather than disabling IPv6 entirely. According to official guidance, this can be achieved by configuring the DisabledComponents registry value to define IPv4 precedence.
Registry Path:
HKEY_LOCAL_MACHINE\SYSTEM\CurrentControlSet\Services\Tcpip6\Parameters\DisabledComponents
Modify or Create the DisabledComponents
reg.exe add HKEY_LOCAL_MACHINE\SYSTEM\CurrentControlSet\Services\Tcpip6\Parameters /v DisabledComponents /t REG_DWORD /d 0x20 /f
Setting the value to 0x20 ensures that IPv4 is preferred while avoiding a complete disablement of IPv6.
A system reboot is required for this change to take effect.
Summary
Windows Server prioritizes IPv6 by default, which can lead to WinRM and PowerShell Remoting connection failures when services are bound only to IPv4. Adjusting the IPv6 prefix policy ensures IPv4 connectivity is attempted first, mitigating these issues without disabling IPv6 system-wide.