Monofor PoC installation can be done with the steps below.
Before Start Installation
Monofor products are designed to work on container architecture. Therefore, in order to download the images, it is necessary to download them from Monofor's Official Repositories. If you do not have access to the Official Repositories, the installation cannot be performed. To overcome this, you can contact Monofor Sales Engineers or authorized partners to receive support.
Monofor Virtual Appliance
Monofor has providing virtual machine which is ready for Monofor Products. If you don’t want lose any time to preparing of the linux server you can download and import your VMware Infrastructure.
Supported Virtualization Platform
|
Virtualization Platform |
Version |
Information |
|---|---|---|
|
VMware |
ESXi 7.0 U2 or newer |
|
|
*HyperV |
Not Supported Yet |
|
Monofor Virtual Appliance can be download below link
https://download.monofor.com/install/v2023.04/monofor-vapp-v2023.04.zip
MD5 - for file integrity check.
https://download.monofor.com/install/v2023.04/monofor-vapp-v2023.04.md5
|
File Name |
Hash md5 |
|---|---|
|
|
|
If you want to check hash of the monofor-vapp-v2023.04.zip file with command line you can use below methods.
with Powershell on Windows
Get-FileHash .\monofor-vapp-v2023.04.zip -Algorithm MD5

Algorithm       Hash                                    Path
---------       ----                                    ----
MD5             8a17f1f411ec0fe38030860bc0d71874        C:\monofor-vapp-v2023.04.zip
with Shell on Linux
root@monofor:/# md5sum monofor-vapp-v2023.04.zip
8a17f1f411ec0fe38030860bc0d71874  monofor-vapp-v2023.04.zip
If you already downloaded md5 file you can use below example.
root@monodeb:/# md5sum -c monofor-vapp-v2023.04.md5
monofor-vapp-v2023.04.zip: OK
Importing vAppliance
VMware Vcenter
Monofor vAppliance will be import to VMware Vcenter. Below steps will help how to import monofor-vapp-v2023.04.ova file
Open your vcenter admin UI on your browser.
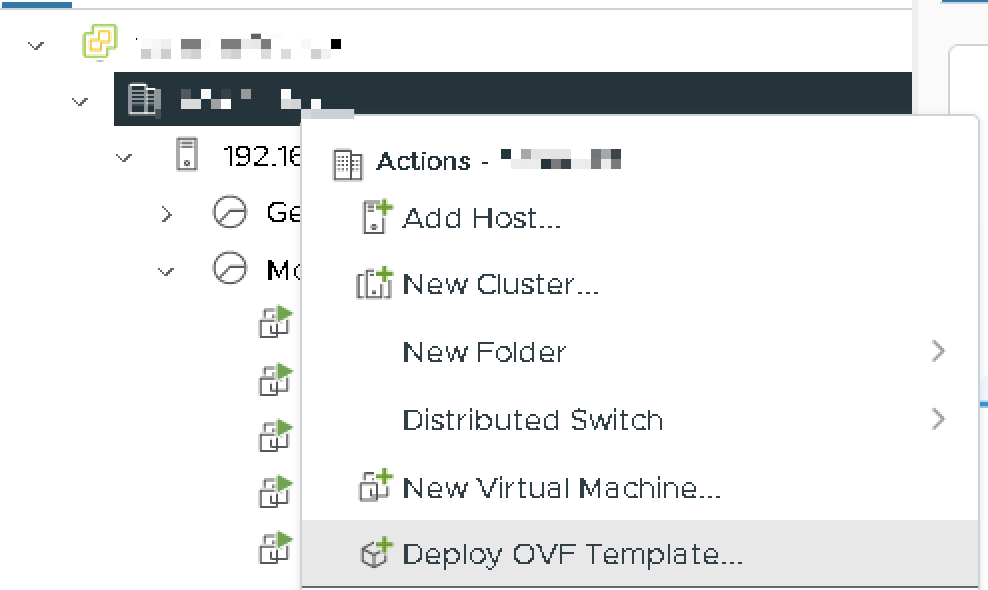
Right Click your Datacenter → Click Deploy OVF Template
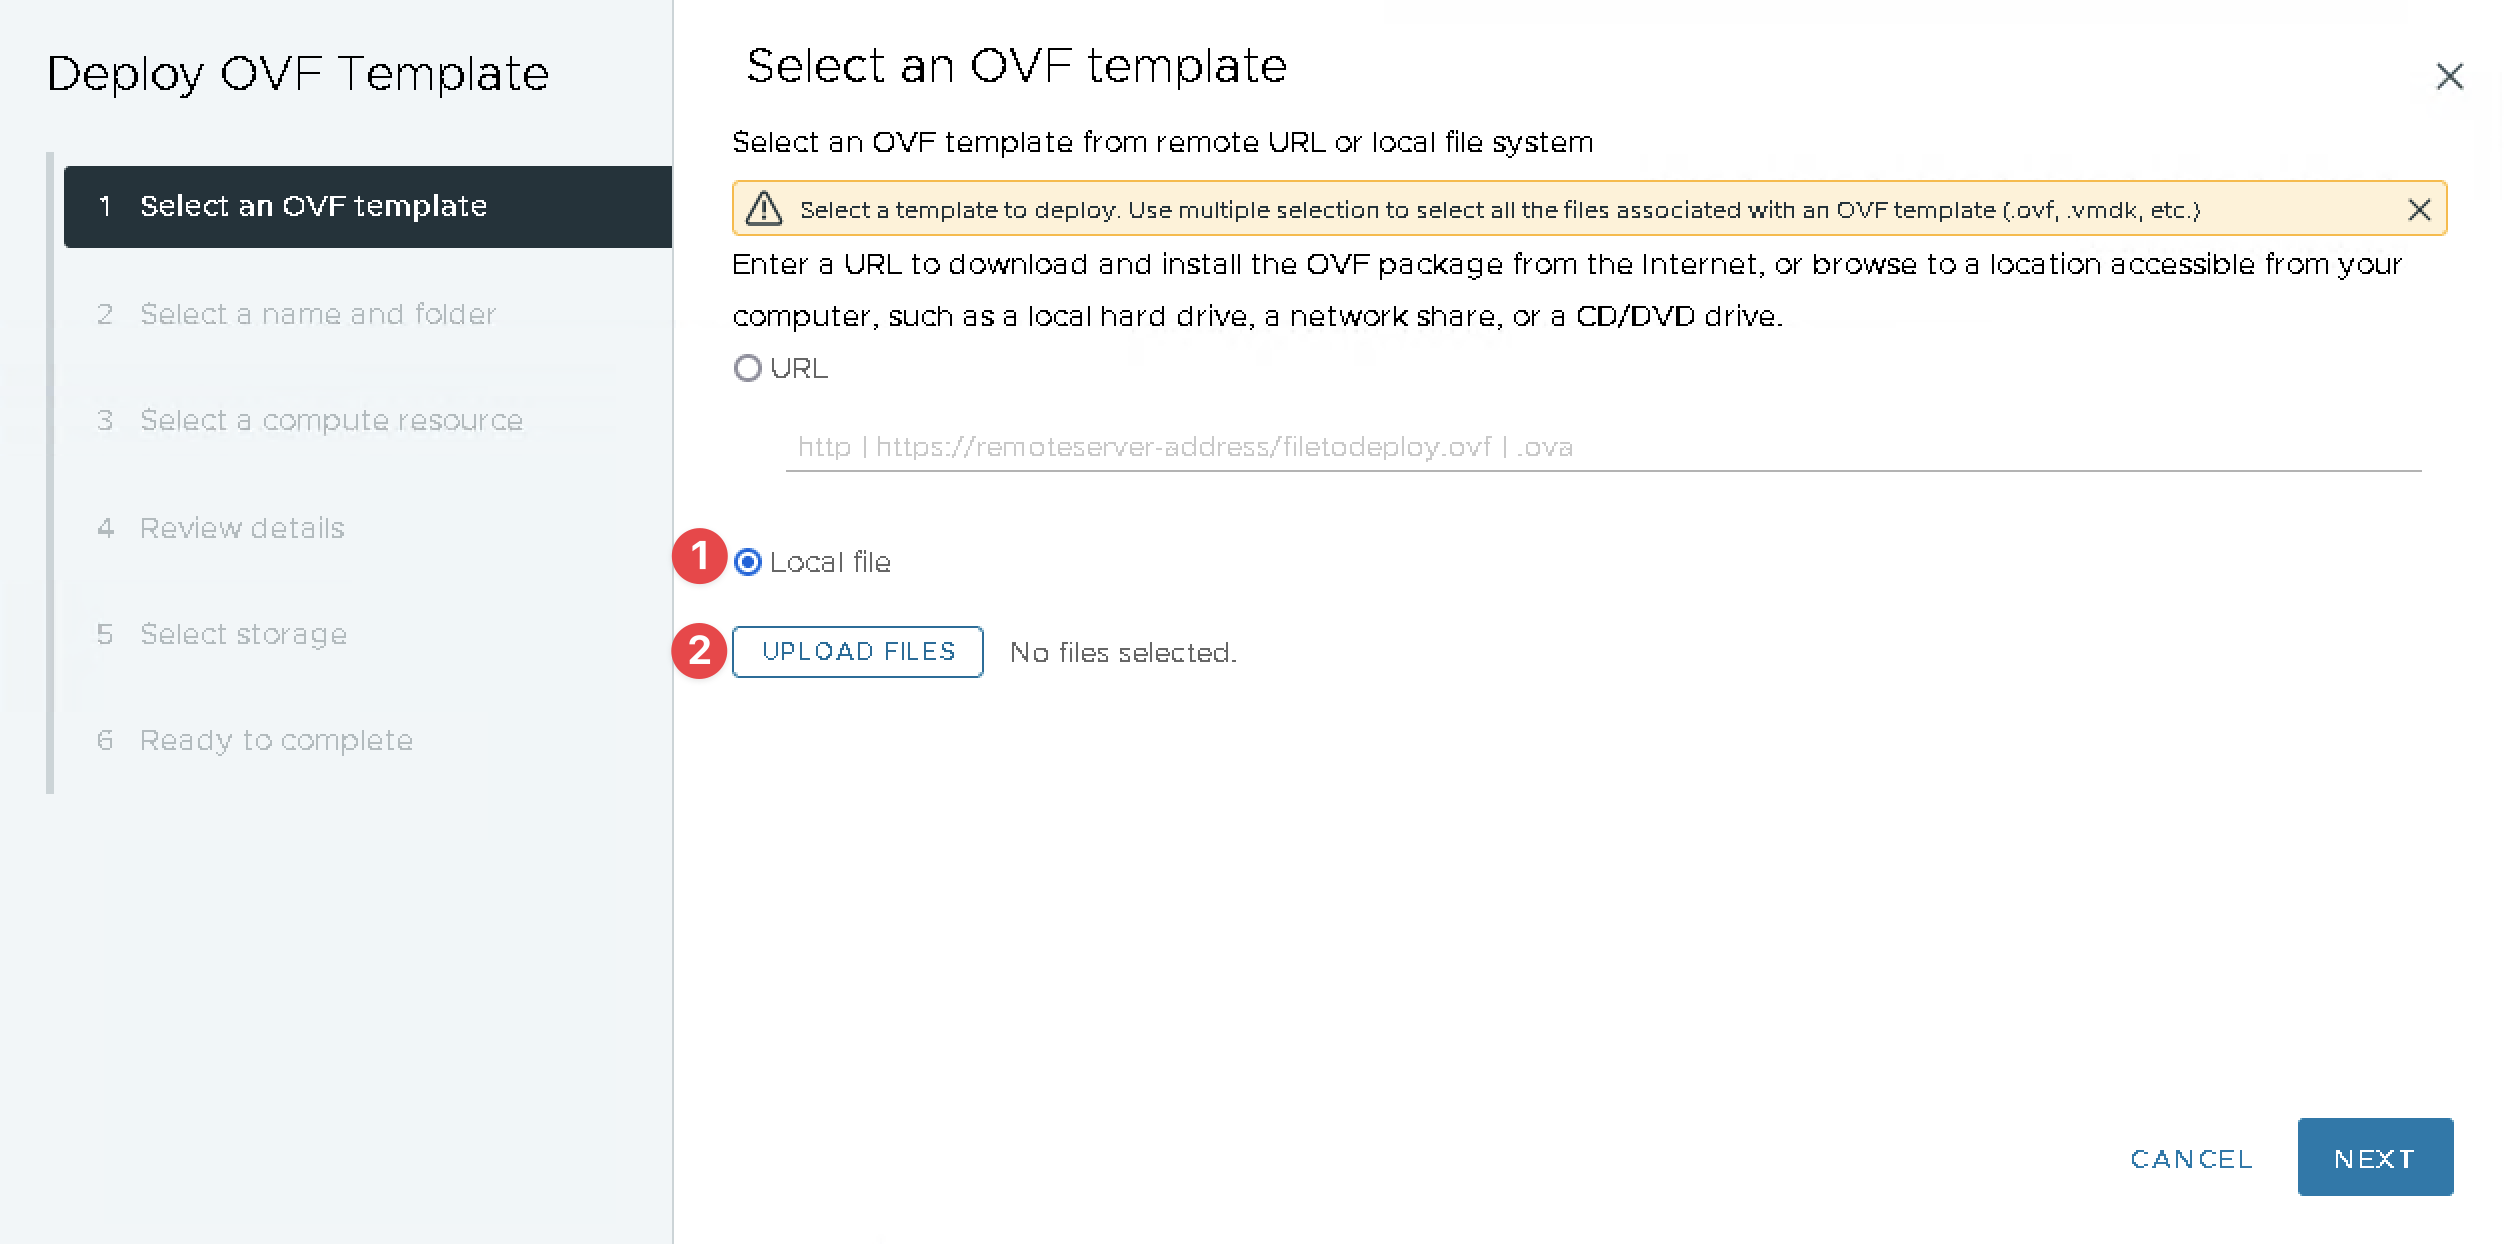
Click(1) Local File and Click(2)UPLOAD FILES
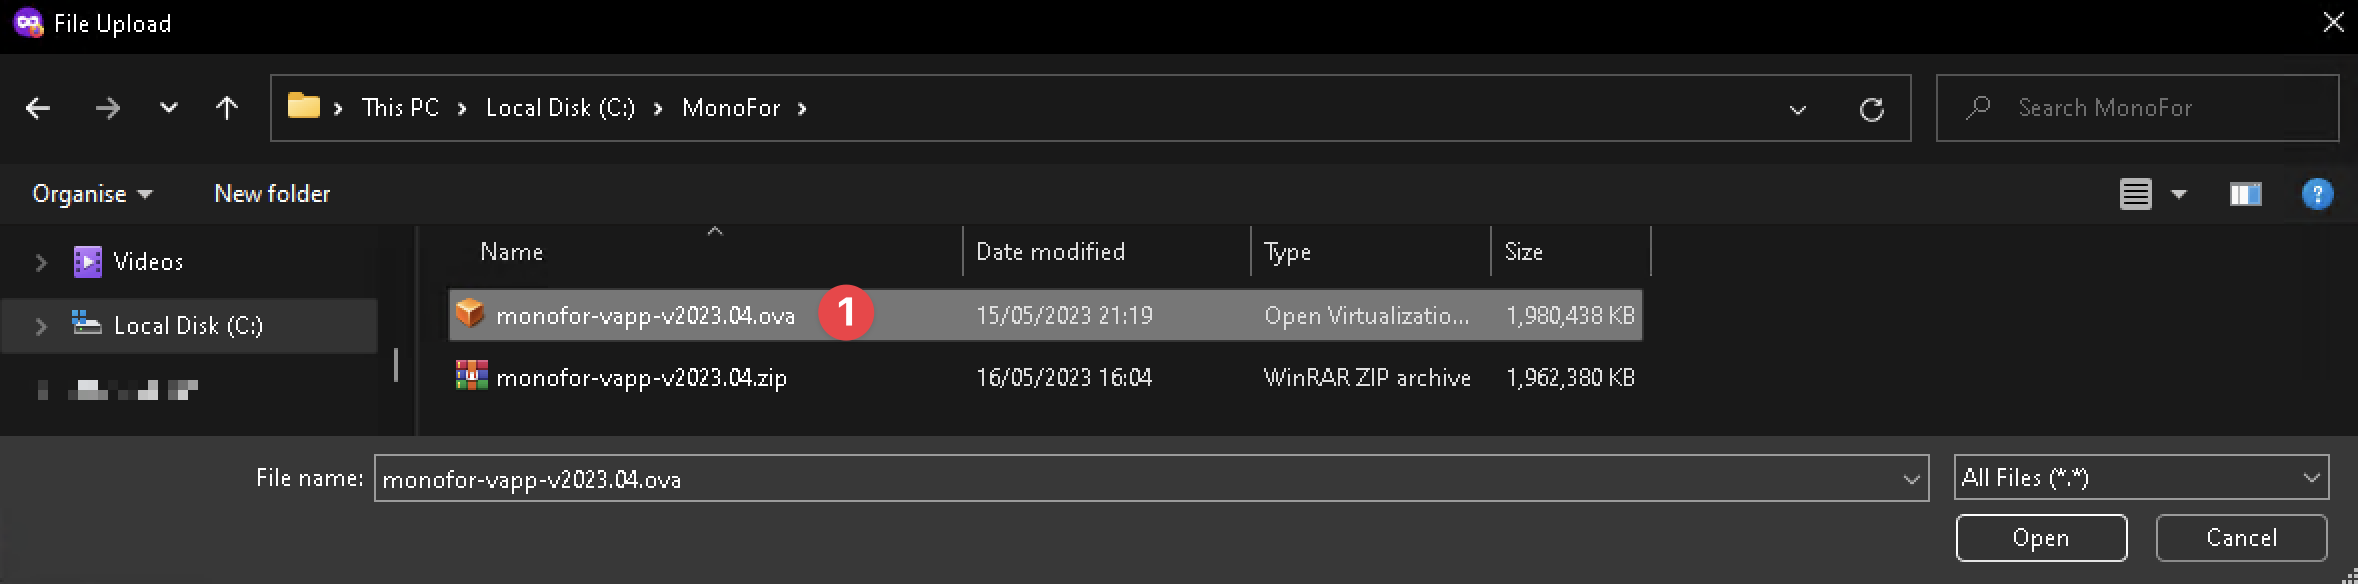
Choose Monofor Virtual Appliance OVA file monofor-vapp-v2023.04.ova and click Open
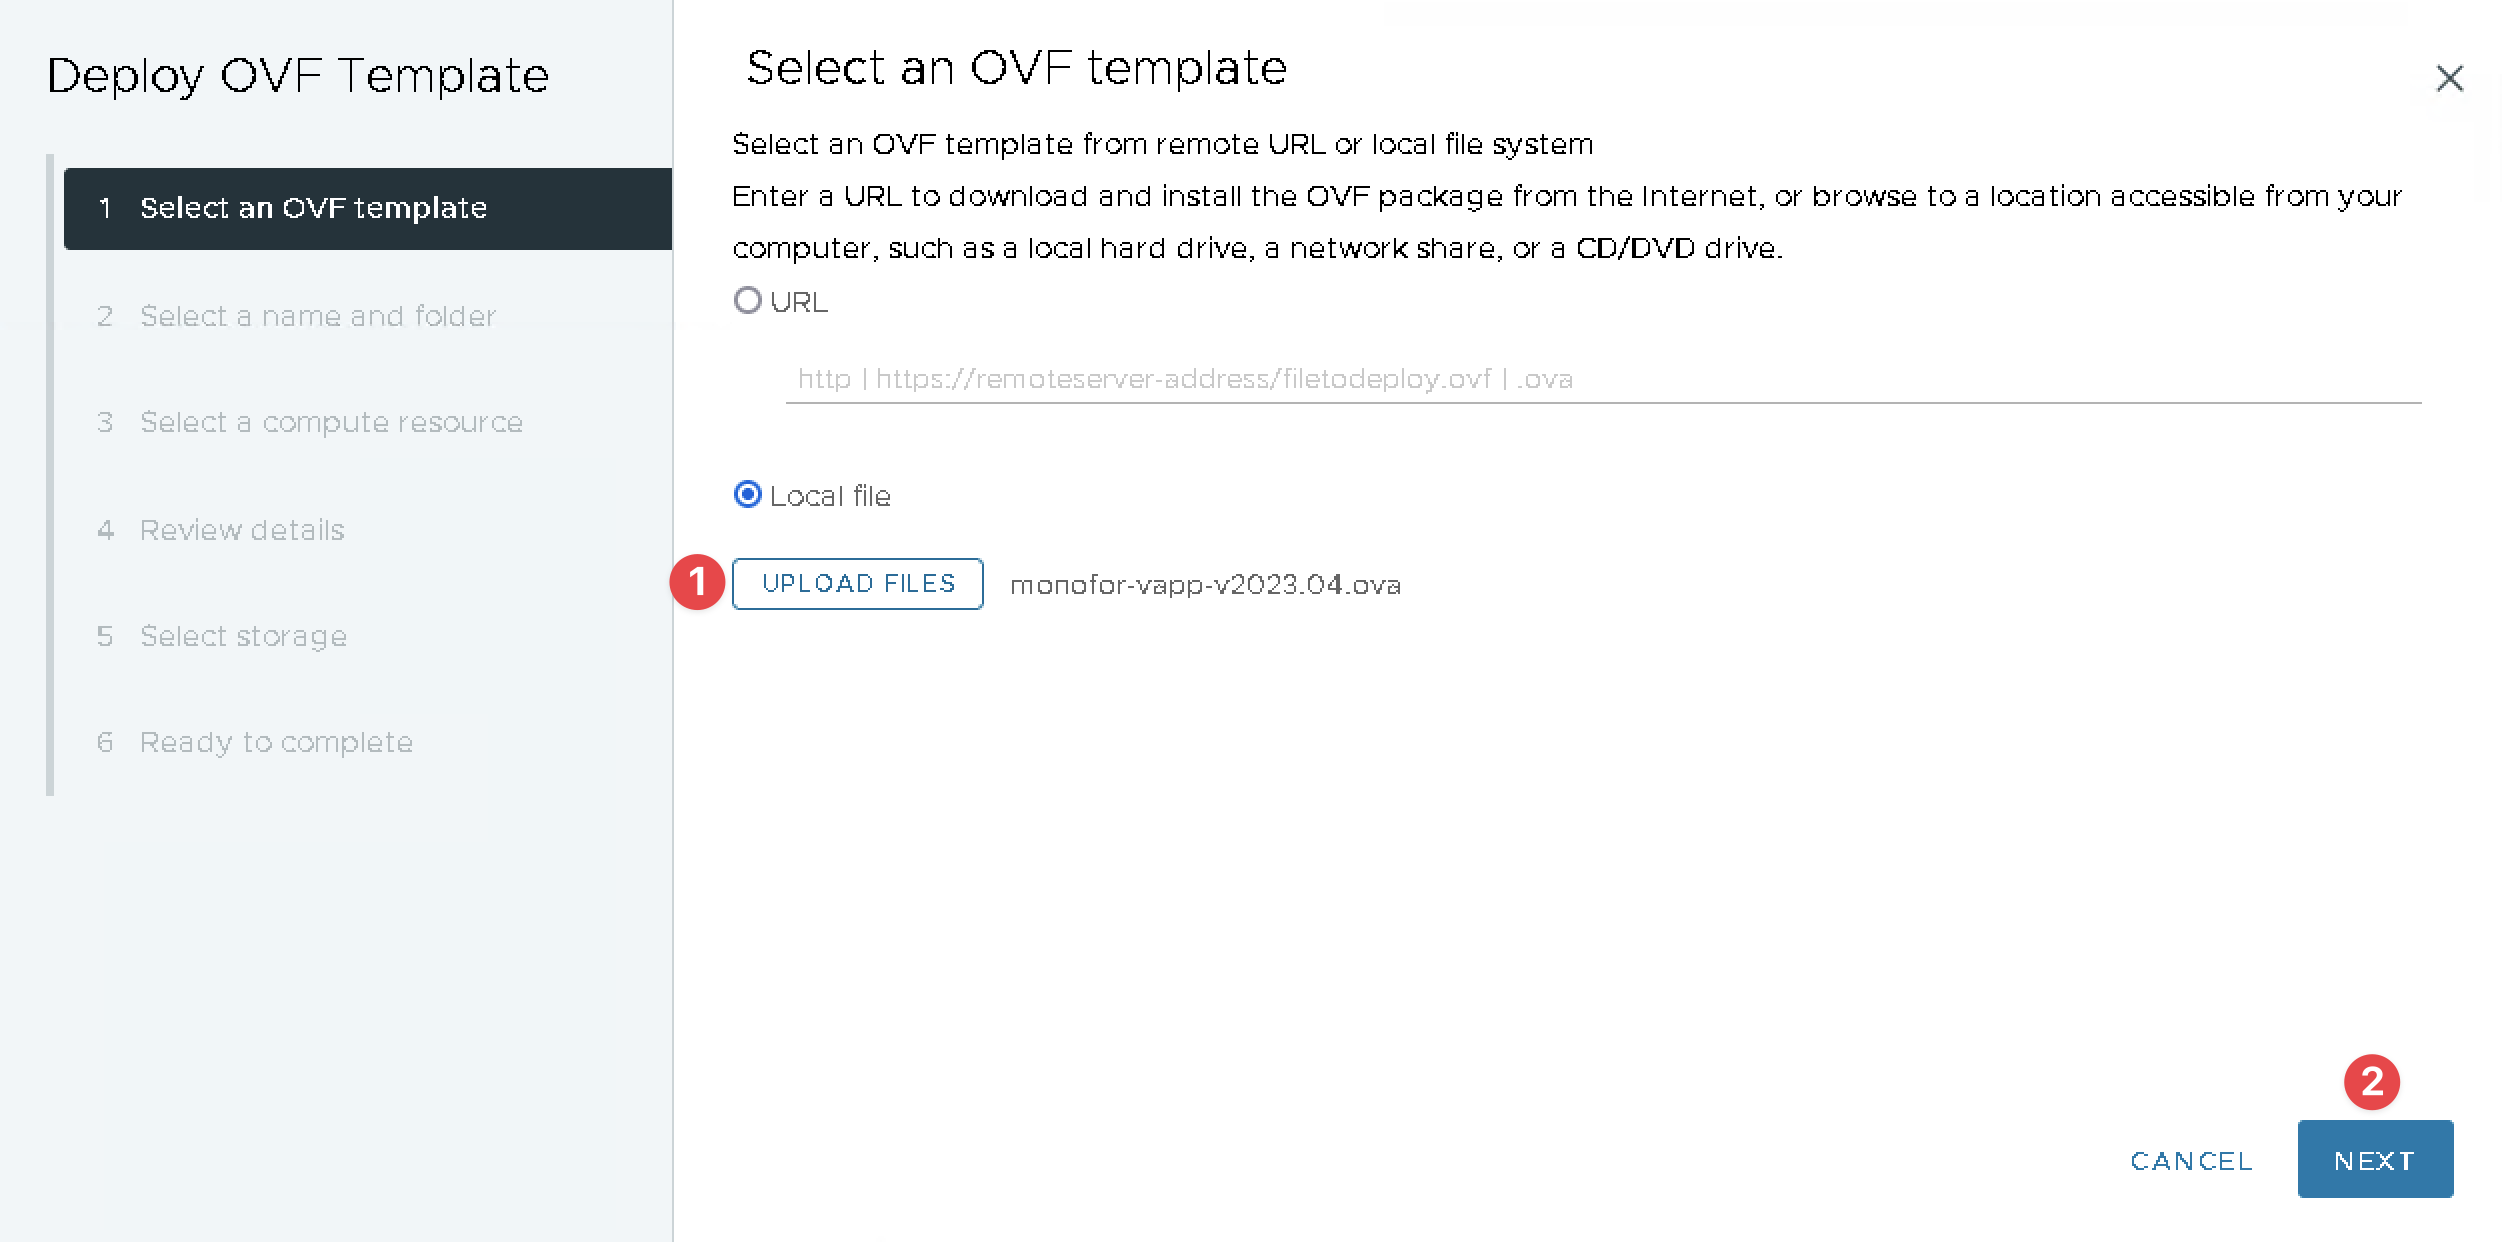
You will see selected files right side of the UPLOAD FILES button then click NEXT button.
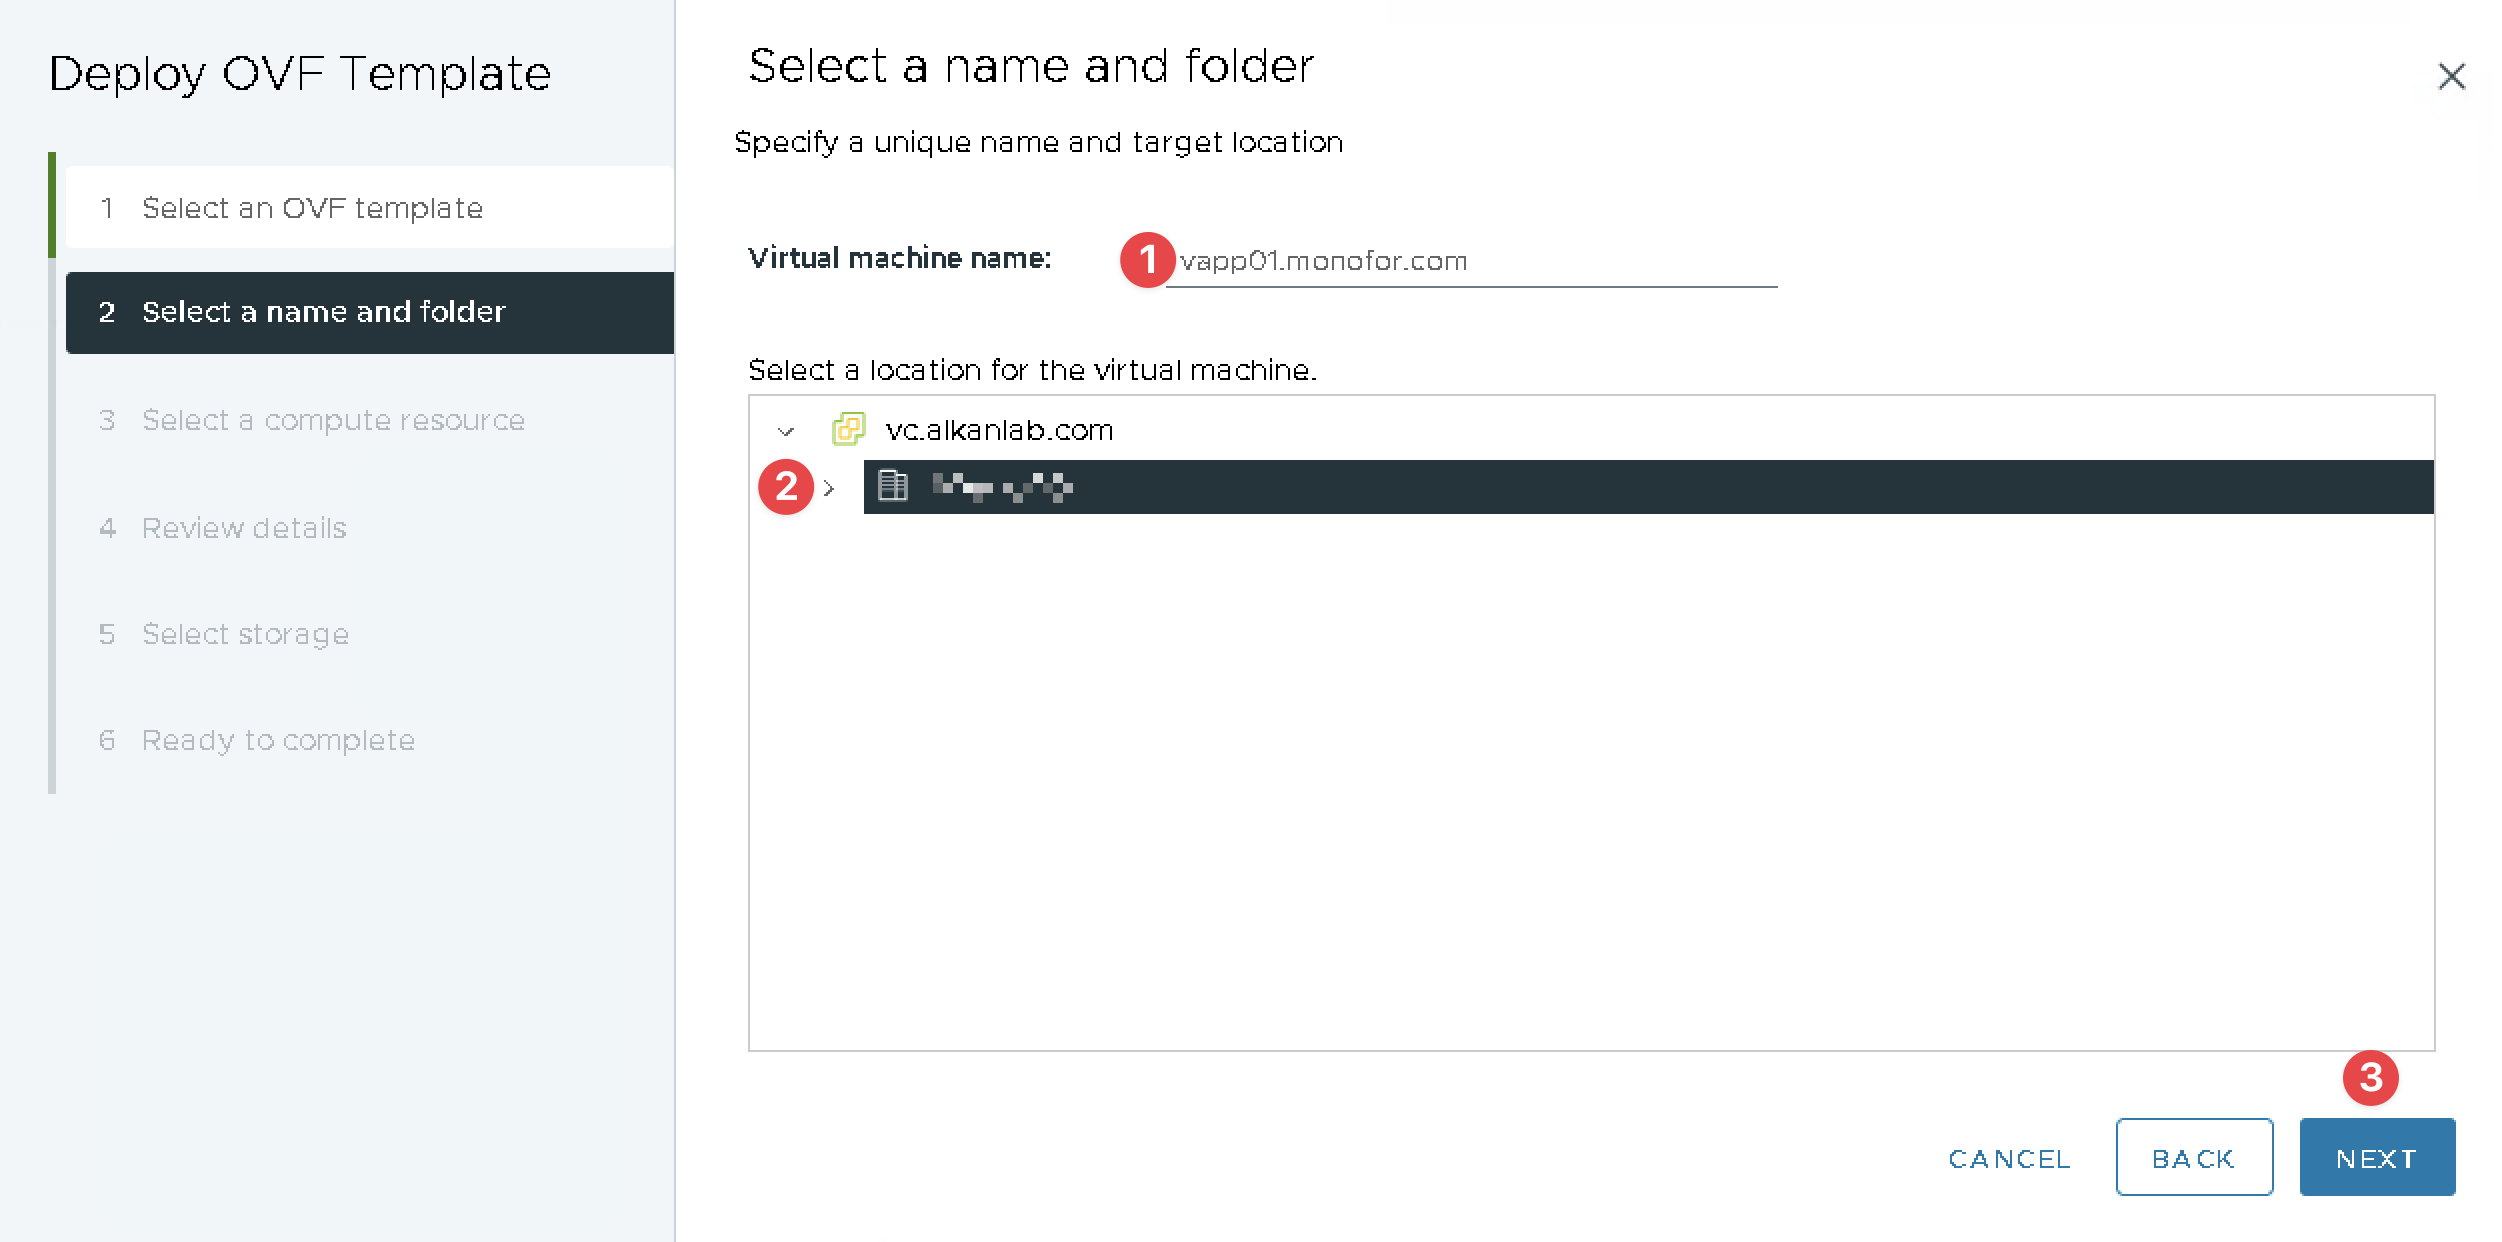
Input(1) Virtual machine name, Choose(2) location of virtual machine and click(3) NEXT.
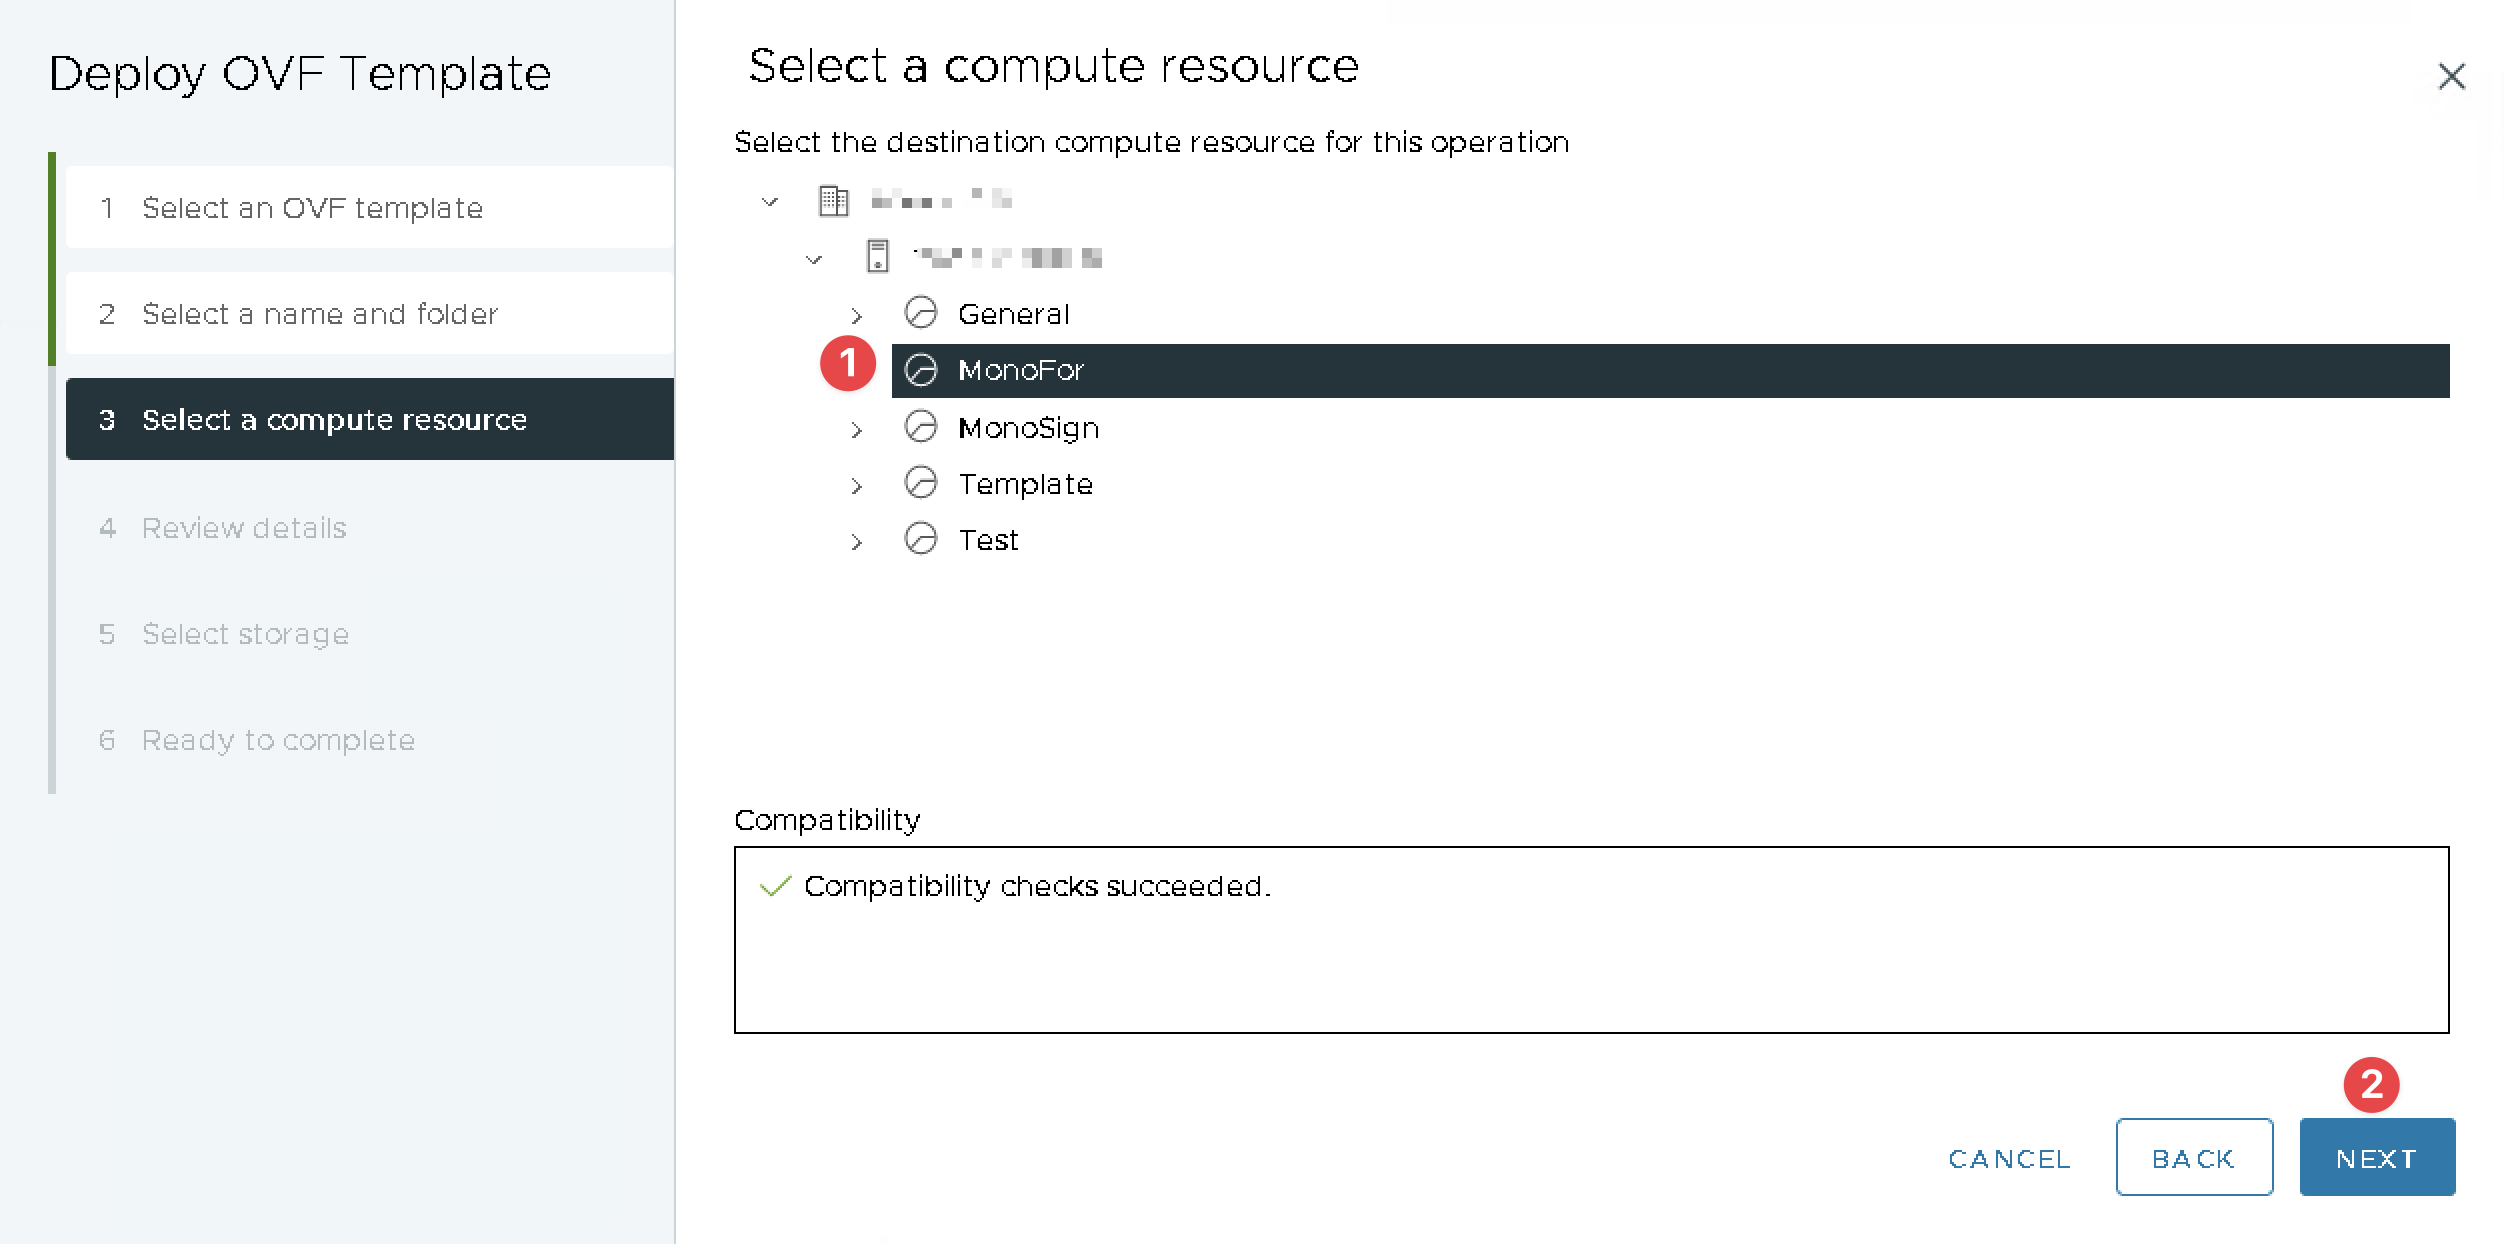
Select(1) Compute Resource if needed and Click(2) NEXT.
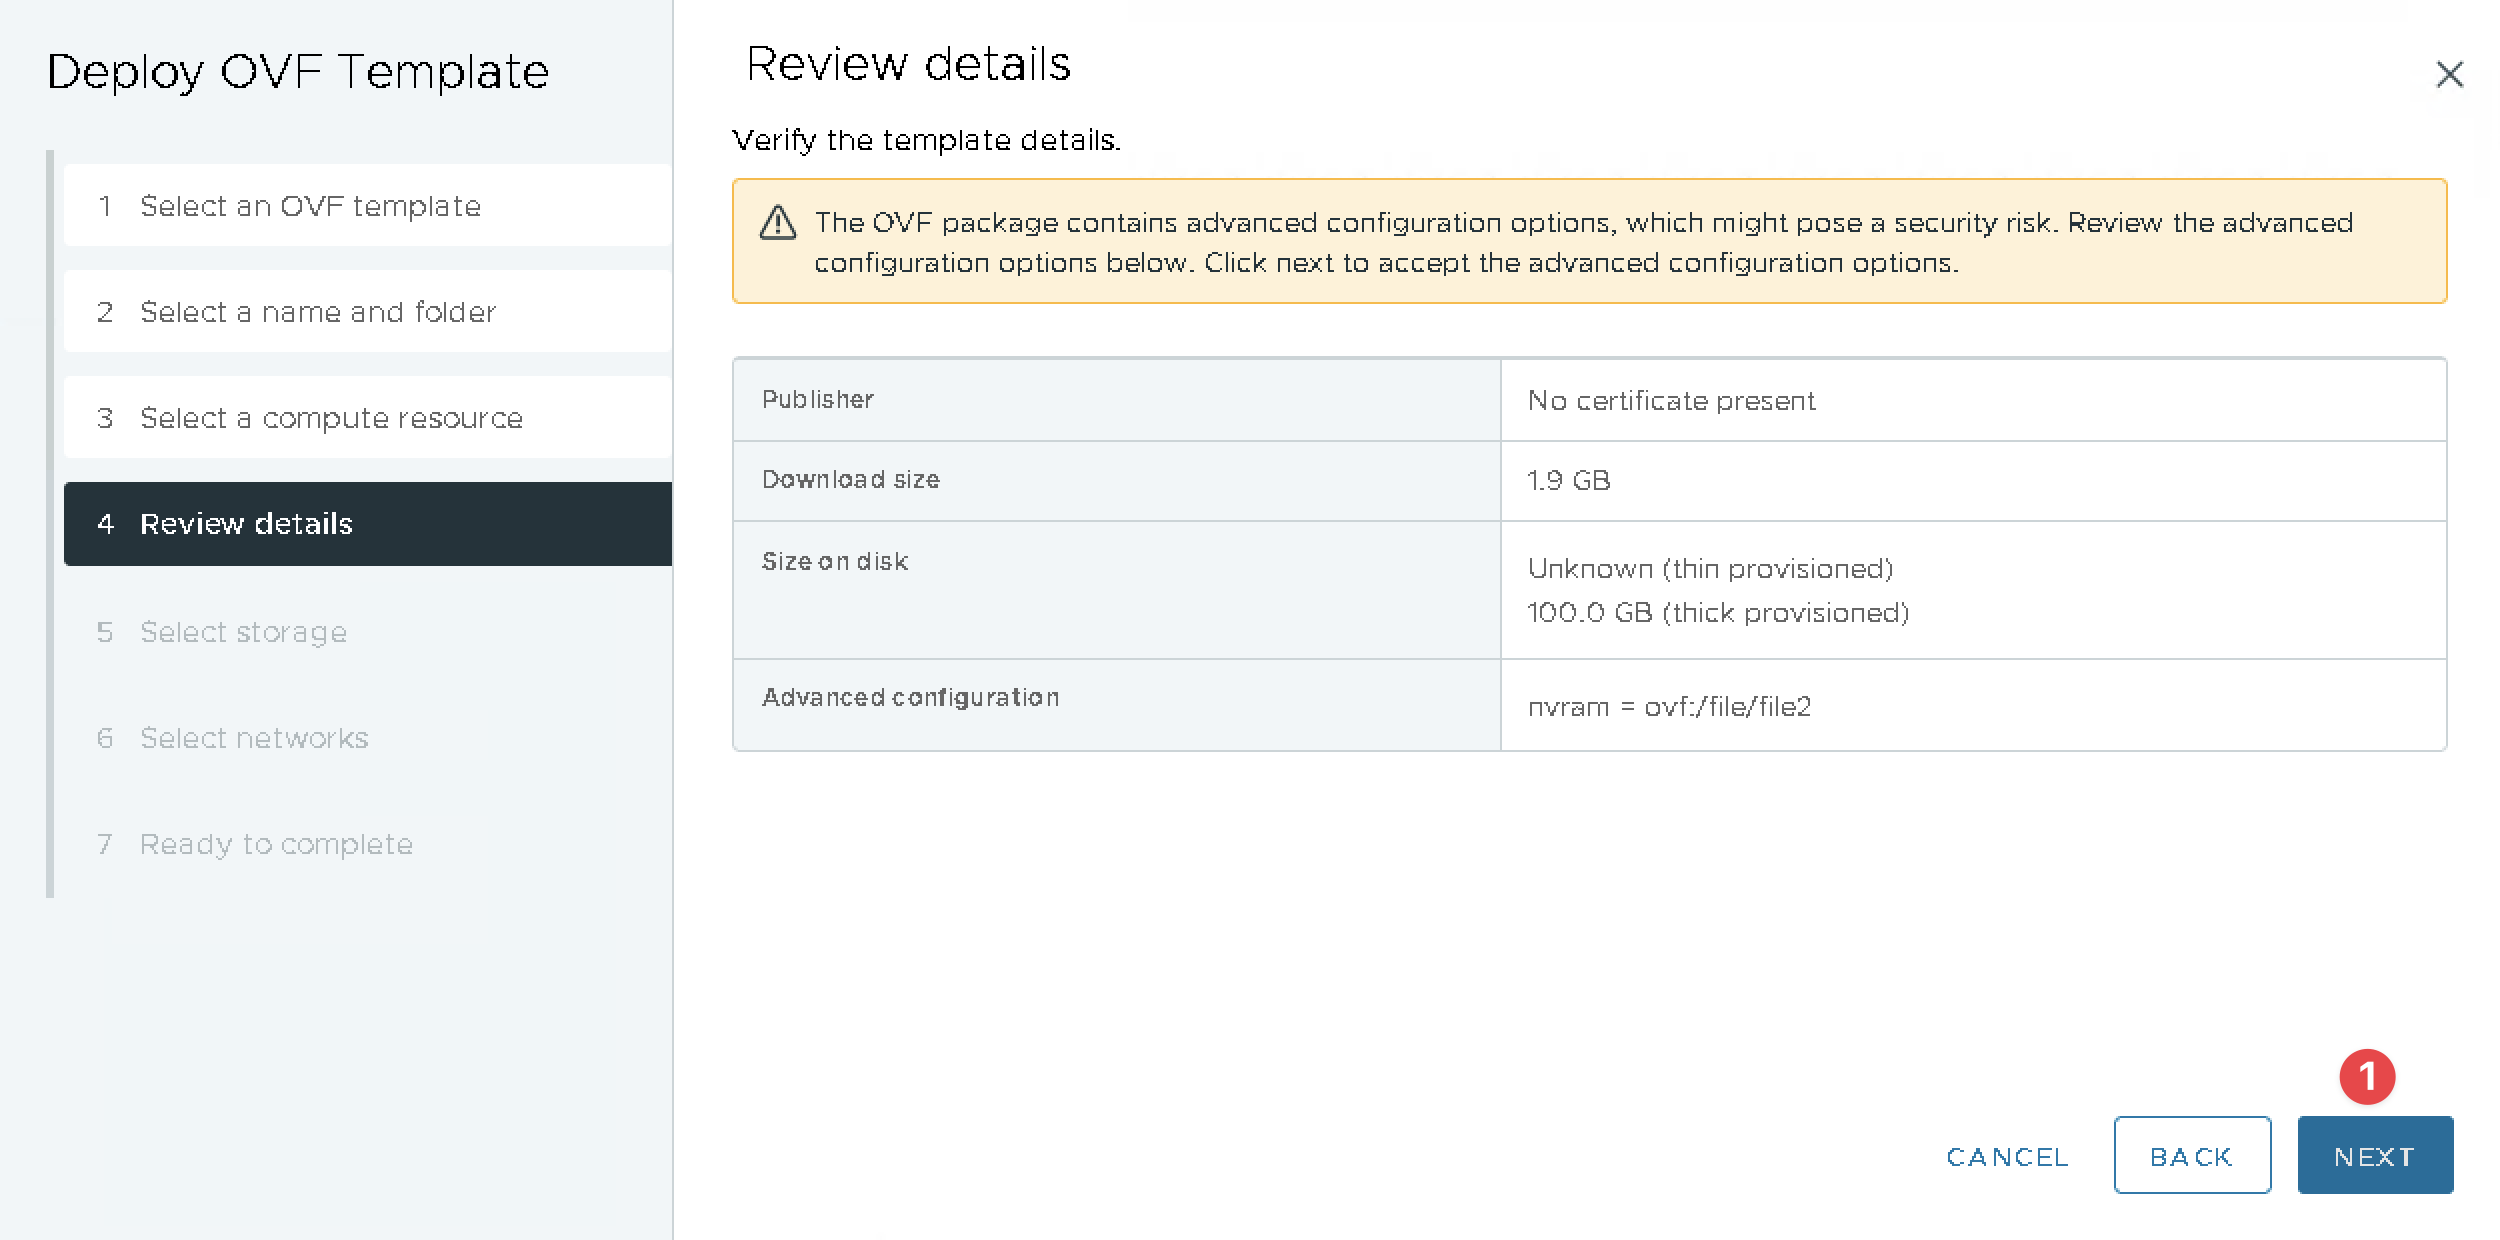
Review details and Click NEXT.
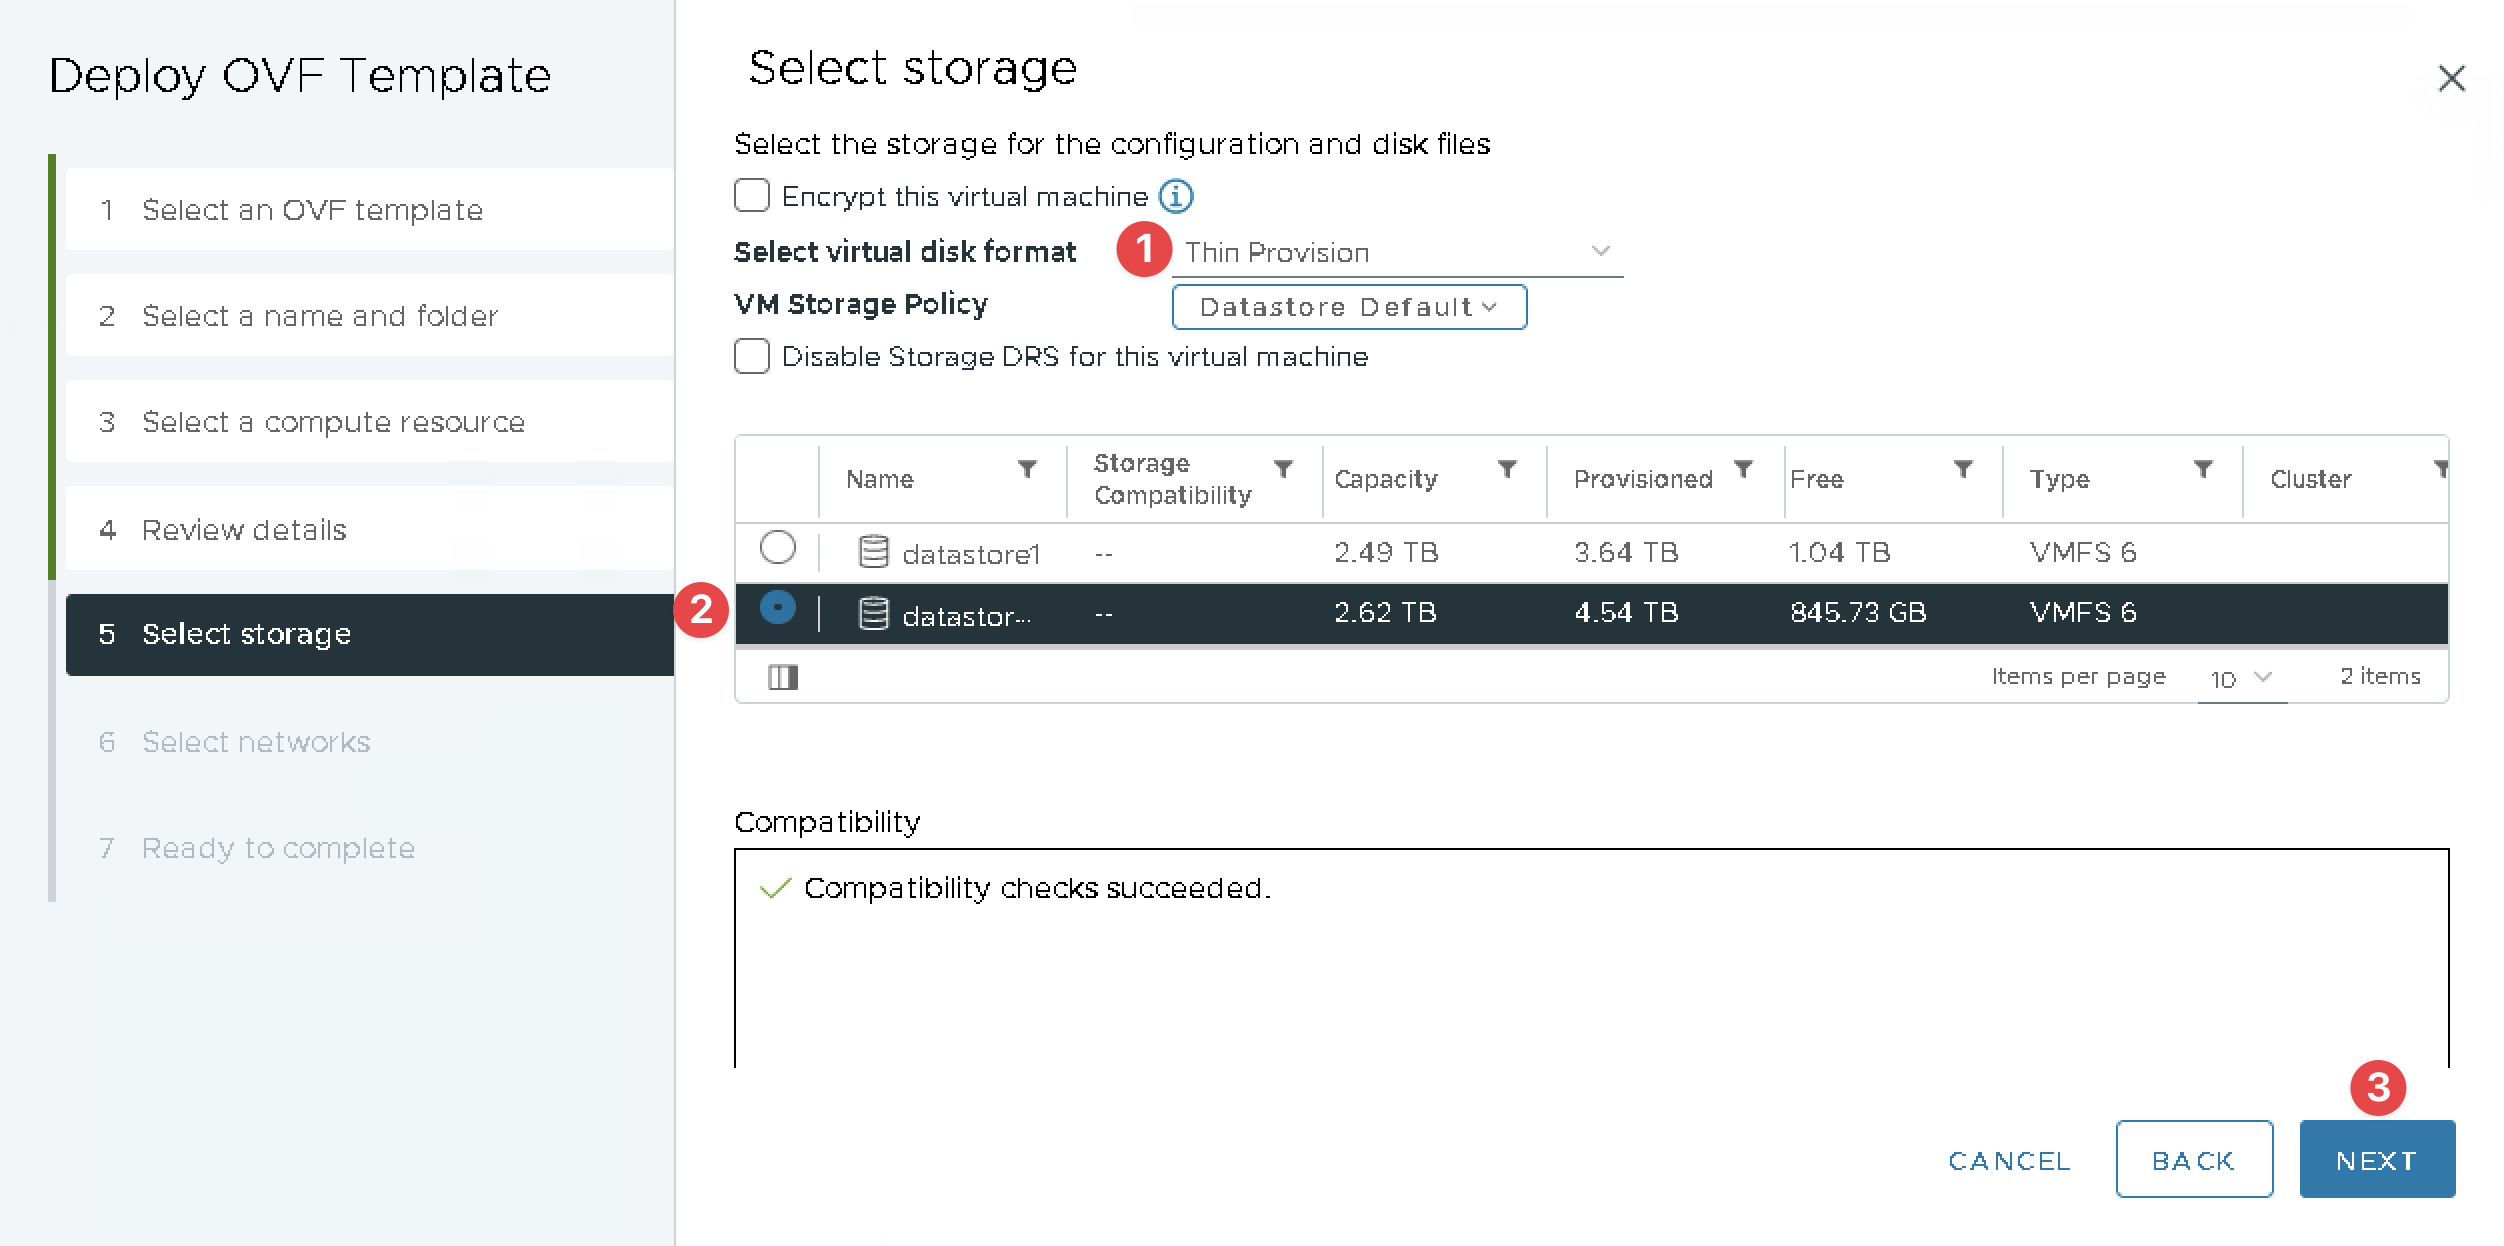
Select virtual disk format(1), Choose(2) Datastore and Click(3) NEXT.
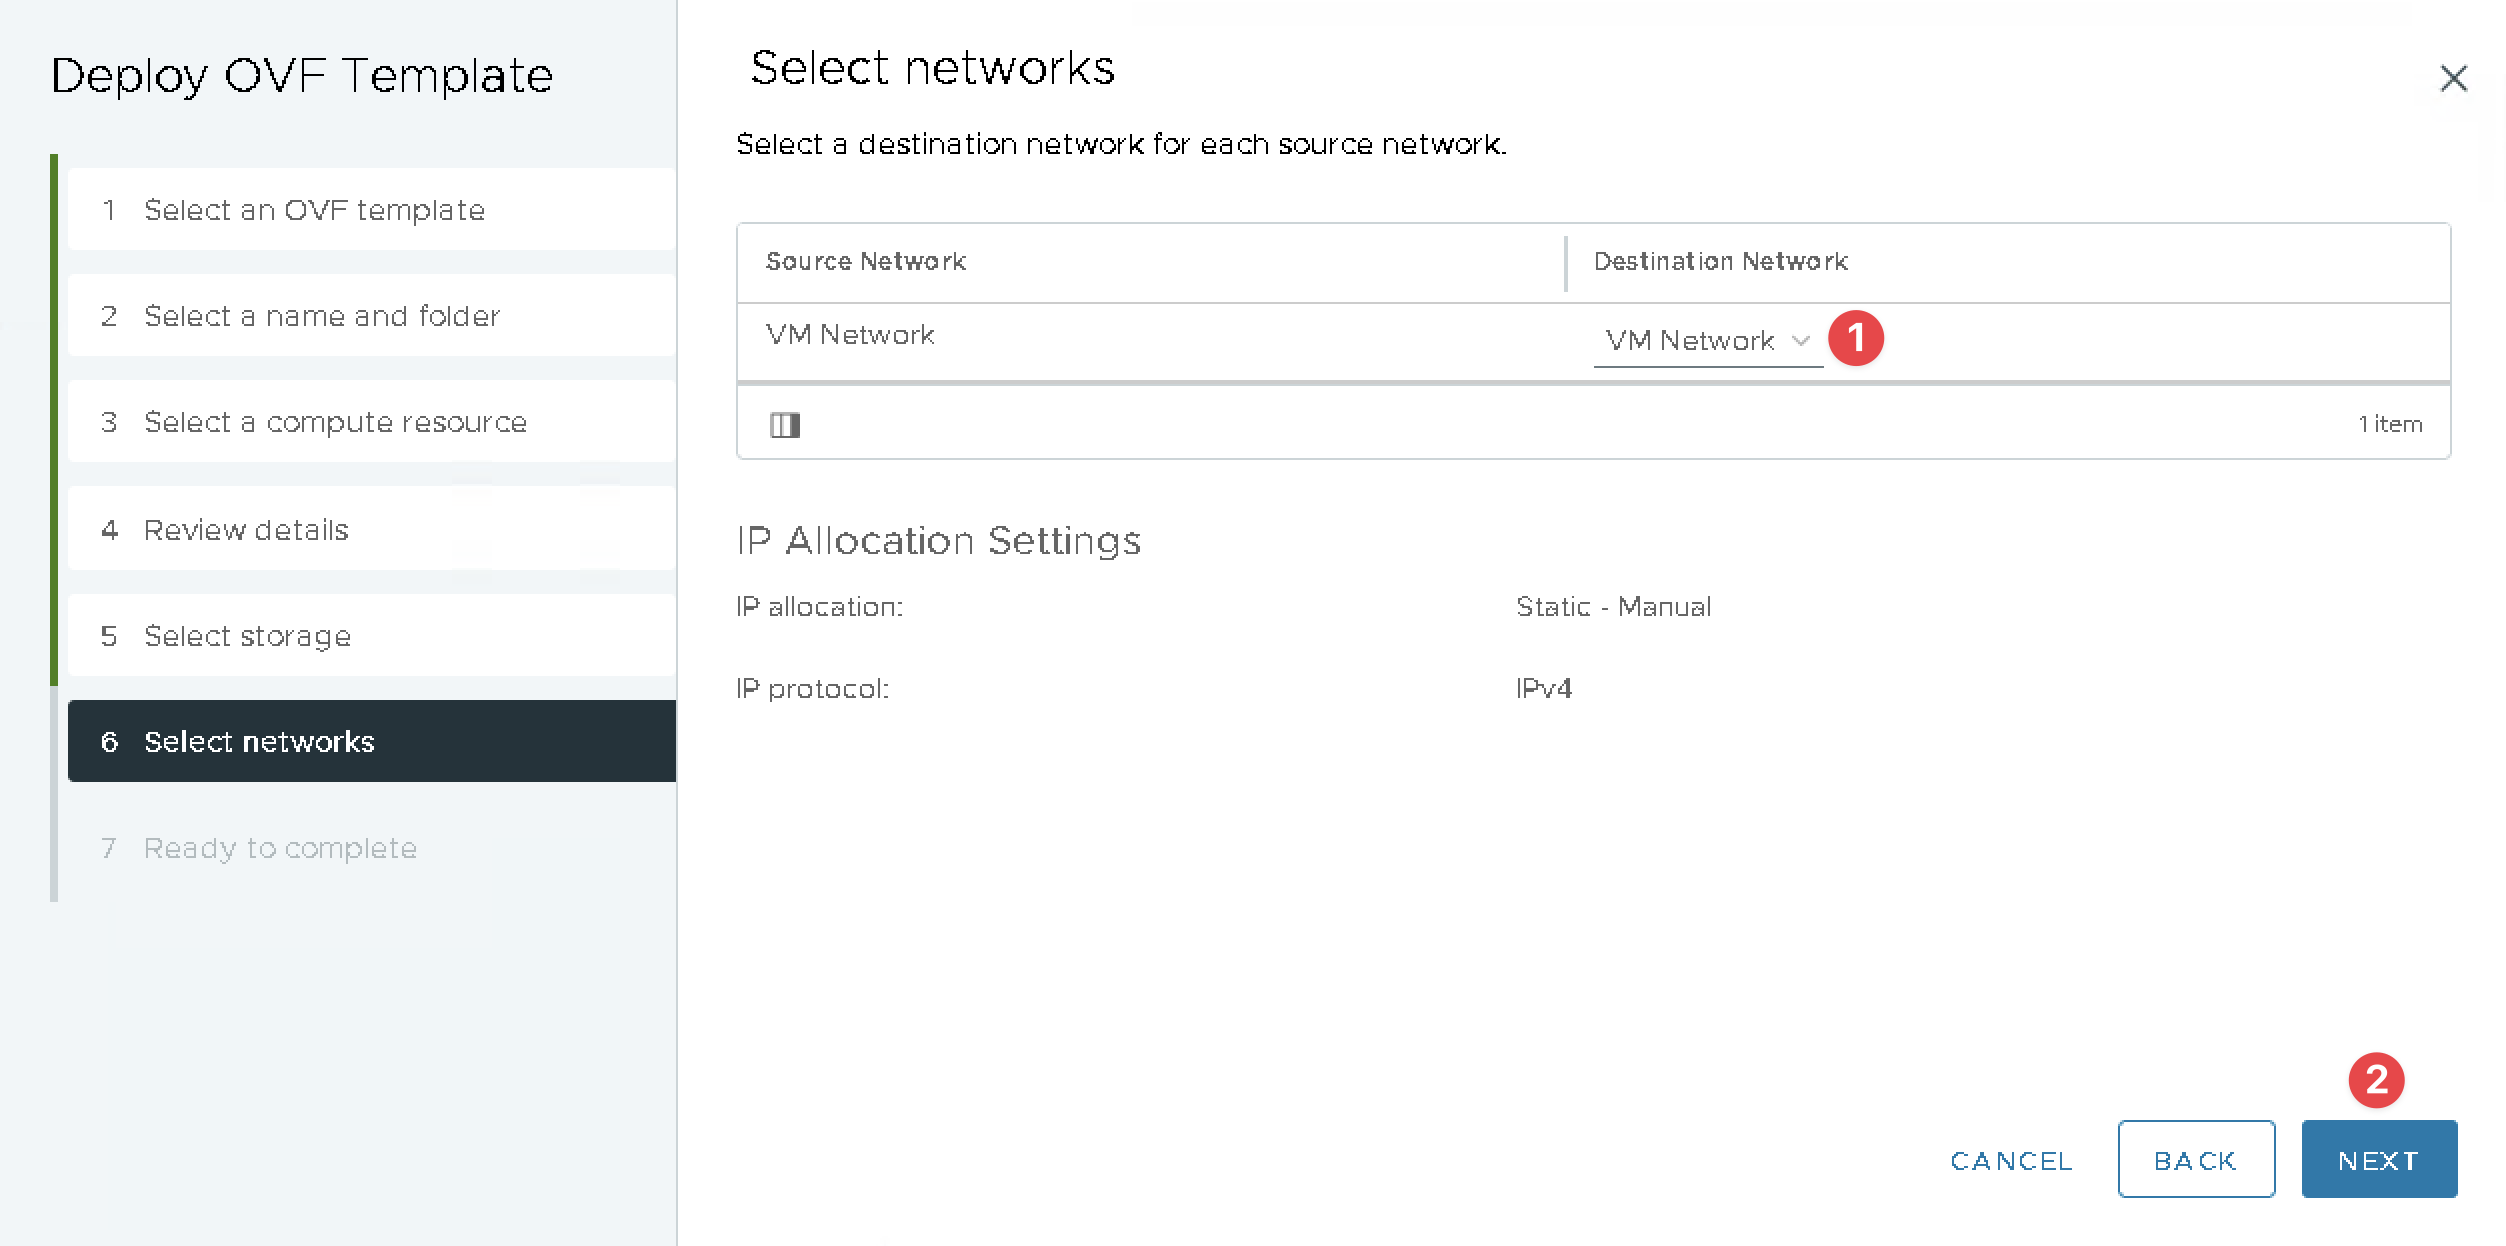
Select(1) Network and Click(2) NEXT.
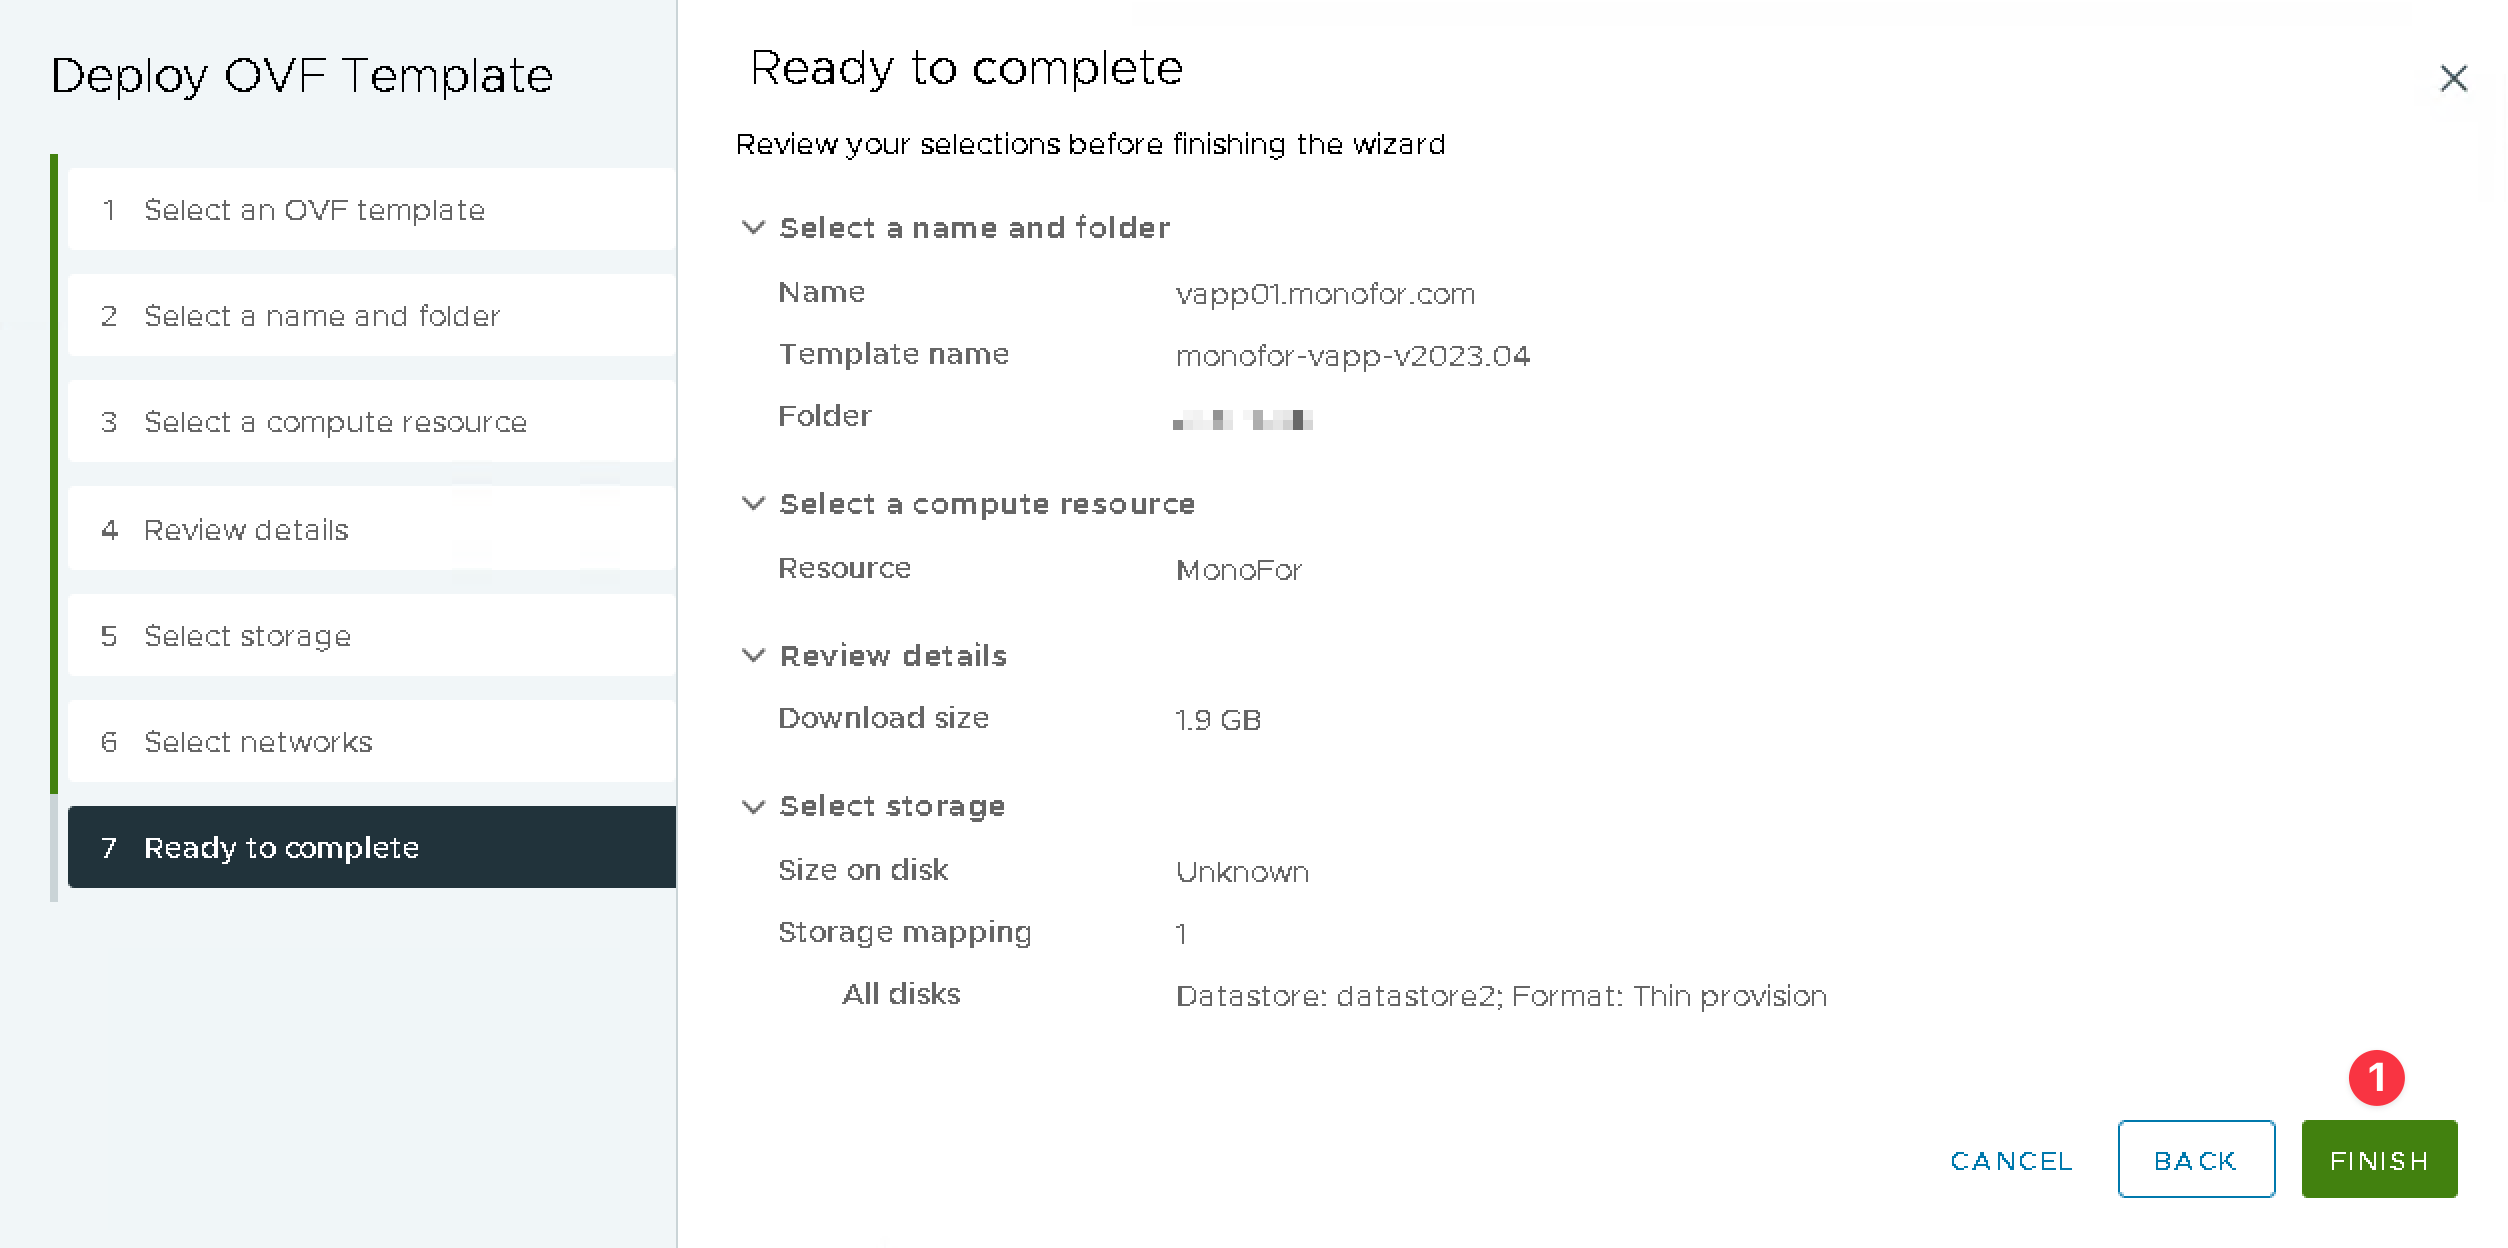
Now Monofor Virtual Appliance Ready to complete. Click(1) NEXT.
After that ova file import will start. It can be follow status in Recent Tasks.

It can be verified if successfully completed in Recent Tasks.

Now you can go to Inventory & Host in Vcenter and verify imported ova machine will be there. In this example Monofor Virtual Appliance name is vapp01.monofor.com.

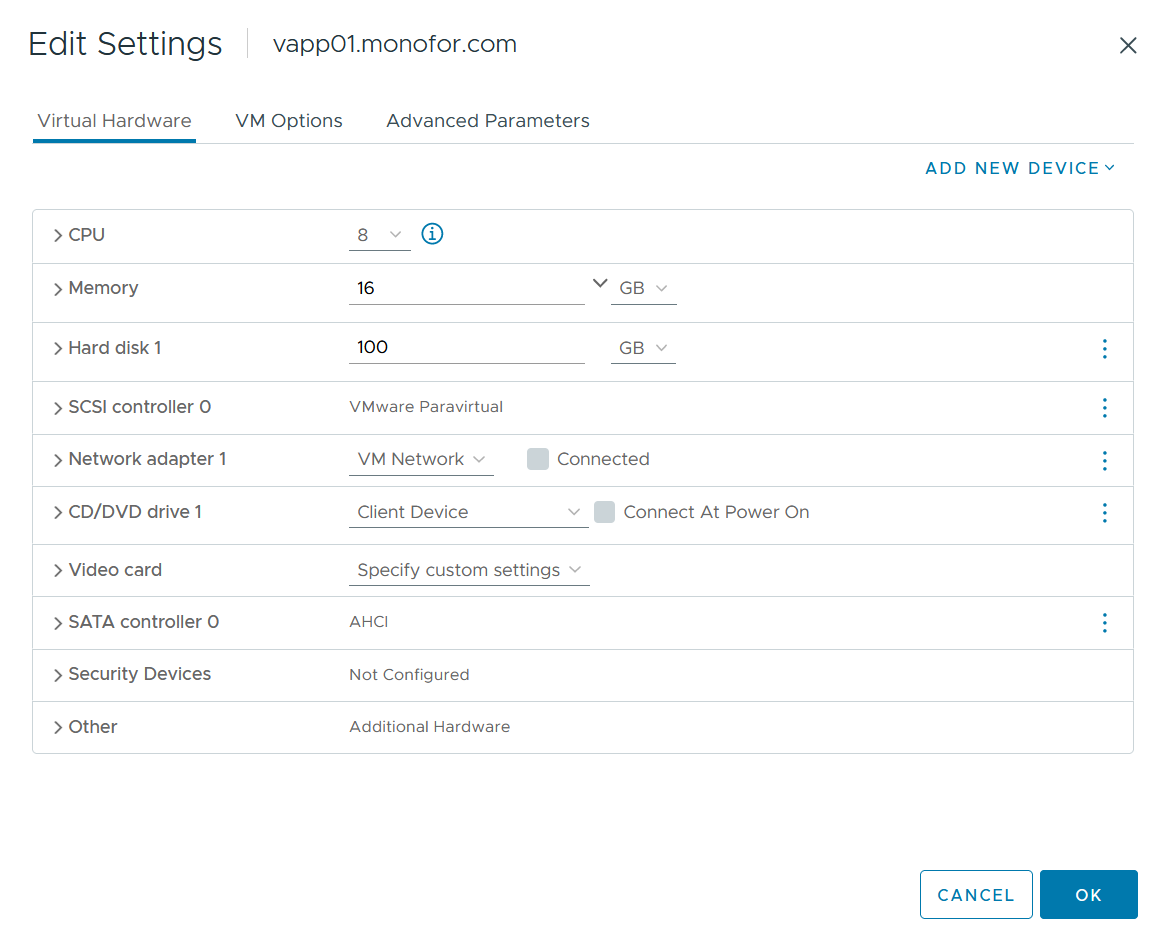
Before Power On virtual machine please verify hardware resources CPU, Memory, Disk and Network Mapping.
|
CPU |
8 Core |
|
Memory |
16 GB |
|
Disk |
100 GB |
Right Click of virtual machine and Click Edit Settings.

You can verify hardware resource in this menu
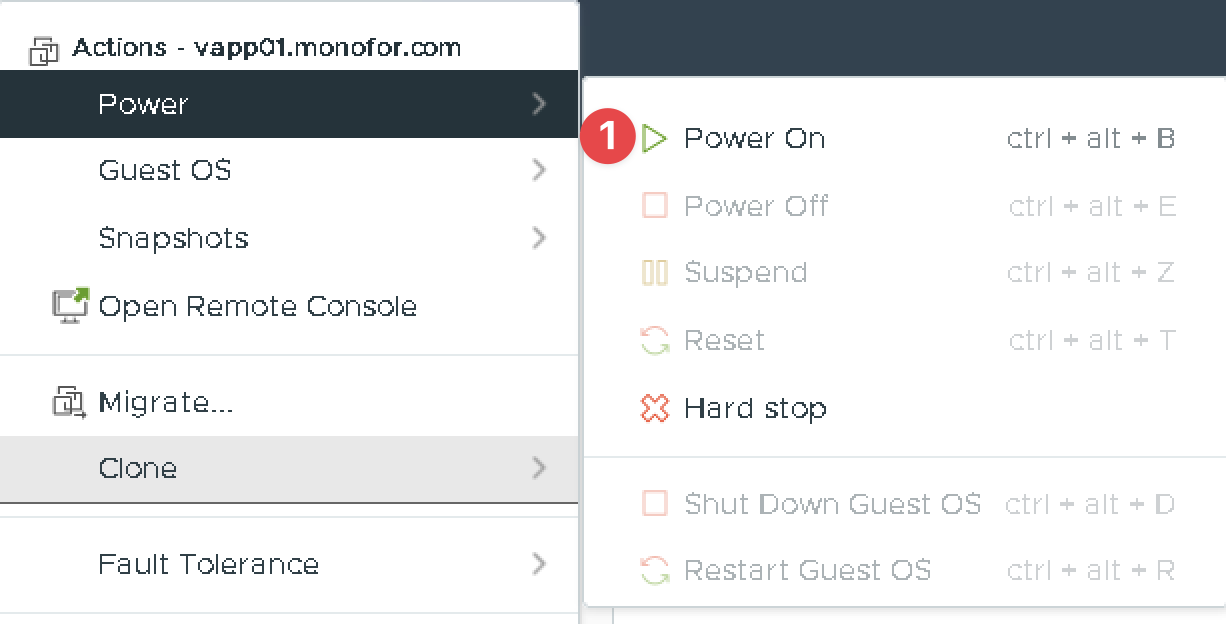
Right click of the virtual machine, go to Power and Click Power On the start
After virtual machine Powered On you can Click(1) LAUNCH WEB CONSOLE.
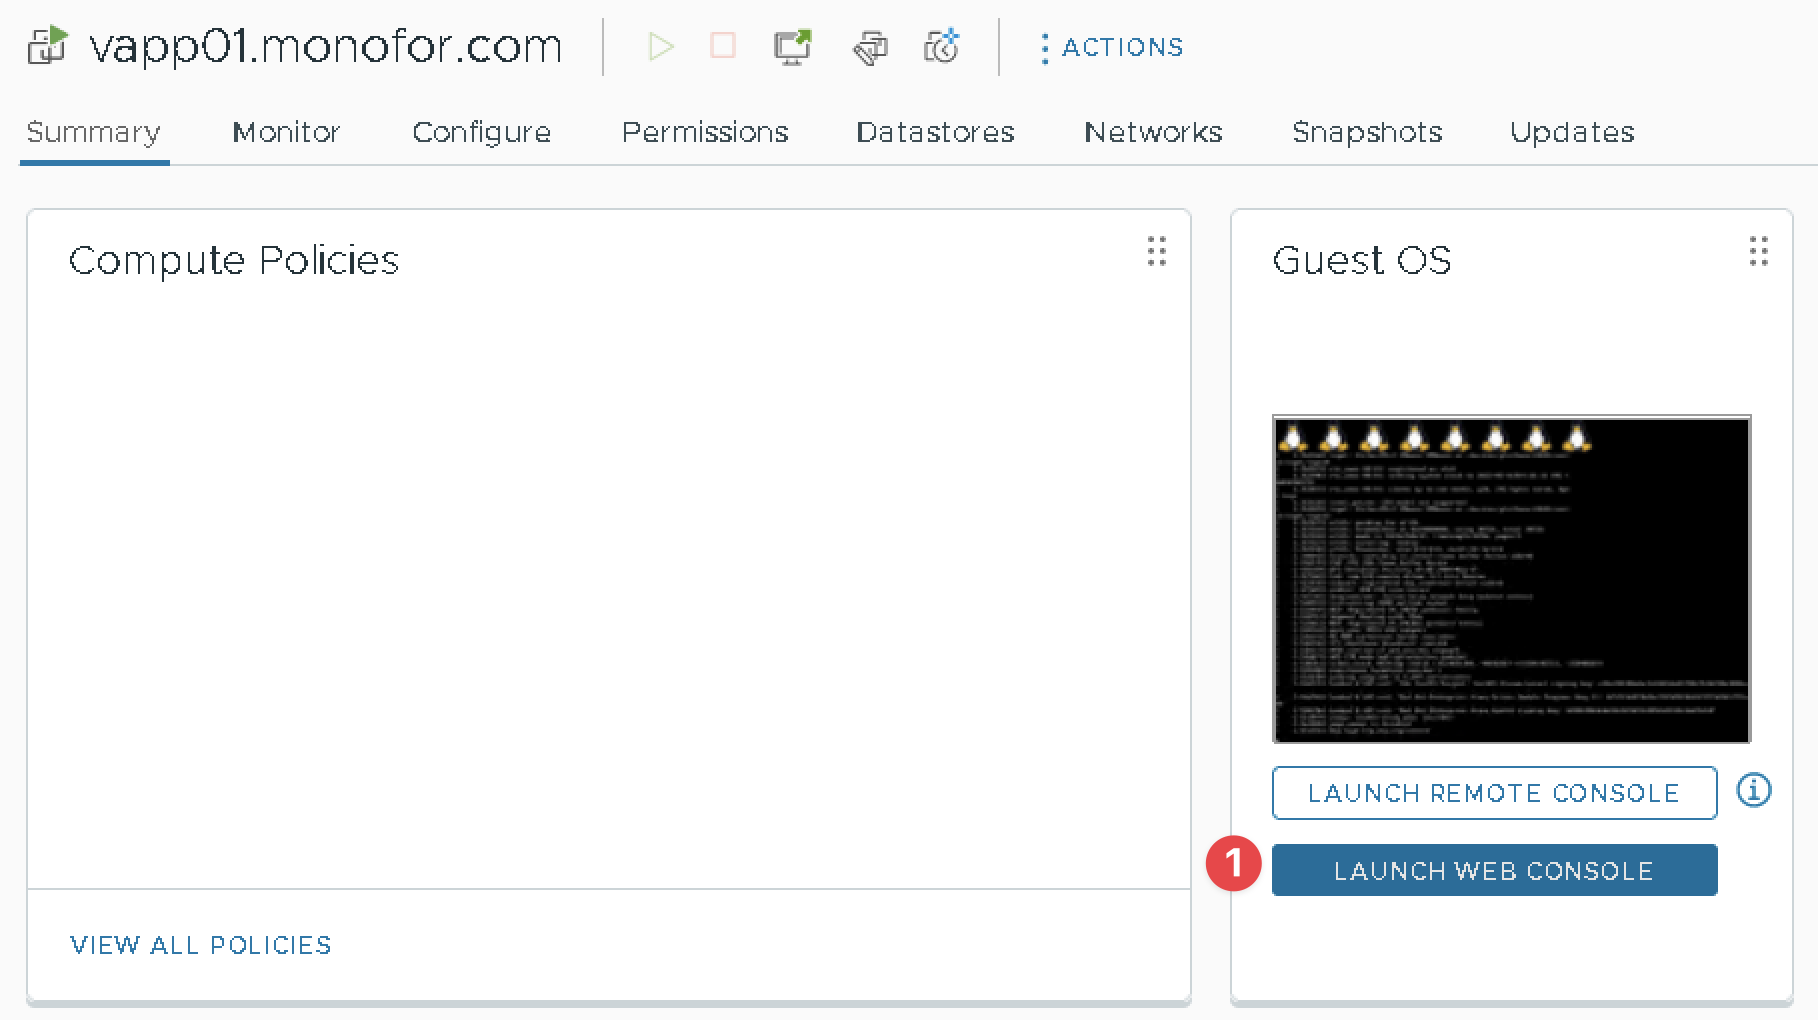
Now you can access Monofor Virtual Appliance in console mod.

Operating System Initial Configuration
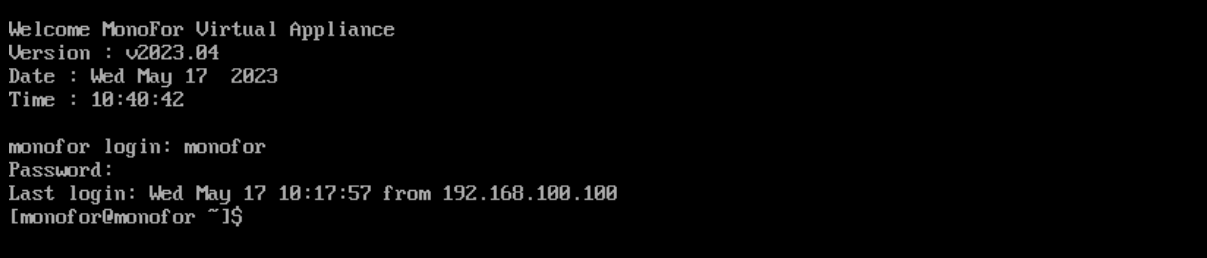
Monofor Virtual Appliance has default user. After connecting via console you can able to login to server with this default user credential.
Credential Information
User     : monofor
Password : MonoFor1!
Network Configuration
Monofor Virtual Appliance network configuration is stored /etc/NetworkManager/system-connections/eth0.nmconnection. You can edit this file to set correct IP configuration.
Original File

Change of the IP address in this file you can edit /etc/NetworkManager/system-connections/eth0.nmconnection with your text editor like vim or nano.
with vim
vi /etc/NetworkManager/system-connections/eth0.nmconnection

OR

with nano
nano /etc/NetworkManager/system-connections/eth0.nmconnection
We will continue to edit and save the configuration
vi /etc/NetworkManager/system-connections/eth0.nmconnection

[connection]
id=eth0
uuid=ab49df52-1f25-4a40-9f22-8d080e341698
type=ethernet
interface-name=eth0

[ethernet]

[ipv4]
method=manual
address1=IP_ADDR/CIDR,GW
dns=DNS1;DNS2;
dns-search=domain.com;

[ipv6]
addr-gen-mode=default
method=auto

[proxy]
You need to change IP_ADDR/CIDR,GW, DNS1,DNS2 and search domain domain.com
Example
|
IPADDR/CIDR |
|
|
GW |
|
|
DNS1 |
|
|
DNS2 |
|
|
Search Domain |
|
Change values then save the file and reboot the virtual appliance.
Now you can access your vAppliance via SSH.
Time Zone and NTP
Change NTP
Monofor services are sensitive to time synchronization. If Linux server time is different than the client devices time this will cause an issue.
First ntp must be change on vAppliance. It can be done with editing /etc/chrony.conf file and restart chronyd.service
/etc/chrony.conf file is containing default NTP server configuration pool 0.pool.ntp.org iburst you need to change value.
Before editing:
# Use public servers from the pool.ntp.org project.
# Please consider joining the pool (https://www.pool.ntp.org/join.html).
# Add your NTP server here
# Example pool ntp.monofor.com iburst
pool 0.pool.ntp.org iburst

...
After changes done:
# Use public servers from the pool.ntp.org project.
# Please consider joining the pool (https://www.pool.ntp.org/join.html).
# Add your NTP server here
# Example pool ntp.monofor.com iburst
pool ntp.monofor.com iburst

...
Restart NTP services:
systemctl restart chronyd.service
It can be verified with below commands
[root@monofor ~]# chronyc tracking
Reference ID    : C21BDE05 (ntp.monofor.com)
Stratum         : 2
Ref time (UTC)  : Wed May 17 13:42:03 2023
System time     : 0.000020147 seconds fast of NTP time
Last offset     : +0.000012351 seconds
RMS offset      : 0.000133759 seconds
Frequency       : 11.033 ppm slow
Residual freq   : +0.006 ppm
Skew            : 0.777 ppm
Root delay      : 0.019084107 seconds
Root dispersion : 0.002137284 seconds
Update interval : 64.4 seconds
Leap status     : Normal
Change Timezone
Timezone can be change with below command.
First you need to list timezones. This command list all of the timezones.
timedatectl list-timezones
To find the local timezone according to your location, run the following command:
timedatectl list-timezones | grep -o "America/.*" | column
timedatectl list-timezones | grep -o "Asia/.*" | column
timedatectl list-timezones | grep -o "Europe/.*" | column
Set your local timezone in vAppliance, you will use the set-timezone switch as shown below.
timedatectl set-timezone America/New_York
and it can be check with below command.
timedatectl
Now you can continue with the other requirements. Please visit this page.