
From a fresh installation to a recorded session: add a Linux server, keep its account in the vault, give a group access with a policy, connect from the browser and find the session in Recordings and the audit log. The example uses a server called web-01.
|
Applies to |
Who can do this |
|---|---|
|
Monopam v2026.10 |
An administrator (member of |
Before you begin
-
Monopam is installed and you can sign in through Monosign.
-
At least one gateway is online and can reach the server (Gateways; the dashboard's Platform Health card shows it).
-
You know an account on the server that Monopam may use.
1. Add the server
Open Resources → Add New. Enter a Name and the Server address, choose the Type (here Linux) and click Save. If SSH listens on a port other than 22, set it on the Advanced tab.
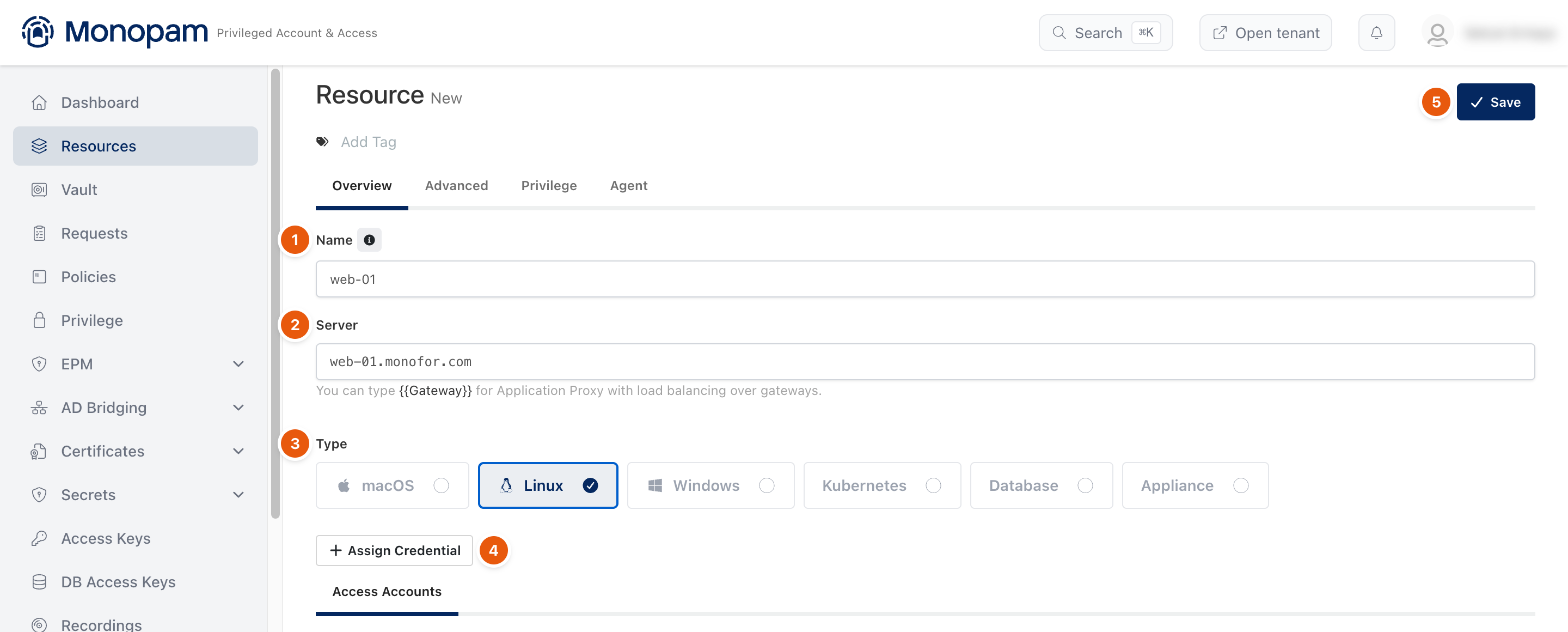
Figure 1. Adding web-01.
2. Keep its account in the vault
On the saved resource, click Assign Credential, choose SSH, then Add New Credential. Choose UserName and Password and Local User, select the resource, enter the account, and click Add.
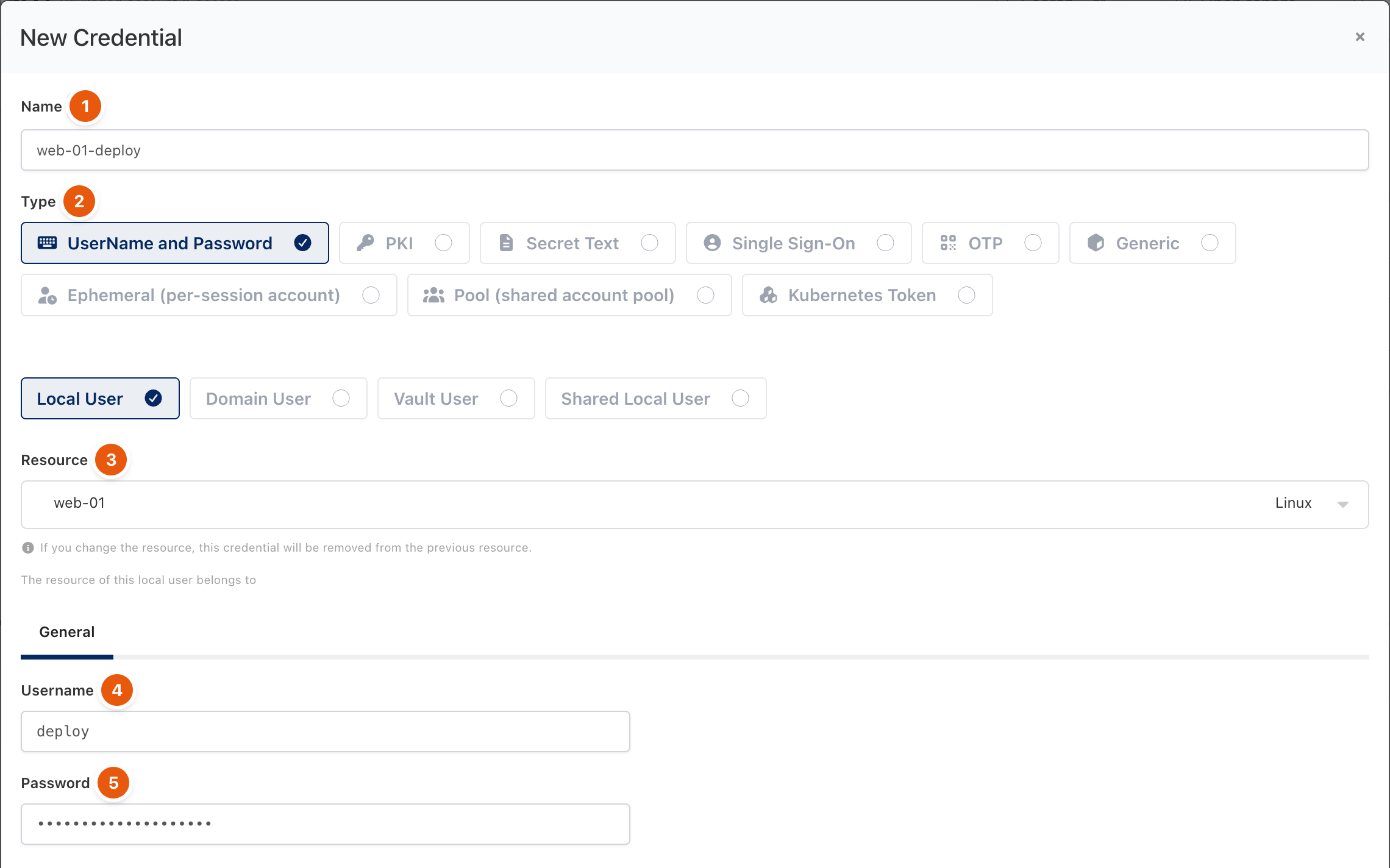
Figure 2. The account, stored in the vault.
The new item is selected in Assign Credentials. Click Add, then Save on the resource.
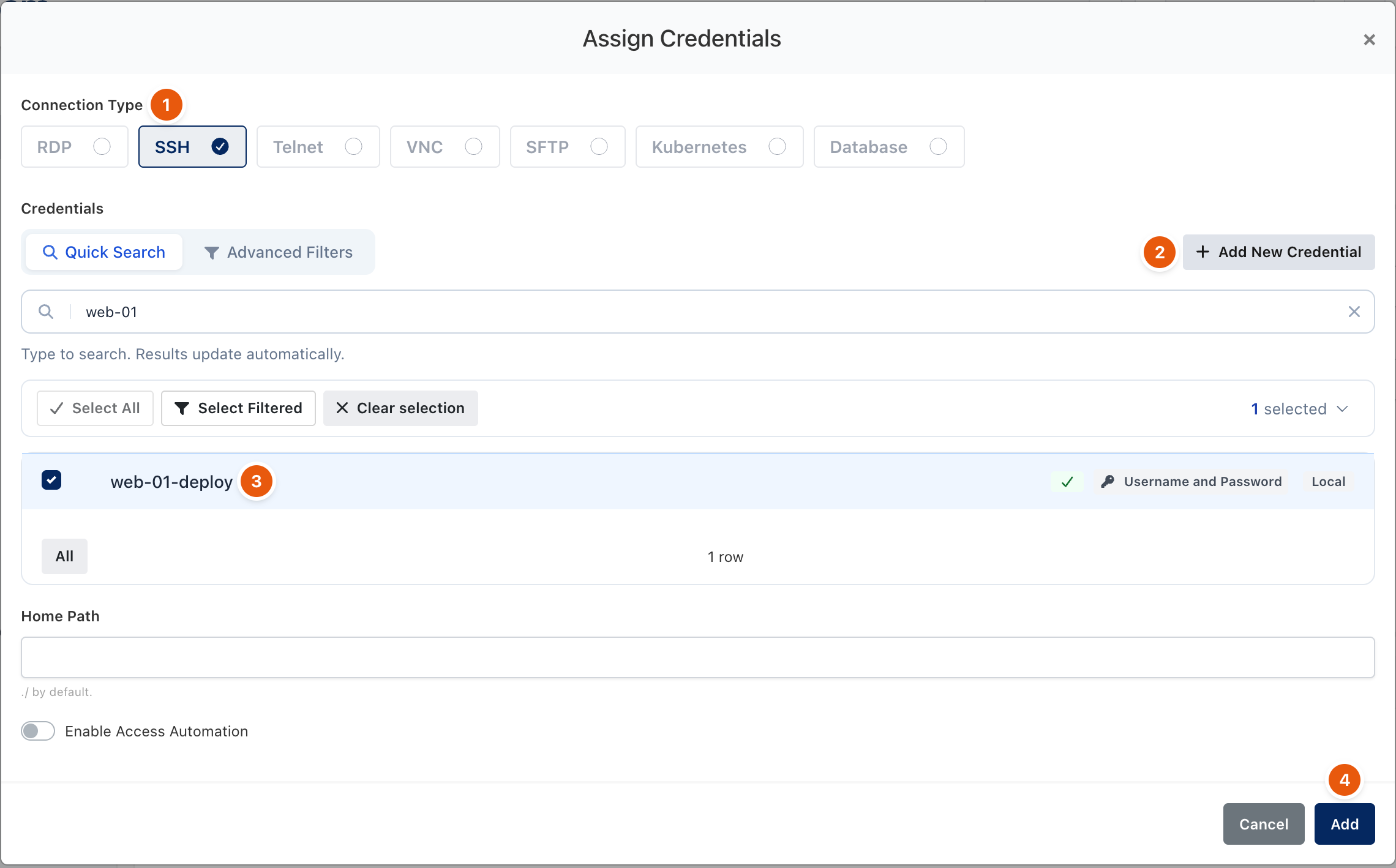
Figure 3. Assigning the account for SSH.
3. Give a group access
Open Policies → Add New → Advanced, choose Resource Access Policy, name it, and click Add Resource to add the server with its account.
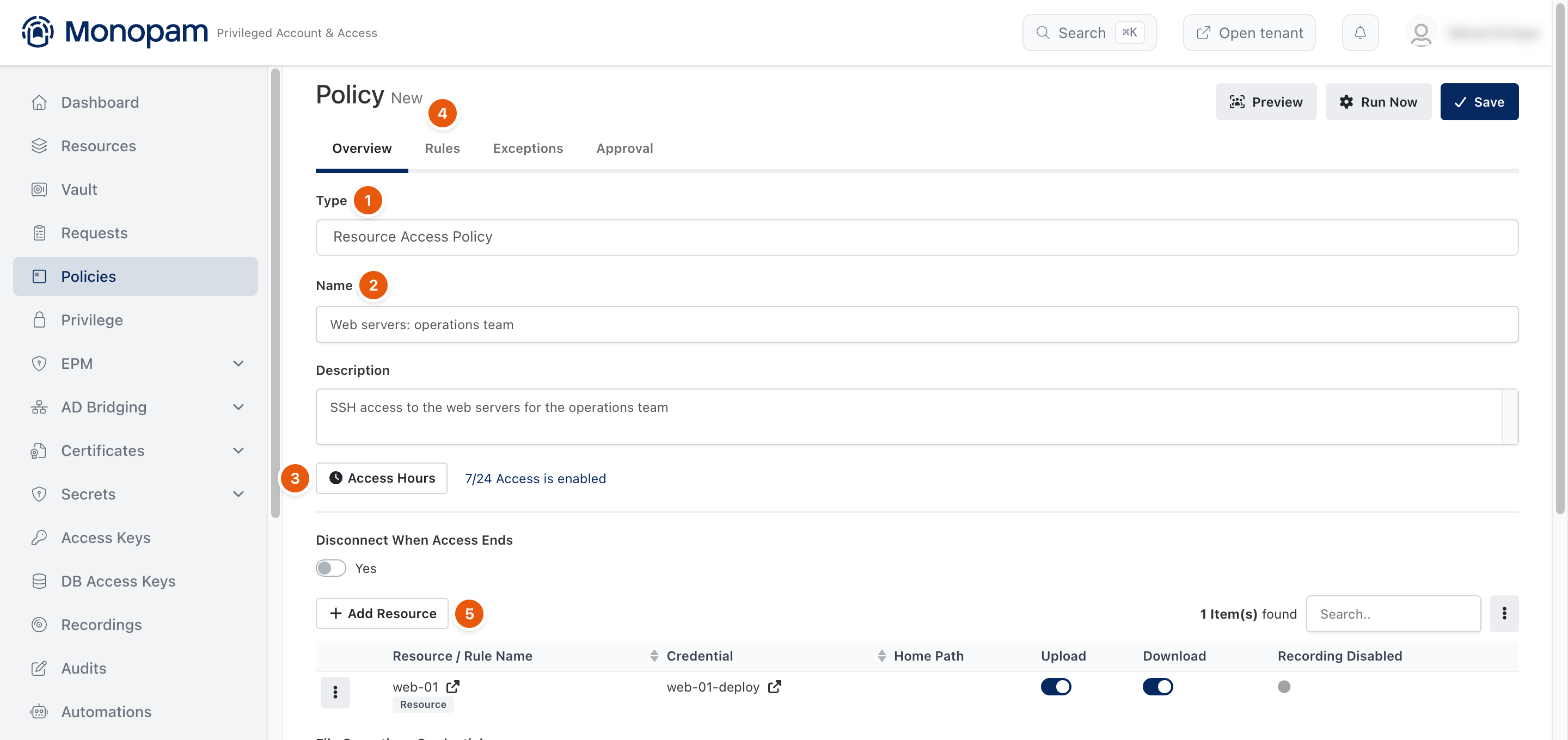
Figure 4. The policy, with web-01 added.
On the Rules tab, add User → Group → in → <your group> and click Save. If you use spaces, make sure the group also has a Space Access Policy for the server's space.
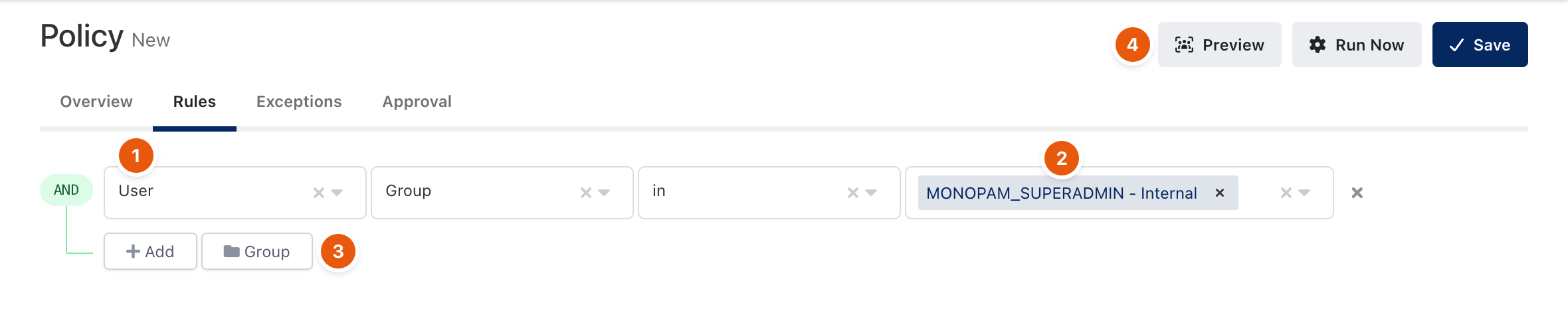
Figure 5. Who the policy applies to.
4. Connect
As a member of the group, click Connect on the server, give a reason and click Connect. The session opens in the browser; the password is never shown.
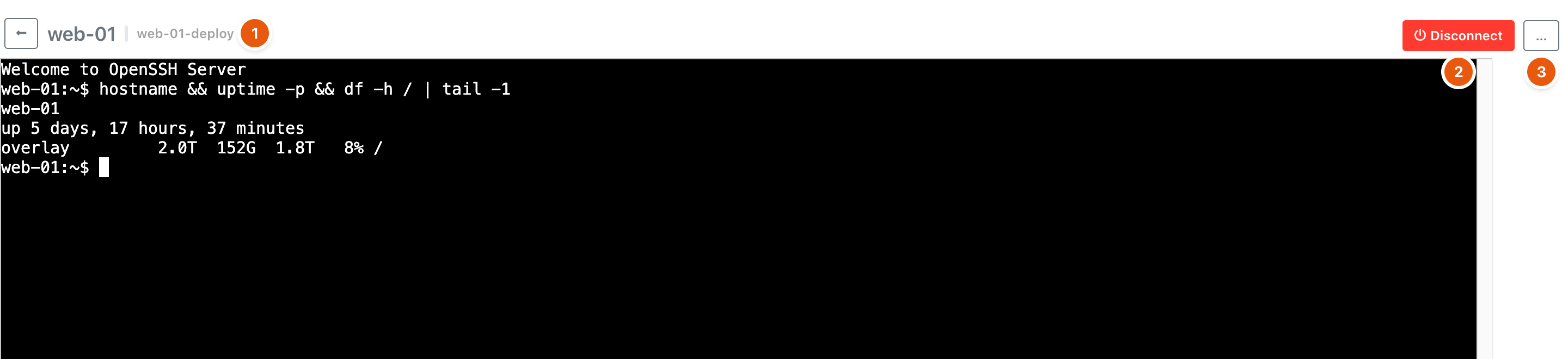
Figure 6. Connected to web-01.
5. Review the session
After Disconnect, the session is listed under Recordings; click Read to replay it.
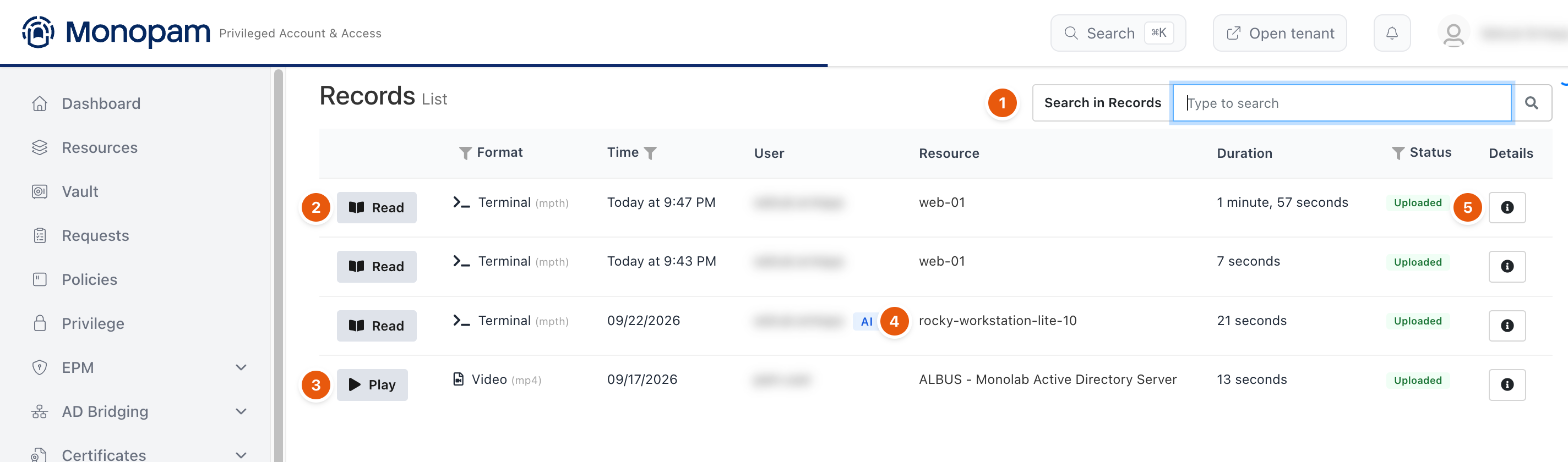
Figure 7. The recording of the session.
Under Audits, search for the server: the session left Connected (with the reason), Disconnected (with the duration) and Session Exited.
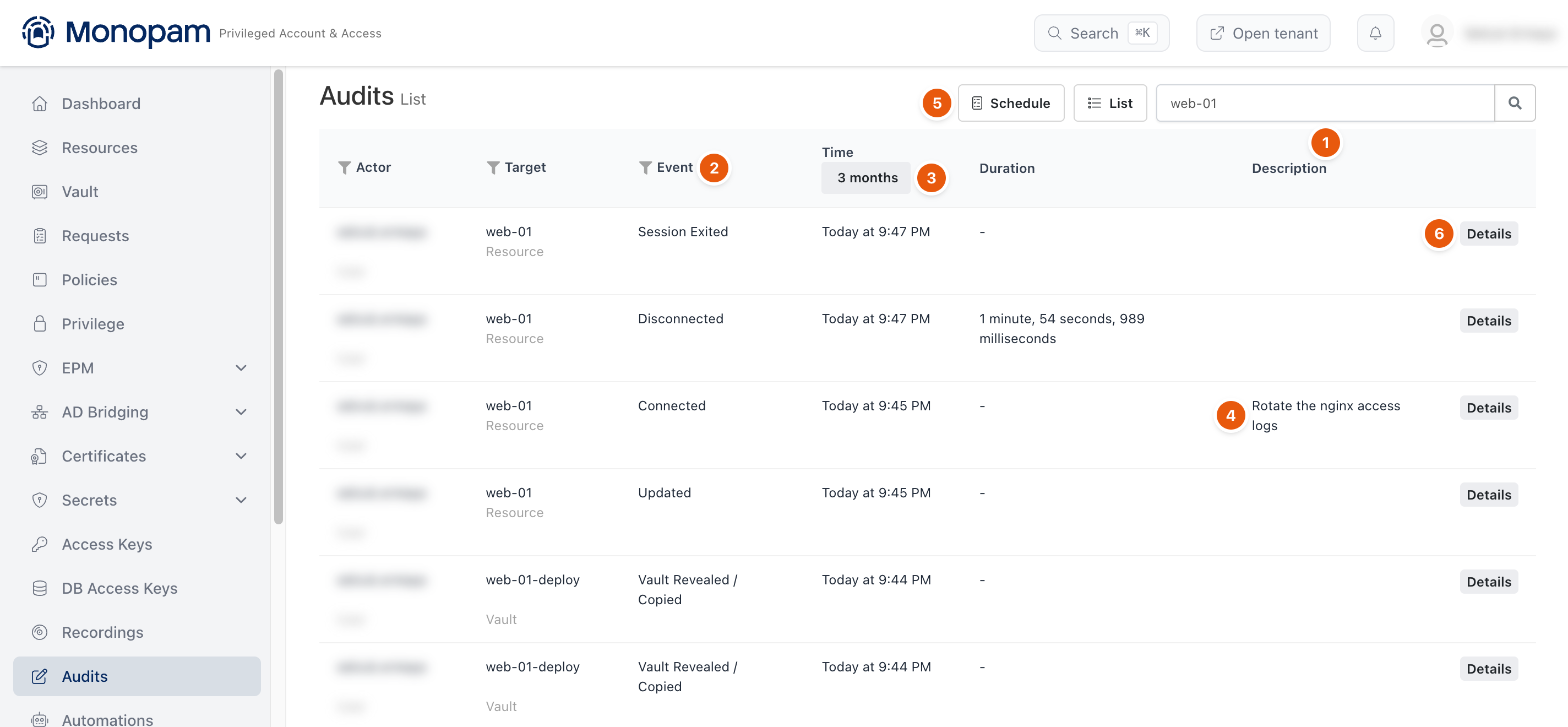
Figure 8. The audit trail of the session.
Next steps
-
Require approval before connecting: Approve and revoke access.
-
Rotate the account's password on a schedule: Password rotation and reconcile.
-
Block or gate risky commands: Privileged Commands.
Related
-
Add a resource
-
Vault items
-
Resource Access Policy
-
Connect from the browser
-
Recordings and session notes
-
Audit log