This document explains how to enable email-based two-factor authentication (2FA) for all users in Monosign, so that users can receive their verification codes via email instead of only push or OTP-based authenticators.
⚠️ Prerequisites
-
Administrative access to the Monosign Management Portal, specifically the System → Configurations and Security → Authenticators sections.
-
SMTP server details for outgoing mail, including host, port, credentials, and connection security settings.
📘 Instructions
1. Configure email notification settings
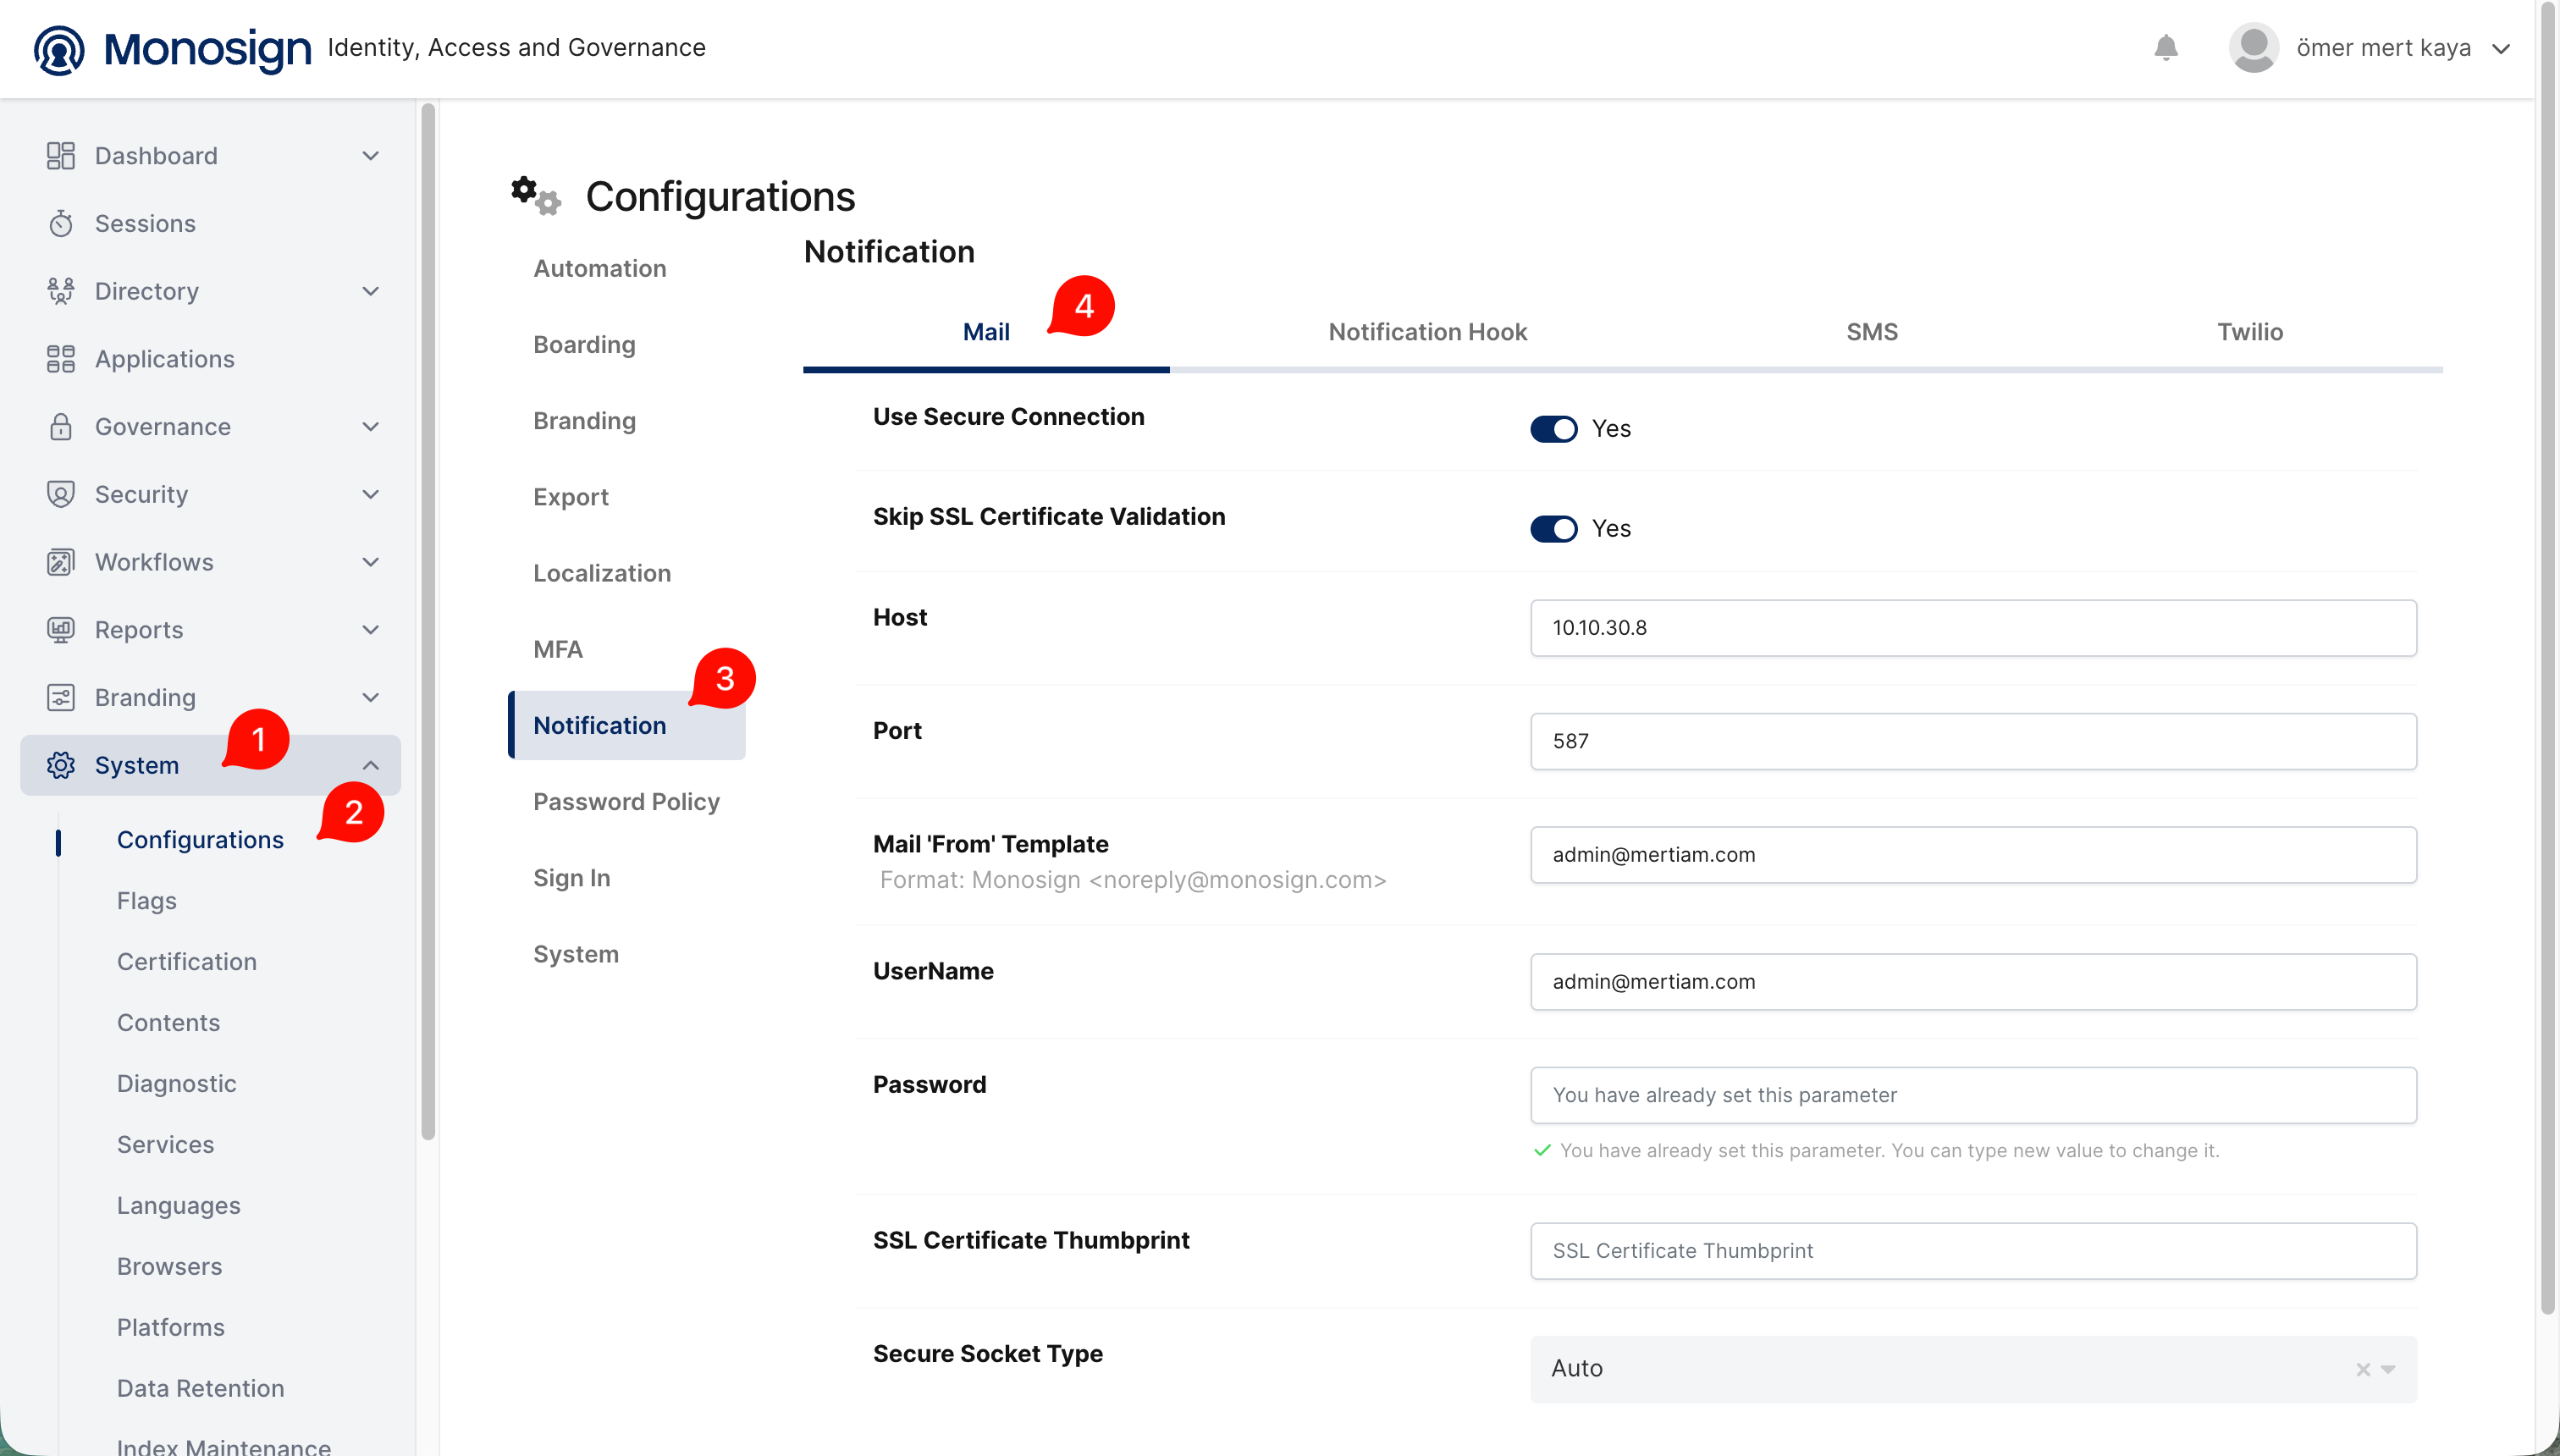
To configure email notifications settings, go to System (1) > Configurations (2) > Notification (3) and select the Mail (4) tab. From here, enter your SMTP server details including host, port, credentials, and connection security settings.
2. Verify the mail configuration
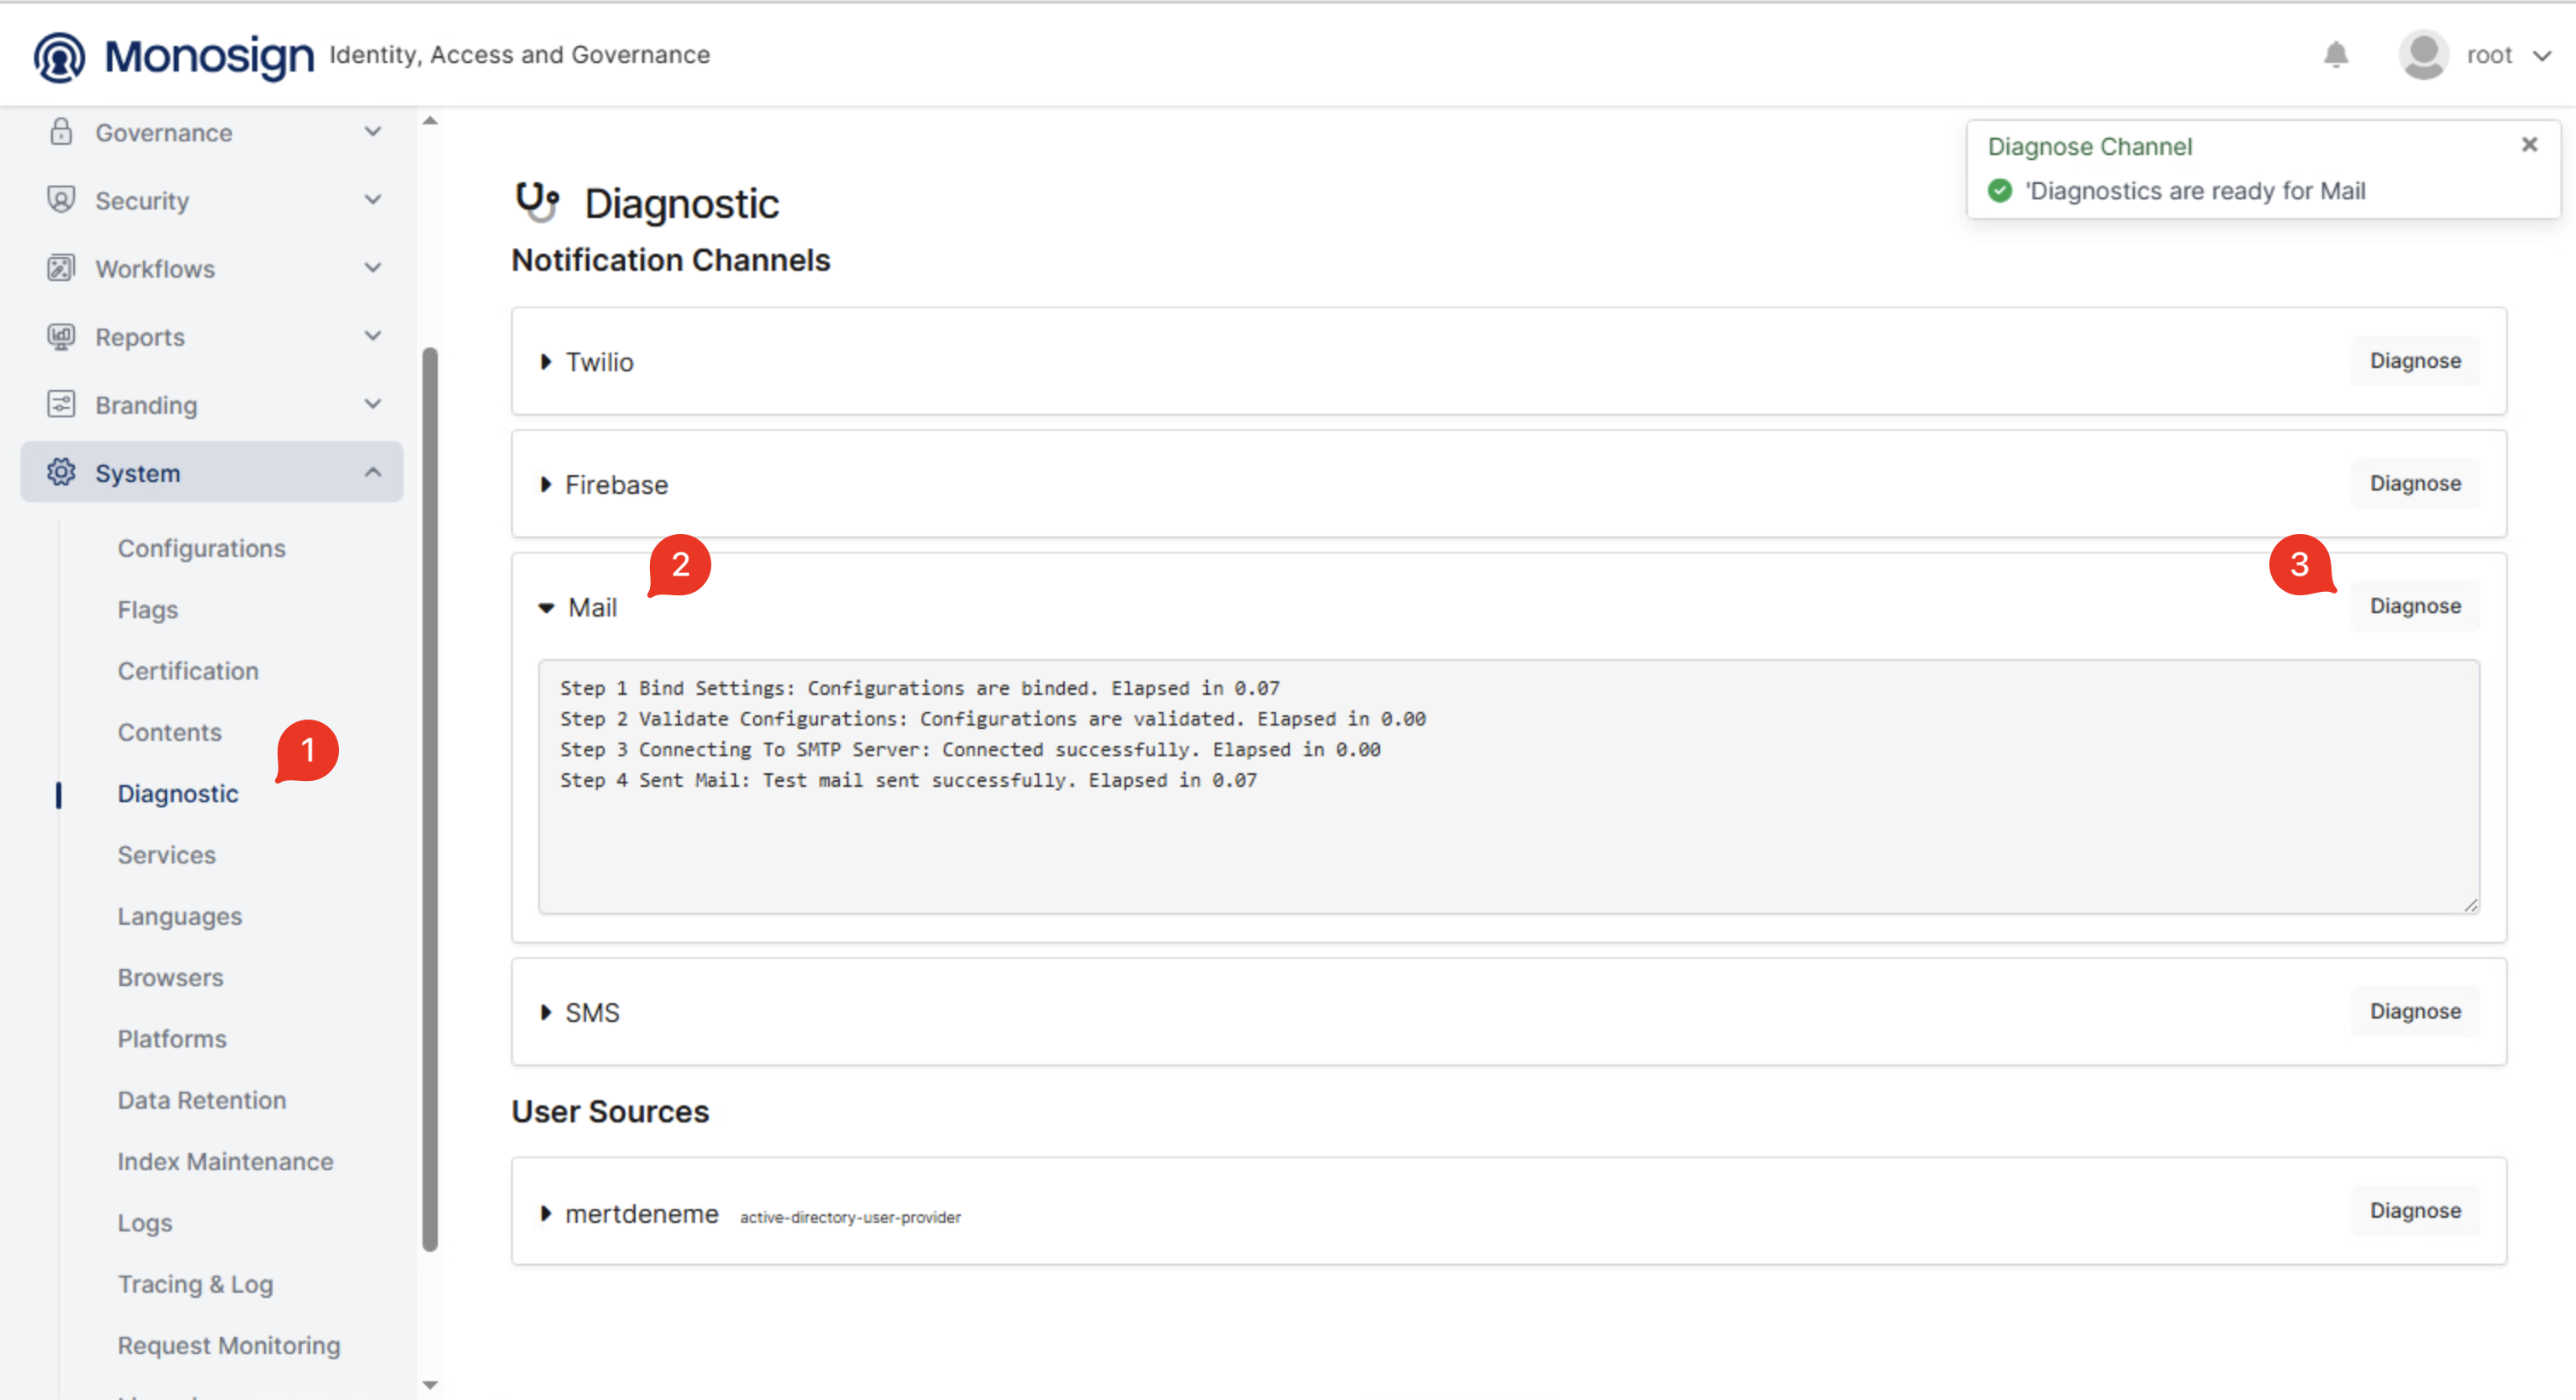
To verify the configuration is working, go to Diagnostic (1), expand the Mail (2) section under Notification Channels, and click Diagnose (3). A successful result will show all steps completed — settings bound, configurations validated, SMTP connection established, and a test mail sent successfully.
3. Enable the Email authenticator
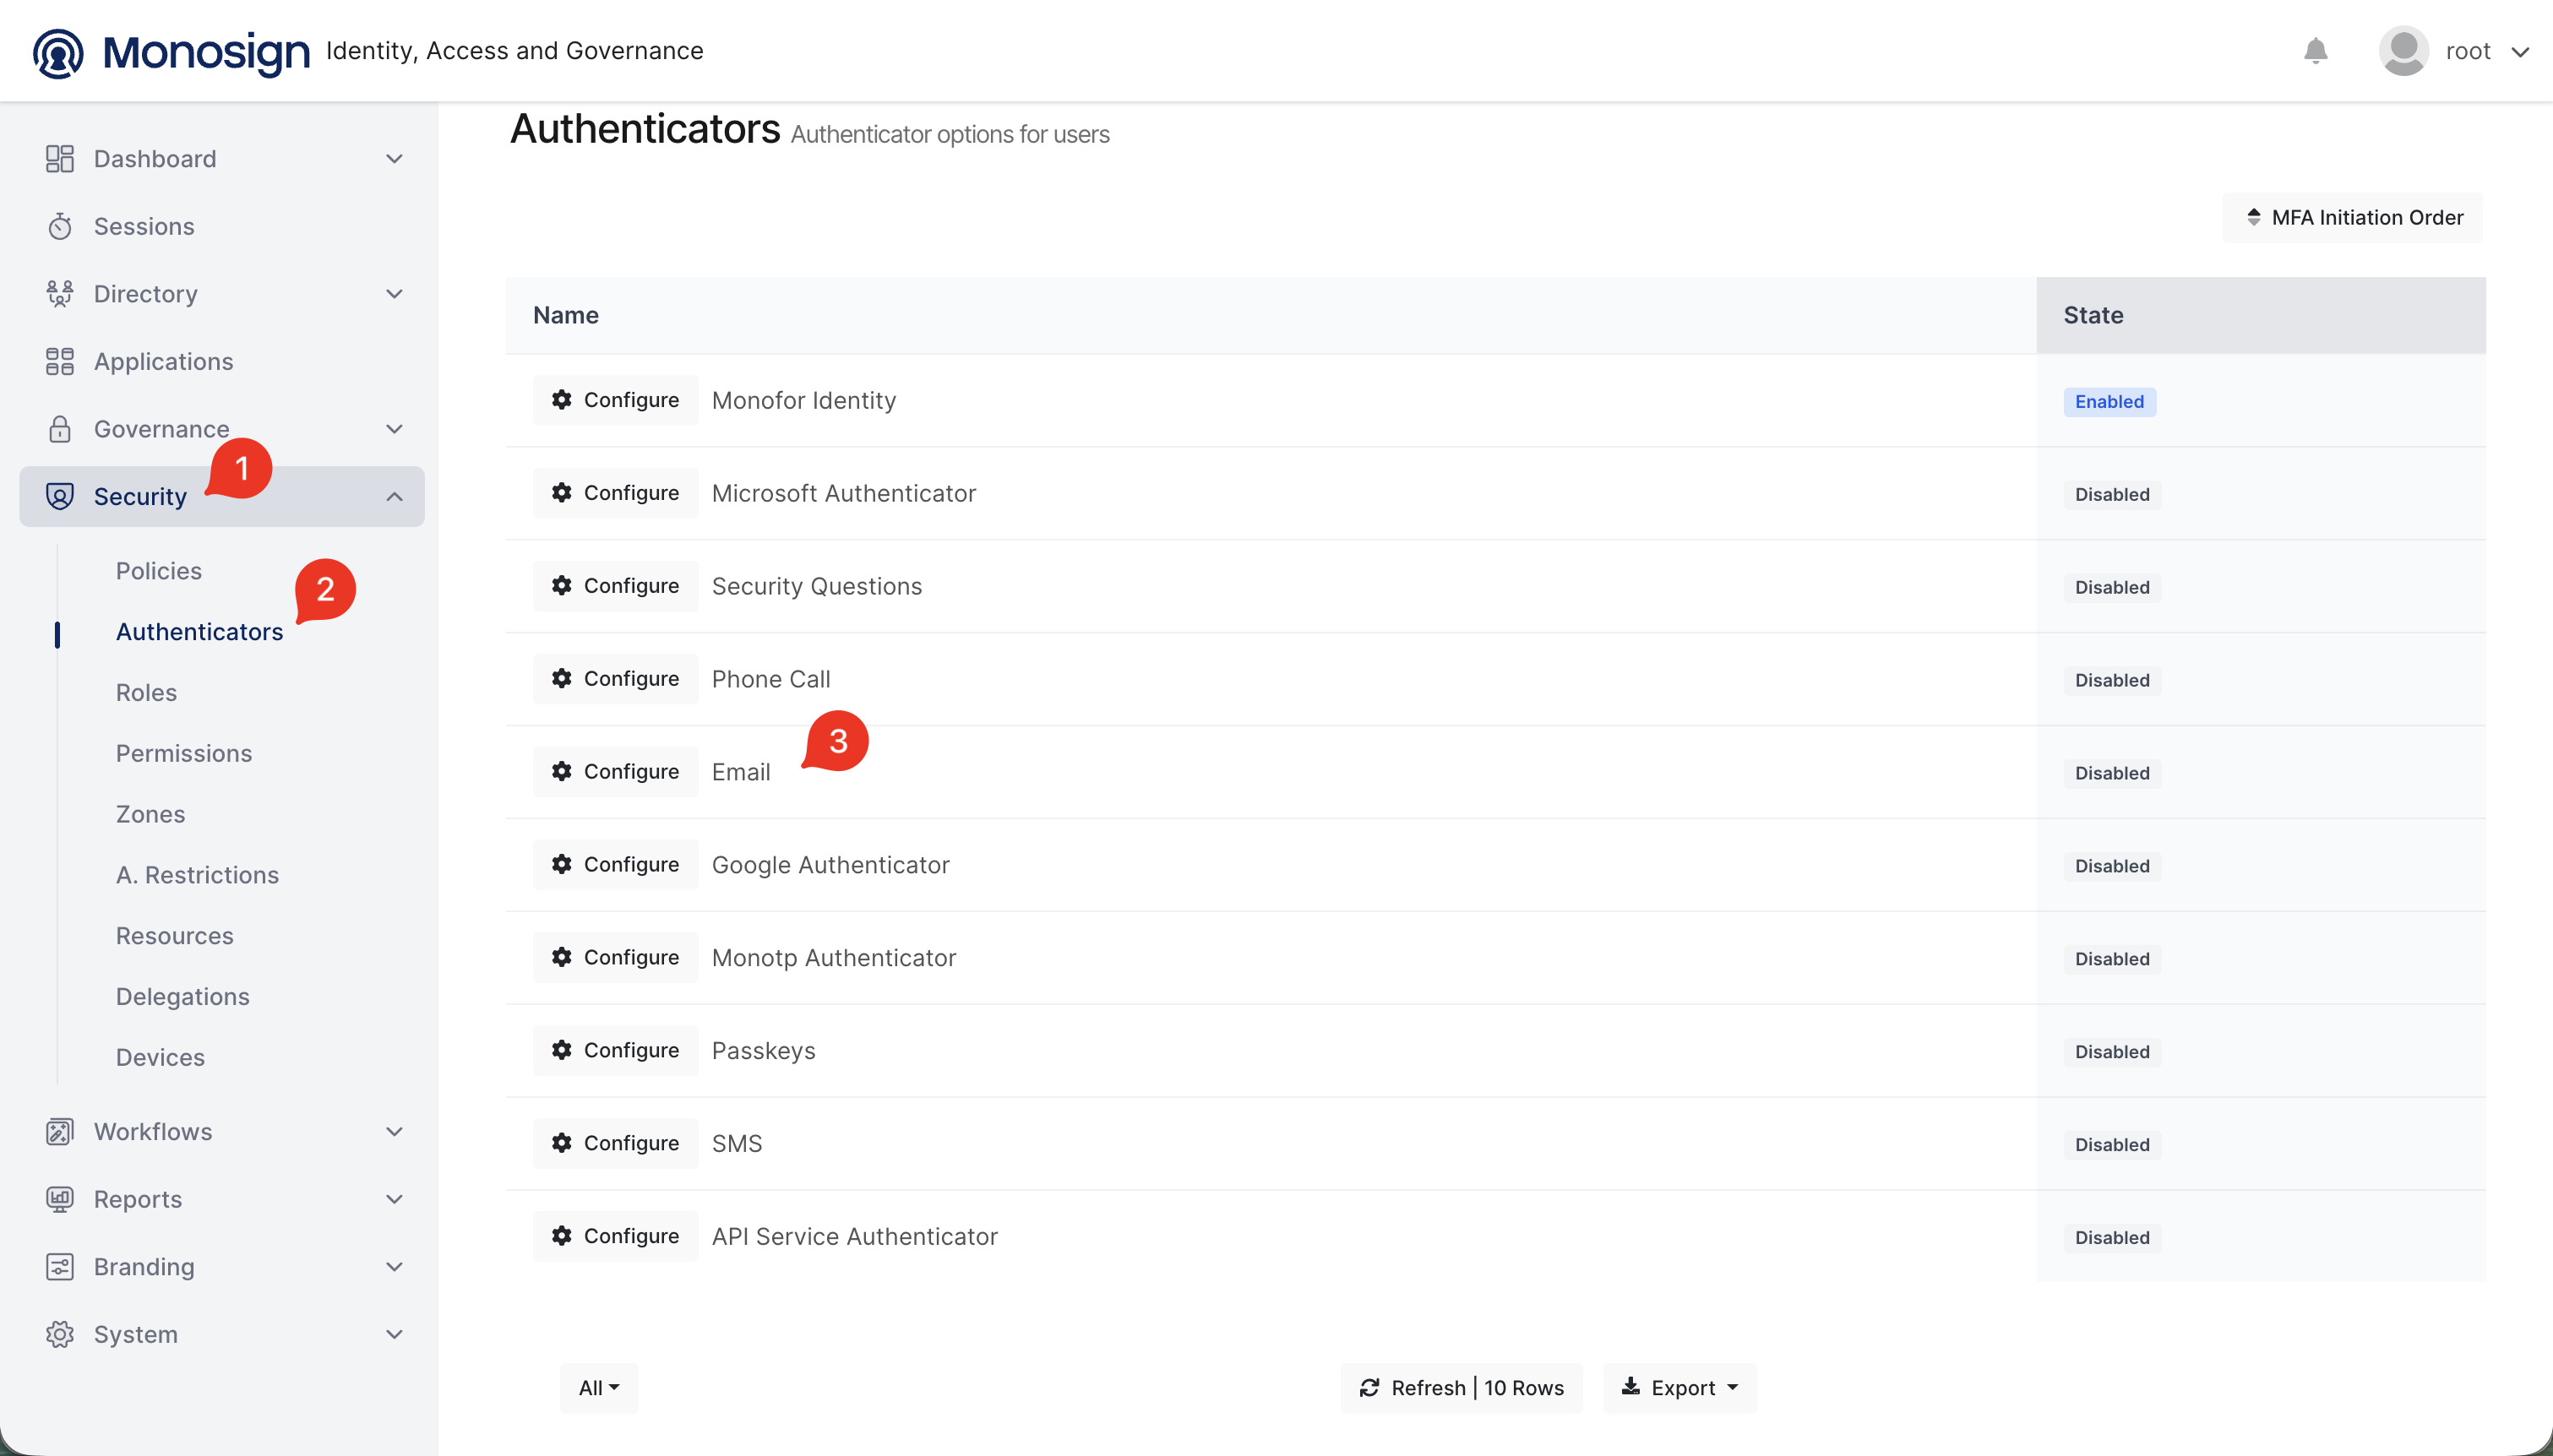
Next, go to Security (1) > Authenticators (2) and find the Email (3) authenticator. Click Configure to enable it so that users can receive their 2FA codes via email.
4. Configure the Email authenticator
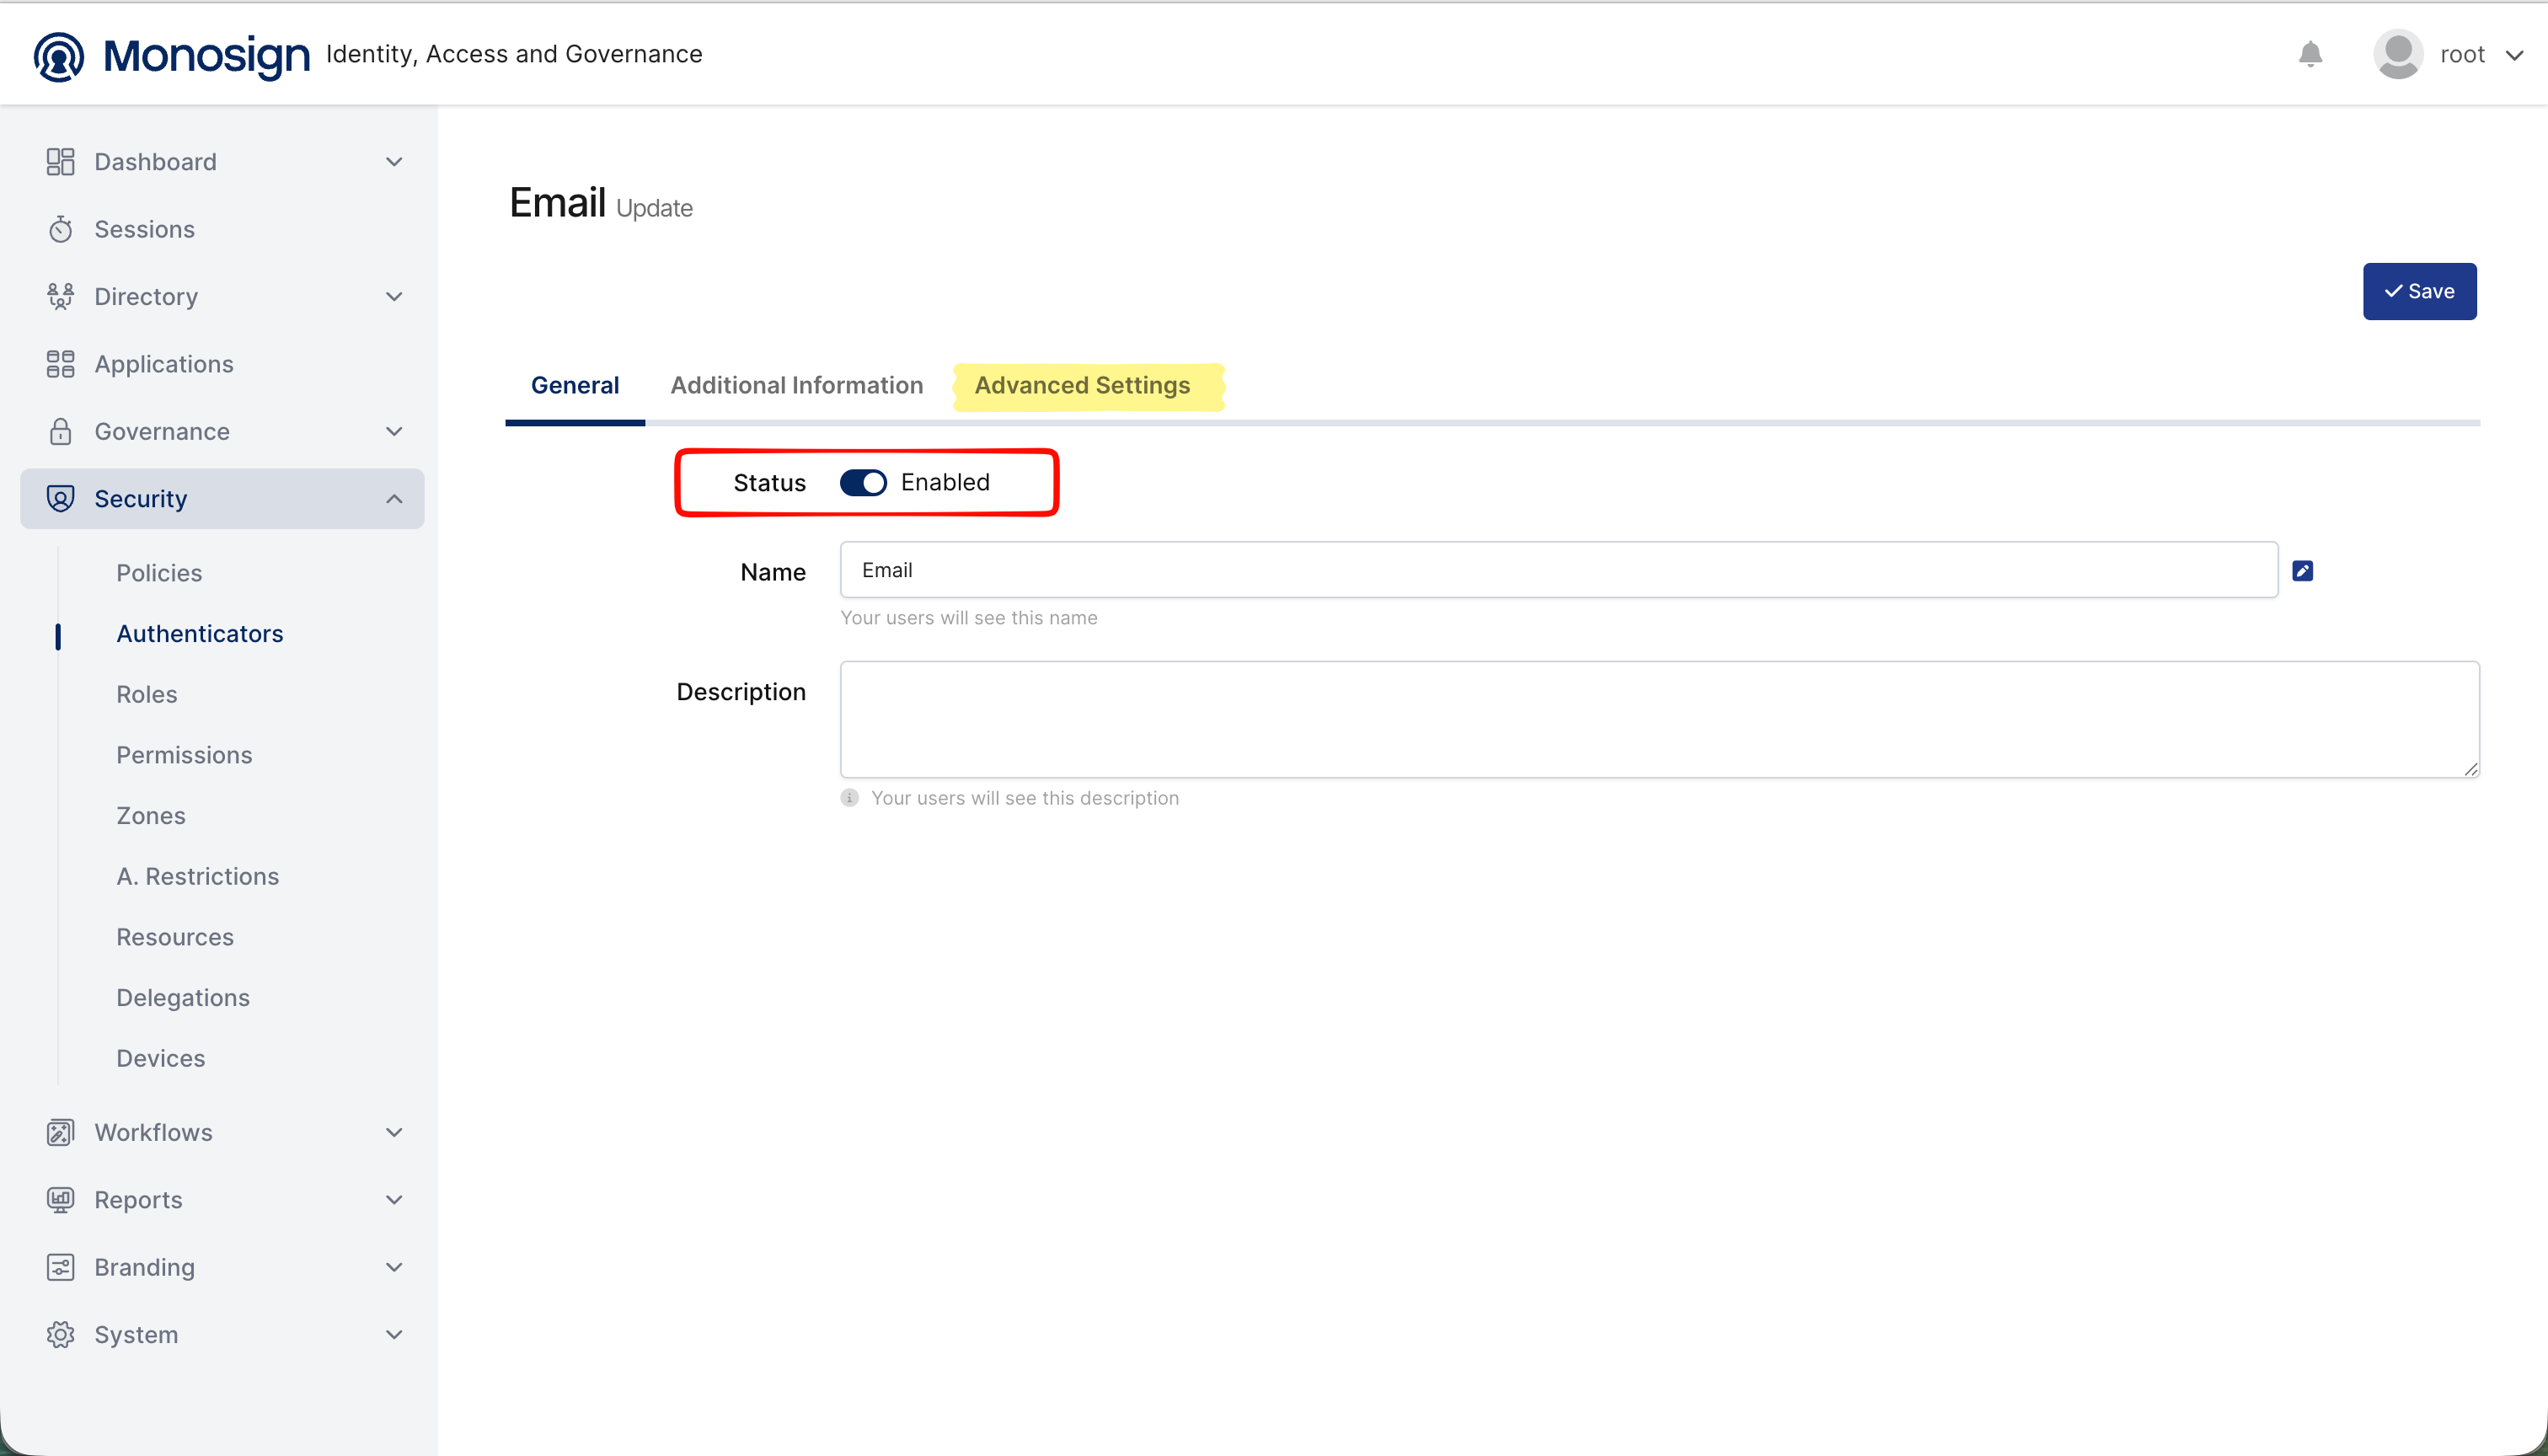
In the Email authenticator settings, set the Status to Enabled under the General tab. Then switch to the Additional Information tab, where you can configure the Required Property (the user profile field that holds the email address, e.g. Personal Email), an optional Second Property, and a Required Authenticator if you want to chain it with another method. Once done, click Save.
5. Configure advanced settings
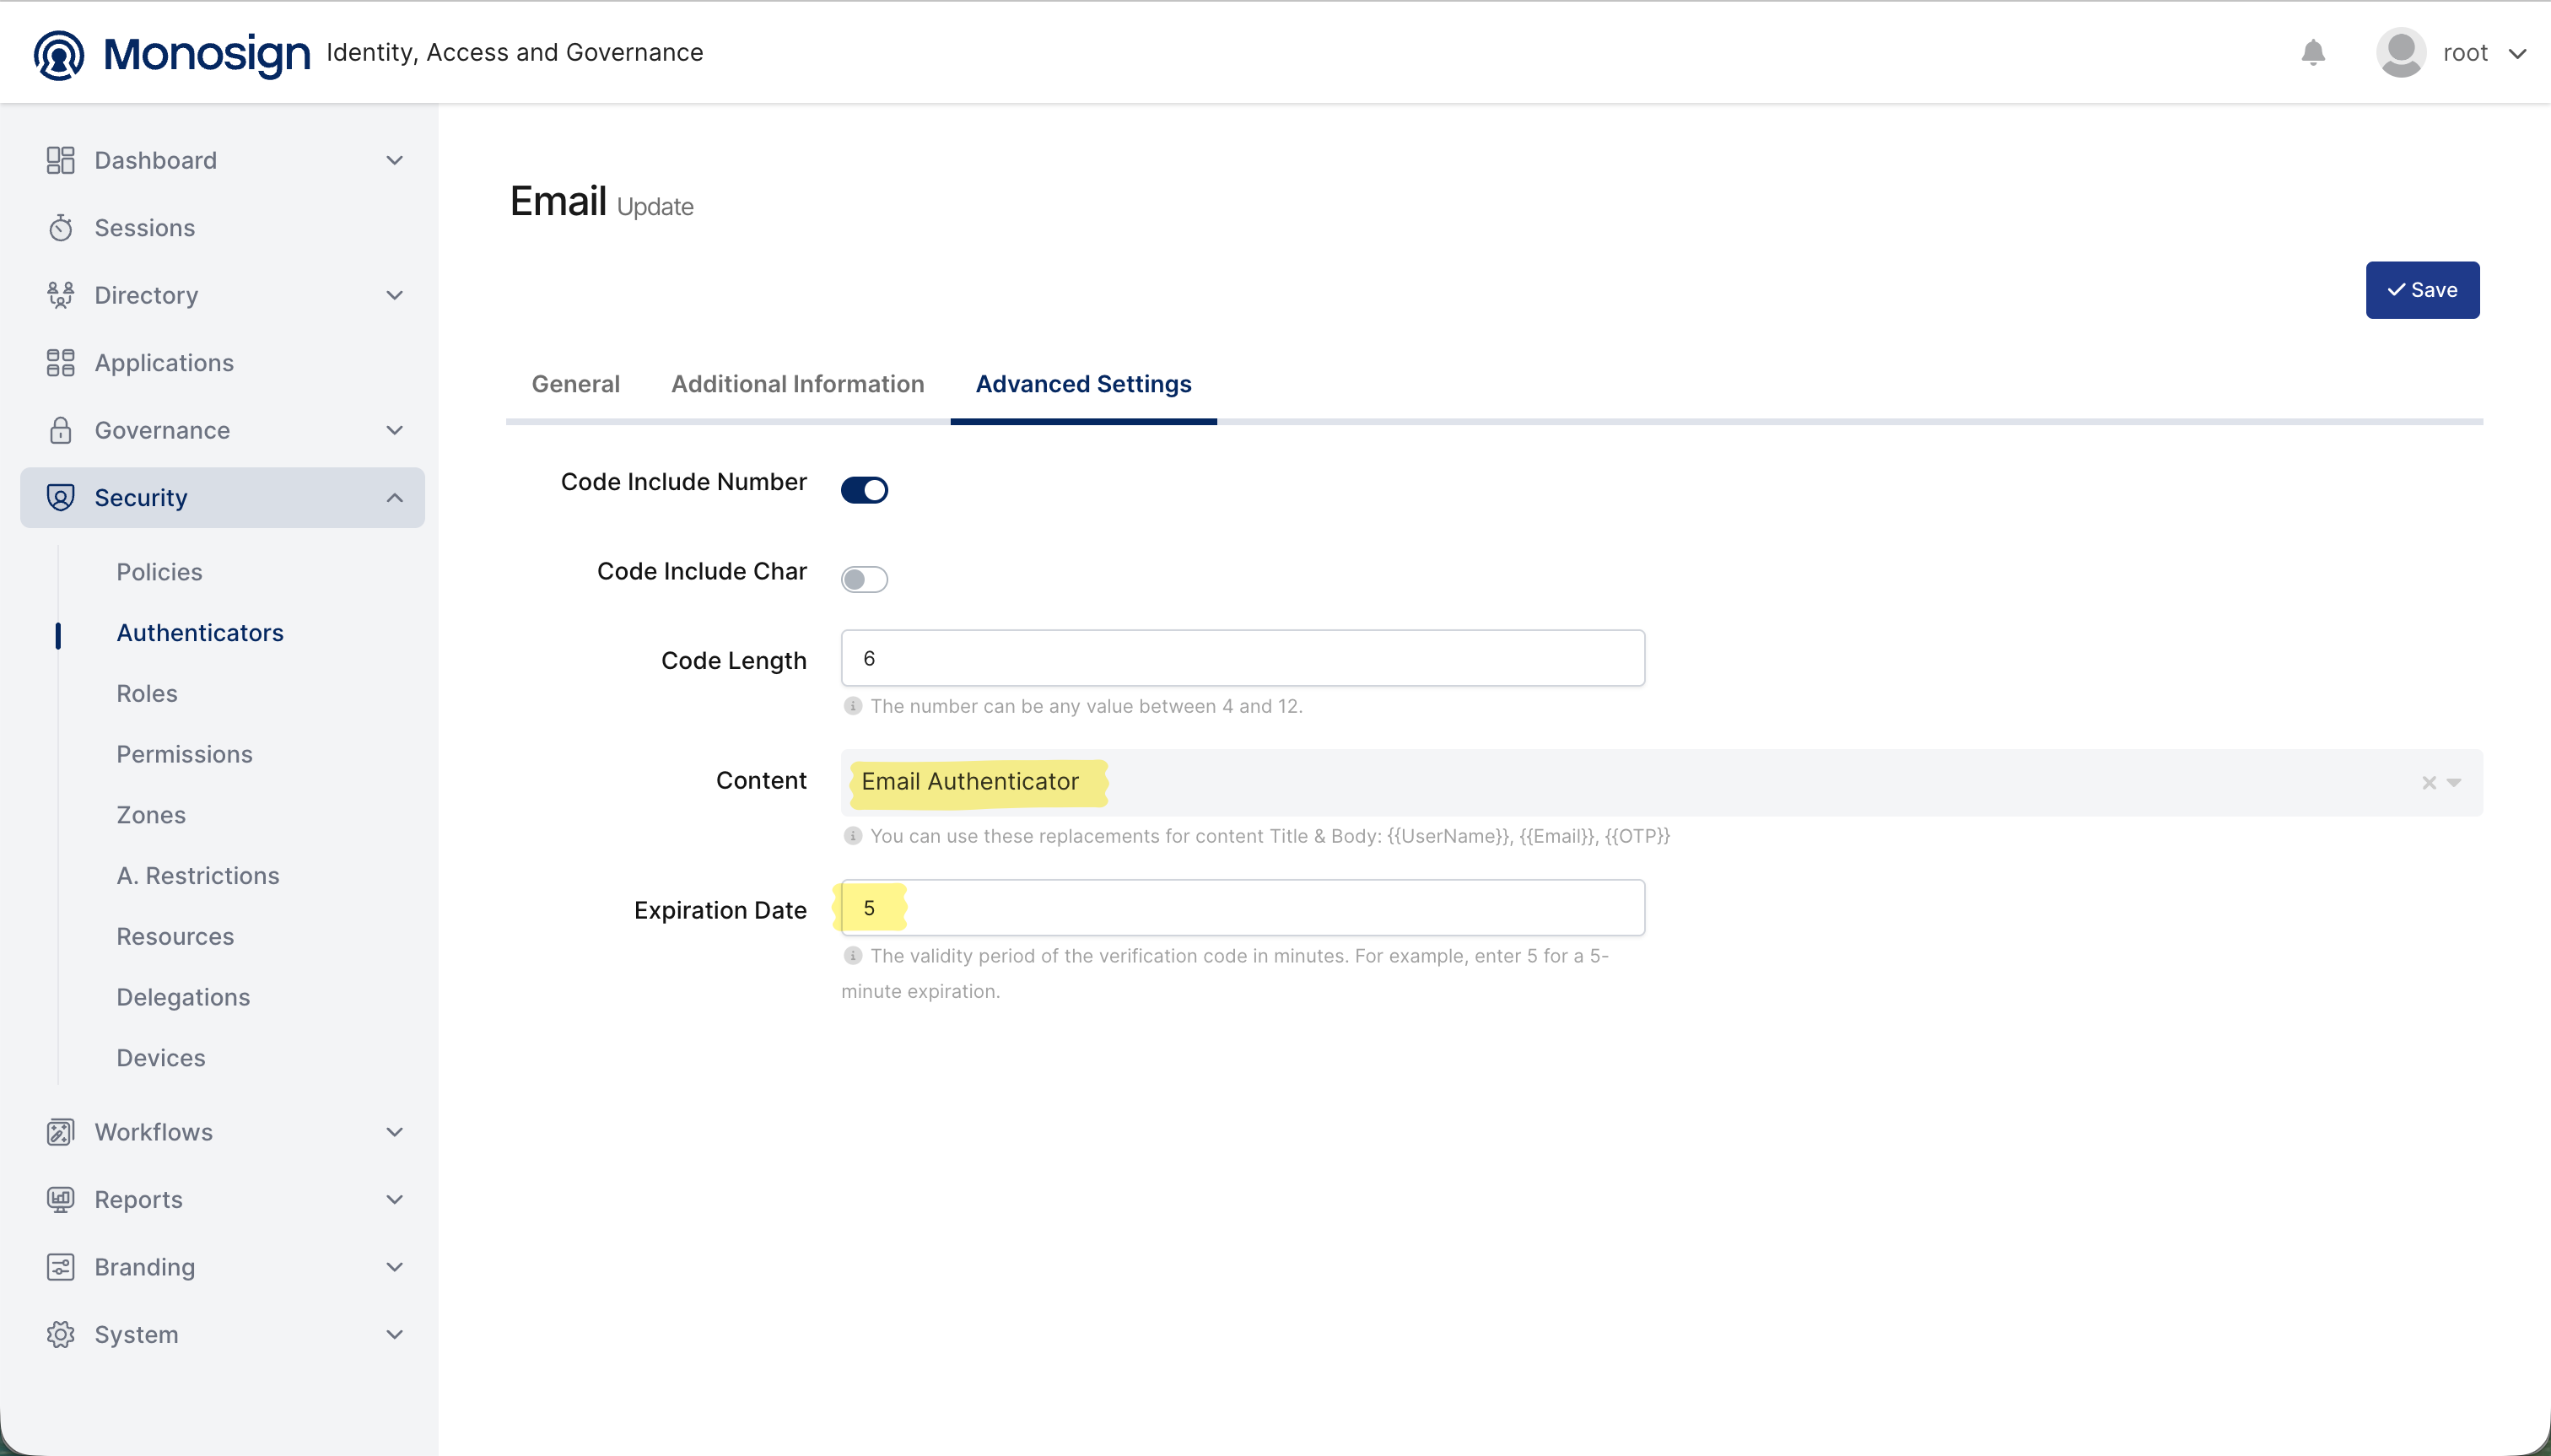
In the Advanced Settings tab, set the code length, choose whether it includes numbers or characters, select the email template under Content, and set the Expiration Date (in minutes) for how long the code stays valid.
6. Create an automation workflow to enforce email 2FA
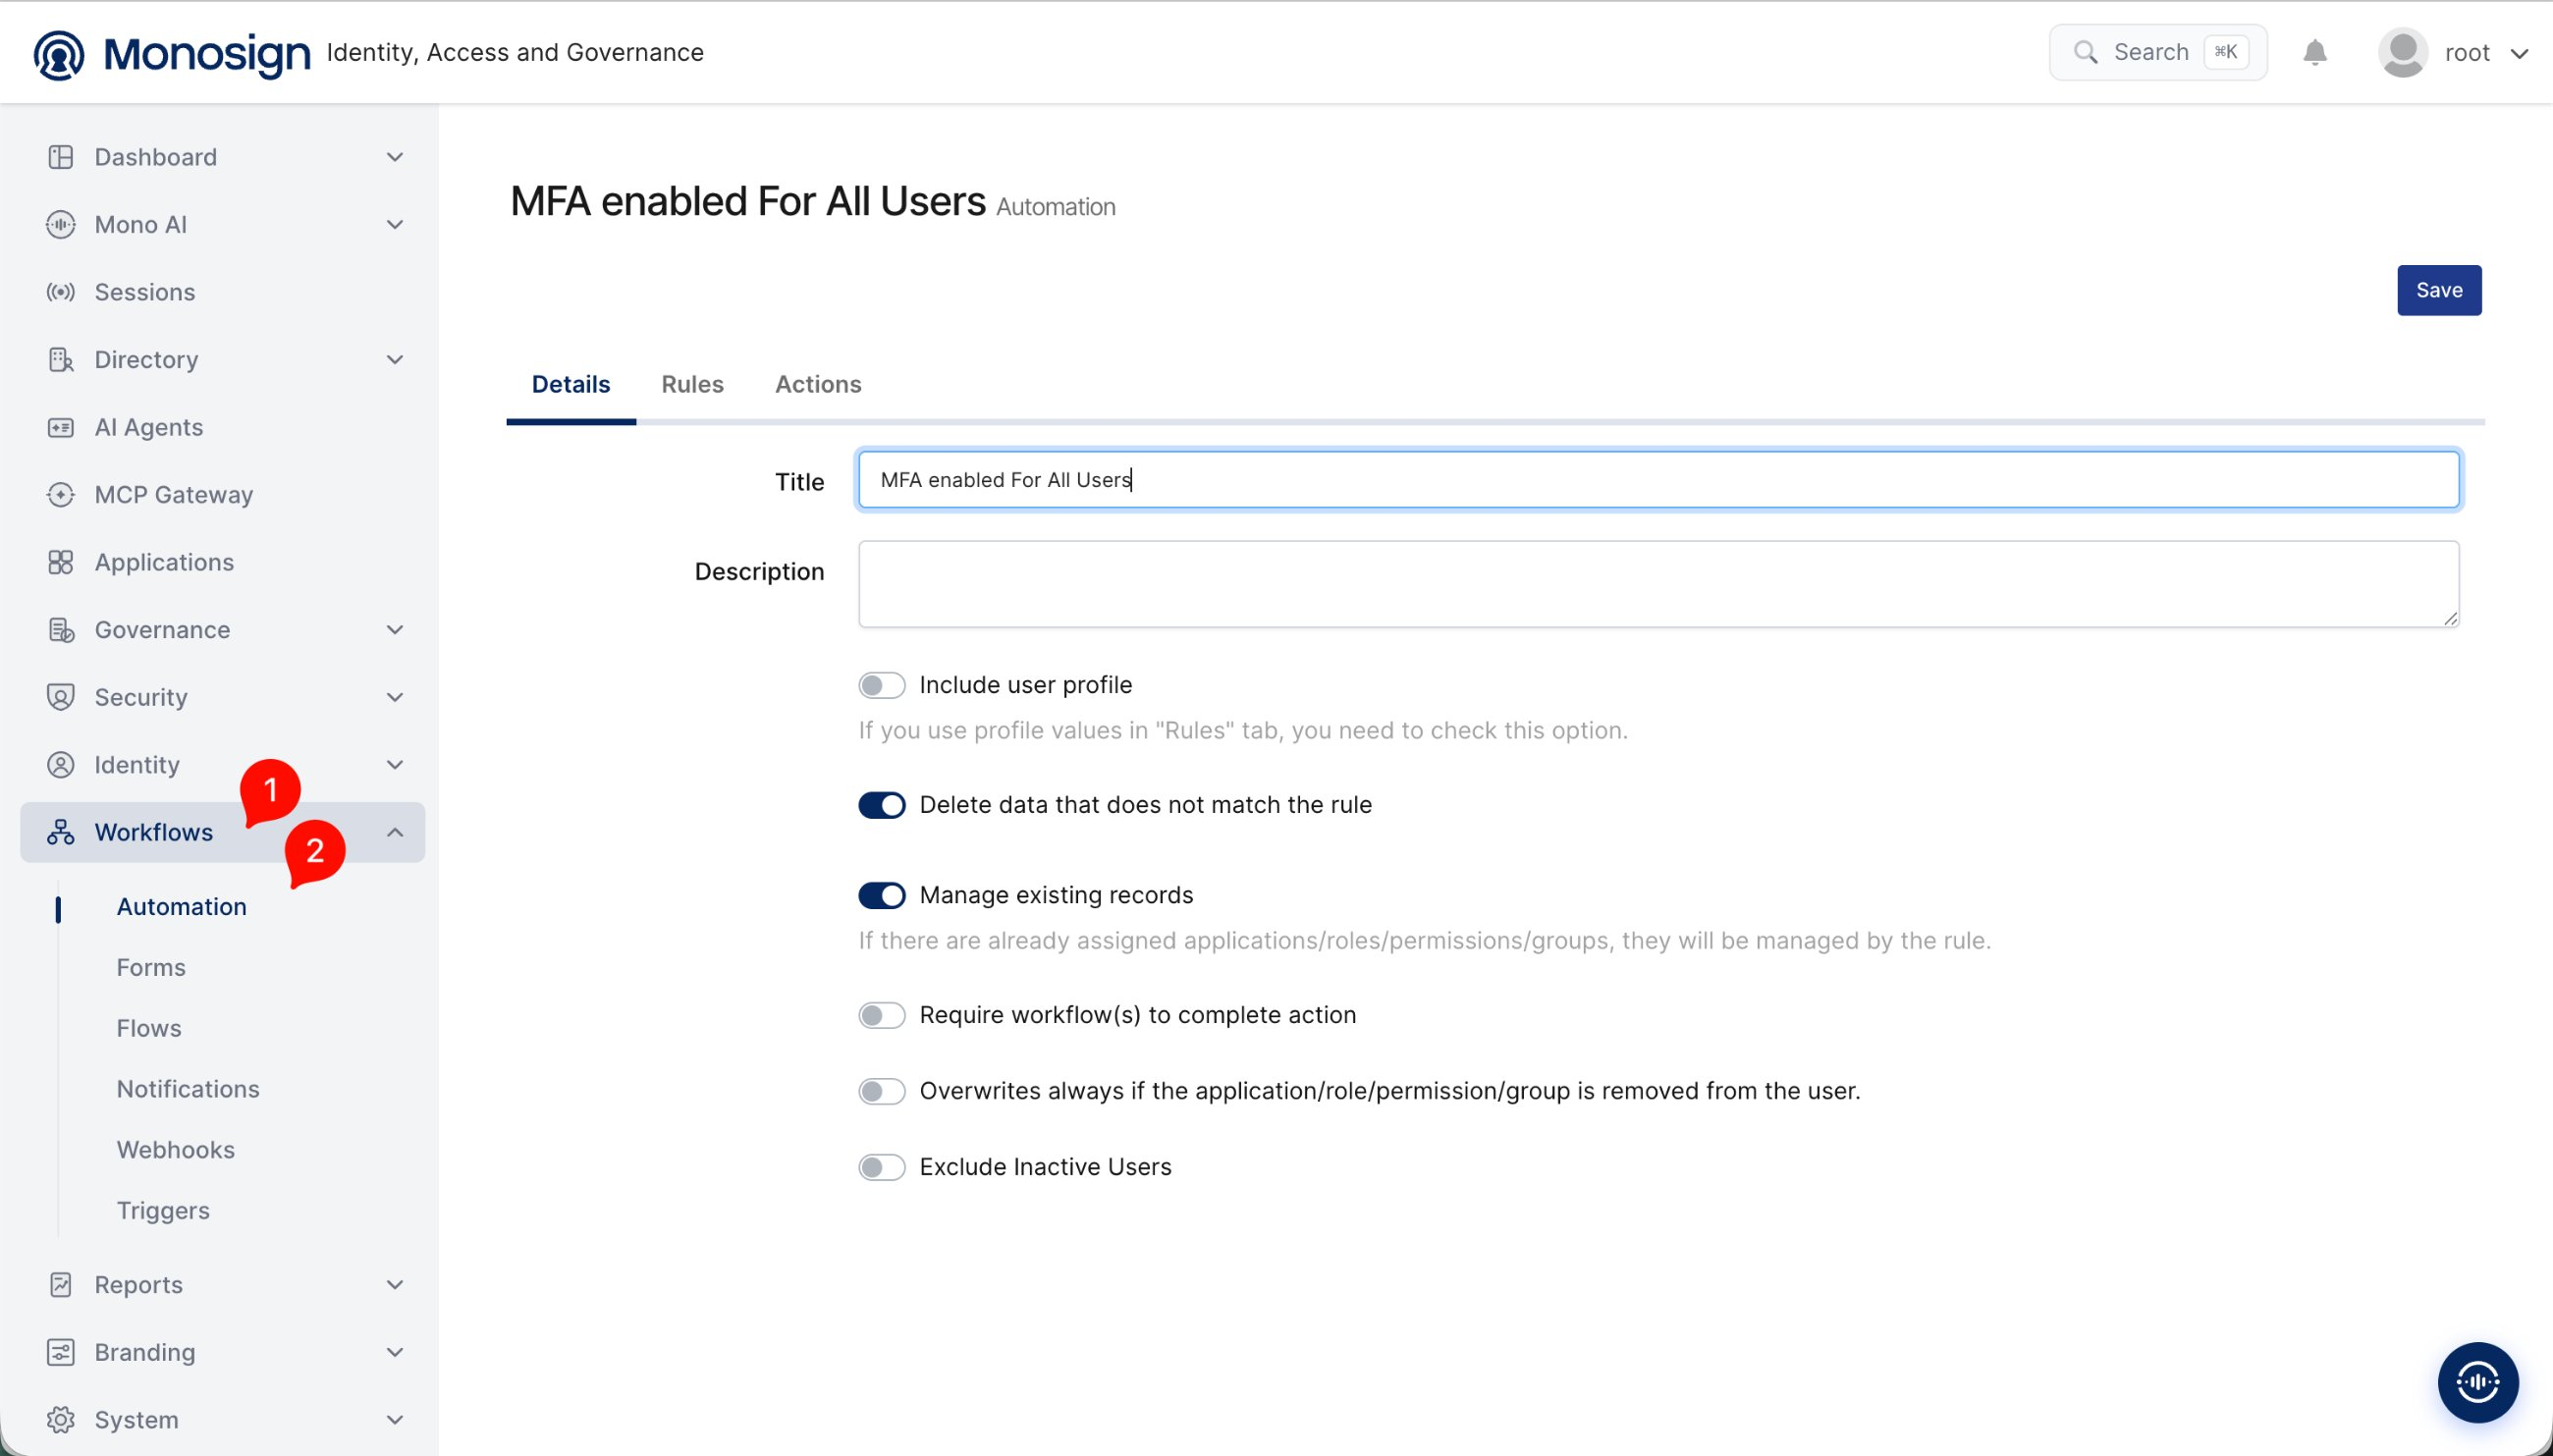
Go to Workflows (1) > Automation (2) and create a new workflow (e.g. named MFA enabled For All Users). On the Details tab, set the title and description, and configure options such as Include user profile, Delete data that does not match the rule, Manage existing records, Require workflow(s) to complete action, Overwrites always if the application/role/permission/group is removed from the user, and Exclude Inactive Users as needed.
Then use the Rules tab to define the scope of the workflow — either all users or a specific user group — and the Actions tab to assign the Email authenticator/2FA requirement to the matching users. Click Save once configured.
7. Define who the rule applies to
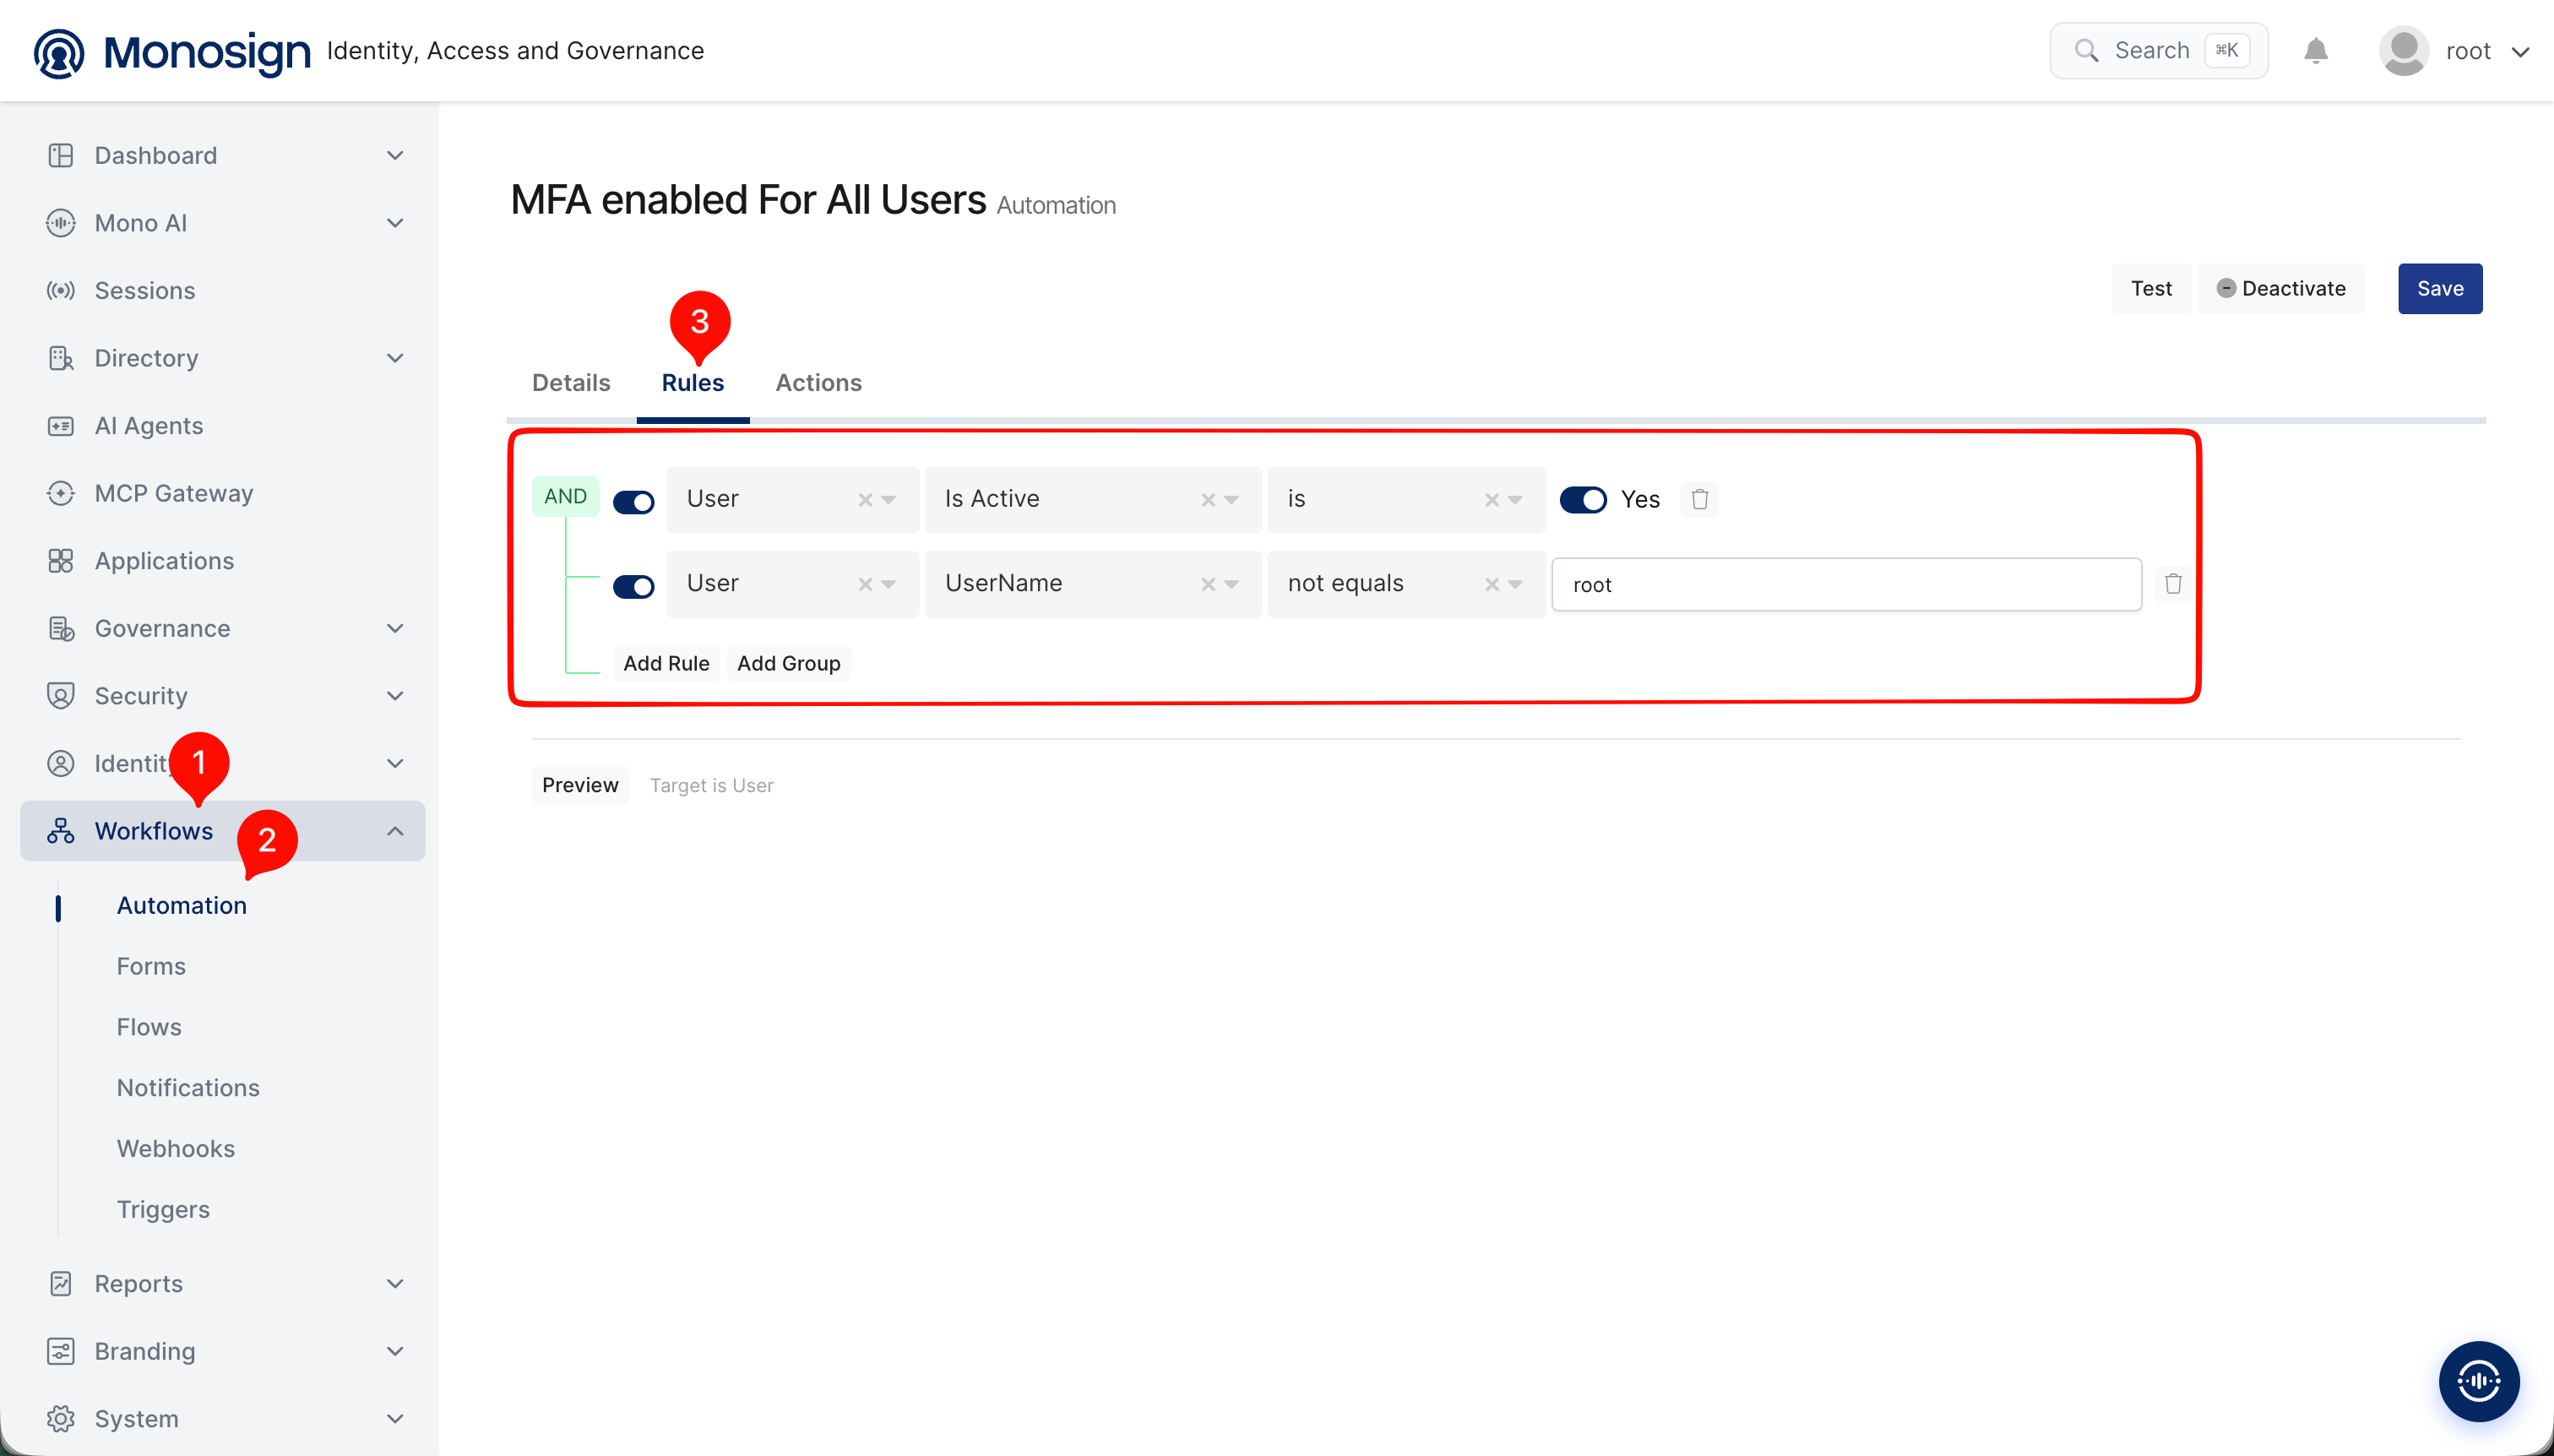
On the Rules (1) tab, build the condition that determines which users the workflow applies to: select the User (2) field, choose an attribute such as Is Active (3), and set the condition value, e.g. toggle it to Yes (4). Use Add Rule to add further conditions (for example, a group attribute equal to a specific user group) or Add Group to nest condition groups, and combine them with AND/OR logic as needed.
For all users, a single User → Is Active → is → Yes rule is enough. To target a specific user group instead, add a rule that filters on the user's group. The Preview panel at the bottom of the tab shows the resulting target (e.g. "Target is User") so you can confirm the scope before saving.
8. Configure the action to enable email 2FA
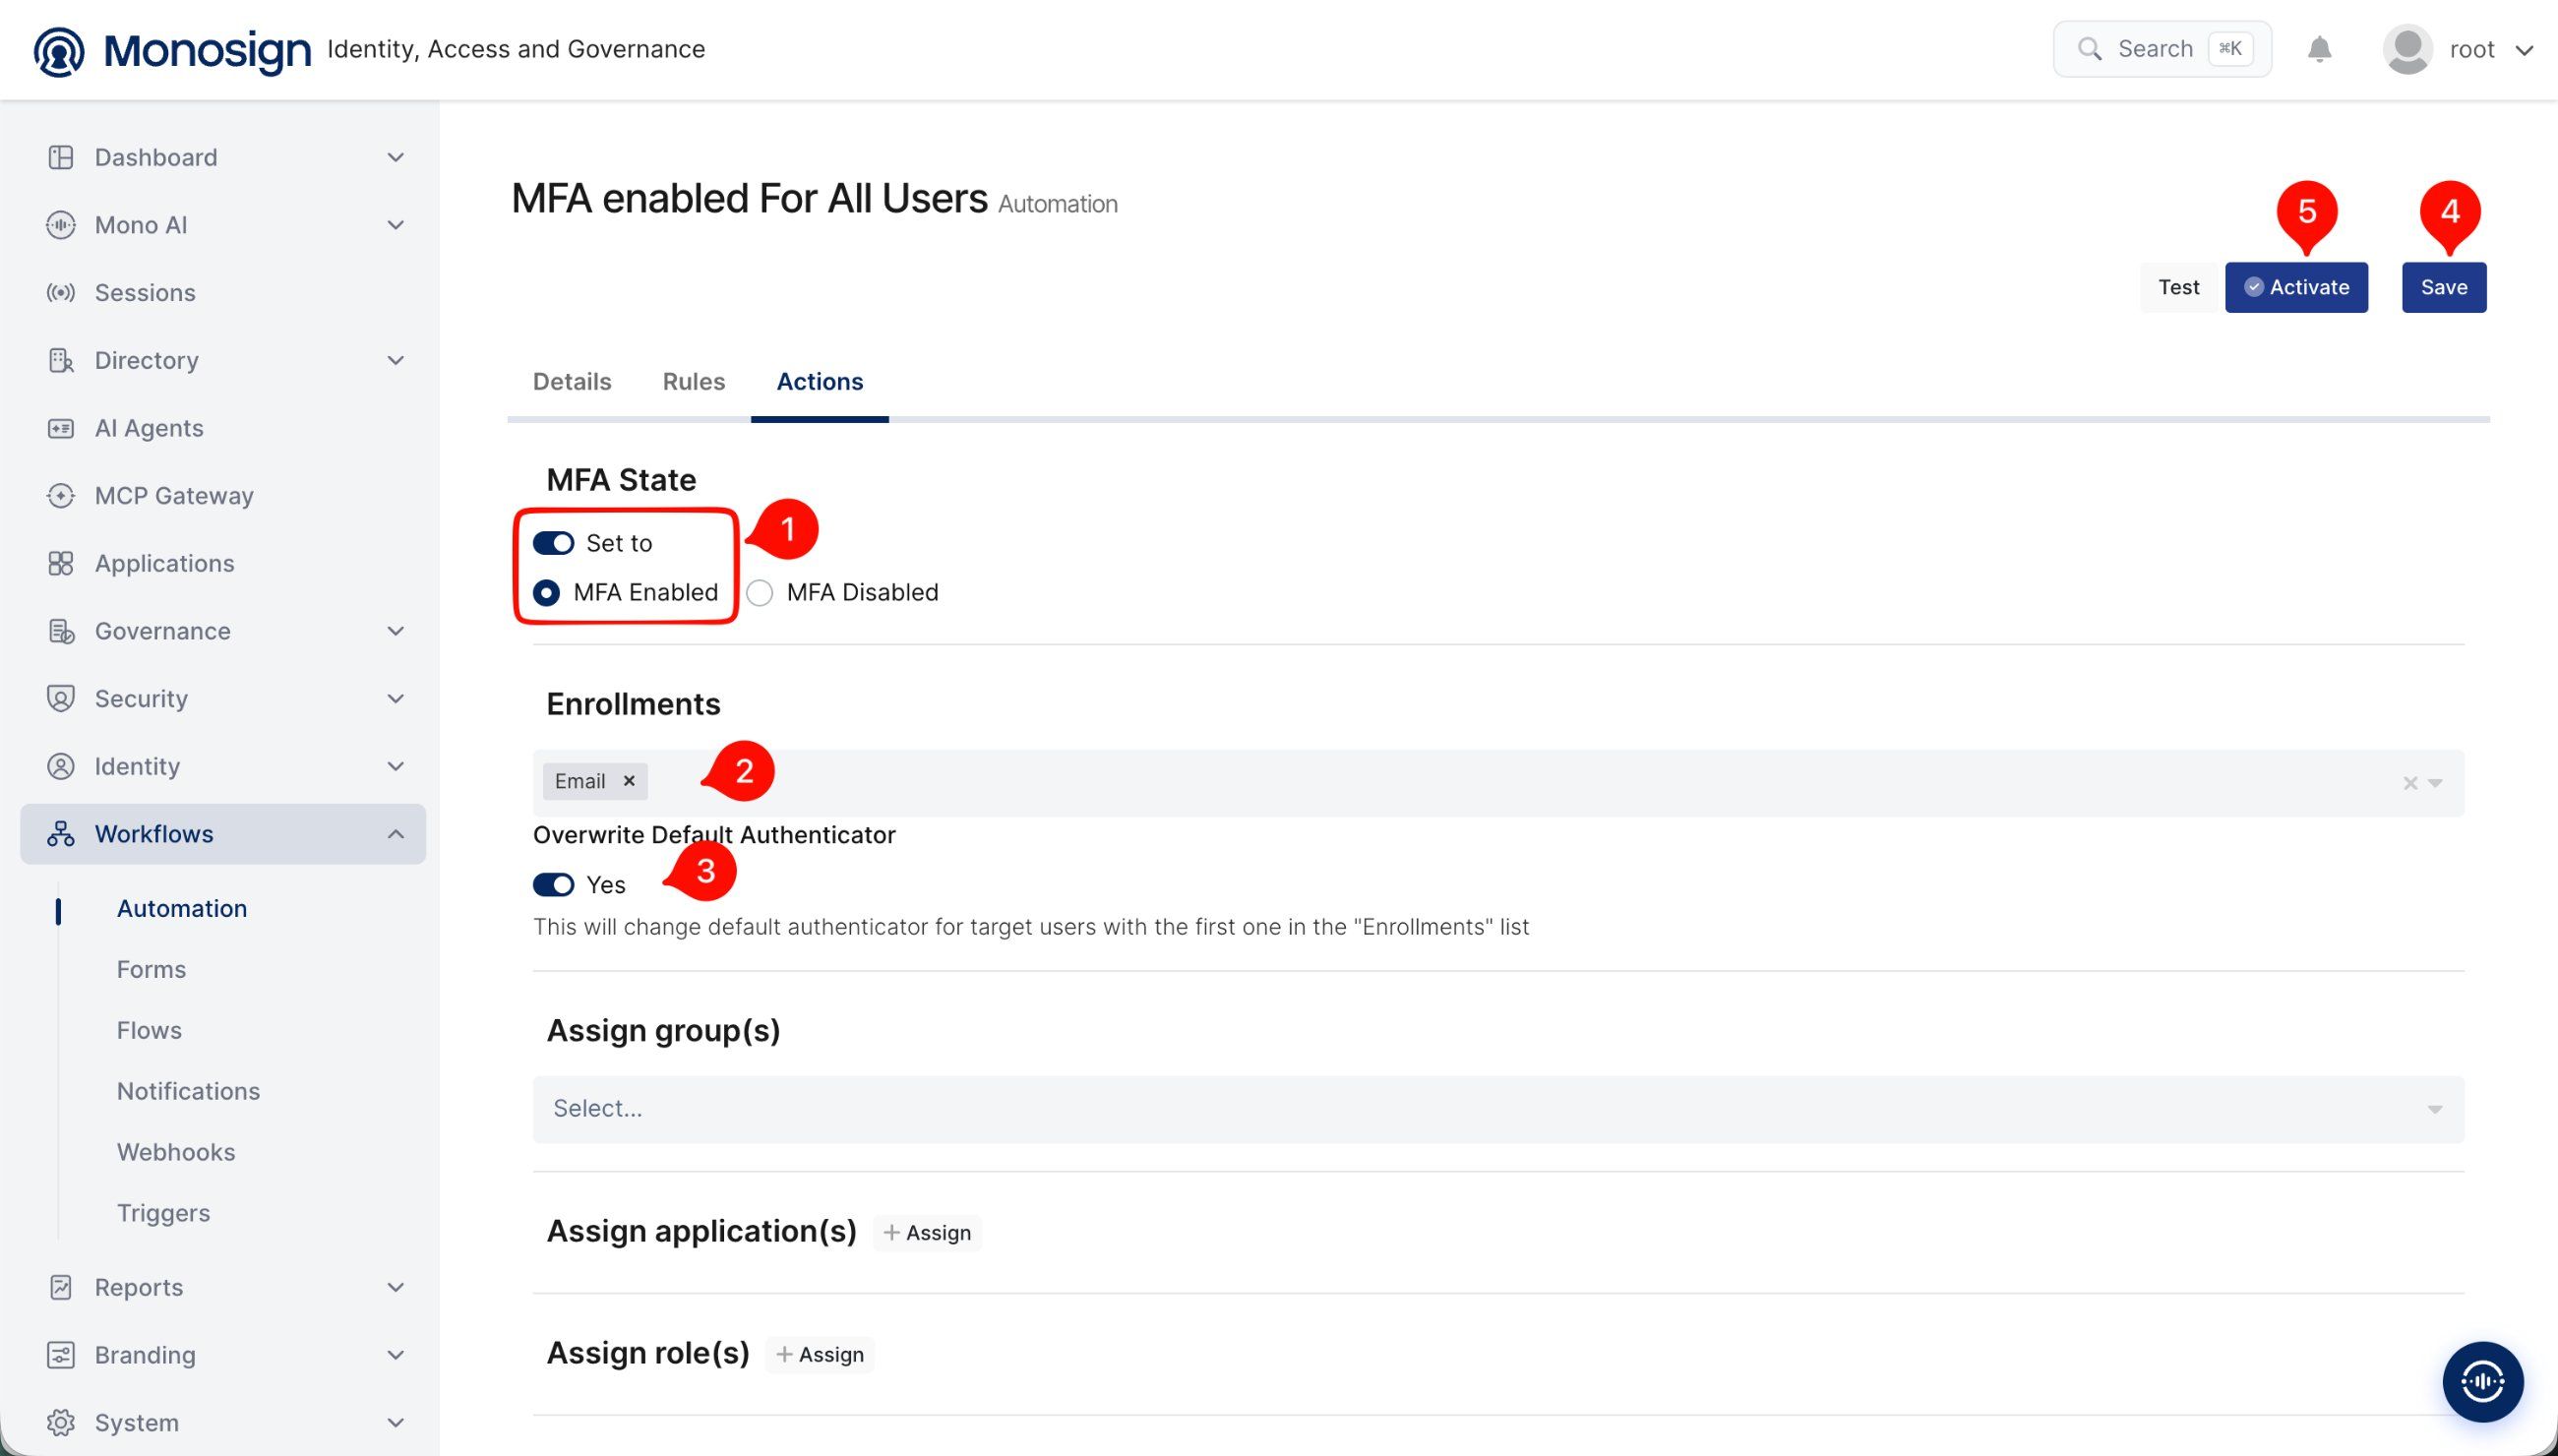
On the Actions tab, under MFA State, toggle Set to (1) and choose MFA Enabled (or MFA Disabled if you want the workflow to turn 2FA off instead).
Under Enrollments, select Email (2) as the authenticator to enroll matching users in. If you want this to become the user's default authenticator, toggle Overwrite Default Authenticator (3) to Yes — this changes the default authenticator for target users to the first one listed under Enrollments.
Optionally, use Assign group(s), Assign application(s), and Assign role(s) to grant additional access alongside enabling 2FA.
Once everything is configured, click Save (4) to save the workflow, and Activate (5) to turn it on. You can also use Test beforehand to validate the workflow before activating it.
✅ Verification
1. Check the user list for the MFA badge
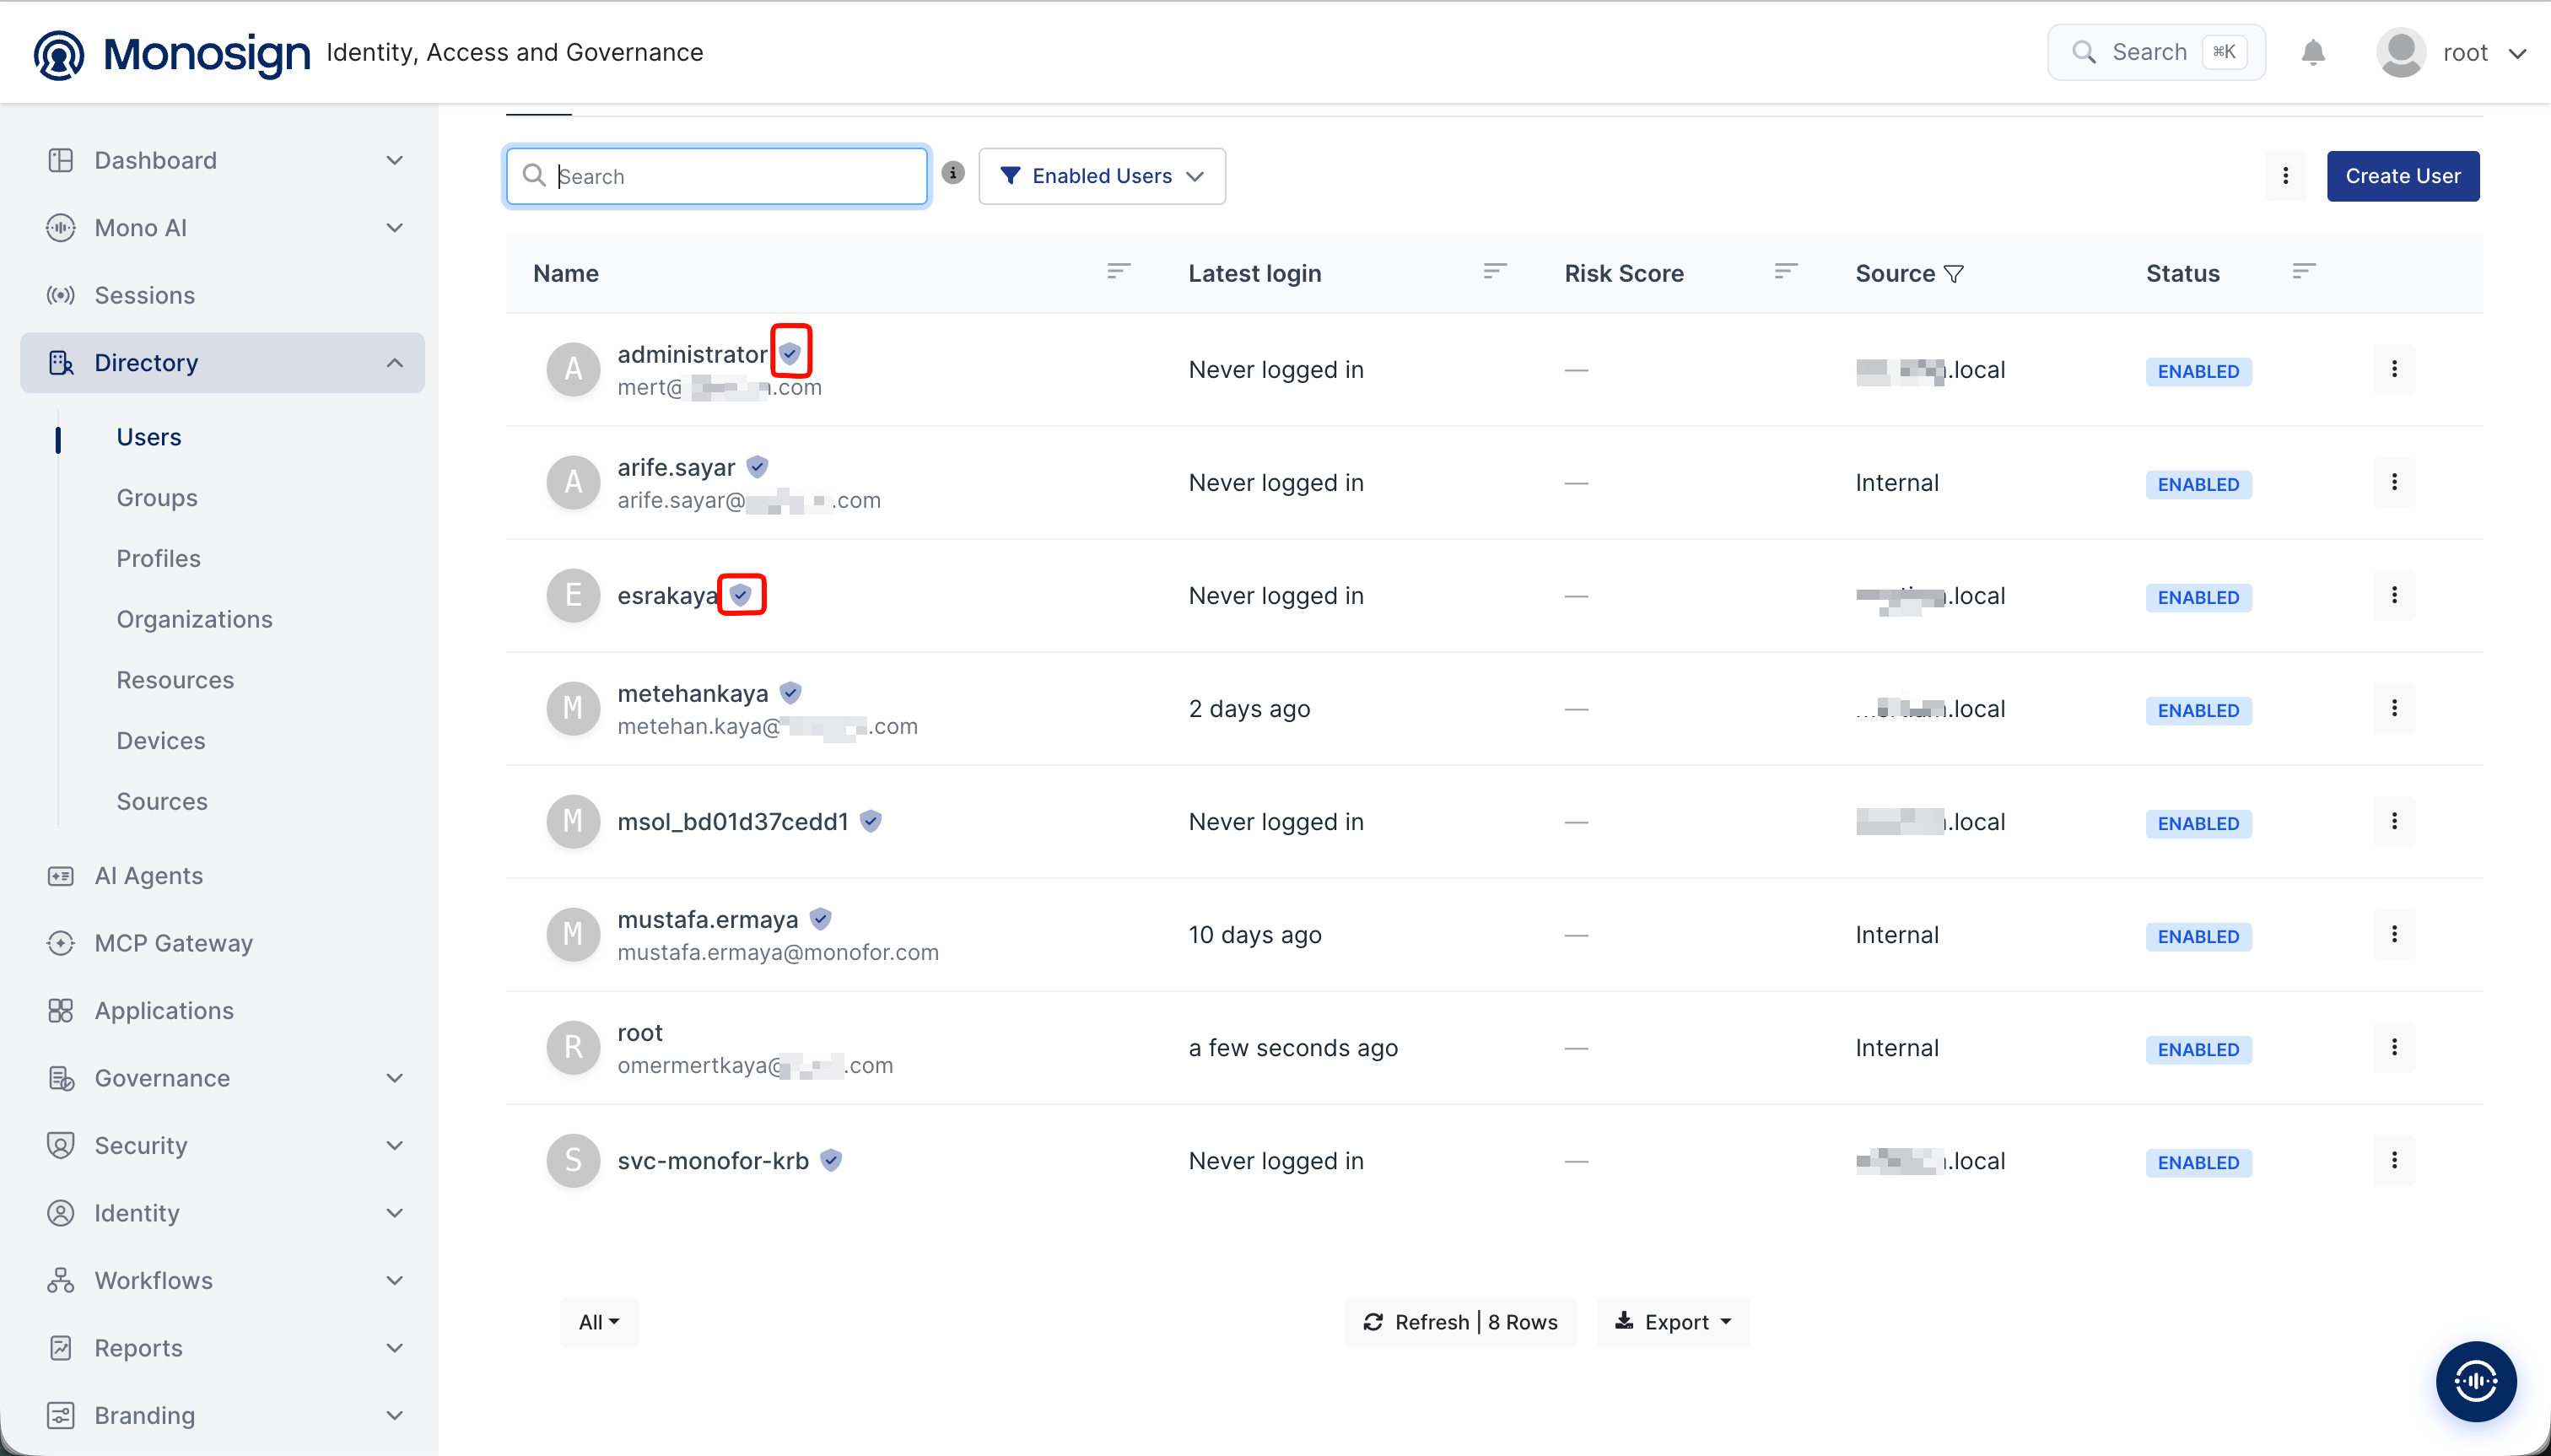
Go to Directory > Users and check the user list. Once the workflow has been activated and applied, matching users should show a shield/checkmark badge next to their name hovering over it displays "Protected with MFA", confirming that email-based 2FA has been successfully enabled for that user.
2. Sign in as a test user
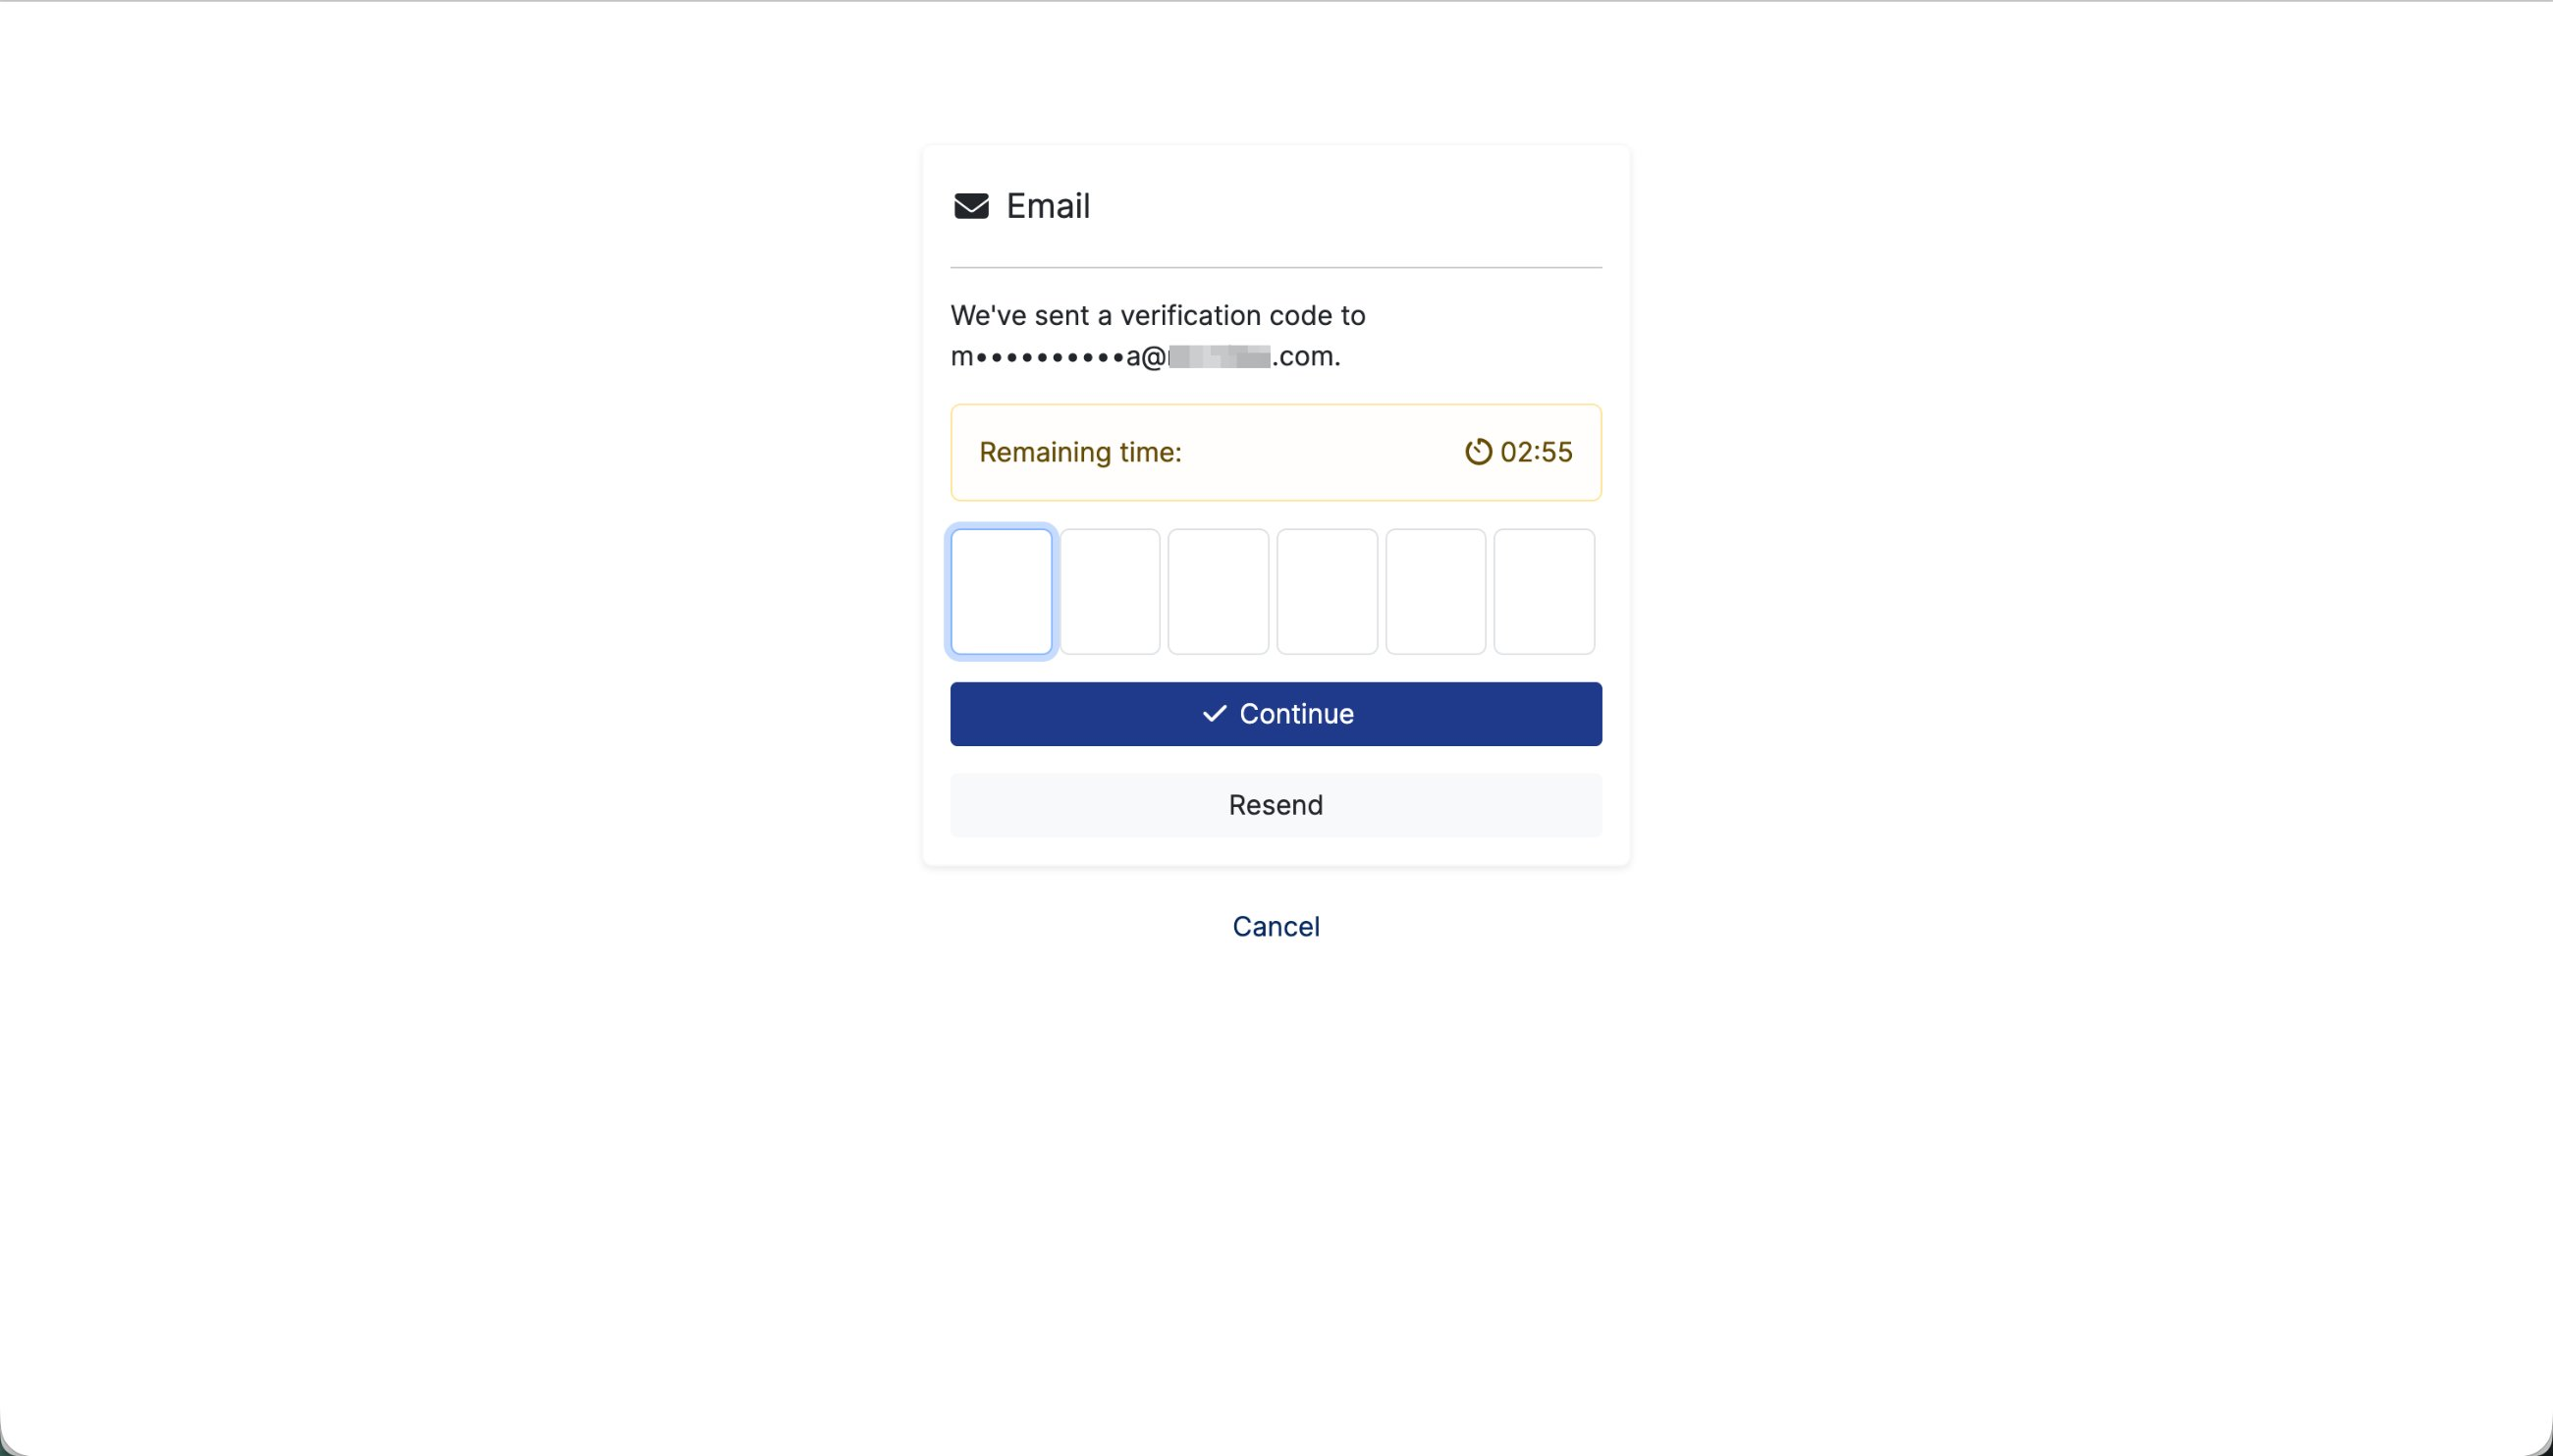
Test the flow by signing in as one of the affected users. After entering valid credentials, the Email authenticator screen should appear, showing that a verification code was sent to the user's (masked) email address, a countdown of the remaining time before the code expires, and a 6-digit code input. Enter the code received by email and click Continue to complete sign-in — Resend can be used to request a new code if it doesn't arrive in time.
3. Check the verification code email
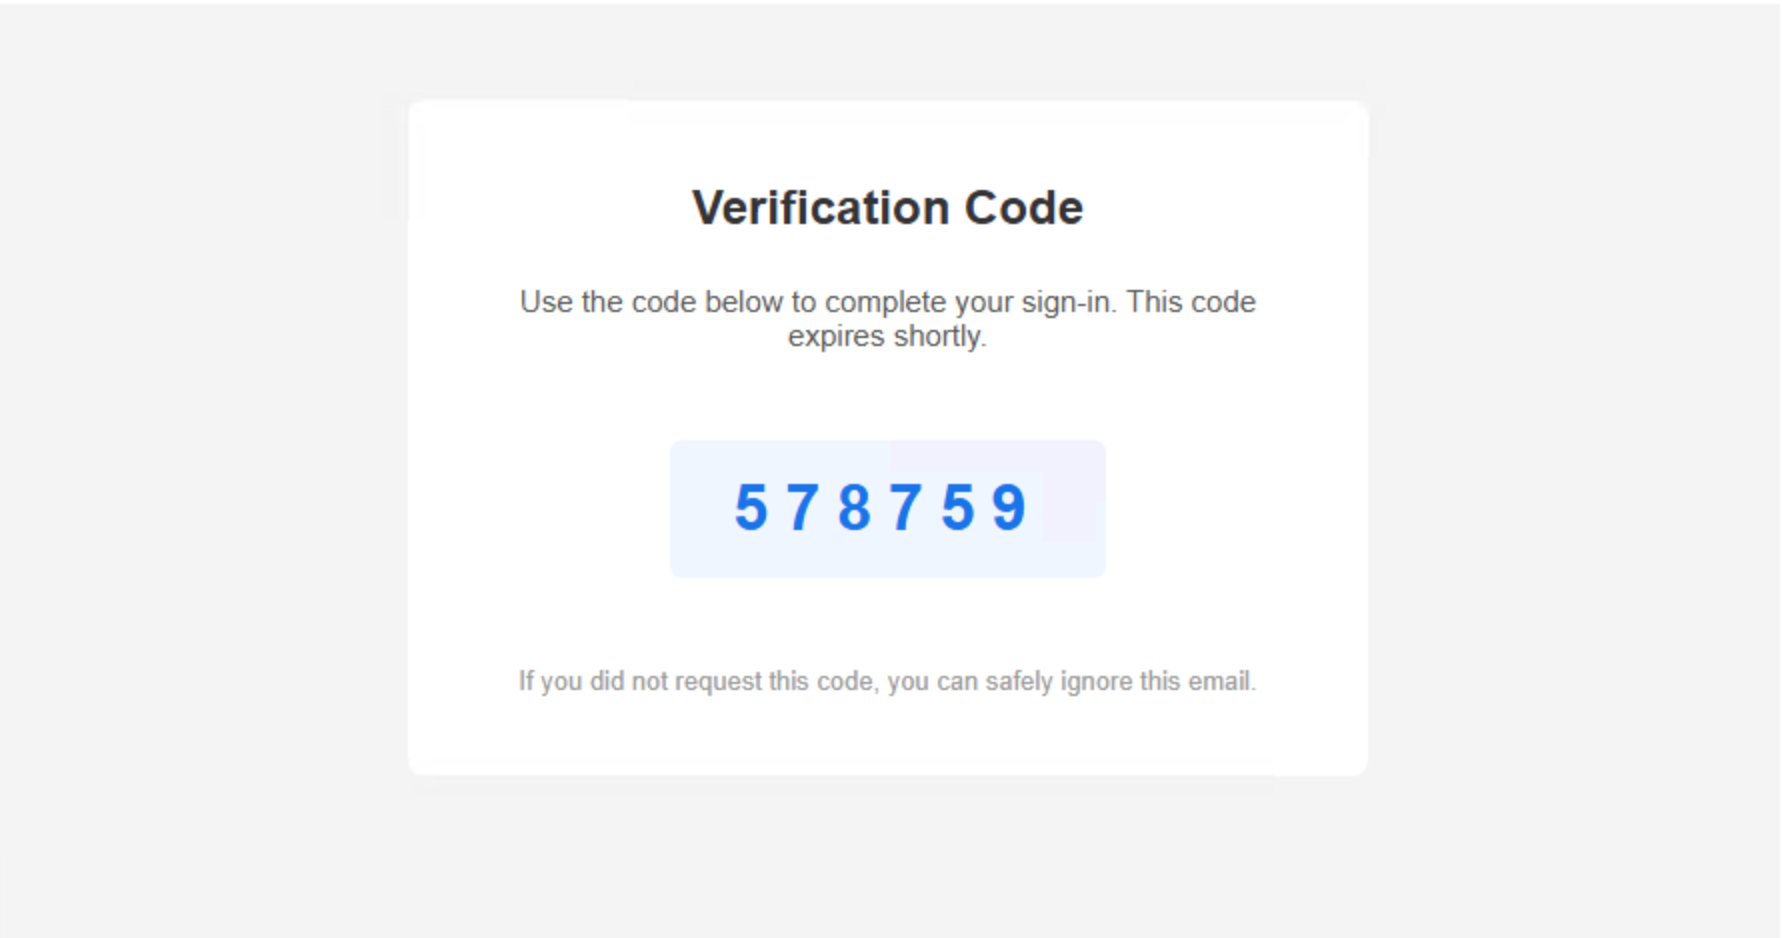
Check the received email itself: it should contain a Verification Code heading, a short message that the code is used to complete sign-in and expires shortly, and the 6-digit code displayed clearly (e.g. 578759), along with a note that the email can be safely ignored if the code wasn't requested.
ℹ️ Additional Information
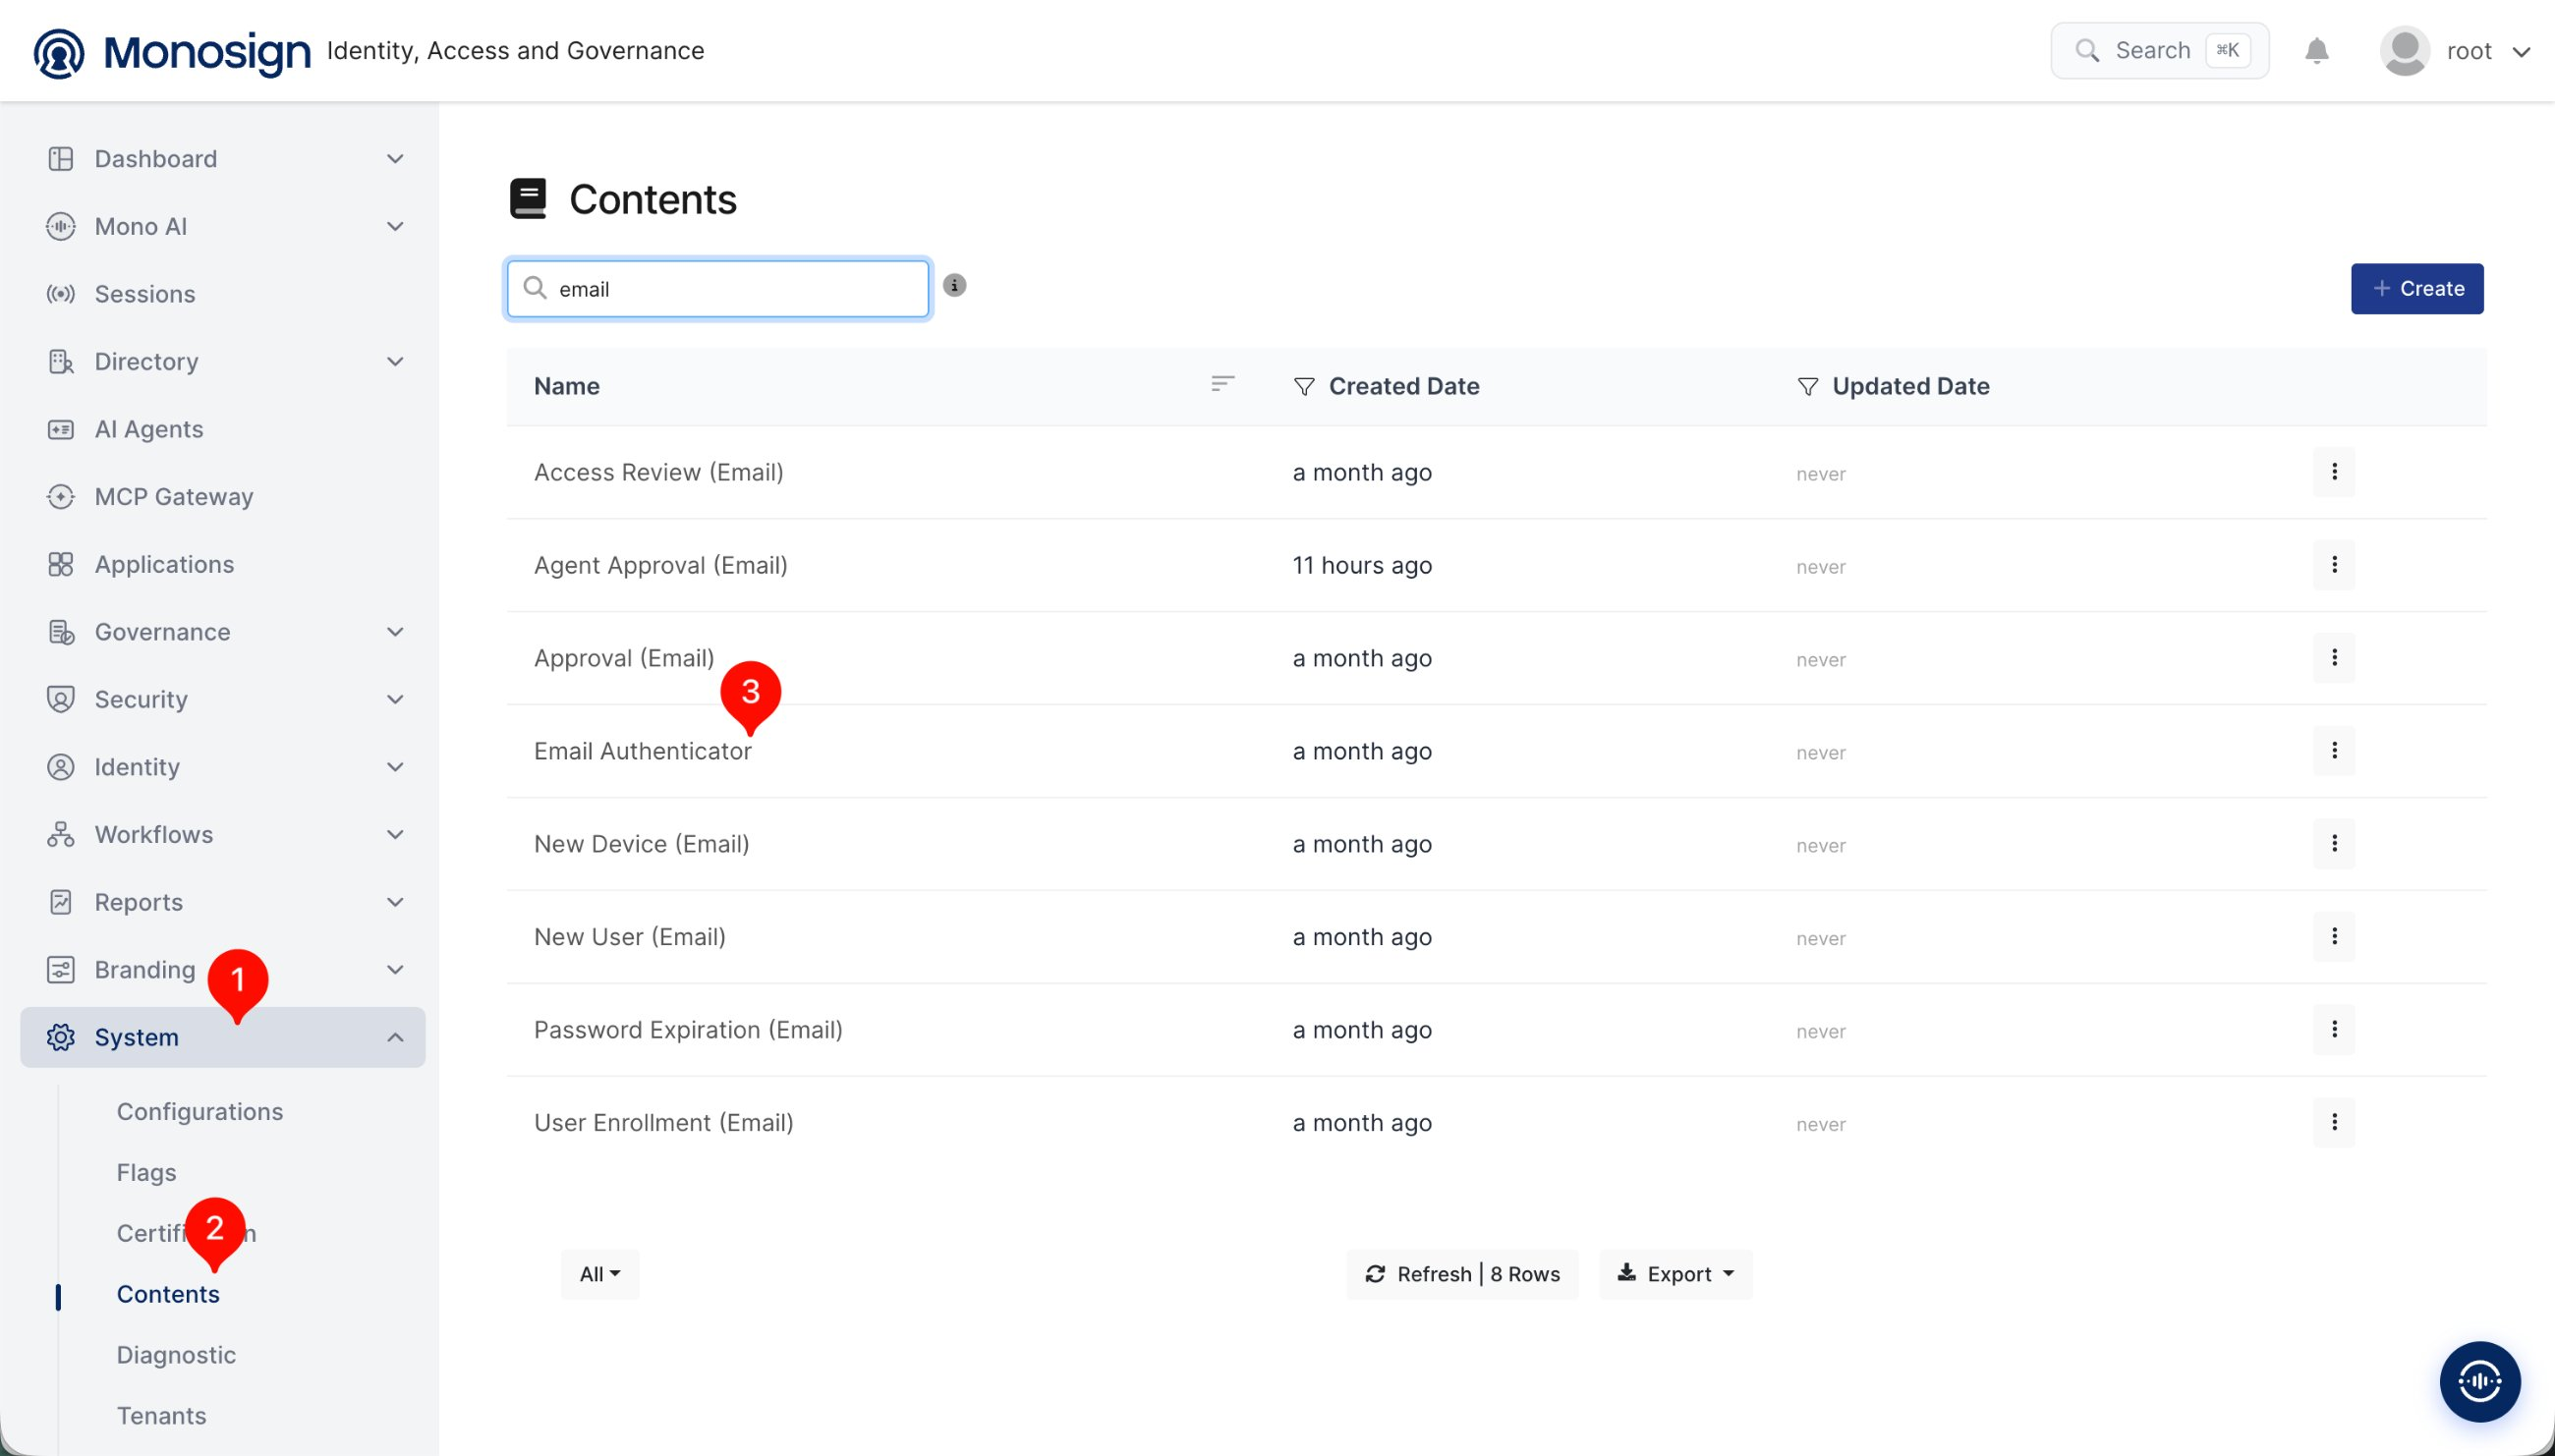
The content (template) of the email sent to users with their verification code can be edited separately from System (1) > Contents (2). Search for "email" in the Contents list and open the Email Authenticator (3) content — this is the same template referenced under the Content field in the Email authenticator's Advanced Settings tab (see step 5), and can be customized as needed (subject, wording, branding, etc.).