
This guide explains how to configure Single Sign-On (SSO) between MonoSign and a self-hosted Vikunja instance using OpenID Connect (OIDC).
Overview
Vikunja supports OpenID Connect natively, no additional proxy or plugin is required. The provider is registered entirely through server-side configuration (environment variables or config.yml); there is no in-app admin screen for this step.
Prerequisites
-
Administrative access to your MonoSign tenant
-
A self-hosted Vikunja instance (Docker deployment) that you can restart
-
Your Vikunja instance's public URL, e.g.
https://vikunja.example.com
Step 1: Create an OIDC Application in MonoSign
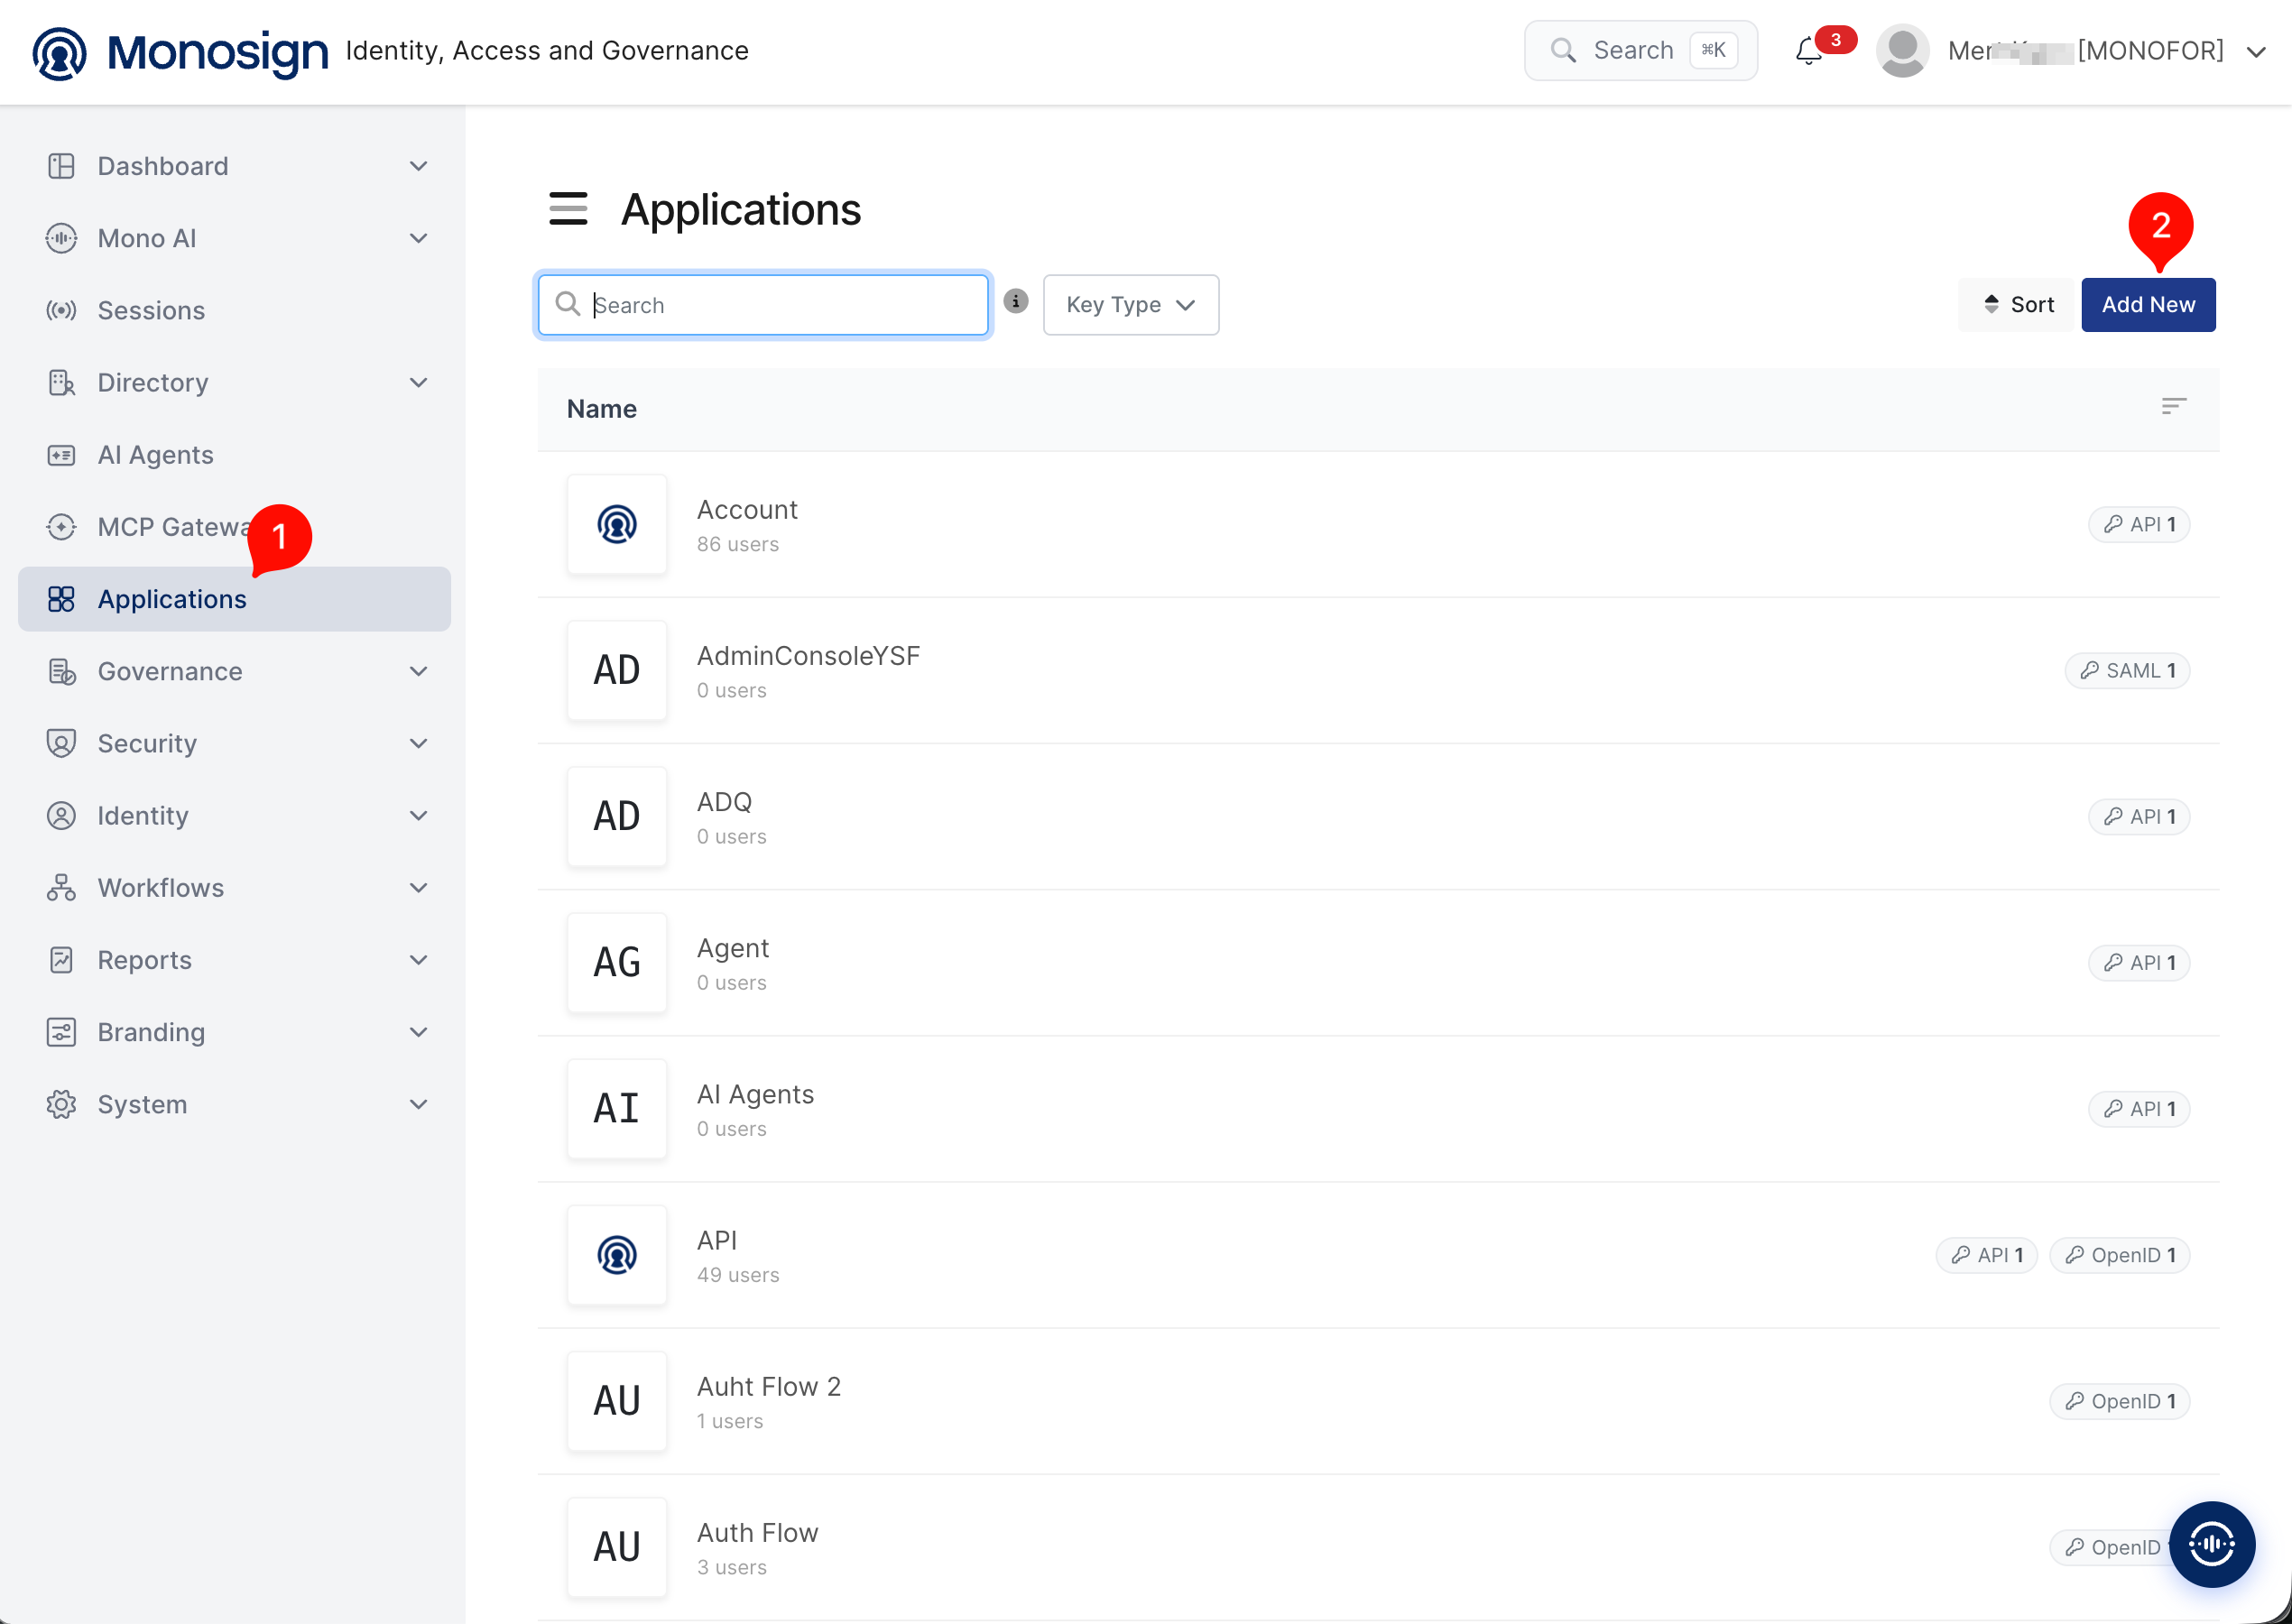
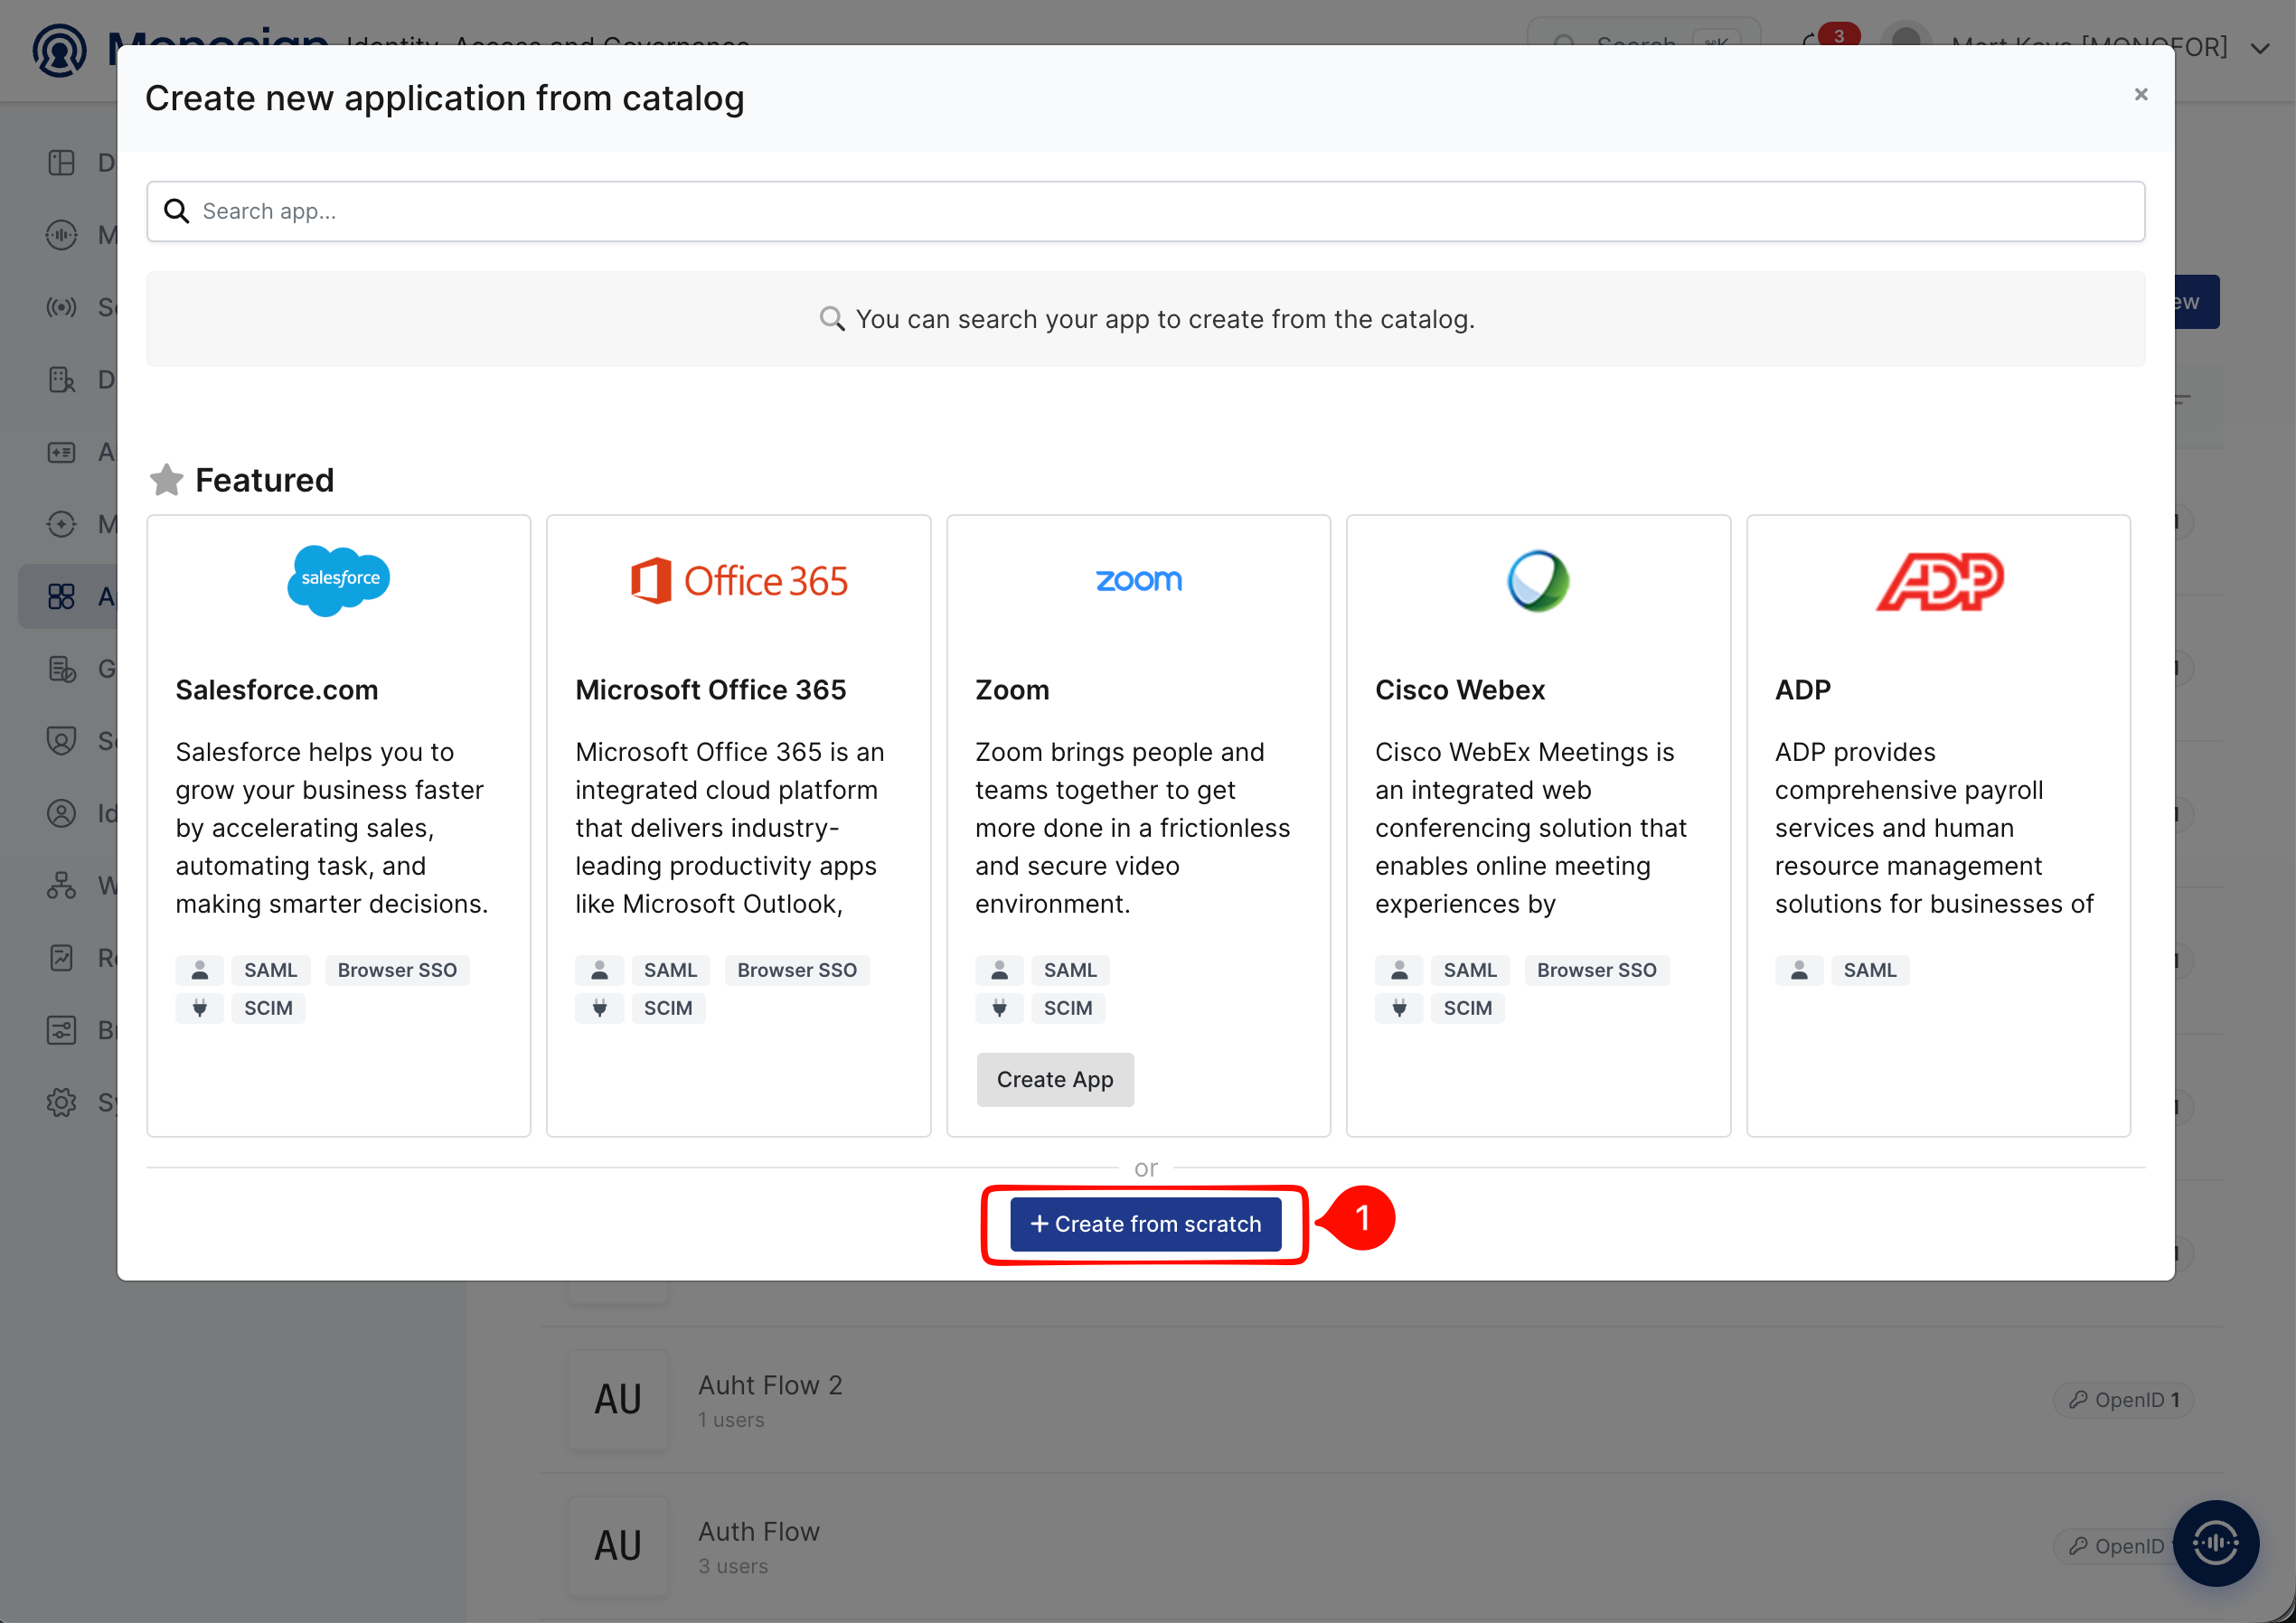
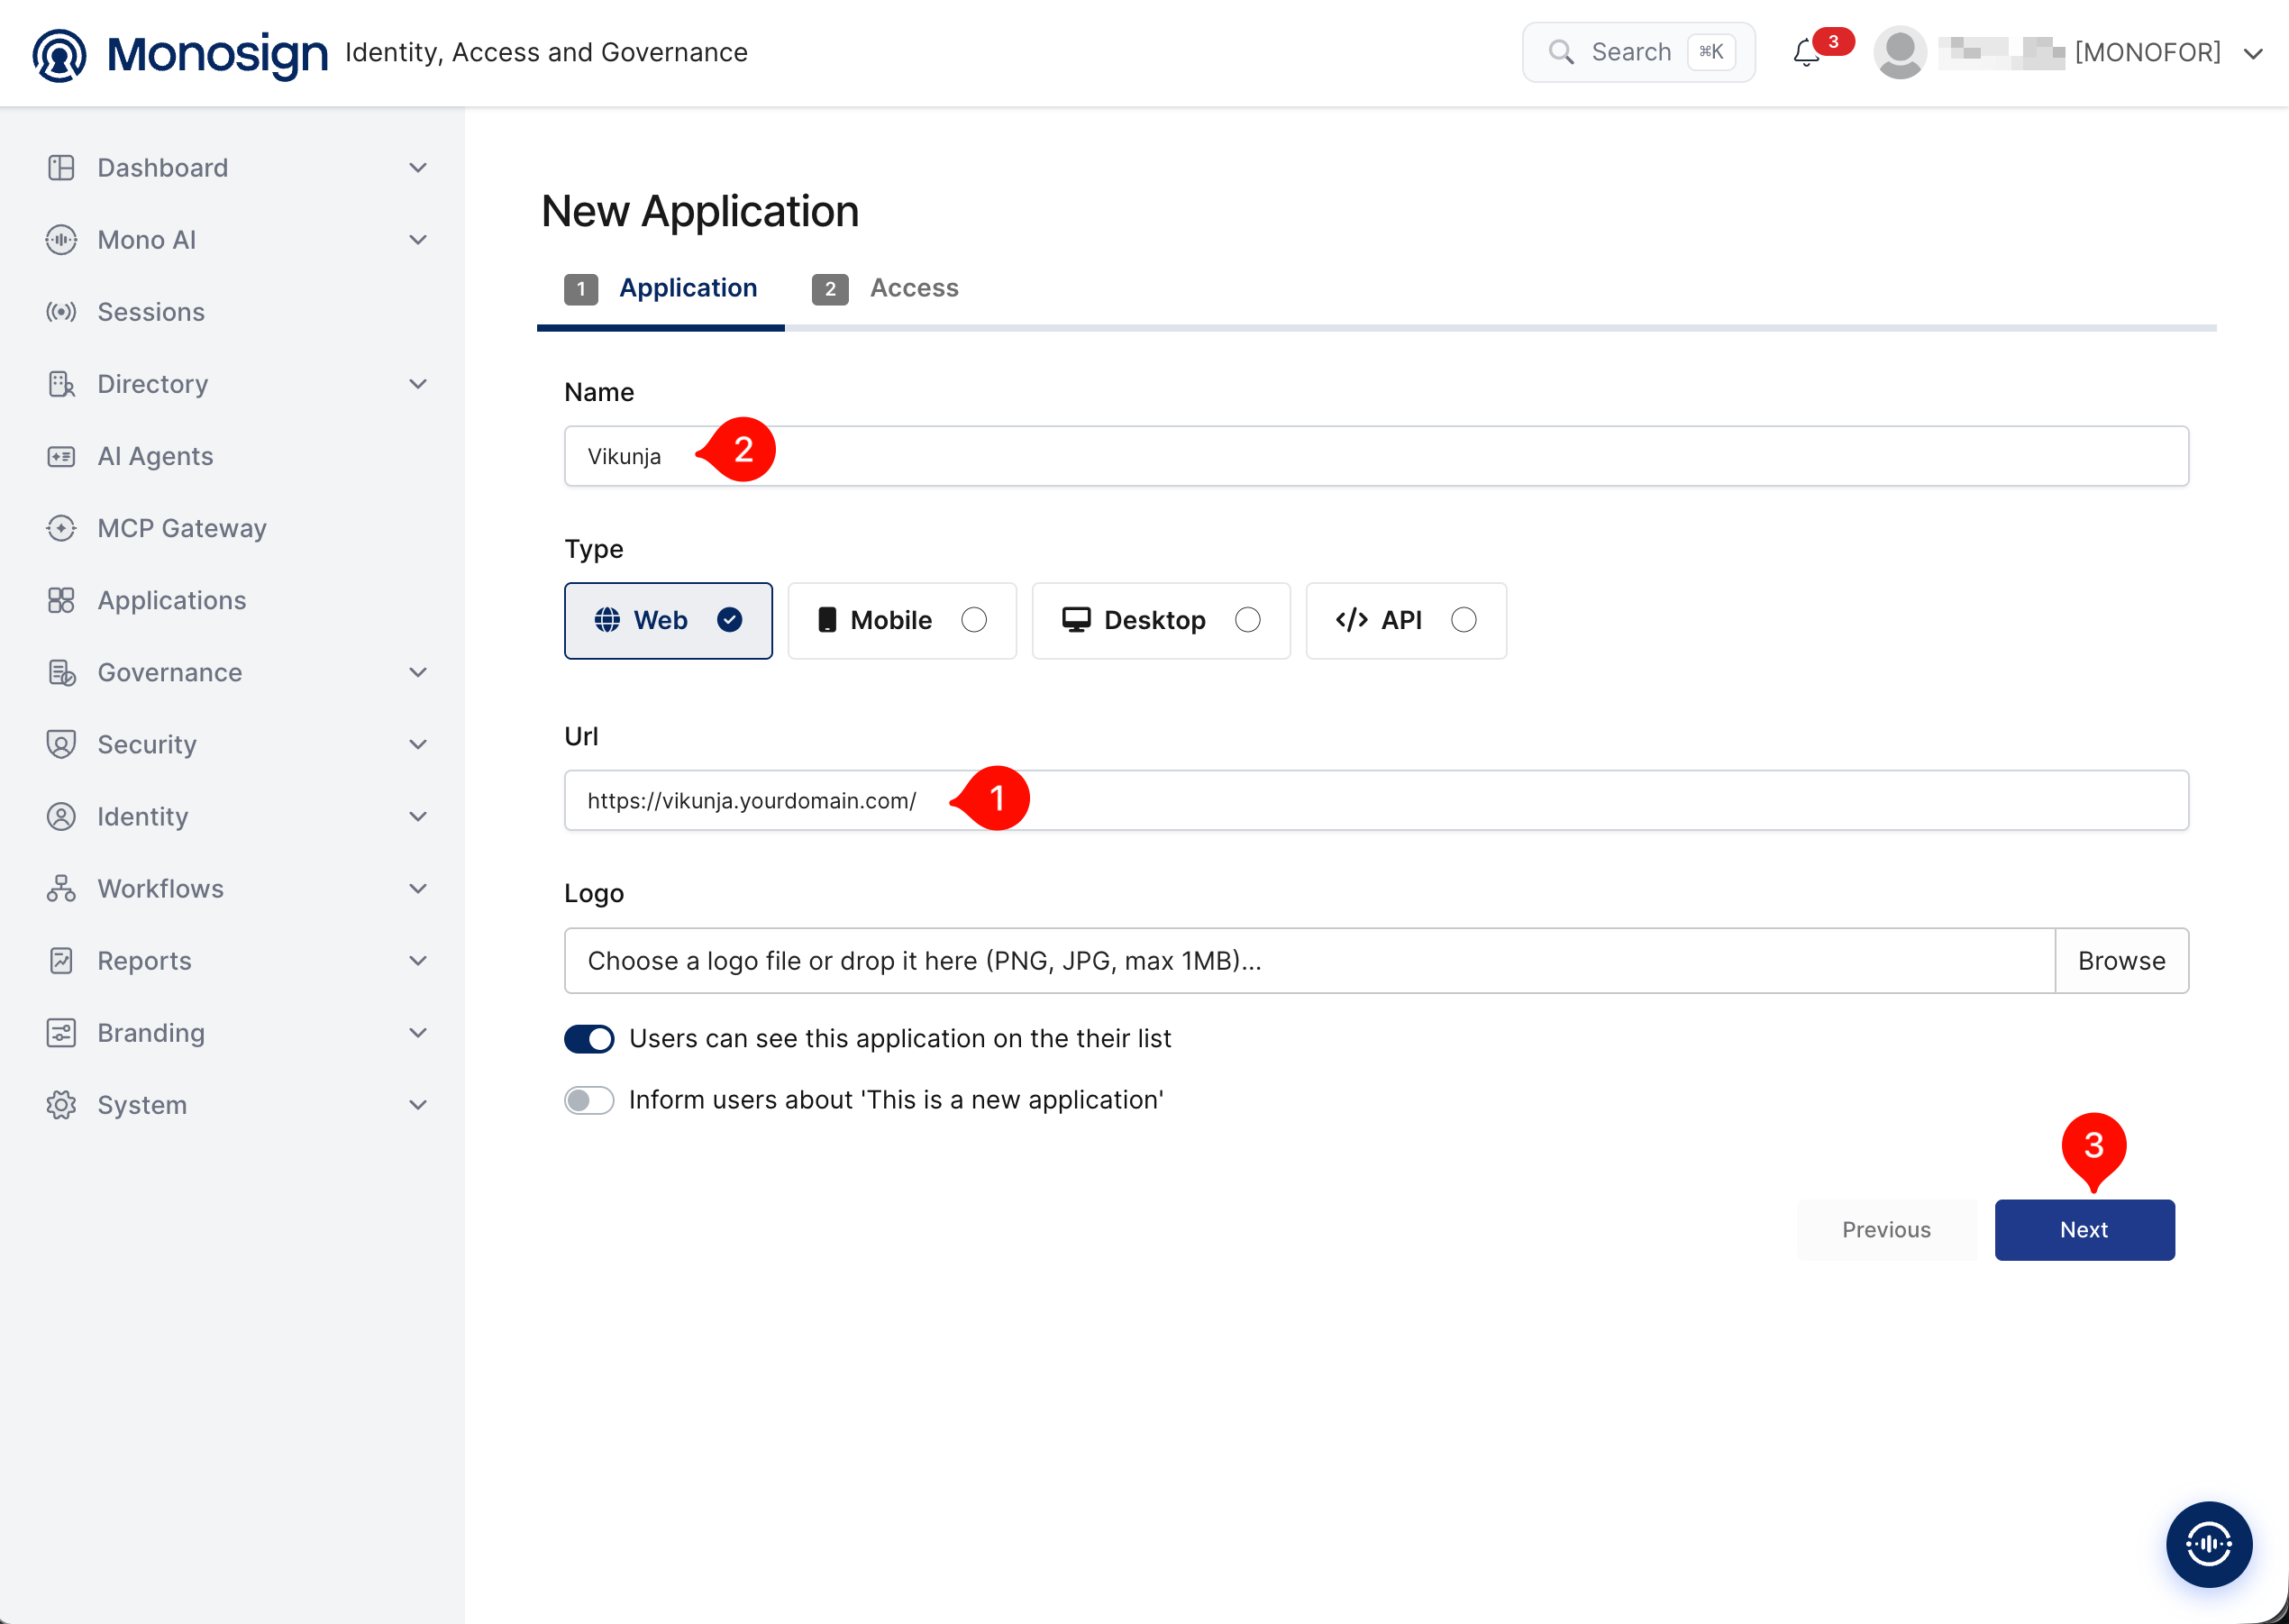
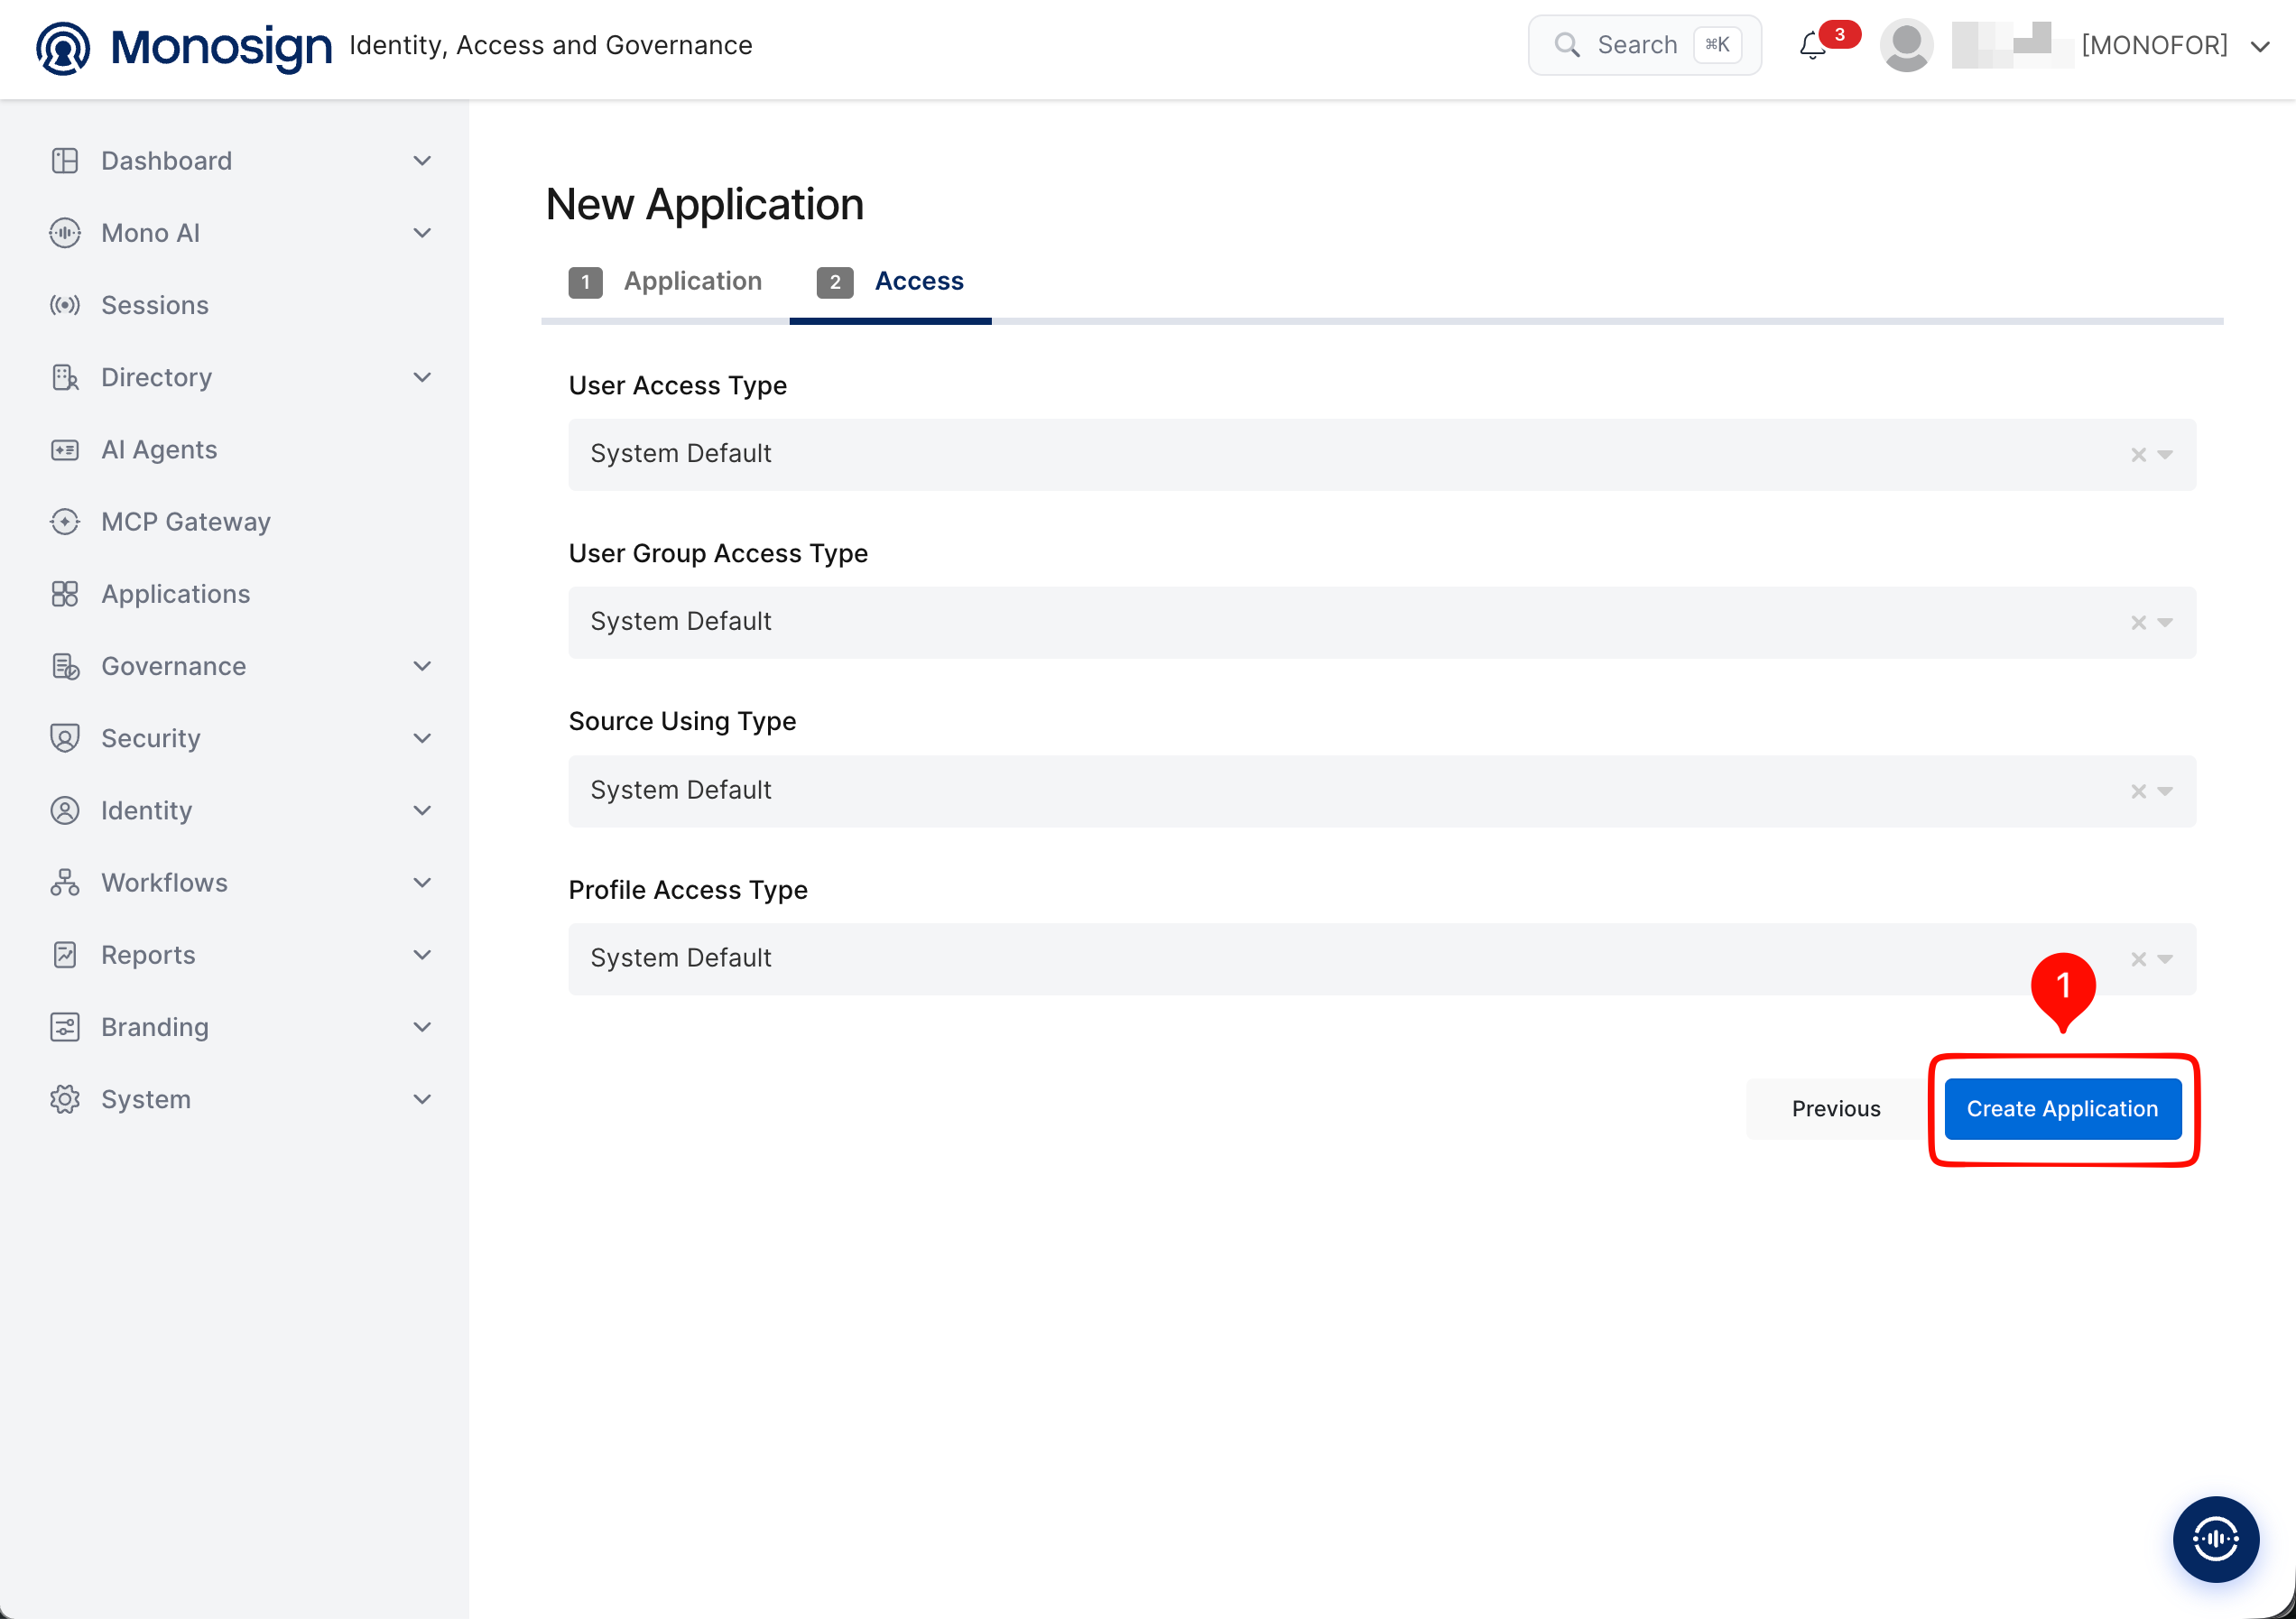
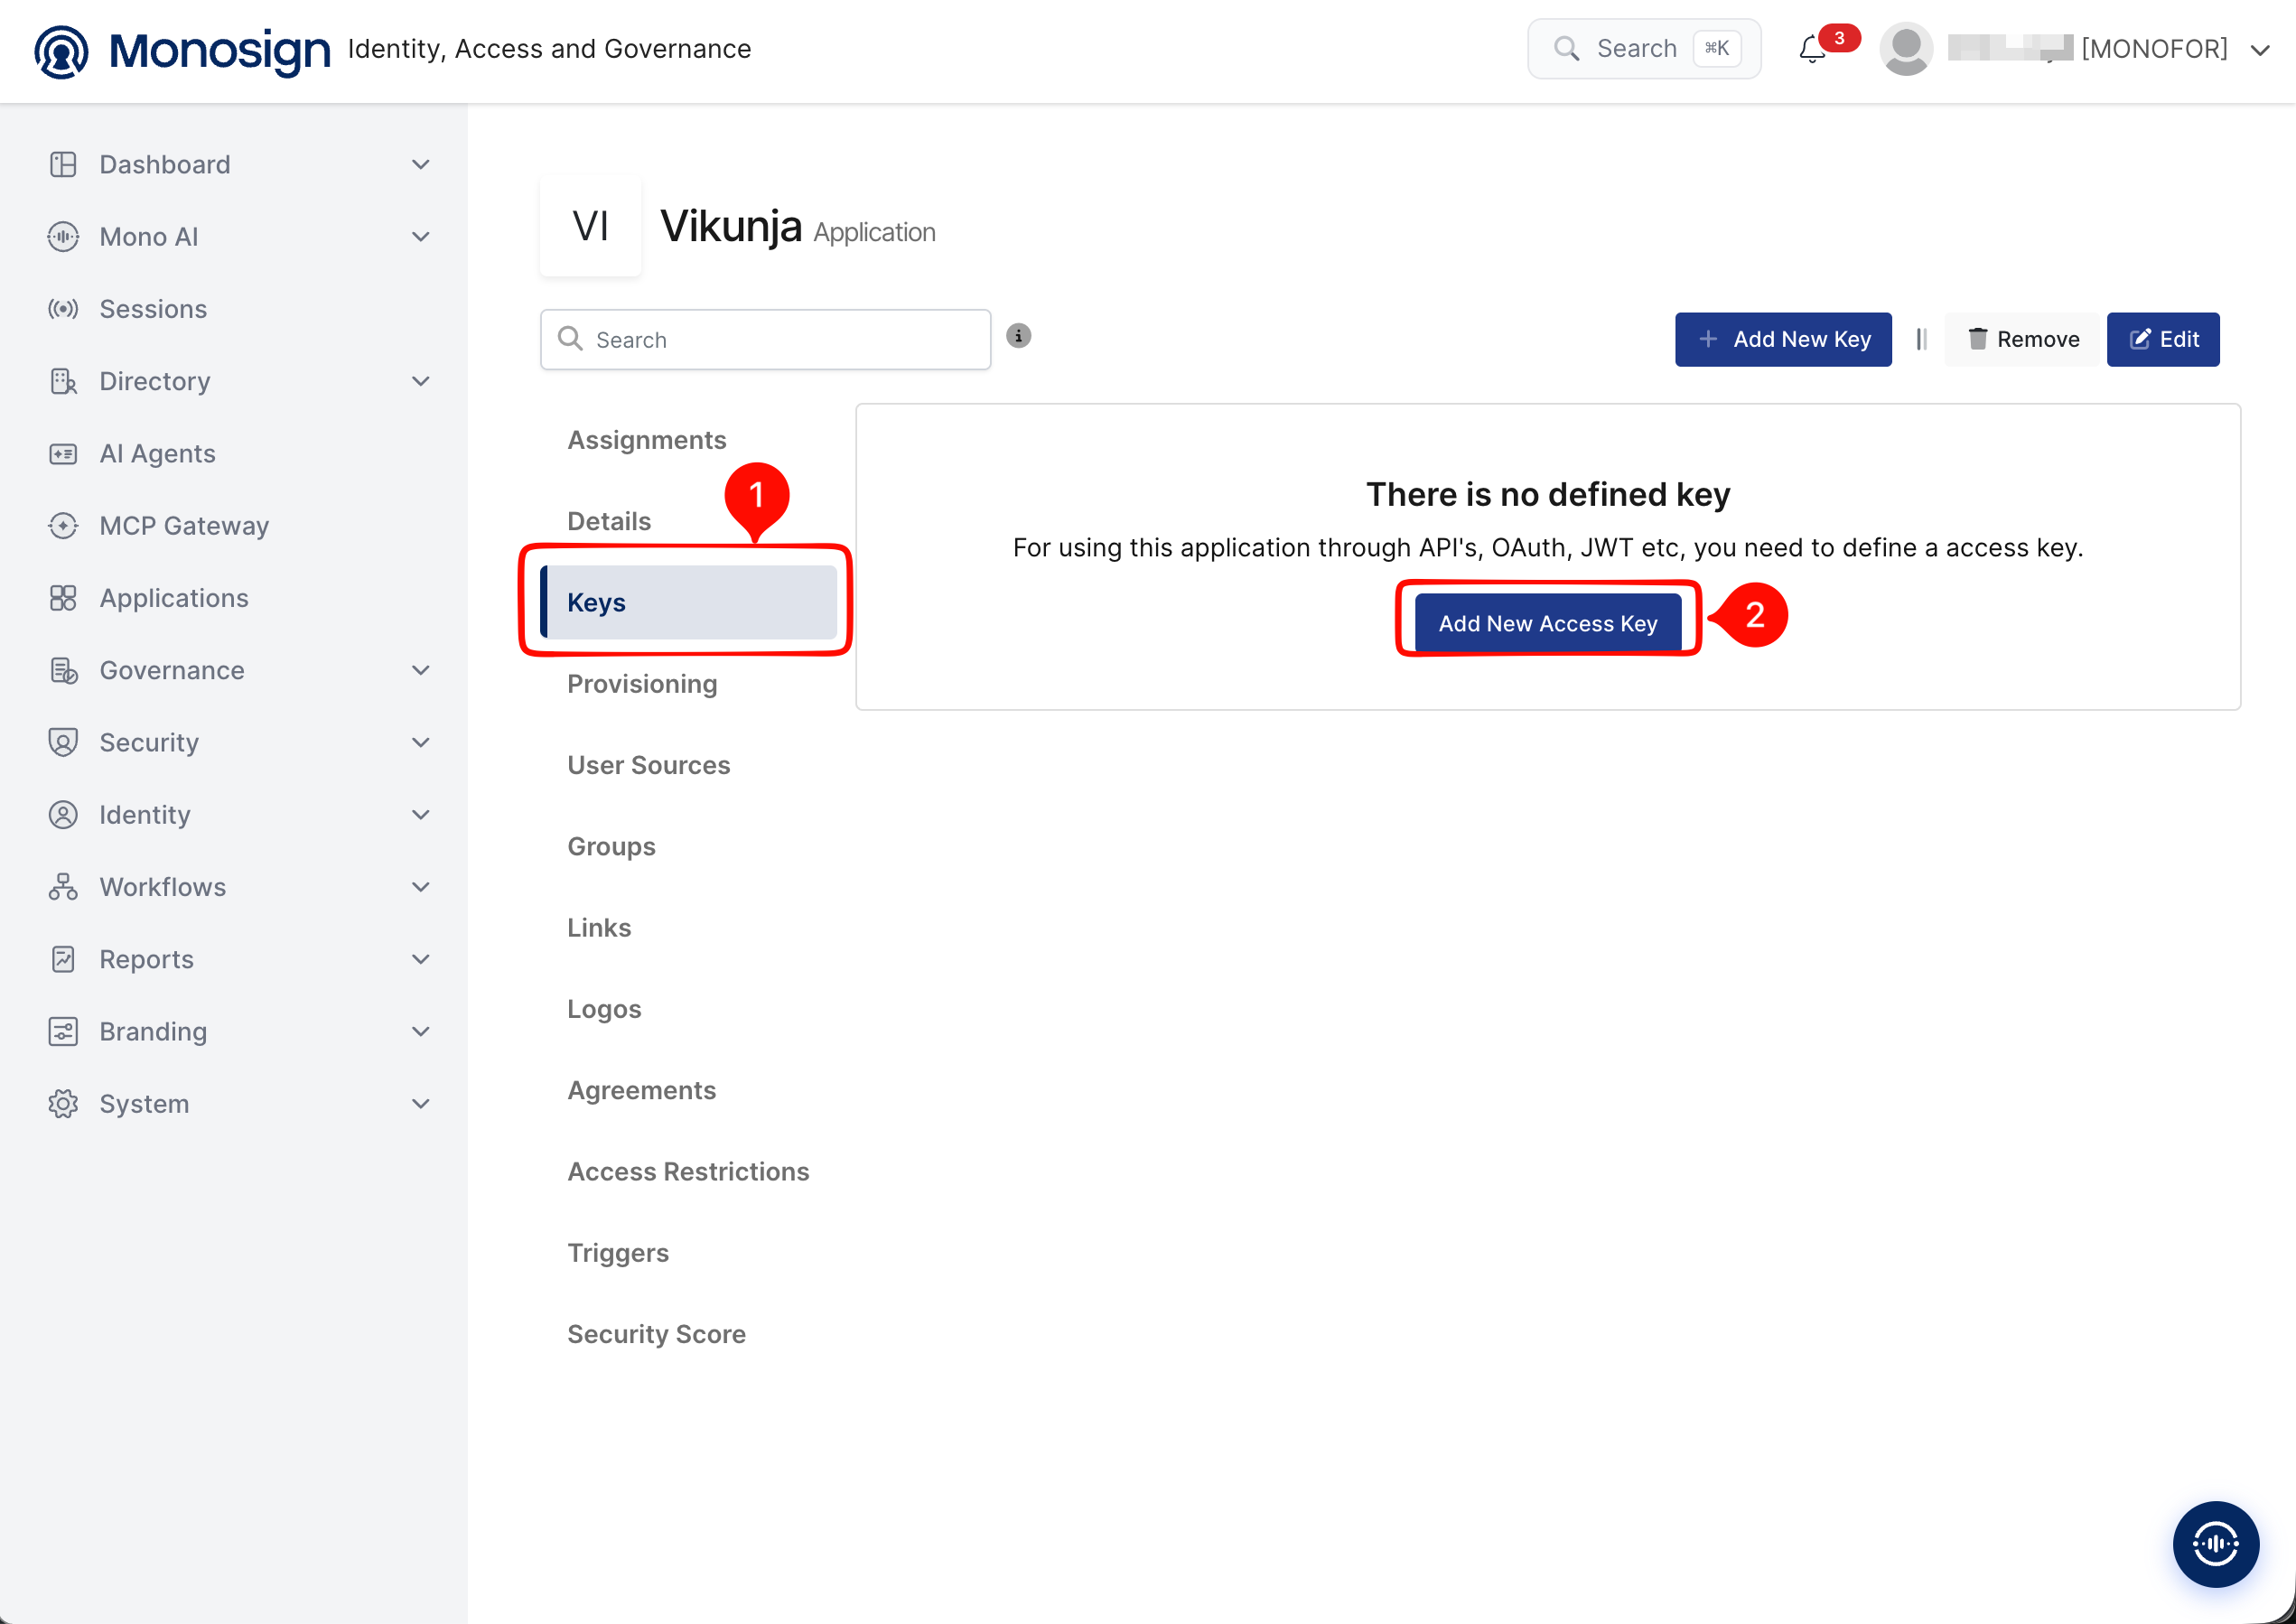
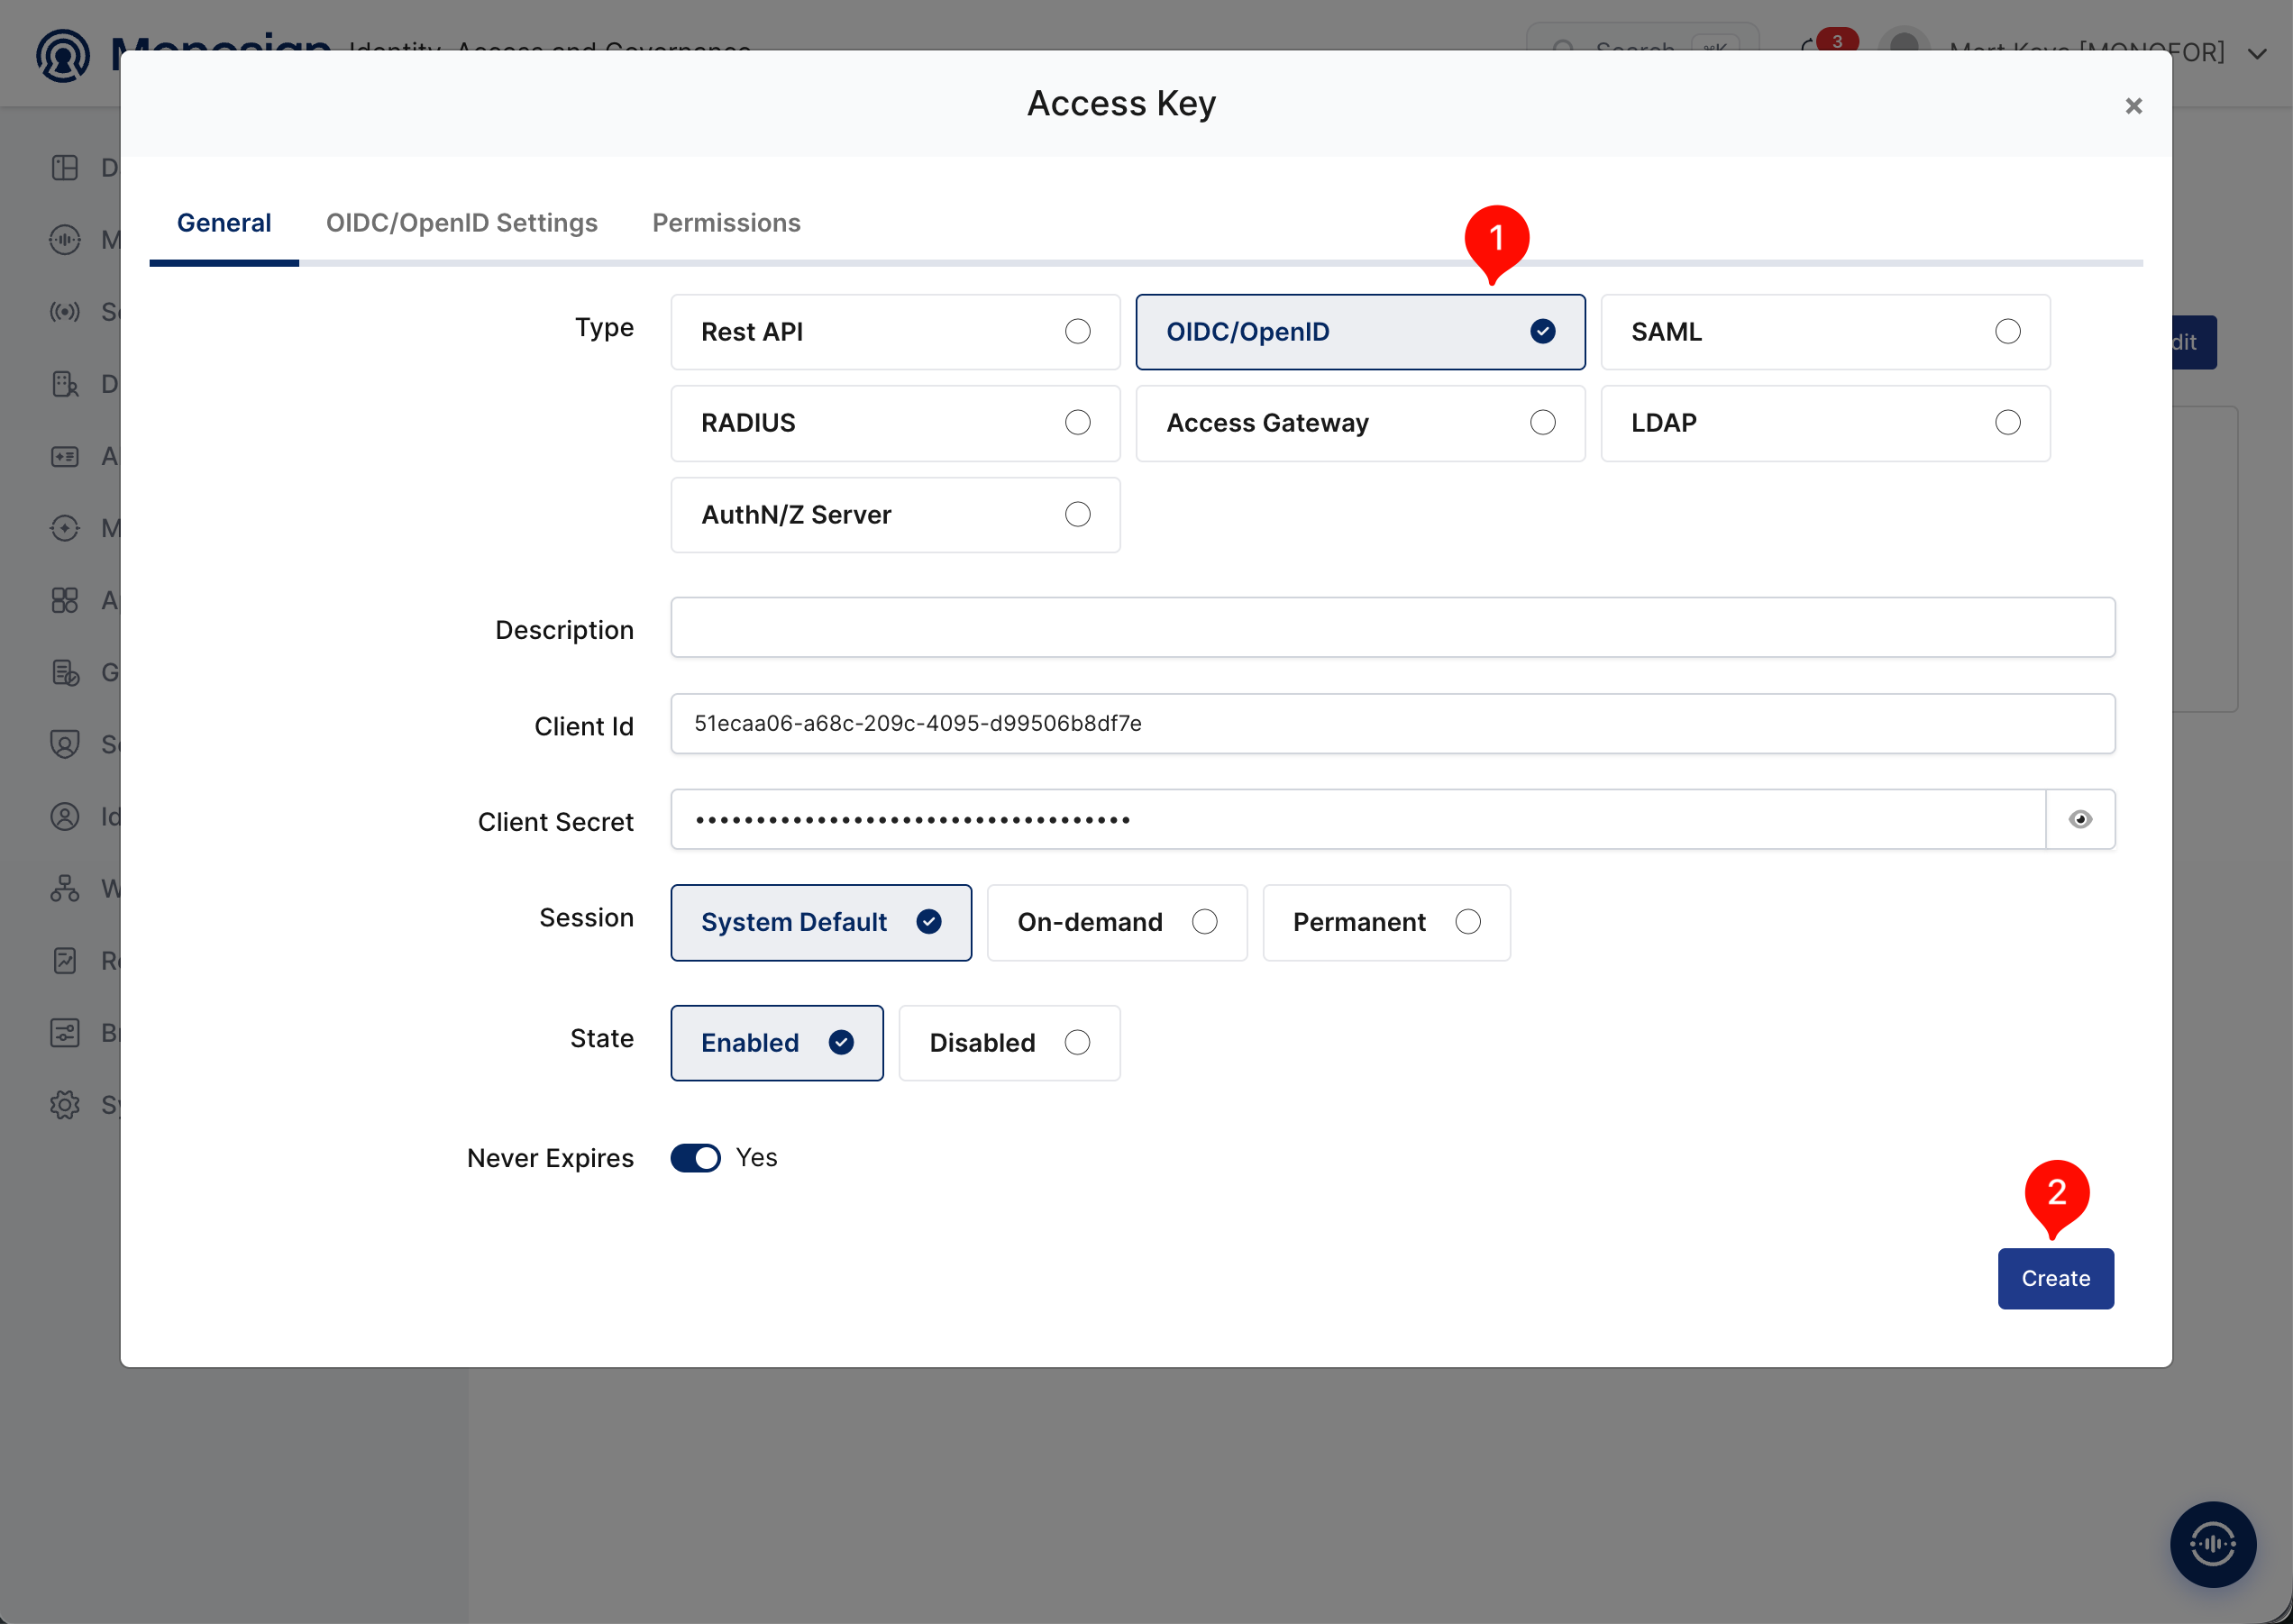
In MonoSign, create a new application and add an Access Key of type OIDC/OpenID.
|
Property |
Value |
|---|---|
|
Key Type |
OIDC/OpenID |
|
Expiration |
Lifetime (or a specific date, per your policy) |
Vikunja derives its OIDC redirect URI from your instance's public URL and the provider key you choose in its configuration, using the pattern:
{VIKUNJA_PUBLIC_URL}/auth/openid/{provider-key}
For example, using monosign as the provider key and https://vikunja.example.com as the public URL, register the following Redirect URI on the MonoSign application:
https://vikunja.example.com/auth/openid/monosign
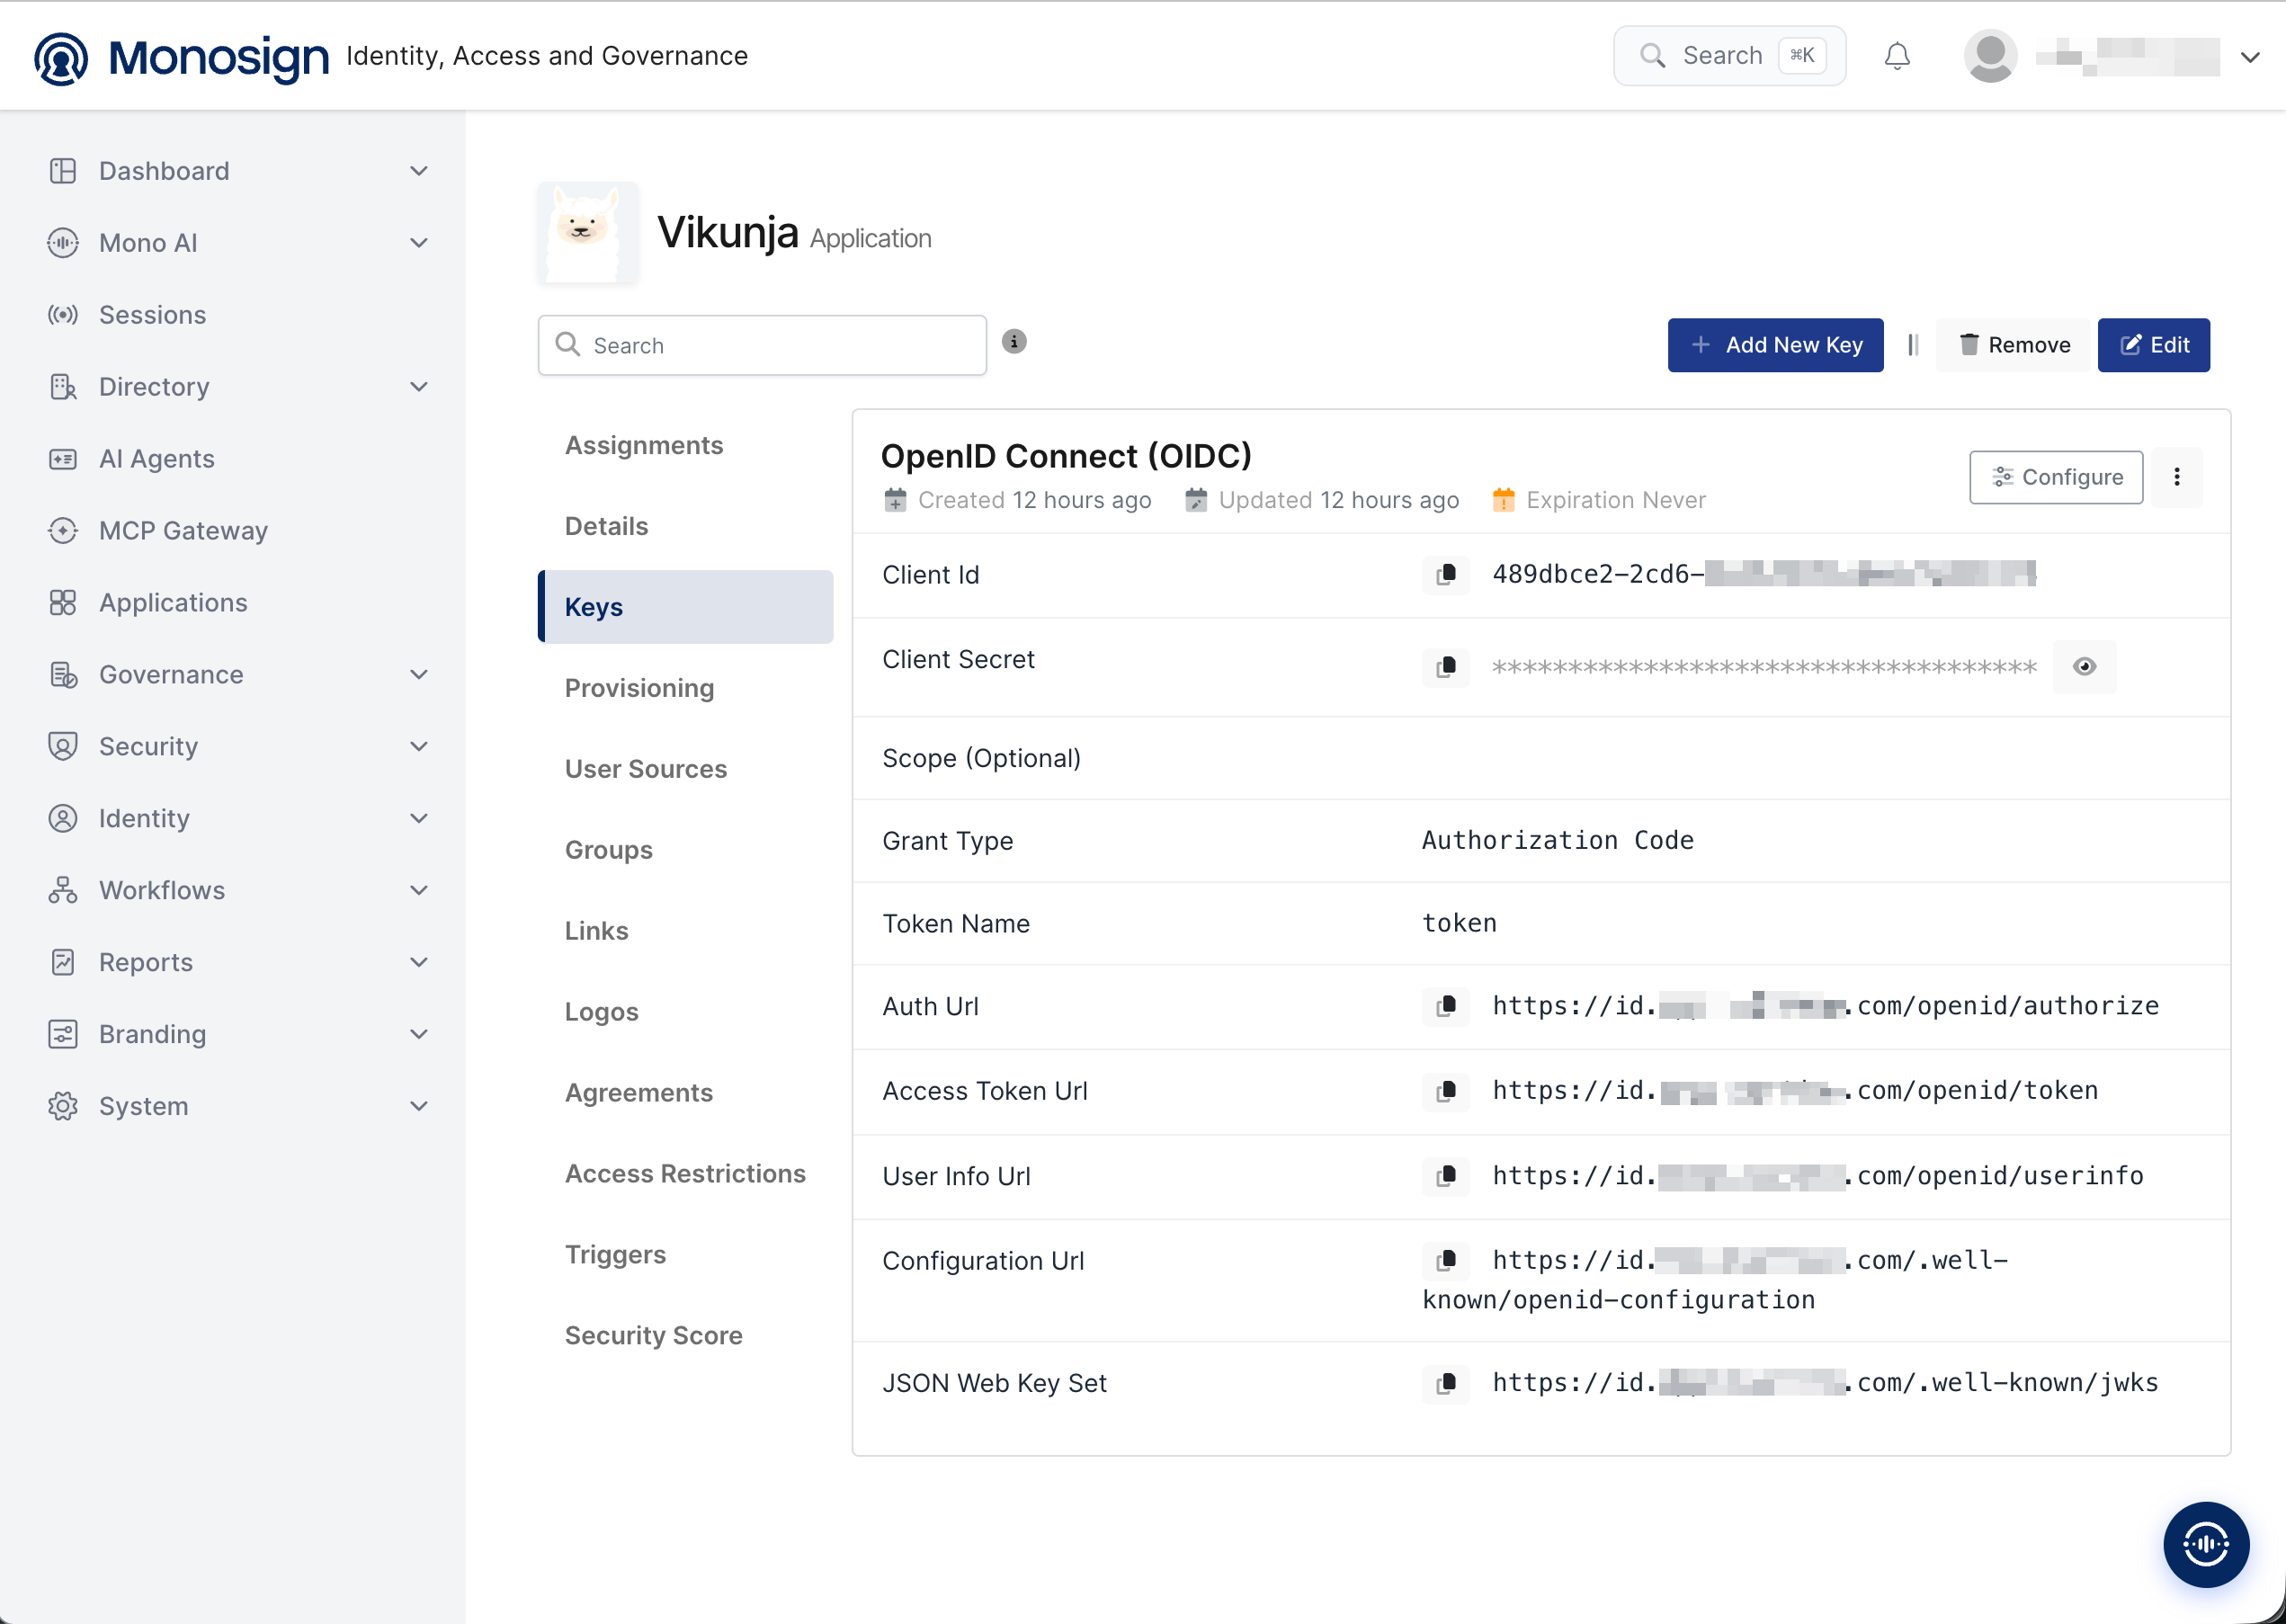
After saving, MonoSign will display a Client ID and Client Secret for the application, along with its Auth URL (issuer). You will need these in the next step.
Step 2: Configure Vikunja for OpenID Connect
Add the following environment variables to the Vikunja service definition (e.g. docker-compose.yml):
environment:
  VIKUNJA_SERVICE_PUBLICURL: "https://vikunja.yourdomain.com/"
  VIKUNJA_AUTH_OPENID_ENABLED: "true"
  VIKUNJA_AUTH_OPENID_PROVIDERS_MONOSIGN_NAME: "MonoSign"
  VIKUNJA_AUTH_OPENID_PROVIDERS_MONOSIGN_AUTHURL: "https://id.yourmonosign.com/"
  VIKUNJA_AUTH_OPENID_PROVIDERS_MONOSIGN_CLIENTID: "{CLIENT_ID}"
  VIKUNJA_AUTH_OPENID_PROVIDERS_MONOSIGN_CLIENTSECRET: "{CLIENT_SECRET}"
  VIKUNJA_AUTH_OPENID_PROVIDERS_MONOSIGN_SCOPE: "openid profile email"
|
Variable |
Description |
|---|---|
|
|
Label shown on the login button (e.g. “Login with MonoSign”) |
|
|
Becomes the lowercase |
|
|
Your MonoSign issuer / auth URL from Step 1 |
|
|
Credentials issued by MonoSign in Step 1 |
Treat the client secret like any other credential: store it in a secrets manager or restricted environment file rather than committing it to version control.
Step 3: Restart and Verify
Recreate the container to apply the new configuration:
docker compose up -d
Confirm the provider is registered by checking Vikunja's public info endpoint:
curl -s https://vikunja.example.com/api/v1/info | python3 -m json.tool
The response should include your provider under auth.openid_connect.providers:
"openid_connect": {
    "enabled": true,
    "providers": [
        {
            "name": "MonoSign",
            "key": "monosign",
            "auth_url": "https://{your-monosign-domain}/openid/authorize",
            "client_id": "{CLIENT_ID}",
            "scope": "openid profile email"
        }
    ]
}
Step 4: Test the Sign-In Flow
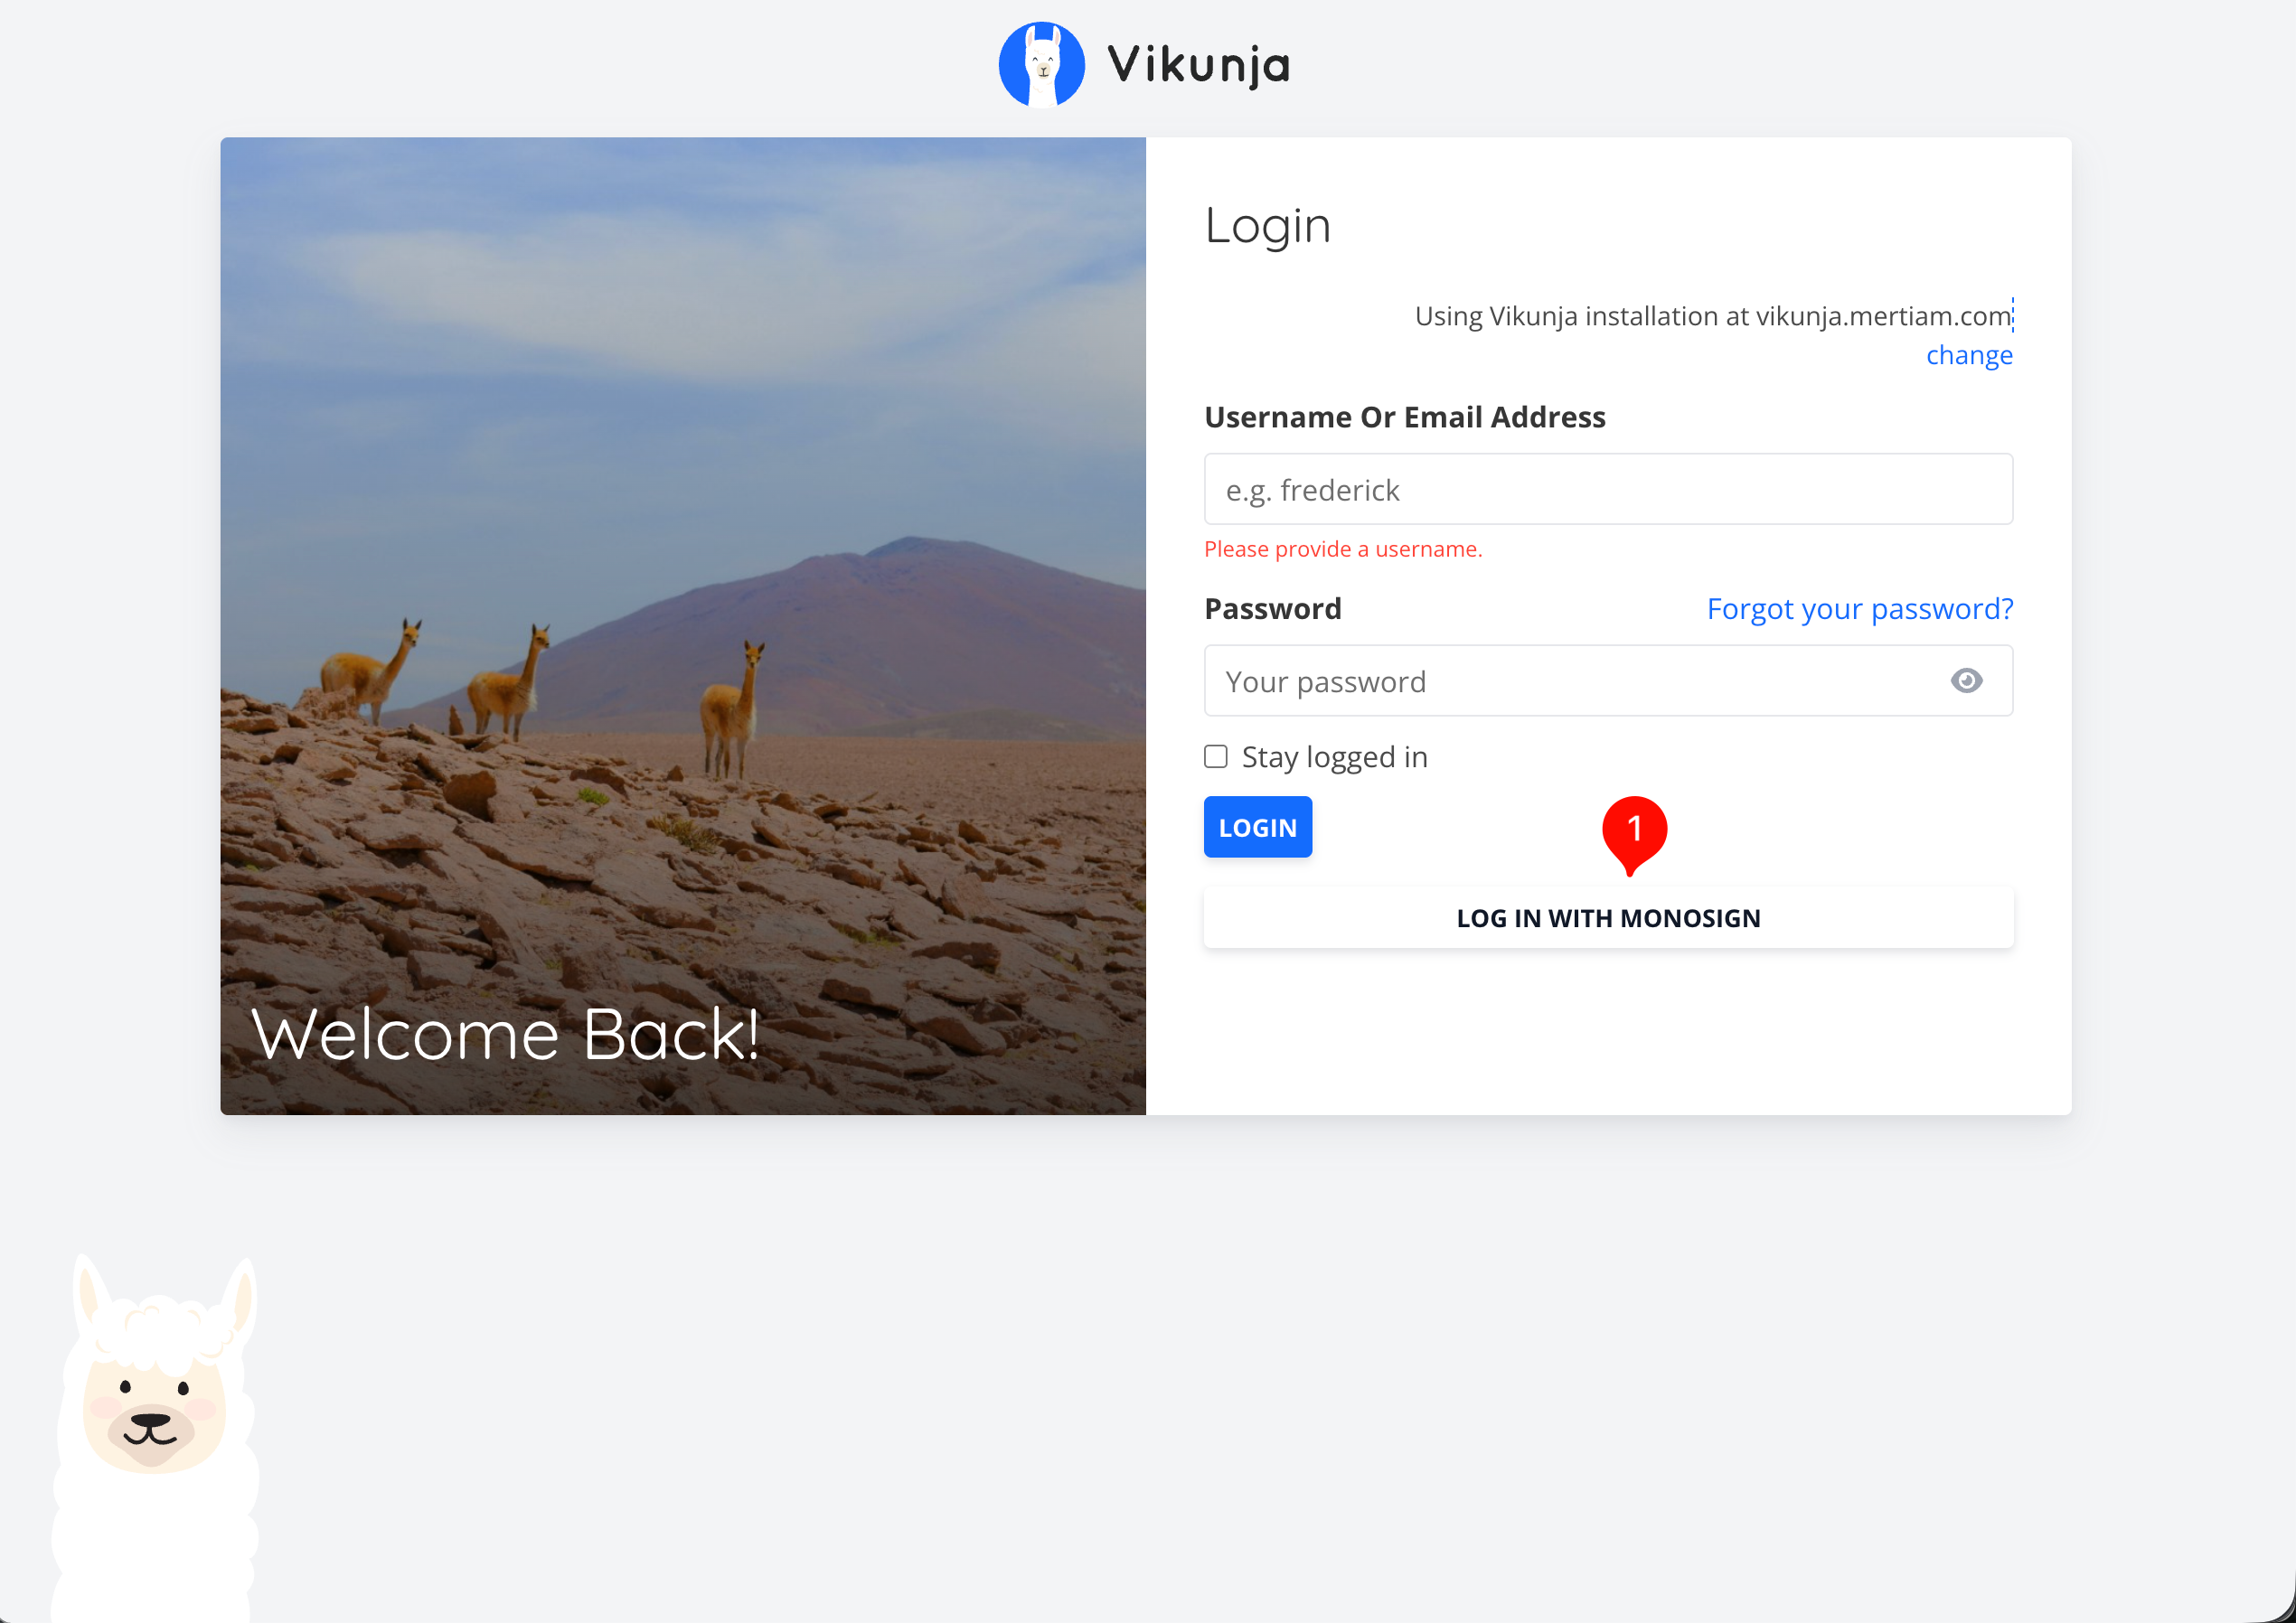
Navigate to your Vikunja instance. A “Login with MonoSign” button should appear below the standard username/password form. Selecting it redirects to the MonoSign login page; upon successful authentication, MonoSign redirects back to {VIKUNJA_PUBLIC_URL}/auth/openid/{provider-key} with an authorization code, and Vikunja completes the sign-in automatically.
Optional: Disable Self-Registration
To prevent new users from self-registering through the local login form — while still allowing existing users to sign in with a username and password as a fallback — set:
VIKUNJA_SERVICE_ENABLEREGISTRATION: "false"
Verify the change via the info endpoint:
"local": { "enabled": true, "registration_enabled": false }
Do not disable local login entirely while the issue above is unresolved; doing so risks locking all users out if the OIDC button fails at the moment someone needs to sign in.