This document explains how to implement MonoSign with Rocket.Chat. It covers Single Sign-On (SSO) via the SAML 2.0 protocol. Before you continue, it is recommended to review Rocket.Chat's official SSO documentation.
Note: Monofor is not responsible for Rocket.Chat-side configurations. For Rocket.Chat-specific support, please contact Rocket.Chat Support Services.
📑 Instructions
This documentation contains 4 main steps for integration.
-
Creating an Application on MonoSign
-
Configuring SAML SSO on Rocket.Chat
-
Assigning a User to the Rocket.Chat Application
-
Sign-In Test
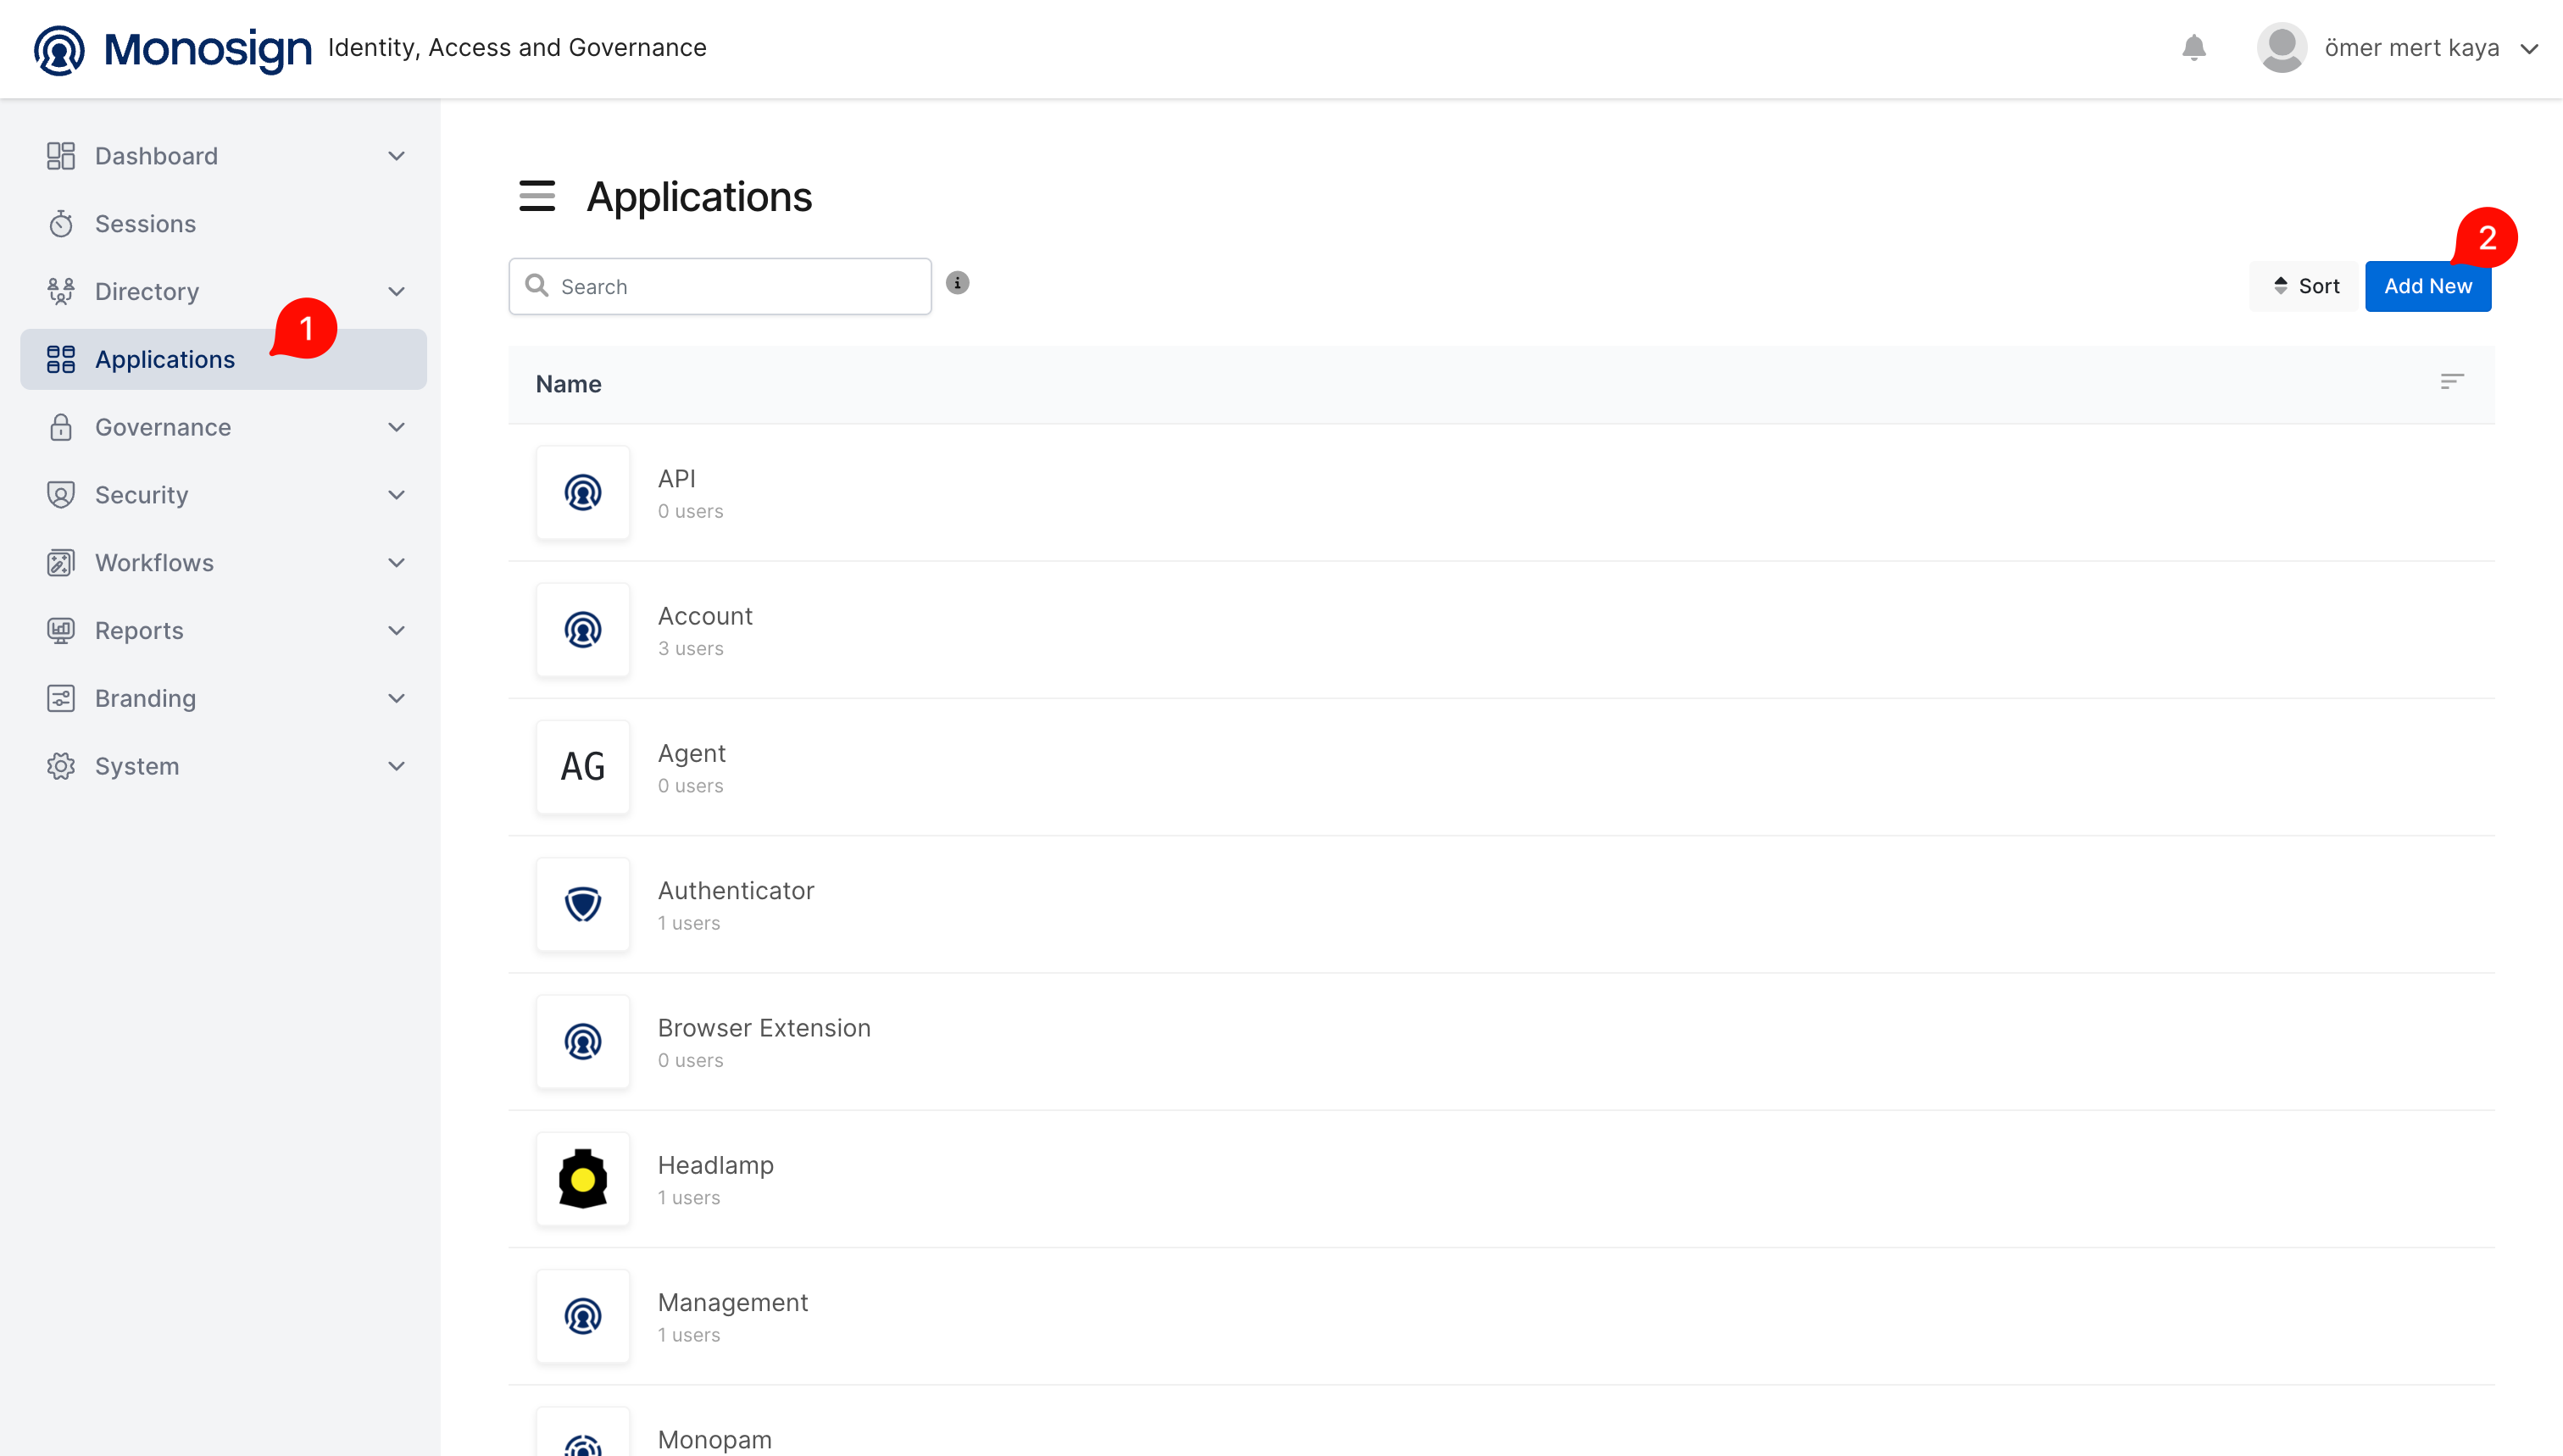
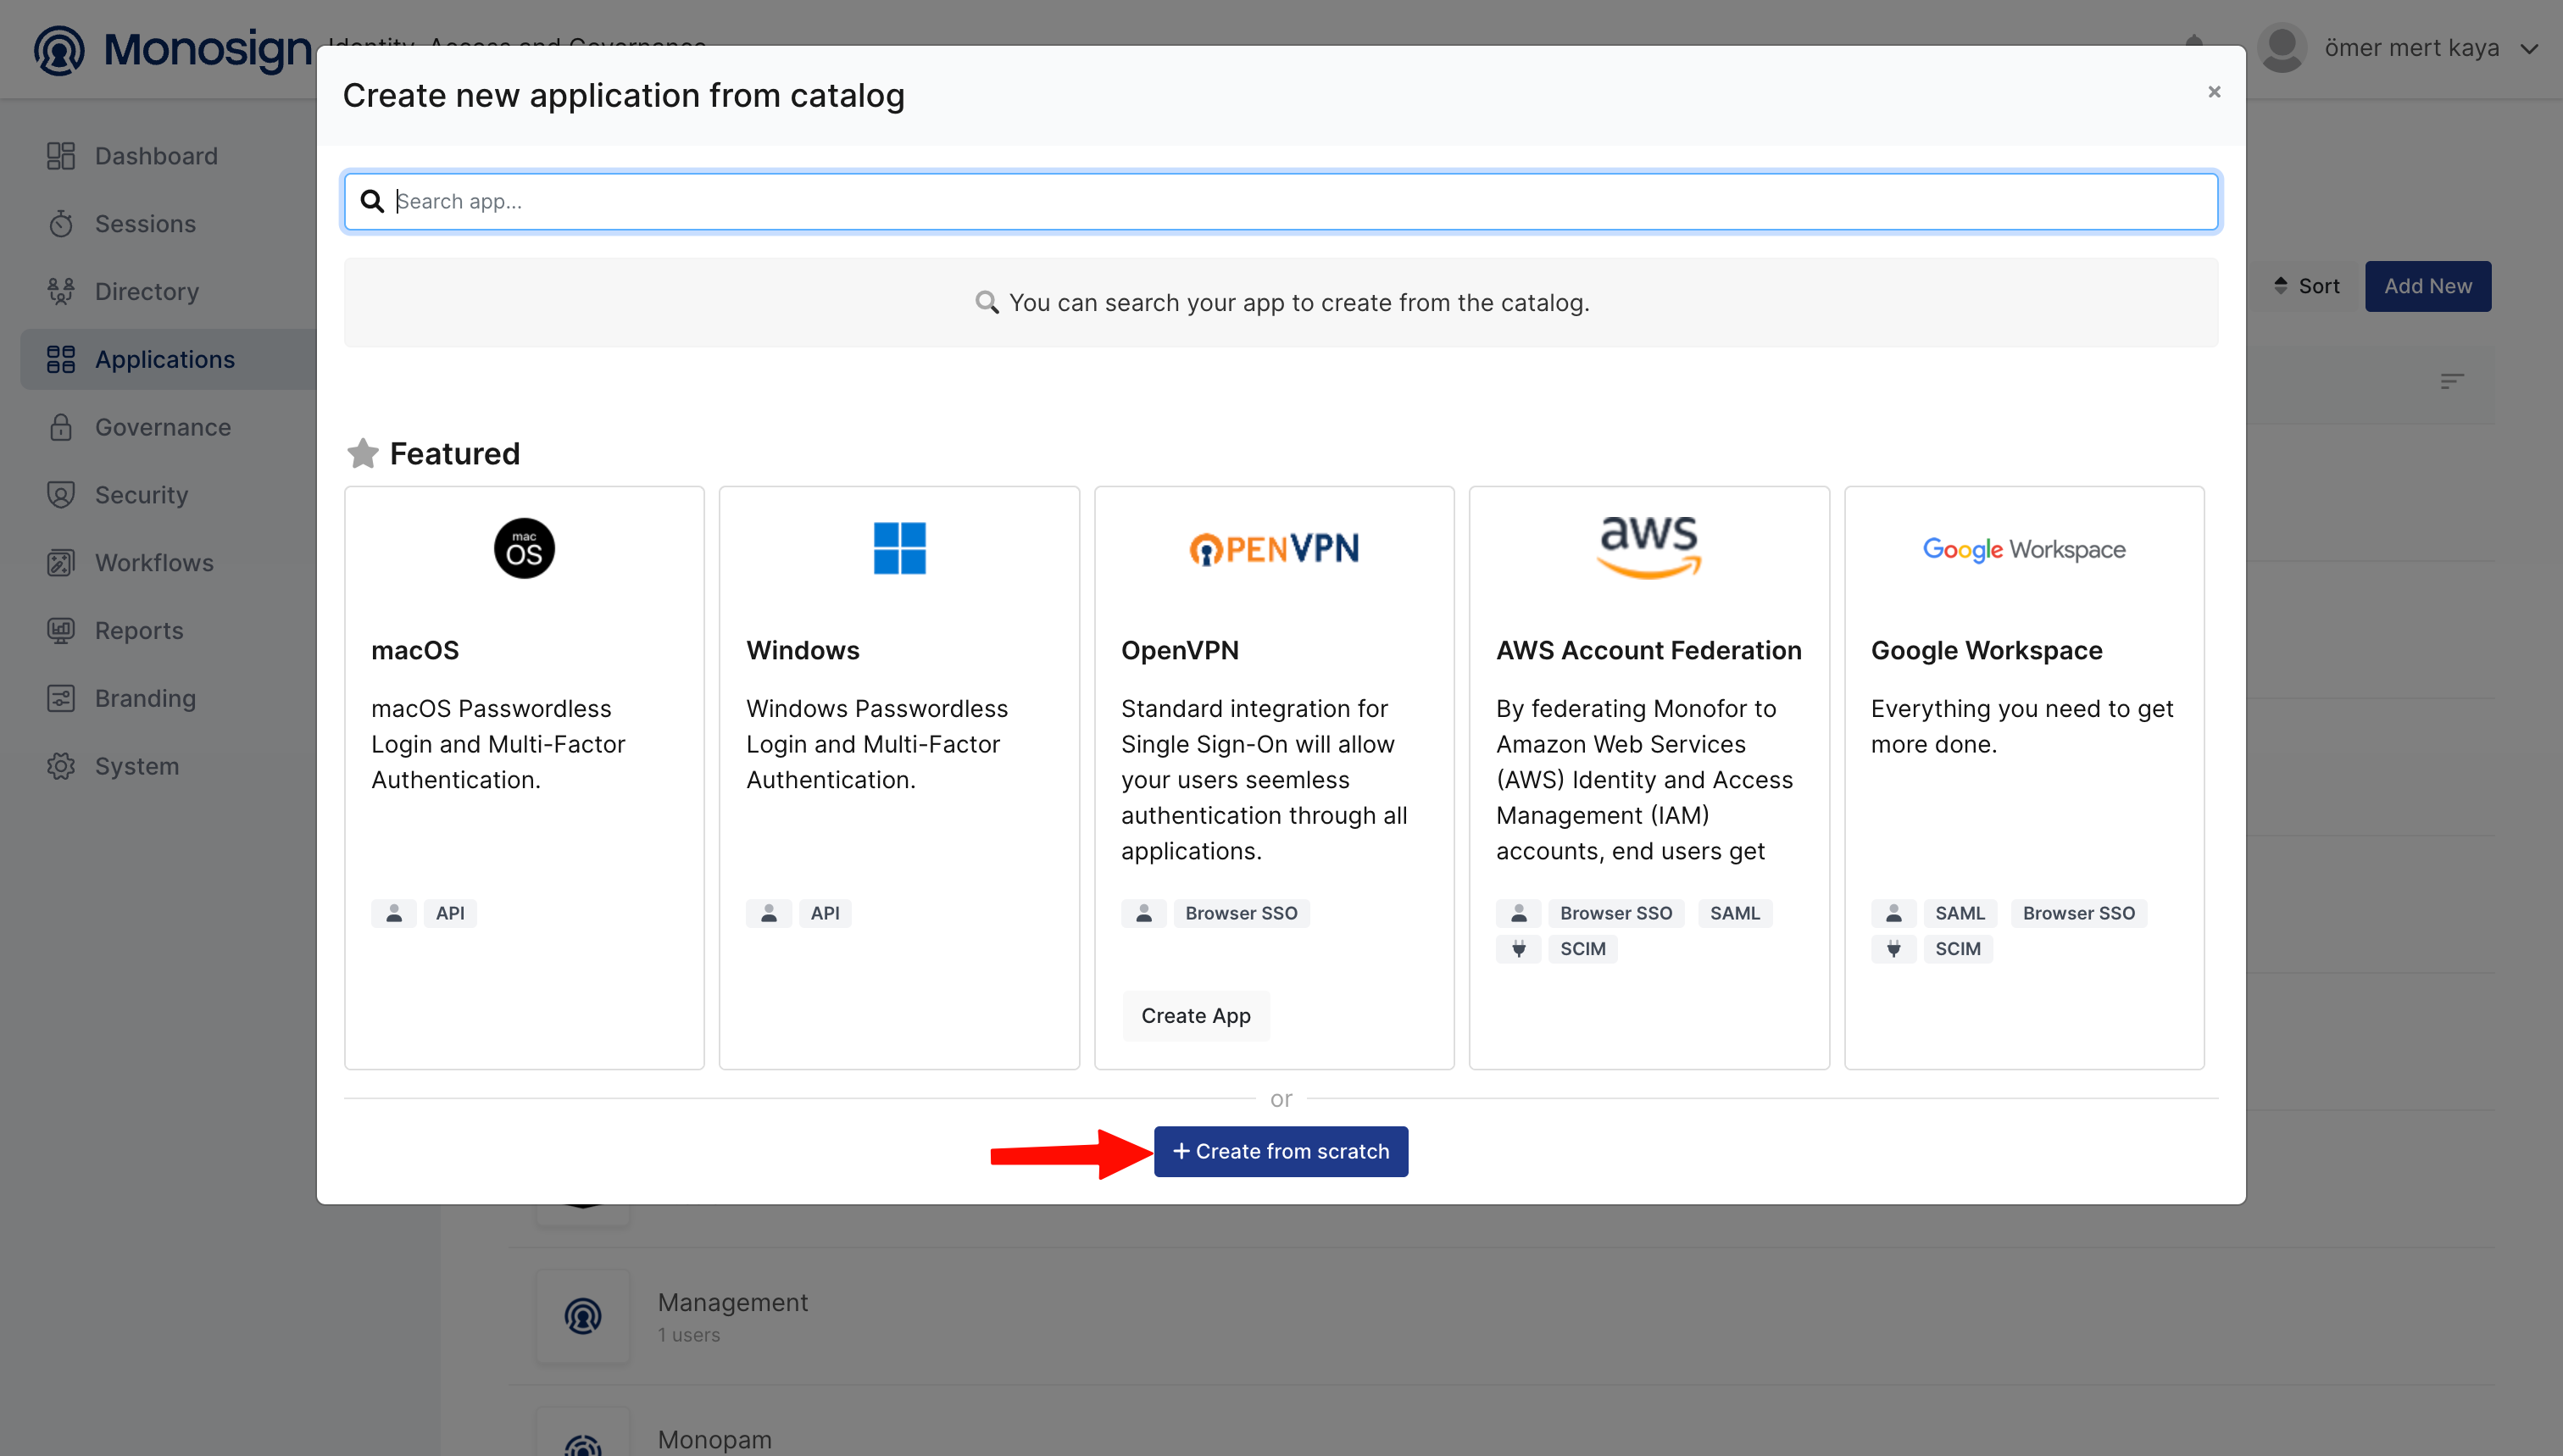
1 — Creating an Application on MonoSign
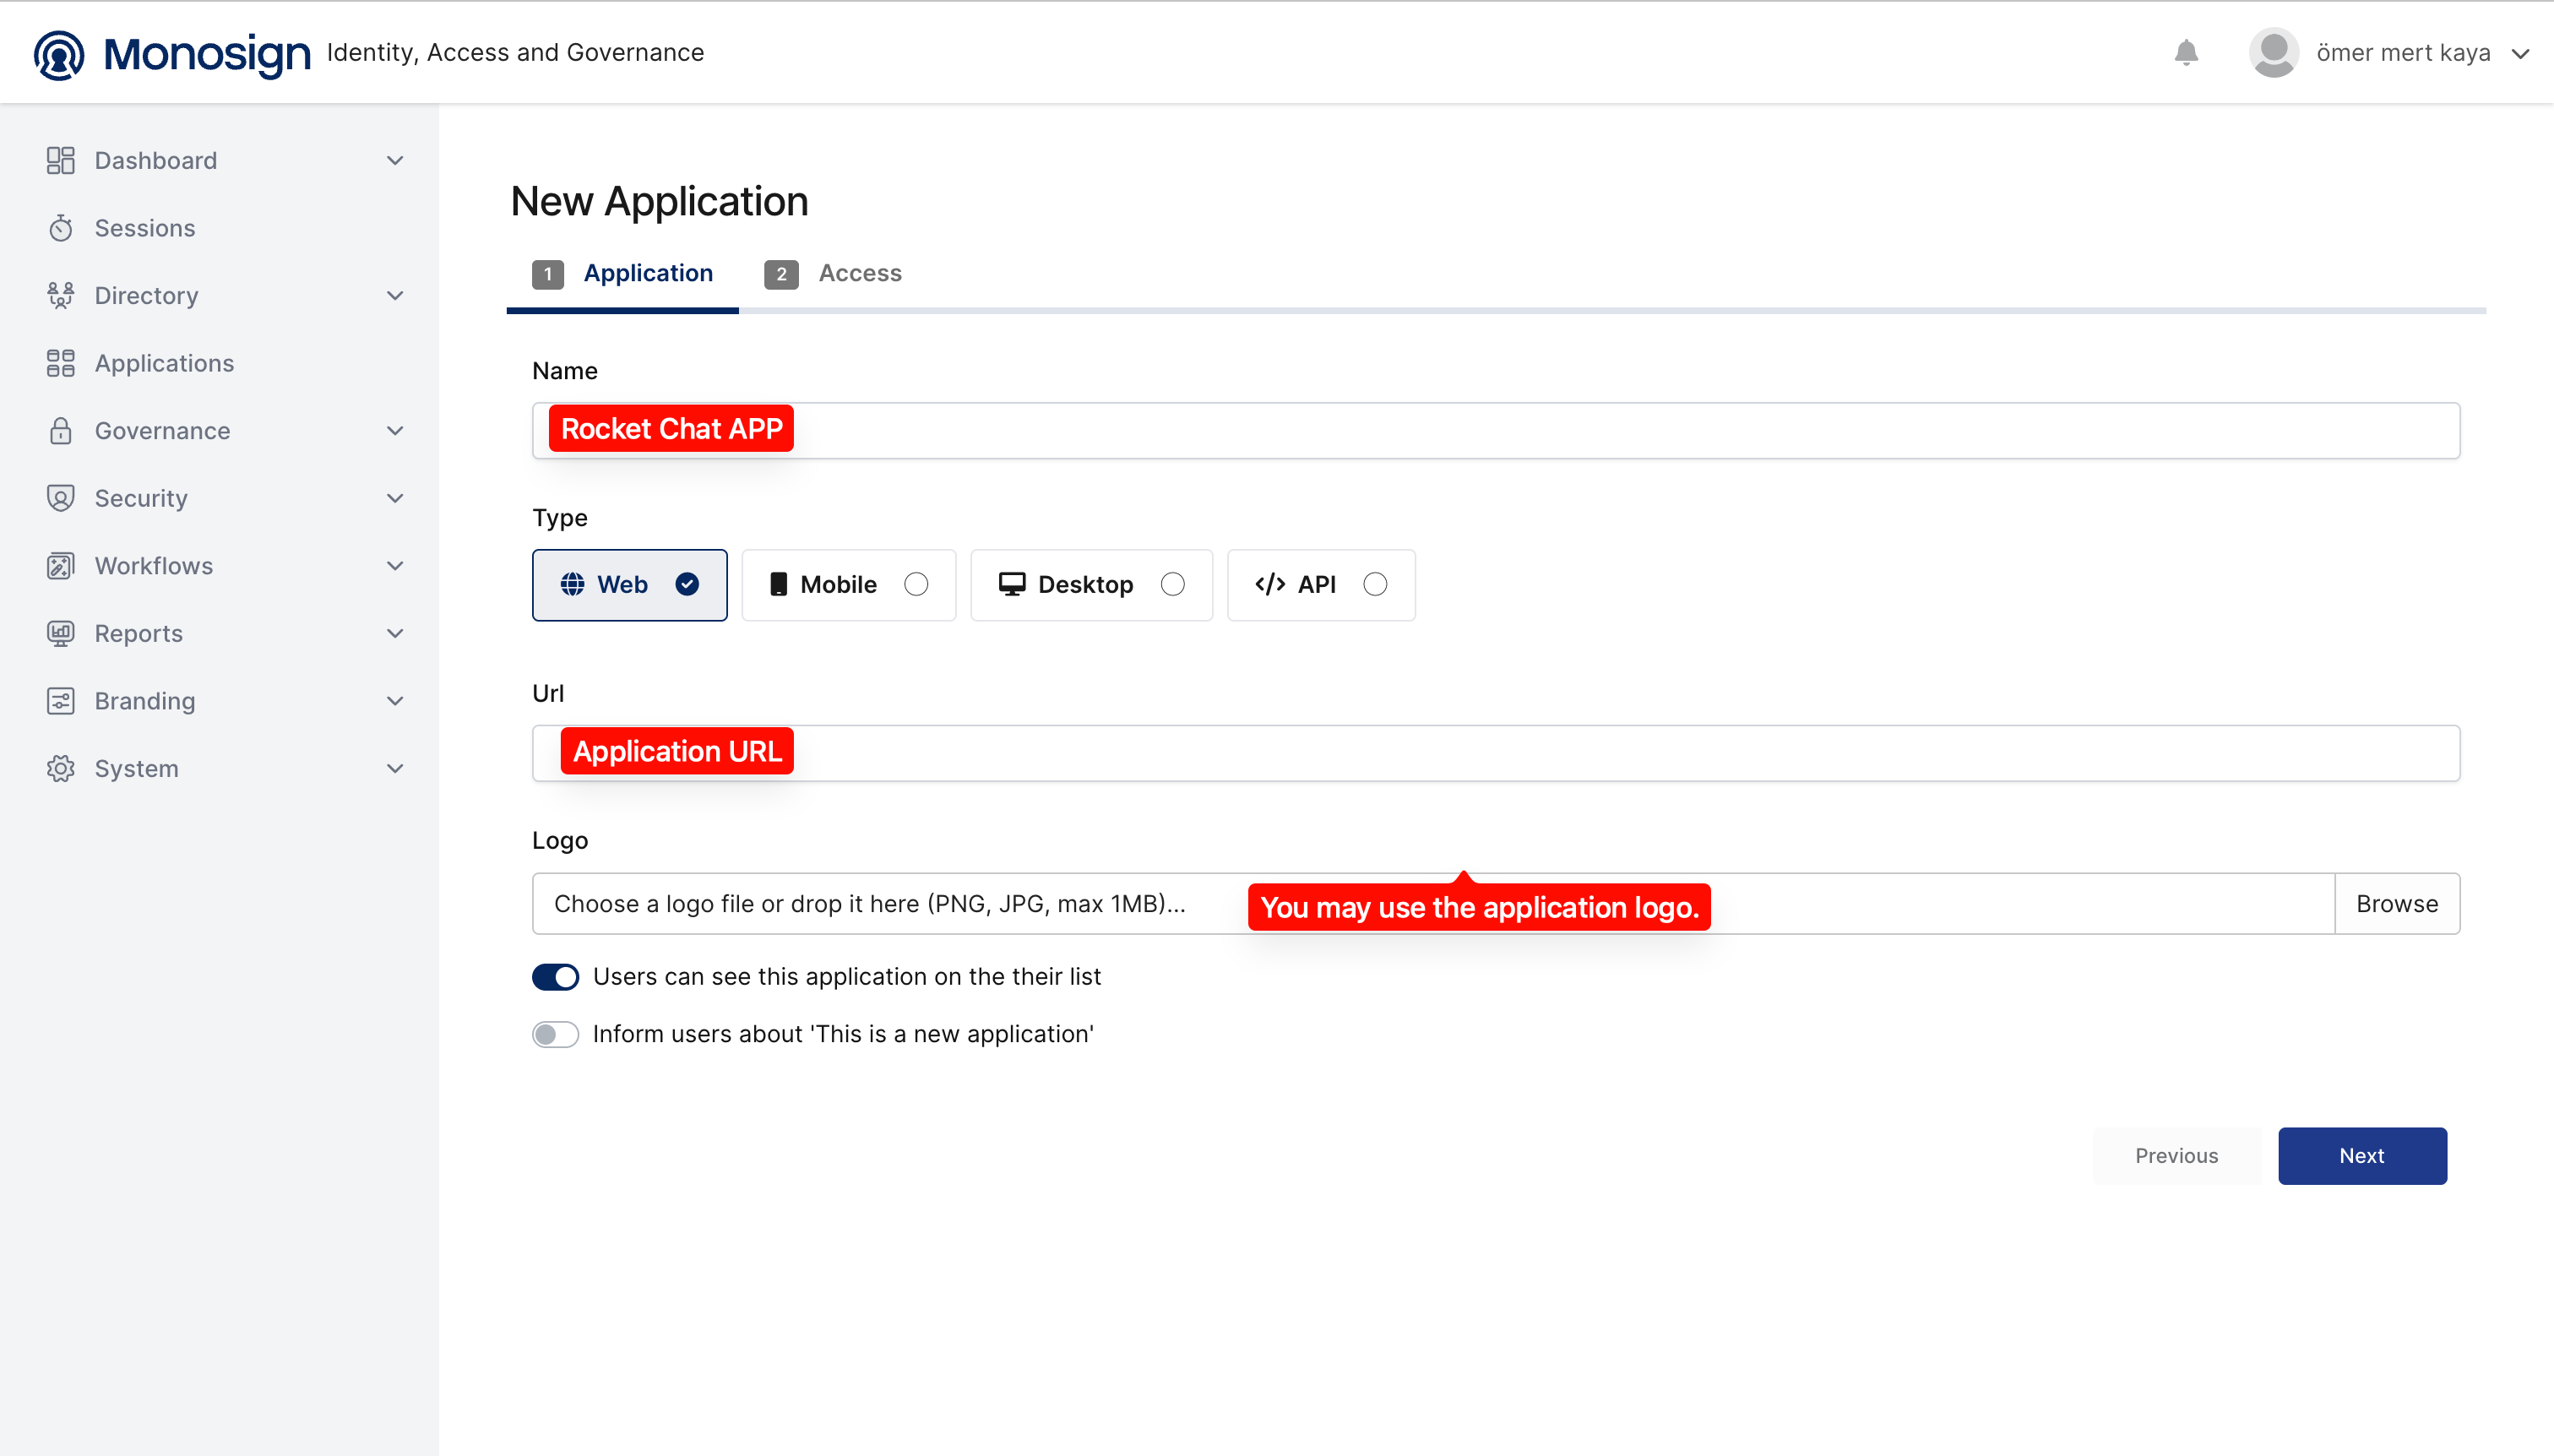
Create the application on MonoSign and configure your access policy. While creating the application, click the Access tab and configure the settings based on your use case.
|
Property |
Description |
Options |
|---|---|---|
|
User Access Type |
Defines which users can access the application. |
Only Assigned Users / All Users |
|
User Group Access Type |
Defines user group access for the application. |
Only Assigned Users / Assigned Users and Defined Sources / All Users |
|
Profile Access Type |
Defines user profile attribute visibility. |
Restricted – Only restricted attributes / All – All profile attributes |
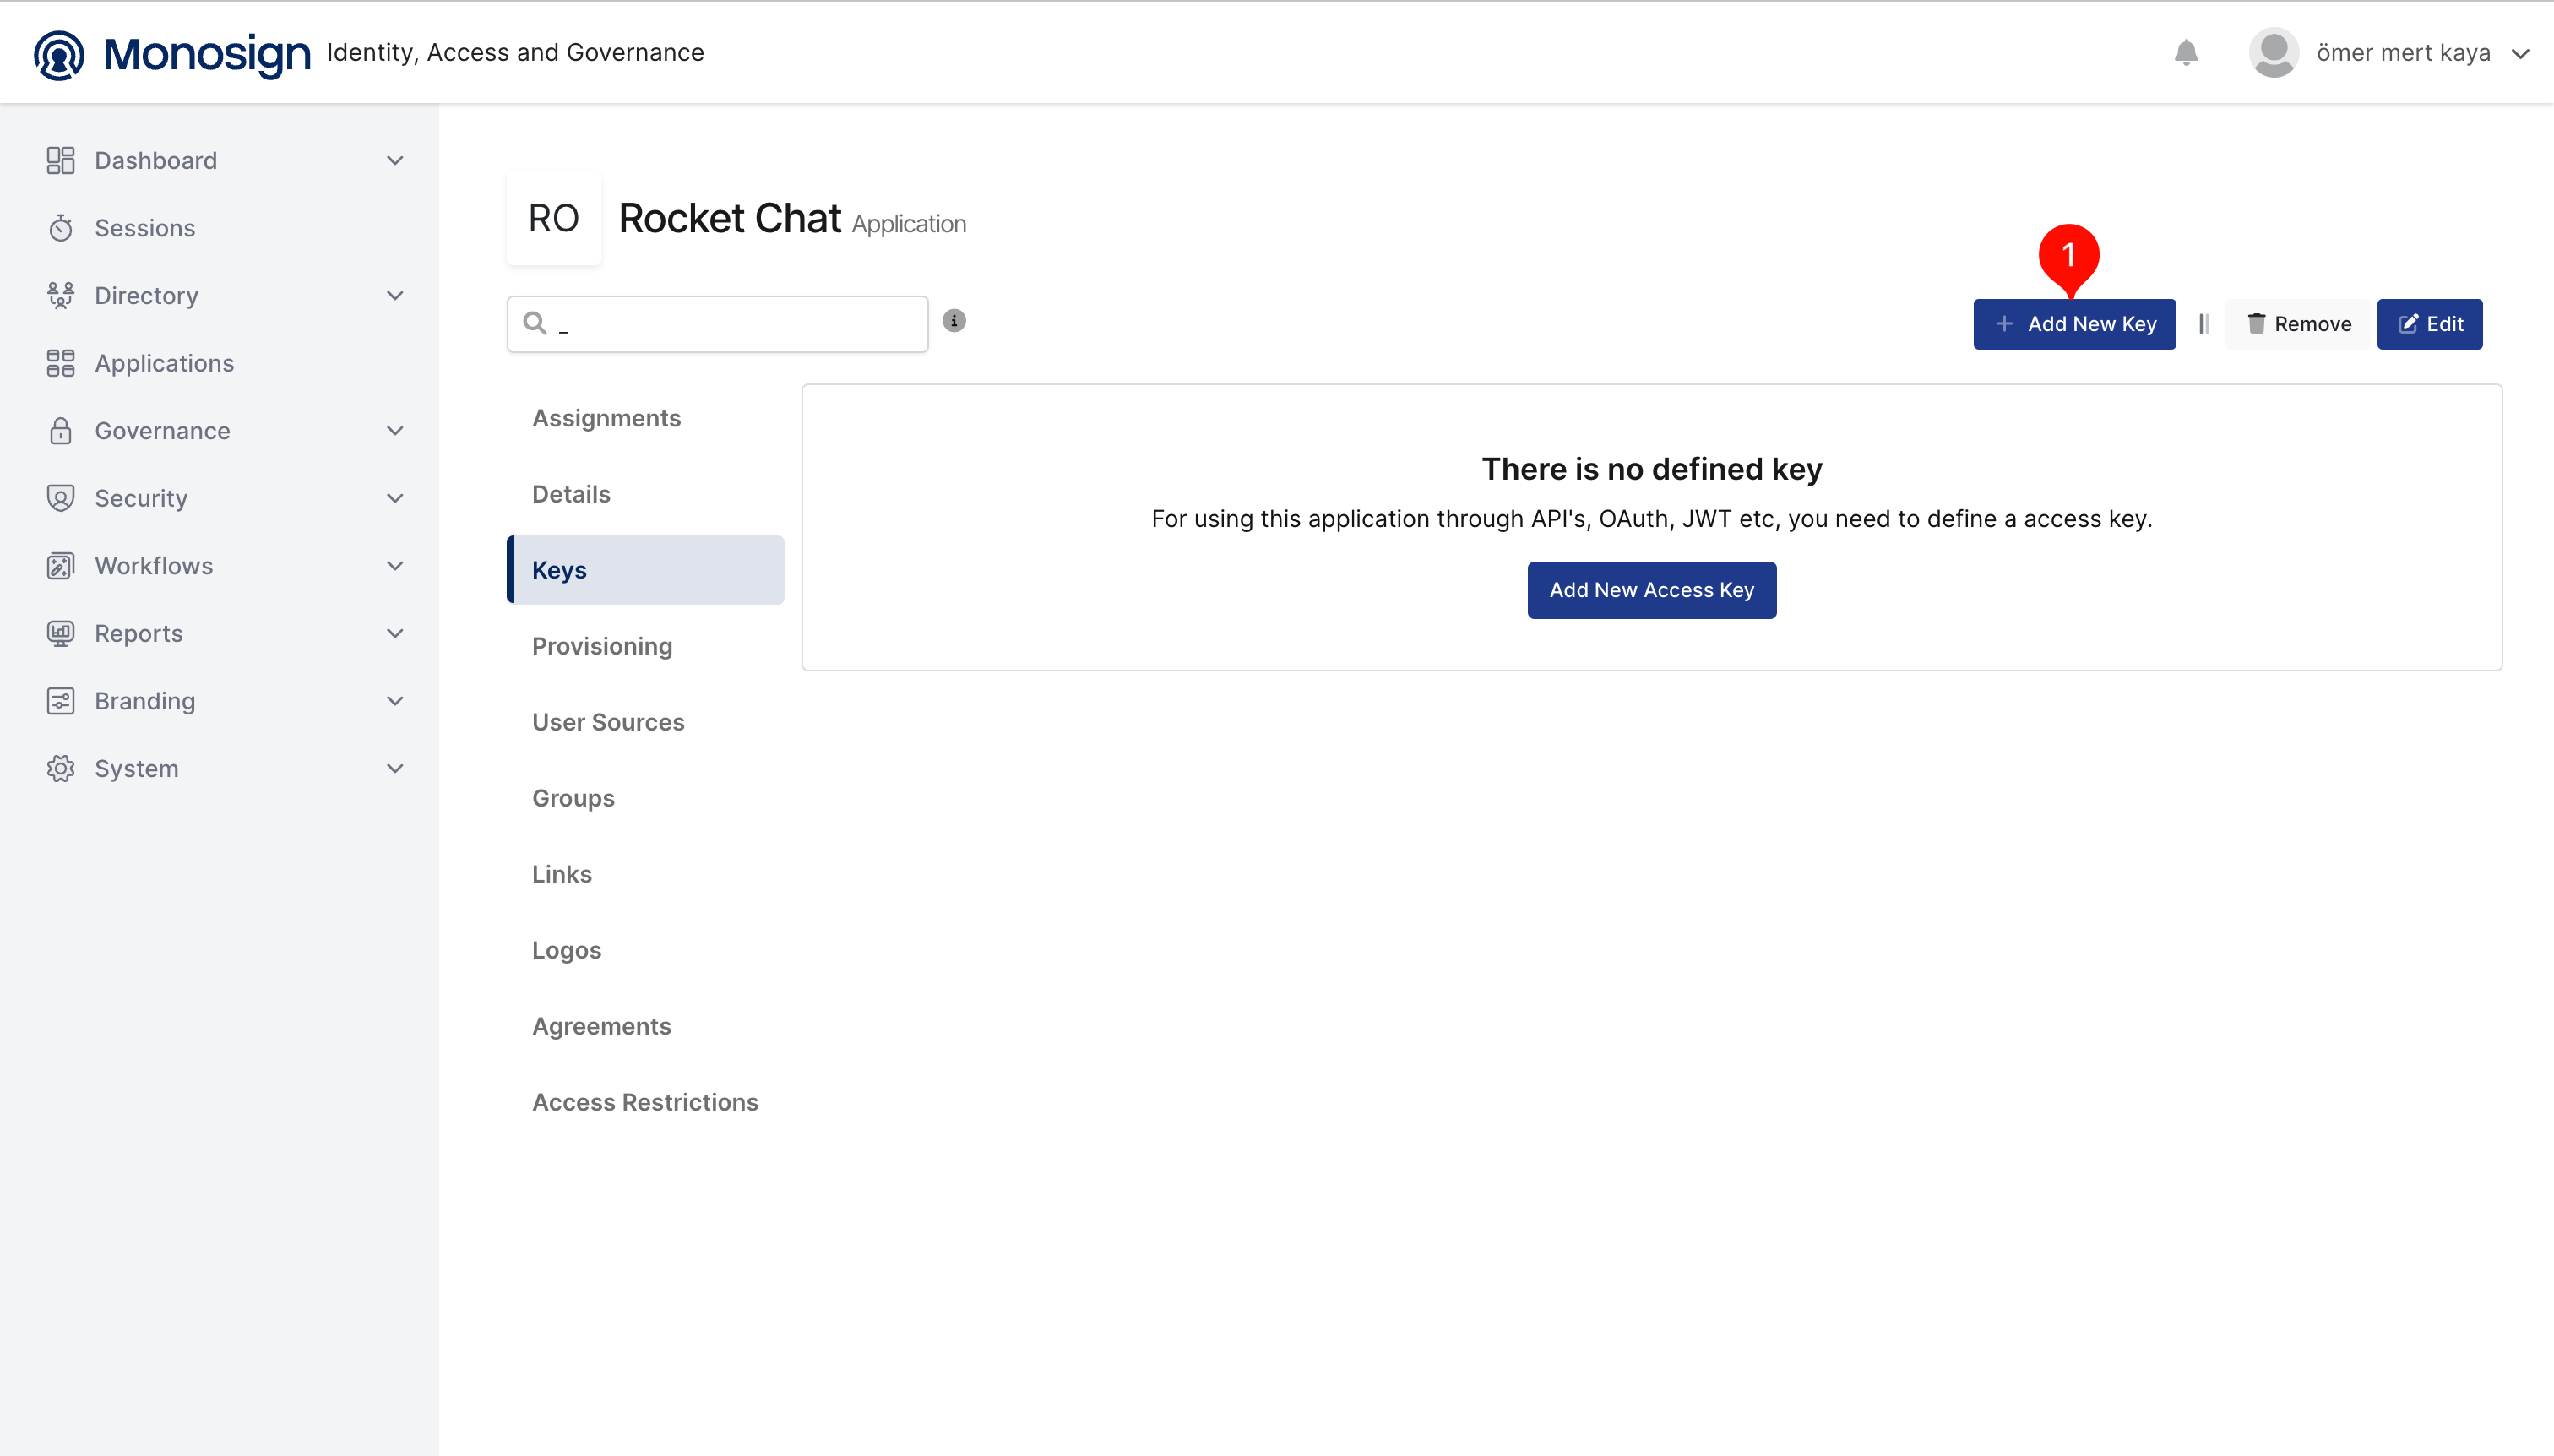
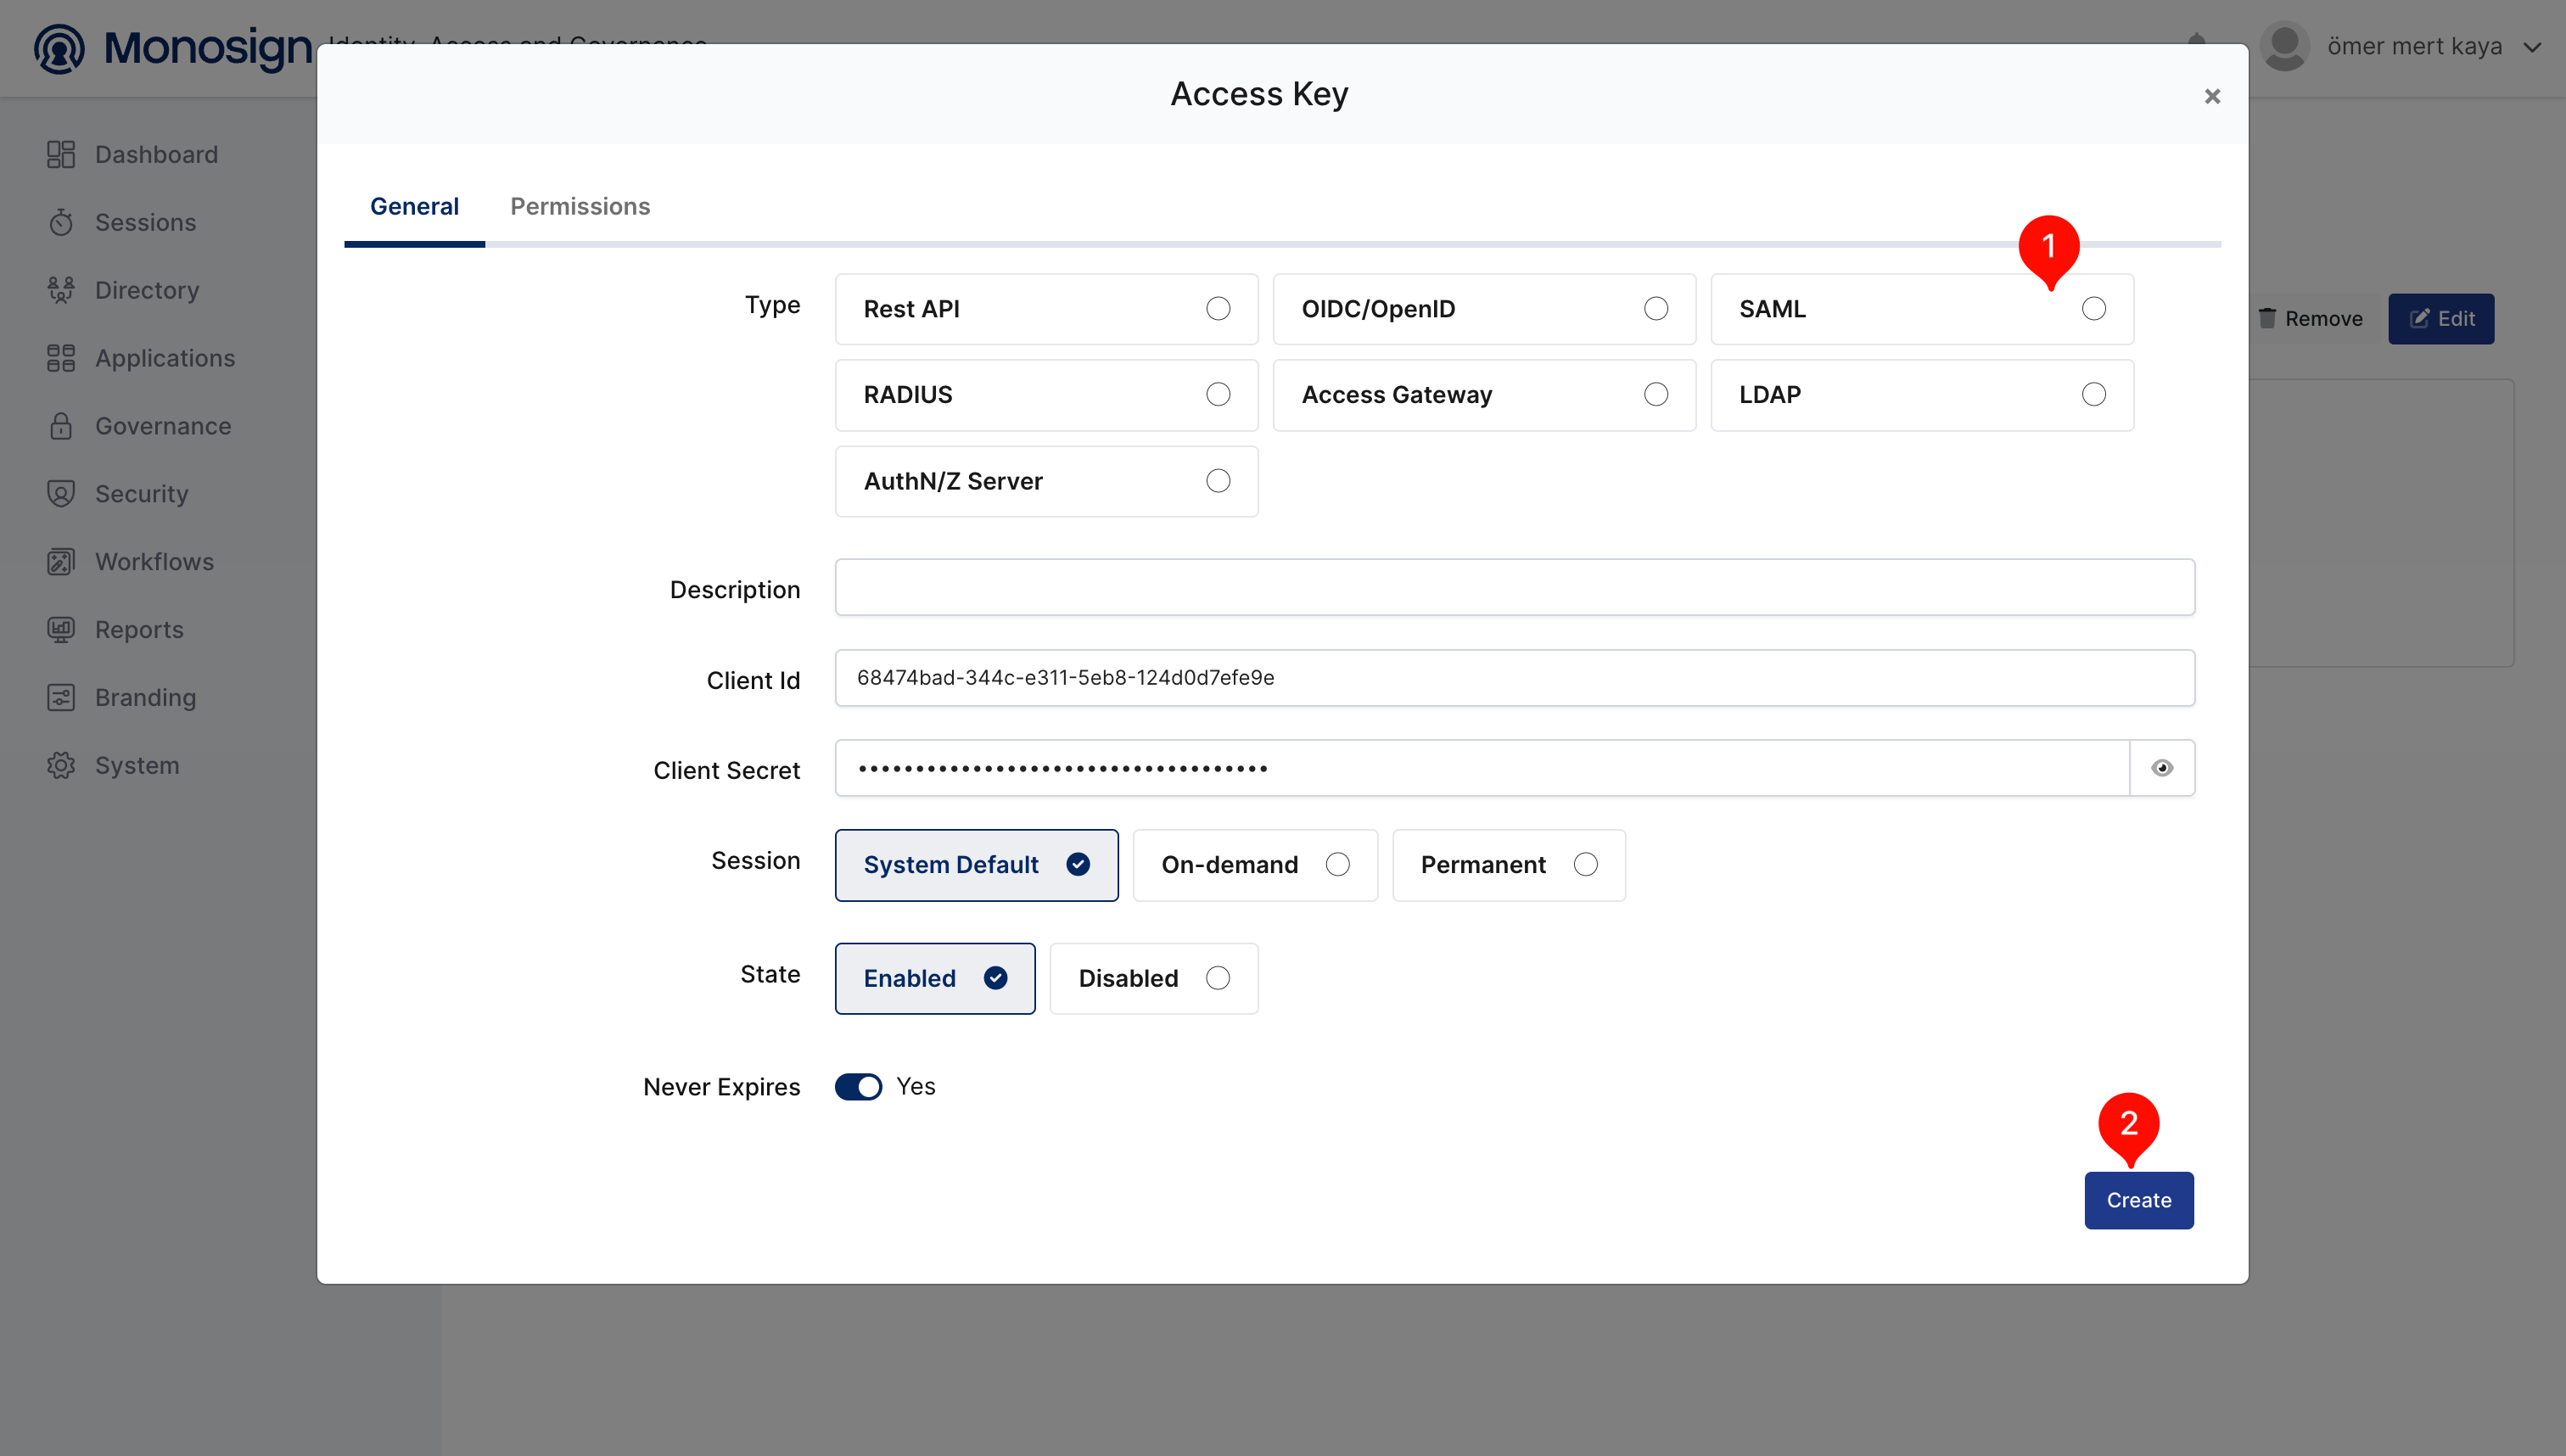
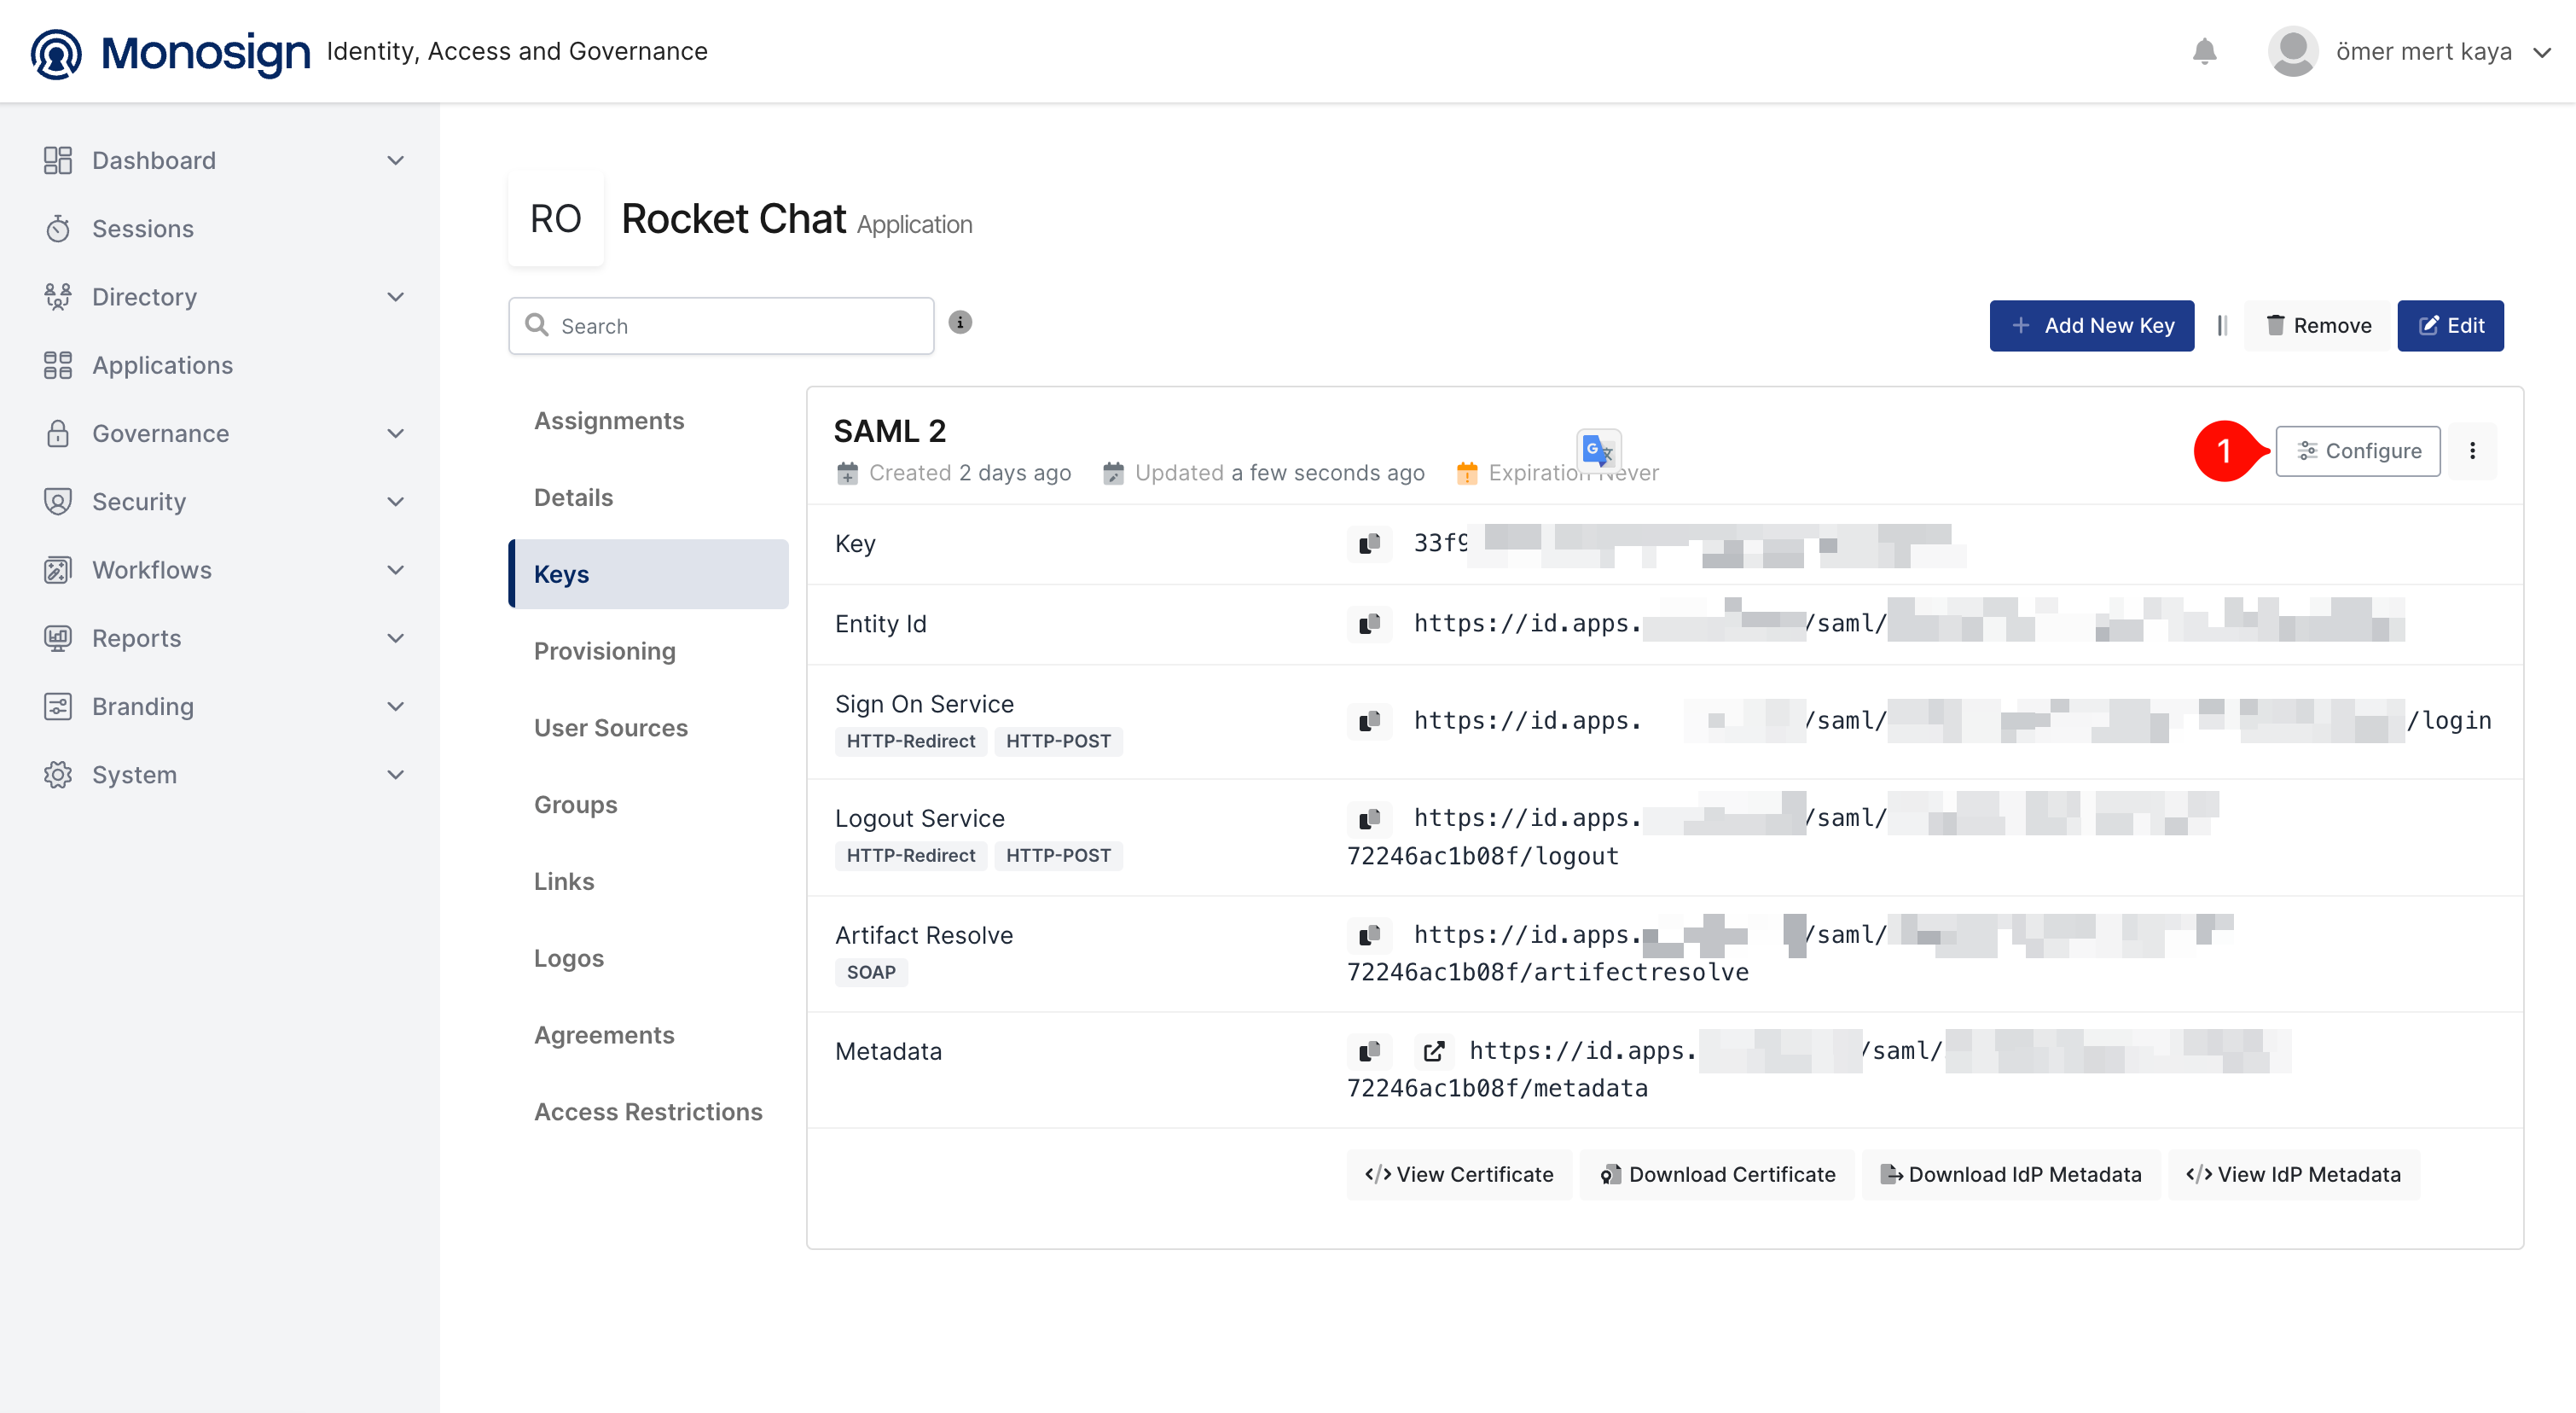
Once the application is created, click Keys and add a new Access Key. Select SAML as the Key Type.
Note: The SAML key values generated in this step will be required when configuring Rocket.Chat in Step 2.
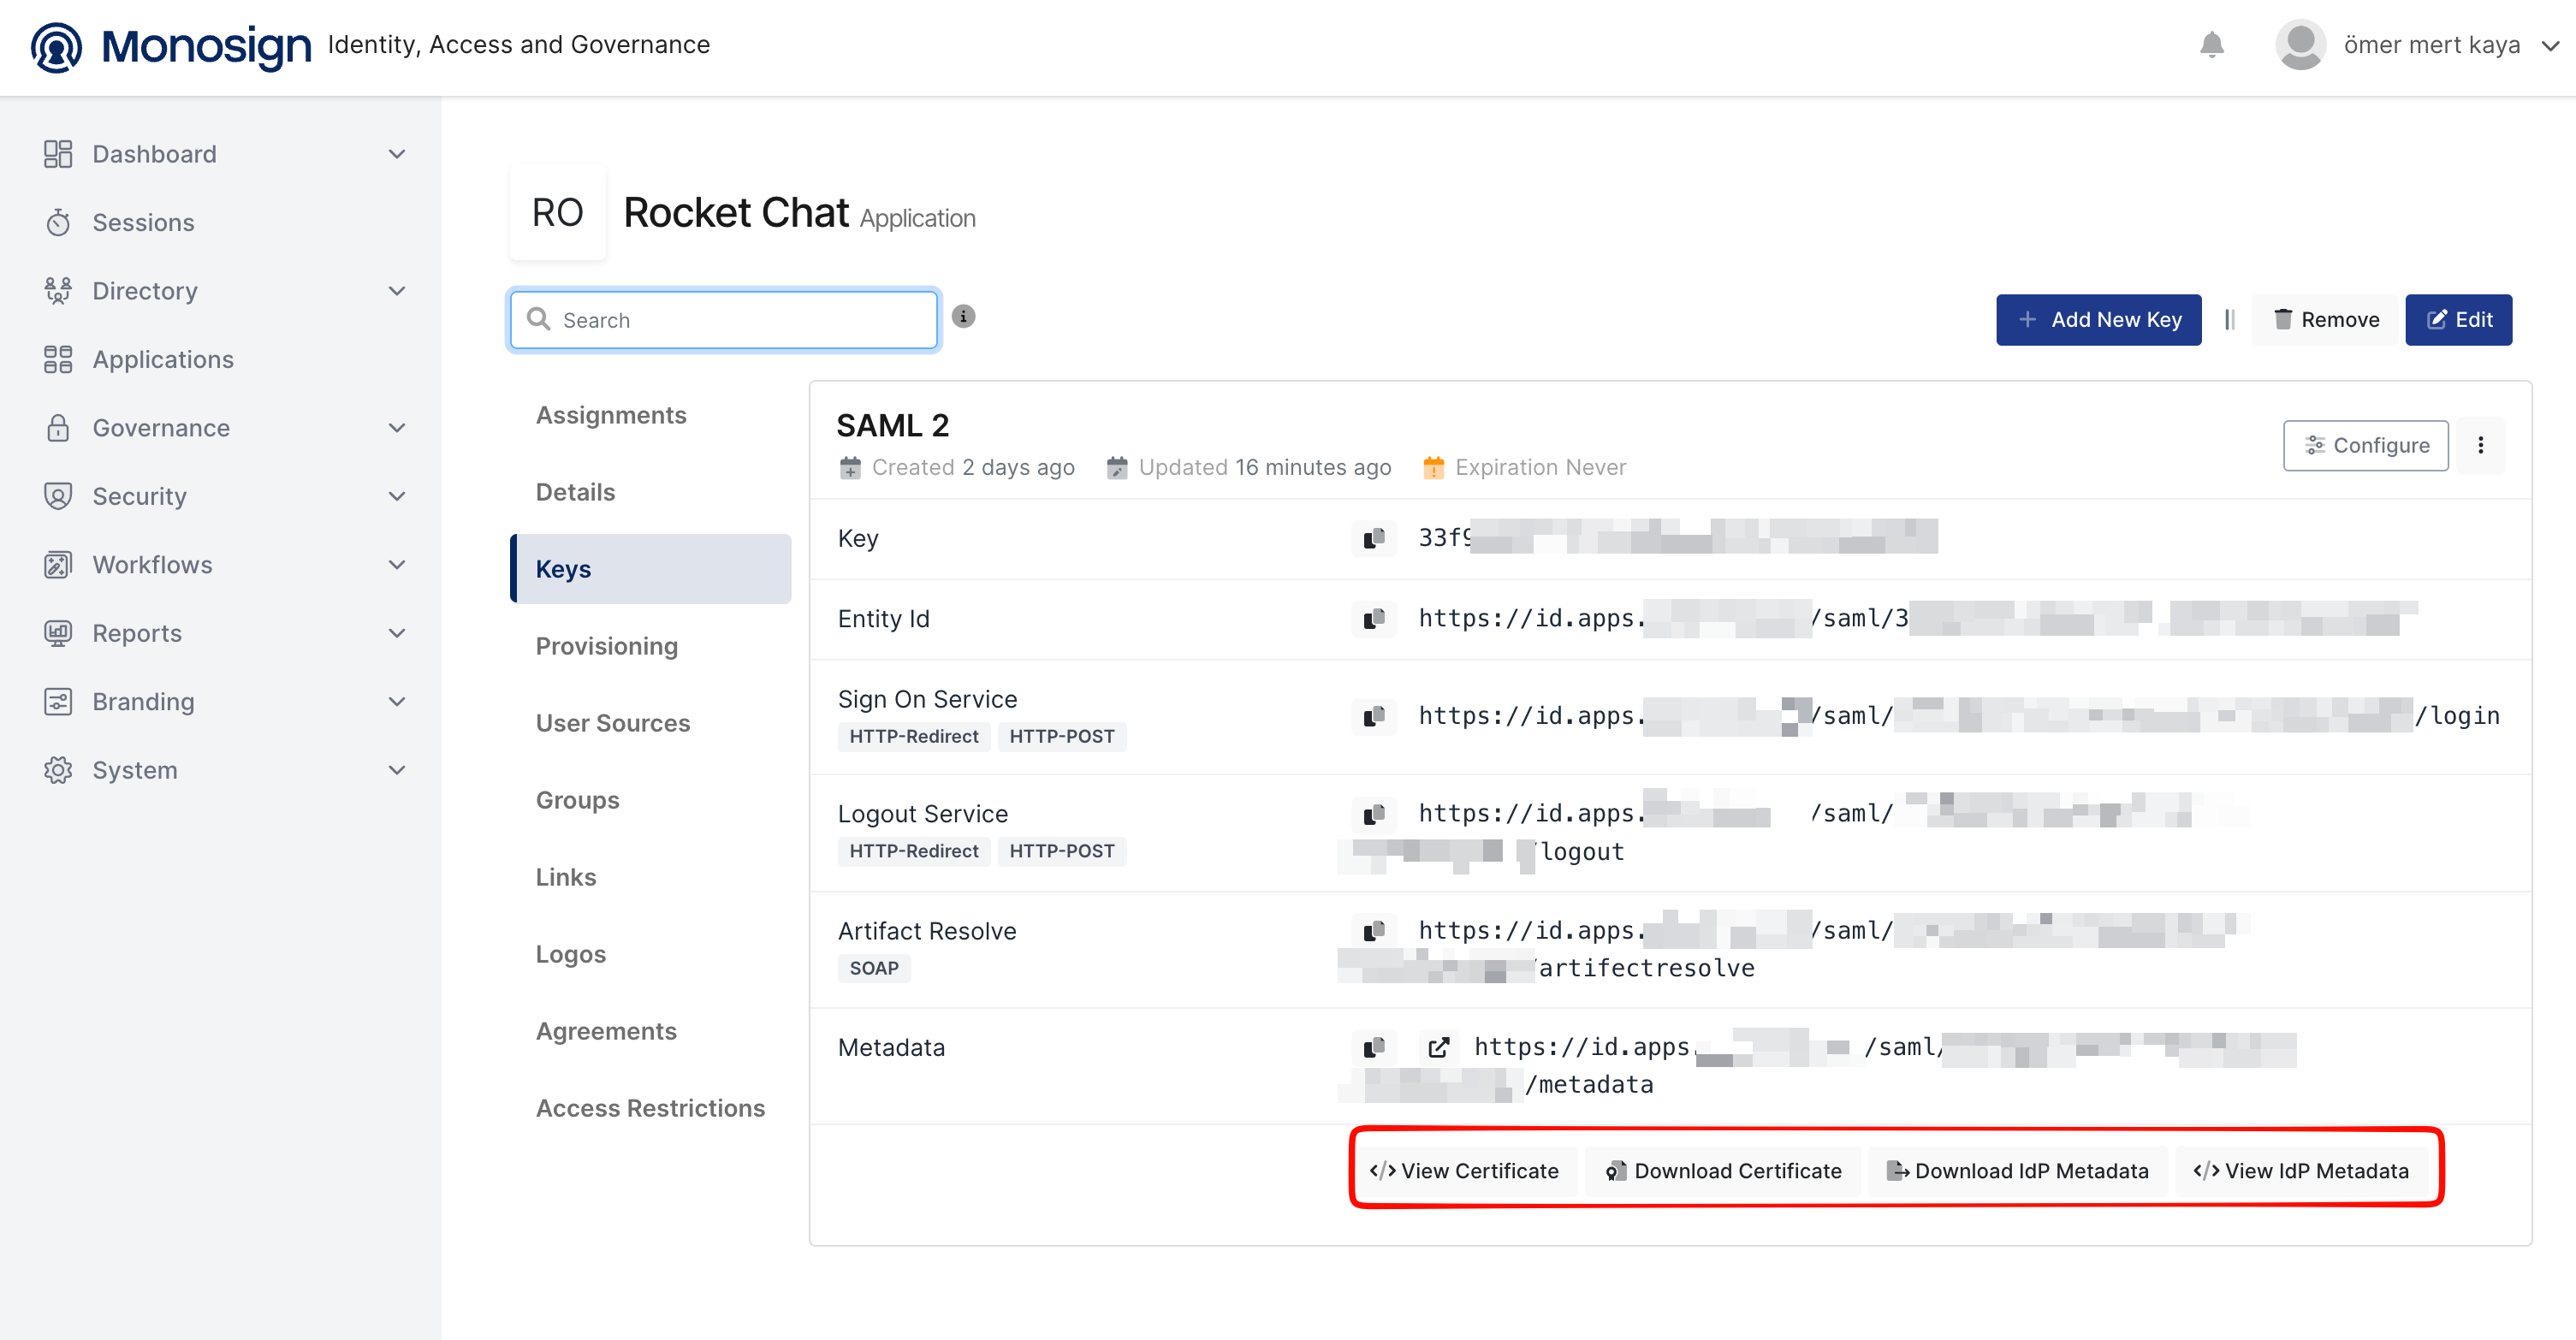
We’re going to use view certificate for saml x509 certificate.
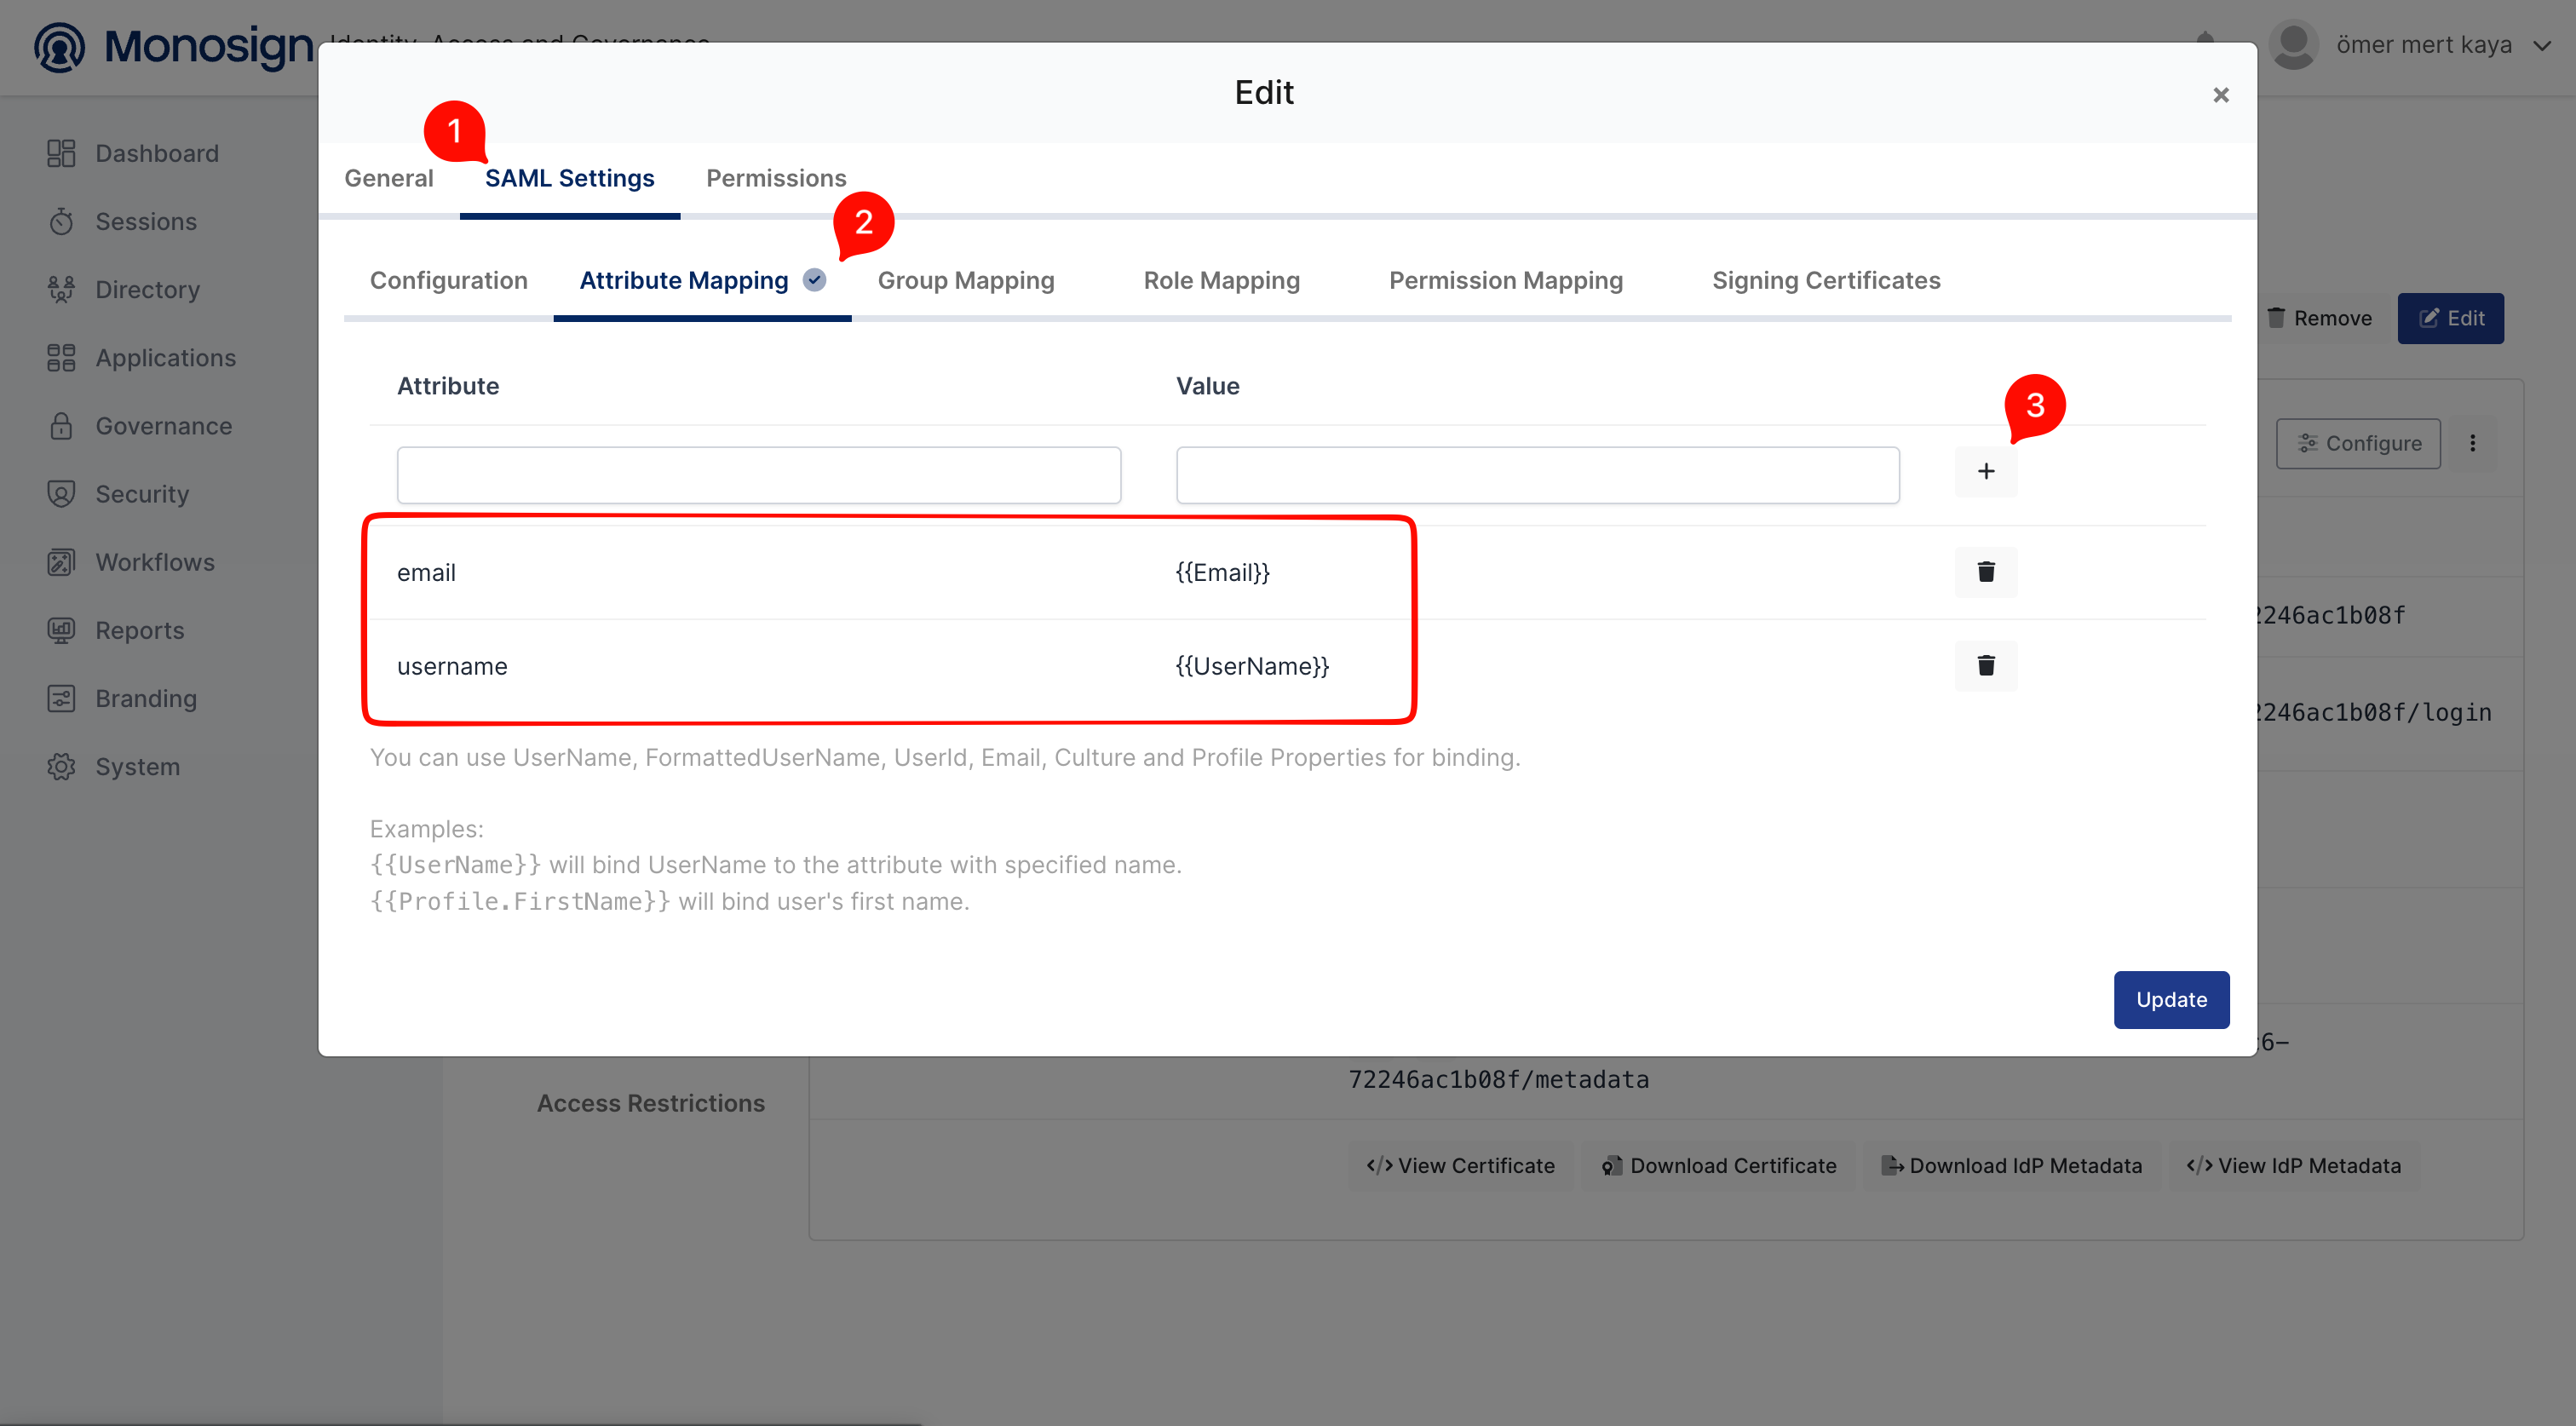
Configure Attribute Mapping on MonoSign
You can add email and username attributes.
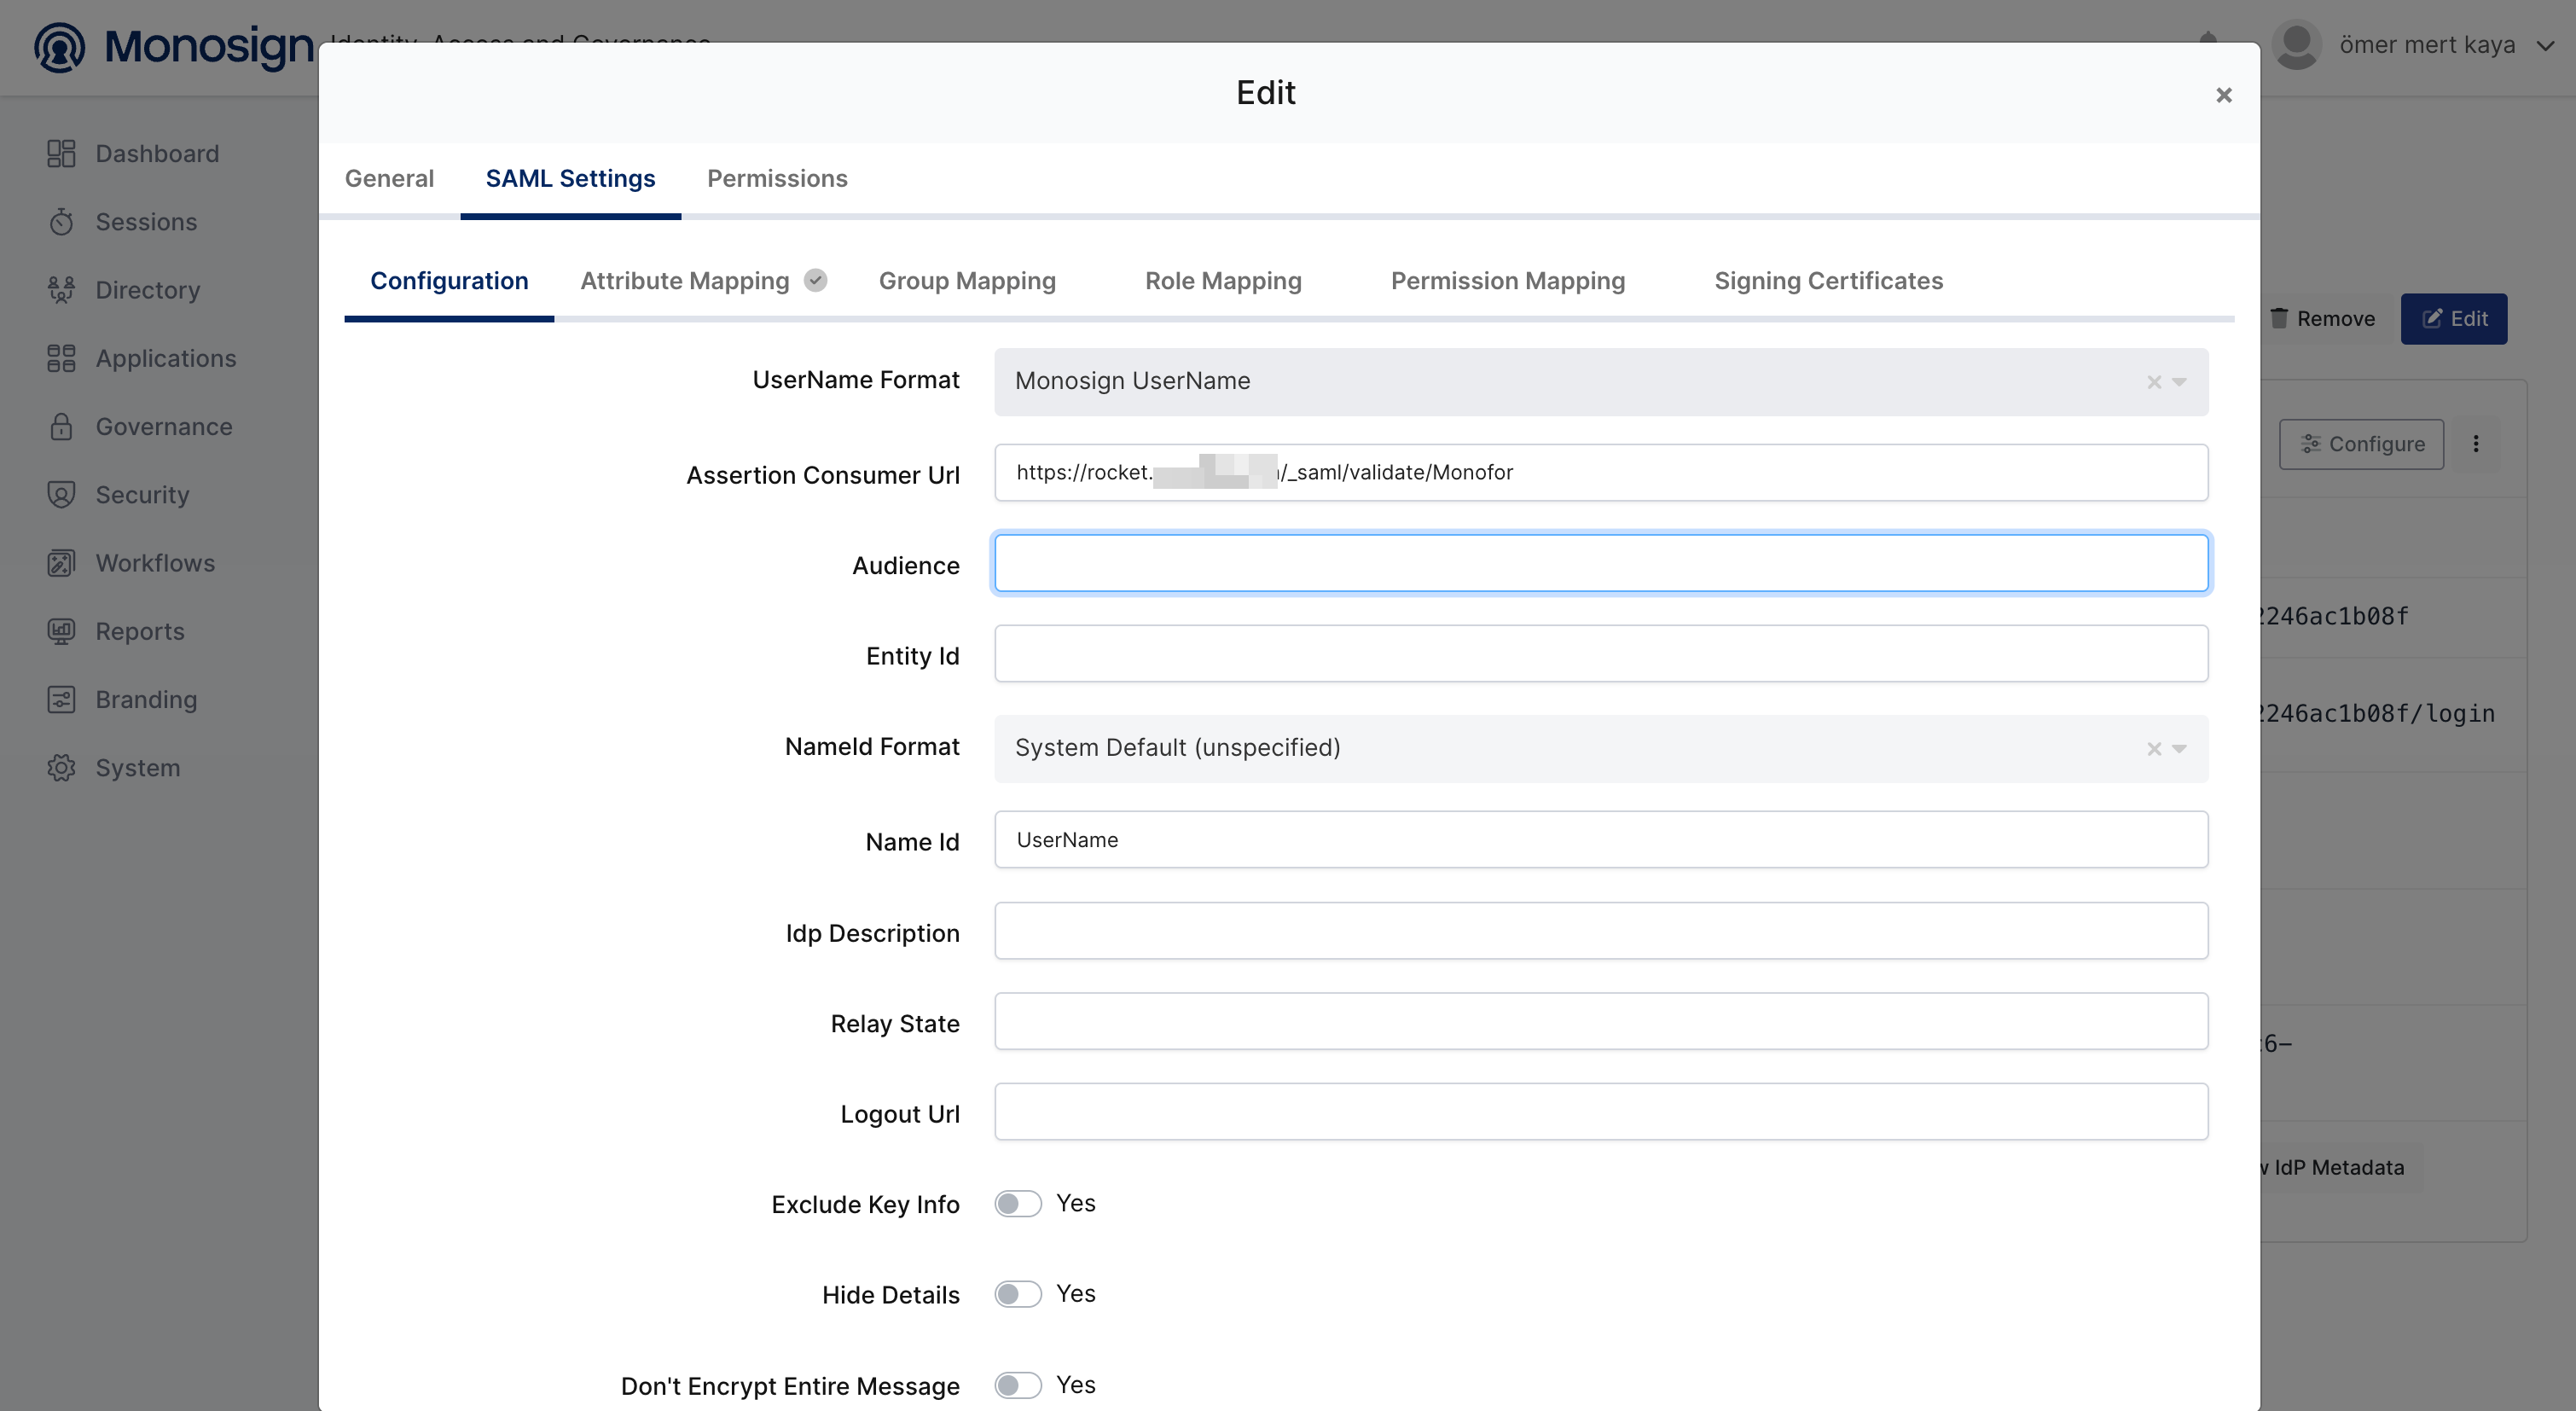
Rocket.Chat Callback URL
The Callback URL (Assertion Consumer Service URL) is automatically generated by Rocket.Chat and follows this format:
https://<your-rocketchat-domain>/_saml/validate/<custom-provider-name>
Note: Copy this URL and paste it into the Assertion Consumer URL (ACS) field in the MonoSign SAML key configuration.
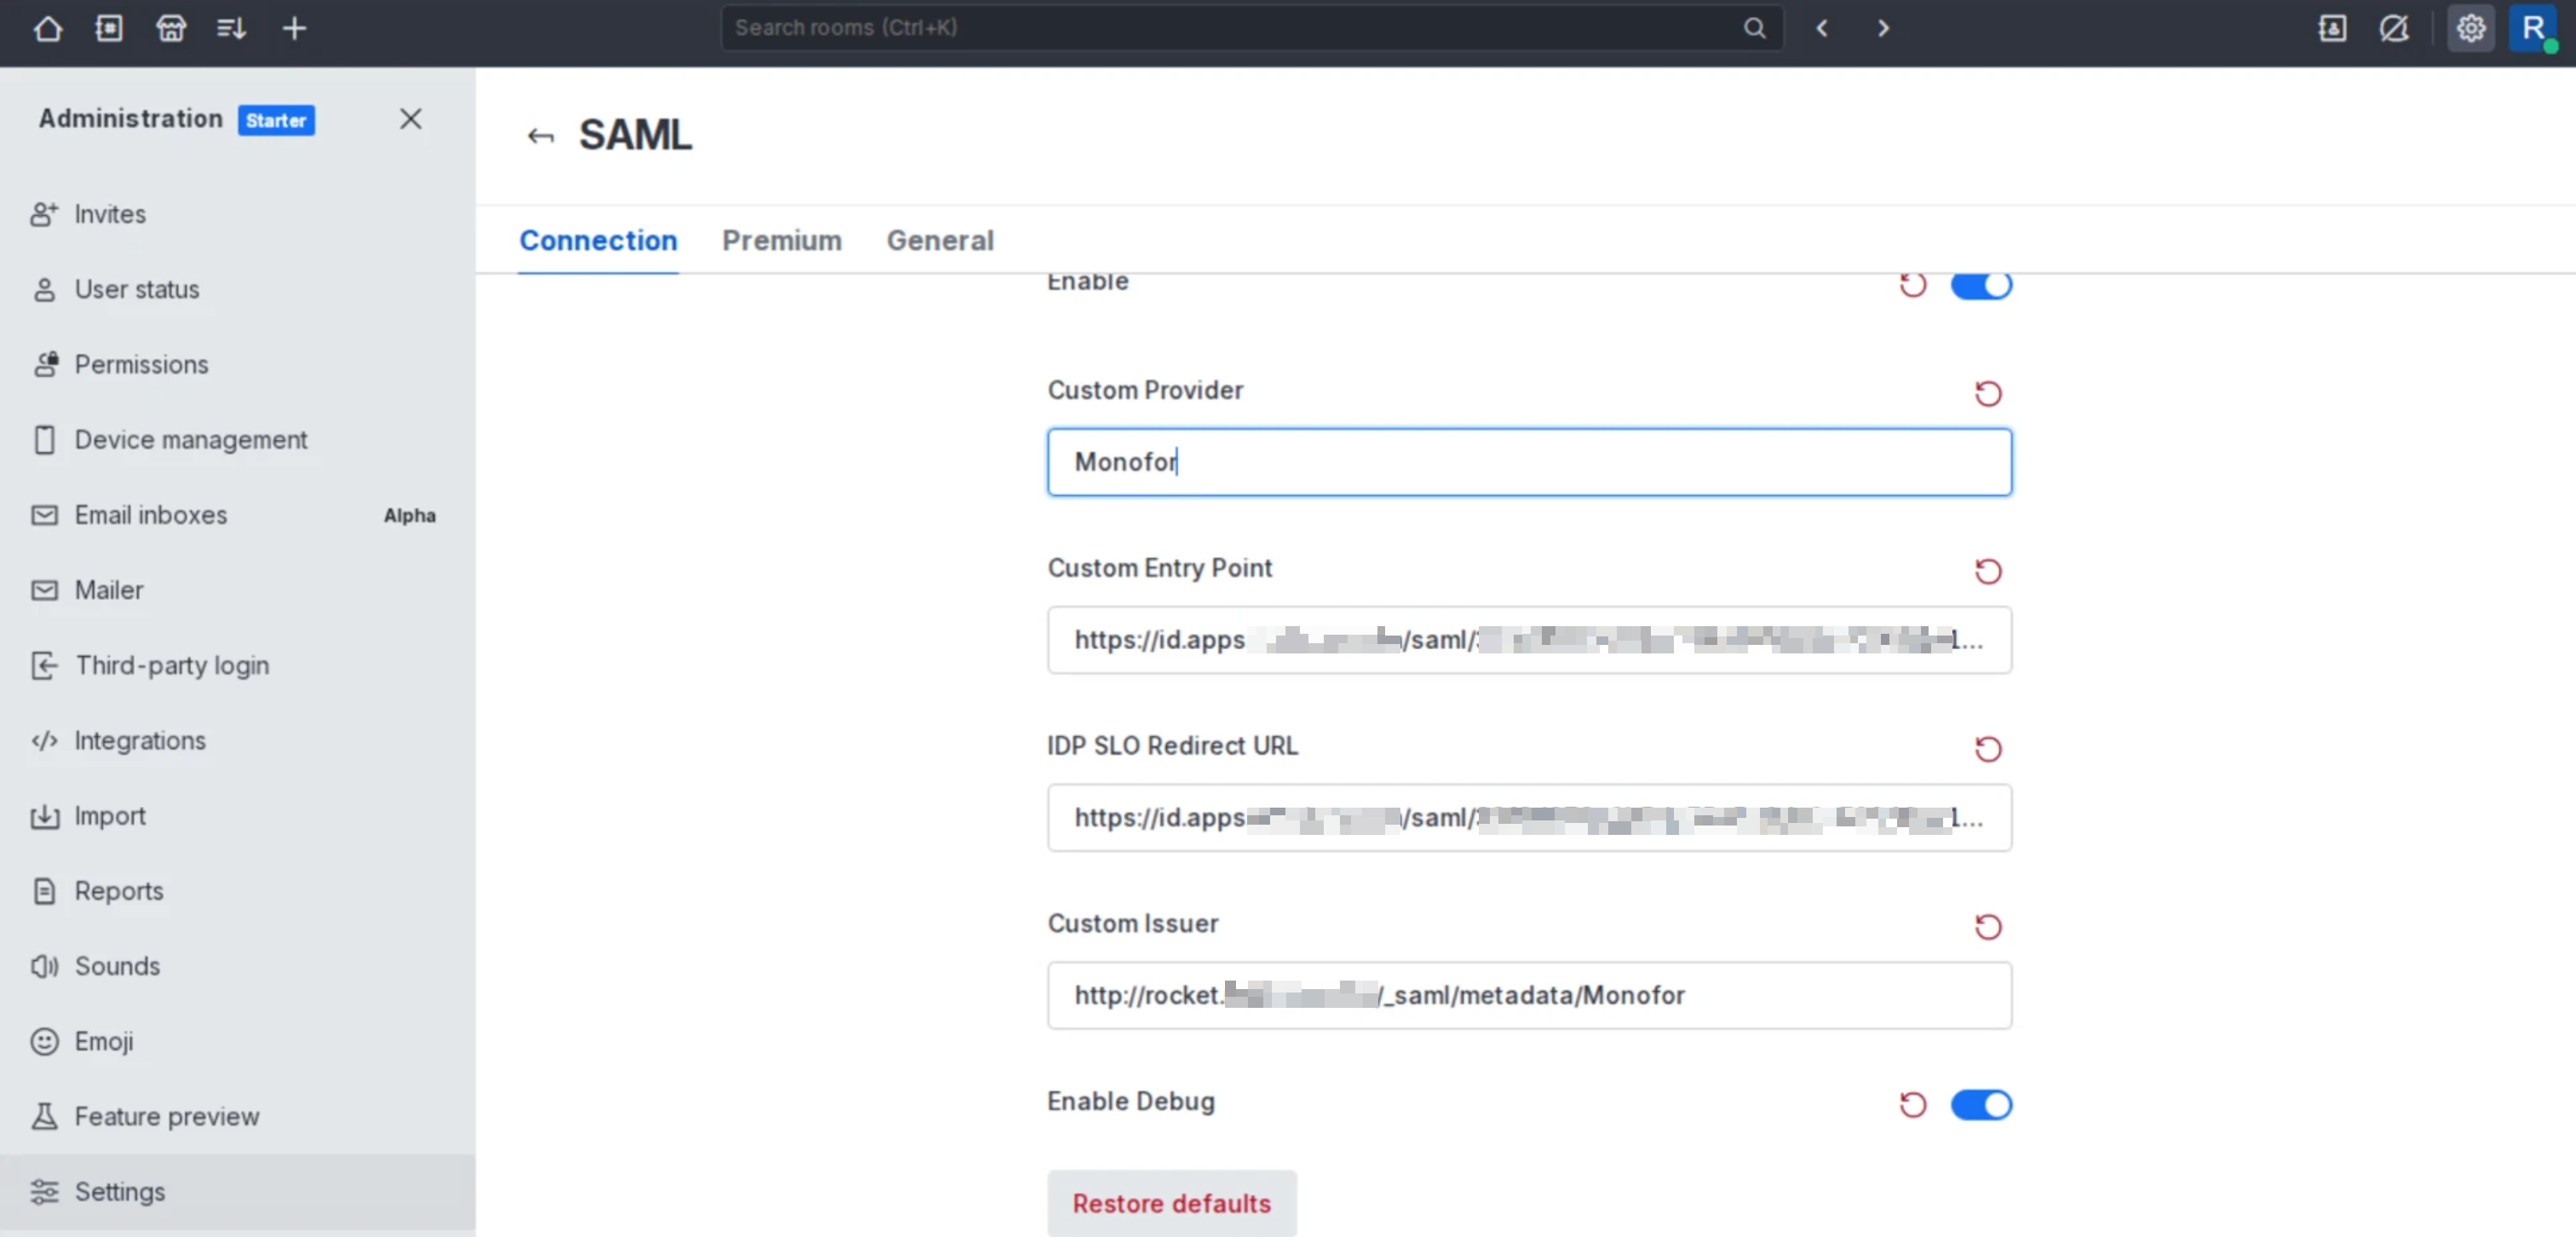
2 — Configuring SAML SSO on Rocket.Chat
Log in to your Rocket.Chat instance as an Administrator. Navigate to:
Administration → Workspace → Settings → SAML
Enable SAML by toggling the switch to ON, then fill in the configuration fields using the values from your MonoSign SAML key.
Connection Settings
|
Rocket.Chat Field |
Value |
Description |
|---|---|---|
|
Custom Provider |
e.g. |
A name for your SAML provider. This value is also part of the Callback URL. |
|
Custom Entry Point |
Sign On Service URL (from MonoSign) |
The URL where Rocket.Chat redirects users for authentication. Copy from MonoSign SAML key → Sign On Service. |
|
IDP SLO Redirect URL |
Logout Service URL (from MonoSign) |
The Single Logout Service endpoint. Copy from MonoSign SAML key → Logout Service. |
|
Custom Issuer |
e.g. |
A unique URL identifying your Rocket.Chat instance. By convention, this is the URL of your SAML metadata. |
Important (Rocket.Chat 8.4.0+): The IDP SLO Redirect URL is mandatory. If left empty, logout requests will fail. The value must match MonoSign's logout endpoint exactly.
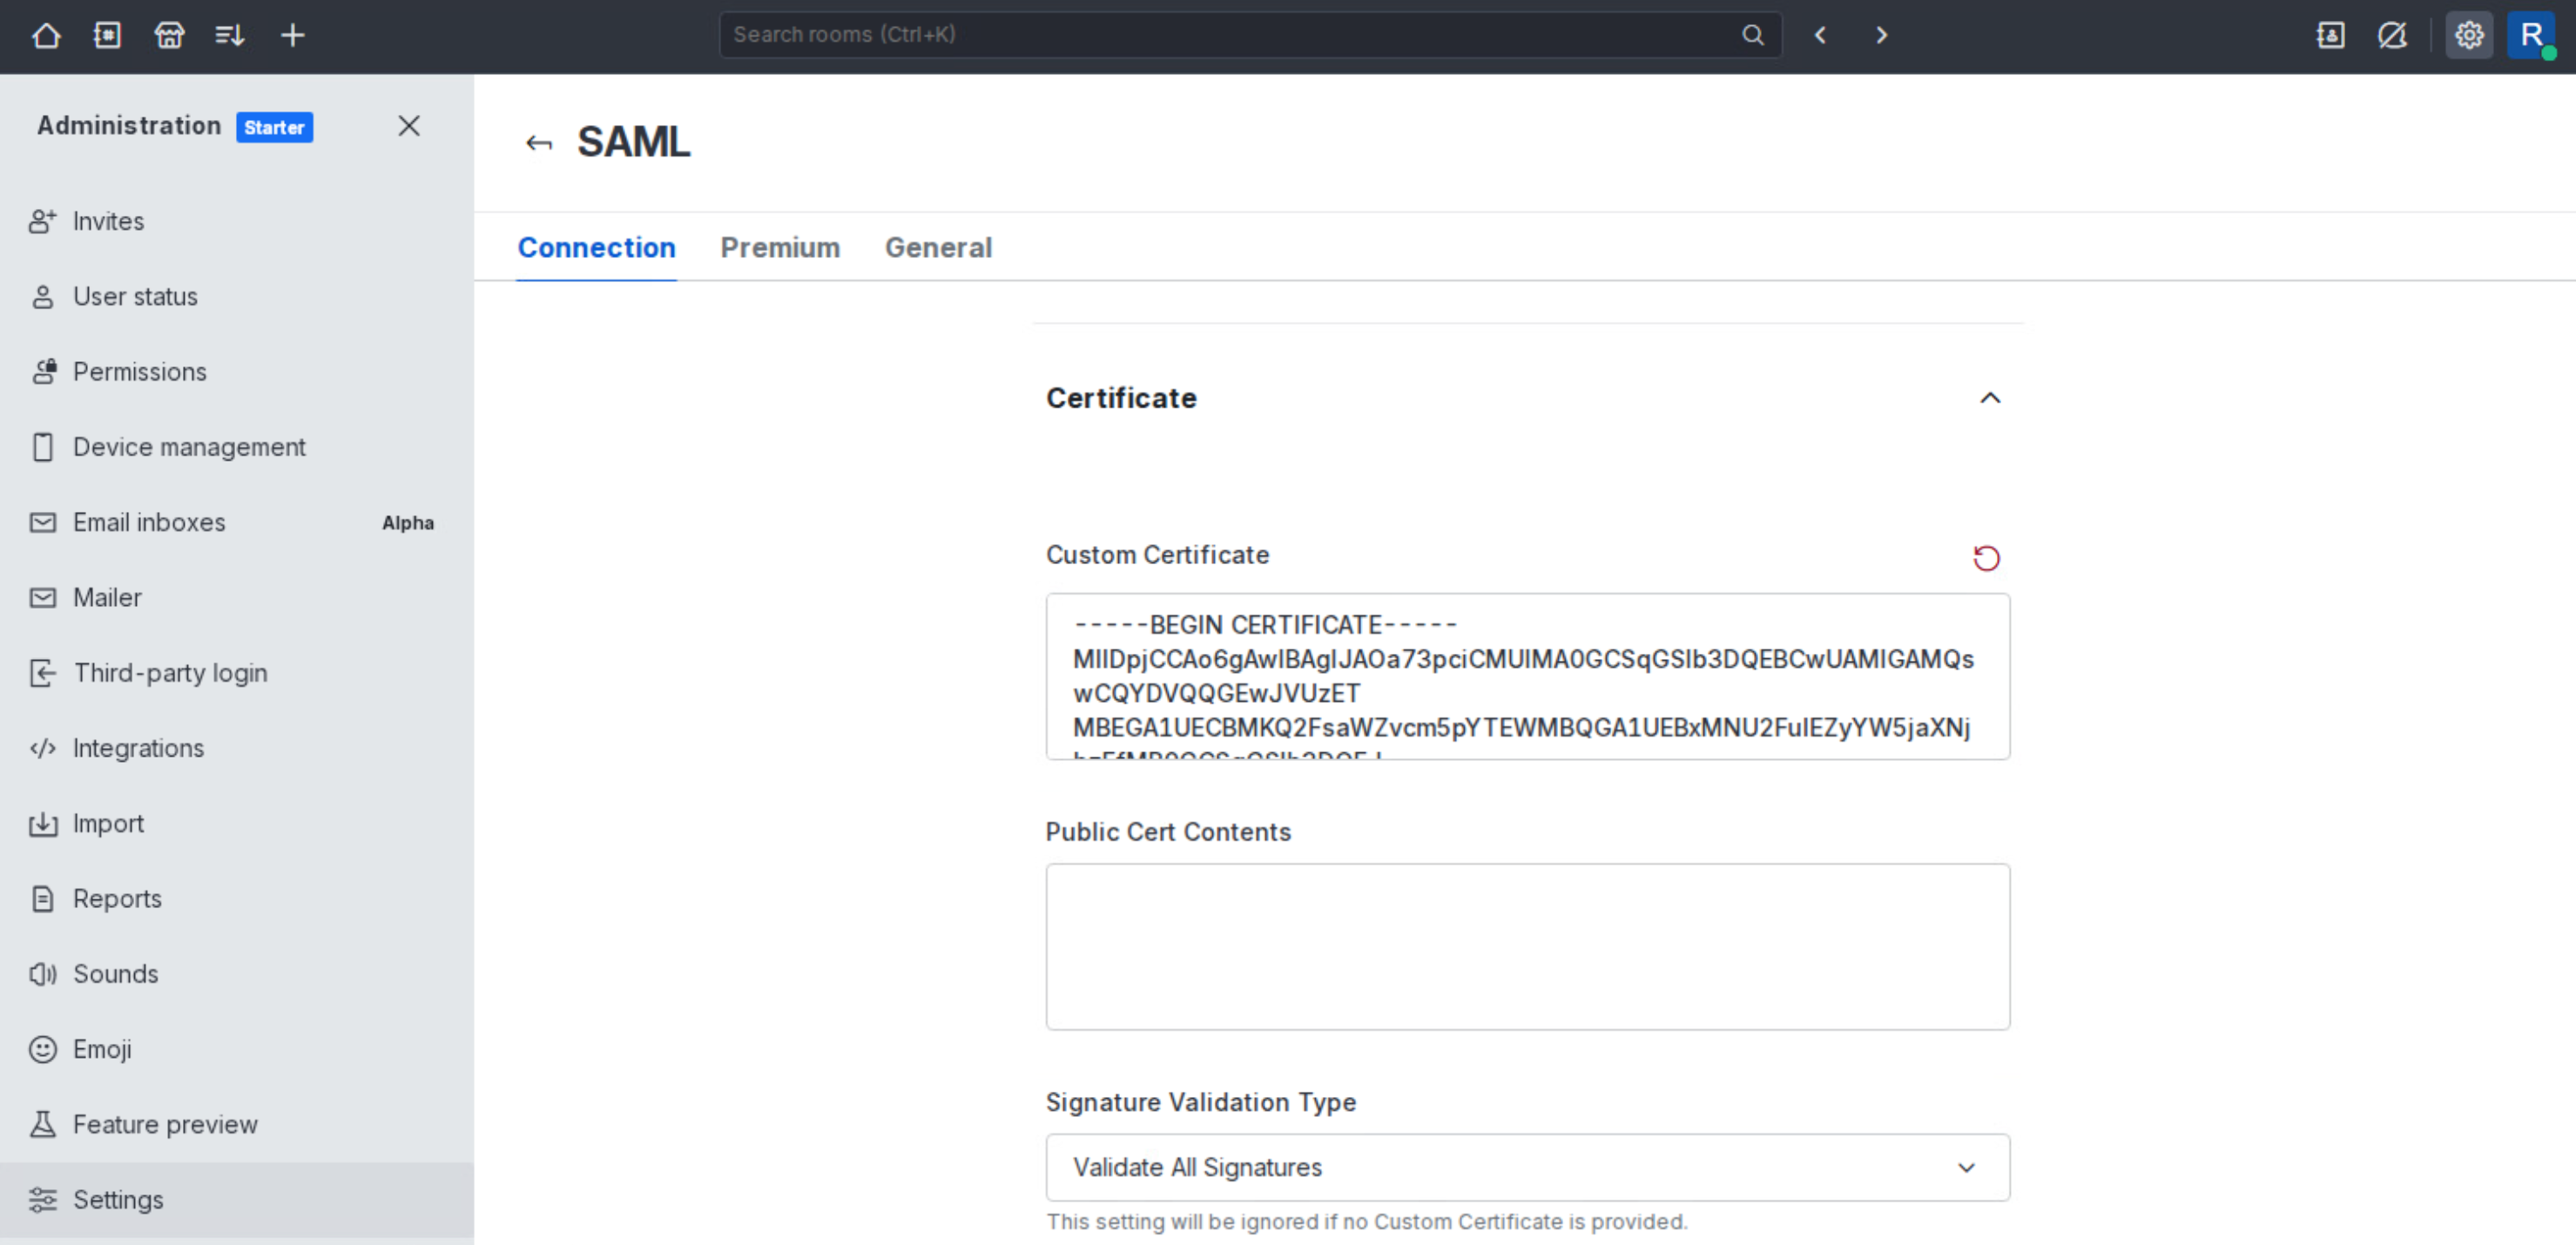
Certificate Configuration
Obtaining the Certificate from MonoSign
On the MonoSign SAML key page, you will find the following actions at the bottom:
|
Action |
Description |
|---|---|
|
|
Displays the IdP X.509 certificate in PEM format in the browser. Use this to copy the certificate content for Rocket.Chat. |
|
Download Certificate |
Downloads the certificate as a |
|
Download IdP Metadata |
Downloads the full SAML IdP metadata as an XML file. |
|
|
Displays the IdP metadata XML in the browser. |
Click View Certificate and copy the certificate content.
-----BEGIN CERTIFICATE-----
MIIDpDCCAoygAwIBAgIGAX...
-----END CERTIFICATE-----
User Data Field Map
Under General → Mapping → User Data Field Map in Rocket.Chat SAML settings, configure the attribute mapping to match the extra attributes sent by MonoSign.
Basic mapping for email and name:
{ "email": "email", "username": "username", "name","name" }
Note: Available fields in Rocket.Chat are
name,username. Any other attributes will be discarded.
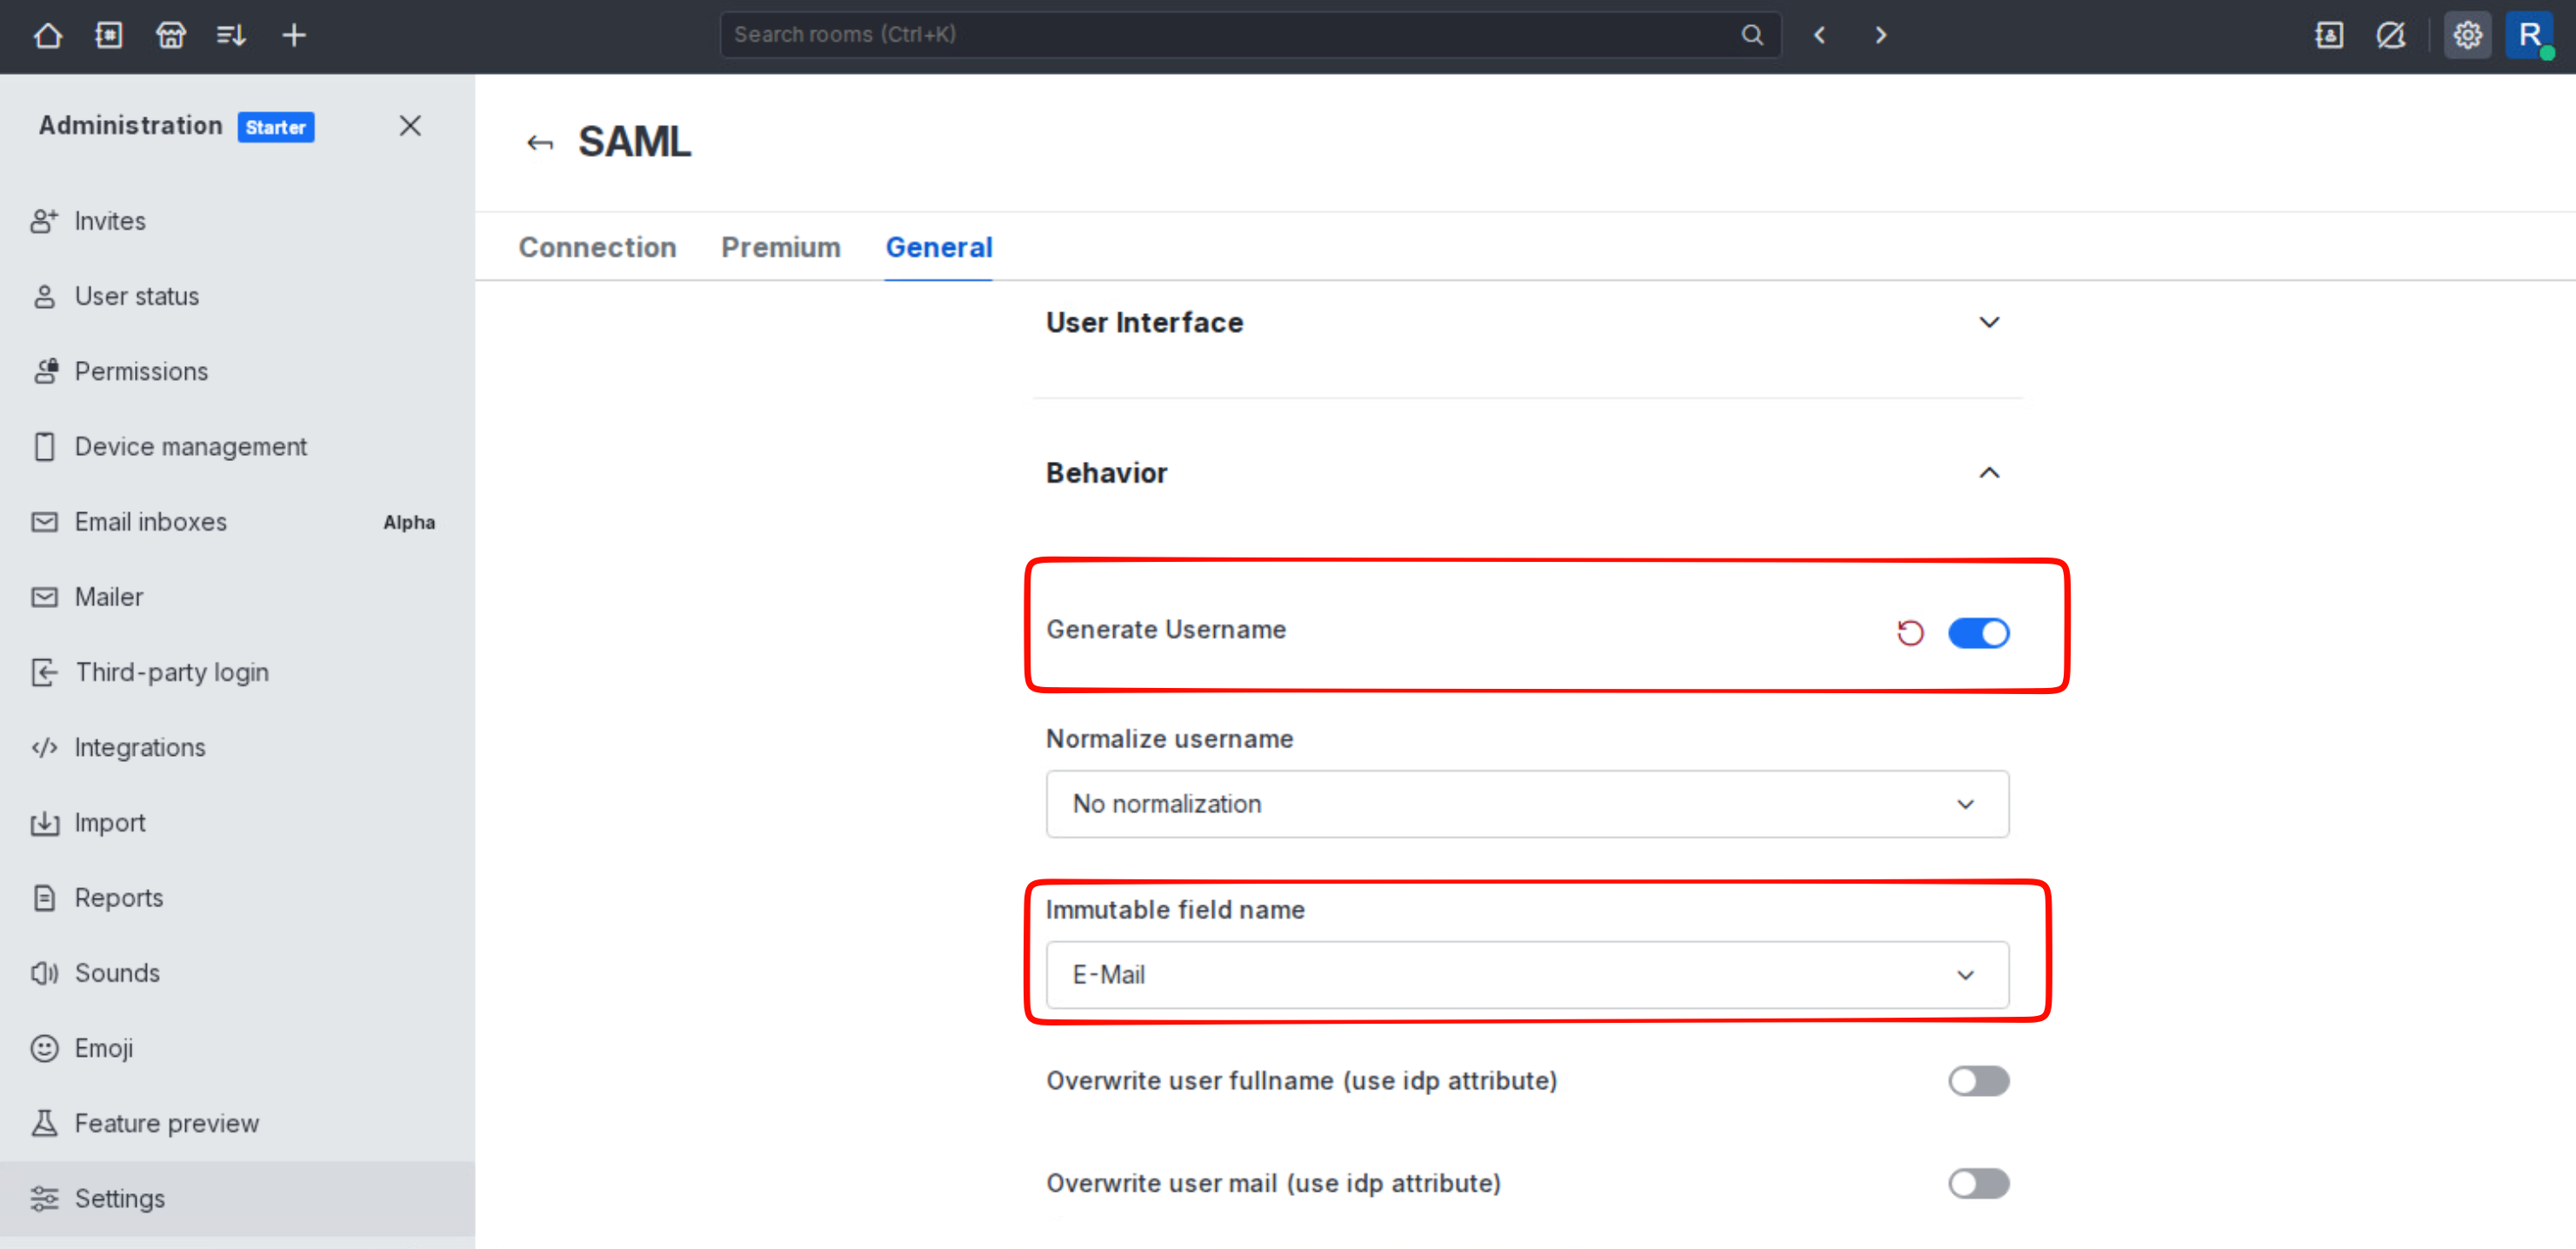
You can configure the settings below.
Generate Username — Enable this setting to automatically generate usernames. When enabled, Rocket.Chat will create a username even if the SAML response does not include one.
Immutable Field Name: E-Mail — Sets the email address as the immutable identifier for the user account. Once set, the email cannot be changed after the user is created via SSO.
3 — Assigning a User to the Rocket.Chat Application
After completing the MonoSign and Rocket.Chat configurations, assign users to the Rocket.Chat application in MonoSign so they can authenticate via SSO.
Follow the steps below to assign a user. In this example, john.smith will be assigned to the application.
-
Navigate to the Rocket.Chat application on MonoSign.
-
Click the Users tab.
-
Search for the user (e.g.
john.smith) and click Assign. -
Confirm the assignment. The user will now appear in the Assigned Users list.
Note: If your application's User Access Type is set to All Users, individual assignment is not required. All users in MonoSign will have access by default.
4 — Sign-In Test
Once all configurations are complete, perform a sign-in test to verify the integration.
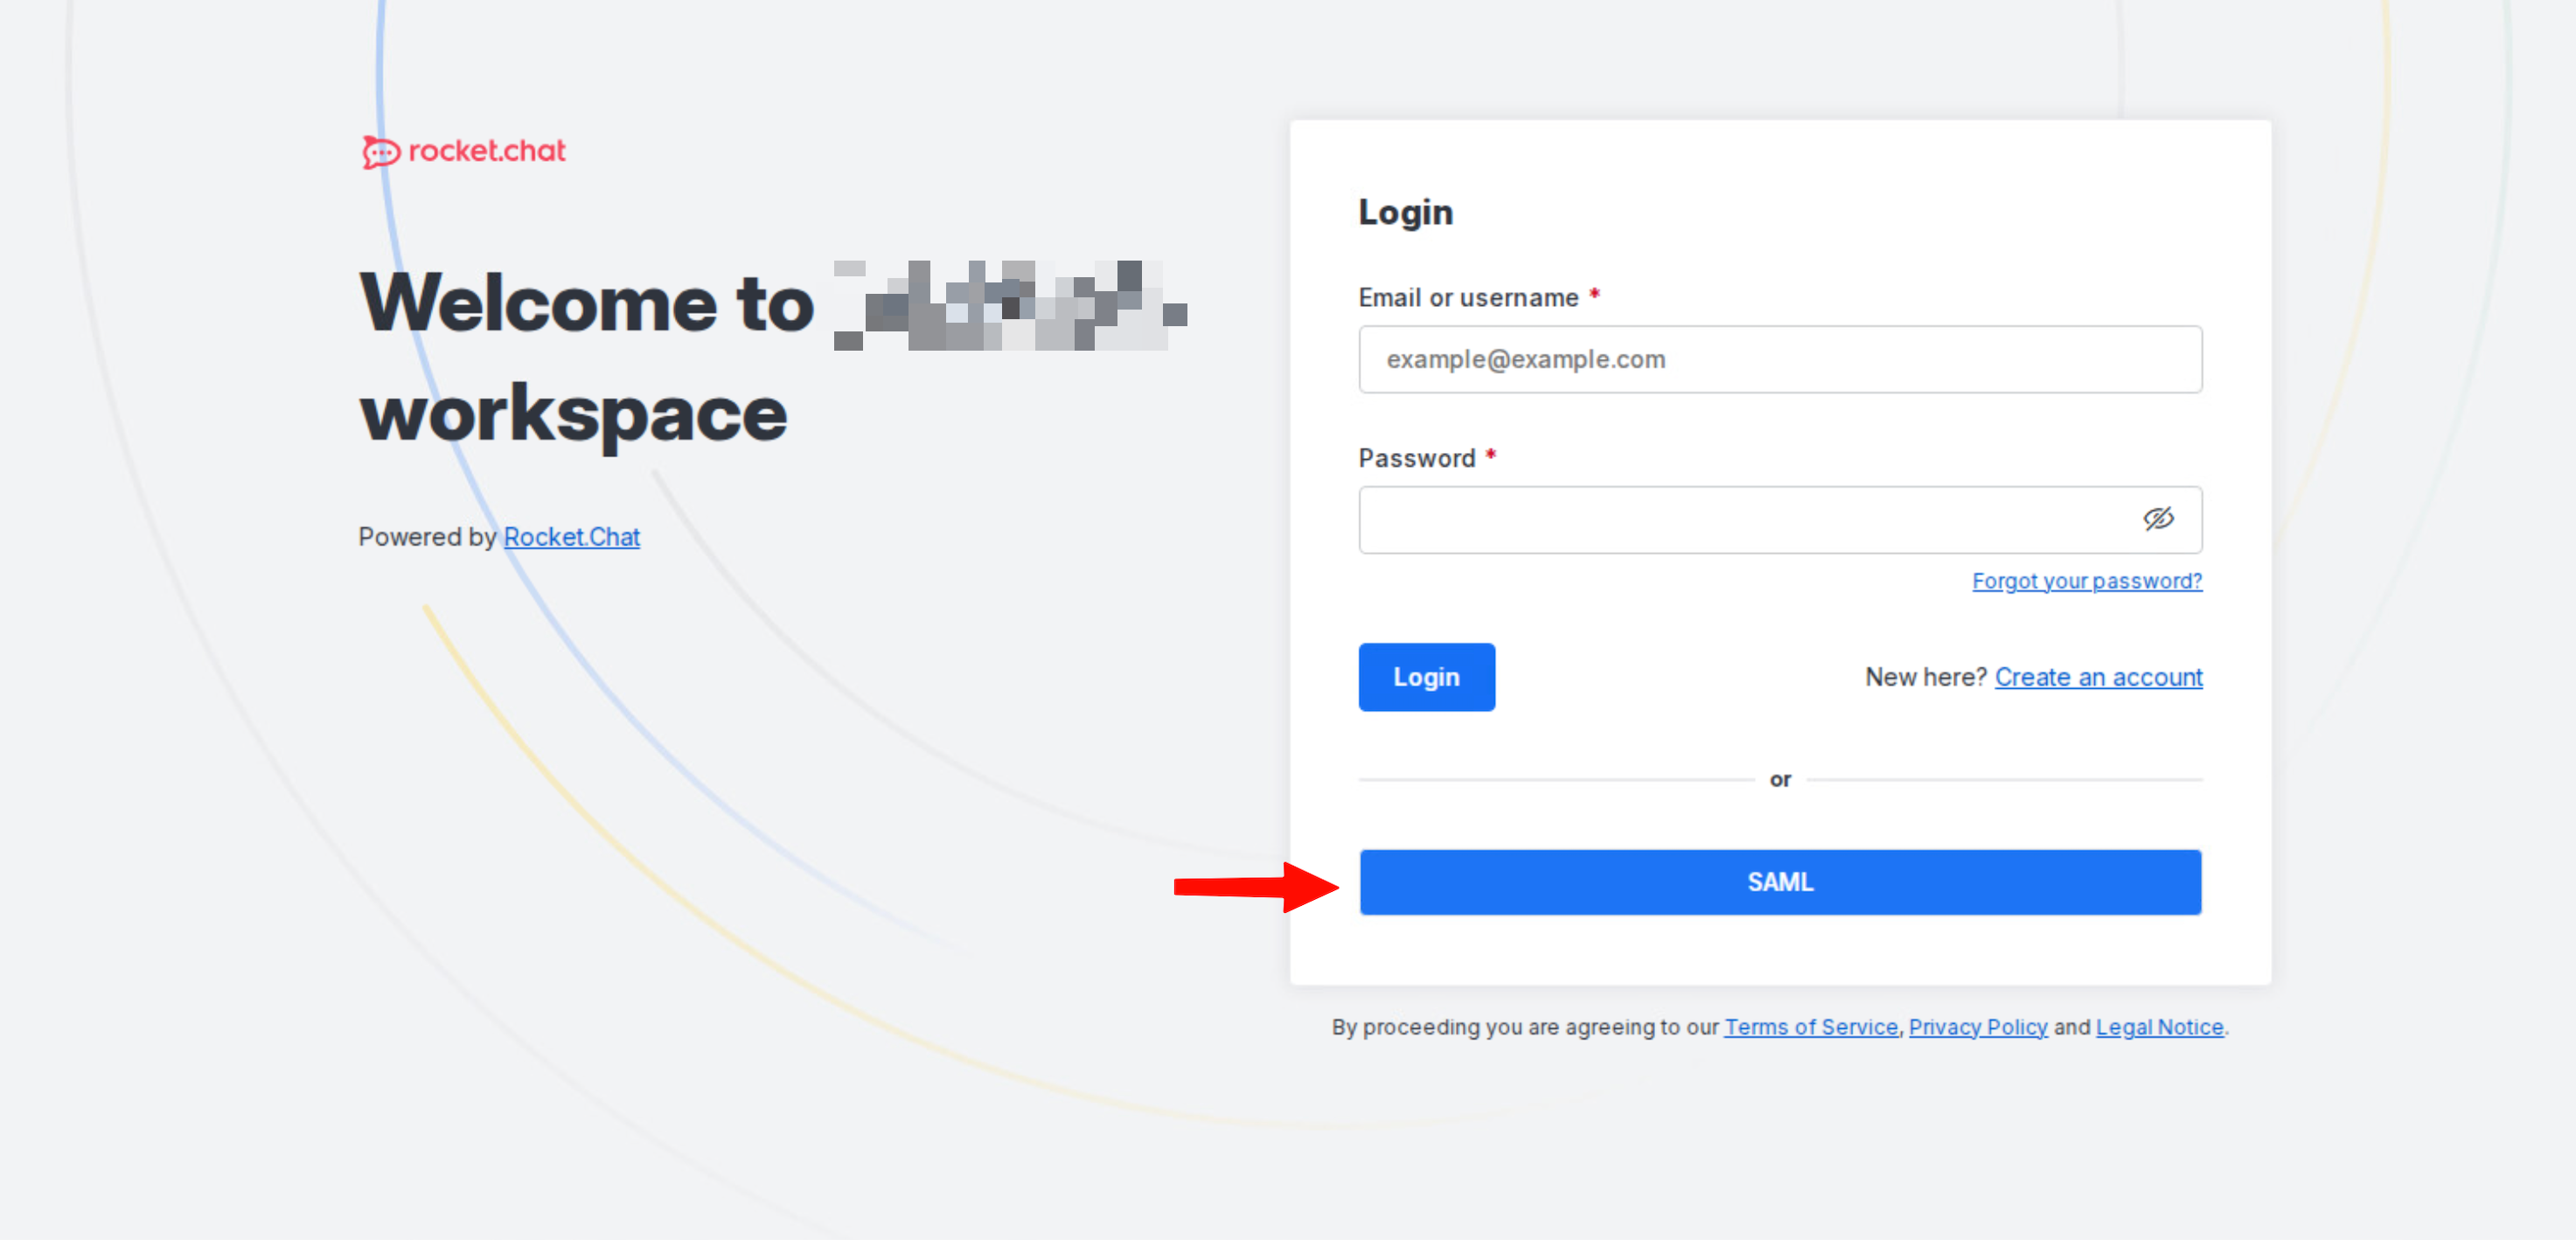
SP-Initiated Login
-
Navigate to your Rocket.Chat login page (e.g.
https://rocket.example.com). -
Click the SSO / Login with MonoSign button.
-
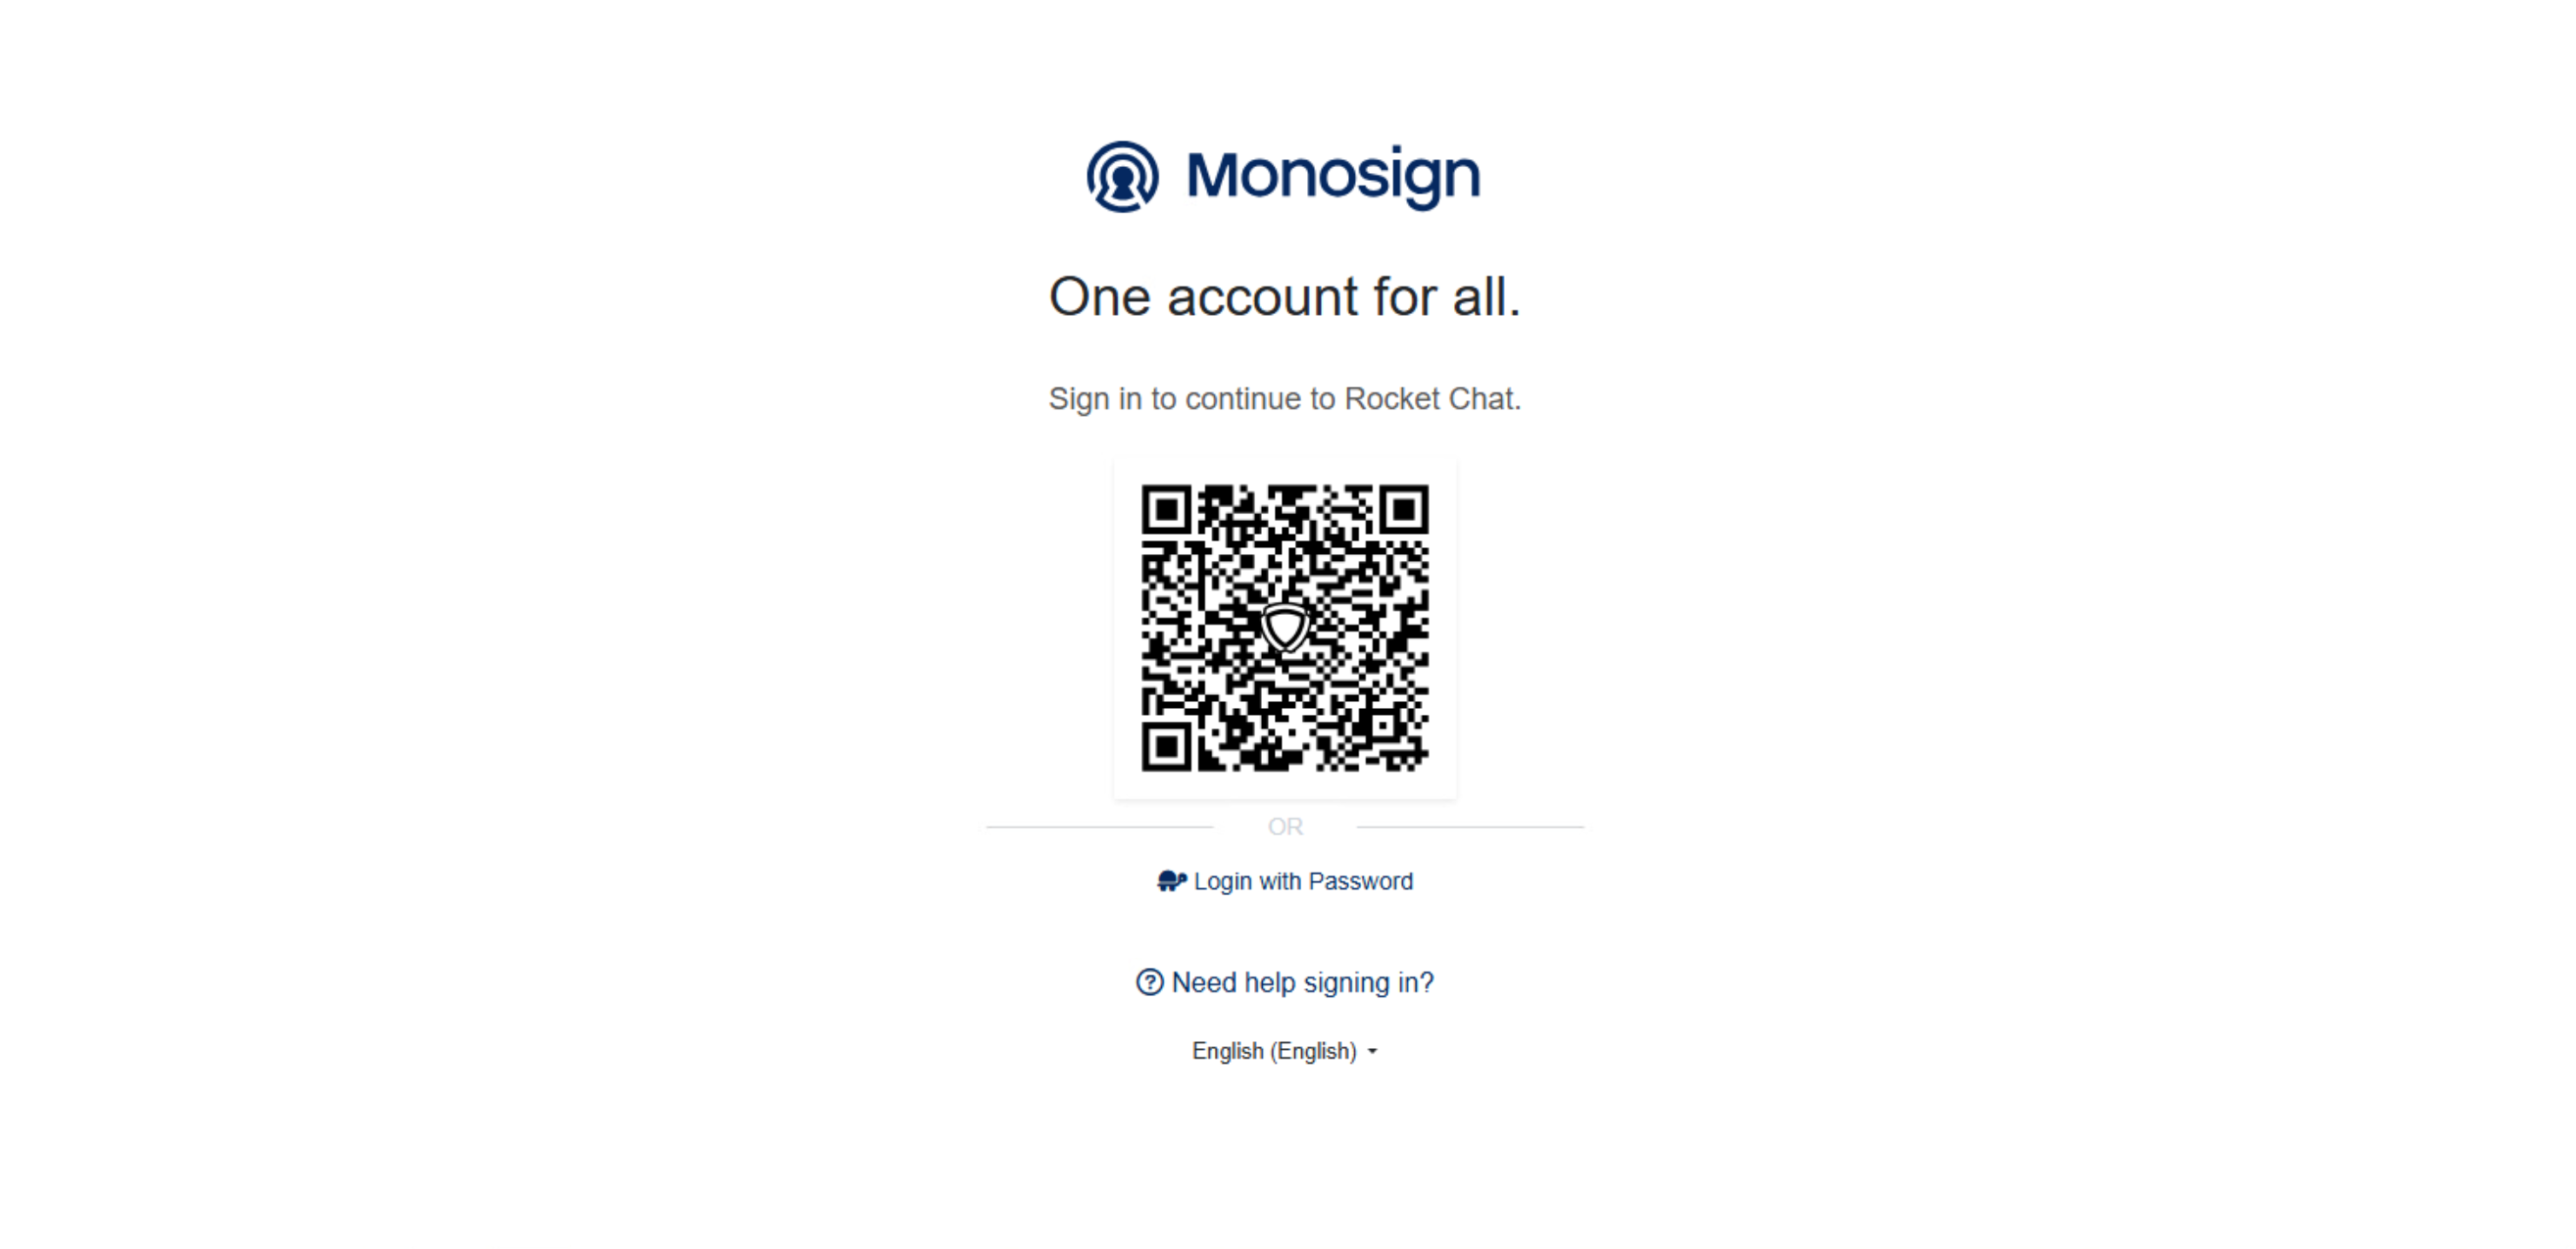
You will be redirected to the MonoSign login page.
-
Authenticate using your credentials (username & password, or QR code for passwordless login).
-
Upon successful authentication, you will be redirected back to Rocket.Chat and logged in automatically.
IdP-Initiated Login
-
Log in to the MonoSign user portal.
-
Find the Rocket.Chat application tile and click it.
-
You will be authenticated and redirected directly to Rocket.Chat without entering credentials again.
Note: If the login fails, verify that the Assertion Consumer URL in MonoSign matches the Callback URL configured in Rocket.Chat, and that the X.509 certificate was pasted correctly without the header/footer lines.