
Add a server, desktop, device, database or cluster as a resource, choose its type and assign the accounts people use to connect.
|
Applies to |
Who can do this |
|---|---|
|
Monopam v2026.10 |
Administrators with permission to manage resources. |
Before you begin
-
The gateway that will reach the resource is online (Gateways).
-
You know the address of the resource and the account Monopam should use. You can add the account to the vault while you assign it.
Create the resource
-
Open Resources and click Add New.
-
Enter a Name (1) and the Server (2): an IP address, DNS name or host name. Type
{{Gateway}}to publish an application through the gateways with load balancing. -
Select the Type (3): macOS, Linux, Windows, Kubernetes, Database or Appliance. The type decides which connection types and settings are offered.
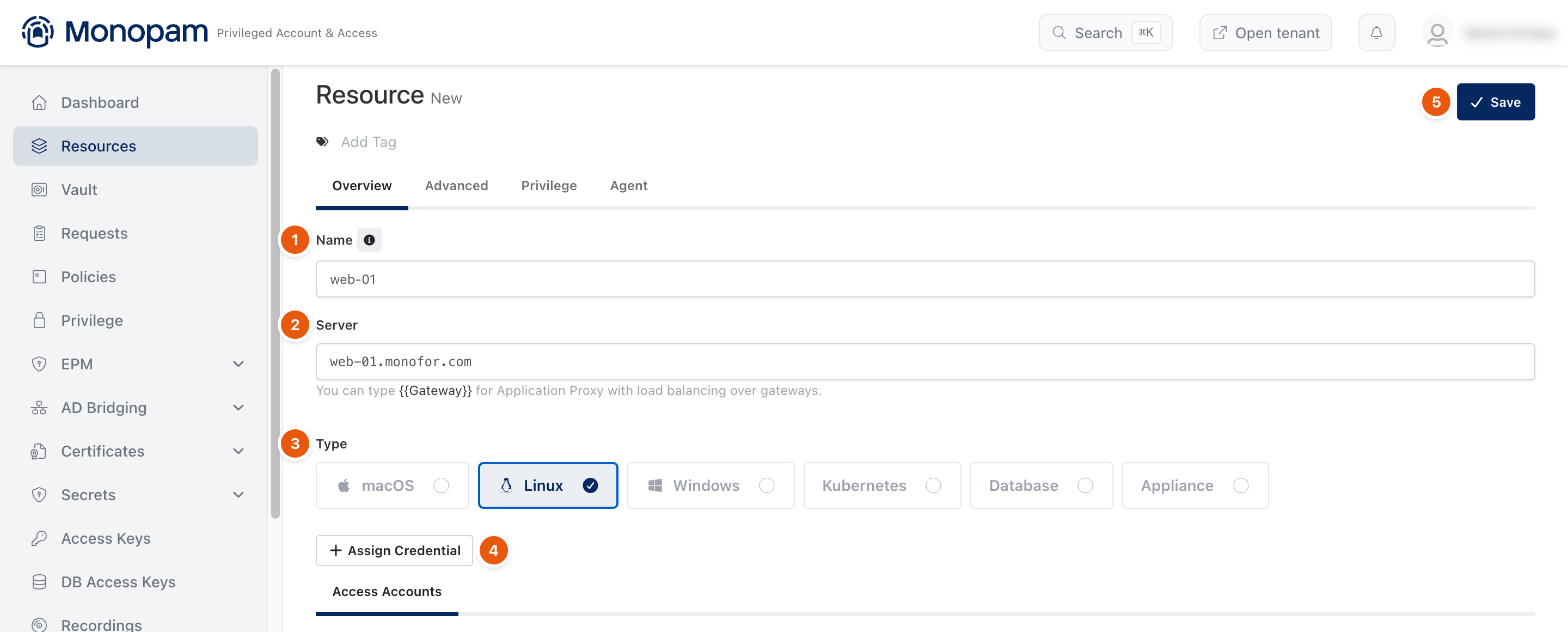
Figure 1. A new Linux resource.
-
Click Save (5). Monopam shows Resource added successfully. and the resource opens with all its tabs.
Assign an account
-
On the resource, click Assign Credential (4 in Figure 1).
-
Choose the Connection Type (1): RDP, SSH, Telnet, VNC, SFTP, Kubernetes or Database. The list shows the vault items that fit.
-
Select one or more vault items (3). To create one now, click Add New Credential (2); see Vault items.
-
Optionally set a Home Path or turn on Enable Access Automation, then click Add (4).
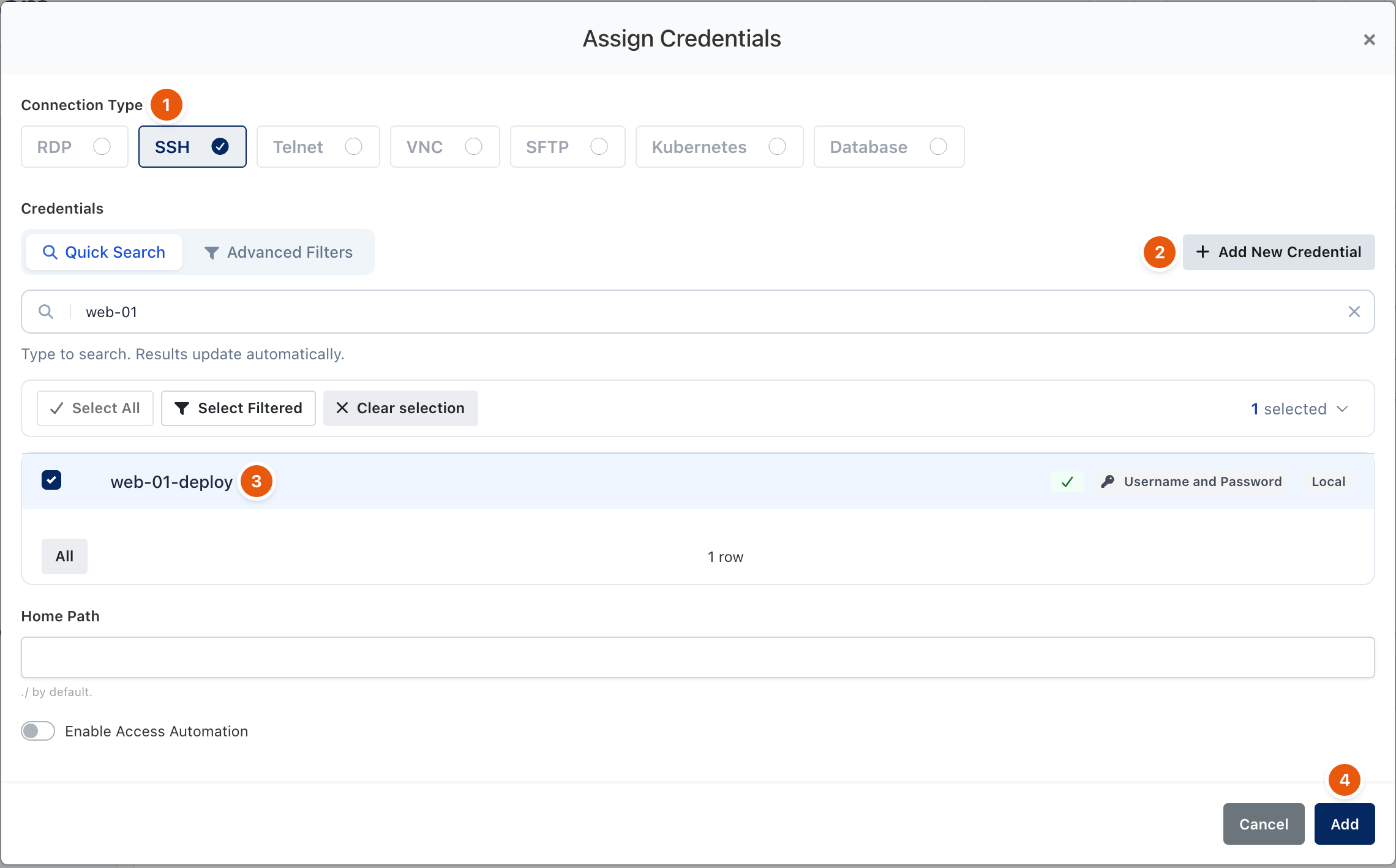
Figure 2. Assigning an SSH account.
-
Click Save. The account is listed under Access Accounts.
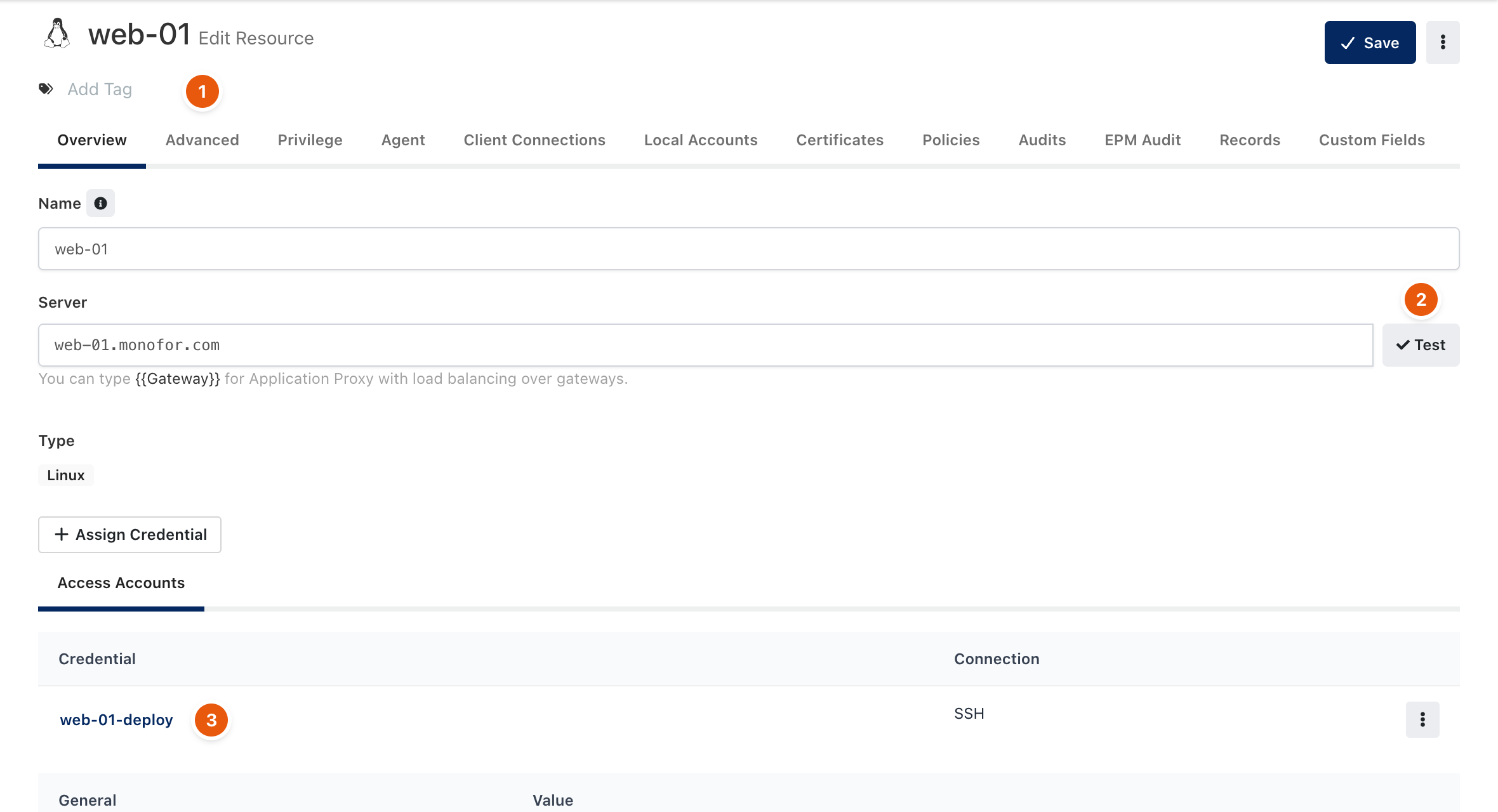
Figure 3. The saved resource.
Use Test (2 in Figure 3) next to the server to check that a gateway can reach it. The tabs (1) hold the resource's other settings: Advanced, Privilege, Agent, Client Connections, Local Accounts, Certificates, Policies, Audits, EPM Audit, Records and Custom Fields.
Advanced settings
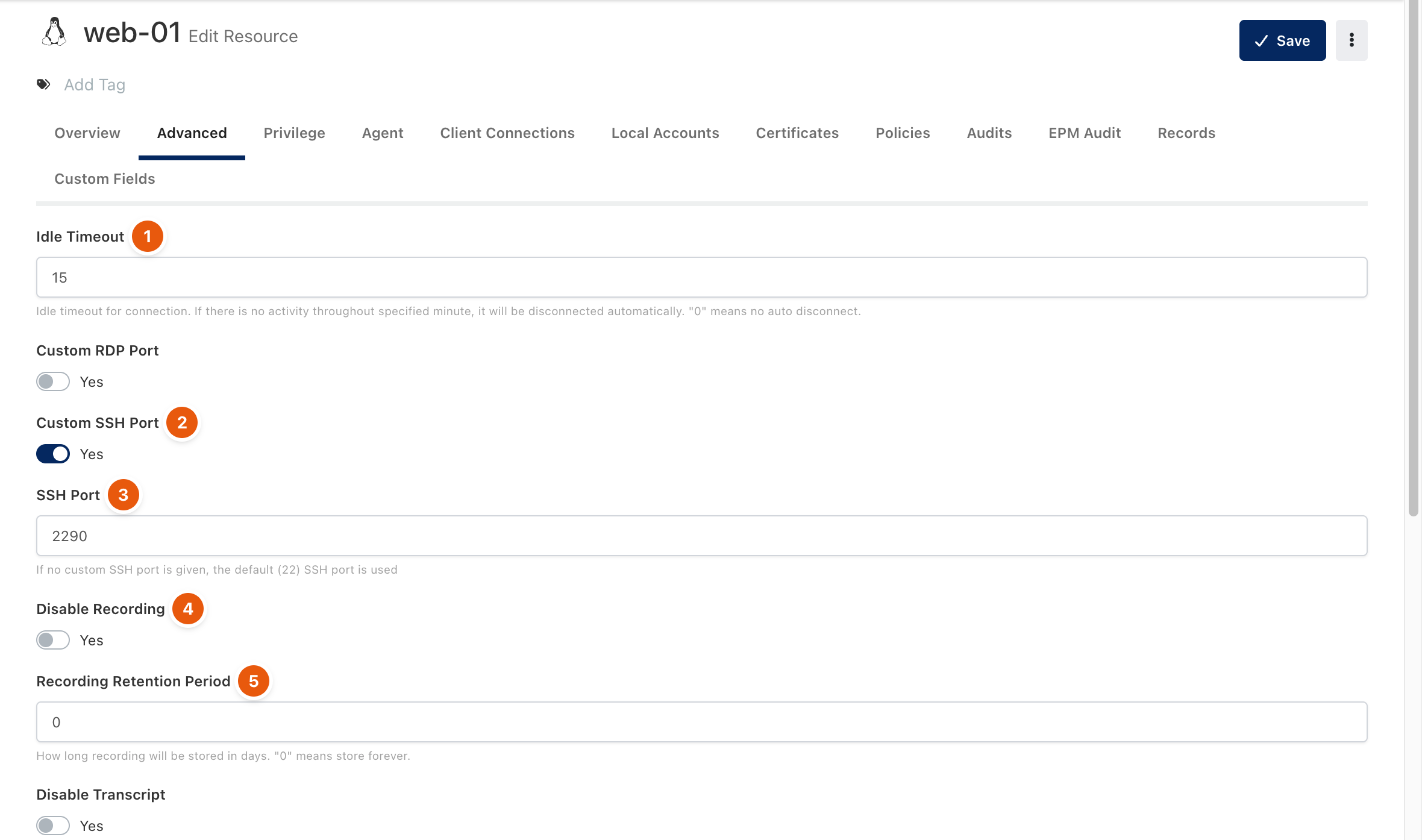
Figure 4. The Advanced tab.
|
Field |
What it does |
|---|---|
|
Idle Timeout (1) |
Minutes without activity before the session is disconnected. |
|
Custom RDP Port, Custom SSH Port (2) |
Connect on a port other than the default (3389 for RDP, 22 for SSH). |
|
SSH Port (3) |
The port to use when Custom SSH Port is on. Without it, the default 22 is used. |
|
Disable Recording (4) |
Do not record sessions on this resource. |
|
Recording Retention Period (5) |
Days to keep recordings. |
|
Disable Transcript |
Do not produce the searchable transcript of terminal sessions. |
|
Allow Draft Script Execution |
Let an unpublished draft of a script run on this resource for testing. Such runs are marked as draft runs. |
|
Site |
Optional location. Without an explicit gateway selection, connections prefer the site's gateways. |
|
Gateways |
Pin the resource to specific gateways. |
|
Require Approval |
Ask approvers before a connection, clipboard or file action. See Approve and revoke access. |
|
Fixed Window Size |
Keep the remote window at a fixed size the user cannot change. |
Troubleshooting
|
What you see |
Why |
What to do |
|---|---|---|
|
The session closes right after Connect. |
The gateway cannot reach the server, or the port is wrong. |
Use Test next to the server. For SSH or RDP on a non-default port, turn on Custom SSH Port or Custom RDP Port on the Advanced tab; a port typed into the Server field is not used for SSH. |
|
The vault item is not offered in Assign Credentials. |
Its type does not fit the connection type, or it belongs to another resource. |
Check the item's type, and for a Local User item, the resource it belongs to. |
Related
-
Vault items
-
Connect from the browser
-
Resource Access Policy
-
Sites