
Bring many accounts into the vault at once, from a CSV file or from Active Directory.
|
Applies to |
Who can do this |
|---|---|
|
Monopam v2026.10 |
Administrators with permission to manage the vault. |
Open an import
Open Vault and the page menu (⋮). Choose Import from Active Directory or Import from CSV. The same menu holds Advanced filters and Generic Types.
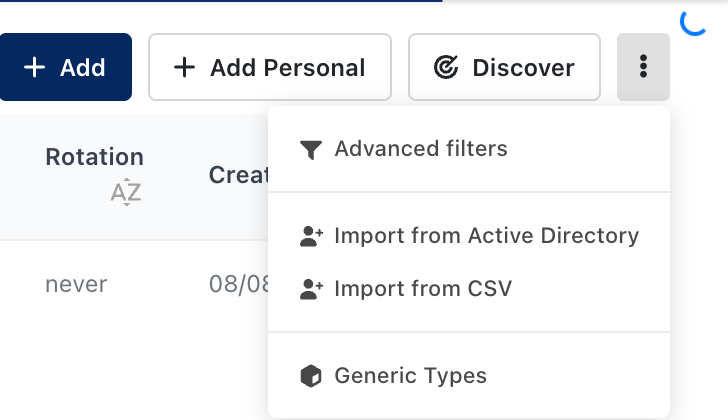
Figure 1. The Vault page menu.
Import from a CSV file
-
1. Select File (1): set the separator, choose the file under Import File (2), and use Mode (3) to edit the rows before importing. The counters show how many columns and rows were read and how many rows match, do not match or are ignored. Show Only Matched and Filter Columns narrow the preview.
-
Click Continue (4). In 2. Import Settings, choose the Additional Type and, depending on it, the Resource, Domain or Resources the accounts belong to. Optionally Create a new Vault Access Policy (with a Policy Name) or Assign vaults to the following Vault Access Policy, and choose a Password Policy.
-
3. Import Summary shows Total, Success, Already Imported, Fail and the Progress.
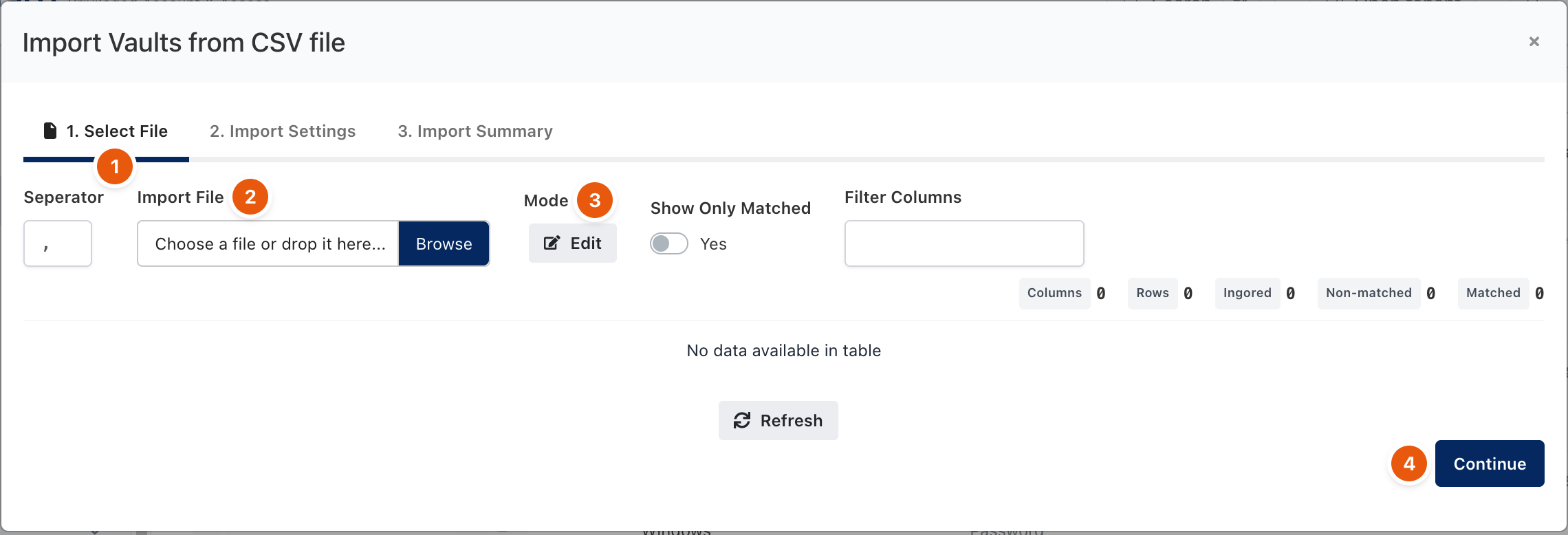
Figure 2. Importing from CSV.
Import from Active Directory
Choose an Active Directory source, search for the accounts and select them. Monopam creates Domain User vault items for them. The source must be defined under Sources first; see Sources and cloud providers.
Related
-
Vault items
-
Generic types
-
Sources and cloud providers