
This document explains how to implement Monosign with Redash, the open-source query and dashboard tool. It covers Single Sign-On using SAML 2.0, where Monosign acts as the Identity Provider (IdP) and Redash as the Service Provider (SP). Before you continue, it is better to start with the Redash documentation.
This configuration is done with the self-hosted Redash 26.9.0 container image (redash/redash:26.9.0), set up with the official Docker Compose files of Redash. If your Redash version or deployment type is different, please check the Redash documentation.
Redash has a built-in SAML 2.0 login. It does not have a generic OAuth 2.0 / OpenID Connect login (only Google OAuth), so this integration uses SAML.
Monofor has no responsibility to do Redash configurations. If you need support please contact the Redash community or your Redash support provider.
📑 Instructions
This documentation contains 5 main steps for integration.
-
Creating an application on Monosign
-
Configuring the SAML settings on Monosign
-
Assign a user to the Redash application
-
Configuration Single Sign-On for Redash
-
Sign In Test
1- Creating an Application on Monosign
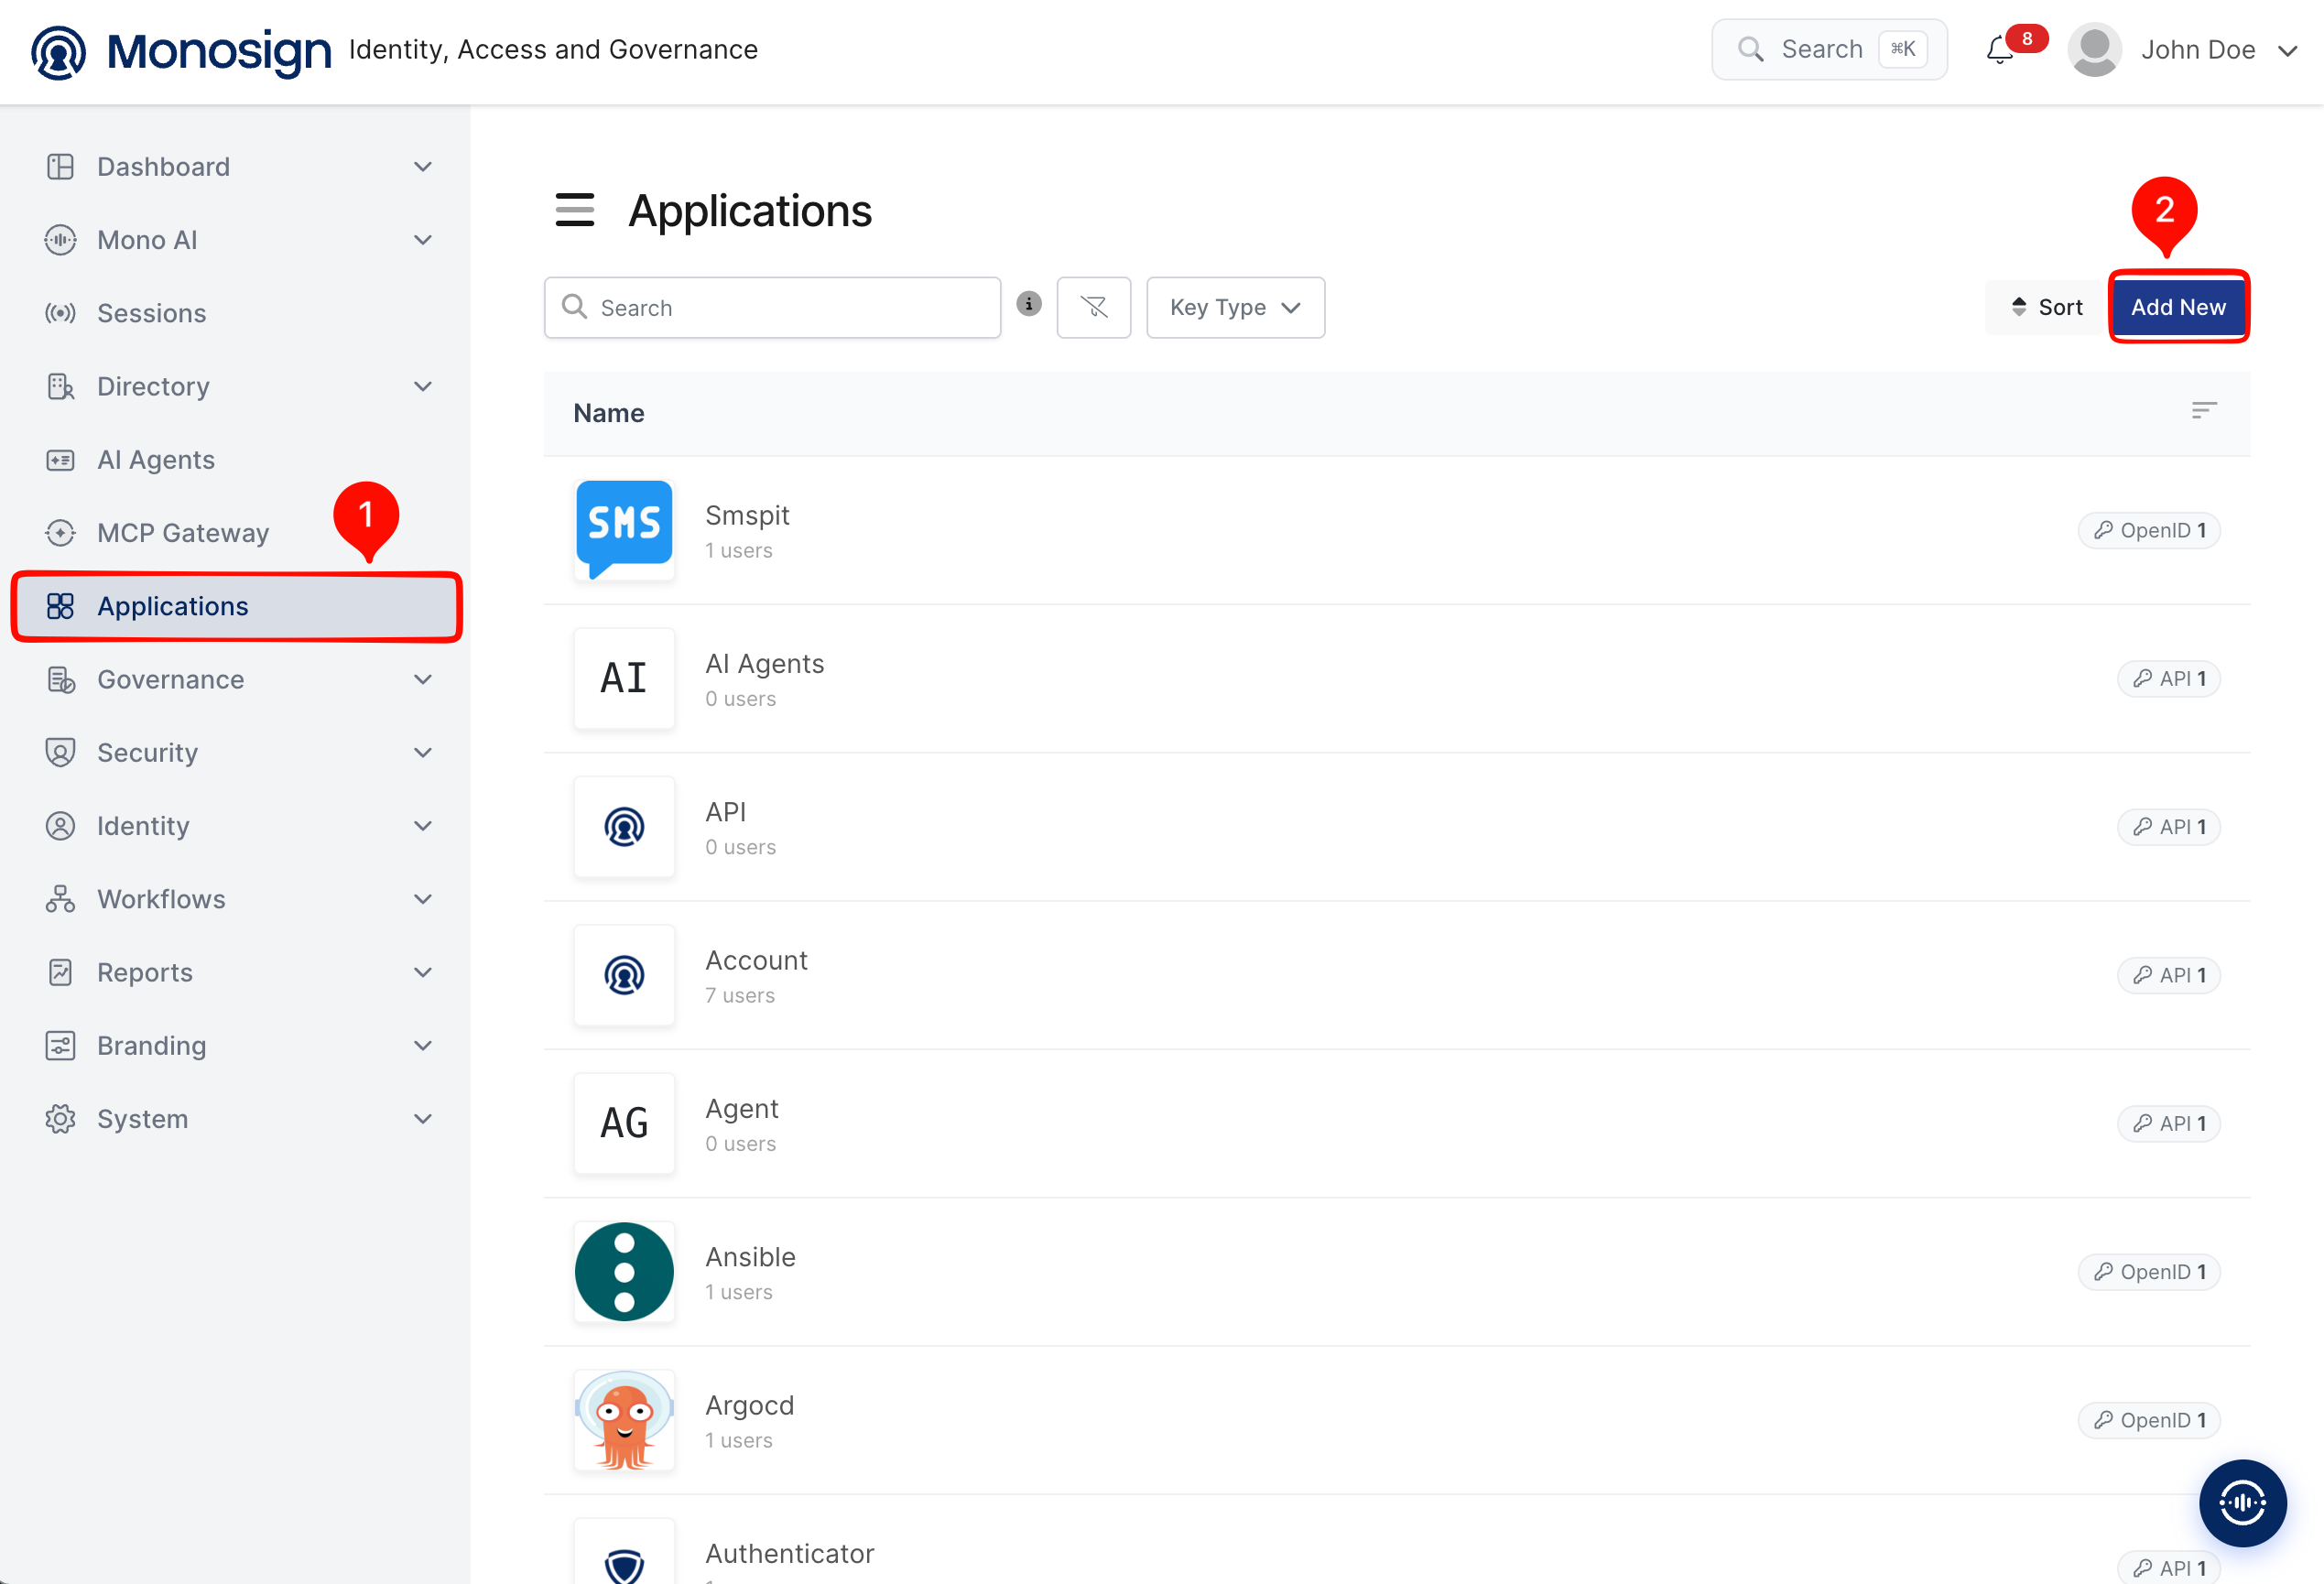
Create your application on Monosign first. Open the Applications page from the left menu and click Add New.
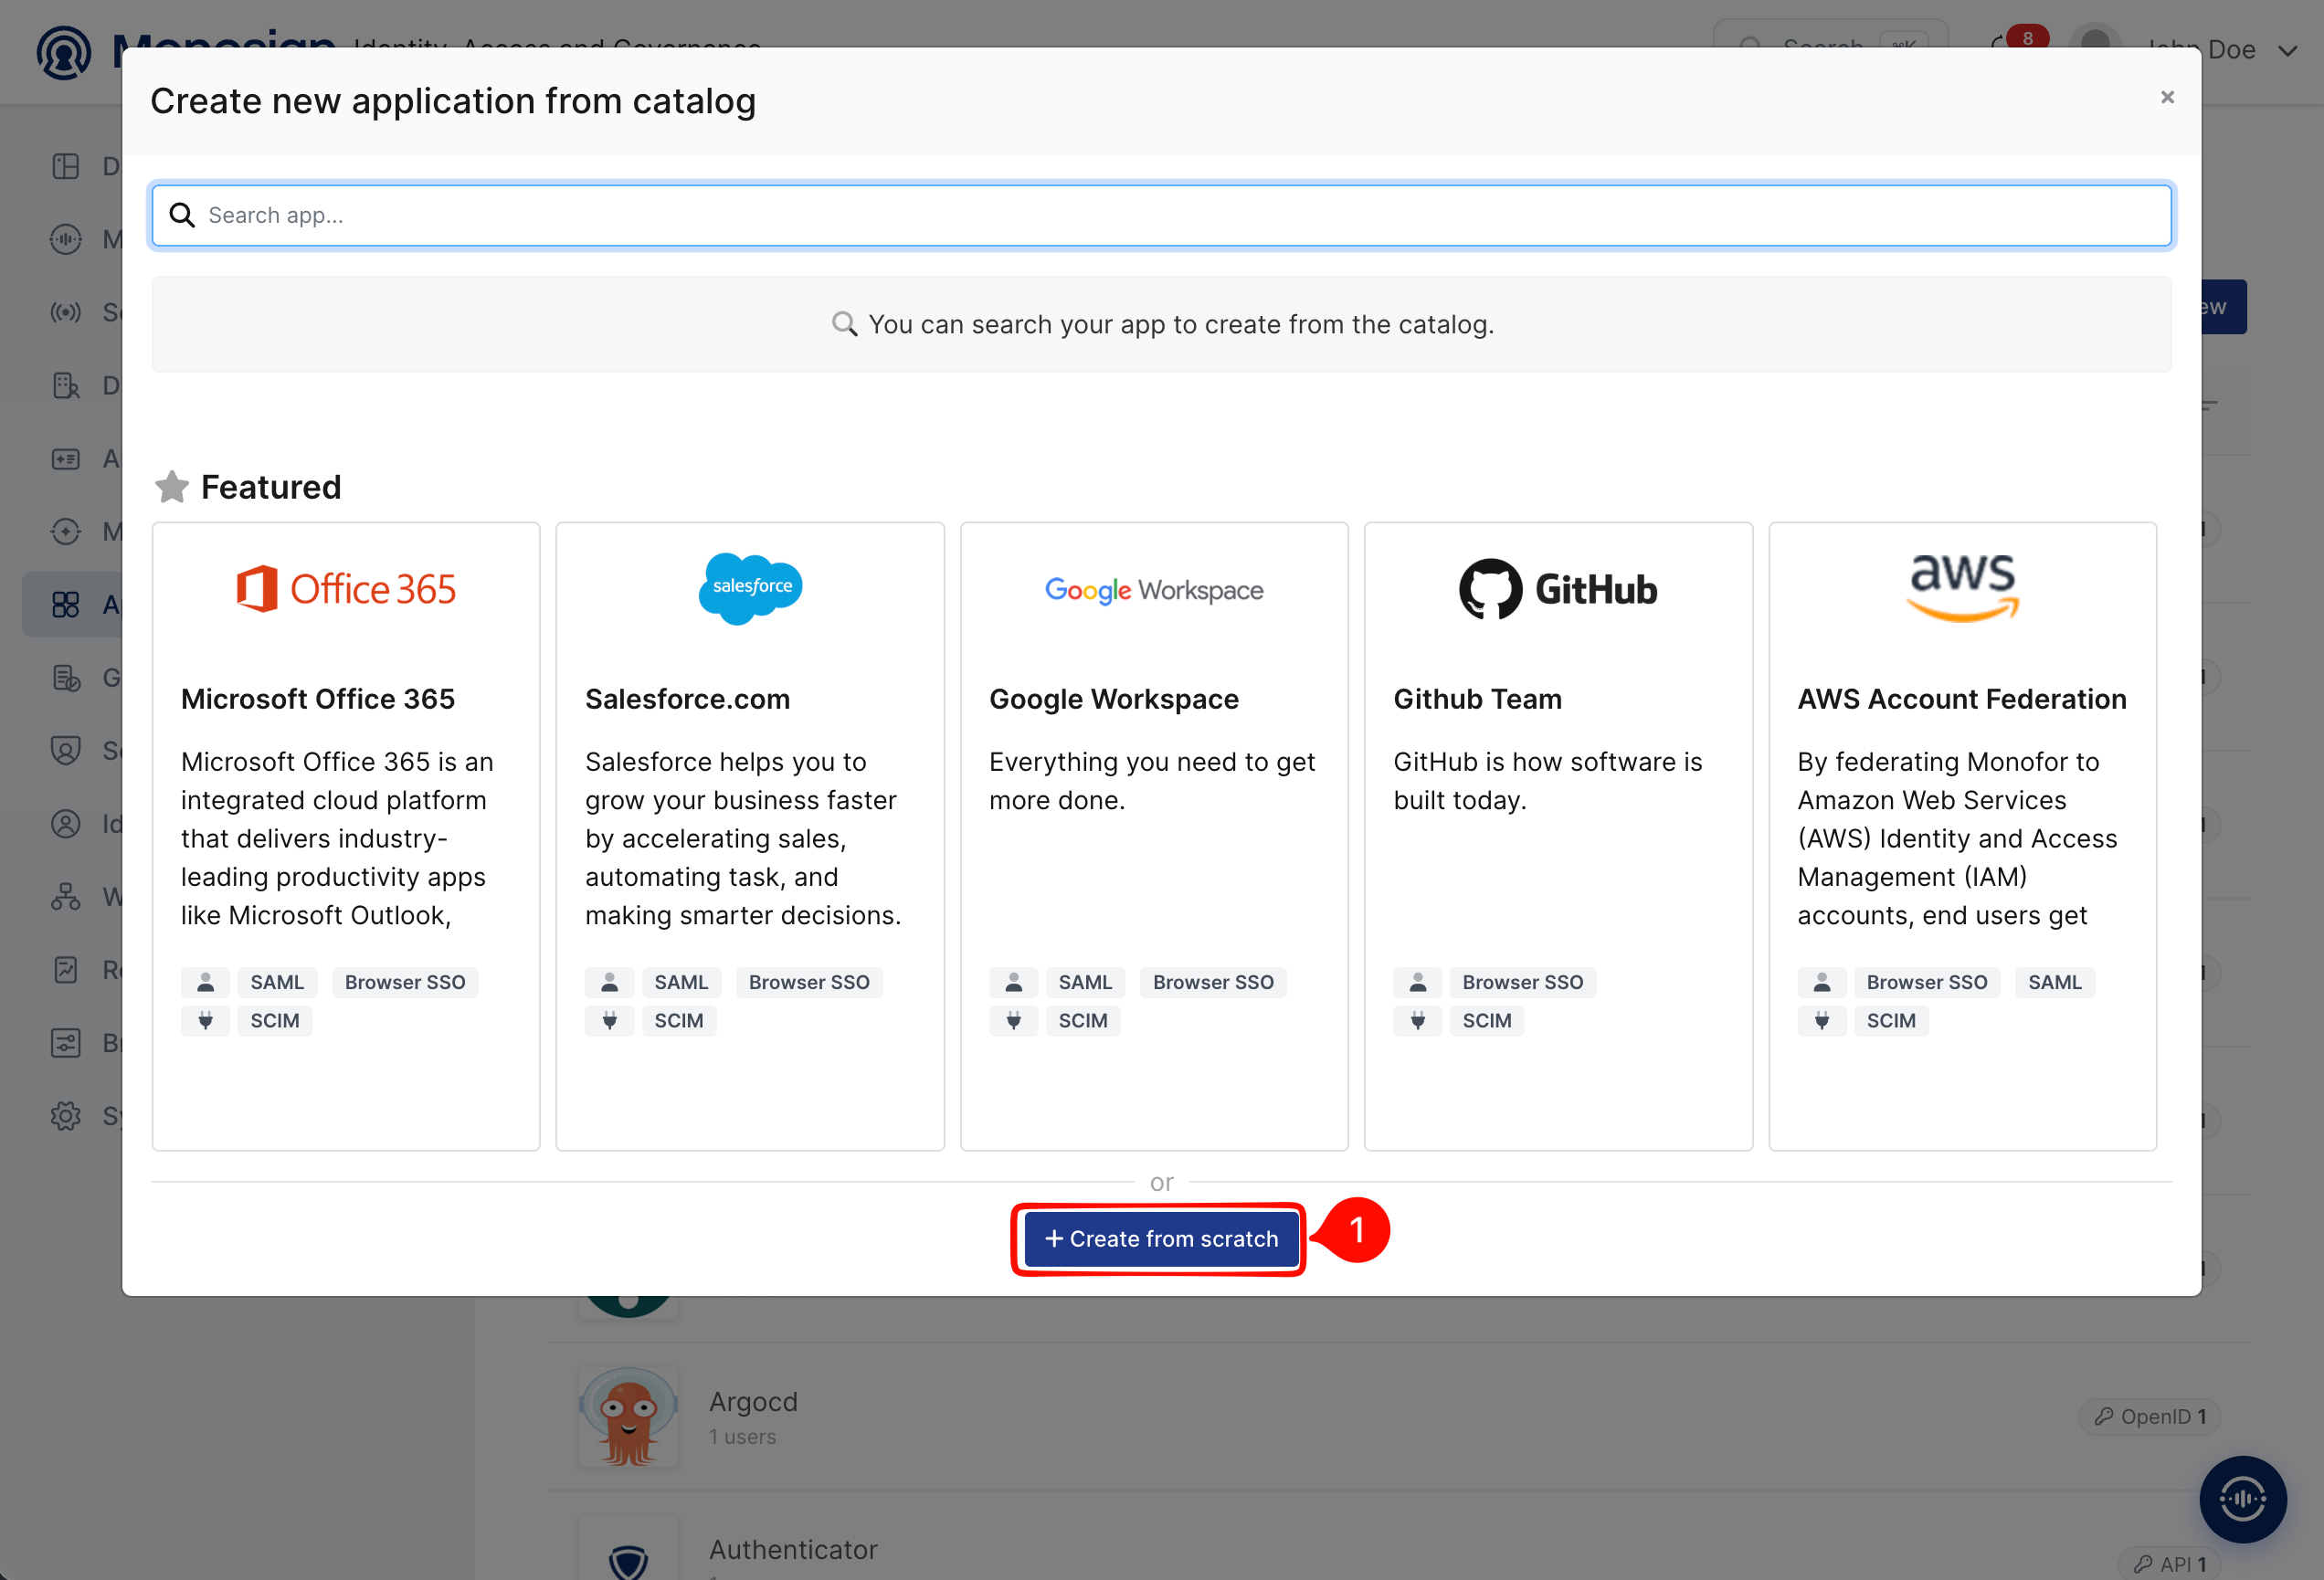
Redash is not in the application catalog, so click Create from scratch.
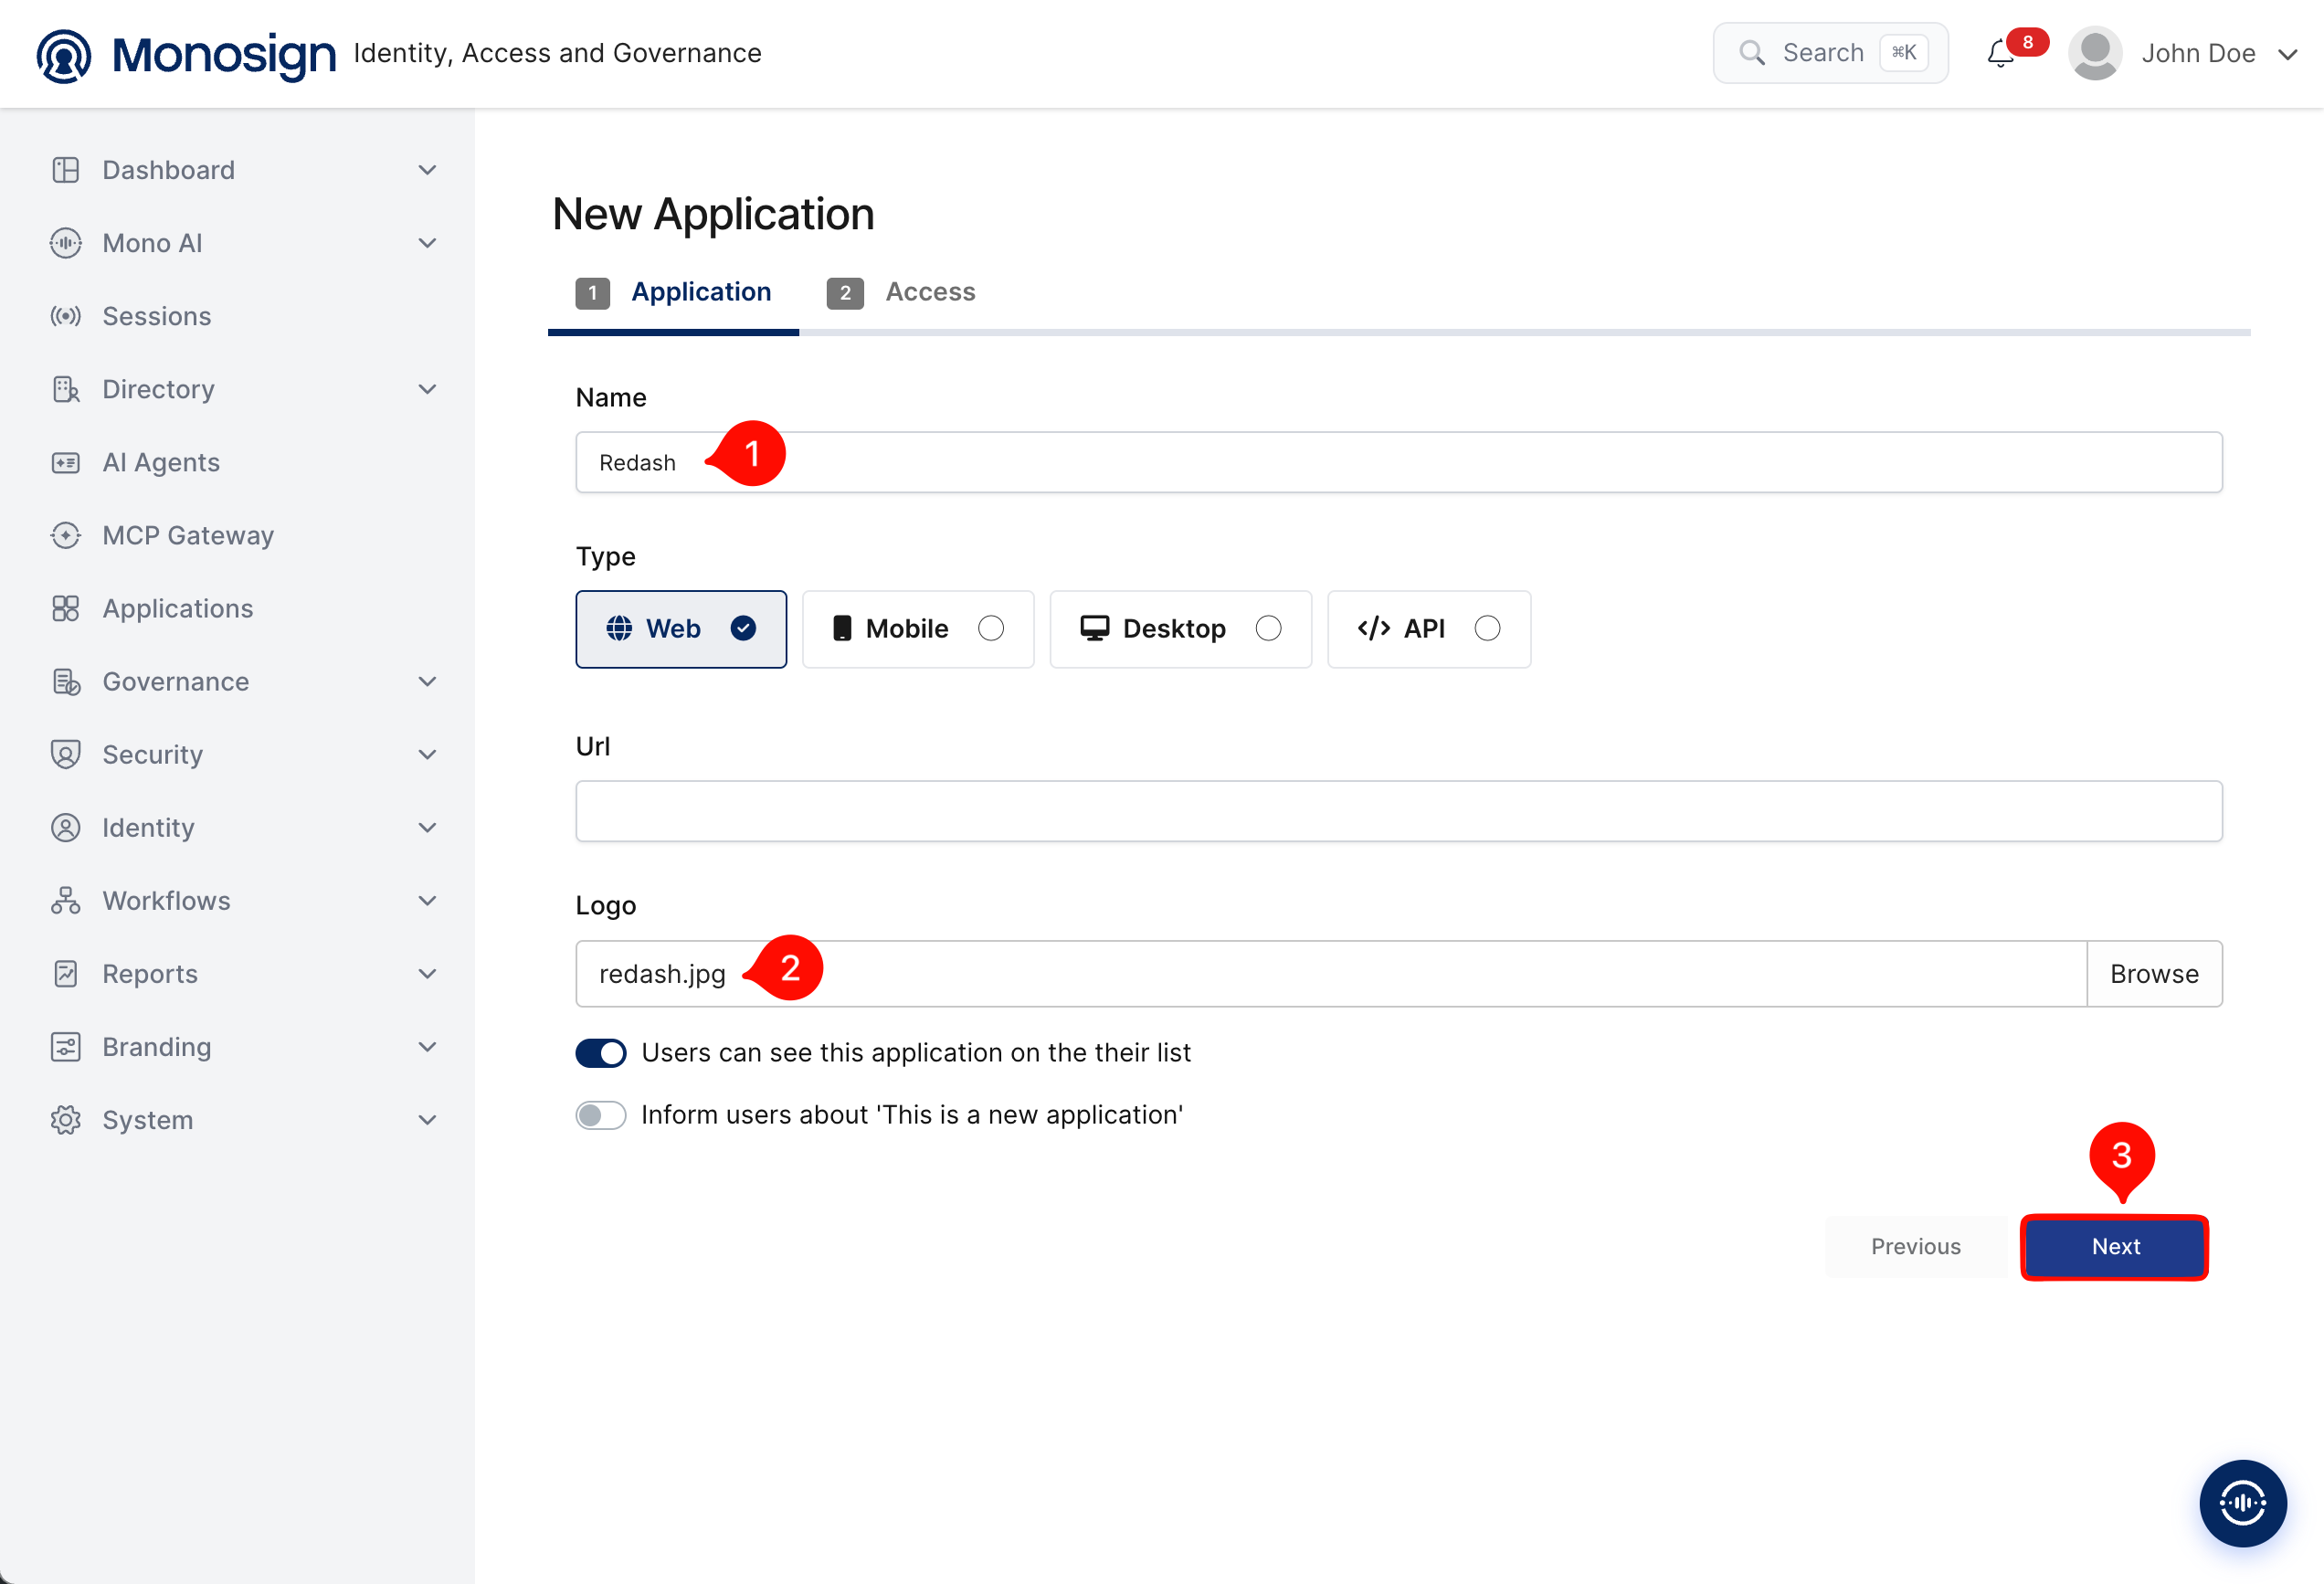
Fill in the application details on the Application tab and click Next.
|
Property |
Value |
Description |
|---|---|---|
|
Name |
|
Name of the application shown to users on the Monosign portal and on the Monosign sign-in page. |
|
Type |
|
Redash is accessed through a web browser. Options: Web, Mobile, Desktop, API. |
|
Url |
Optional |
Leave empty or enter the Redash address (for example |
|
Logo |
|
Optional. Browse and upload a logo; it is also shown on the Monosign sign-in page. |
|
Users can see this application on their list |
|
Displays the application on the user portal. |
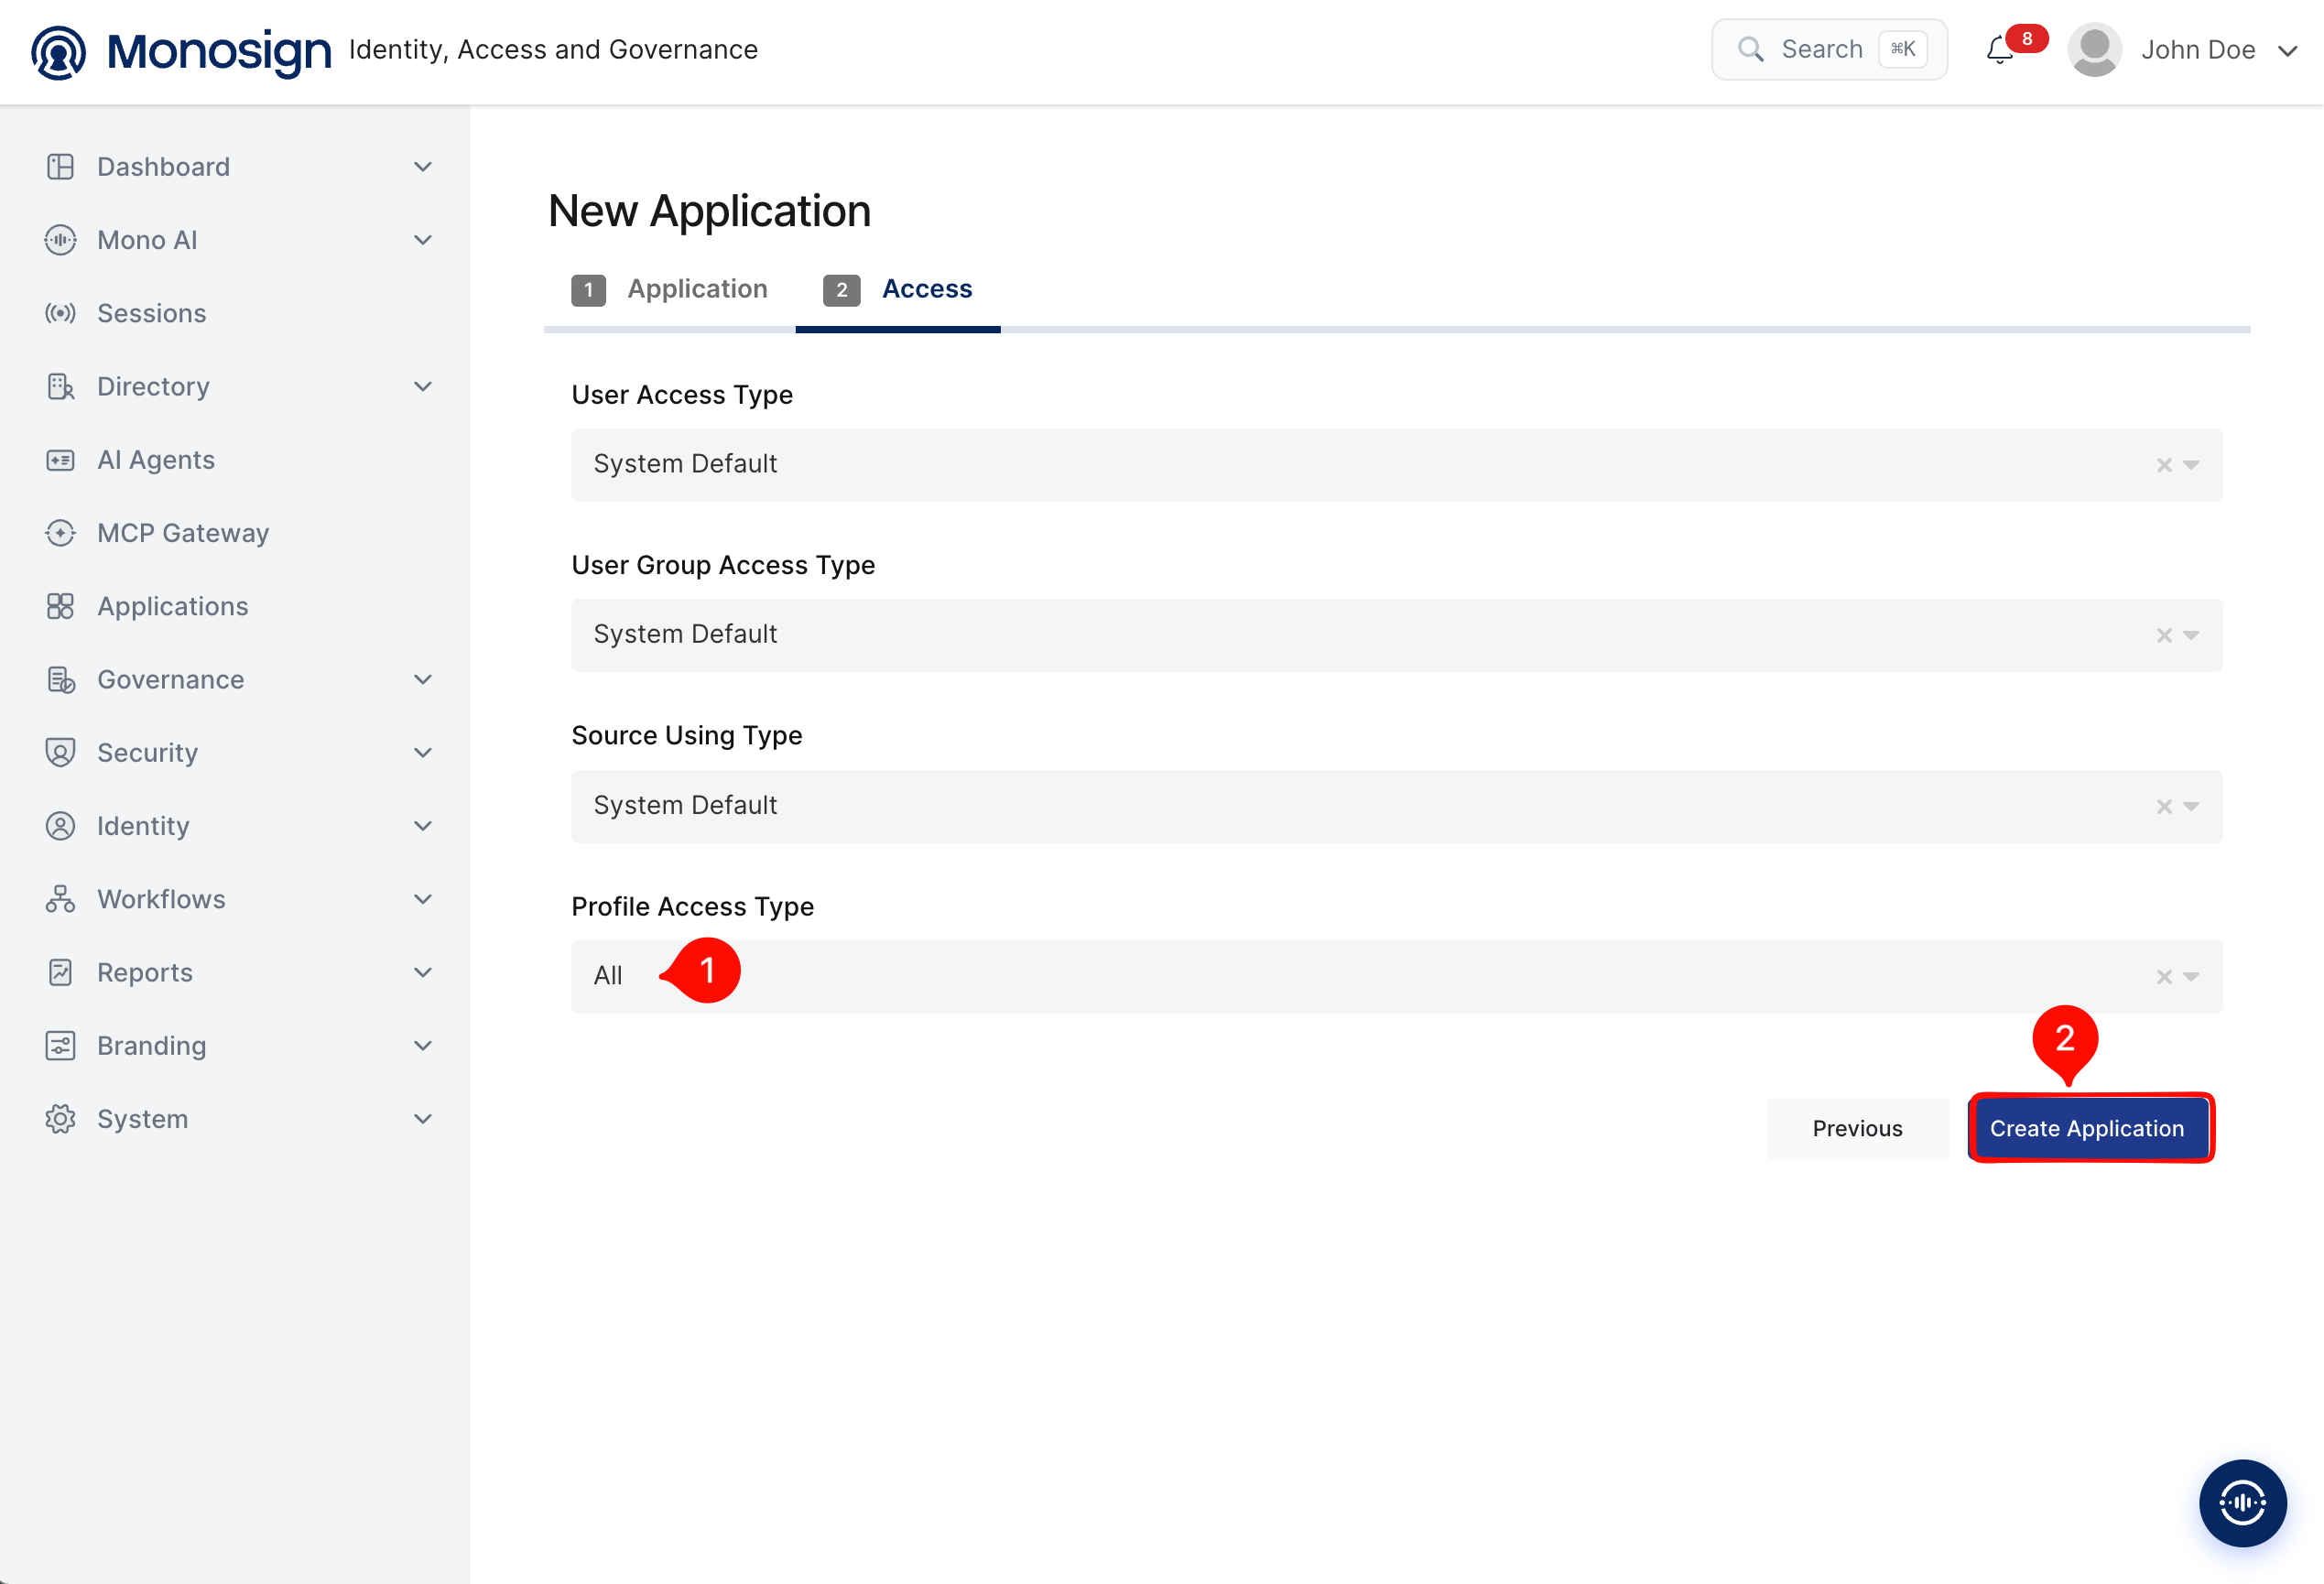
On the Access tab define who can reach the application and click Create Application.
|
Property |
Value |
Description |
|---|---|---|
|
User Access Type |
|
Defines which users can access this application. Options: Only Assigned Users, All Users, System Default. |
|
User Group Access Type |
|
Defines the application’s user group access. |
|
Source Using Type |
|
Defines which user sources the application can use. |
|
Profile Access Type |
|
Defines which user profile attributes are available to the application. Redash needs the first name and the last name of the user, so the profile must be accessible (Options: Restricted, All). |
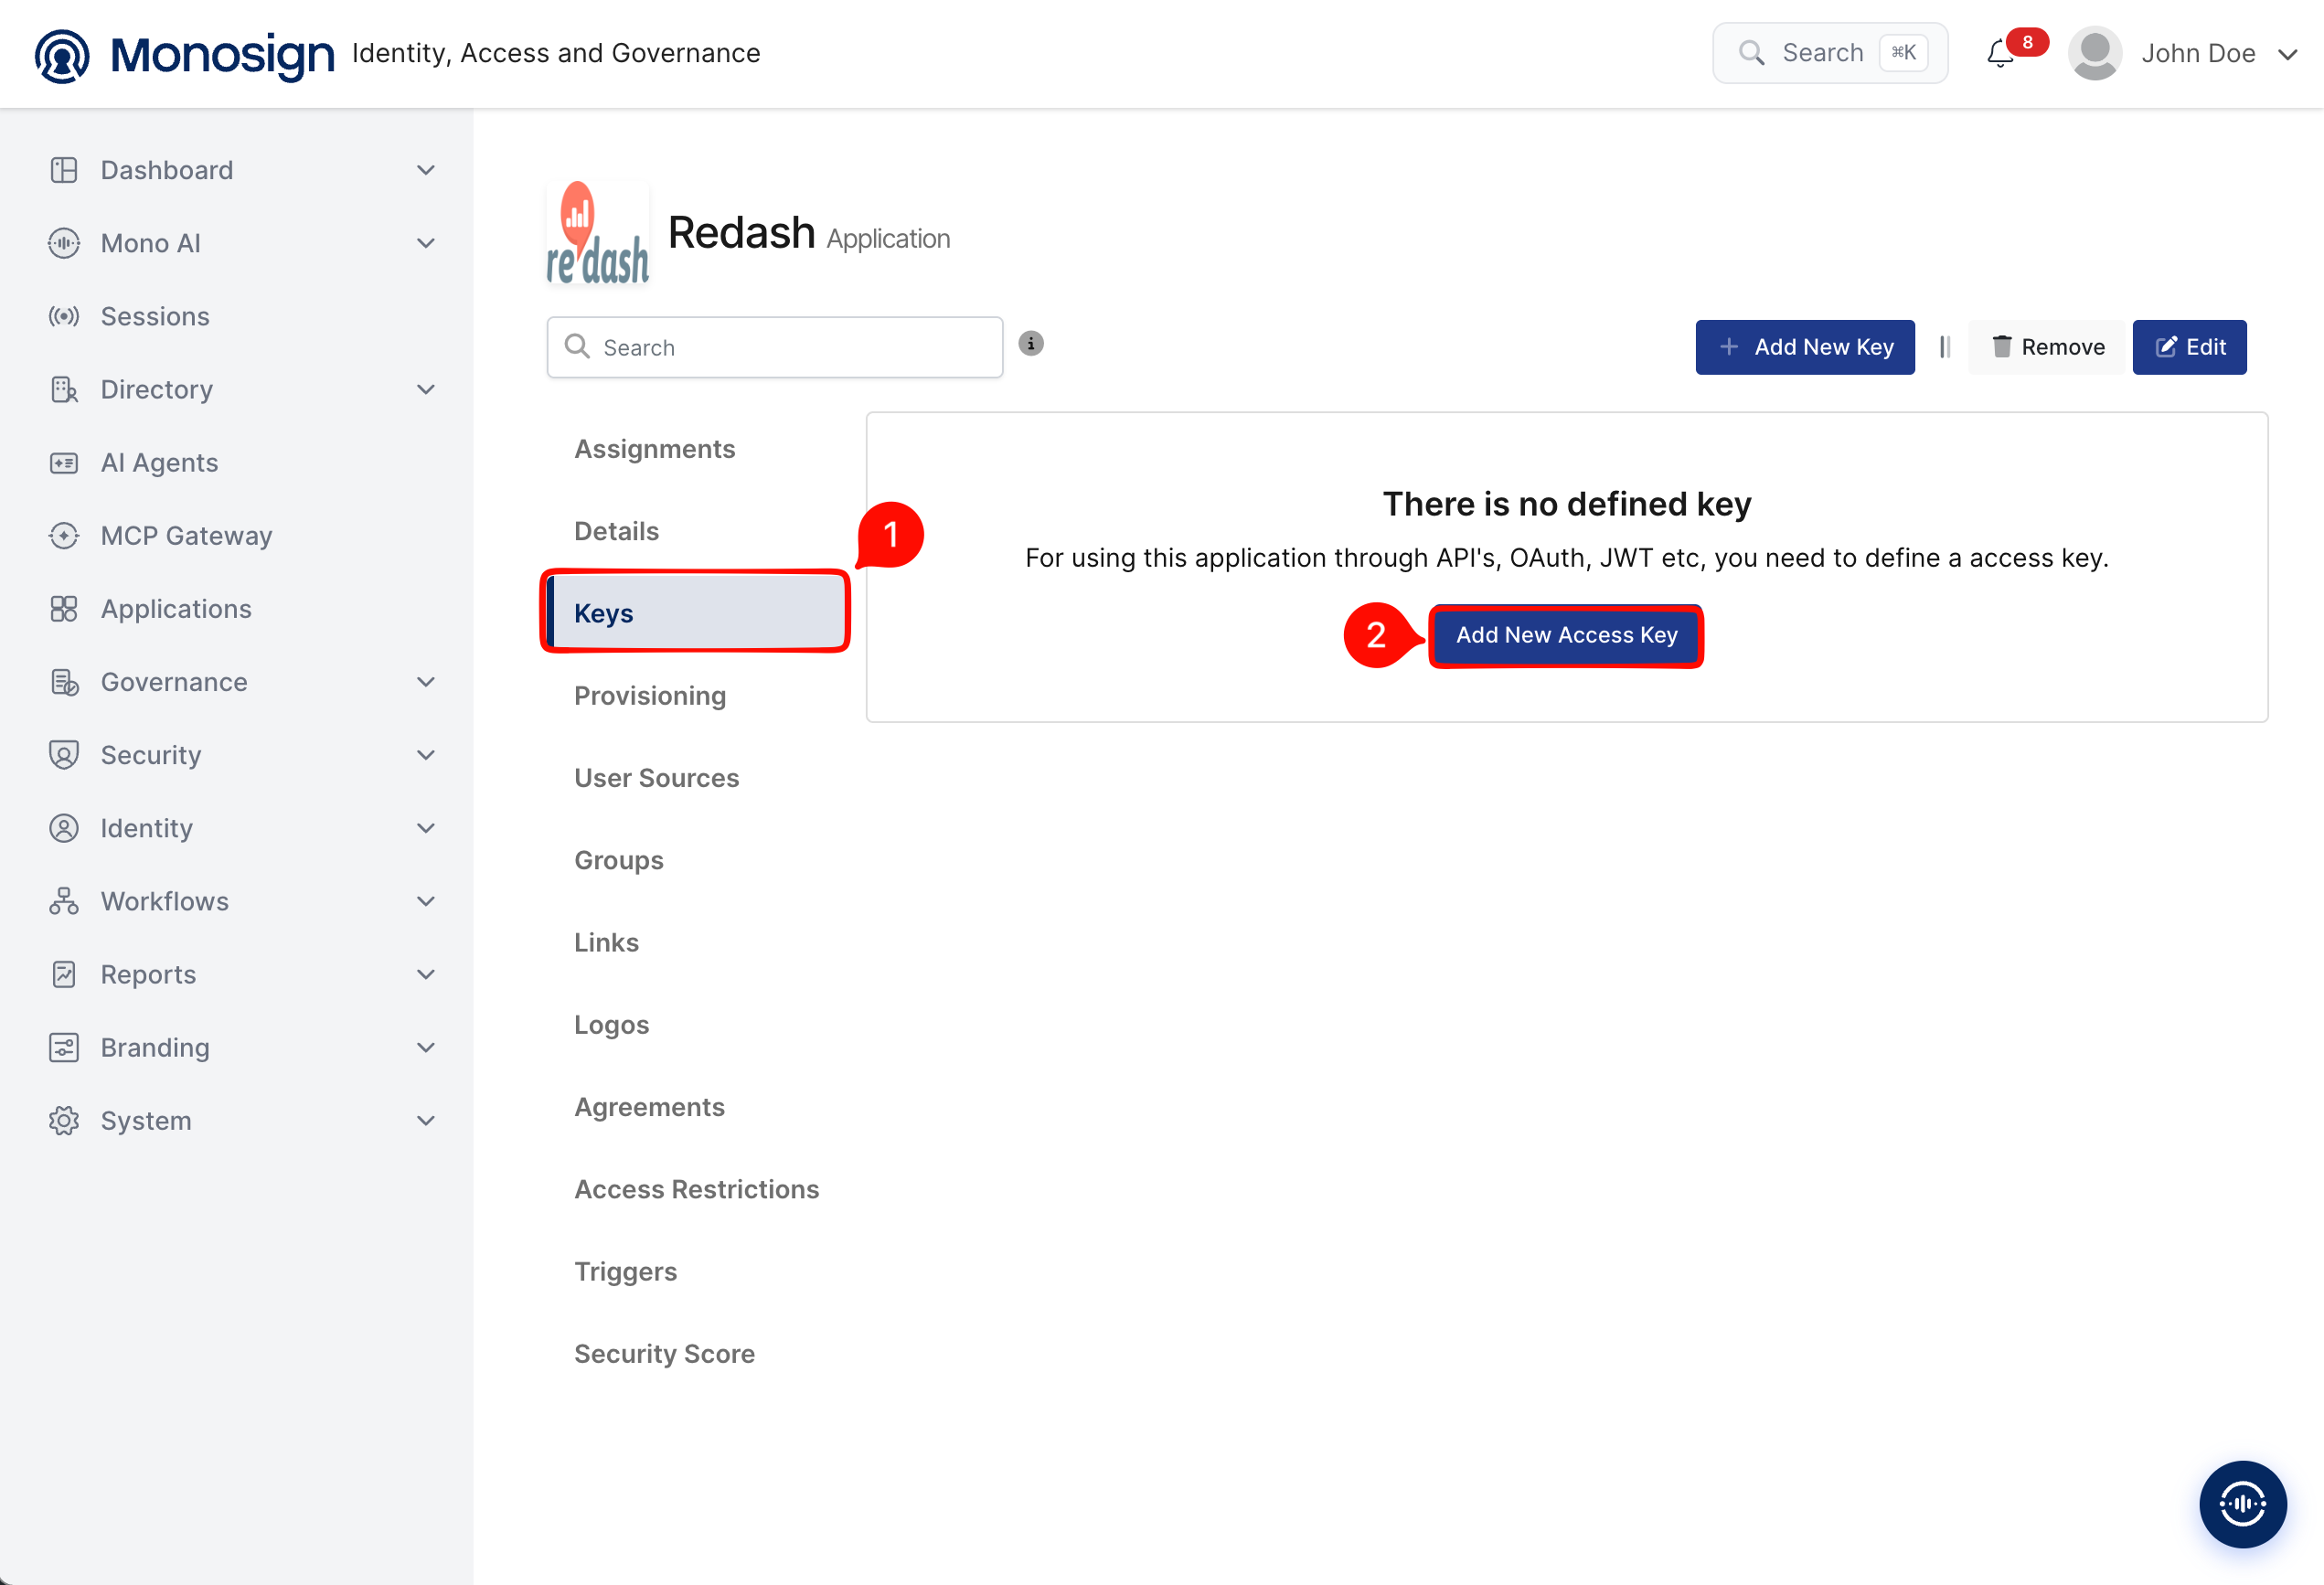
After the application is created, click Keys and add a new Access Key for SAML access.
Select SAML as the key type and click Create. Monosign generates the Key value of the SAML application automatically; it is a part of the Monosign SAML addresses.
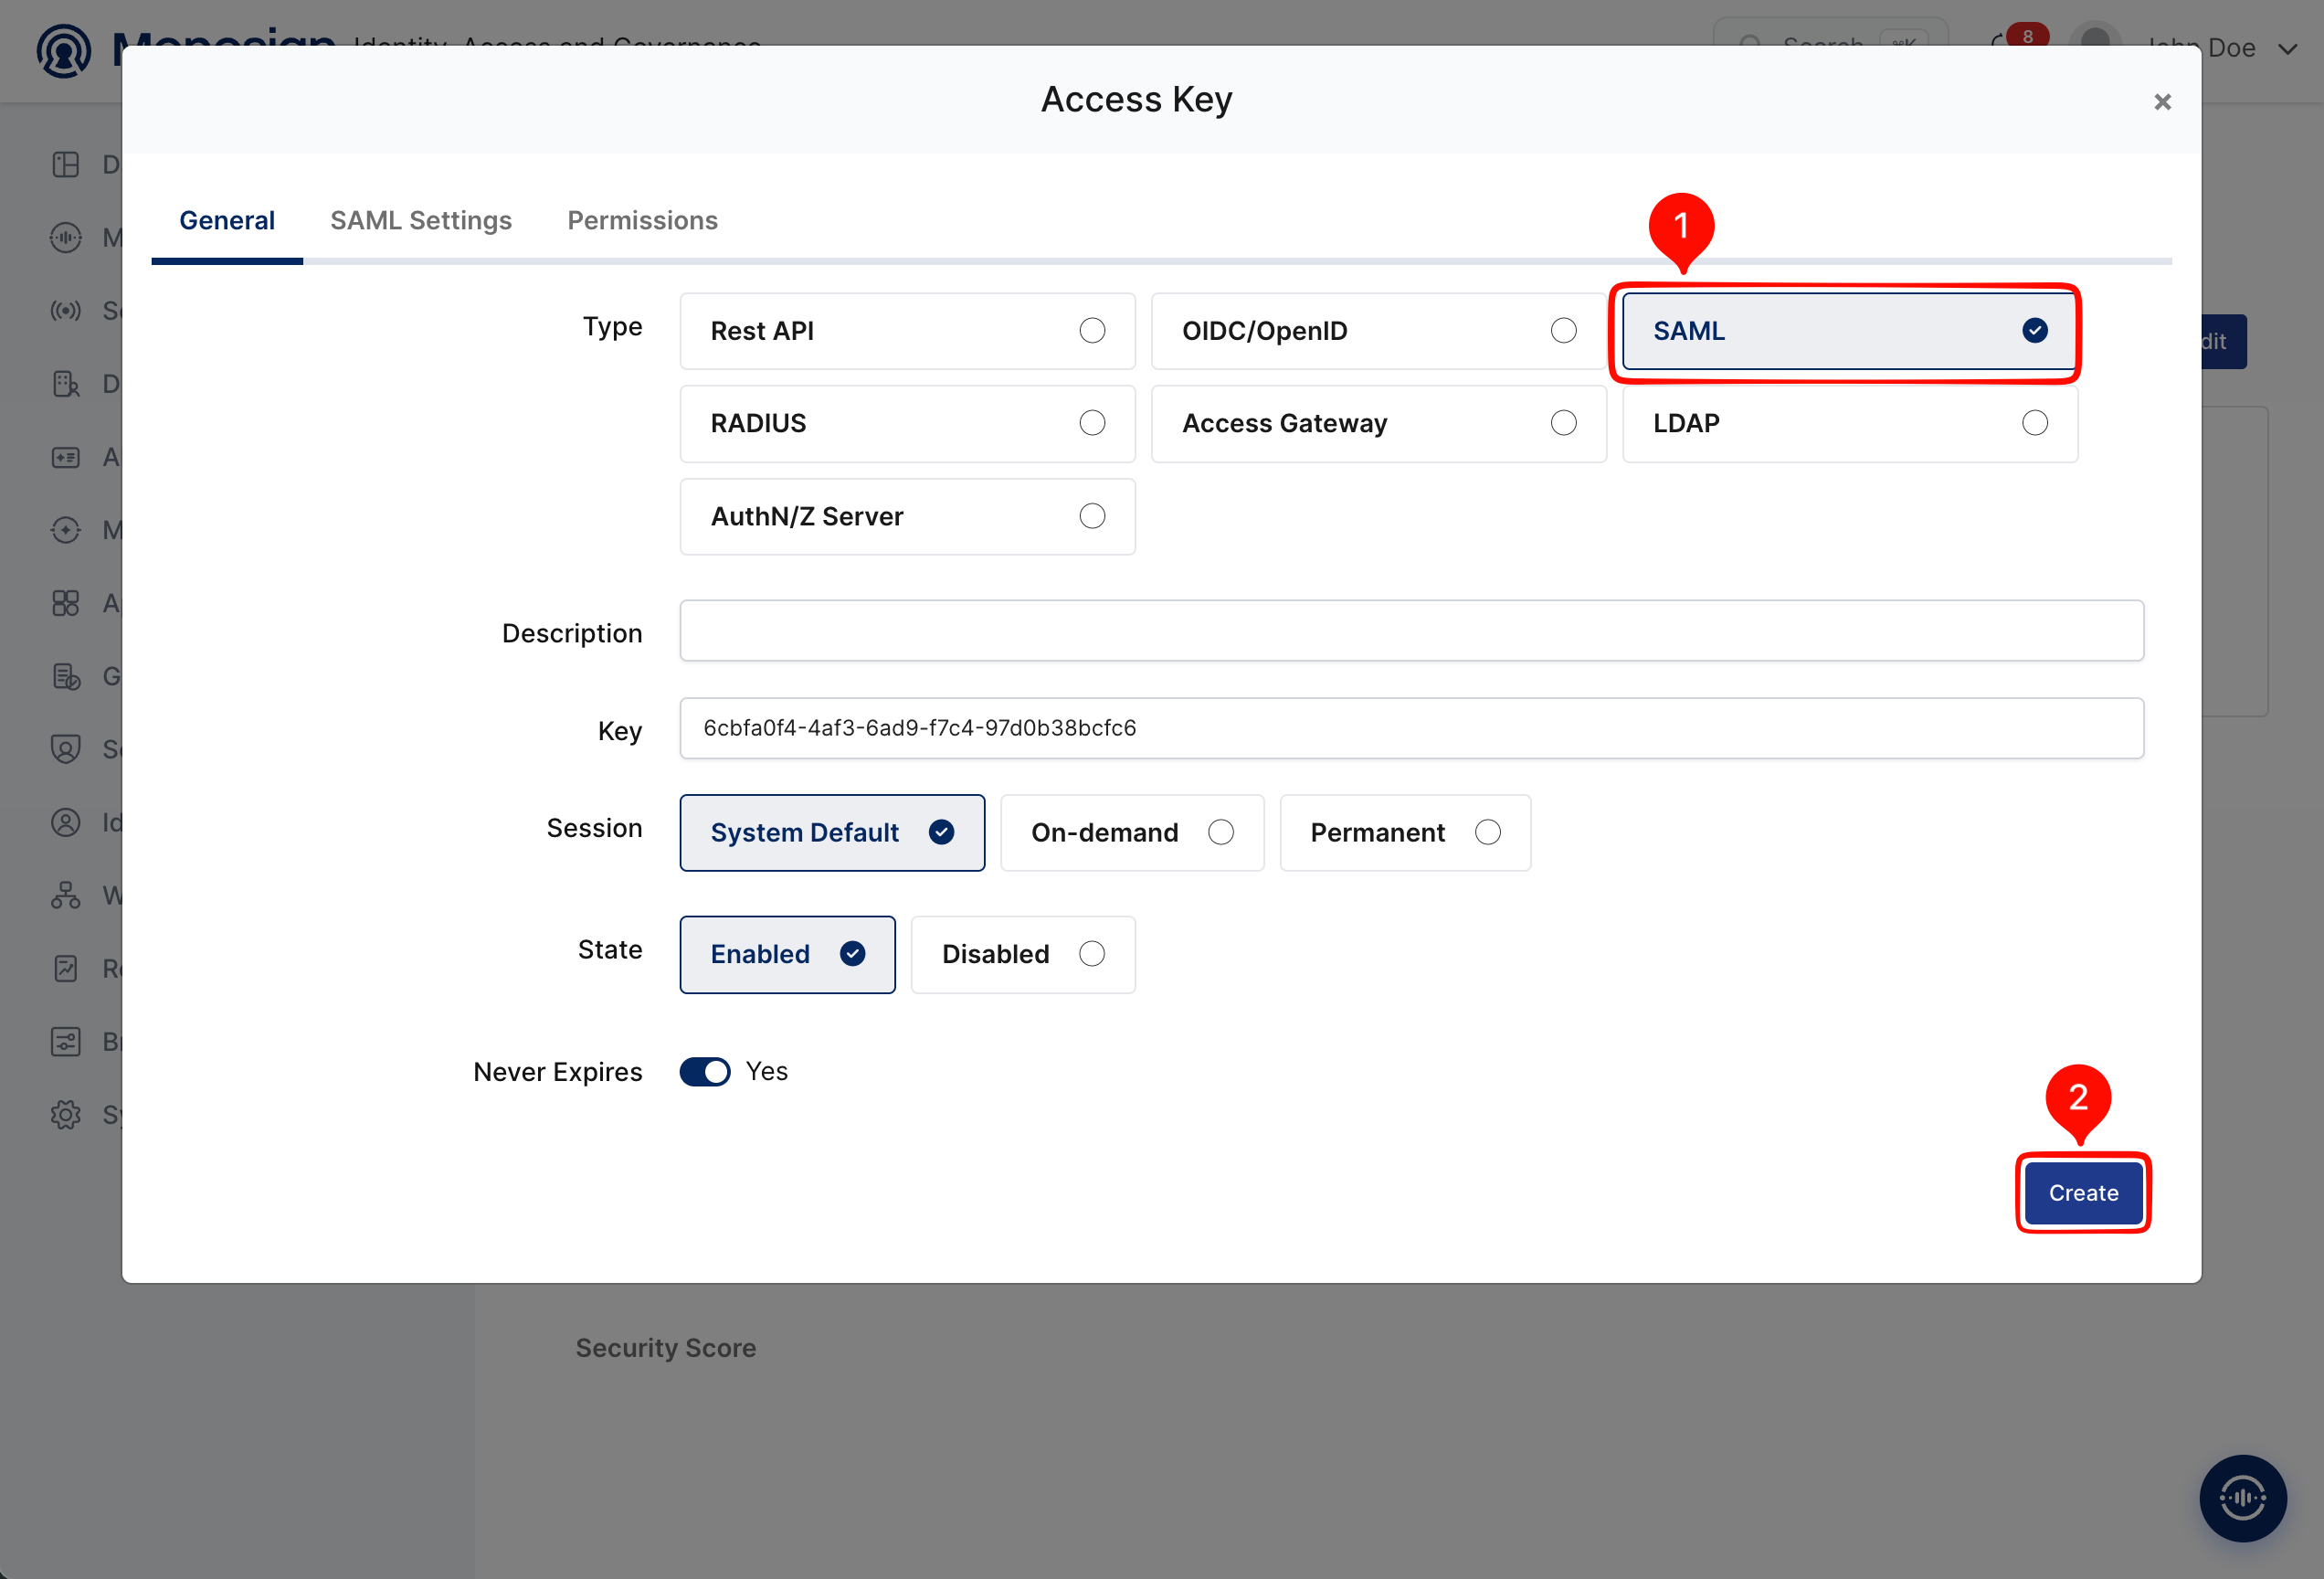
|
Property |
Value |
Options |
|---|---|---|
|
Type |
|
Rest API, OAuth 2.0, JWT, OIDC/OpenID, SAML, RADIUS, Access Gateway, LDAP, AuthN/Z Server |
|
Key |
Generated automatically |
Unique identifier of the SAML application in the Monosign addresses. |
|
Session |
|
System Default, On-demand, Permanent |
|
State |
|
Enabled, Disabled |
|
Never Expires |
|
Turn off to define a specific expiration date for the key. |
2- Configuring the SAML Settings on Monosign
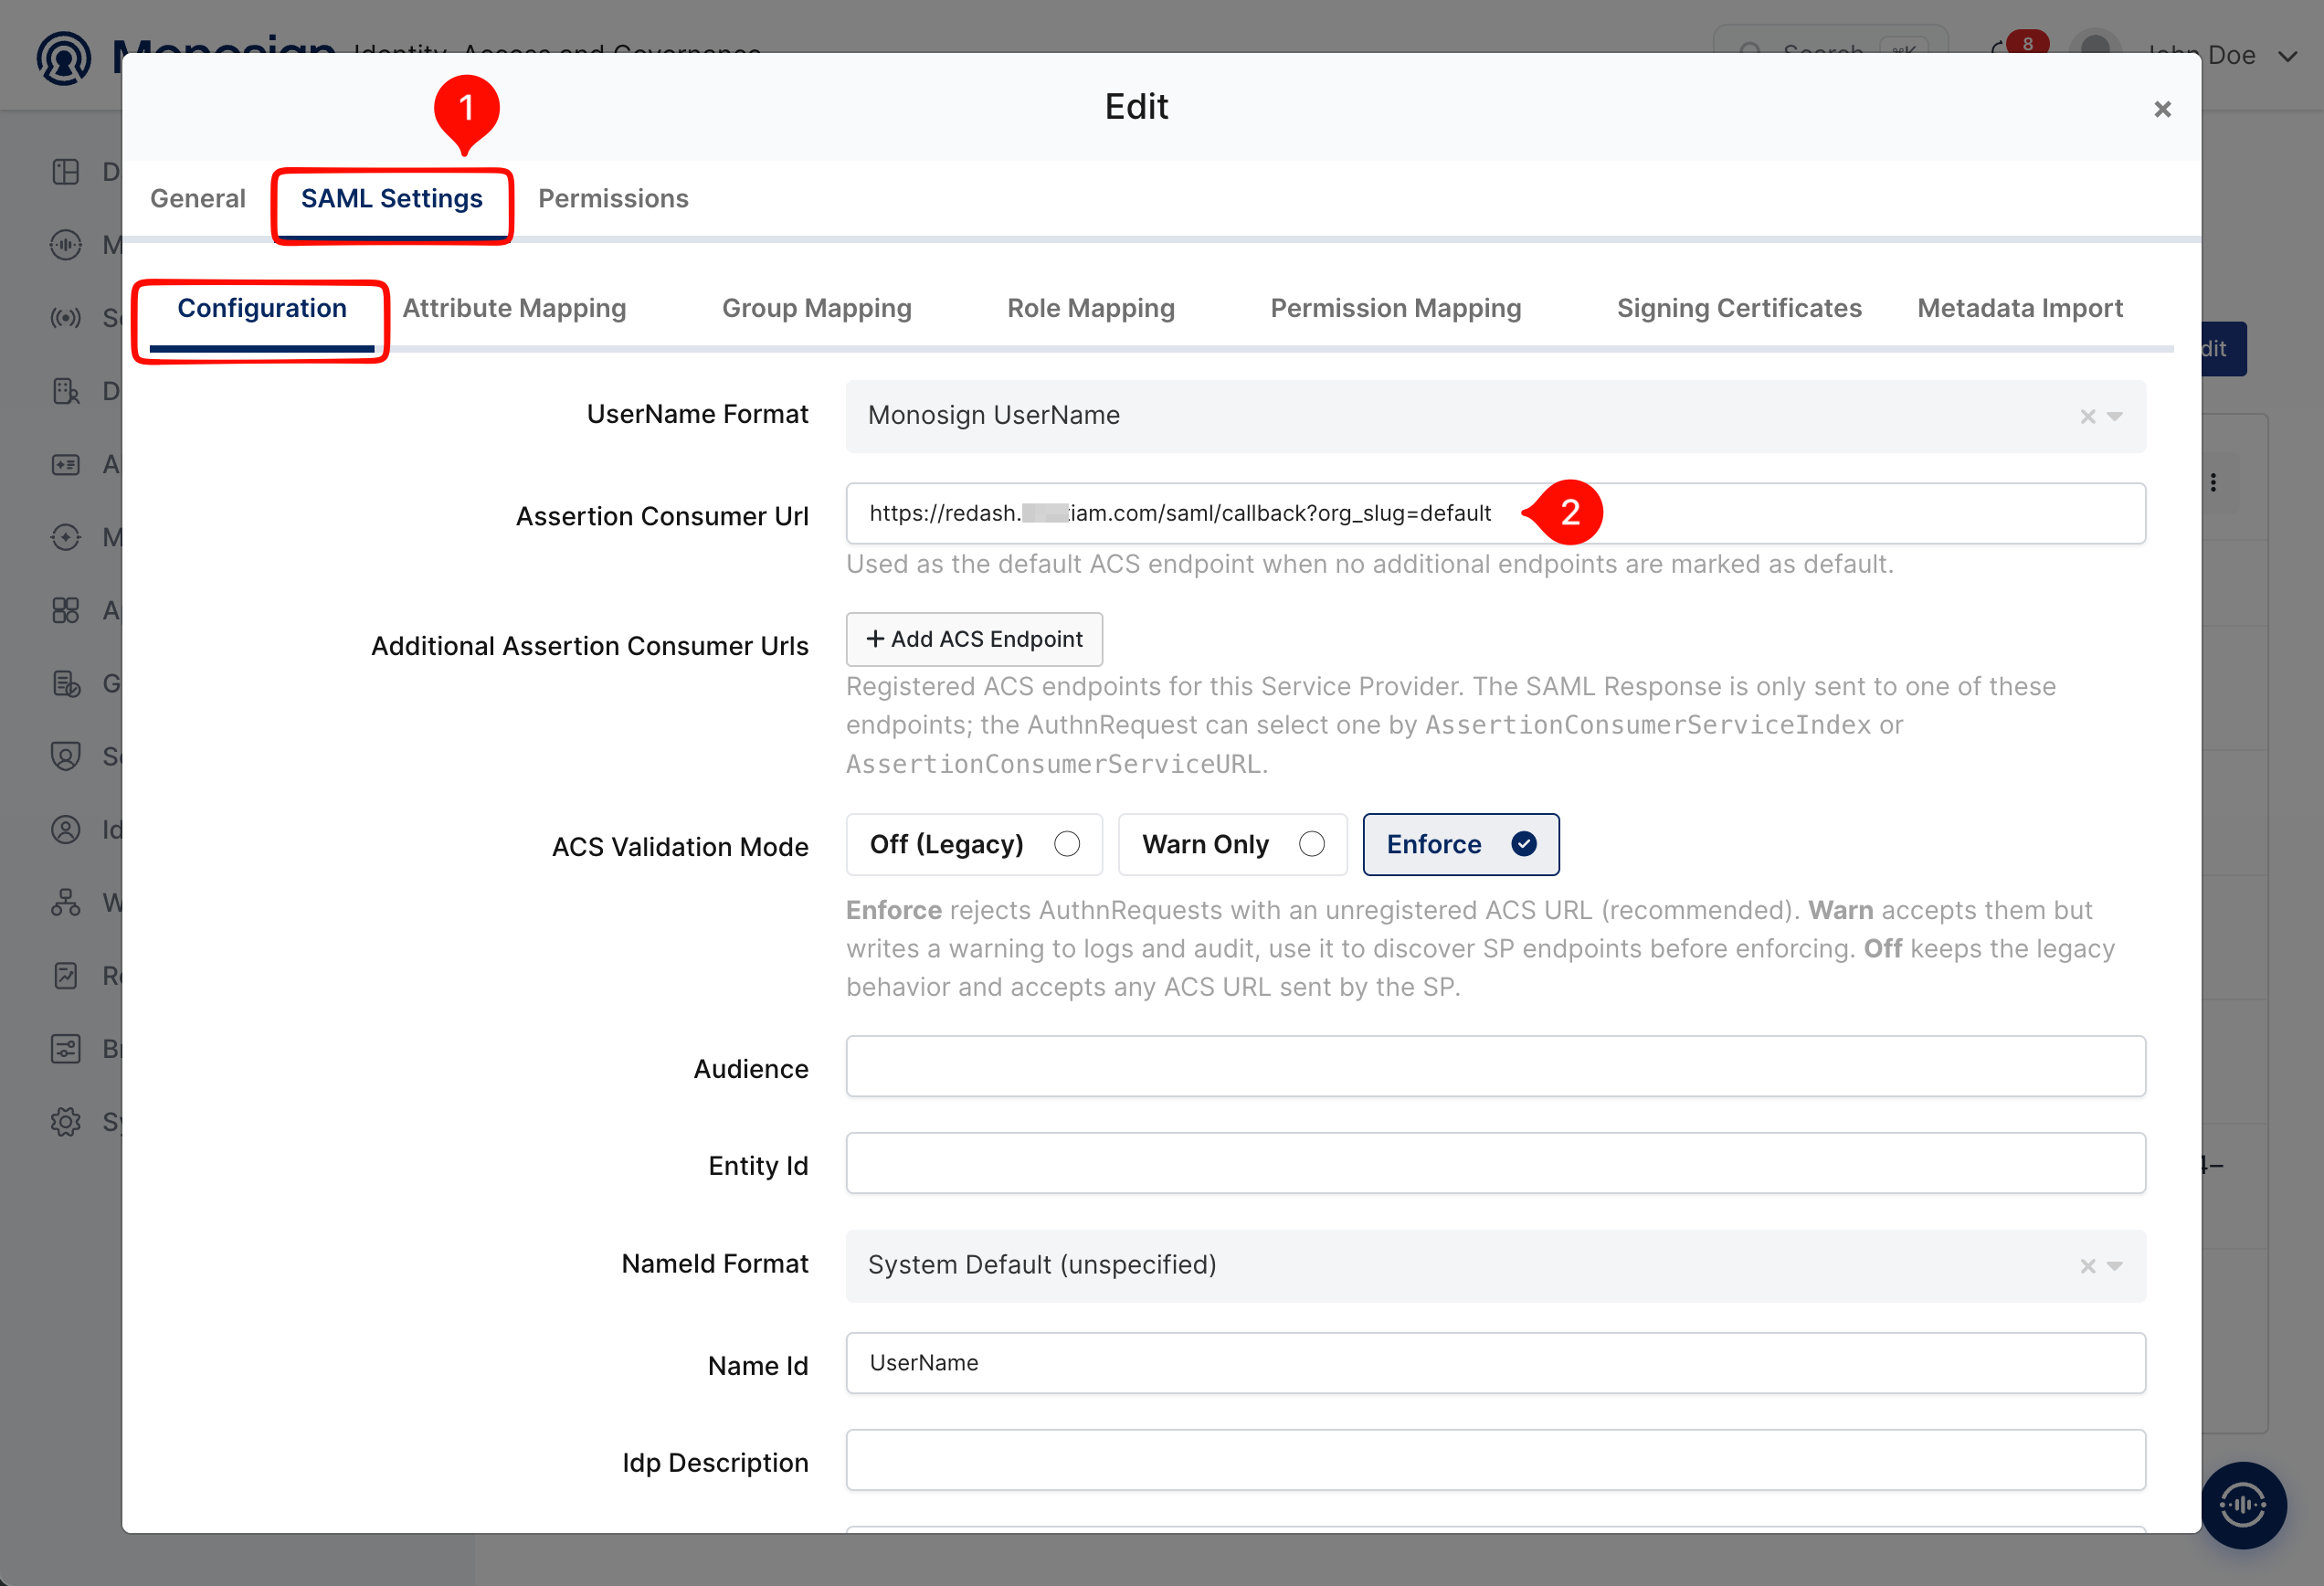
Open the Edit screen of the SAML key and go to the SAML Settings → Configuration tab. Enter the address where Redash receives the SAML response in Assertion Consumer Url.
Then set the NameId Format and the Name Id.
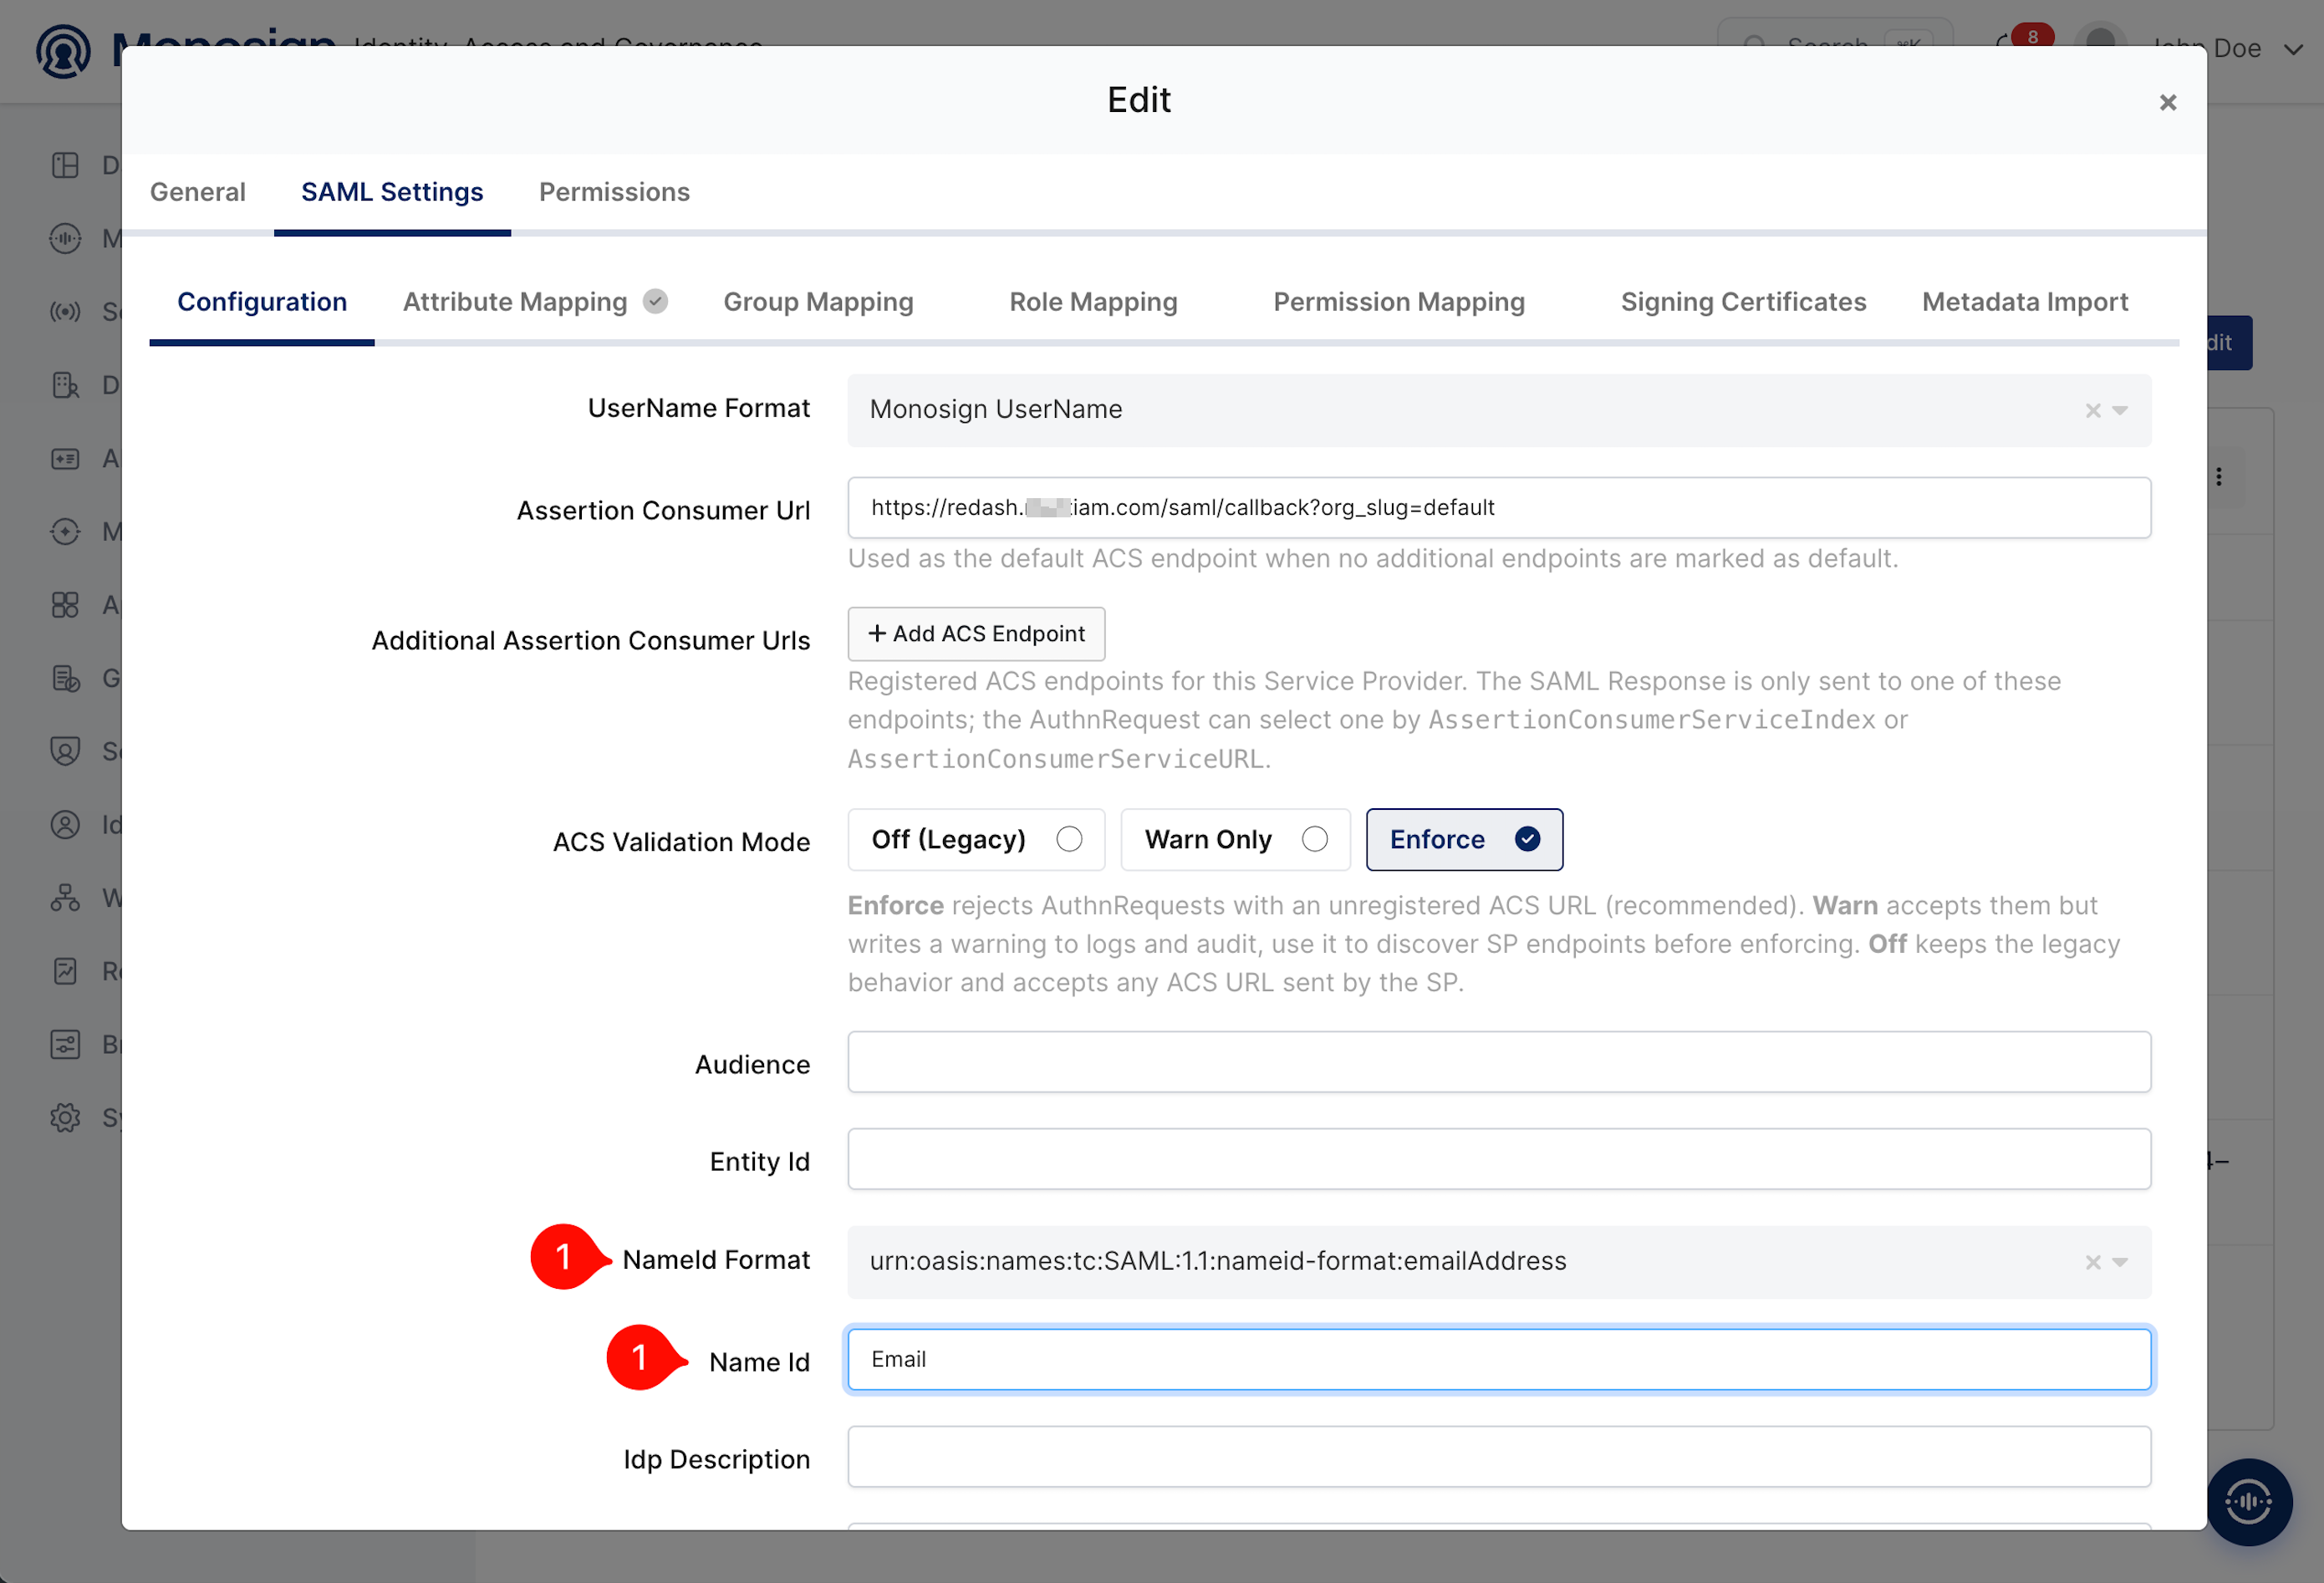
|
Property |
Value |
Description |
|---|---|---|
|
Assertion Consumer Url |
|
The ACS address of Redash. Use the public (HTTPS) address of Redash exactly as shown; |
|
ACS Validation Mode |
|
Monosign accepts only the registered ACS address. |
|
Audience / Entity Id / Idp Description |
Empty |
Not required for Redash. |
|
NameId Format |
|
The user is identified by e-mail address. |
|
Name Id |
|
Redash reads the e-mail address of the user from the NameID of the SAML response, so it must be the e-mail. |
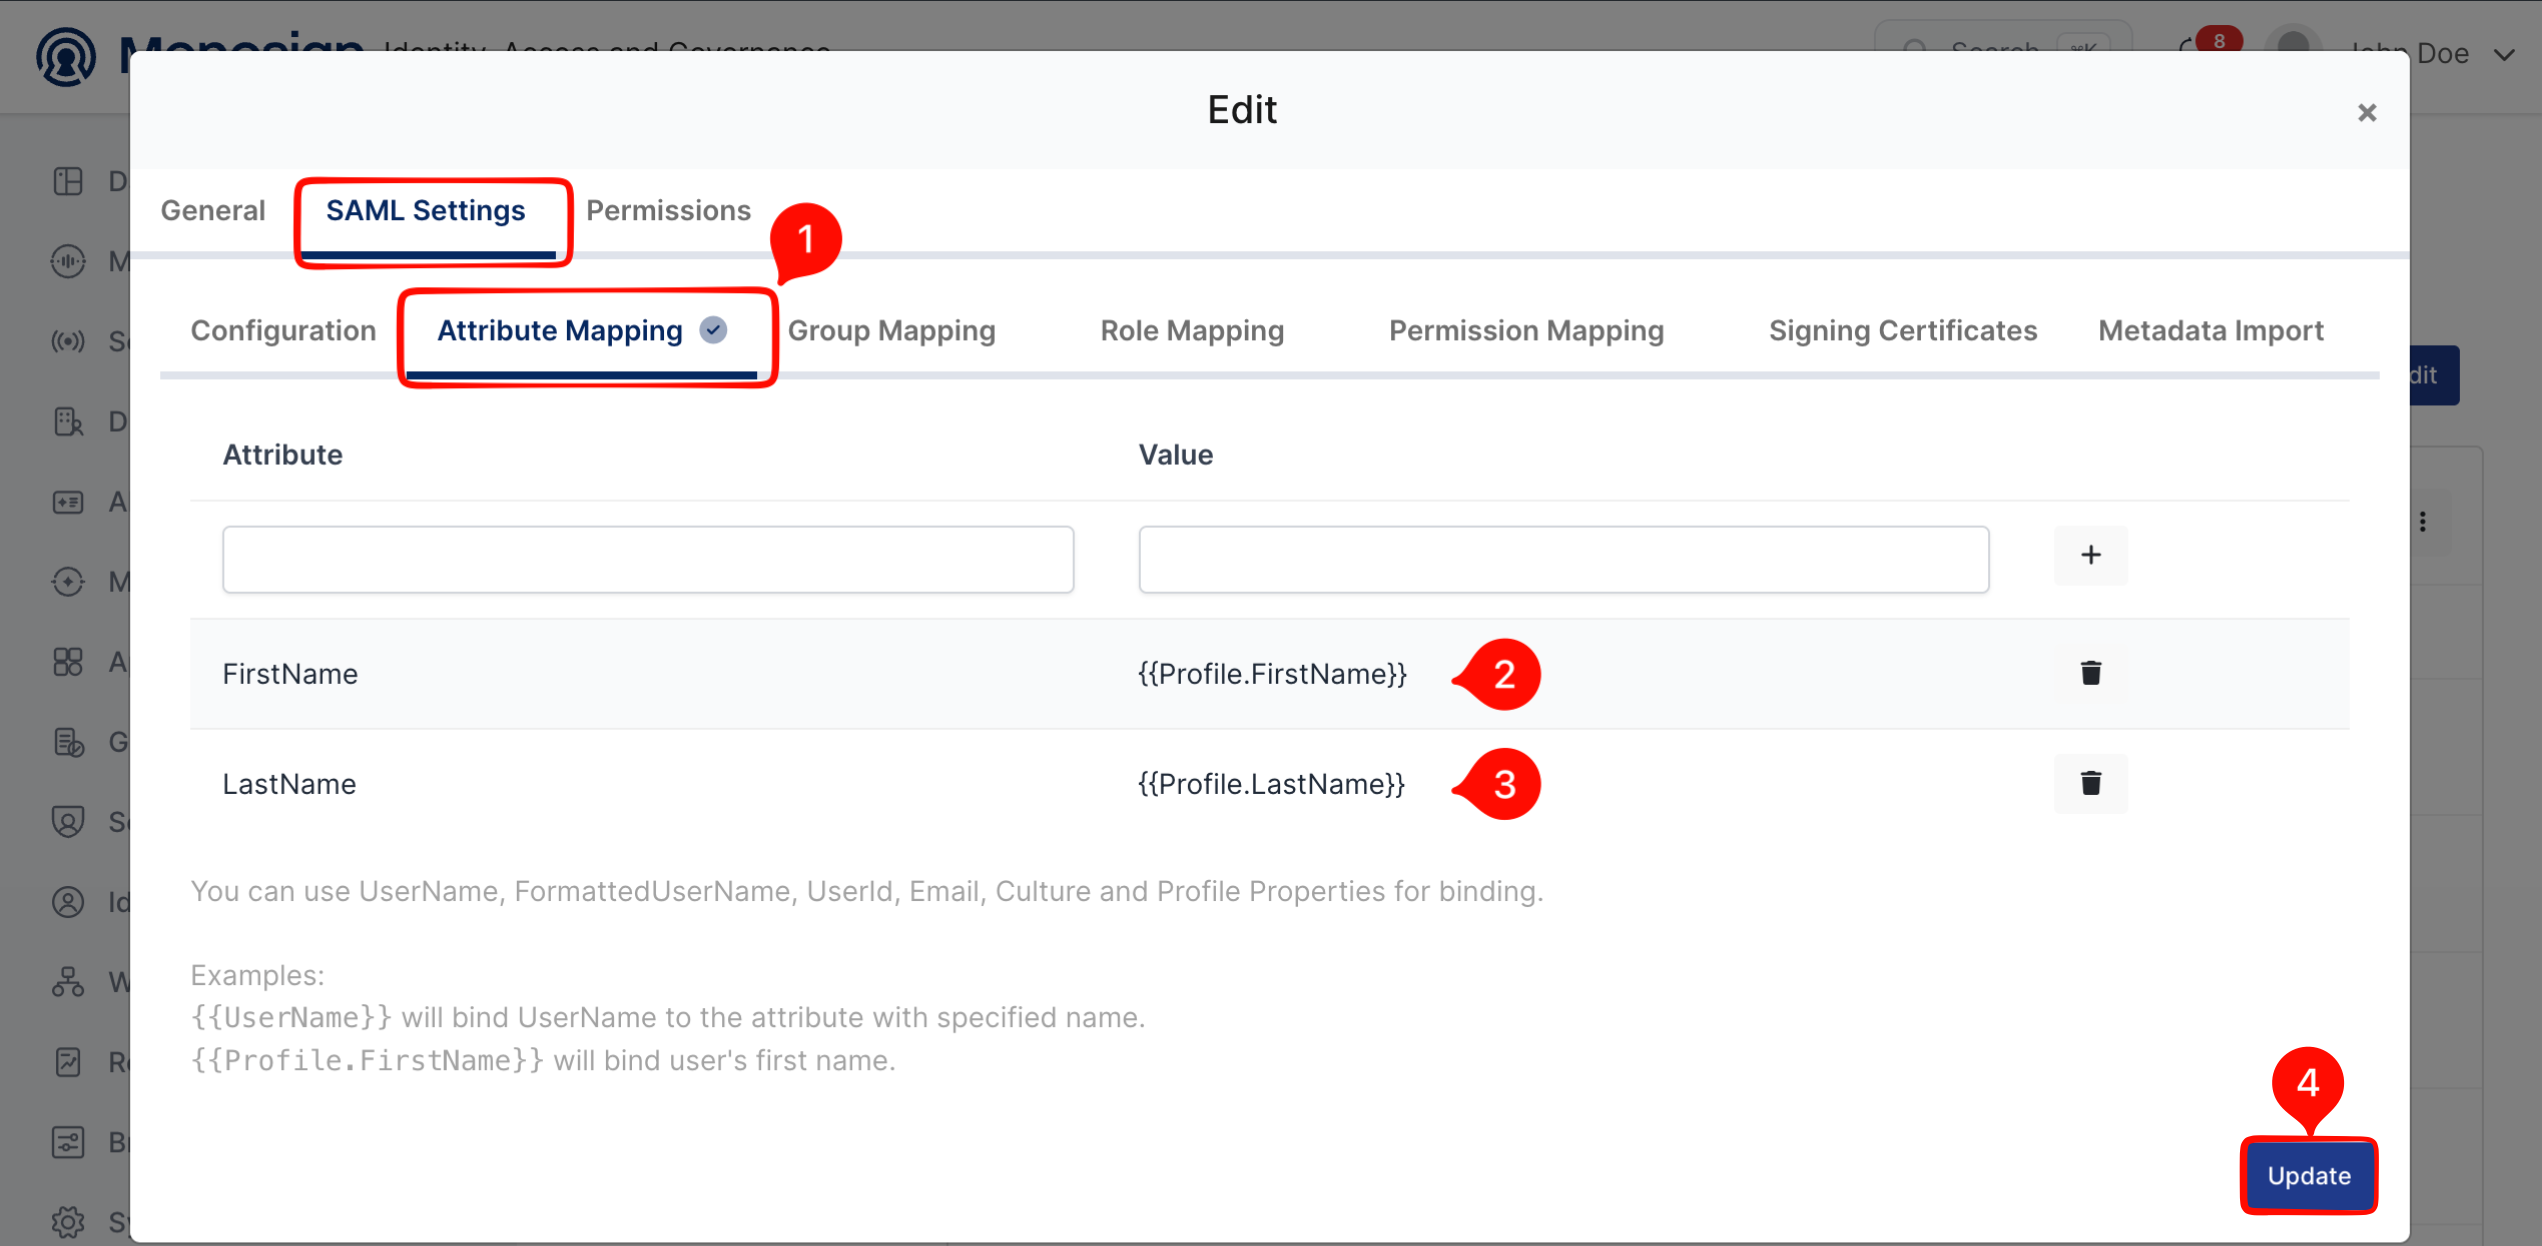
Open the Attribute Mapping tab and add the first name and the last name of the user. Click Update to save.
|
Attribute |
Value |
Description |
|---|---|---|
|
FirstName |
|
First name of the user. Required by Redash. |
|
LastName |
|
Last name of the user. Required by Redash. |
|
RedashGroups |
Optional |
Names of the Redash groups of the user. If it is sent, Redash assigns the user to these groups at every login. |
The attribute names are case sensitive and Redash reads exactly FirstName and LastName. If one of them is missing in the SAML response, Redash cannot create the user and answers with 500 Internal Server Error. Make sure that the Monosign users who sign in to Redash have their first name and last name filled in their profile.
The Monosign values that are needed in the Redash configuration (step 4) are on the key page:
|
Monosign value |
Example |
Used in Redash as |
|---|---|---|
|
Sign On Service |
|
SAML Single Sign-on URL |
|
Entity Id of the IdP (in the IdP metadata) |
|
SAML Entity ID |
|
View Certificate / Download Certificate |
X.509 certificate of Monosign |
SAML x509 cert |
|
Metadata, Download IdP Metadata |
|
SAML Metadata URL (only for the Dynamic mode) |
3- Assign a User to the Redash Application
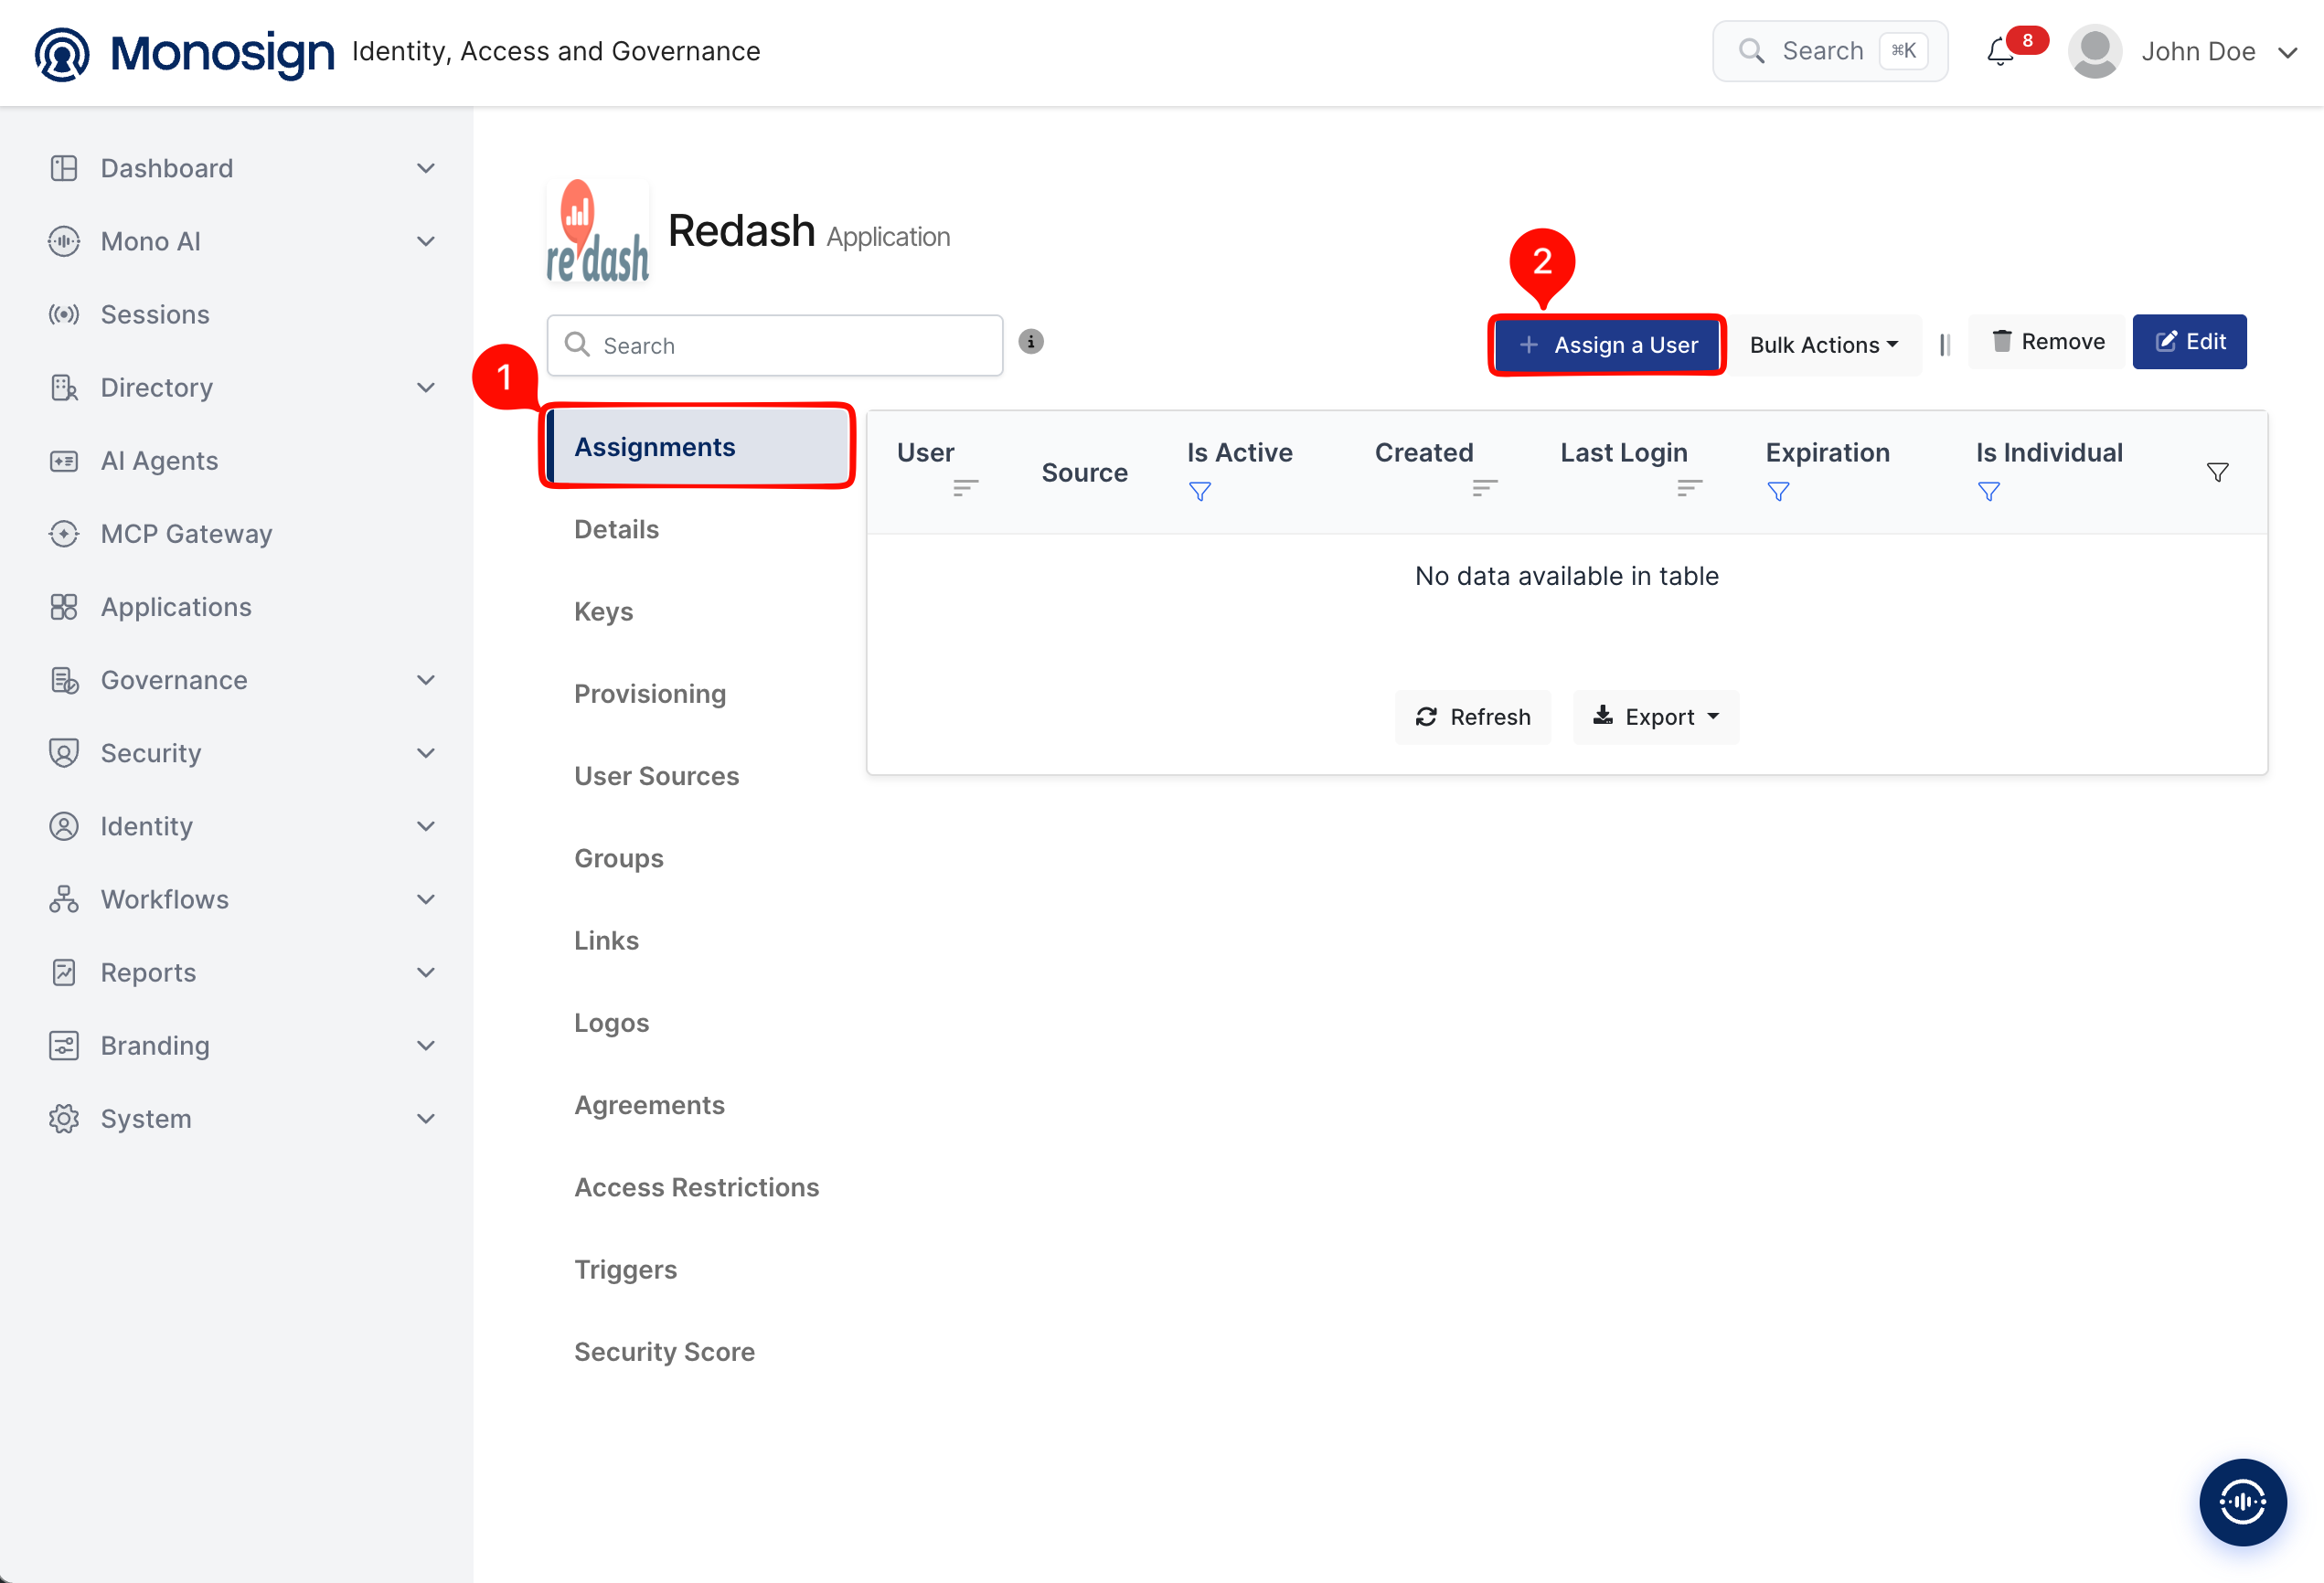
Please follow the below instructions on how to assign a user to the Redash application. Open the application, click the Assignments tab and click Assign a User.
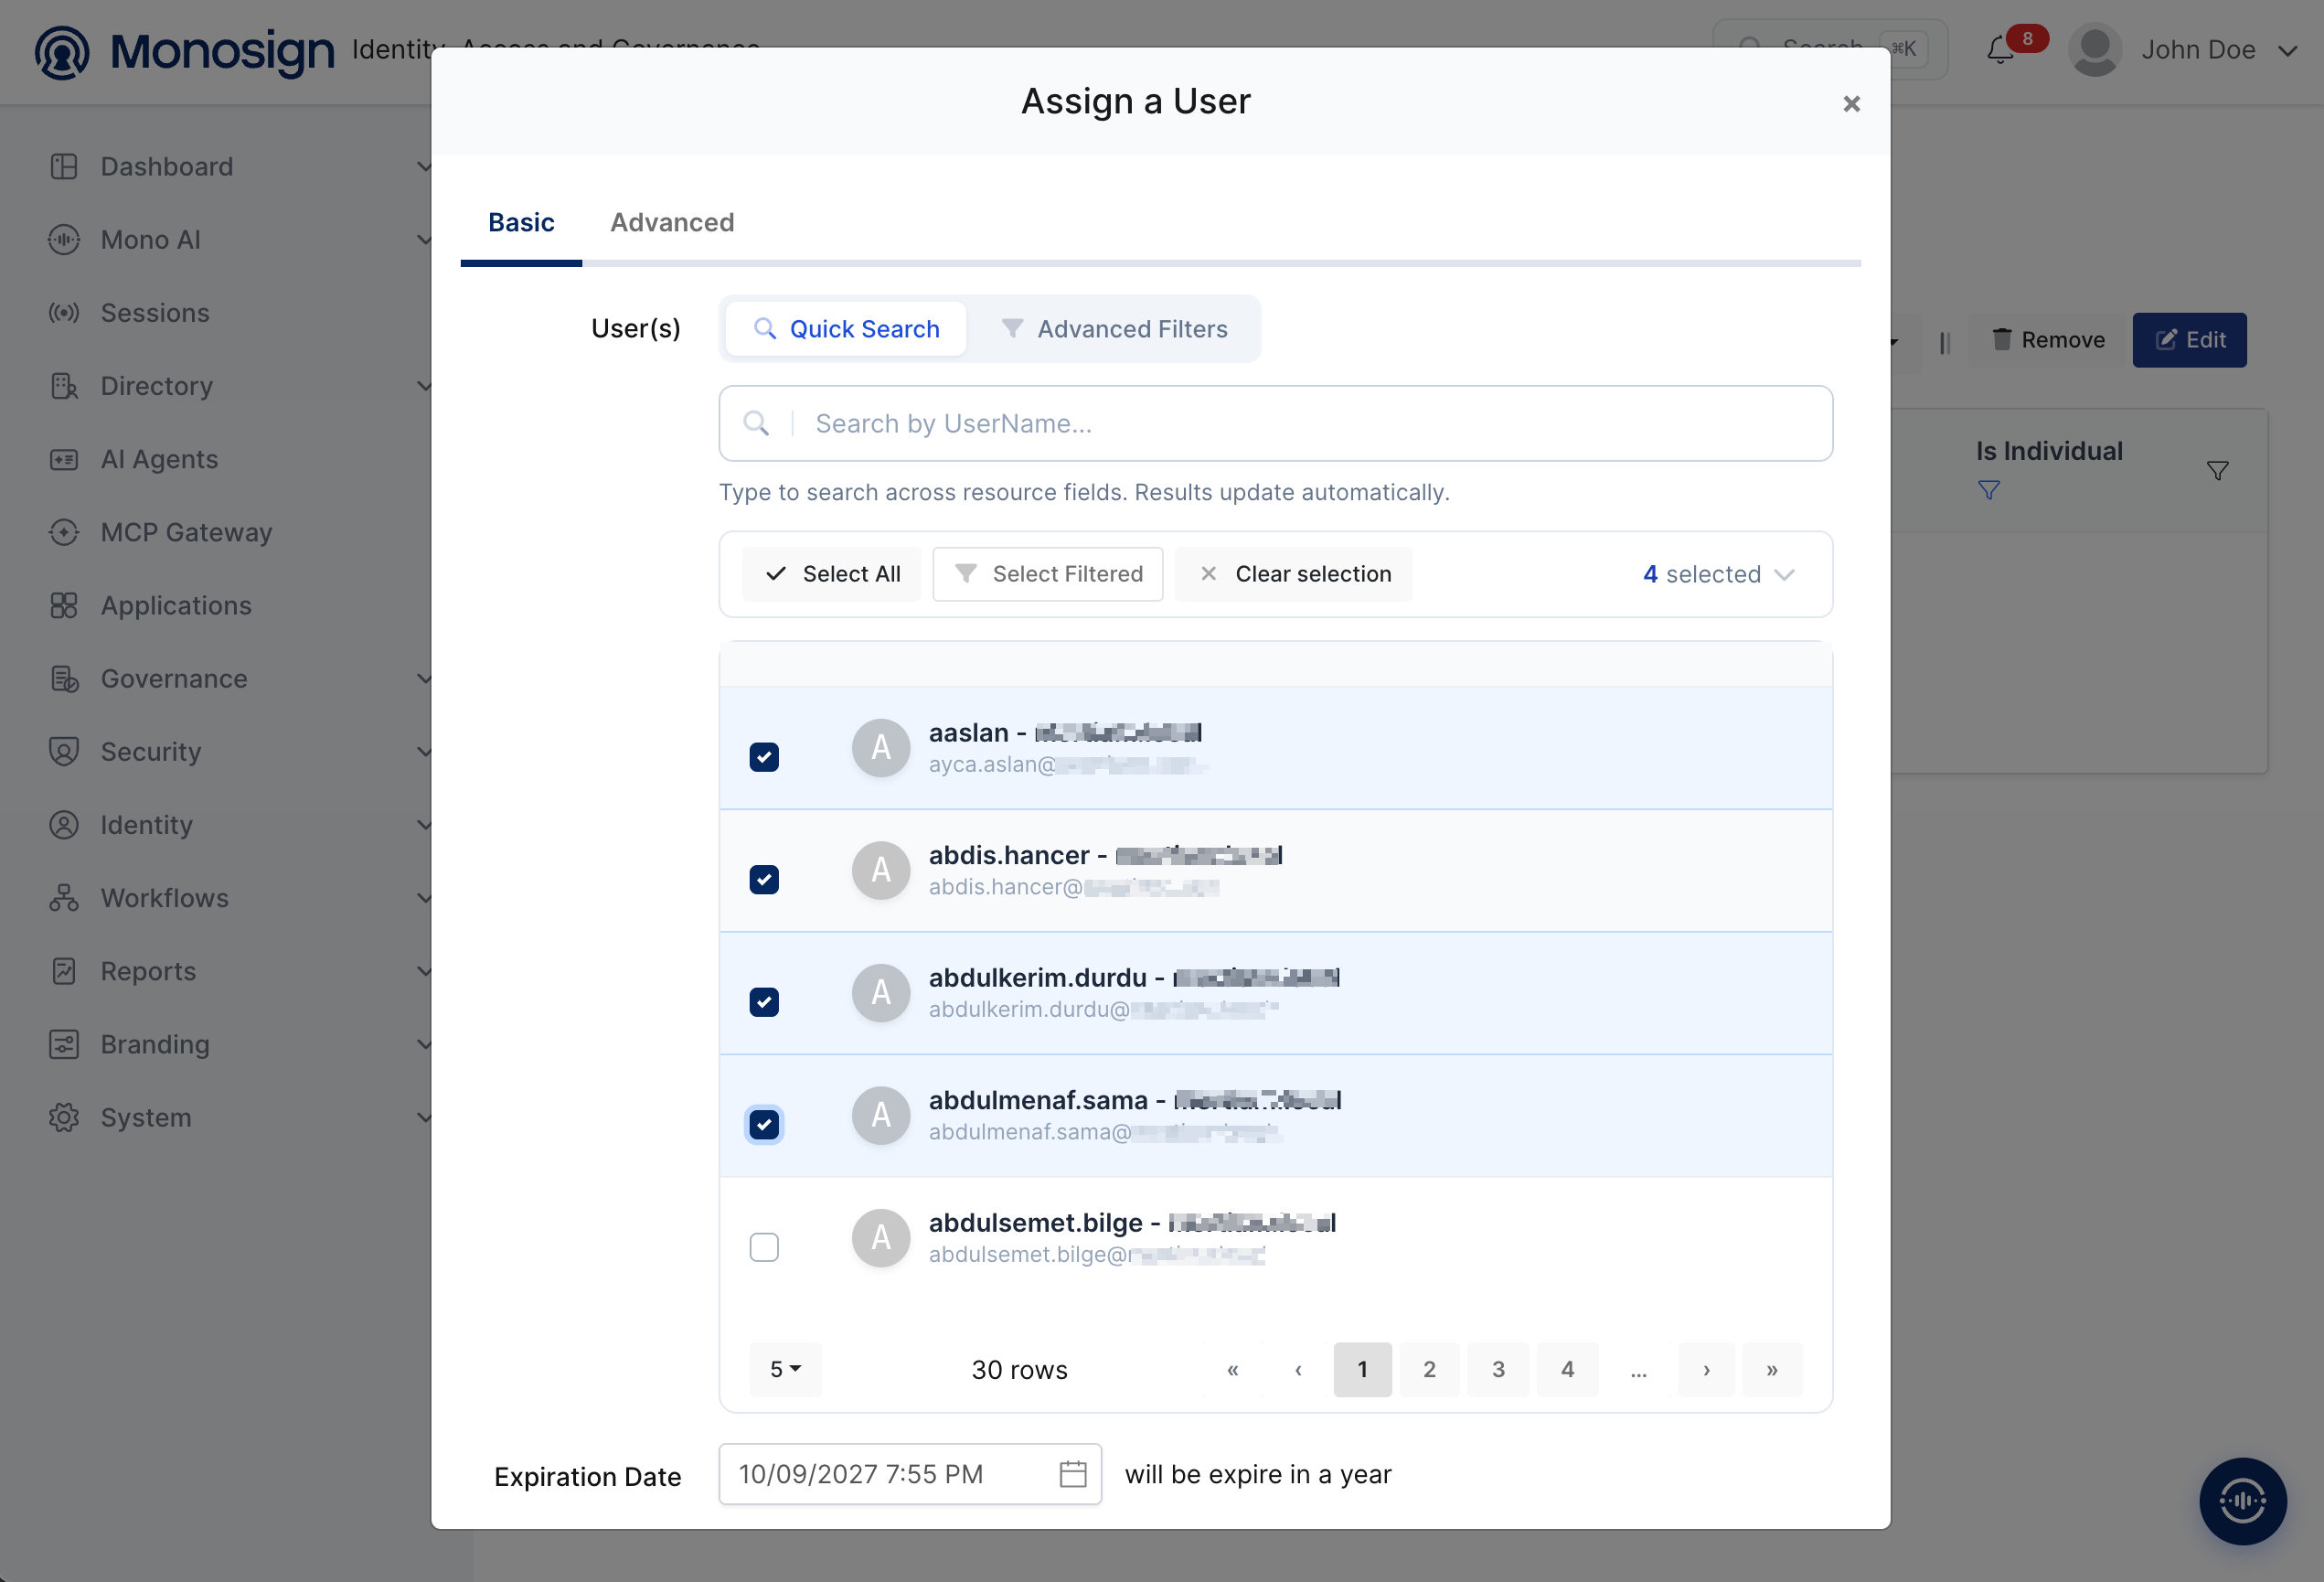
Search and select the users who can sign in to Redash, check the Expiration Date and save. You can select more than one user.
|
Property |
Value |
Description |
|---|---|---|
|
User(s) |
Selected users |
Users who can sign in to Redash with Monosign. |
|
Expiration Date |
Default one year |
The assignment expires on this date. |
4- Configuration Single Sign-On for Redash
As we mentioned at the start, please check out the Redash documentation first. The SAML settings of Redash are made in the Redash web interface by an administrator. A new Redash installation first asks you to create the administrator account on the /setup page. After that the Welcome to Redash page opens.
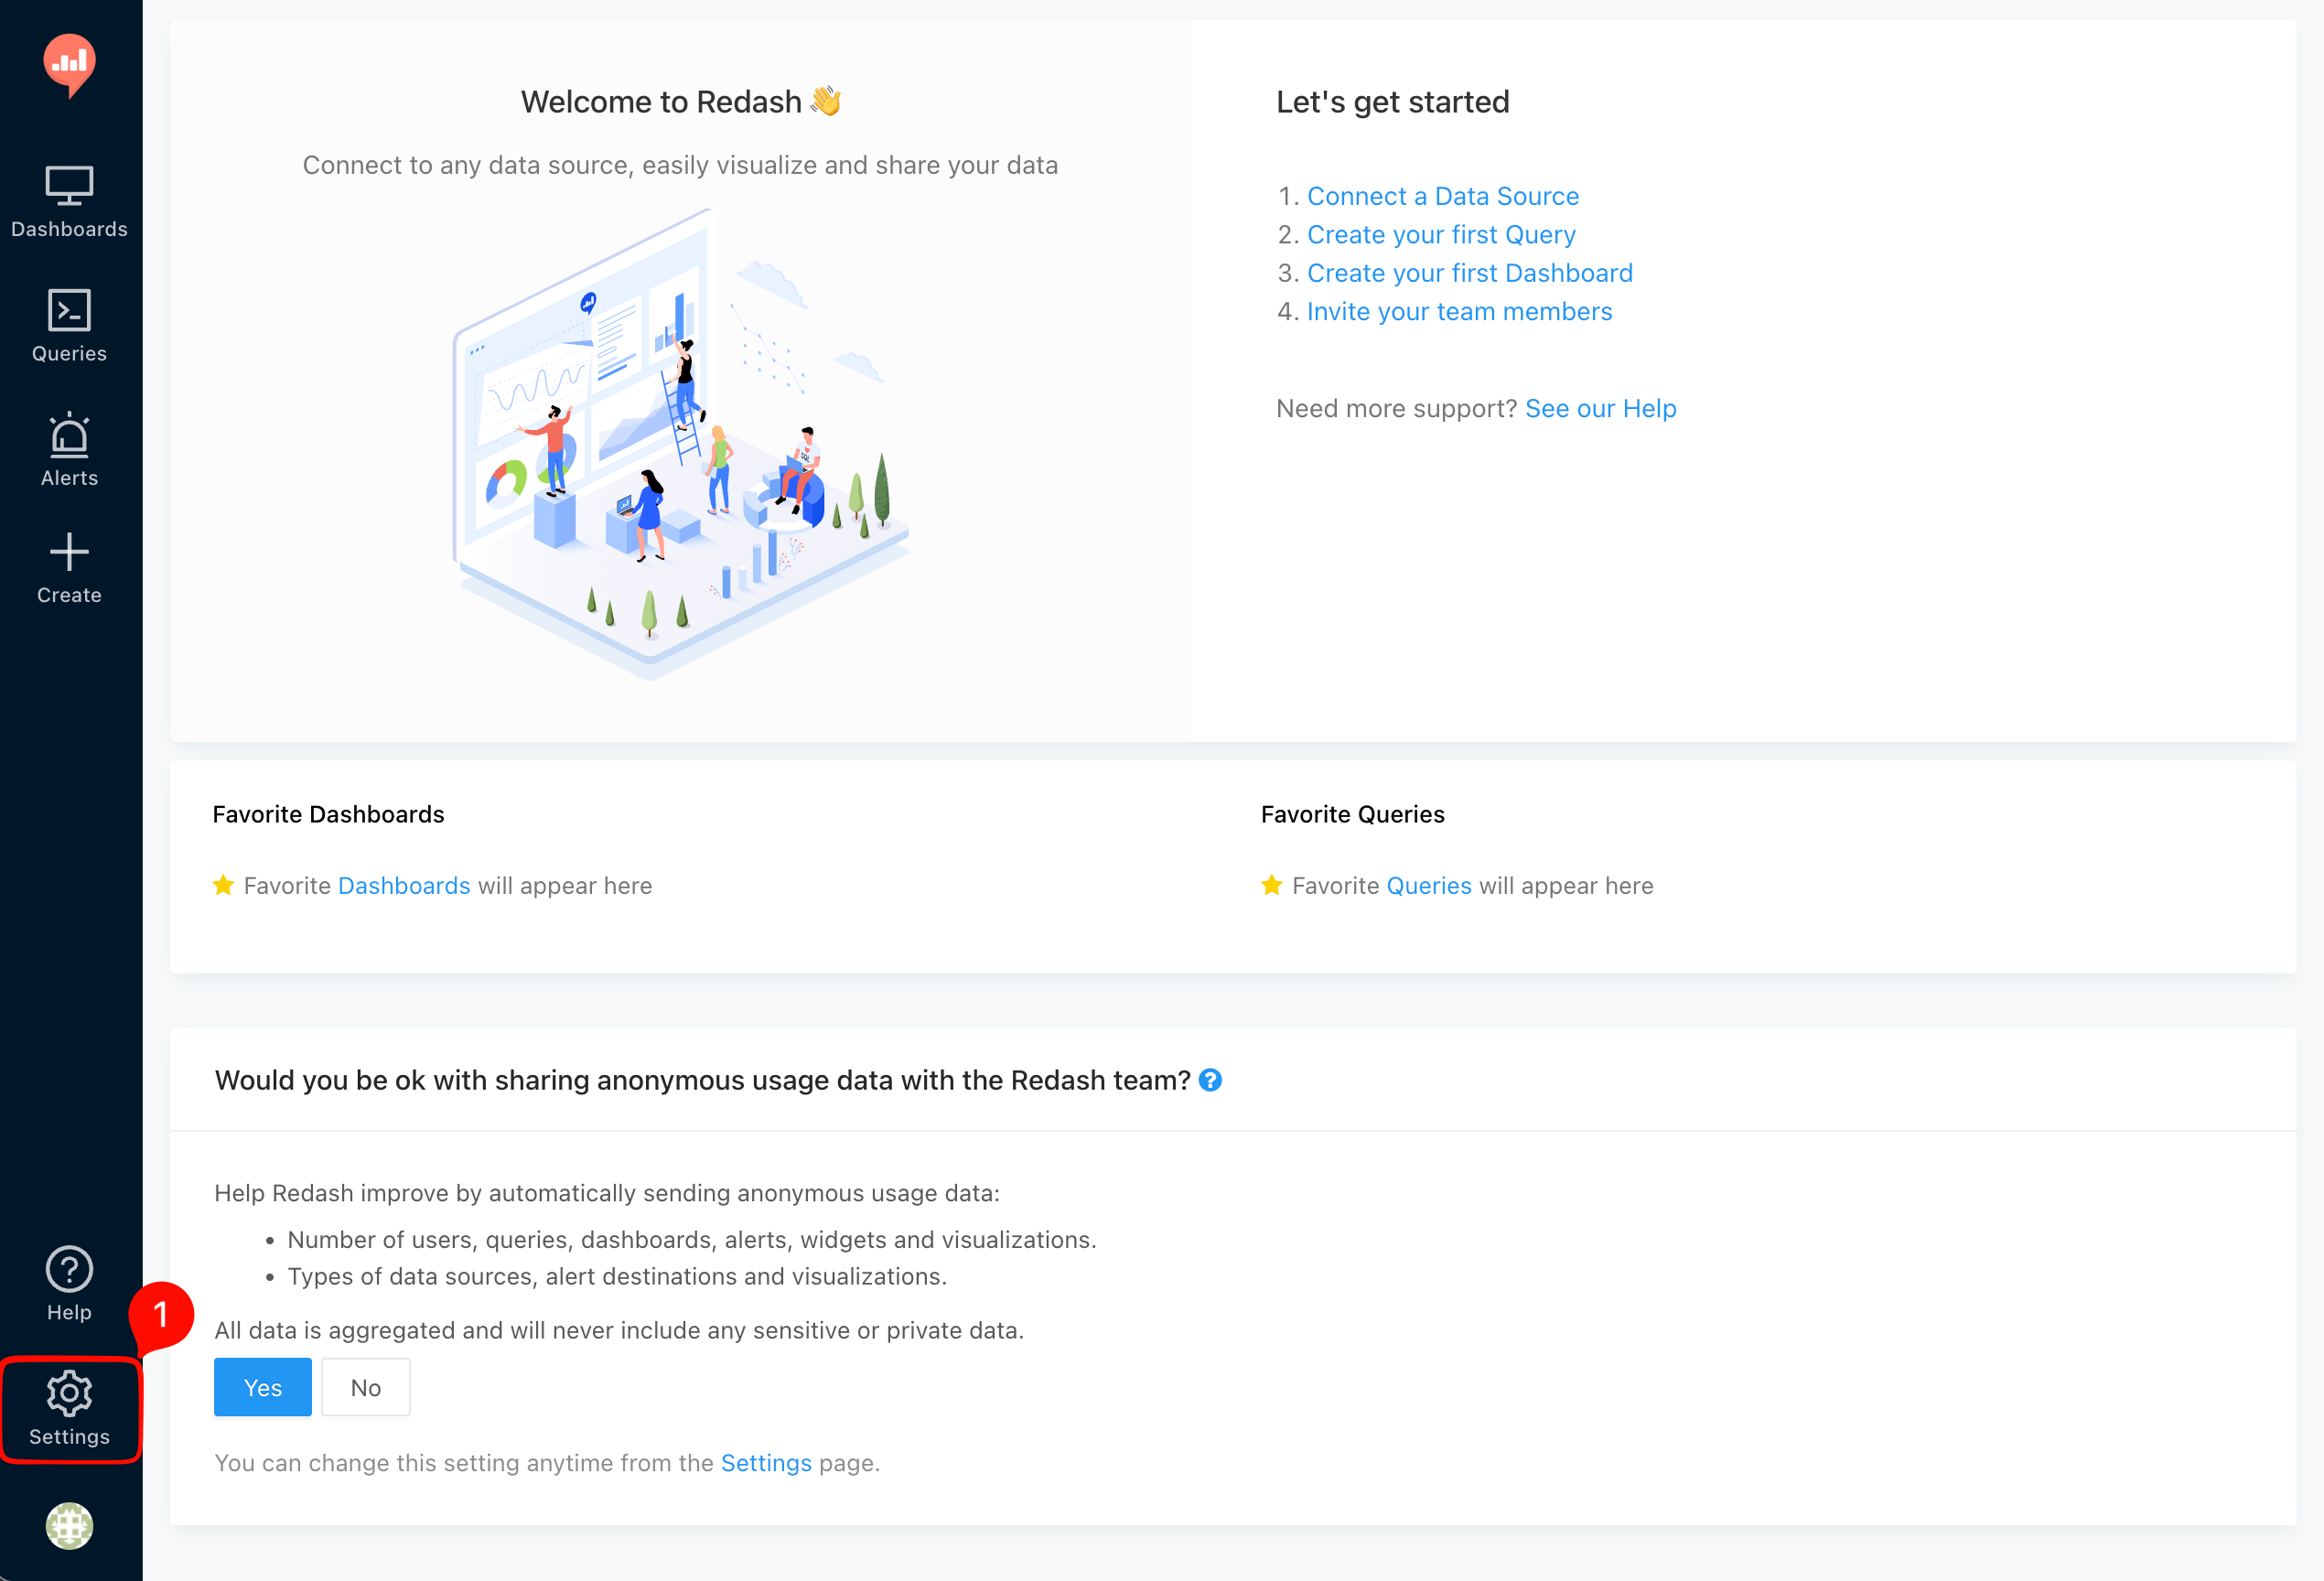
Click Settings, open the General tab and scroll down to the Authentication section.
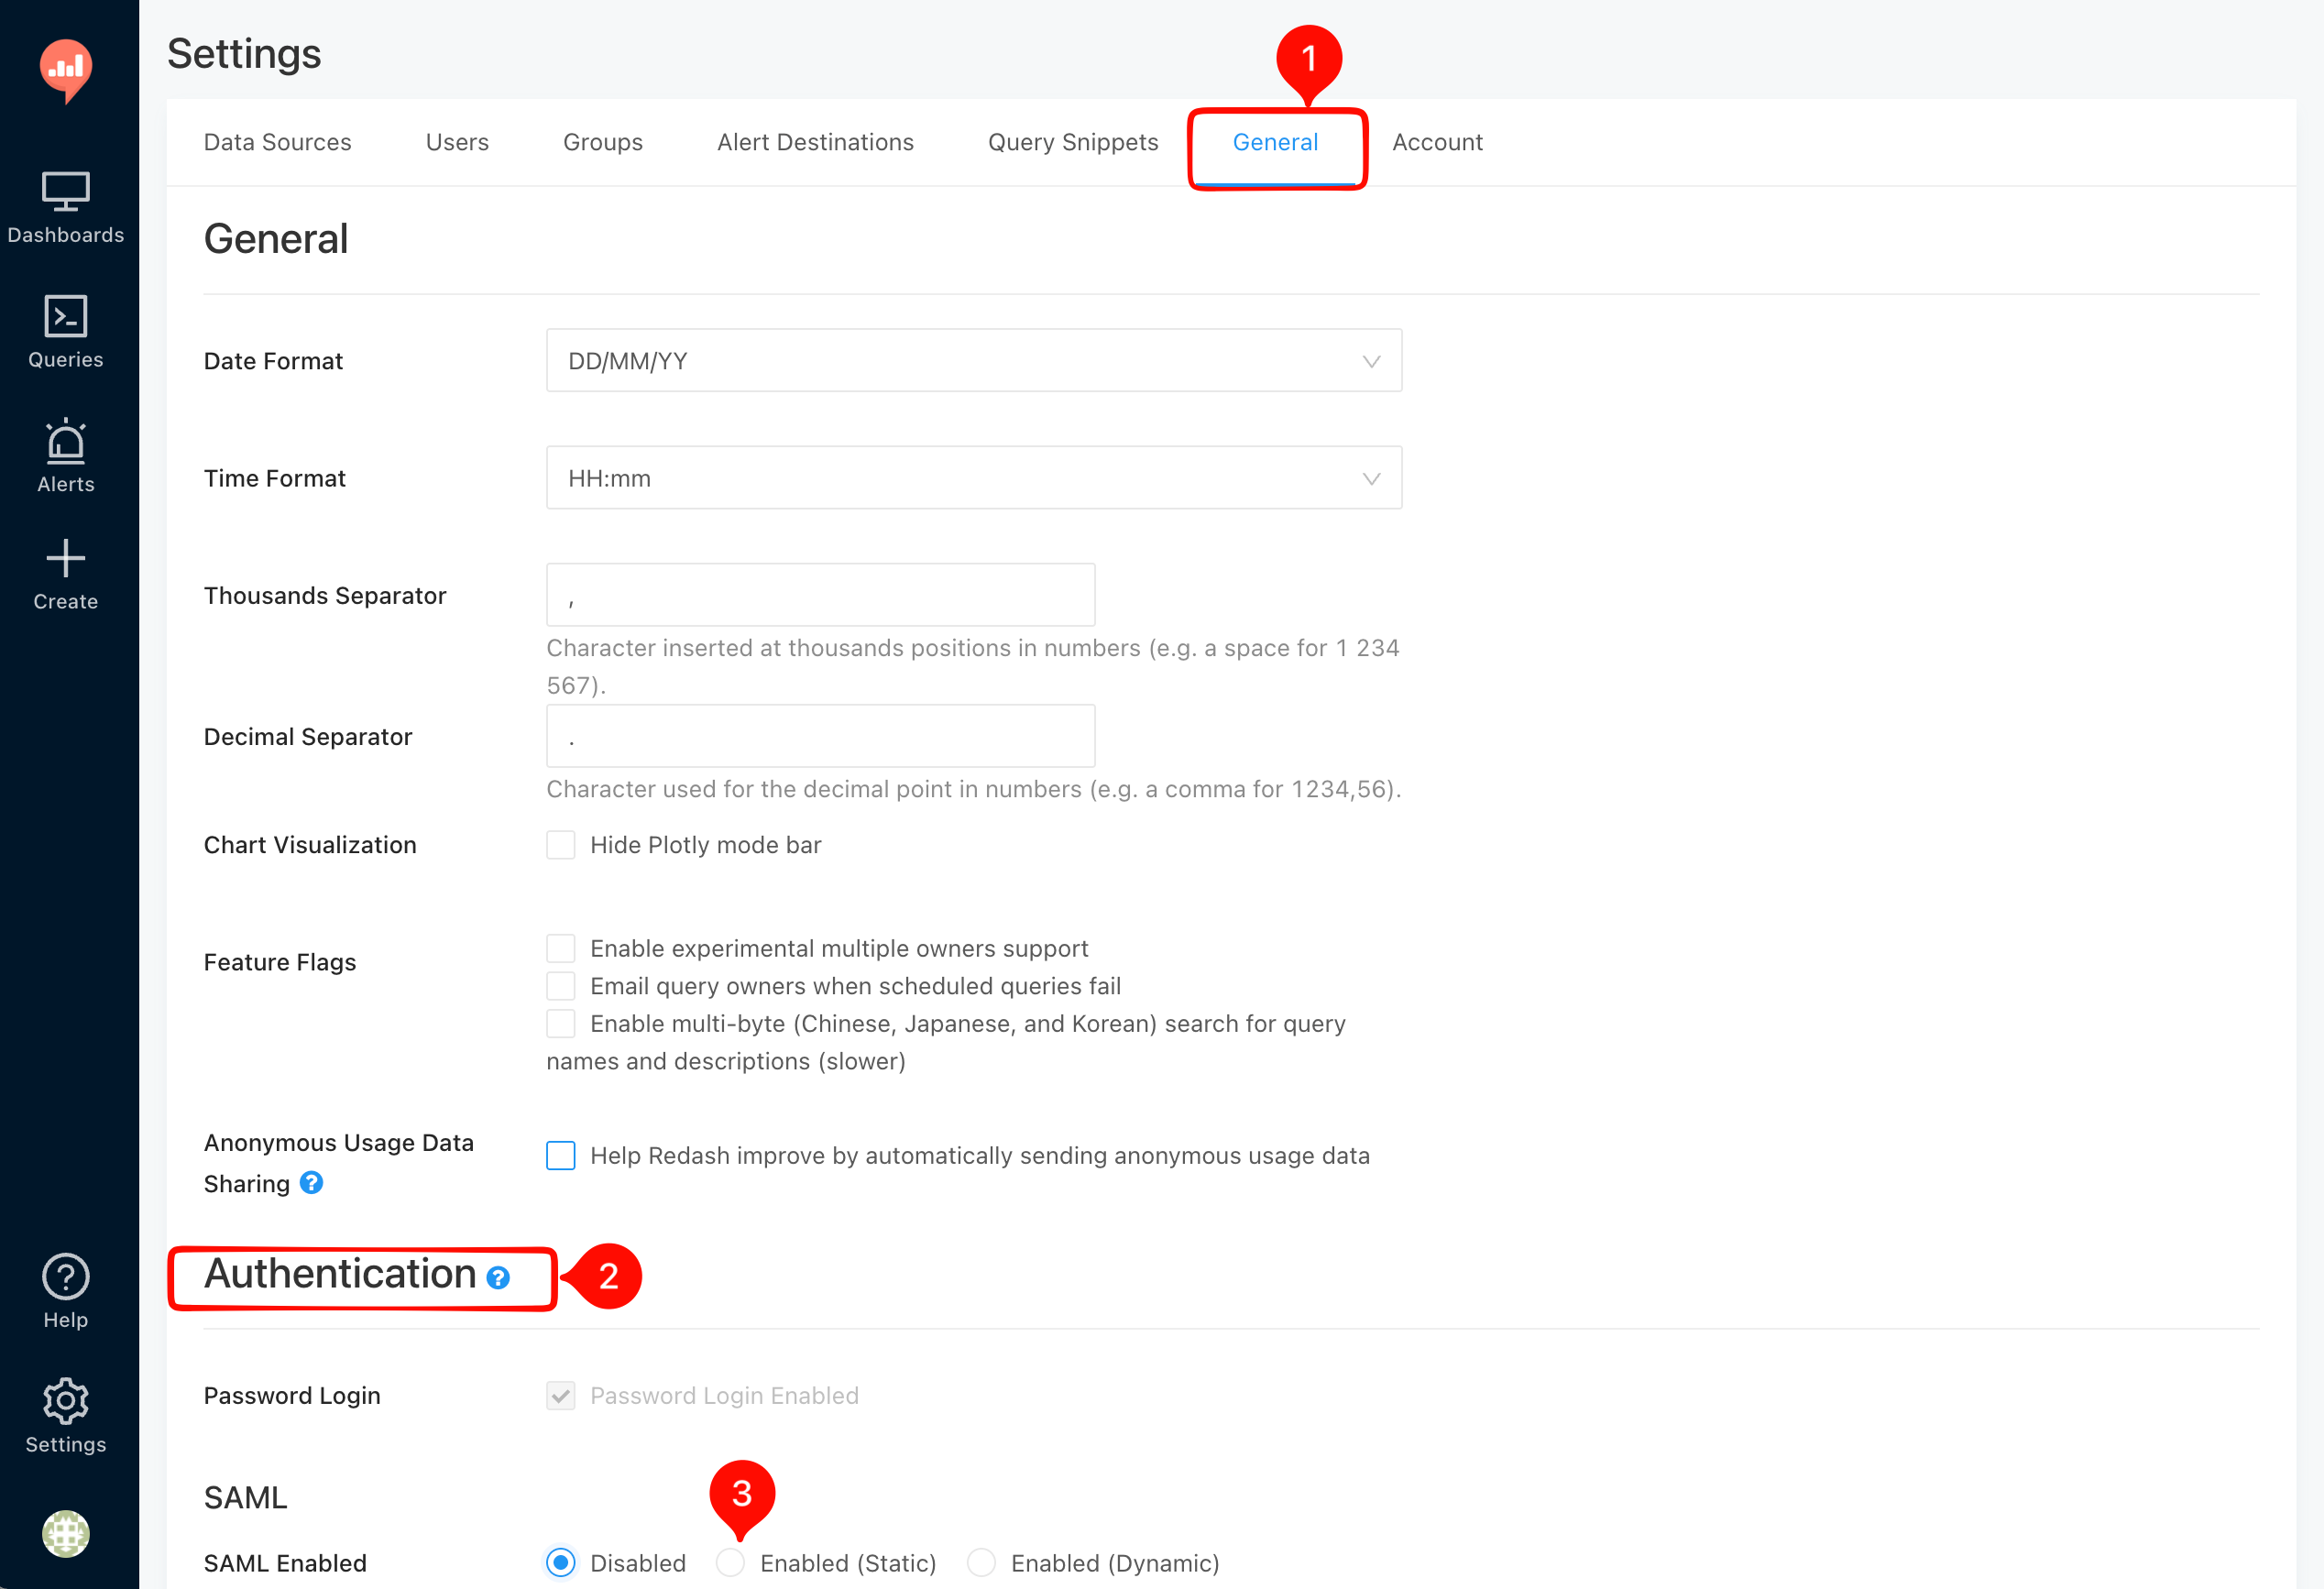
Under SAML select Enabled (Static), enter the Monosign values from step 2 and click Save.
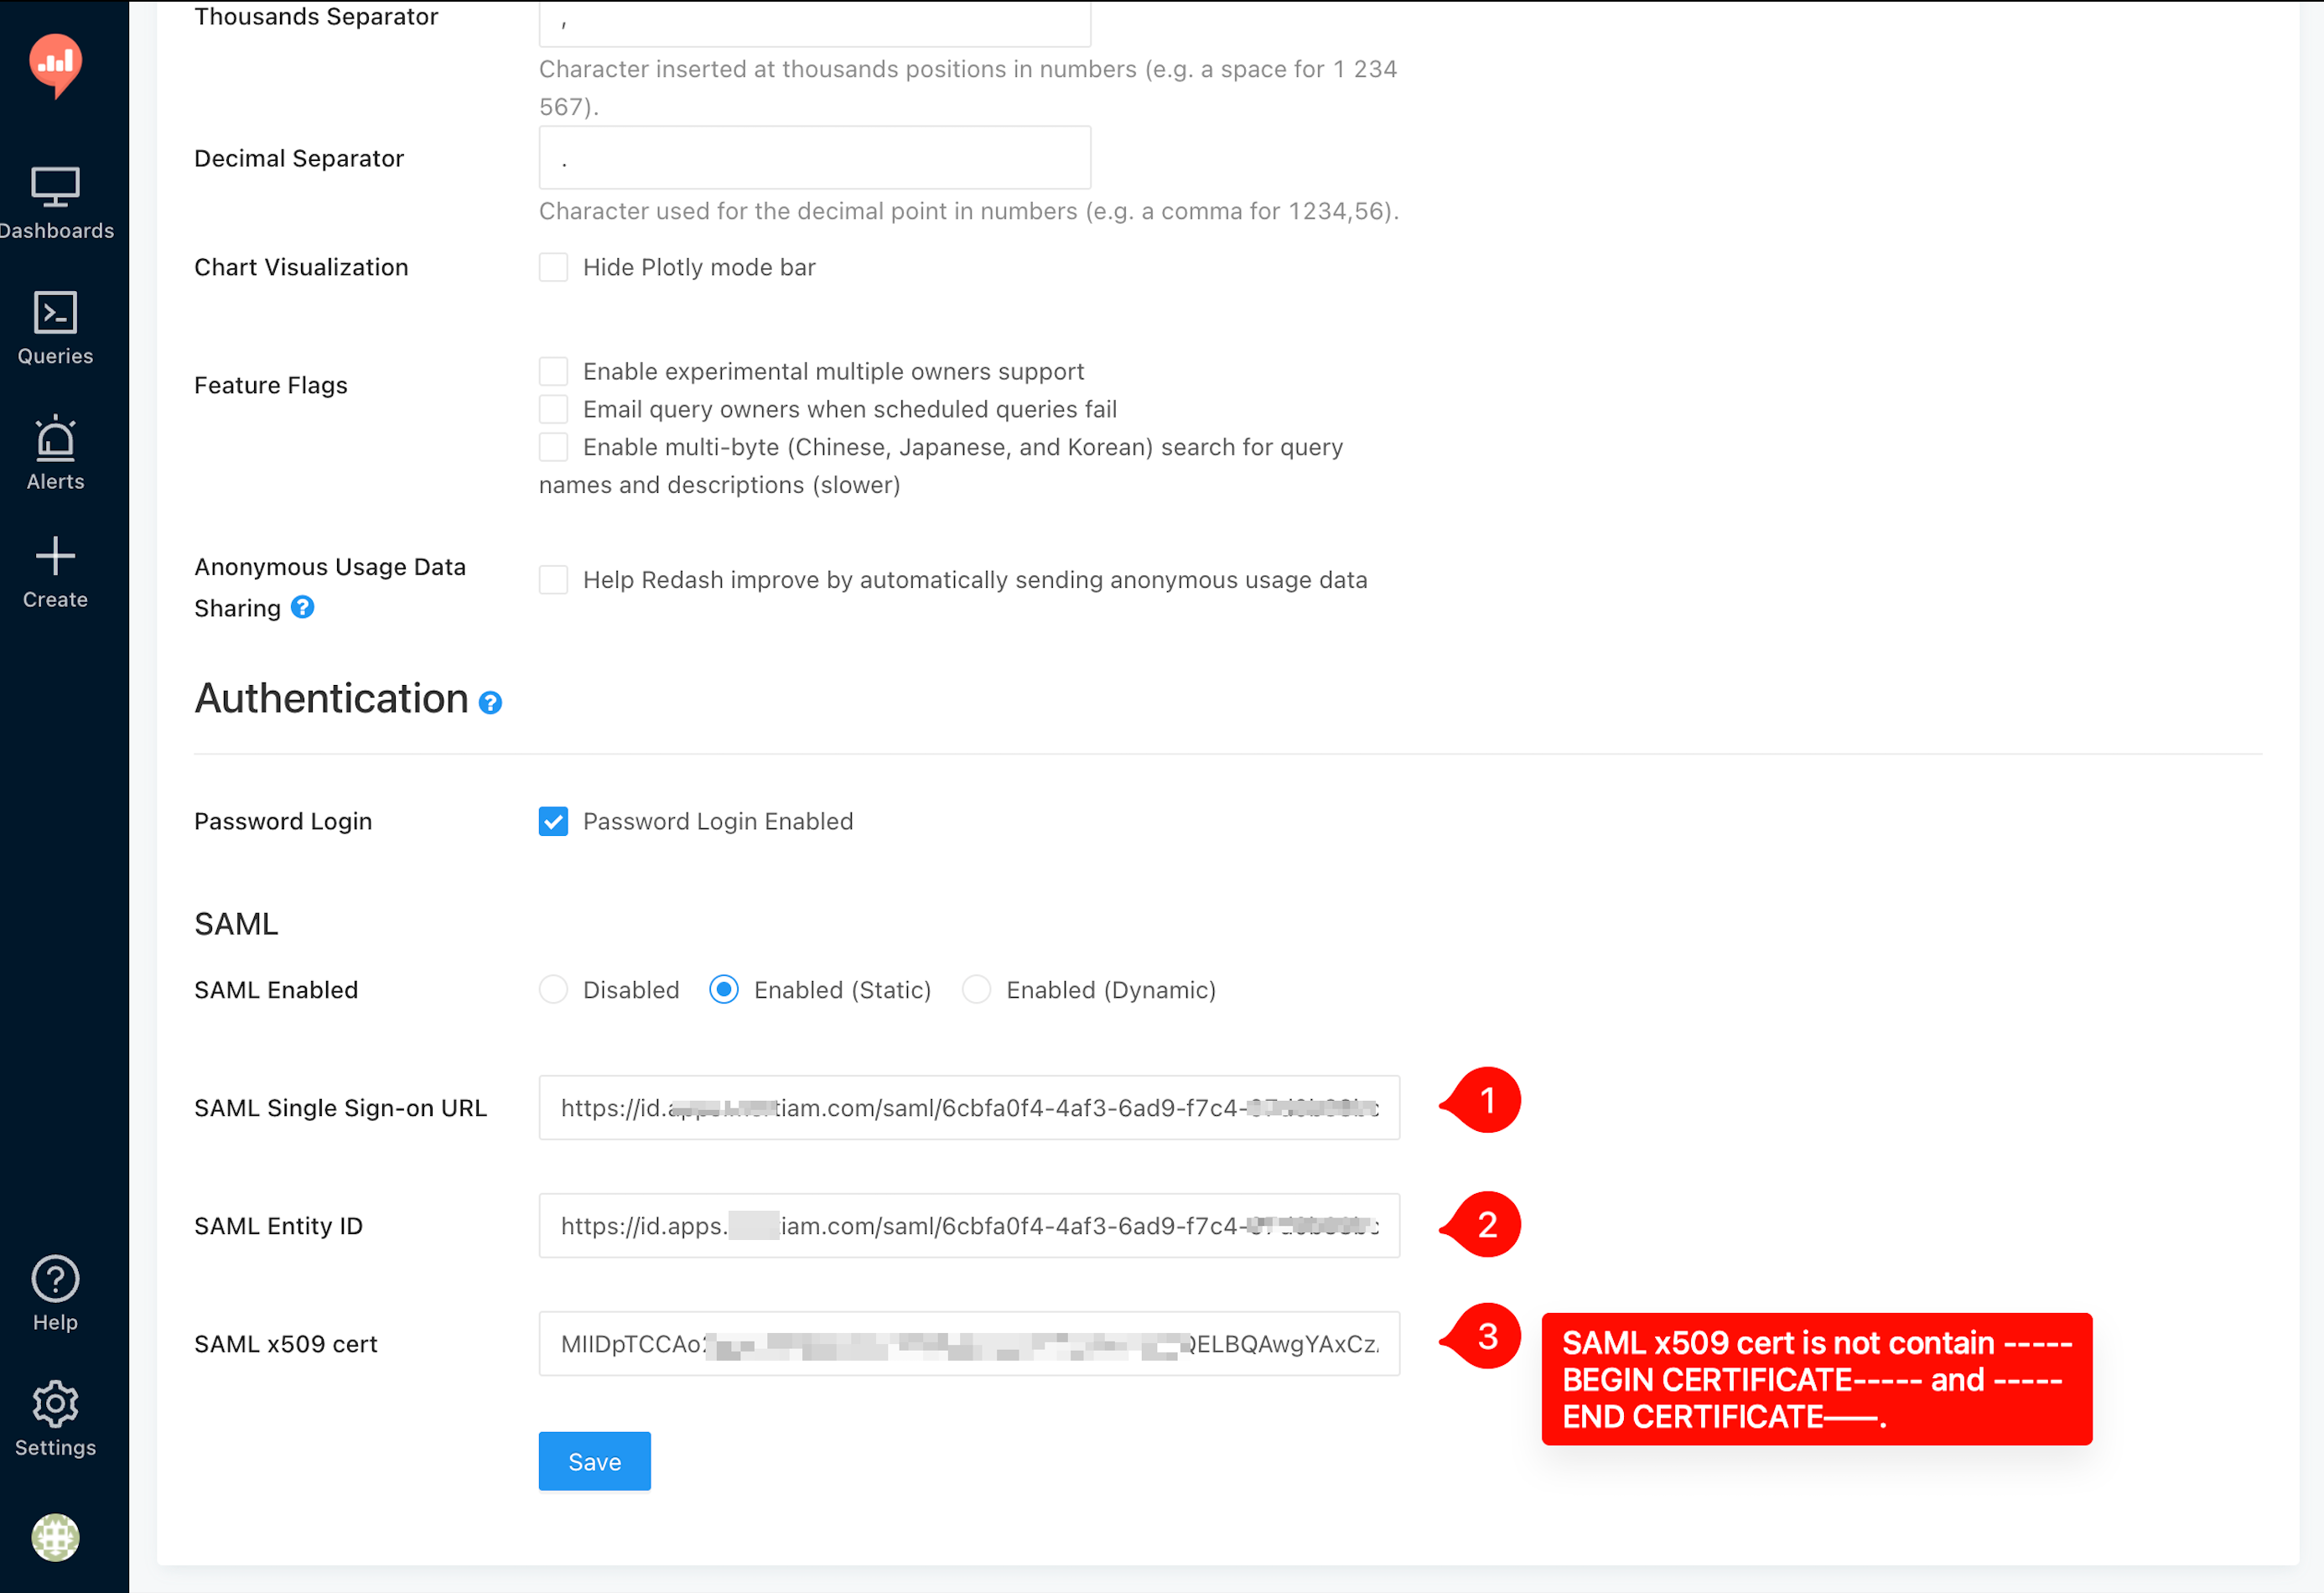
|
Property |
Value |
Description |
|---|---|---|
|
SAML Enabled |
|
The Monosign values are entered by hand. Options: Disabled, Enabled (Static), Enabled (Dynamic). |
|
SAML Single Sign-on URL |
|
Sign On Service of the Monosign SAML key. |
|
SAML Entity ID |
|
Entity Id of the Monosign IdP. |
|
SAML x509 cert |
|
The Monosign certificate as a single line, without the |
Paste only the base64 text of the certificate. Redash puts this value into the SAML metadata as it is. If the BEGIN/END CERTIFICATE lines are included, the certificate becomes invalid, Redash cannot verify the signature of the SAML response and the sign-in fails with “SAML login failed. Please try again later.”. The Redash log shows Failed to verify signature in this case.
Keep Password Login Enabled checked until you have tested the SAML sign-in, so the administrator can still log in with the e-mail address and password.
Instead of the Static mode you can select Enabled (Dynamic) and enter the Monosign SAML Metadata URL, the SAML Entity ID and the SAML NameID Format. Redash users are created automatically on their first SAML sign-in and they are added to the default group of Redash.
5- Sign In Test
Now try to log in to Redash using Monosign SSO.
-
Open a new browser window (or a private window) and type the Redash address, for example
https://redash.example.com. -
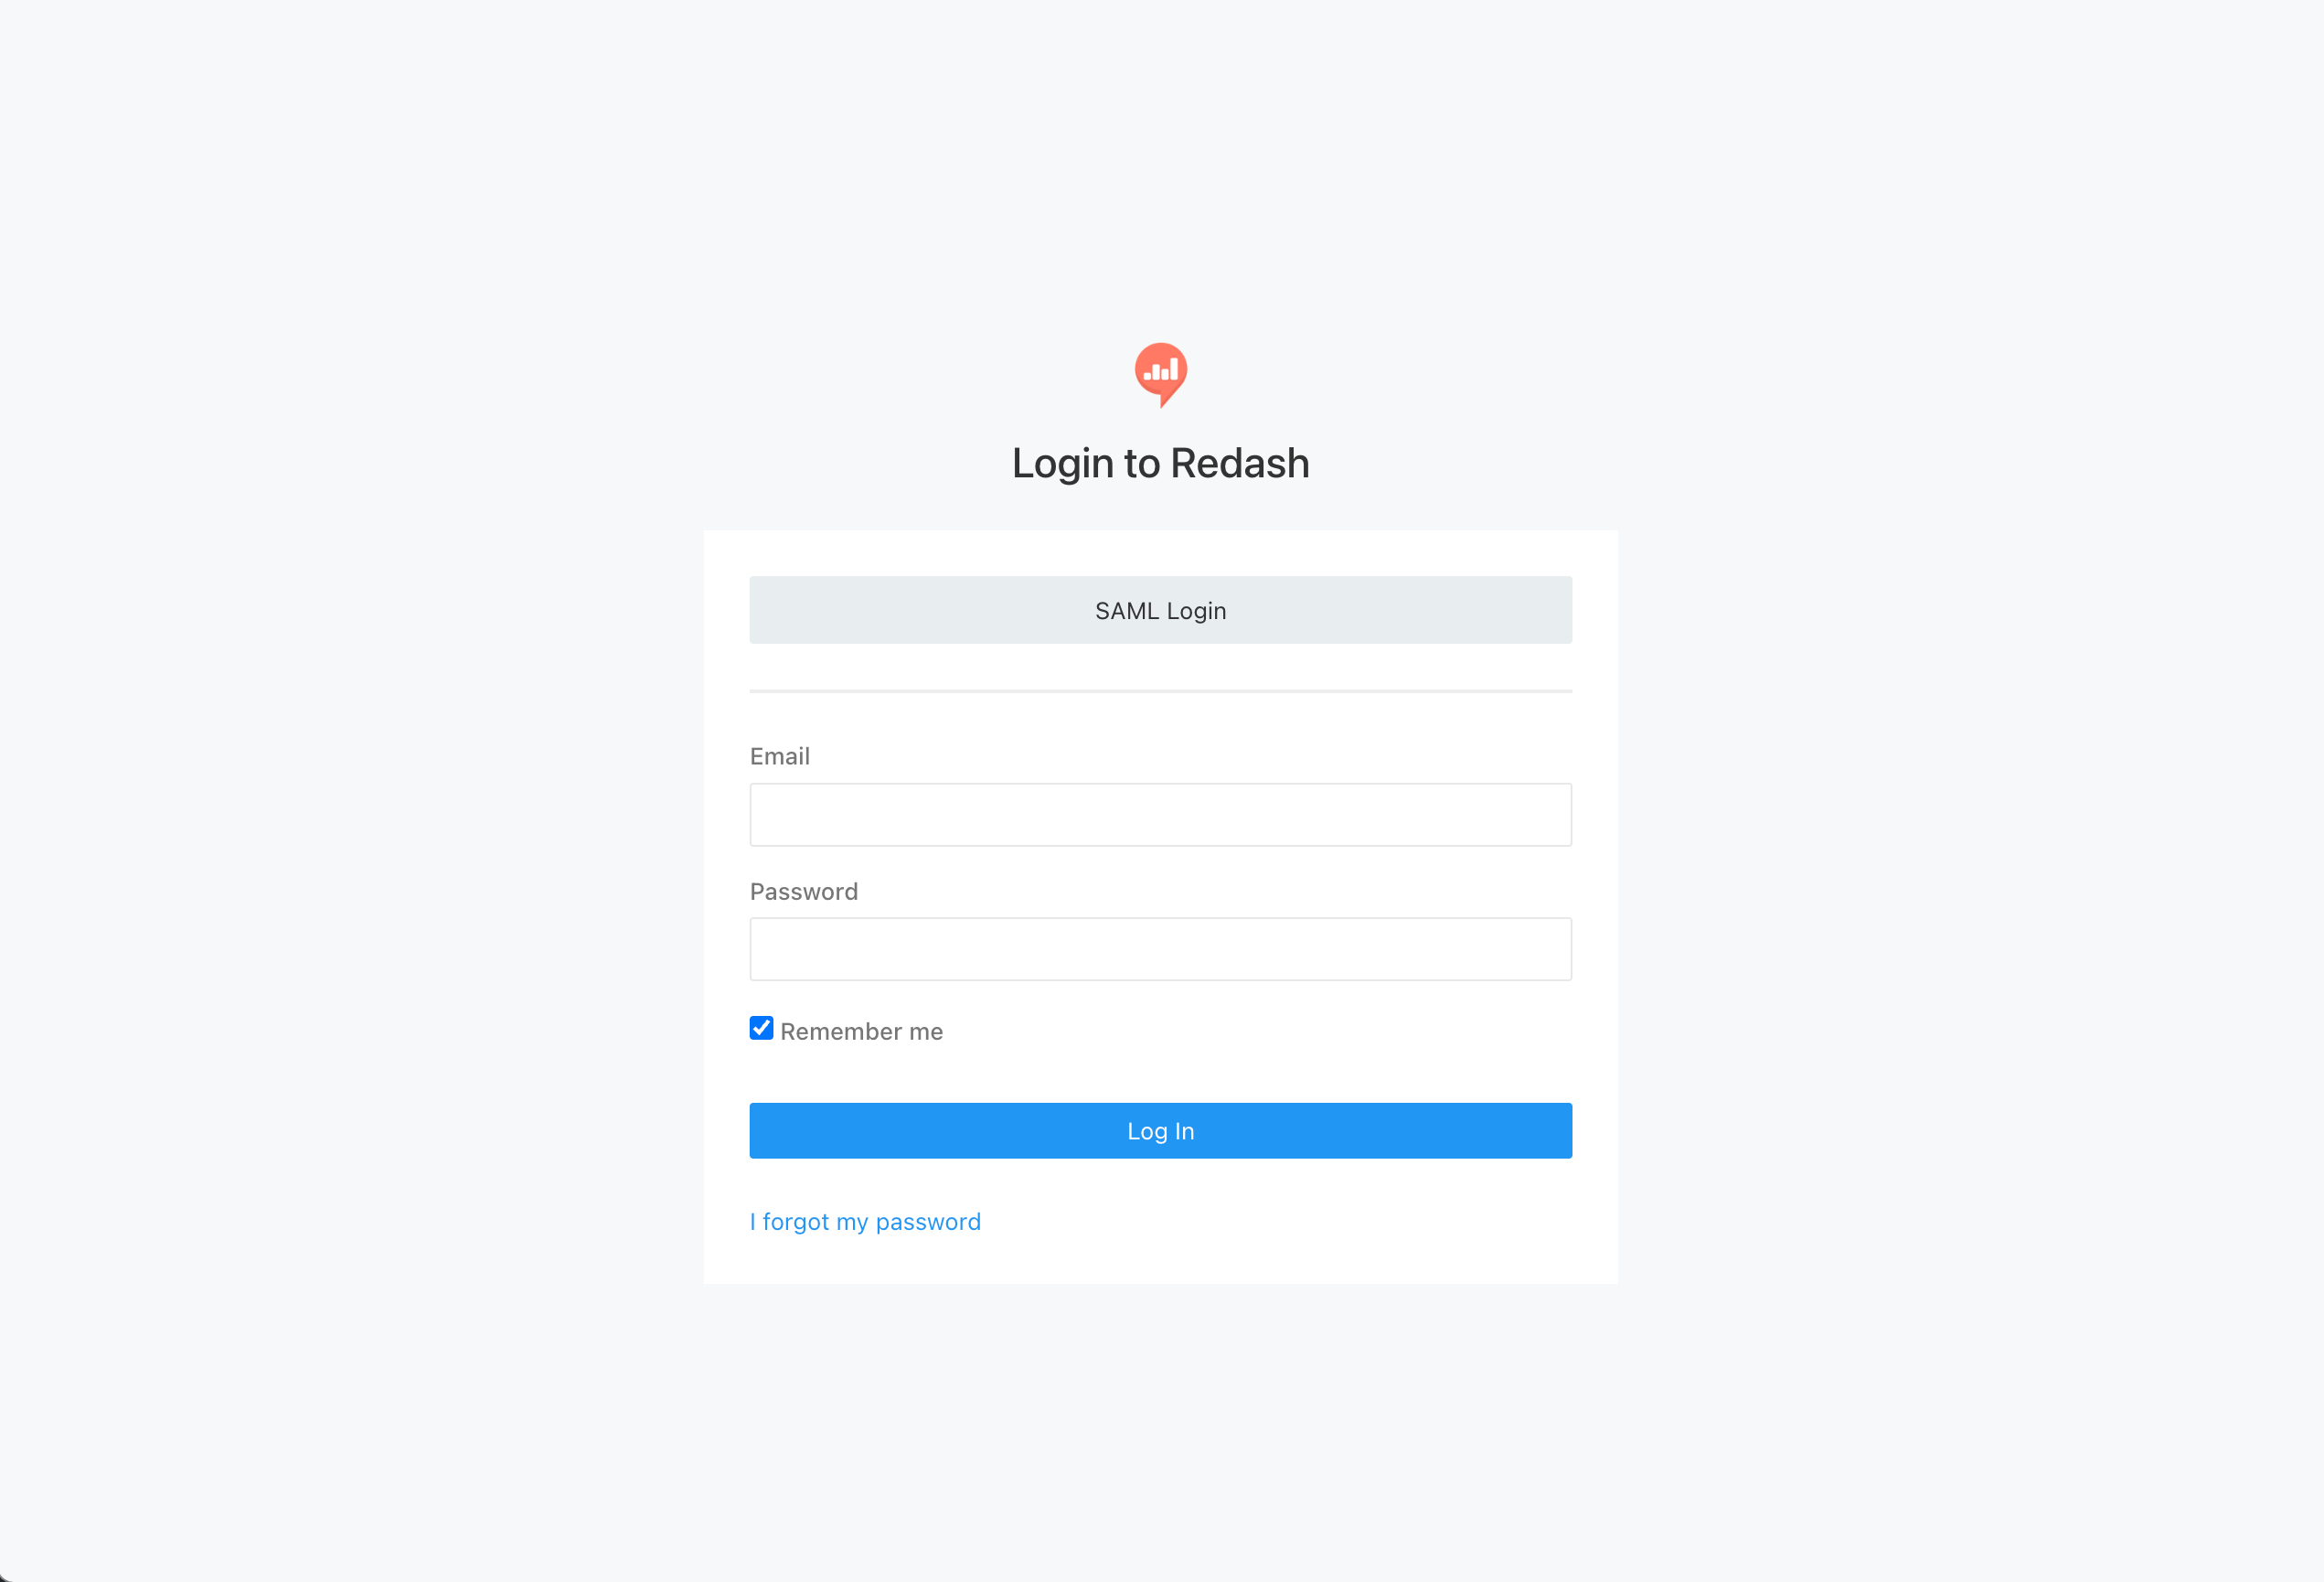
Click SAML Login on the Redash login page. The e-mail and password form stays on the page for the administrator.
-
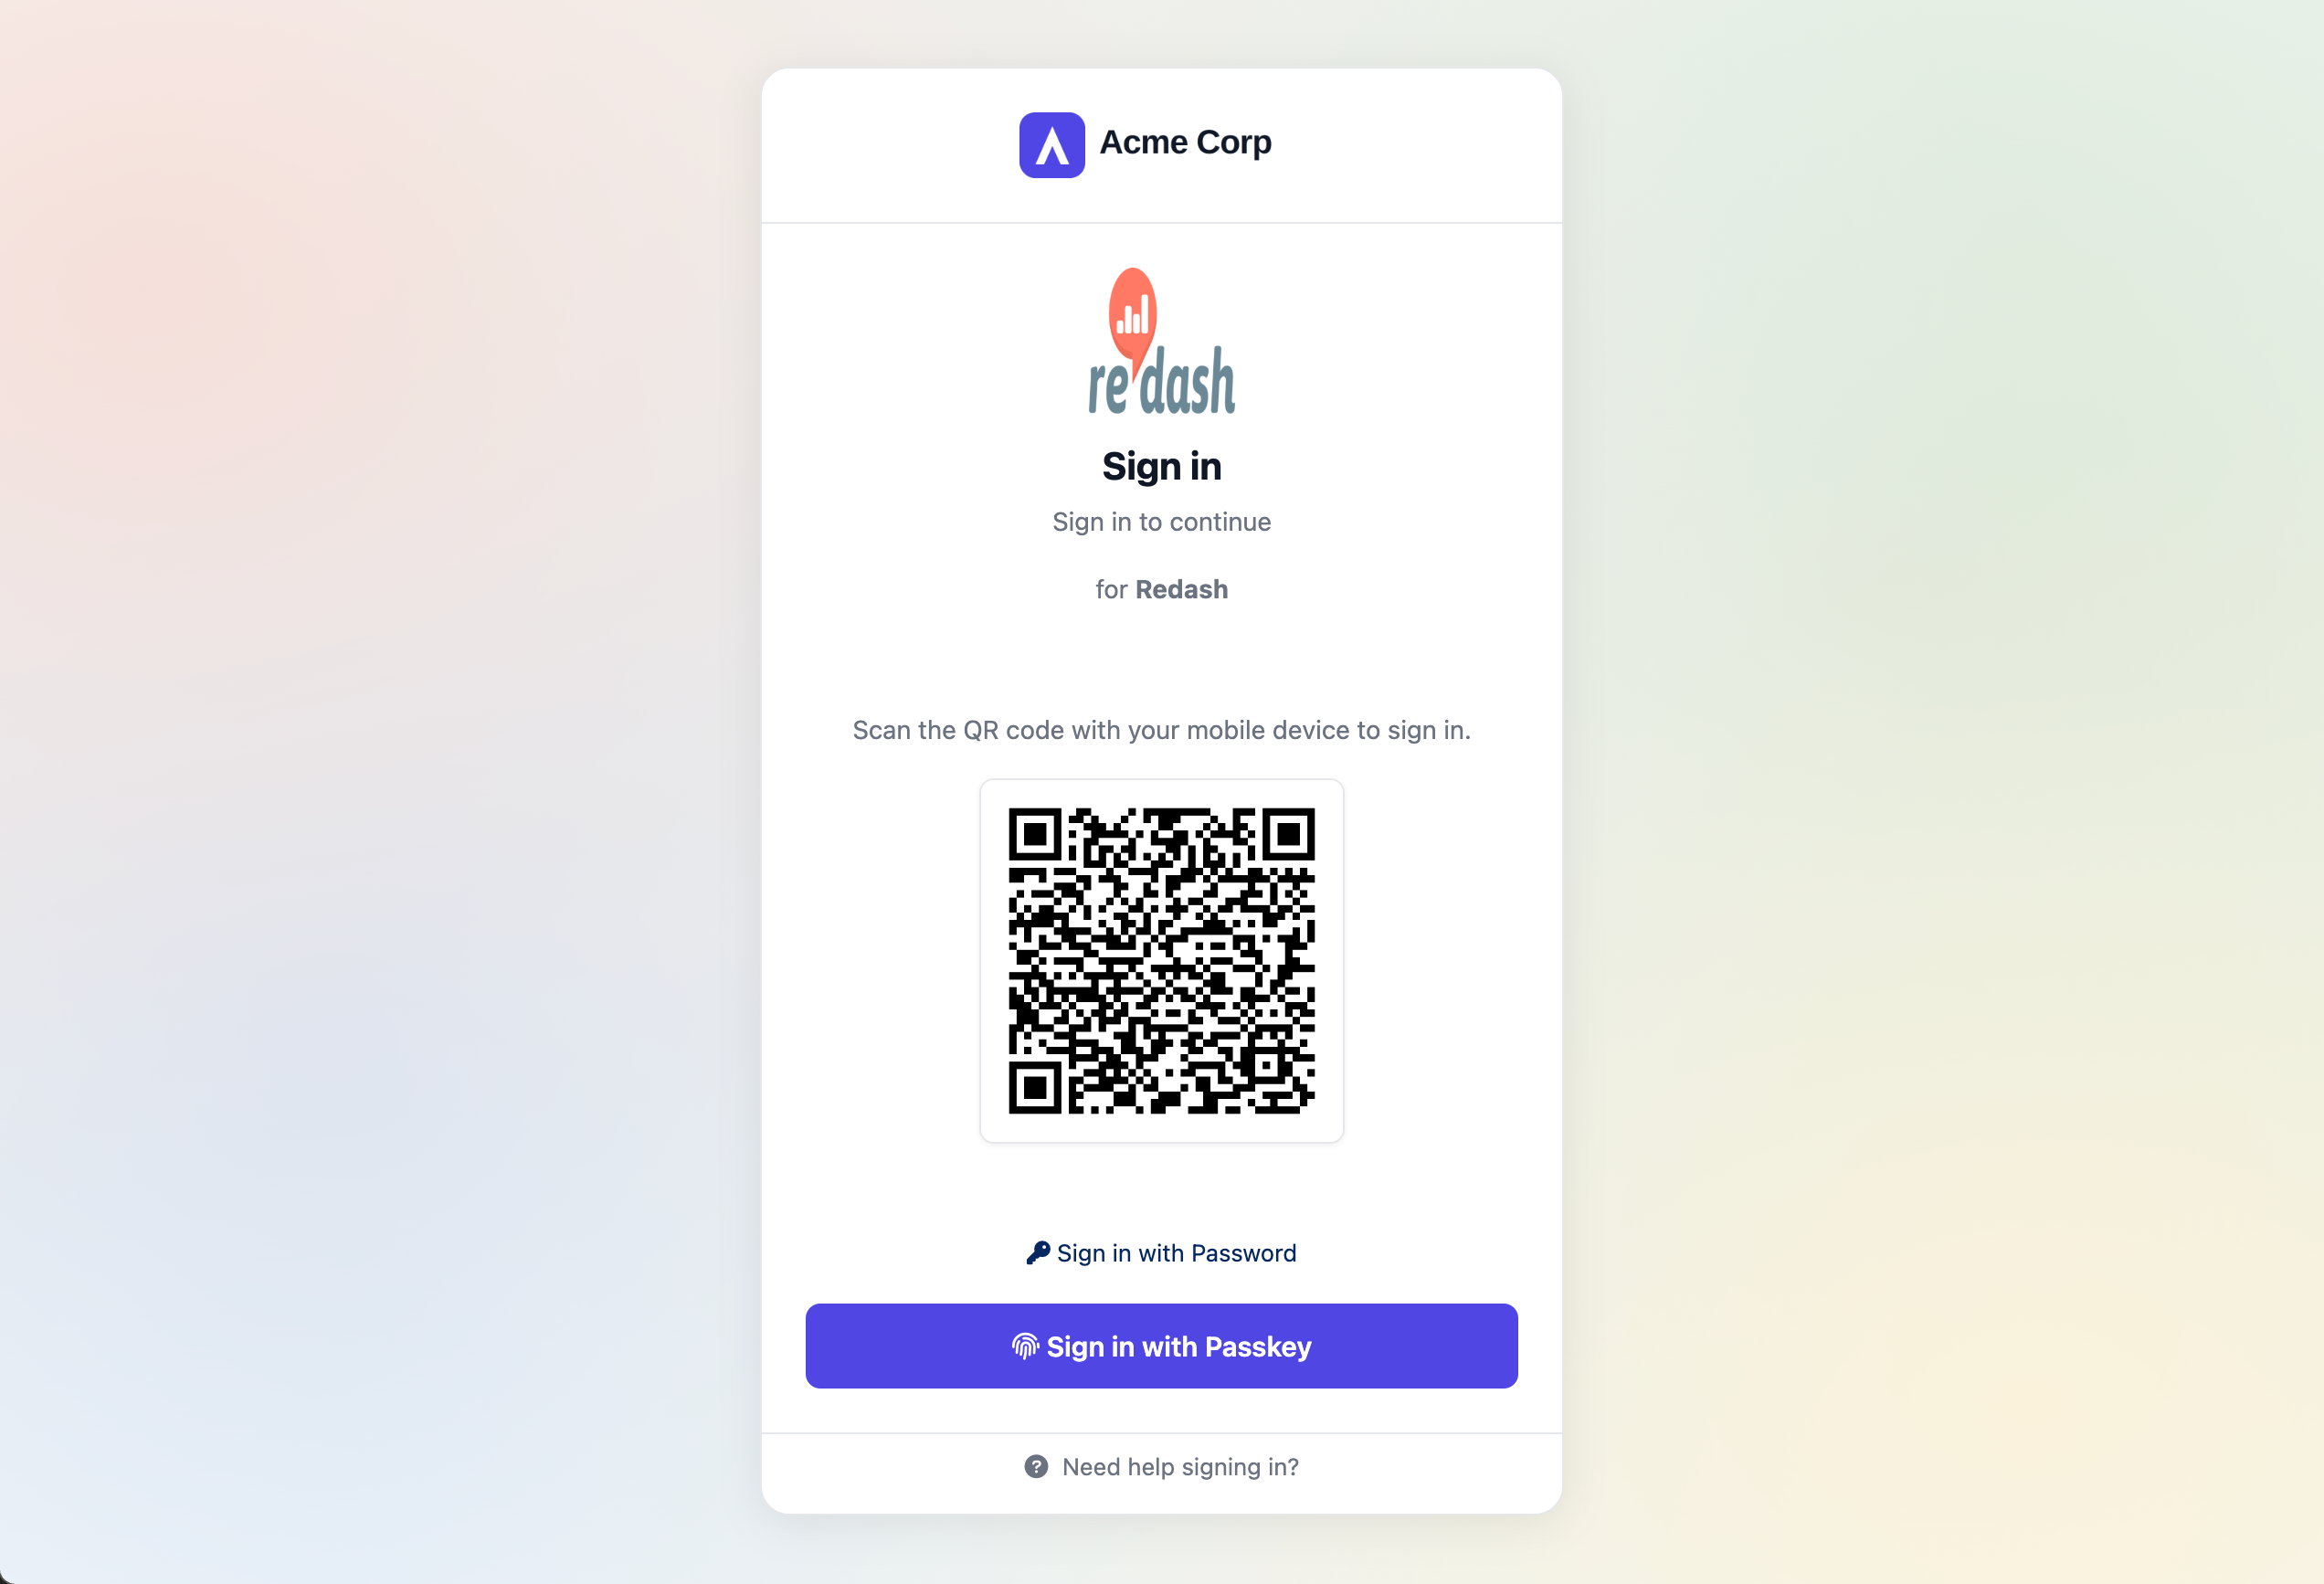
Redash redirects the browser to the Monosign sign-in page of the Redash application. You can log in passwordless with your QR code (Monofor Identity), with a Passkey or with your user name and password (Sign in with Password).
-
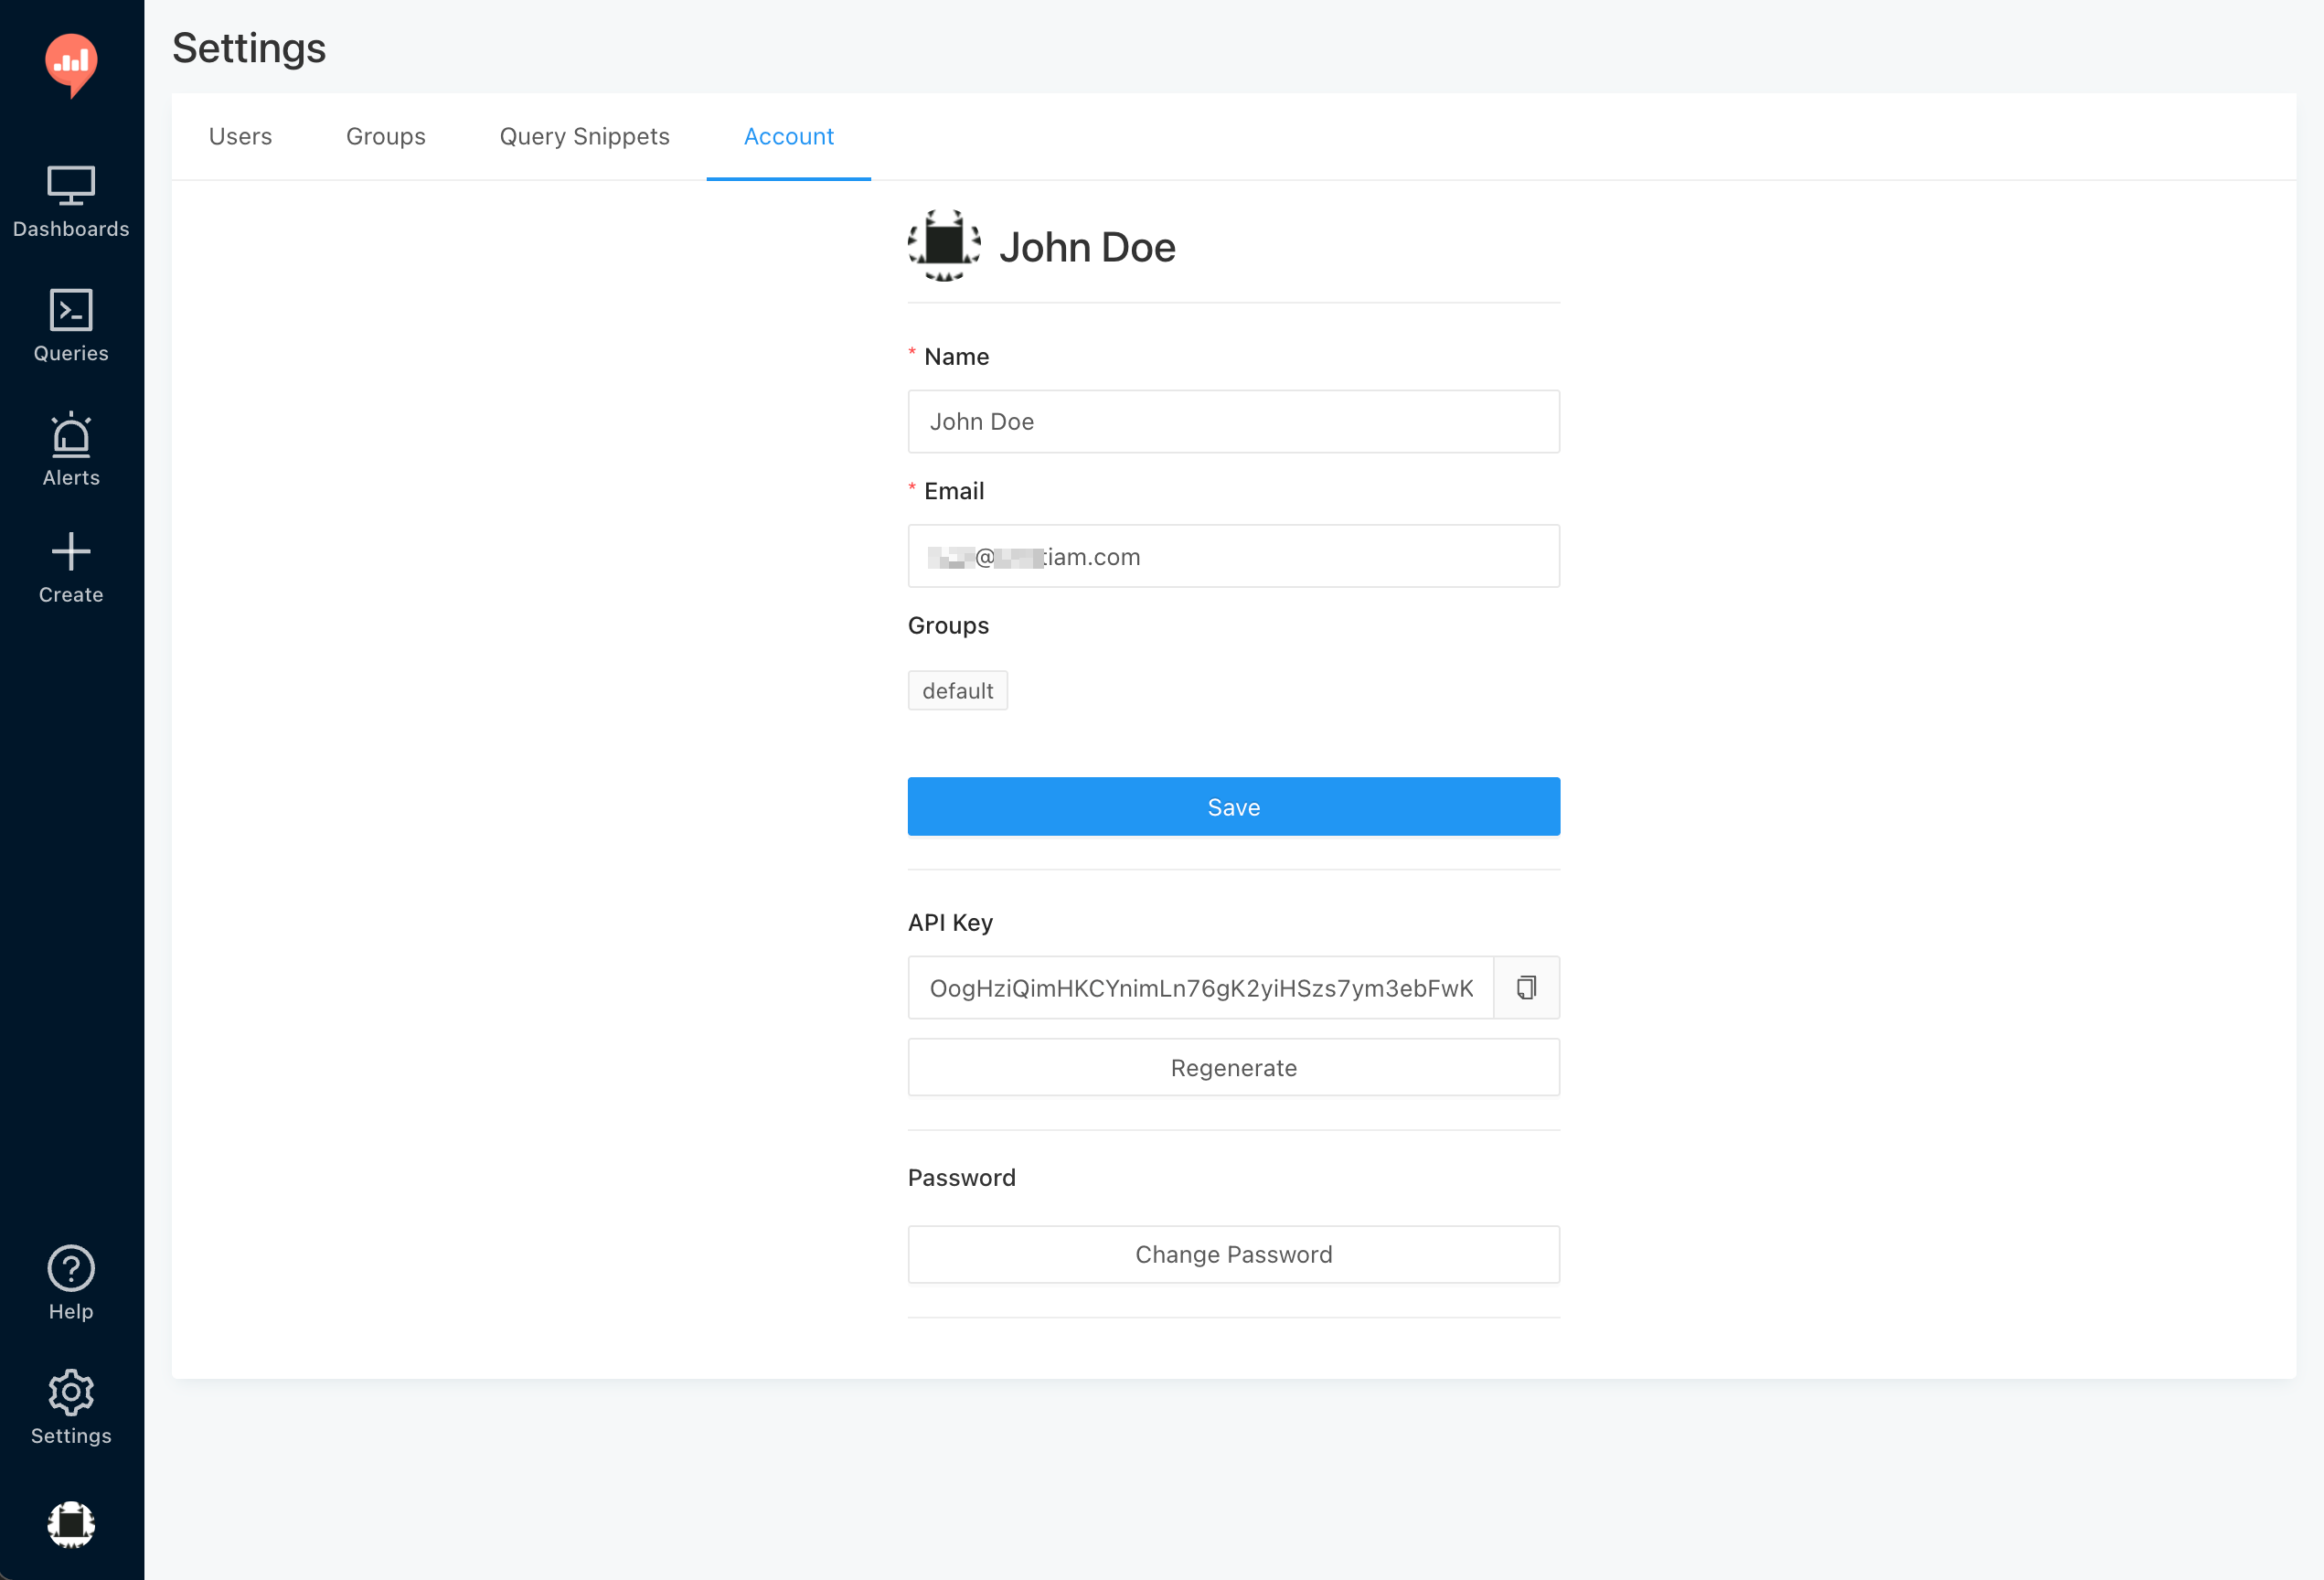
After the sign-in Monosign sends the SAML response to Redash. Redash creates the user on the first sign-in with the name and the e-mail address from Monosign and the user is logged in.
Troubleshooting
|
Symptom |
Cause |
Solution |
|---|---|---|
|
“SAML login failed. Please try again later.” on the Redash login page; the Redash log shows |
The SAML x509 cert is wrong, or it contains the BEGIN/END CERTIFICATE lines. |
Paste only the base64 text of the current Monosign certificate as one line (step 4). |
|
500 Internal Server Error on |
The attribute is not in the SAML response. |
Add |
|
The user is created with a wrong e-mail address |
Name Id is not the e-mail address. |
Set Name Id to |
|
Monosign rejects the request because of the ACS address |
ACS Validation Mode is Enforce and the ACS address of Redash is not the registered one. |
The Assertion Consumer Url must be exactly |
|
A user cannot sign in |
The user is not assigned to the application. |
Assign the user in step 3. |
|
A new user can only see a few Redash pages |
The user is added only to the default group. |
Give the user more permissions in Redash (Settings → Users and Groups) or send the |
|
OAuth 2.0 / OpenID Connect sign-in is required |
Redash has only the Google OAuth, no generic OAuth/OIDC login. |
Use the SAML integration in this document. |
After completing the configuration on Redash and Monosign, it is better to test in a new private browser window if the SAML SSO doesn’t work, because old session cookies of the Redash address may cause errors.