This document explains how to implement Monosign with OpenText Service Manager. It covers Single Sign-On using SAML 2.0, where Monosign acts as the Identity Provider (IdP) and Service Manager as the Service Provider (SP). Before you continue, it is better to start with the OpenText Service Manager documentation about SAML 2.0 single sign-on, including the Renew the SAML certificate (opens in a new tab) topic.
This configuration is based on the SAML 2.0 service provider metadata that Service Manager publishes at https://<service-manager-host>/idm-service/saml/metadata. The service provider requests signed authentication requests (AuthnRequestsSigned=true) and signed assertions (WantAssertionsSigned=true), and identifies the user by e-mail address (NameID format emailAddress). If your Service Manager version is different, please check the OpenText Service Manager documentation.
Monofor has no responsibility to do Service Manager configurations. If you need support please contact OpenText or your Service Manager support provider.
Instructions
This documentation contains 5 main steps for integration.
Creating an application on Monosign
Configuring the SAML settings on Monosign
Assign a user to the Service Manager application
Configuring Single Sign-On for Service Manager
Sign In Test
1- Creating an Application on Monosign
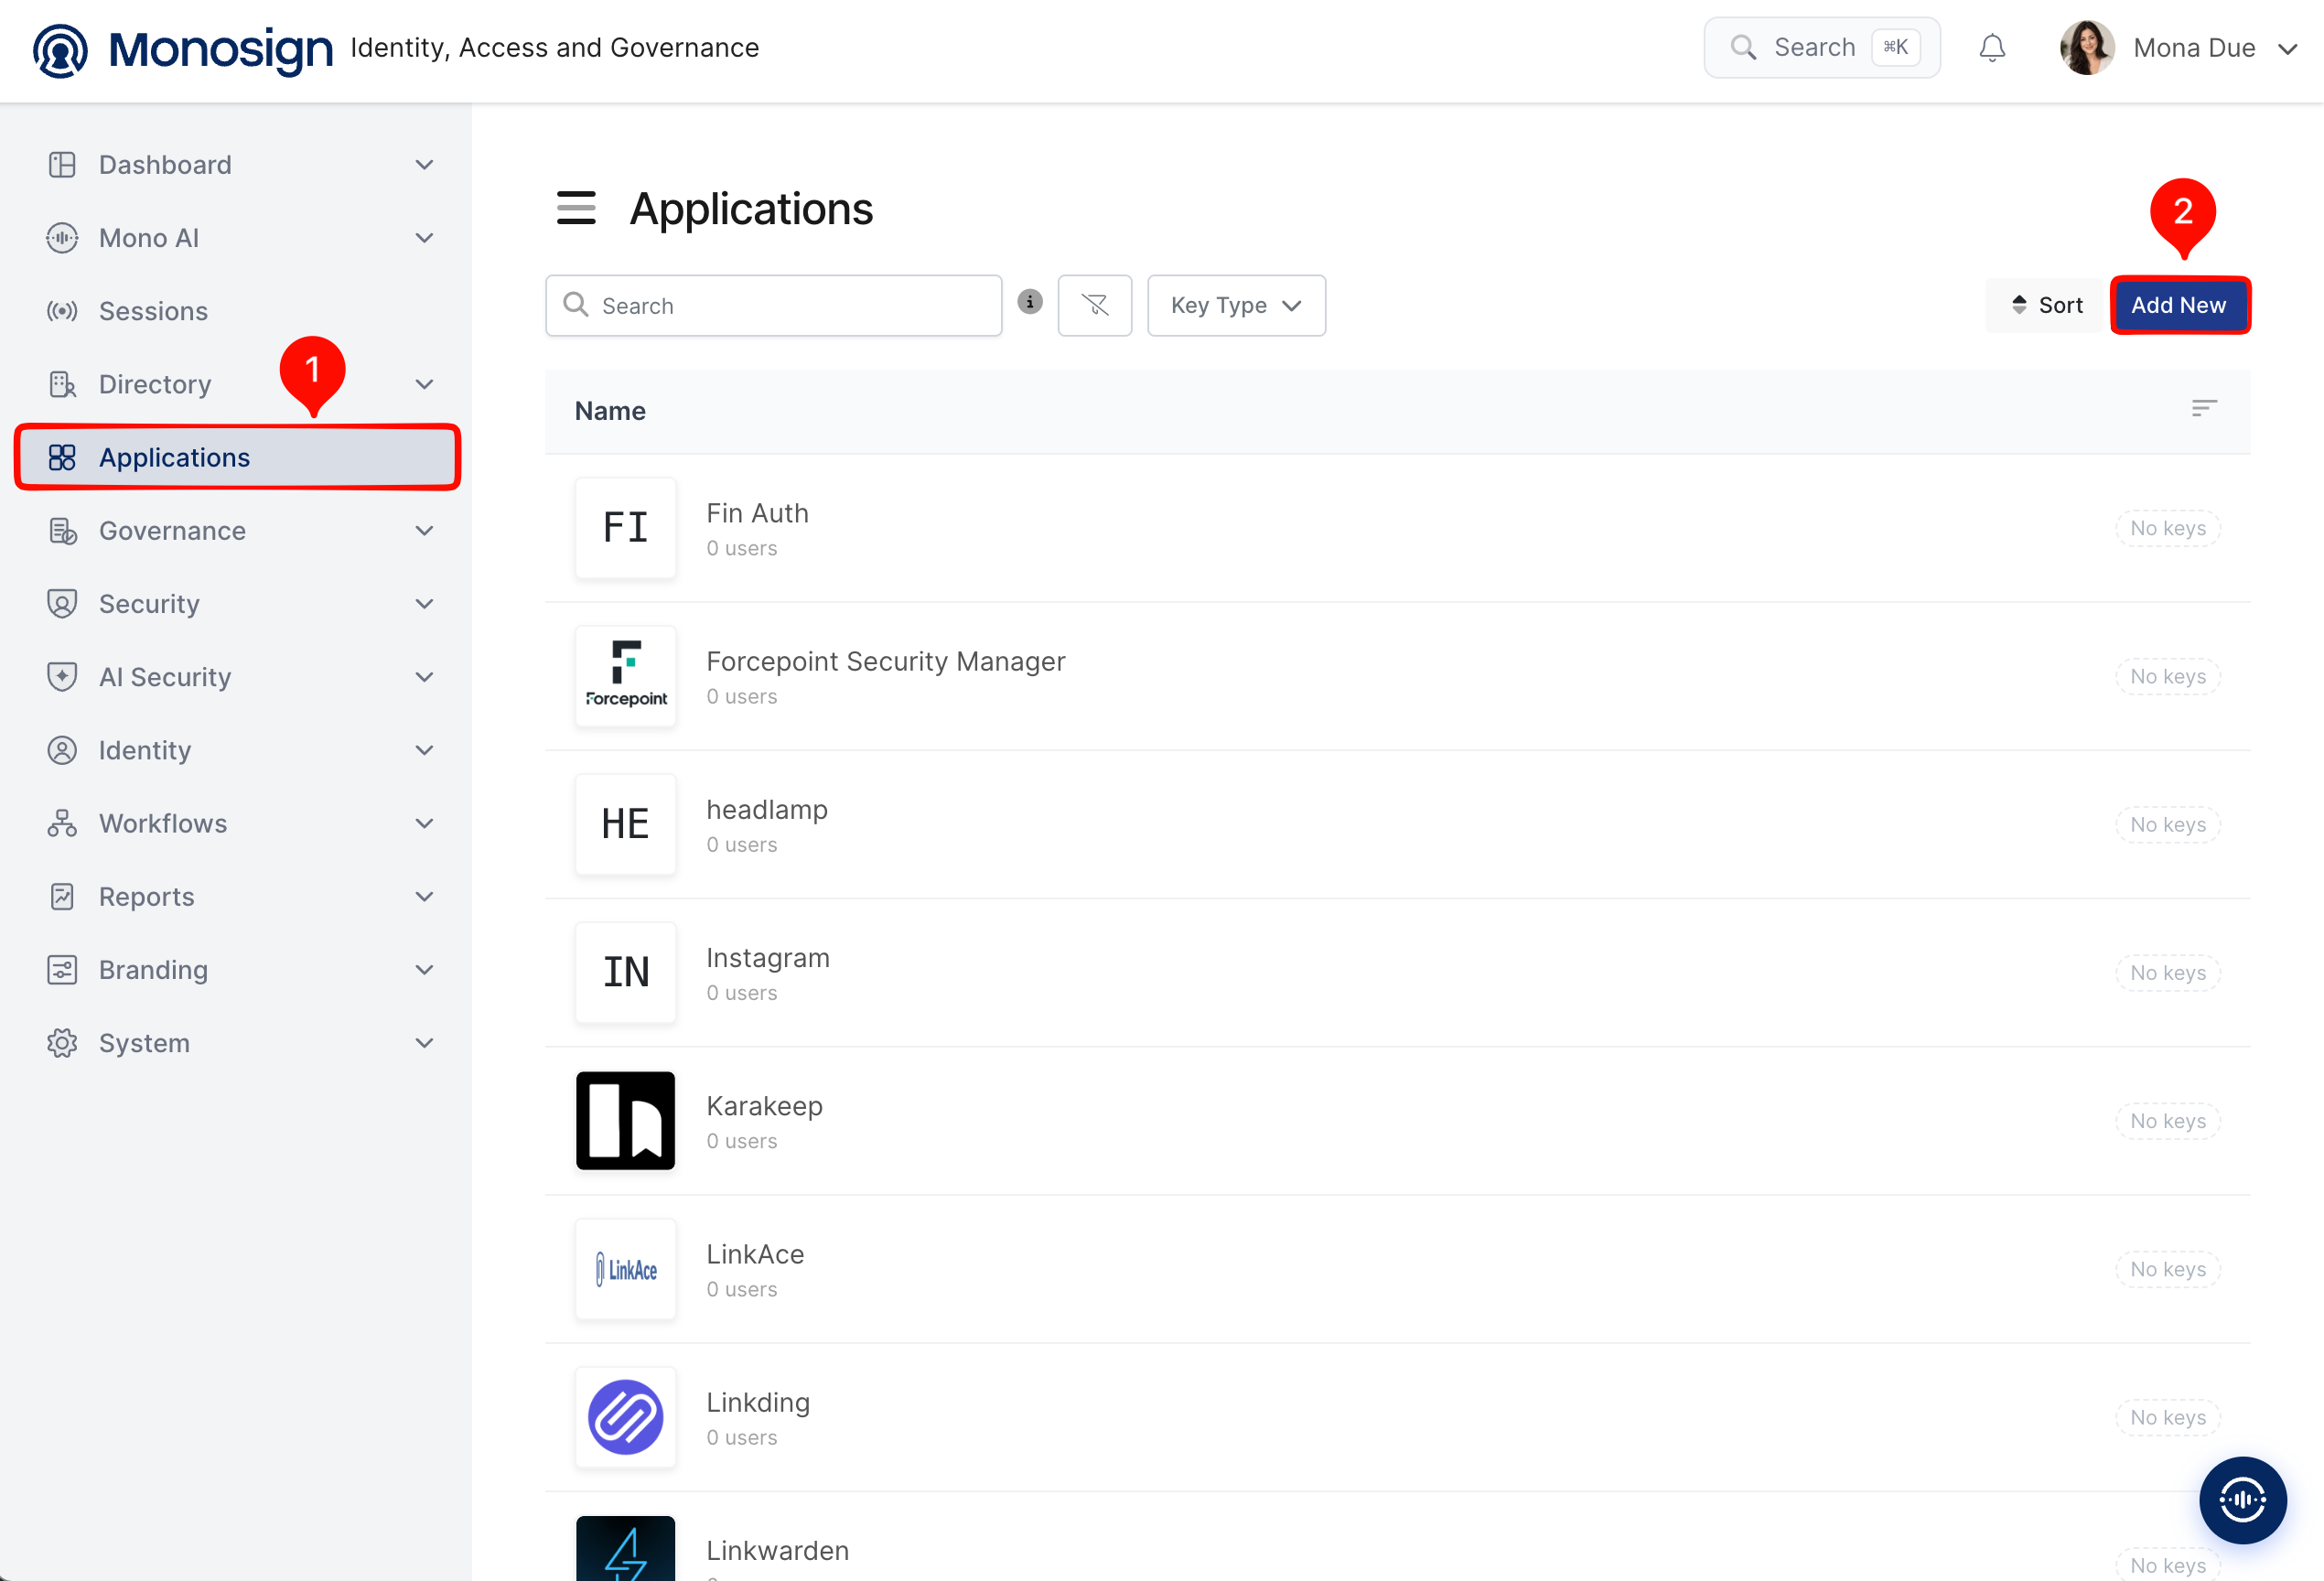
Create your application on Monosign first. Open the Applications page from the left menu and click Add New.
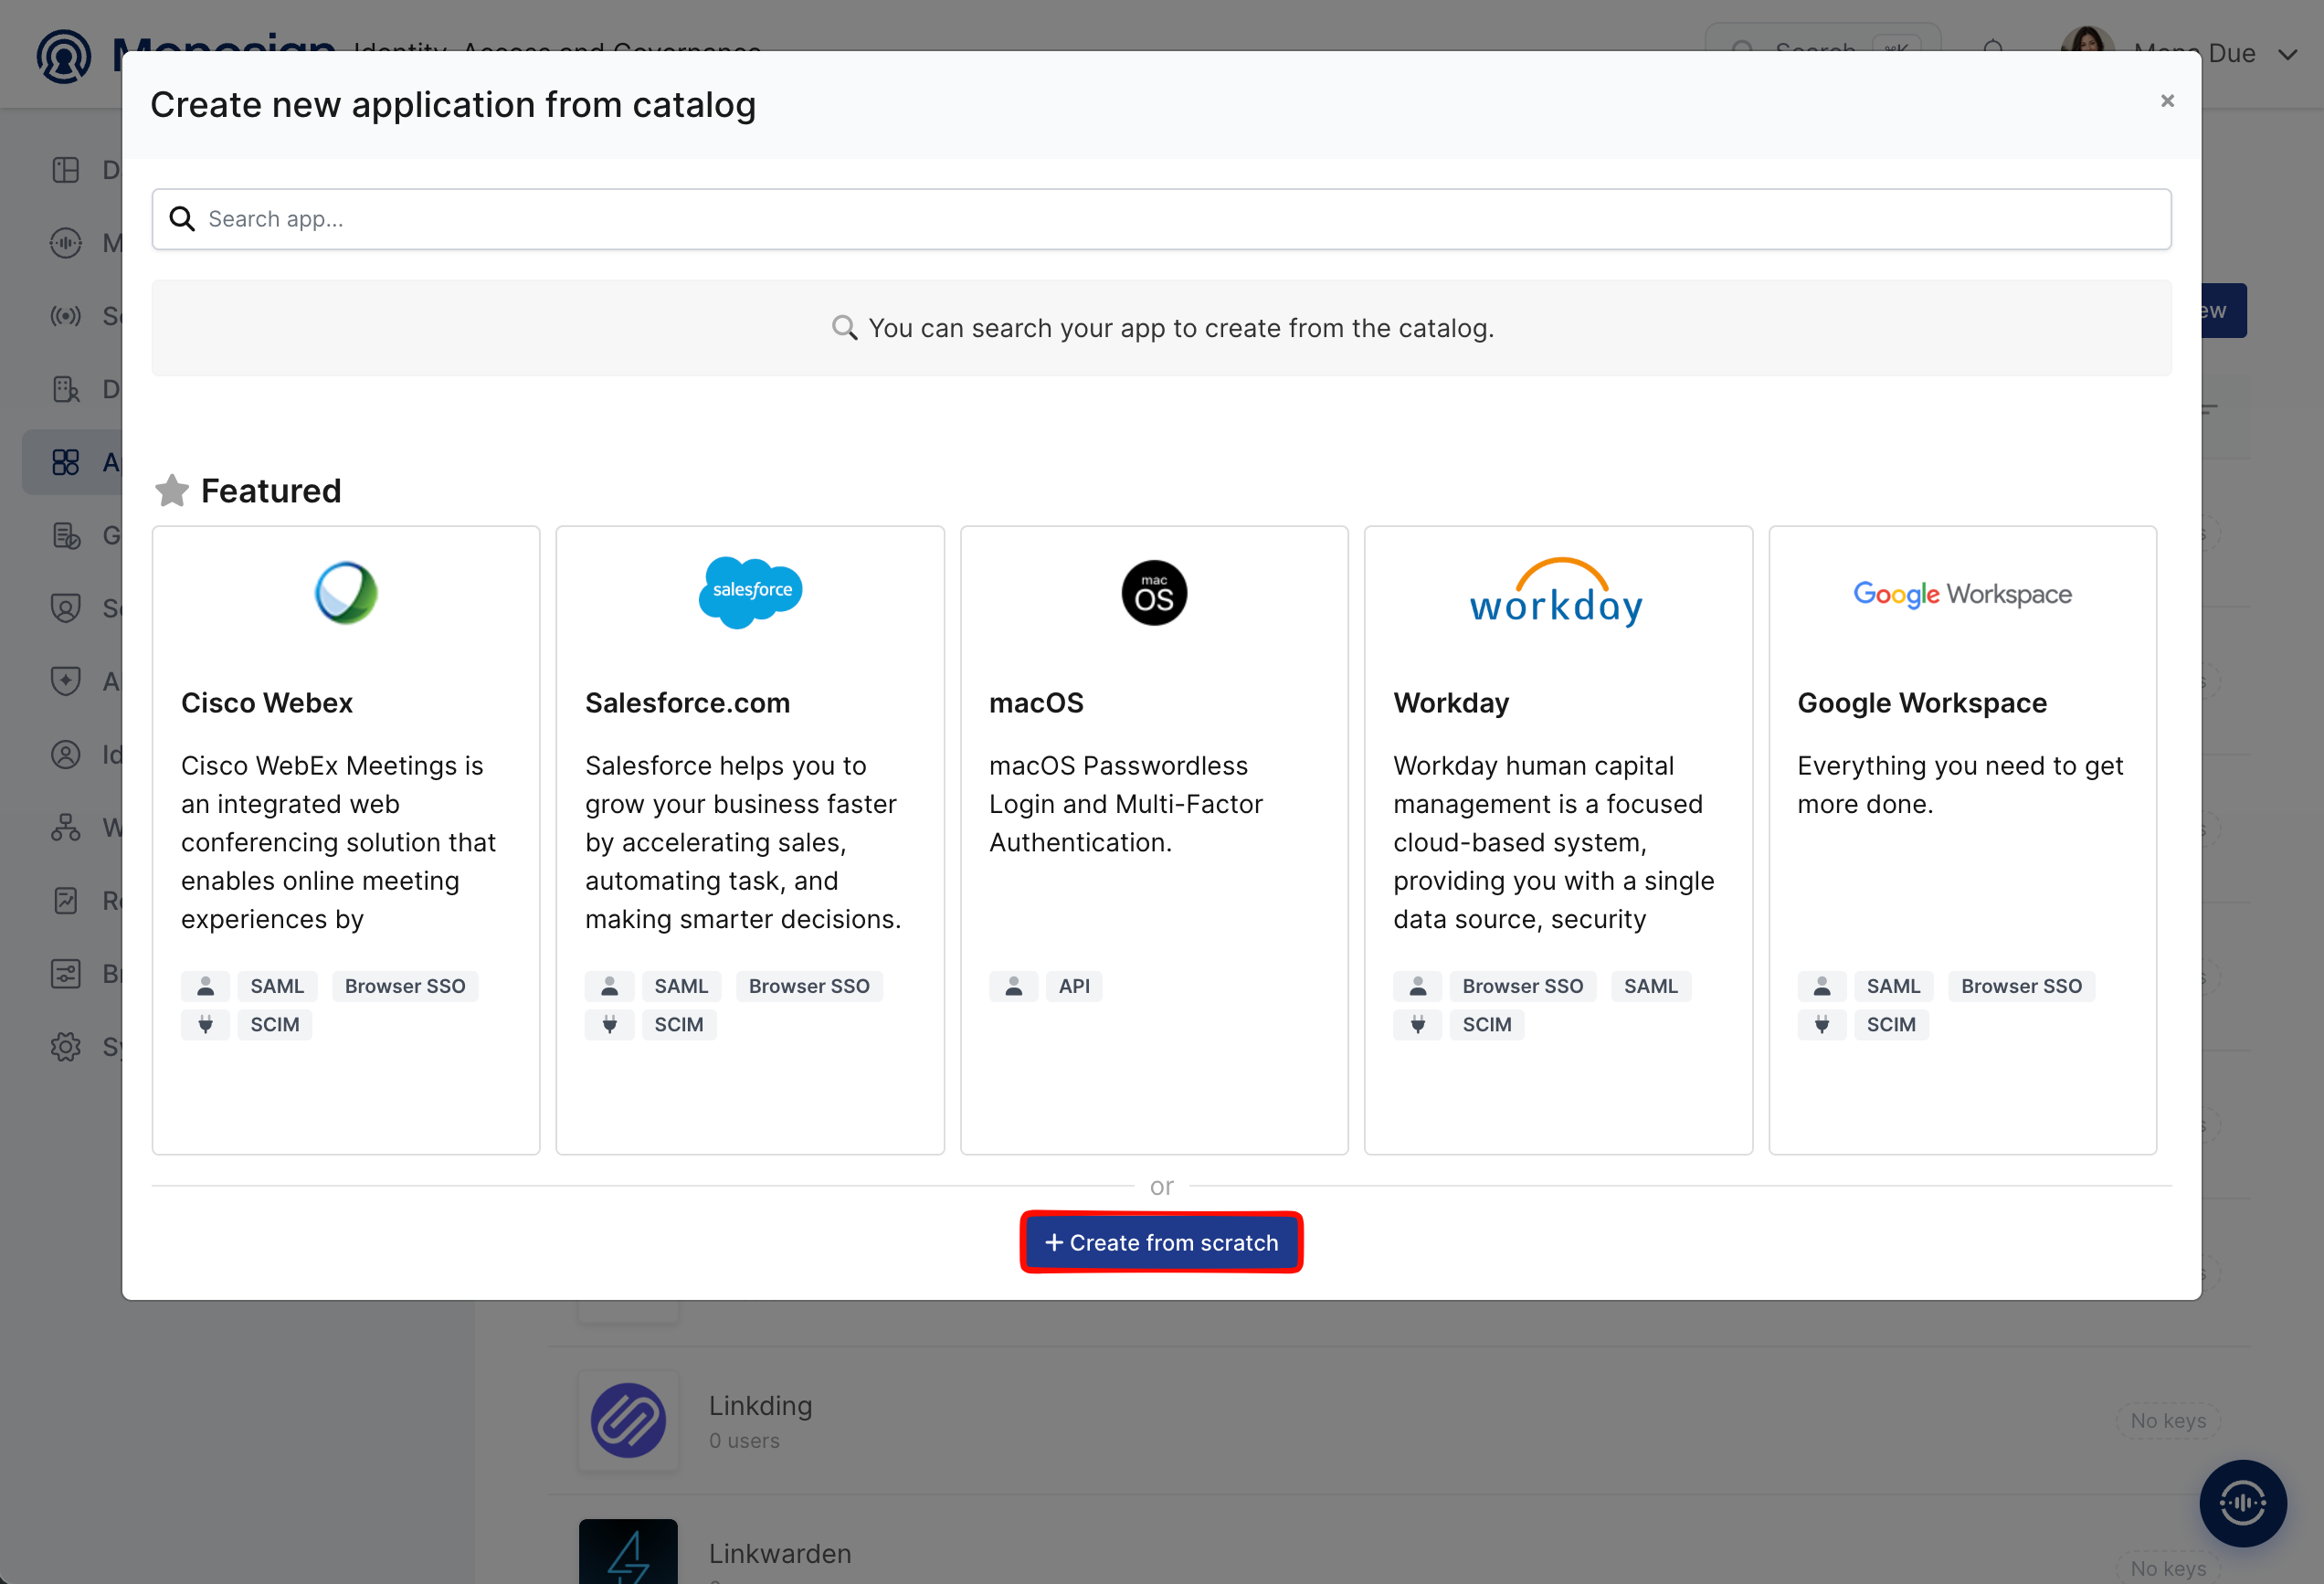
Service Manager is not in the application catalog, so click Create from scratch.
Fill in the application details on the Application tab and click Next.
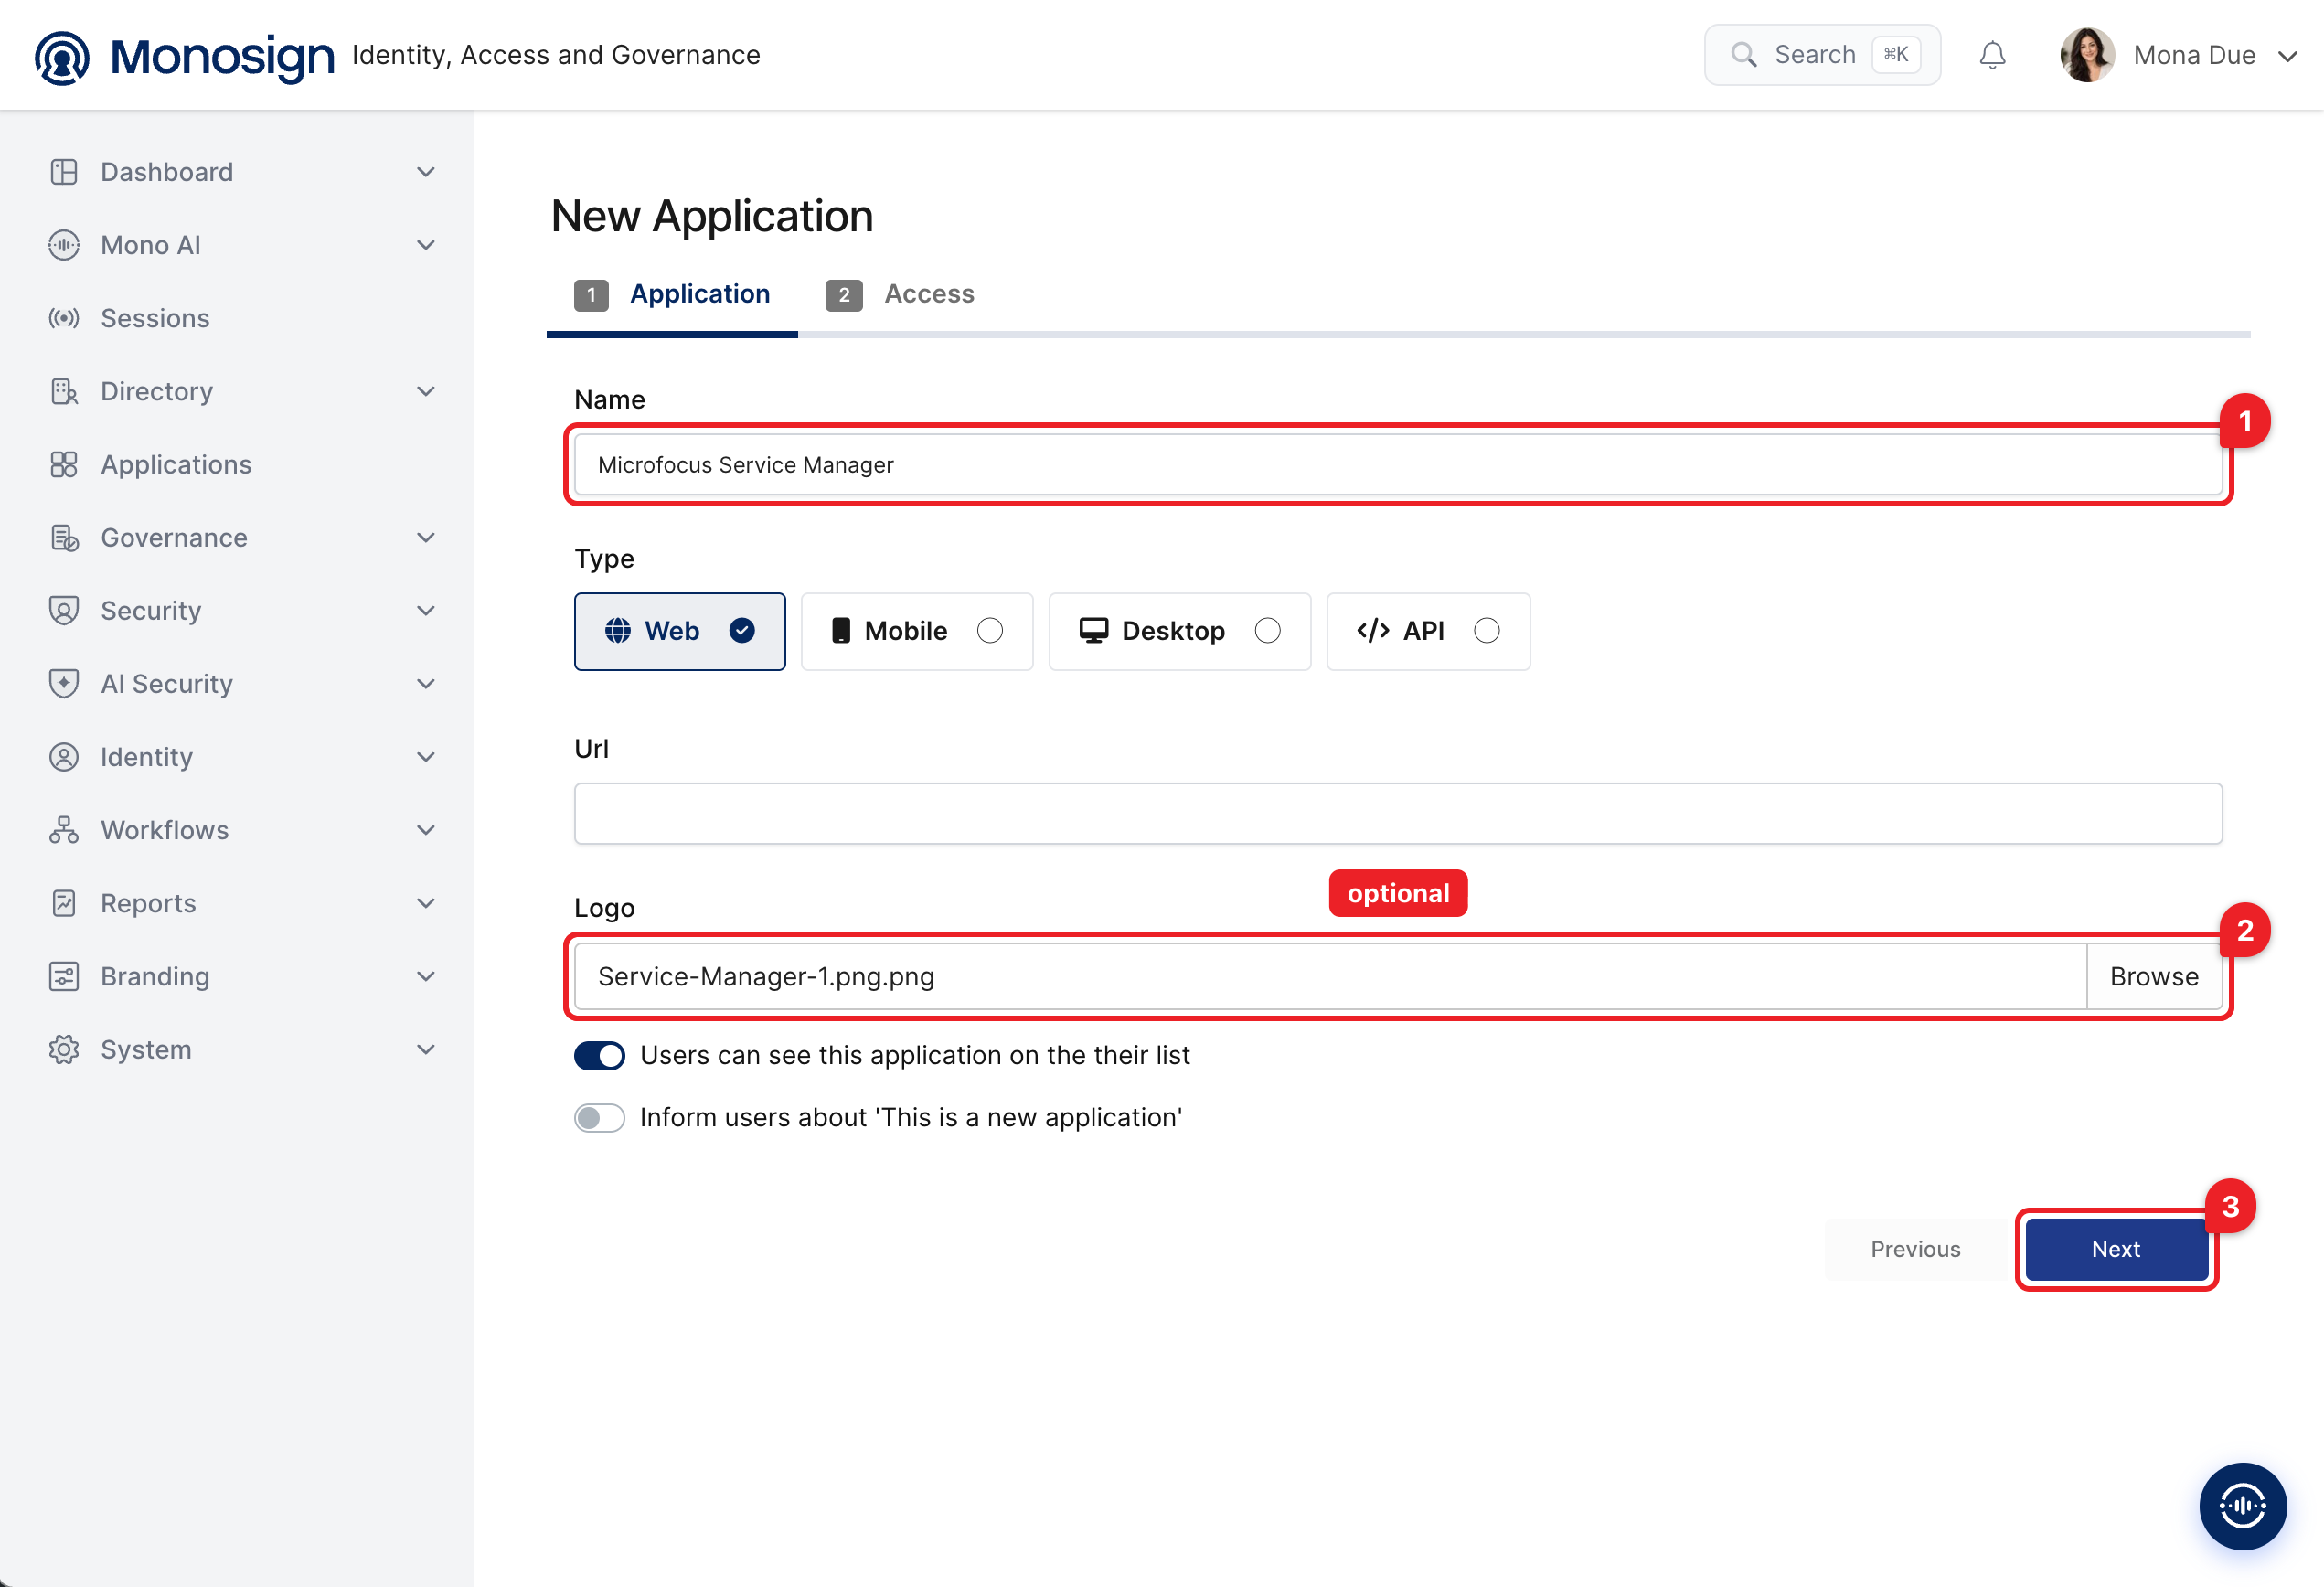
Property | Value | Description |
|---|---|---|
Name |
| Name of the application shown to users on the Monosign portal and on the Monosign sign-in page. |
Type |
| Service Manager is accessed through a web browser. Options: Web, Mobile, Desktop, API. |
Url | Optional | Leave empty or enter the address of Service Manager (for example |
Logo | Optional | Browse and upload a logo; it is also shown on the Monosign sign-in page. |
Users can see this application on their list |
| Displays the application on the user portal. |
On the Access tab define who can reach the application and click Create Application.
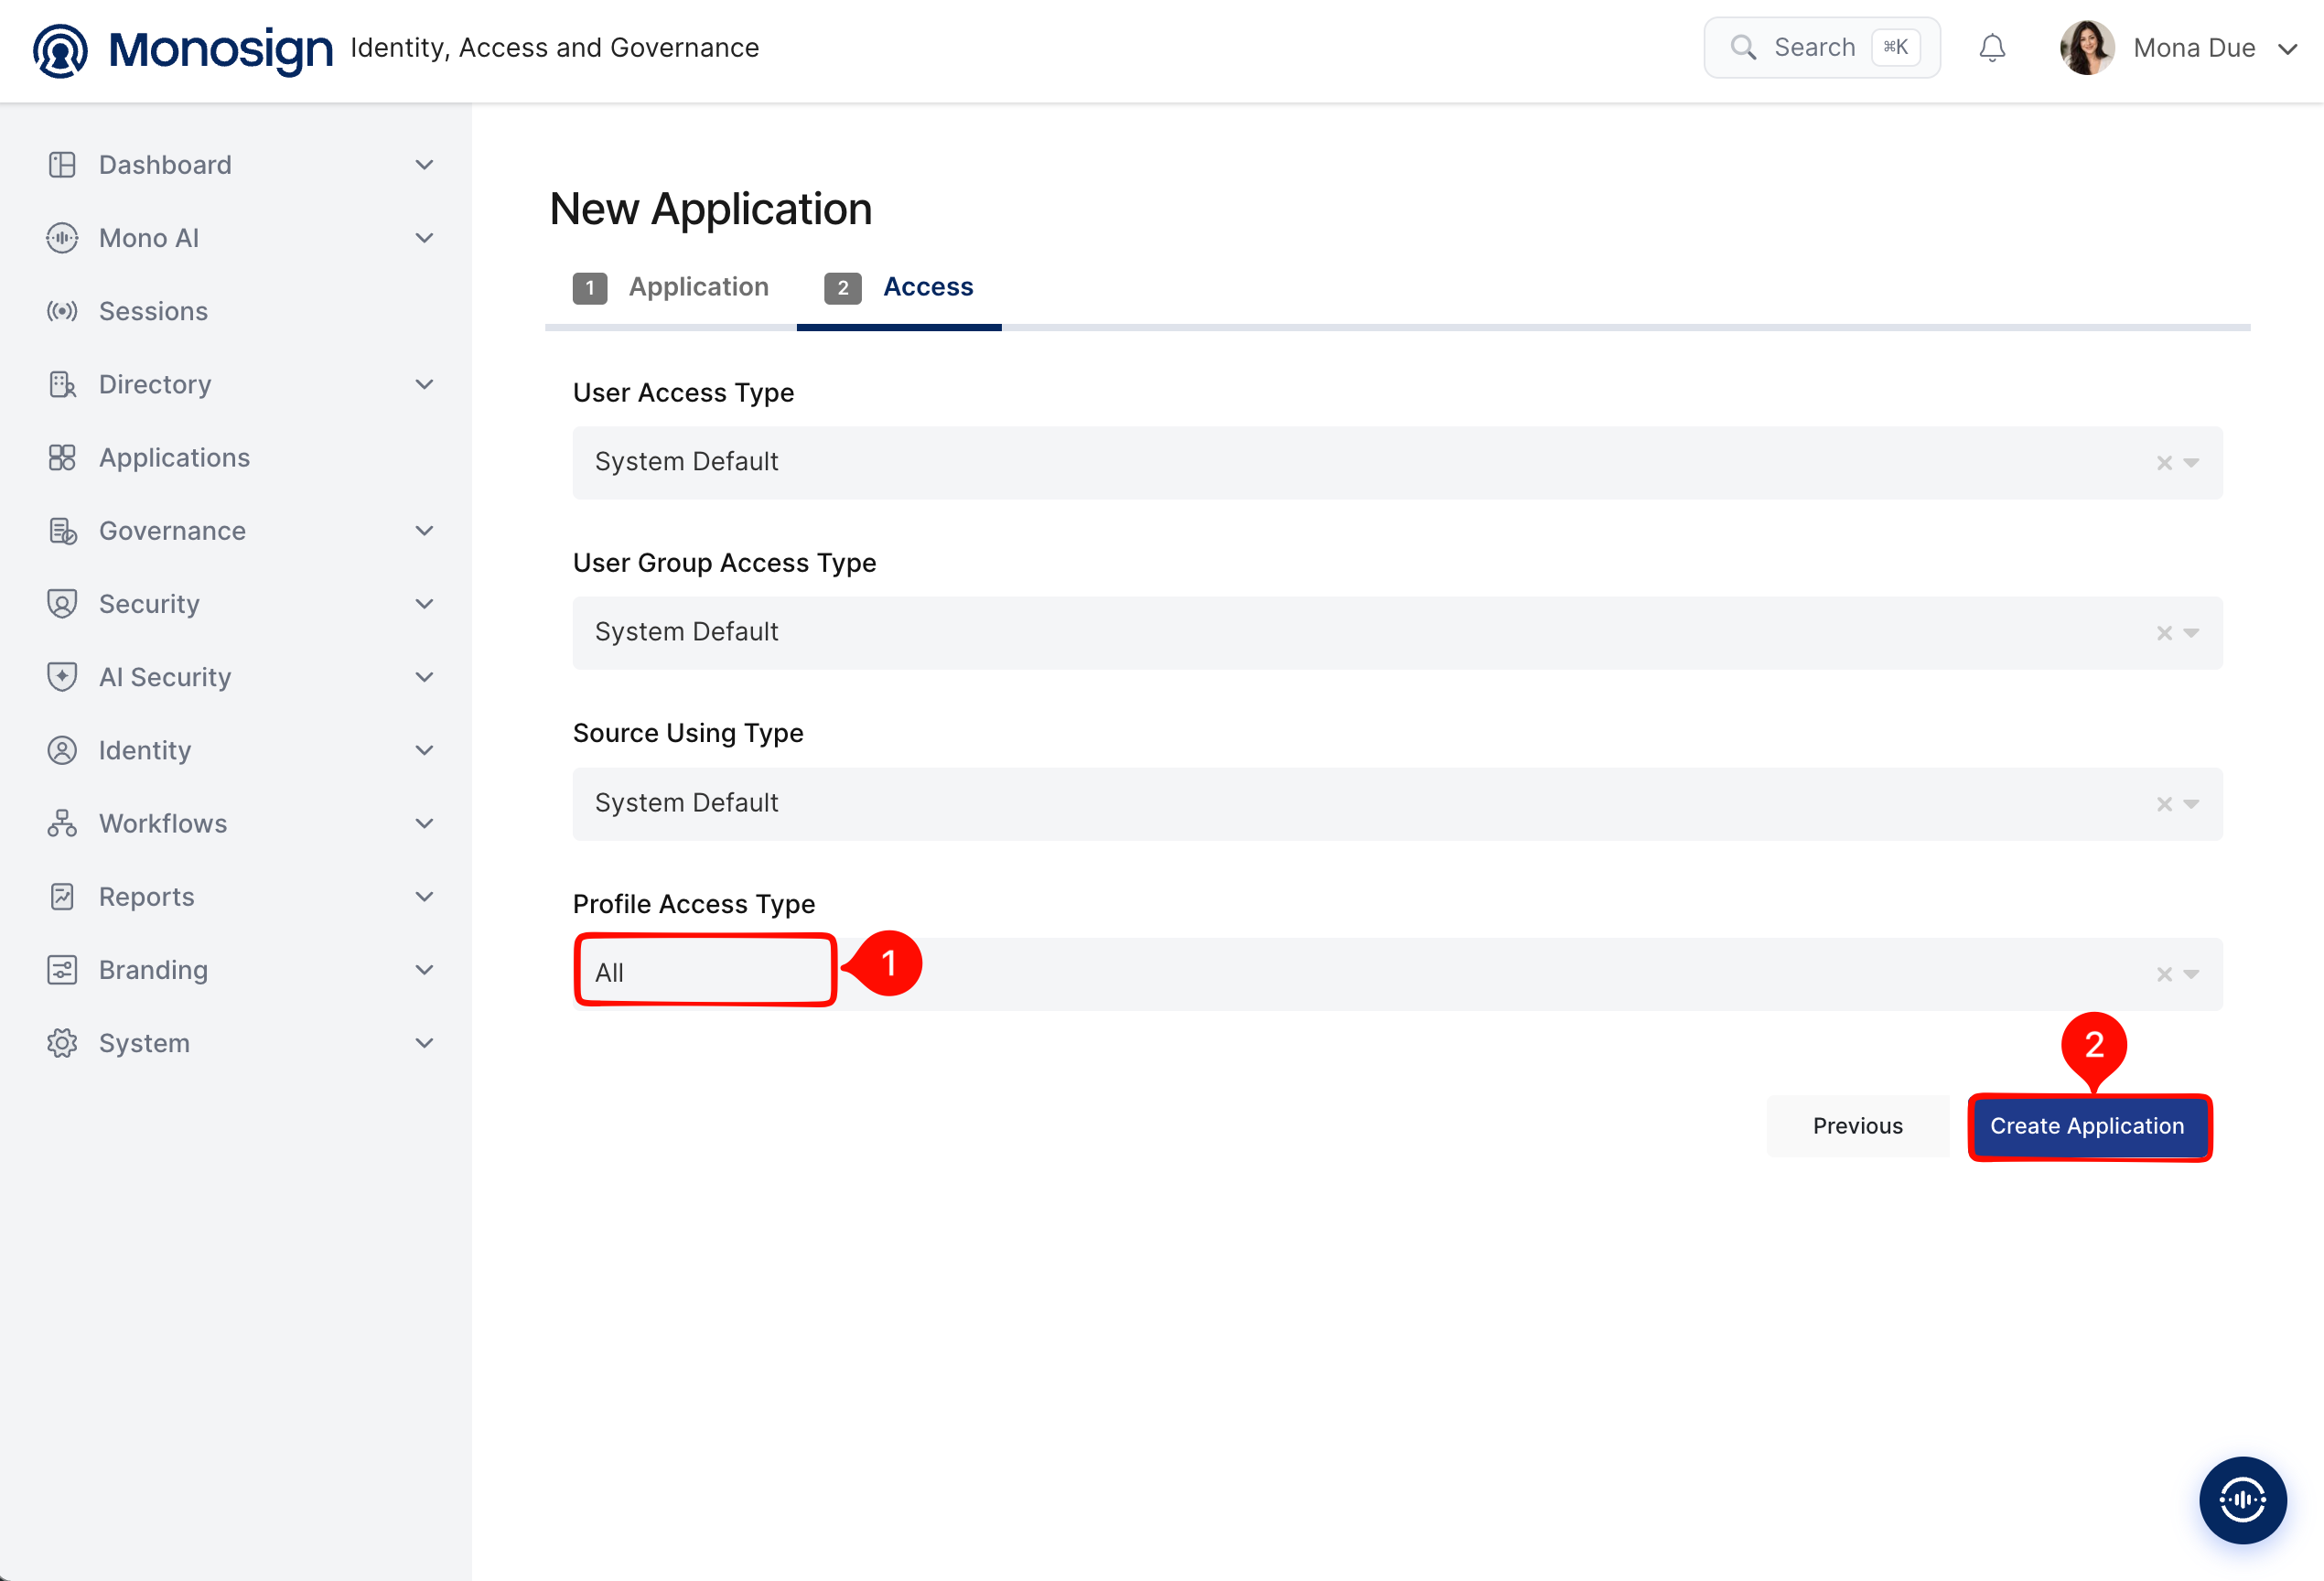
Property | Value | Description |
|---|---|---|
User Access Type |
| Defines which users can access this application. Options: Only Assigned Users, All Users, System Default. |
User Group Access Type |
| Defines the application's user group access. |
Source Using Type |
| Defines which user sources the application can use. |
Profile Access Type |
| Defines which user profile attributes are available to the application (Options: Restricted, All). Service Manager needs the e-mail address of the user, so the profile must be accessible. |
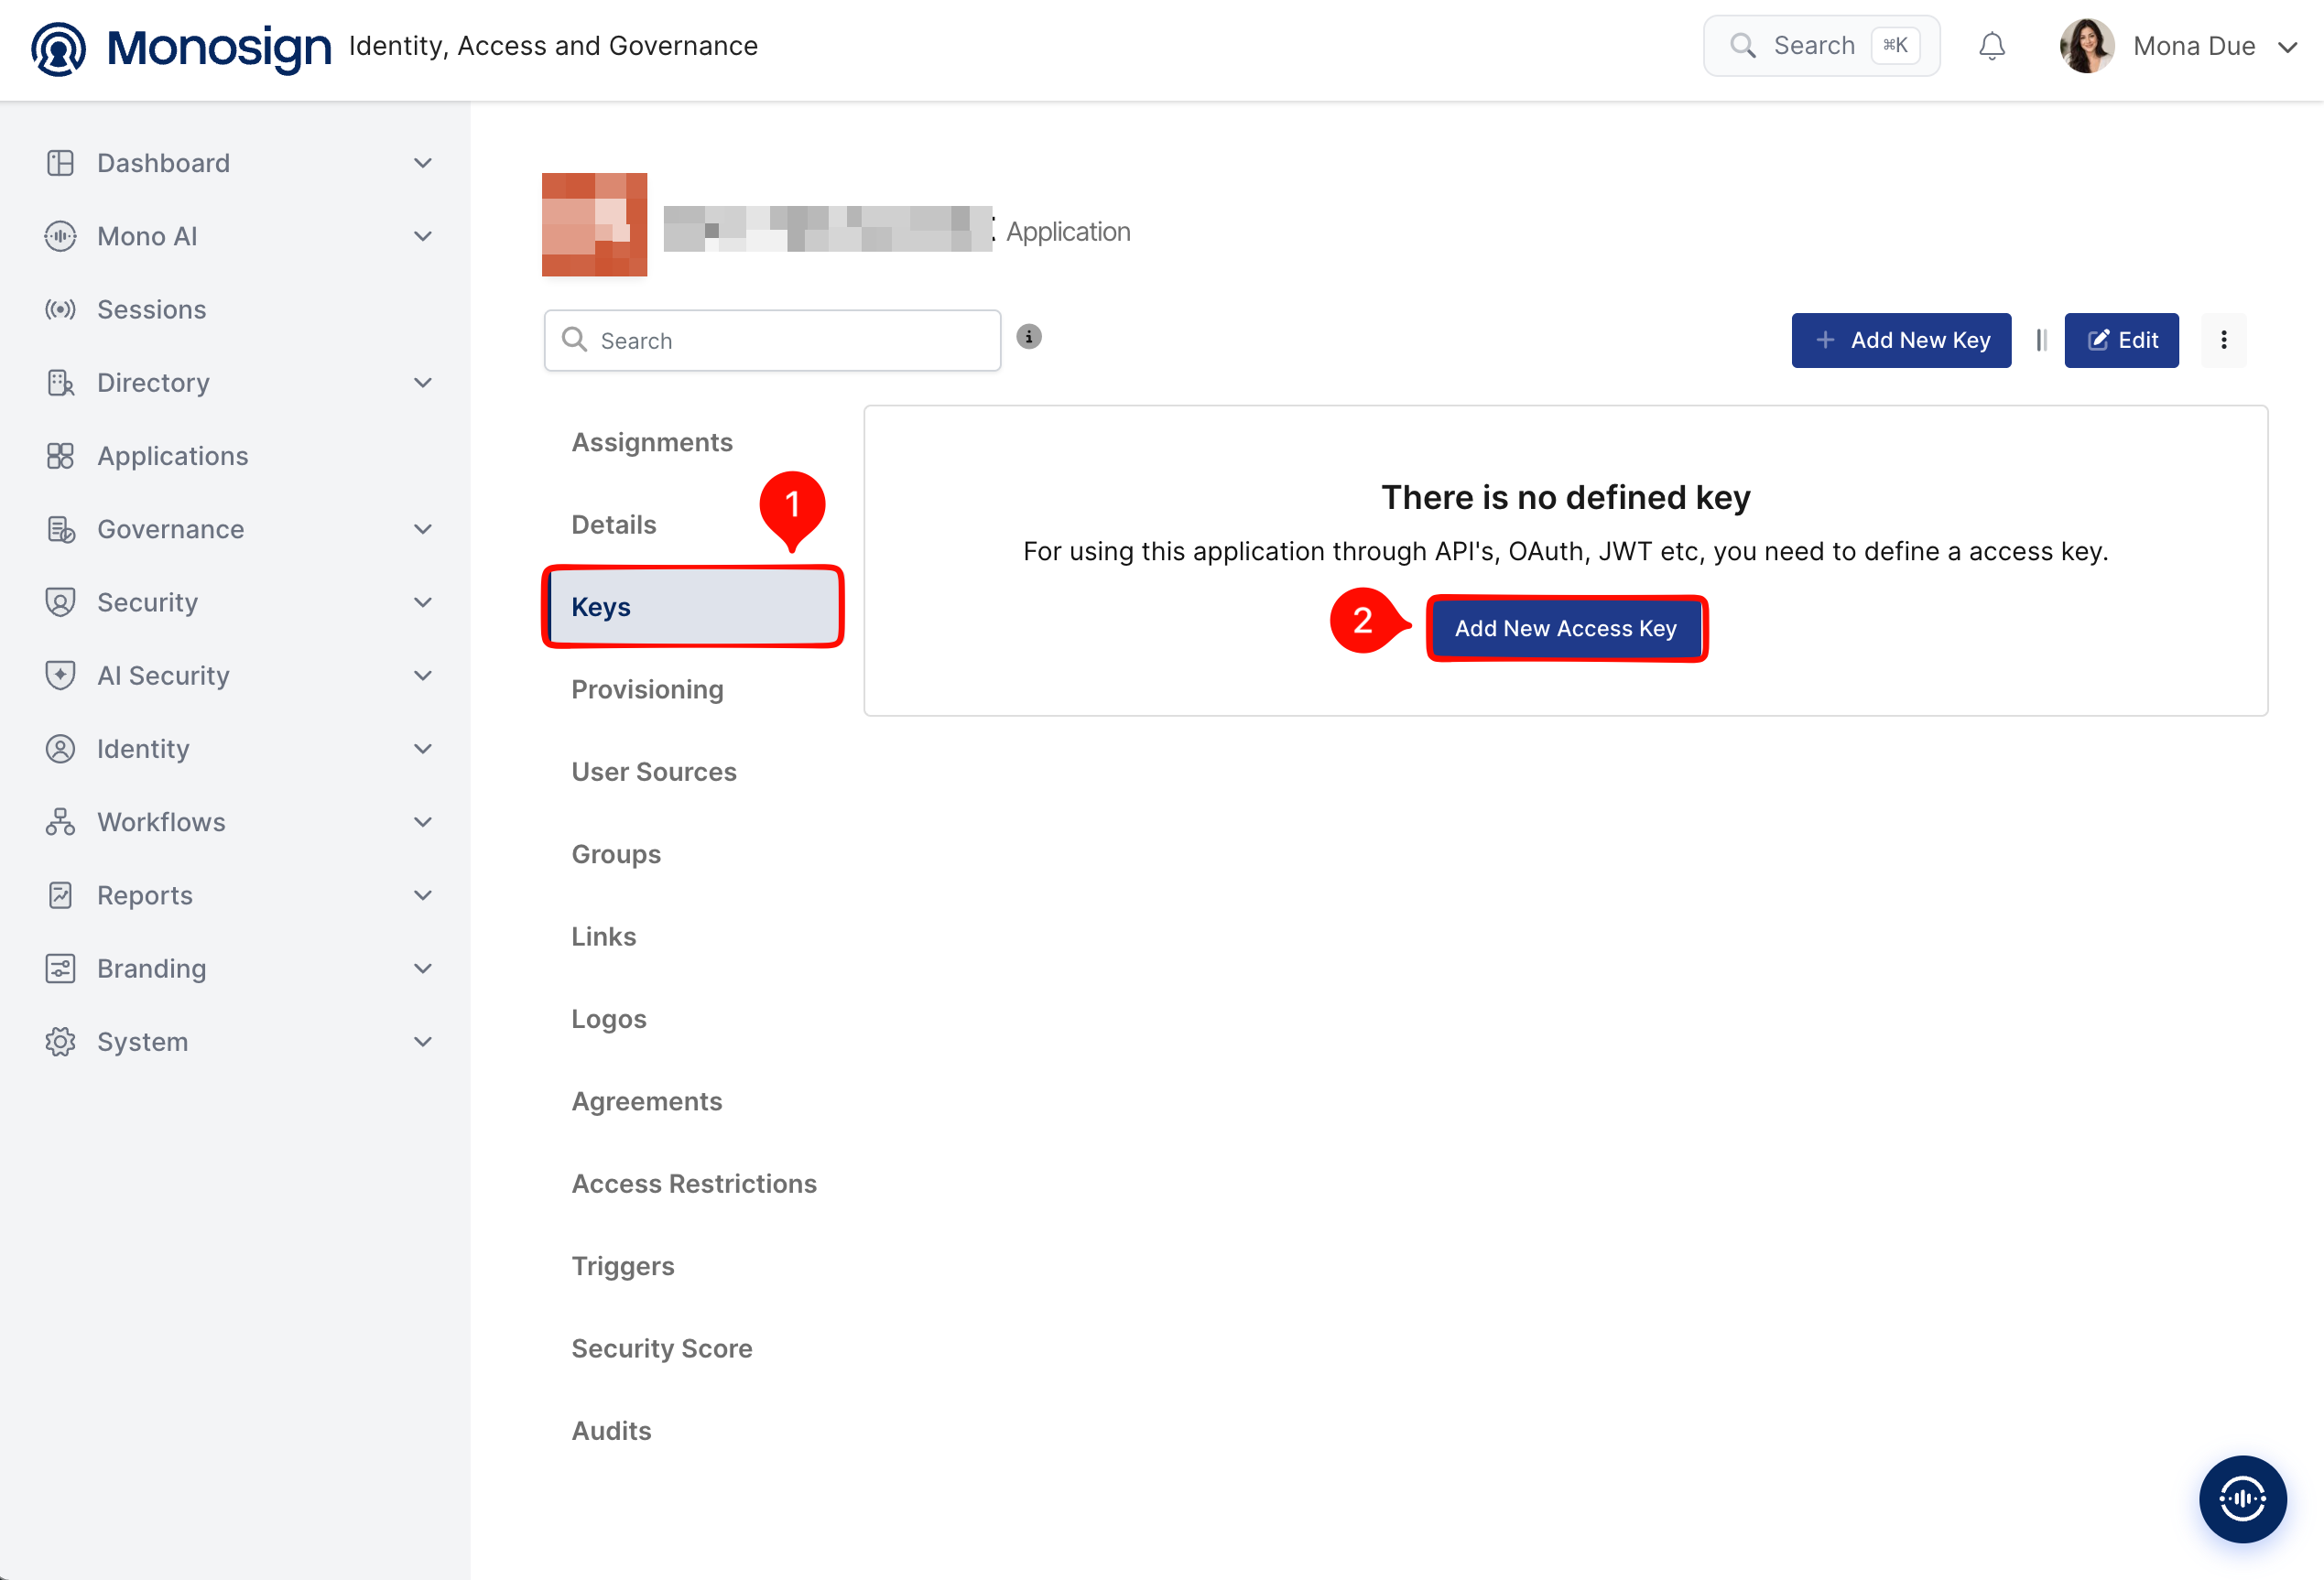
After the application is created, click Keys and add a new Access Key for SAML access.
Select SAML as the key type and click Create. Monosign generates the Key value of the SAML application automatically; it is a part of the Monosign SAML addresses.
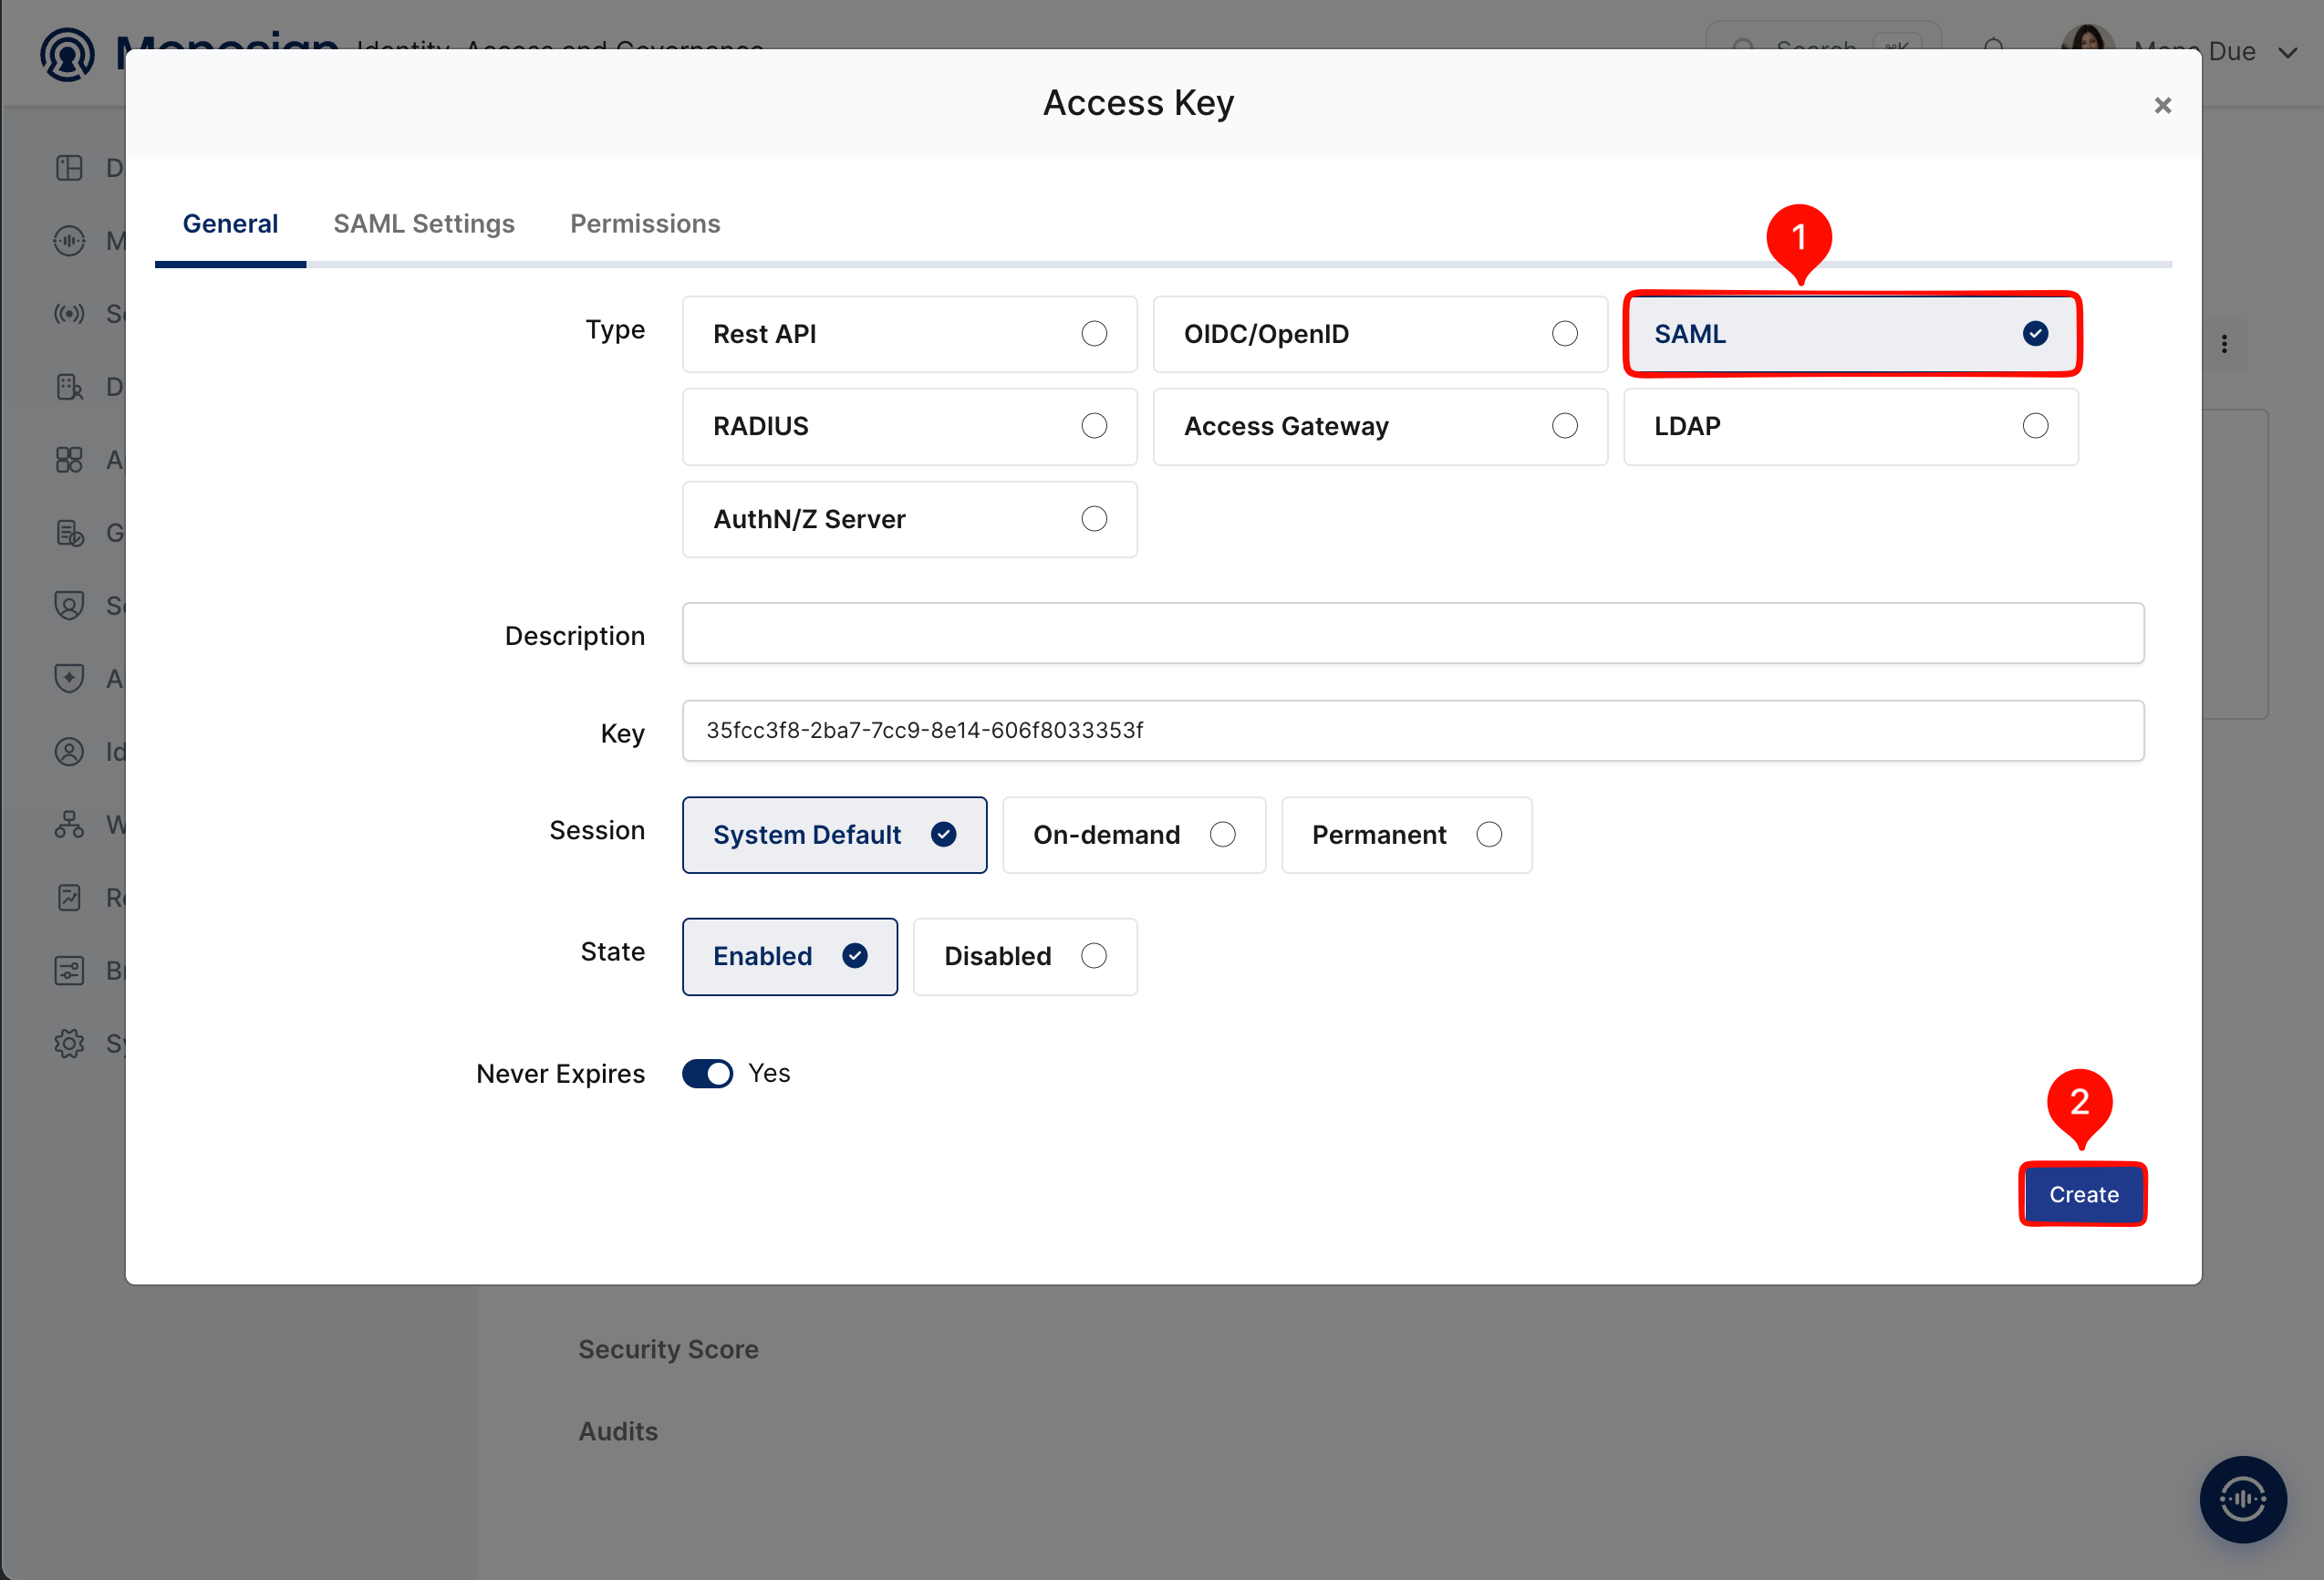
Property | Value | Options |
|---|---|---|
Type |
| Rest API, OIDC/OpenID, SAML, RADIUS, Access Gateway, LDAP, AuthN/Z Server |
Key | Generated automatically | Unique identifier of the SAML application in the Monosign addresses. |
Session |
| System Default, On-demand, Permanent |
State |
| Enabled, Disabled |
Never Expires |
| Turn off to define a specific expiration date for the key. |
The key page shows the Monosign values that are needed in the Service Manager configuration (step 4):
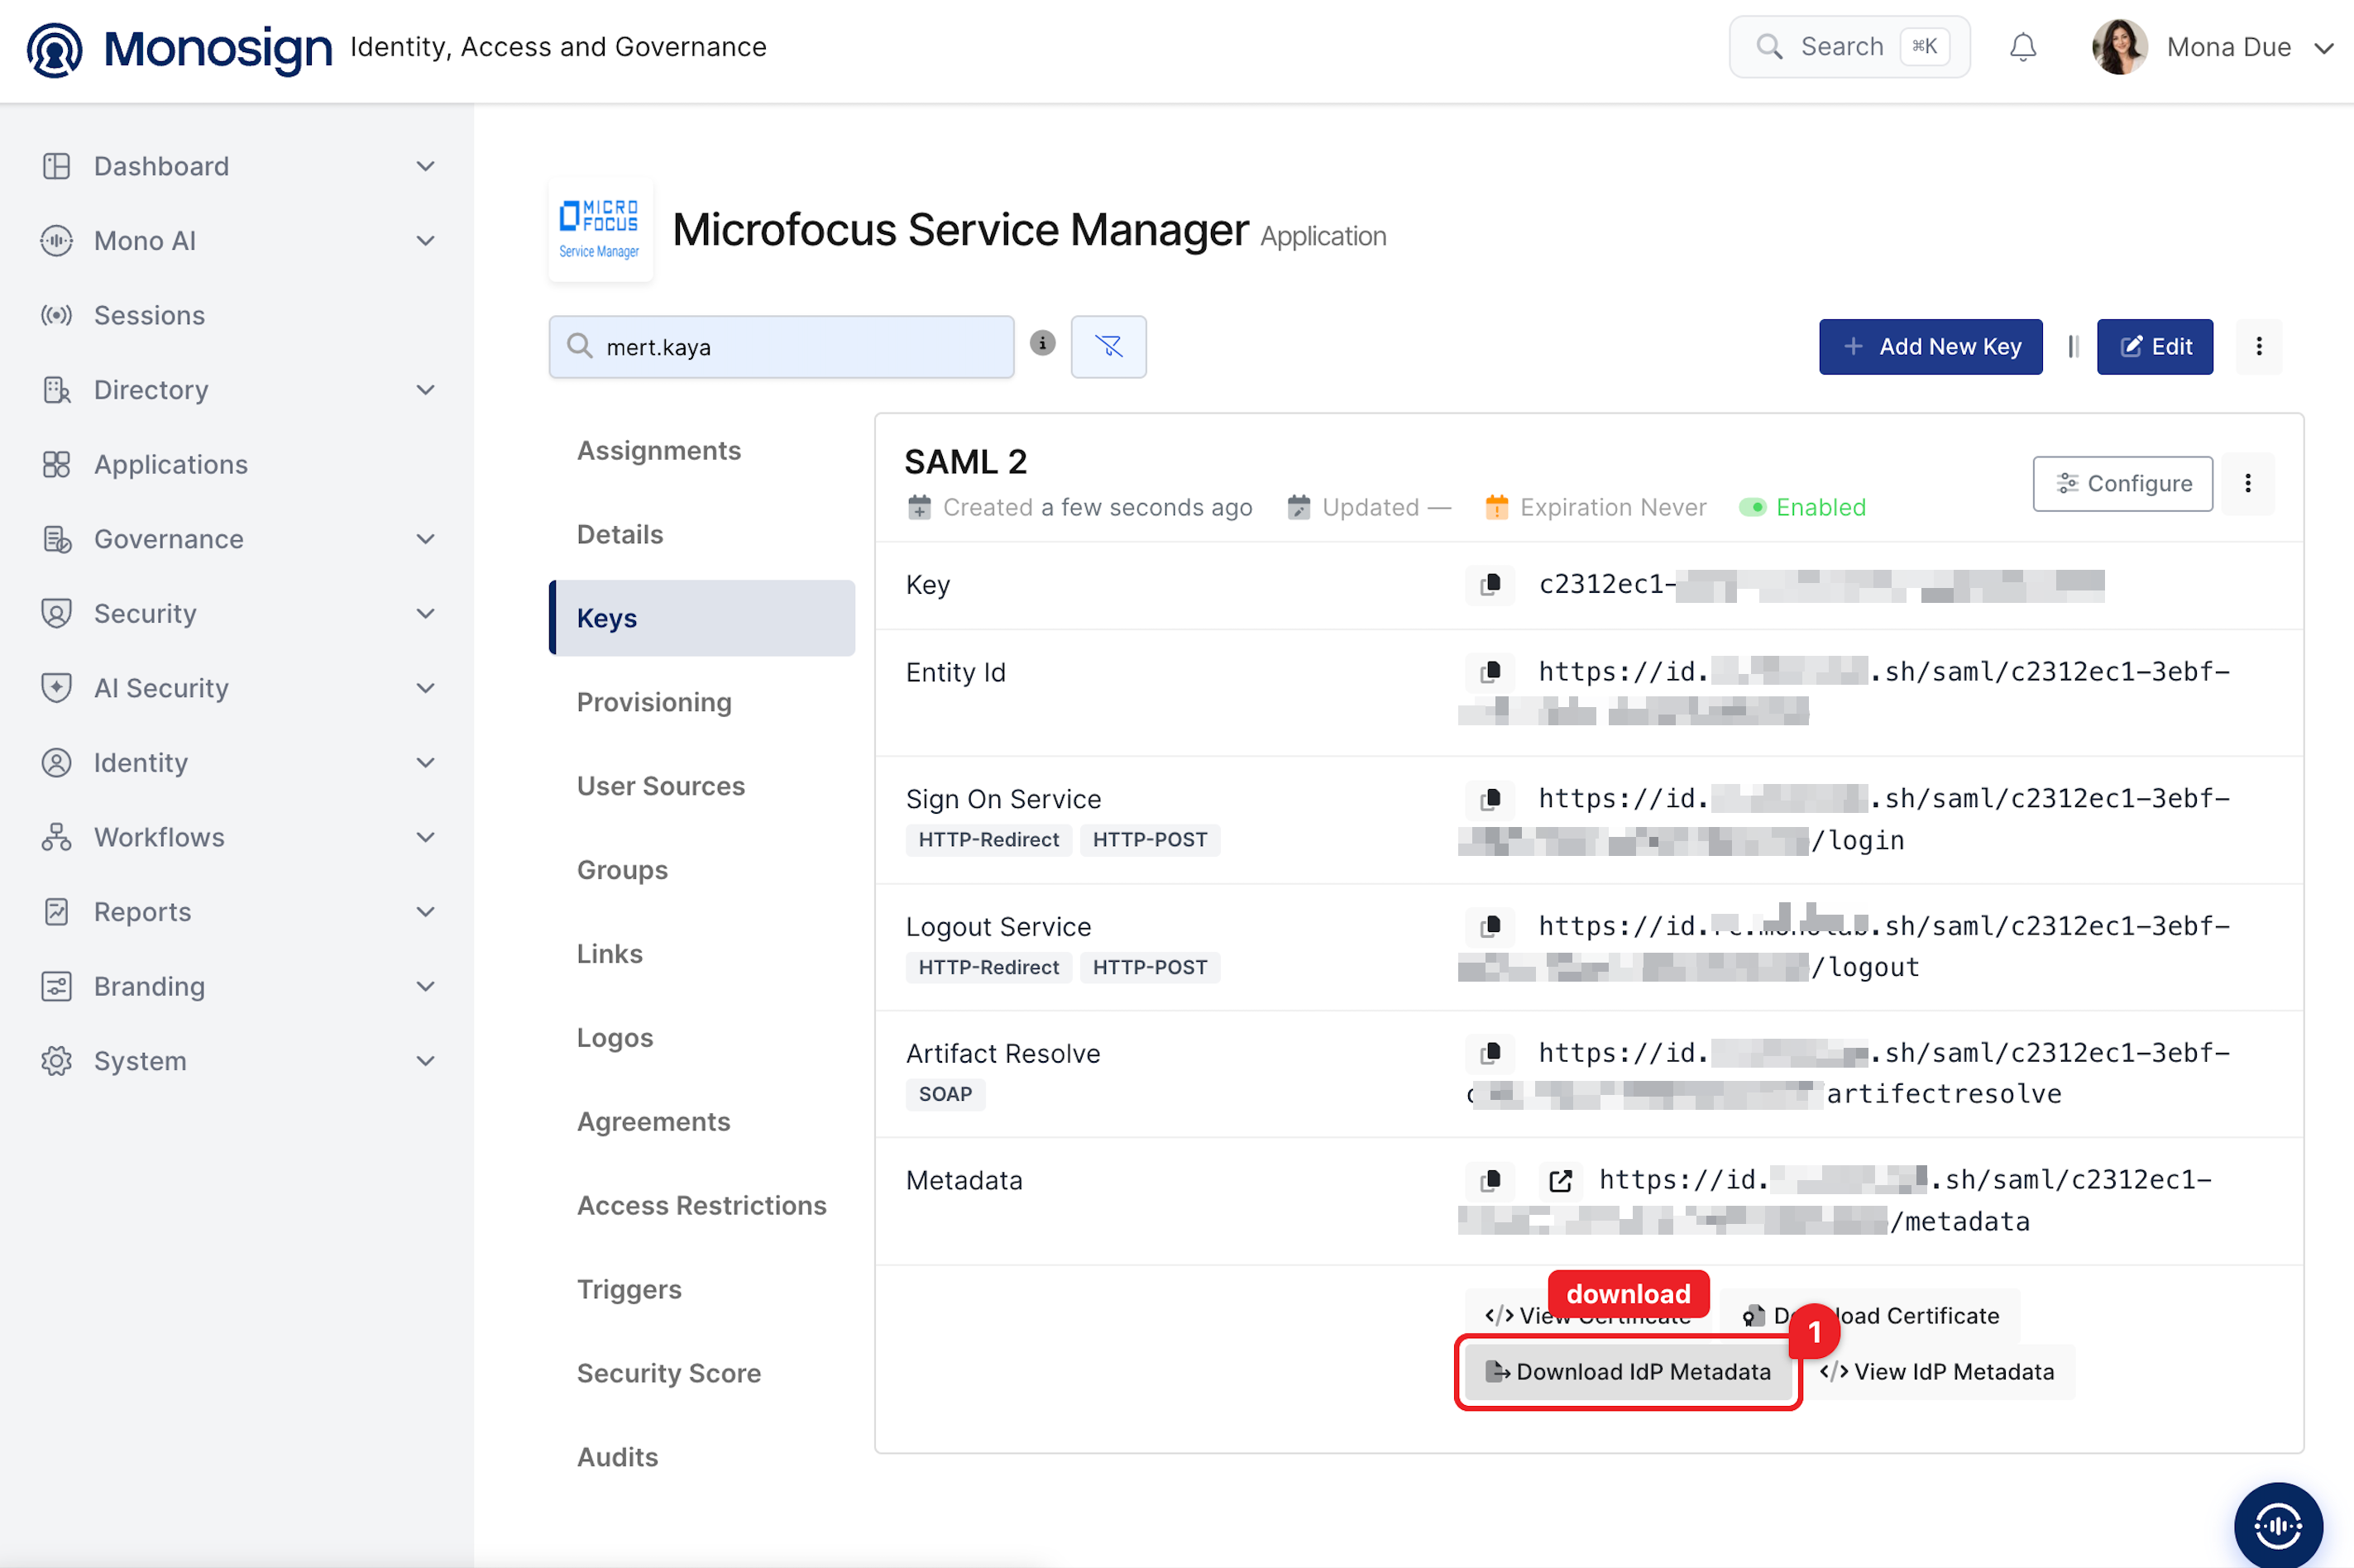
Monosign value | Example | Used in Service Manager as |
|---|---|---|
Sign On Service |
| Identity provider Single Sign-On URL |
Entity Id |
| Identity provider Issuer / Entity ID |
View Certificate / Download Certificate | X.509 certificate of Monosign | IdP signing certificate (X.509) |
Metadata, Download IdP Metadata |
| IdP metadata. If Service Manager can import IdP metadata, this single URL provides the issuer, Sign On Service and certificate at once. |
2- Configuring the SAML Settings on Monosign
Open the Edit screen of the SAML key and go to the SAML Settings → Configuration tab. Enter the address where Service Manager receives the SAML response in Assertion Consumer Url and set the Name Id to the e-mail address of the user.
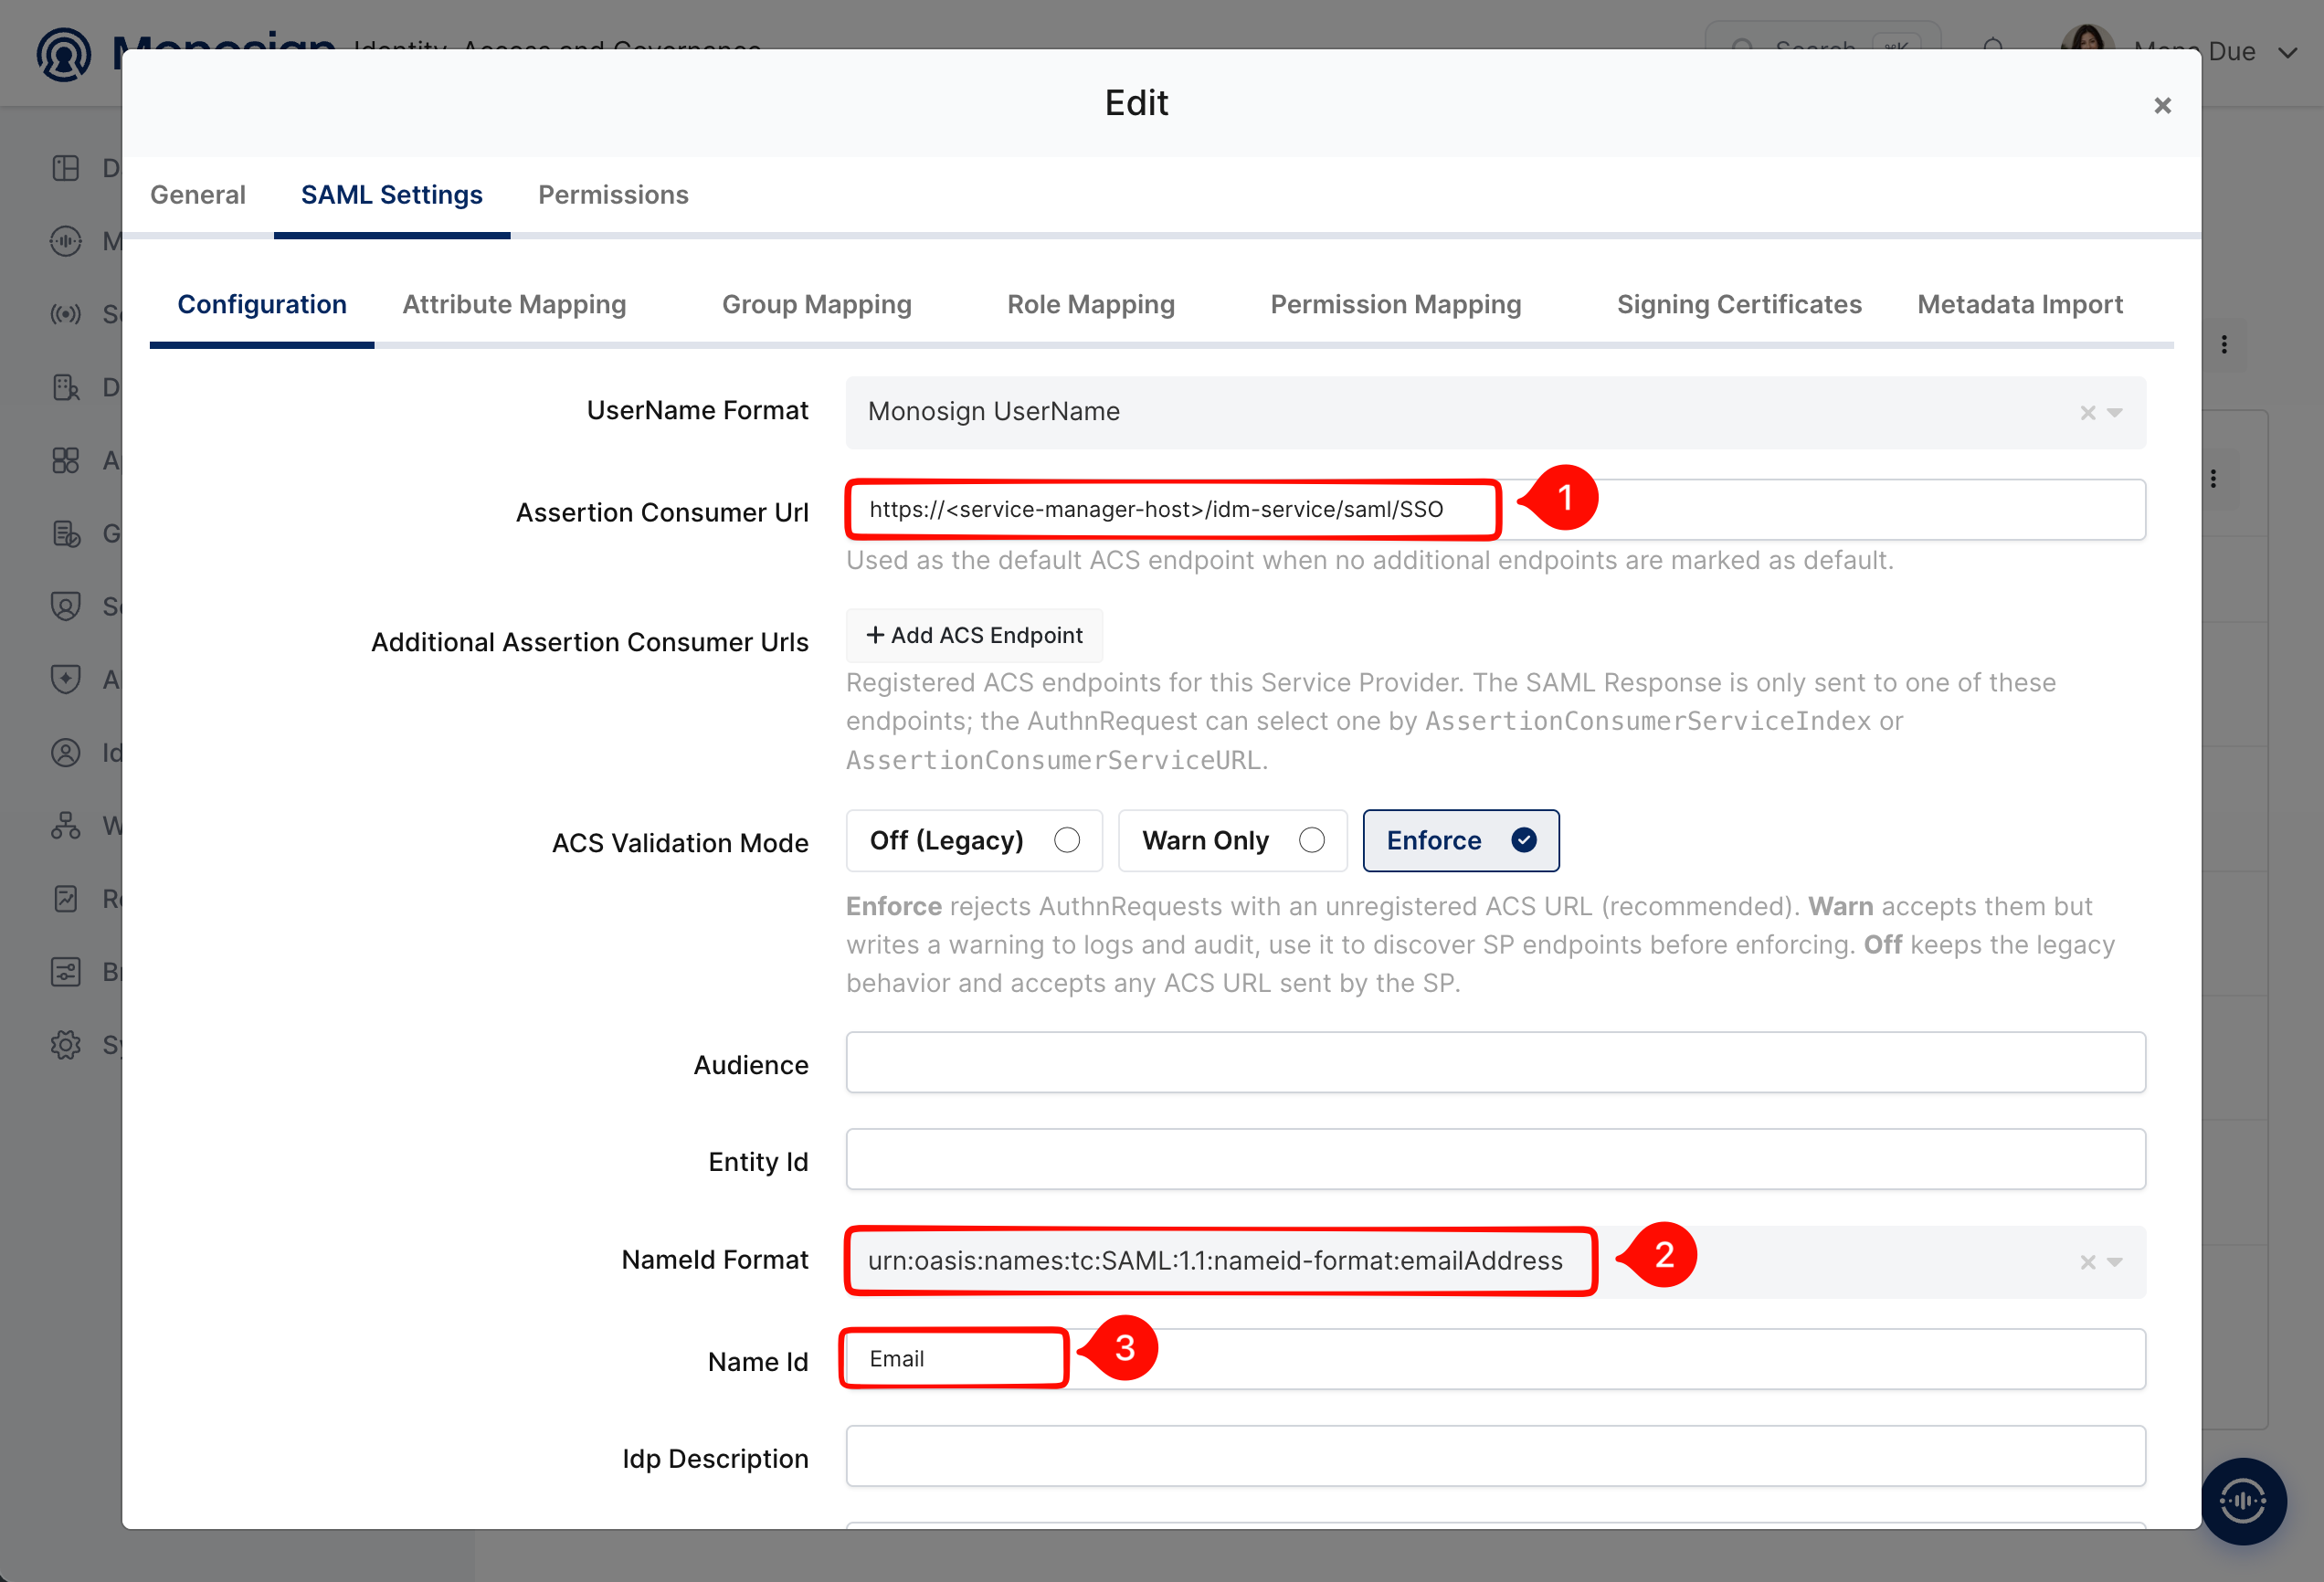
Property | Value | Description |
|---|---|---|
Assertion Consumer Url |
| The address where Service Manager receives the SAML response (HTTP-POST). It is the |
ACS Validation Mode |
| Default. With |
Audience / Entity Id |
| The SP |
Single Logout Url |
| Optional. The |
NameId Format |
| The SP metadata lists the e-mail NameID format first, so send the NameID in e-mail format. |
Name Id |
| Service Manager identifies the user by e-mail address, so the NameID of the SAML response must be the e-mail address. If this is empty, Service Manager shows "emailAddress alanı boş görünüyor" (see Troubleshooting). |
The Service Manager SP metadata sets AuthnRequestsSigned=true and WantAssertionsSigned=true. Make sure Monosign signs the SAML assertion, and provide the Service Manager SP signing certificate to Monosign so the signature of the incoming authentication request can be validated. The SP signing / encryption certificate in the metadata must be valid (not expired) — the default self-signed CN=localhost certificate expires after one year. If it is expired, renew it on the Service Manager side and export the metadata again (see Renew the SAML certificate (opens in a new tab)).
Open the Attribute Mapping tab, add the e-mail attribute and click Update to save.
Attribute | Value | Description |
|---|---|---|
emailAddress |
| E-mail address of the user. Add this attribute if Service Manager reads the e-mail from a SAML attribute named |
3- Assign a User to the Service Manager Application
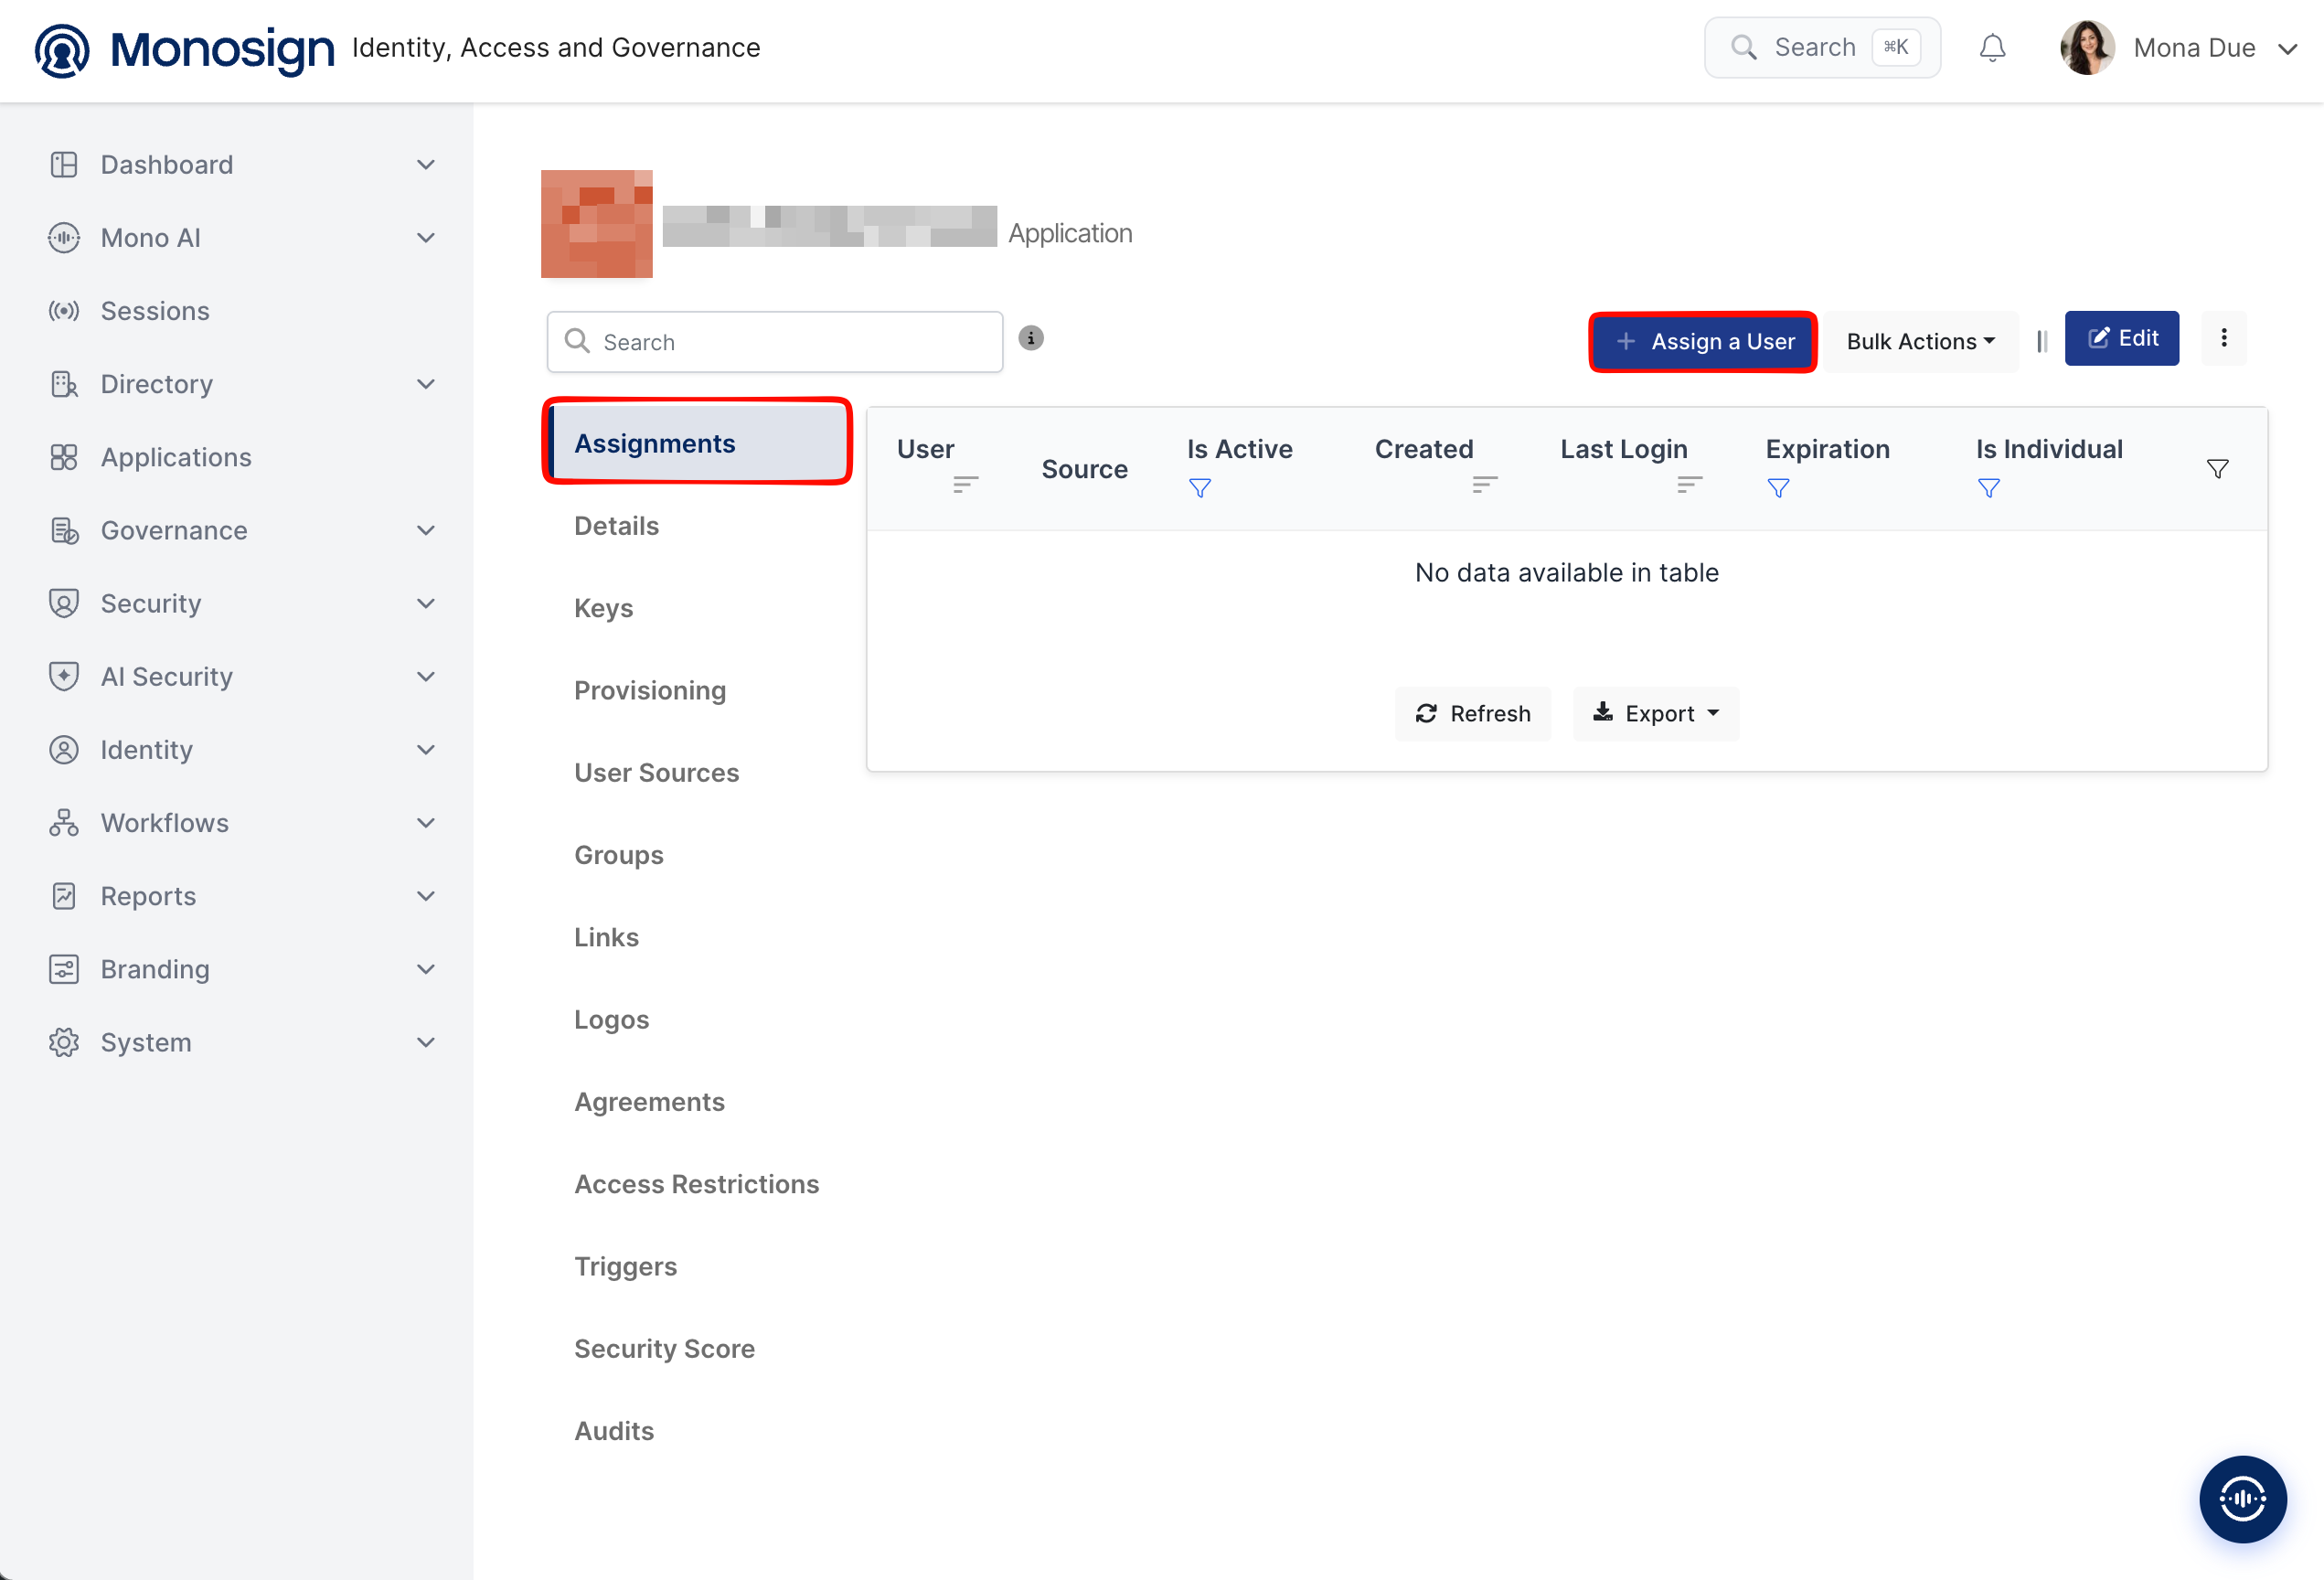
Please follow the below instructions on how to assign a user to the application. Open the application, click the Assignments tab and click Assign a User.
Search and select the users who can sign in to Service Manager, check the Expiration Date and save. You can select more than one user.
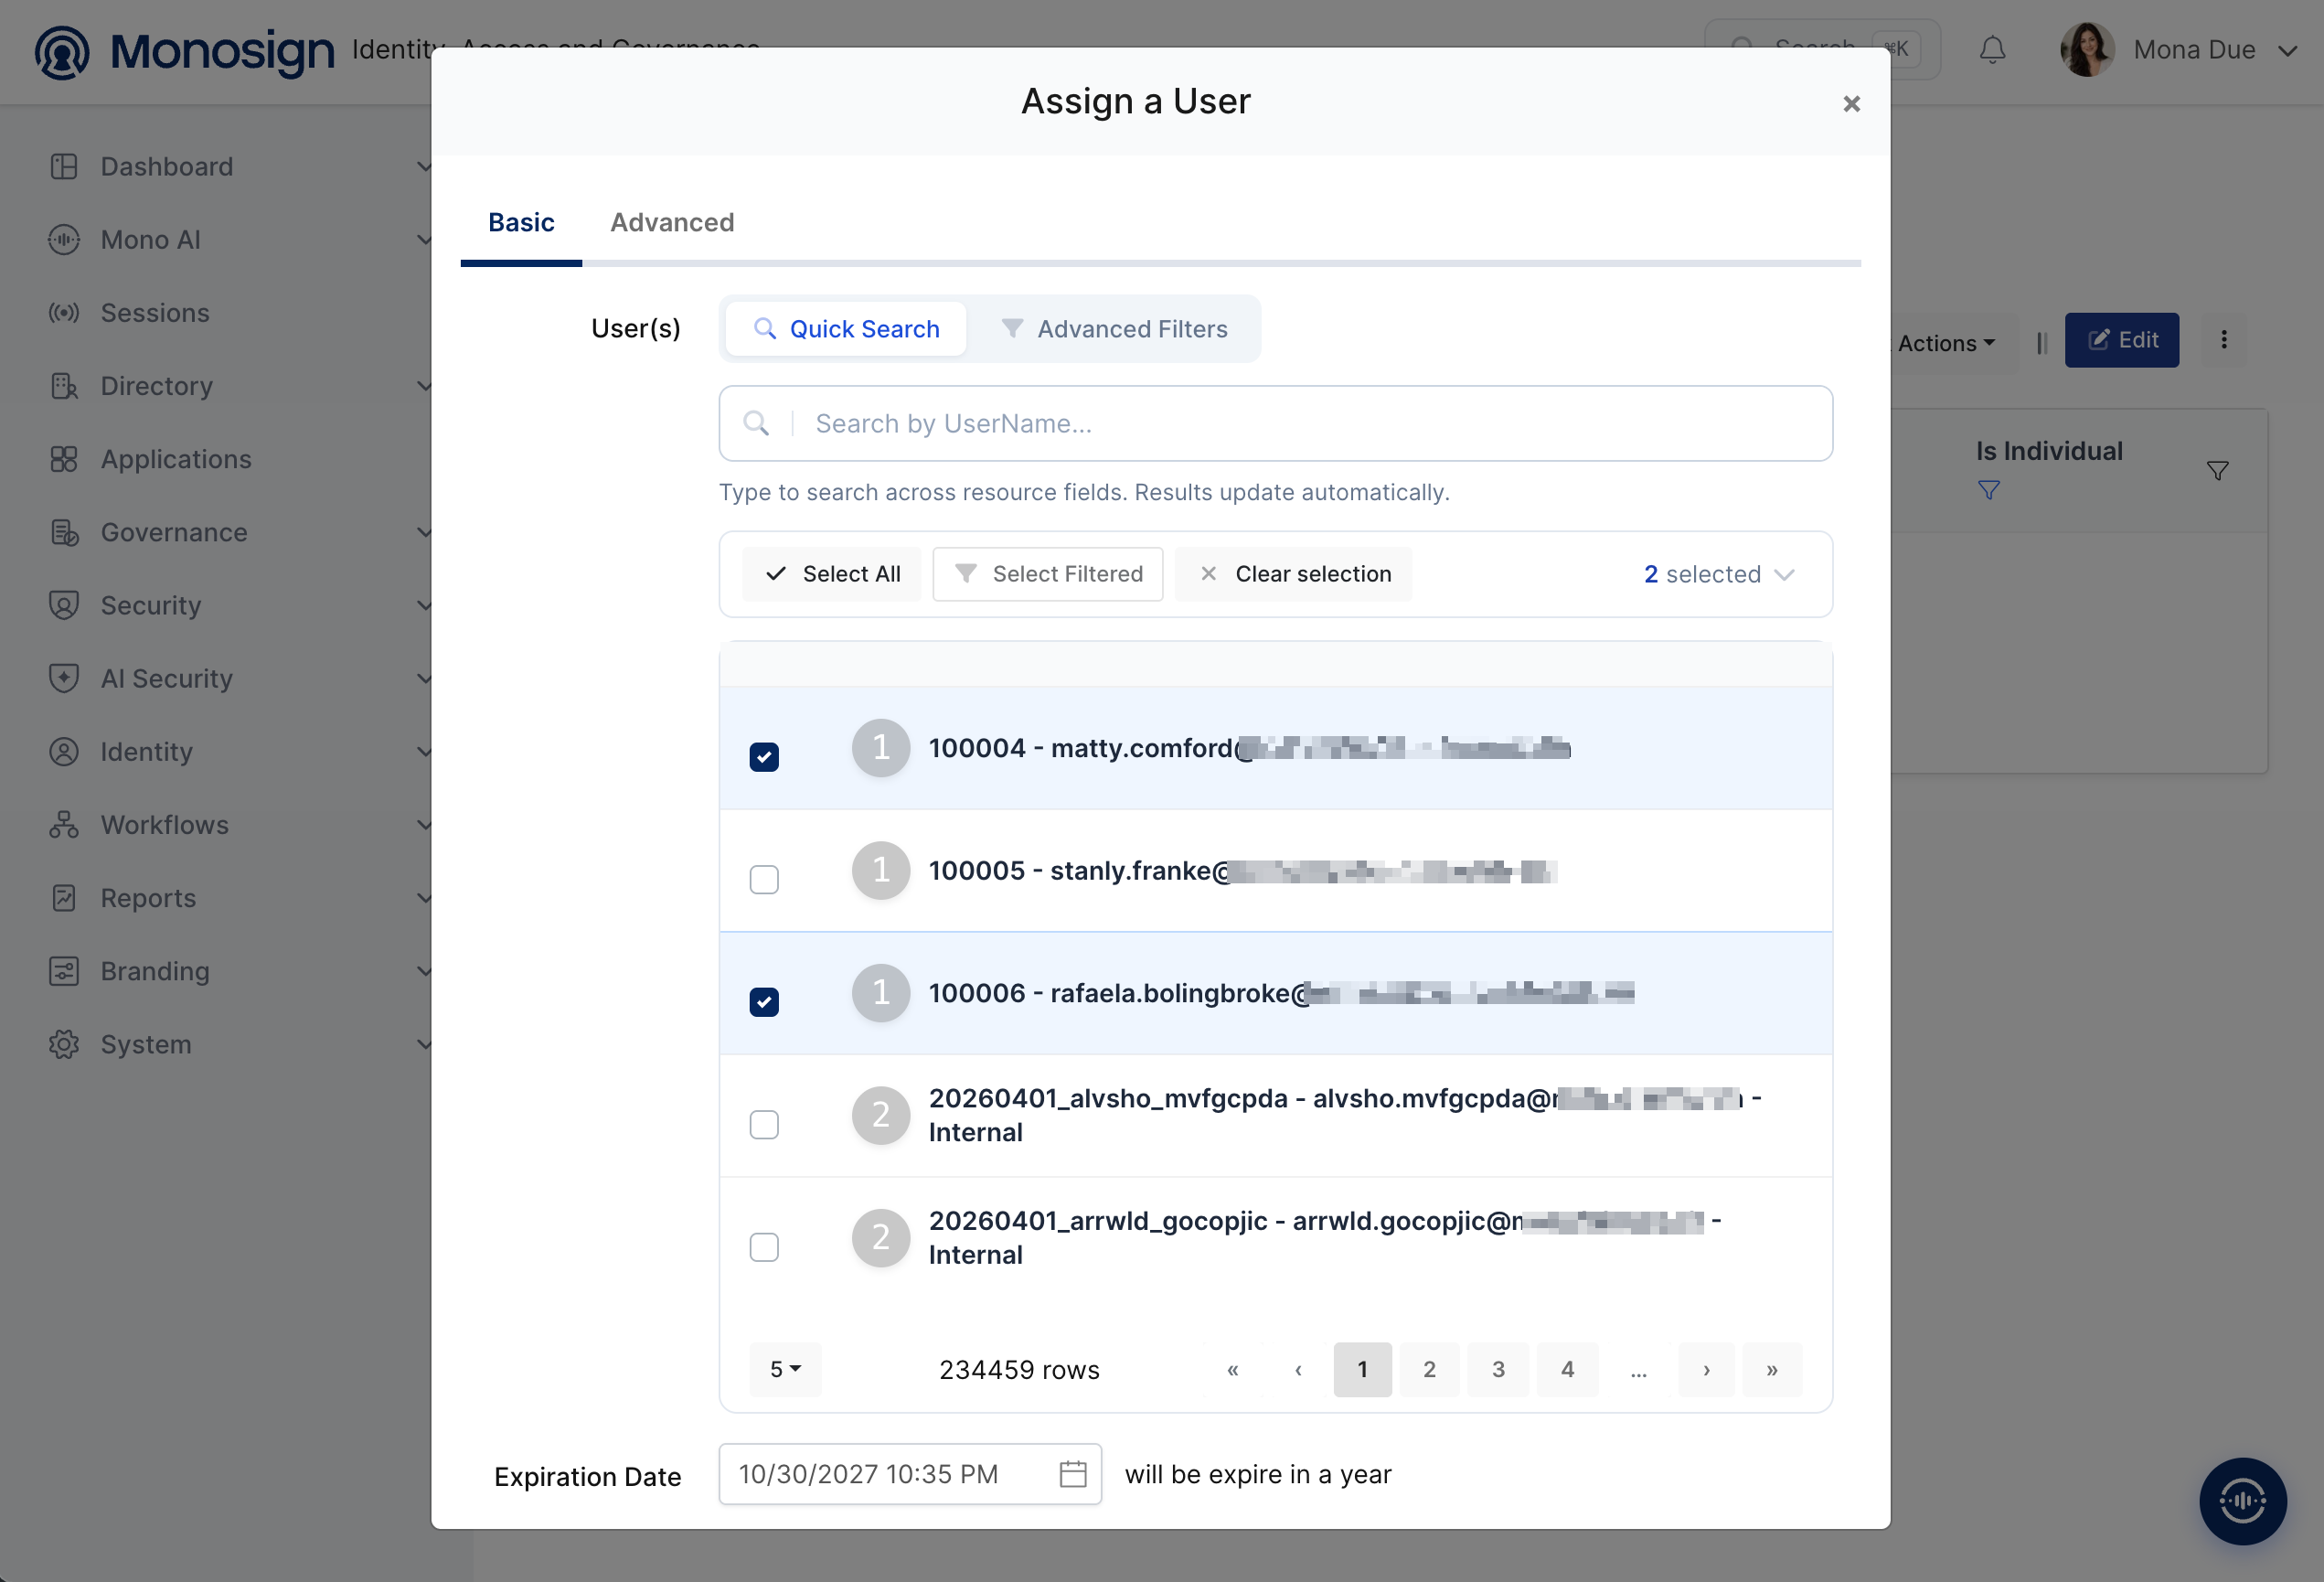
Property | Value | Description |
|---|---|---|
User(s) | Selected users | Users who can sign in to Service Manager with Monosign. |
Expiration Date | Default one year | The assignment expires on this date. |
4- Configuring Single Sign-On for Service Manager
As we mentioned at the start, please check out the OpenText Service Manager documentation first. The SAML service provider settings are made on the Service Manager side (the idm-service component) by the Service Manager administrator. In short, Service Manager must trust Monosign as the identity provider, and Monosign must know the Service Manager service provider addresses.
In the OpenText IDM administration console open Authentication → SAML Configuration, upload the Monosign IdP metadata (or enter the values by hand) and map the attributes:
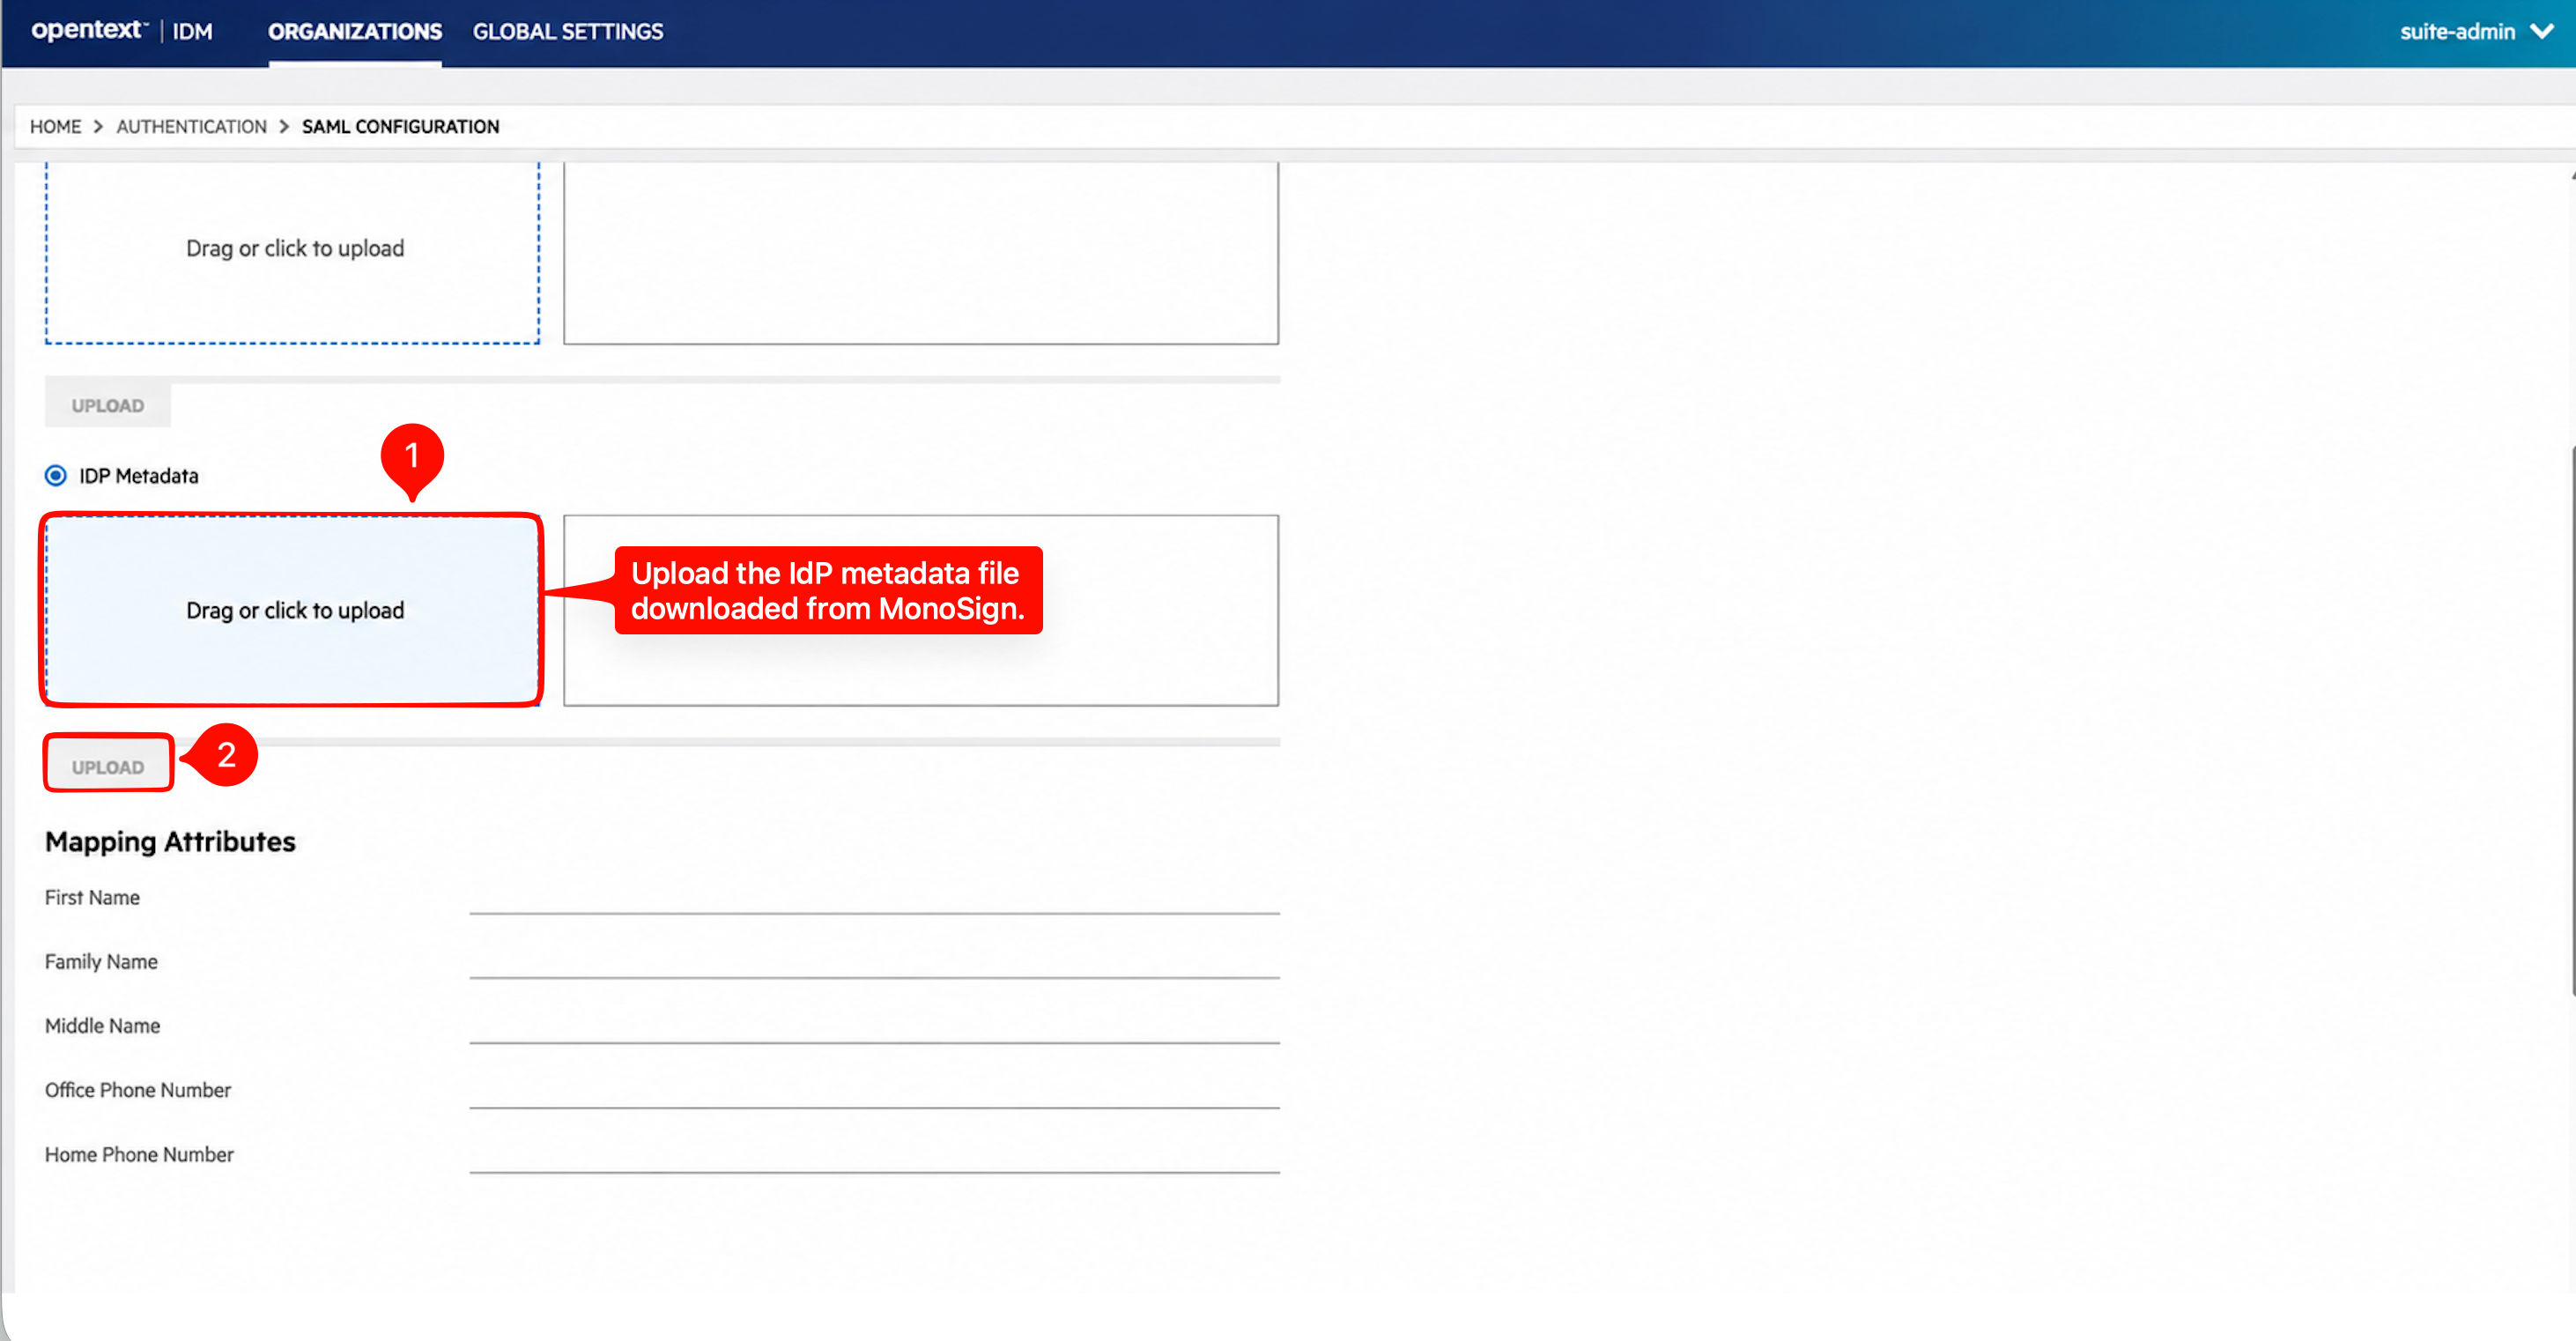
Enter the Monosign values from step 1 into Service Manager (import the IdP metadata, or set the values by hand):
Service Manager (IdP) setting | Value | Description |
|---|---|---|
Identity provider Single Sign-On URL |
| Sign On Service of the Monosign SAML key. |
Identity provider Issuer / Entity ID |
| Entity Id of the Monosign SAML key. |
IdP signing certificate (X.509) |
| The Monosign certificate (View Certificate or Download Certificate on the key page). |
IdP metadata URL |
| If Service Manager supports metadata import, this single URL loads the three values above. |
The Service Manager service provider addresses (from its SP metadata) are entered on the Monosign side in step 2:
Service Manager (SP) value | Value | Used in Monosign as |
|---|---|---|
Assertion Consumer Service URL |
| Assertion Consumer Url (step 2) |
SP Entity ID |
| Audience / Entity Id (step 2) |
Single Logout URL |
| Single Logout Url (step 2) |
SP signing certificate | X.509 certificate from the SP metadata | Provided to Monosign to validate the signed authentication request |
Provision the users in Service Manager with the same e-mail address that Monosign sends as the NameID. To sign in with SAML, a user must be assigned to the application in Monosign (step 3) and must exist in Service Manager with the same e-mail address.
Do not close your own administrator session before the sign-in test is successful. If the single sign-on fails, keep a local administrator / fallback login available on the Service Manager side so you can correct the settings.
5- Sign In Test
Now try to log in to Service Manager using Monosign SSO.
Open a new browser window (or a private window) and type the address of Service Manager, for example
https://<service-manager-host>/idm-service.Start the single sign-on from the Service Manager login page (or open the application tile from the Monosign user portal for an IdP-initiated login).
Service Manager redirects the browser to the Monosign sign-in page of the application. You can log in passwordless with your QR code (Monofor Identity), with a Passkey or with your user name and password (Sign in with Password). If you are already signed in to Monosign, the page is skipped.
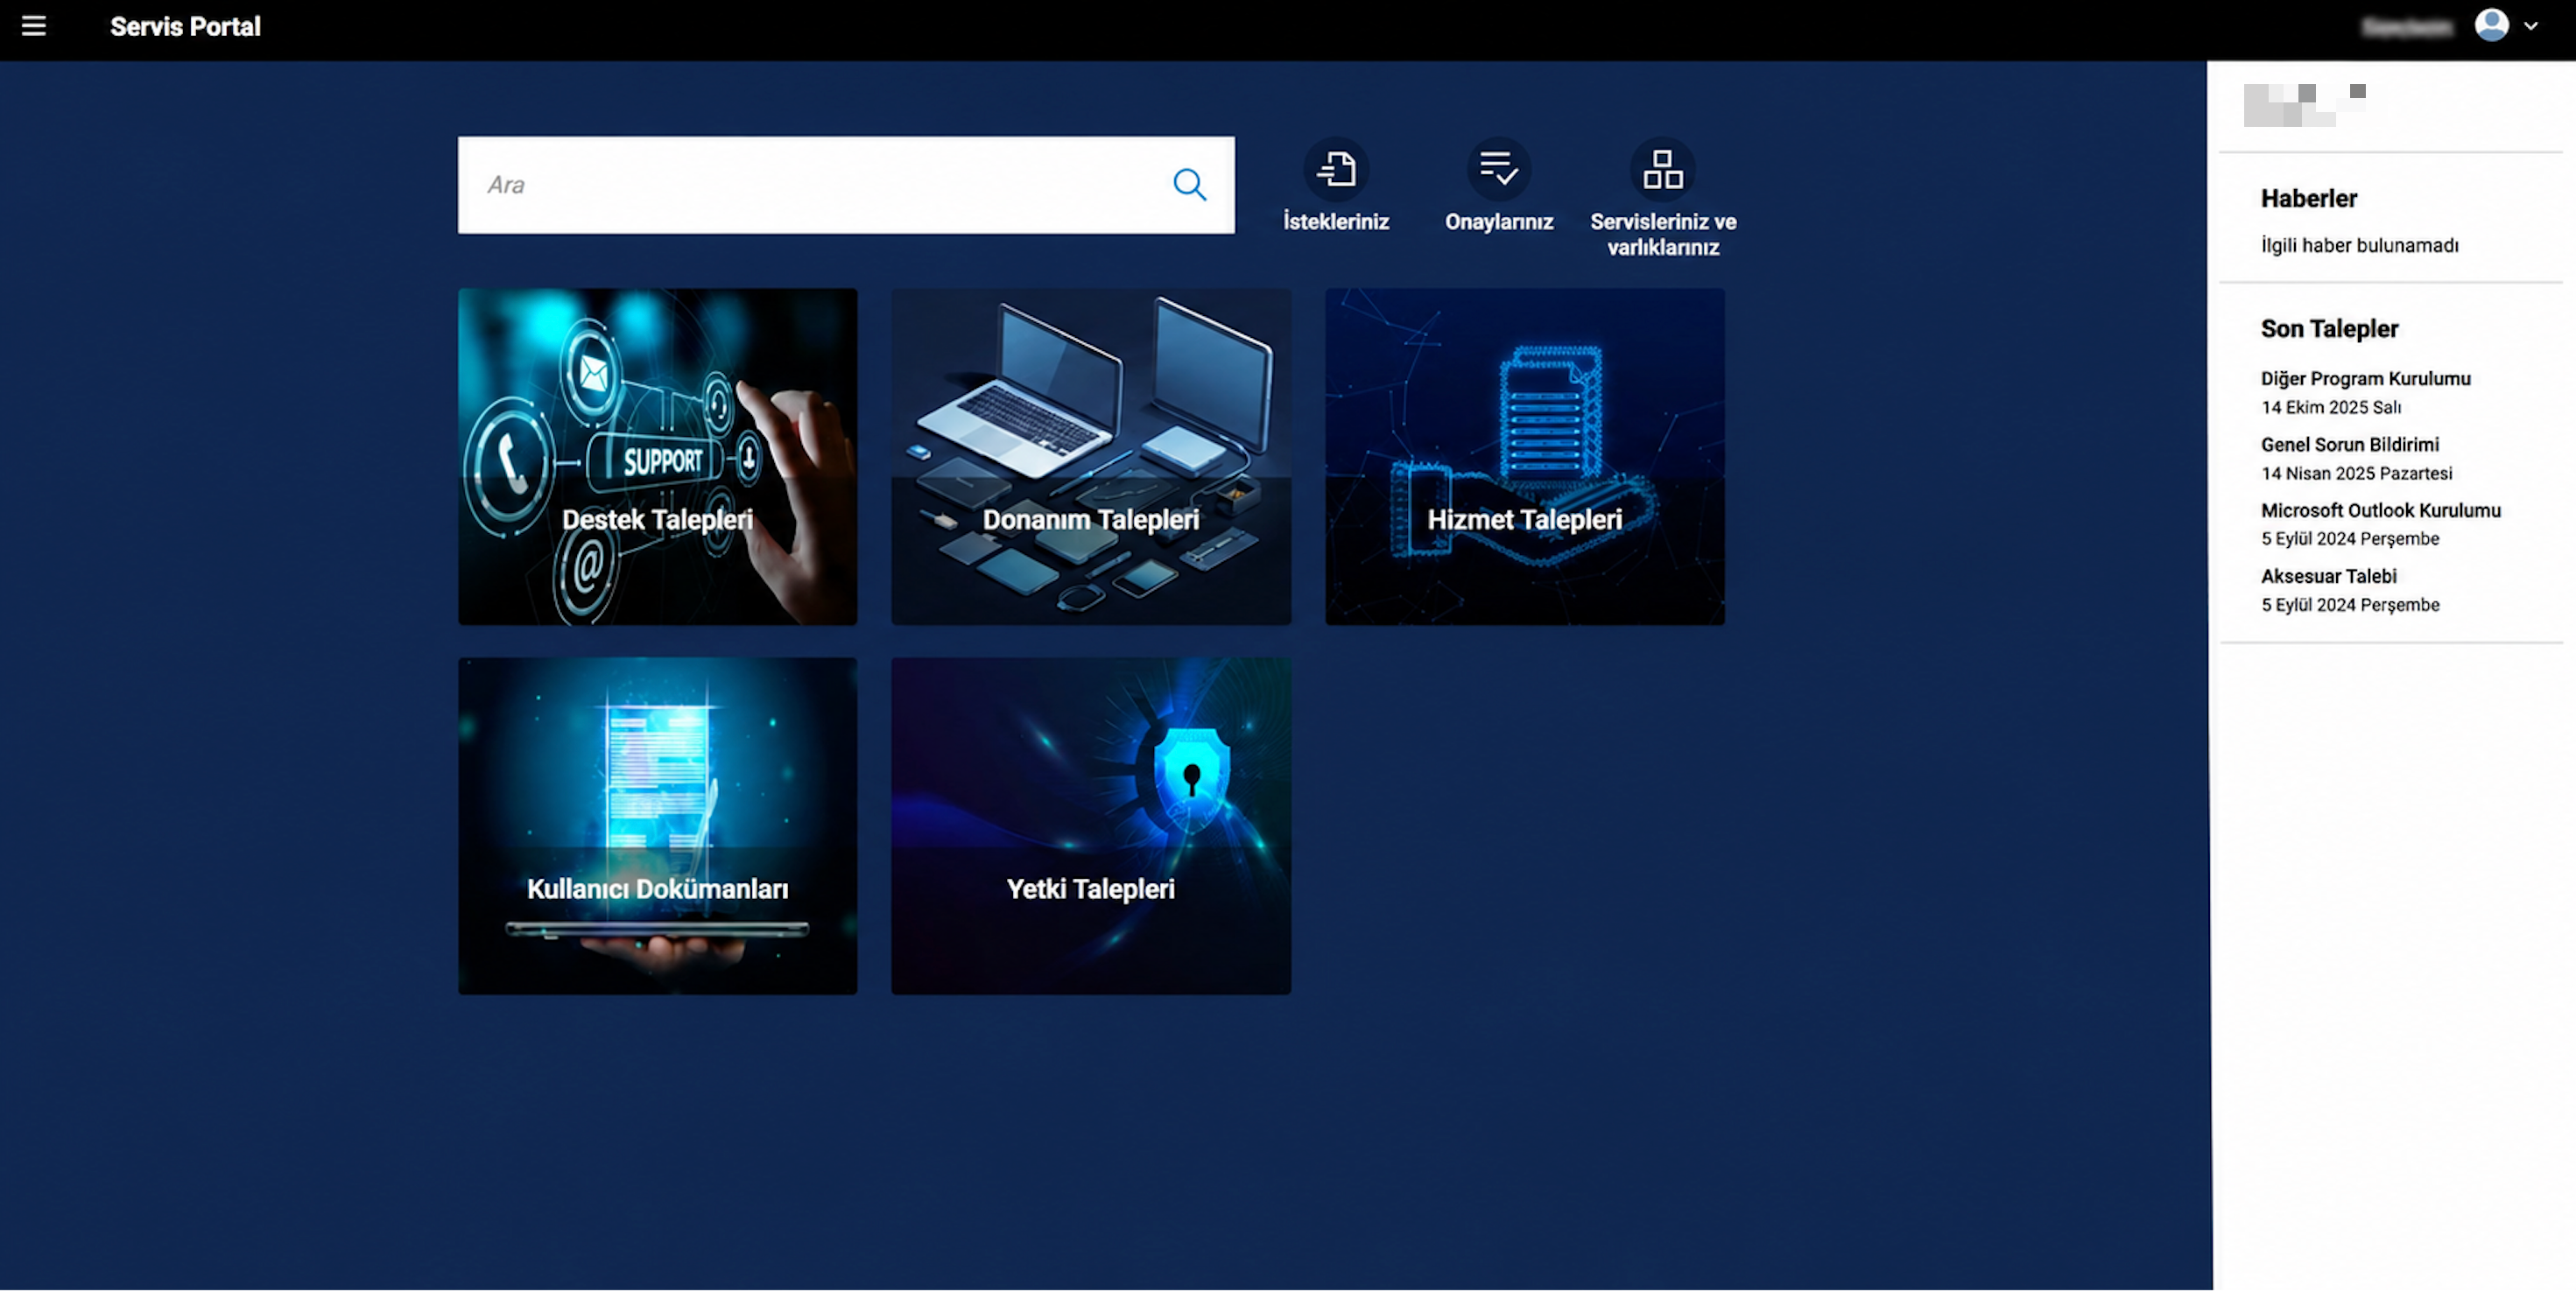
After the sign-in Monosign sends the SAML response to the ACS URL of Service Manager and the user is logged in.
Troubleshooting
Symptom | Cause | Solution |
|---|---|---|
Service Manager shows "emailAddress alanı boş görünüyor" ("the emailAddress field appears empty") | The SAML assertion reached Service Manager but the e-mail (NameID / | Set Name Id to |
The signature of the authentication request or assertion is rejected | The SP requests signed requests and signed assertions. The SP signing certificate is missing/expired in Monosign, or the assertion is not signed. | Enable assertion signing in Monosign, upload the current Service Manager SP signing certificate, and renew the expired |
Monosign shows an error about the ACS address | The Assertion Consumer Url of Monosign is different from the ACS URL of Service Manager, which matters most when ACS Validation Mode is | Copy the ACS URL from the Service Manager SP metadata exactly as shown (step 2). |
The sign-in succeeds on Monosign but Service Manager does not log the user in | The user does not exist in Service Manager, or the e-mail address is different from the Name Id sent by Monosign, or the certificate or issuer is wrong. | Create the user in Service Manager with the same e-mail address, check that Name Id is |
A user cannot sign in | The user is not assigned to the application. | Assign the user in step 3. |
After completing the configuration on Service Manager and Monosign, it is better to test in a new private browser window if the SAML SSO doesn't work, because old session cookies may cause errors.