This document explains how to implement Monosign with Coral, the open source commenting platform of the Coral Project. It covers Single Sign-On with OpenID Connect (OIDC), which is built into Coral. Coral uses the Authorization Code flow and reads the user from the ID token, so the OIDC/OpenID access key of Monosign is used. Before you continue, it is better to read the Coral documentation (opens in a new tab).
This configuration was tested with Coral 9.11.9. If your version is different, please check the Coral documentation.
OIDC is configured in the Coral administration interface under Configure → Authentication, in the section Login with OpenID Connect. SAML is not available; Coral also supports its own Single Sign On with a signed token.
Monofor has no responsibility to do Coral configurations. If you need support please contact the Coral community or your Coral support provider.
Instructions
This documentation contains 5 main steps for integration.
Creating an application on Monosign
Configuring the OIDC/OpenID settings on Monosign
Assign a user to the Coral application
Configuration Single Sign-On for Coral
Sign In Test
1- Creating an Application on Monosign
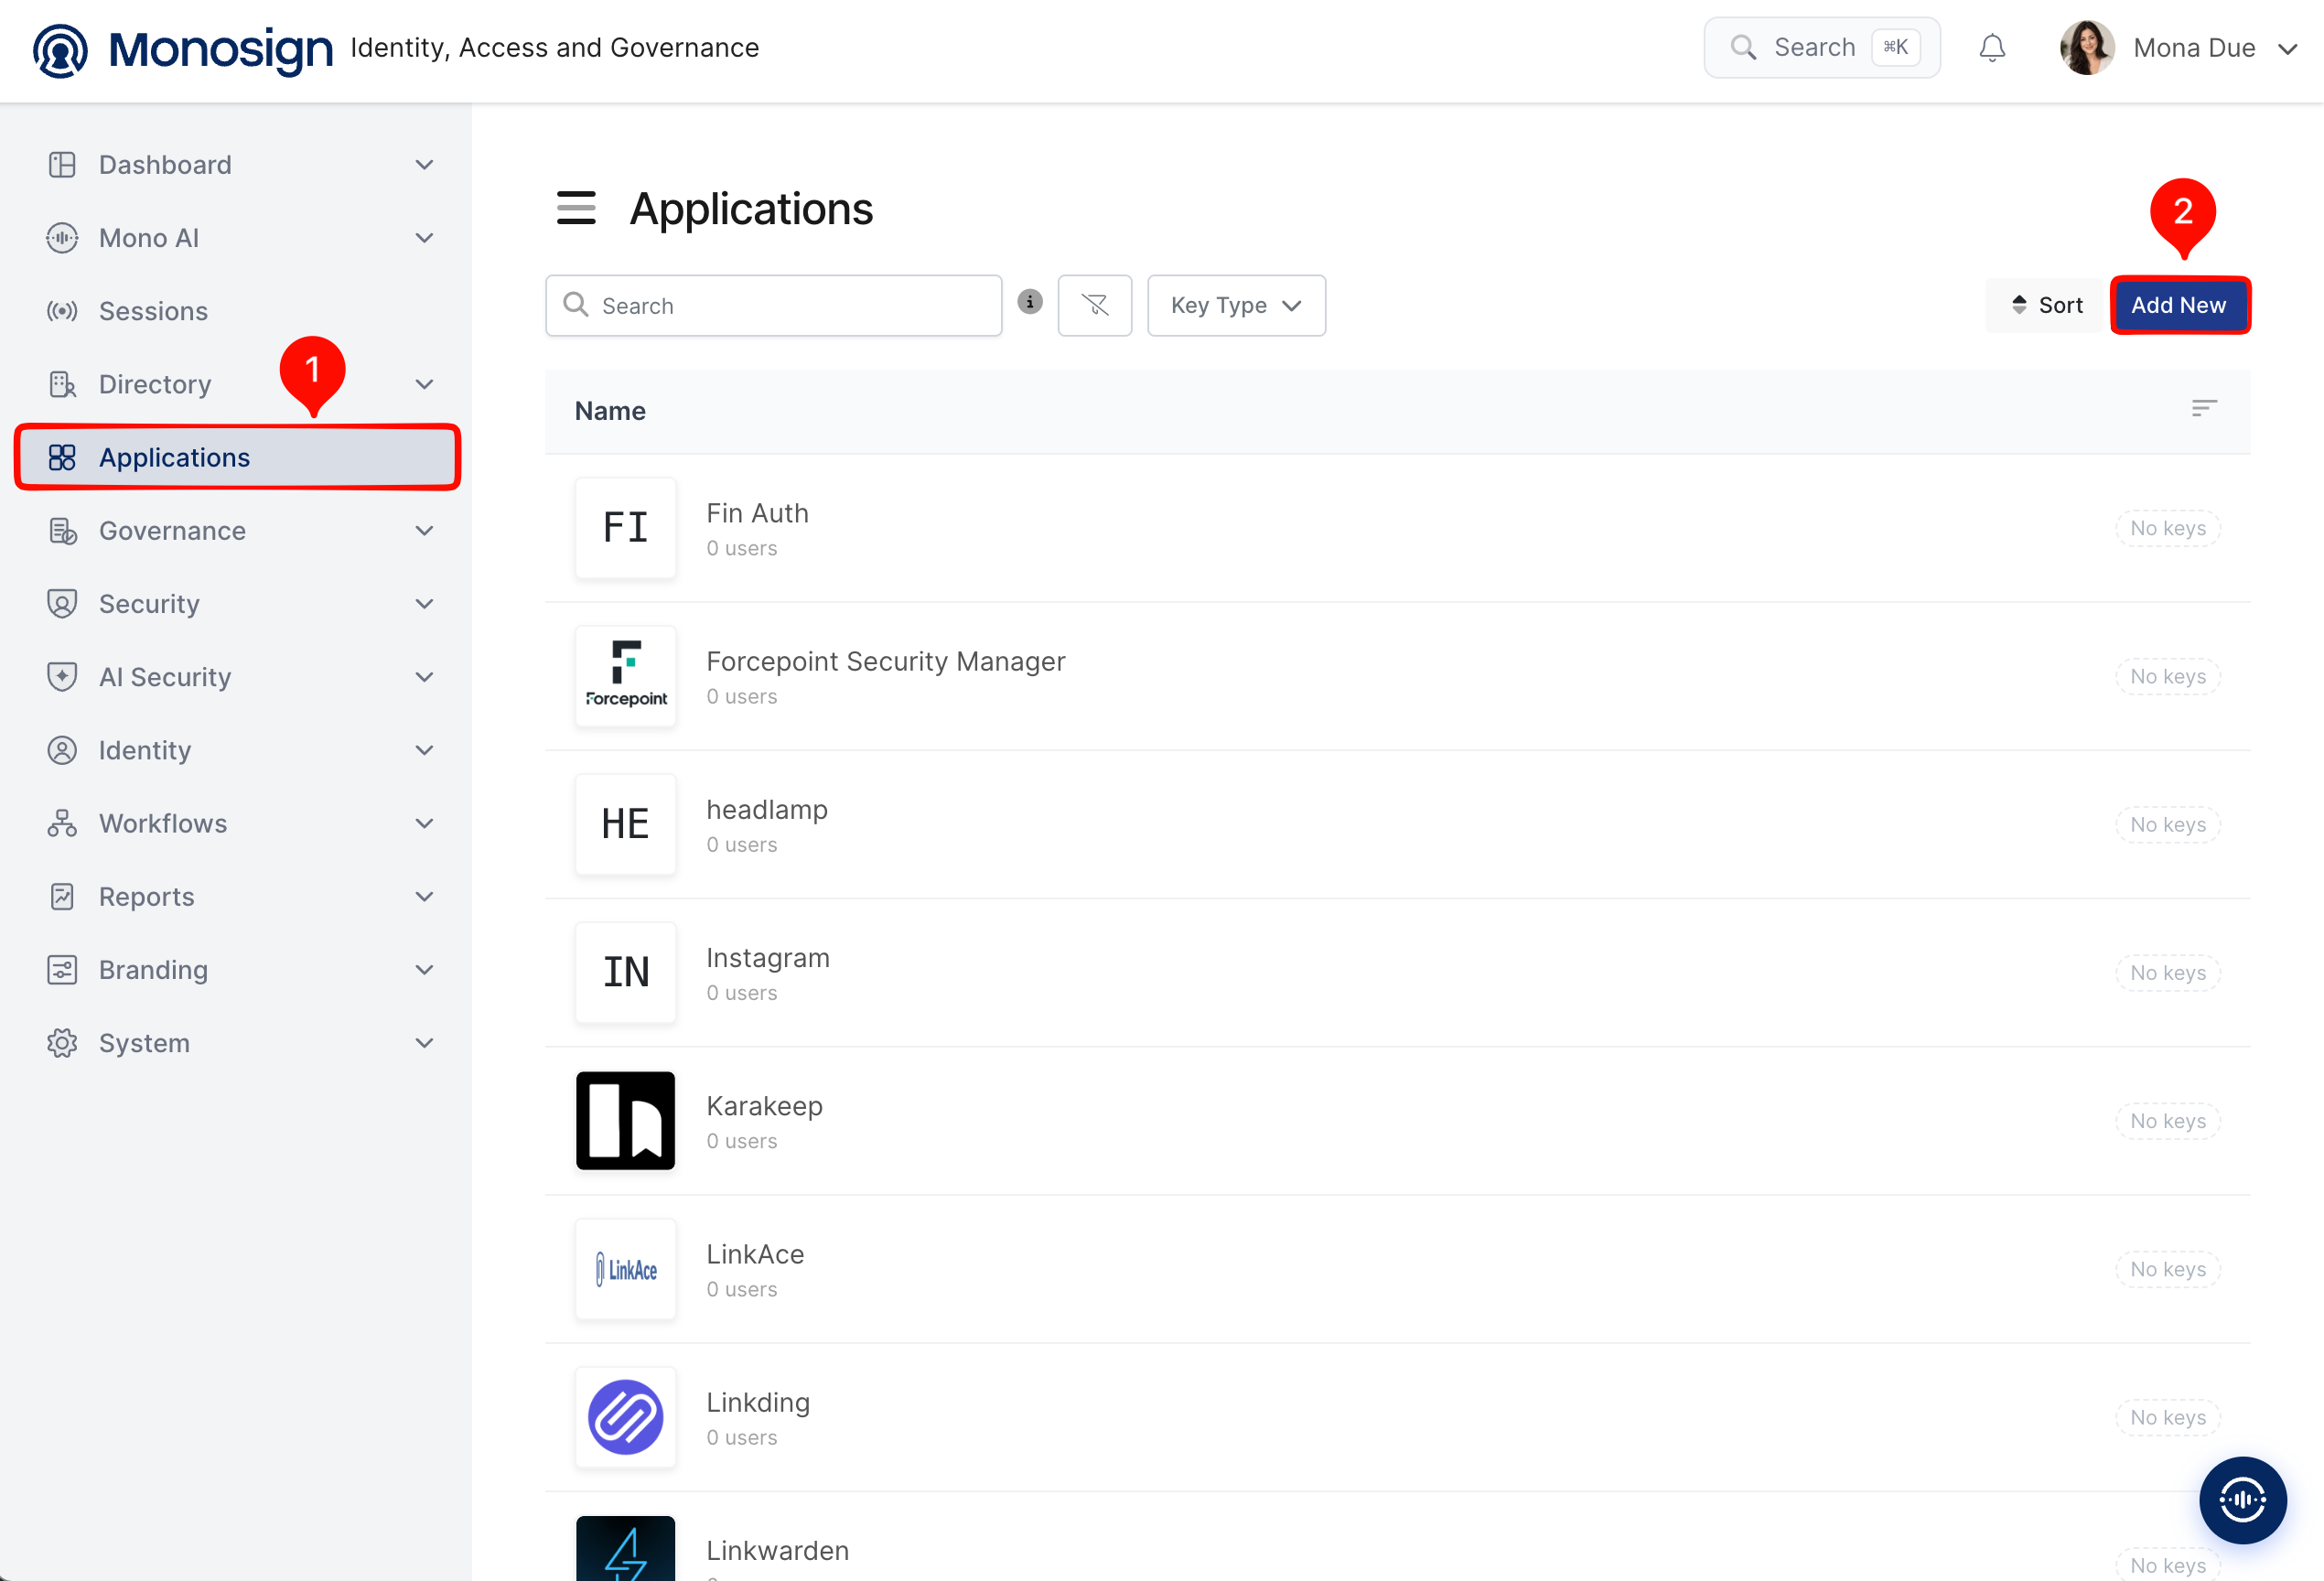
Create your application on Monosign first. Open the Applications page from the left menu and click Add New.
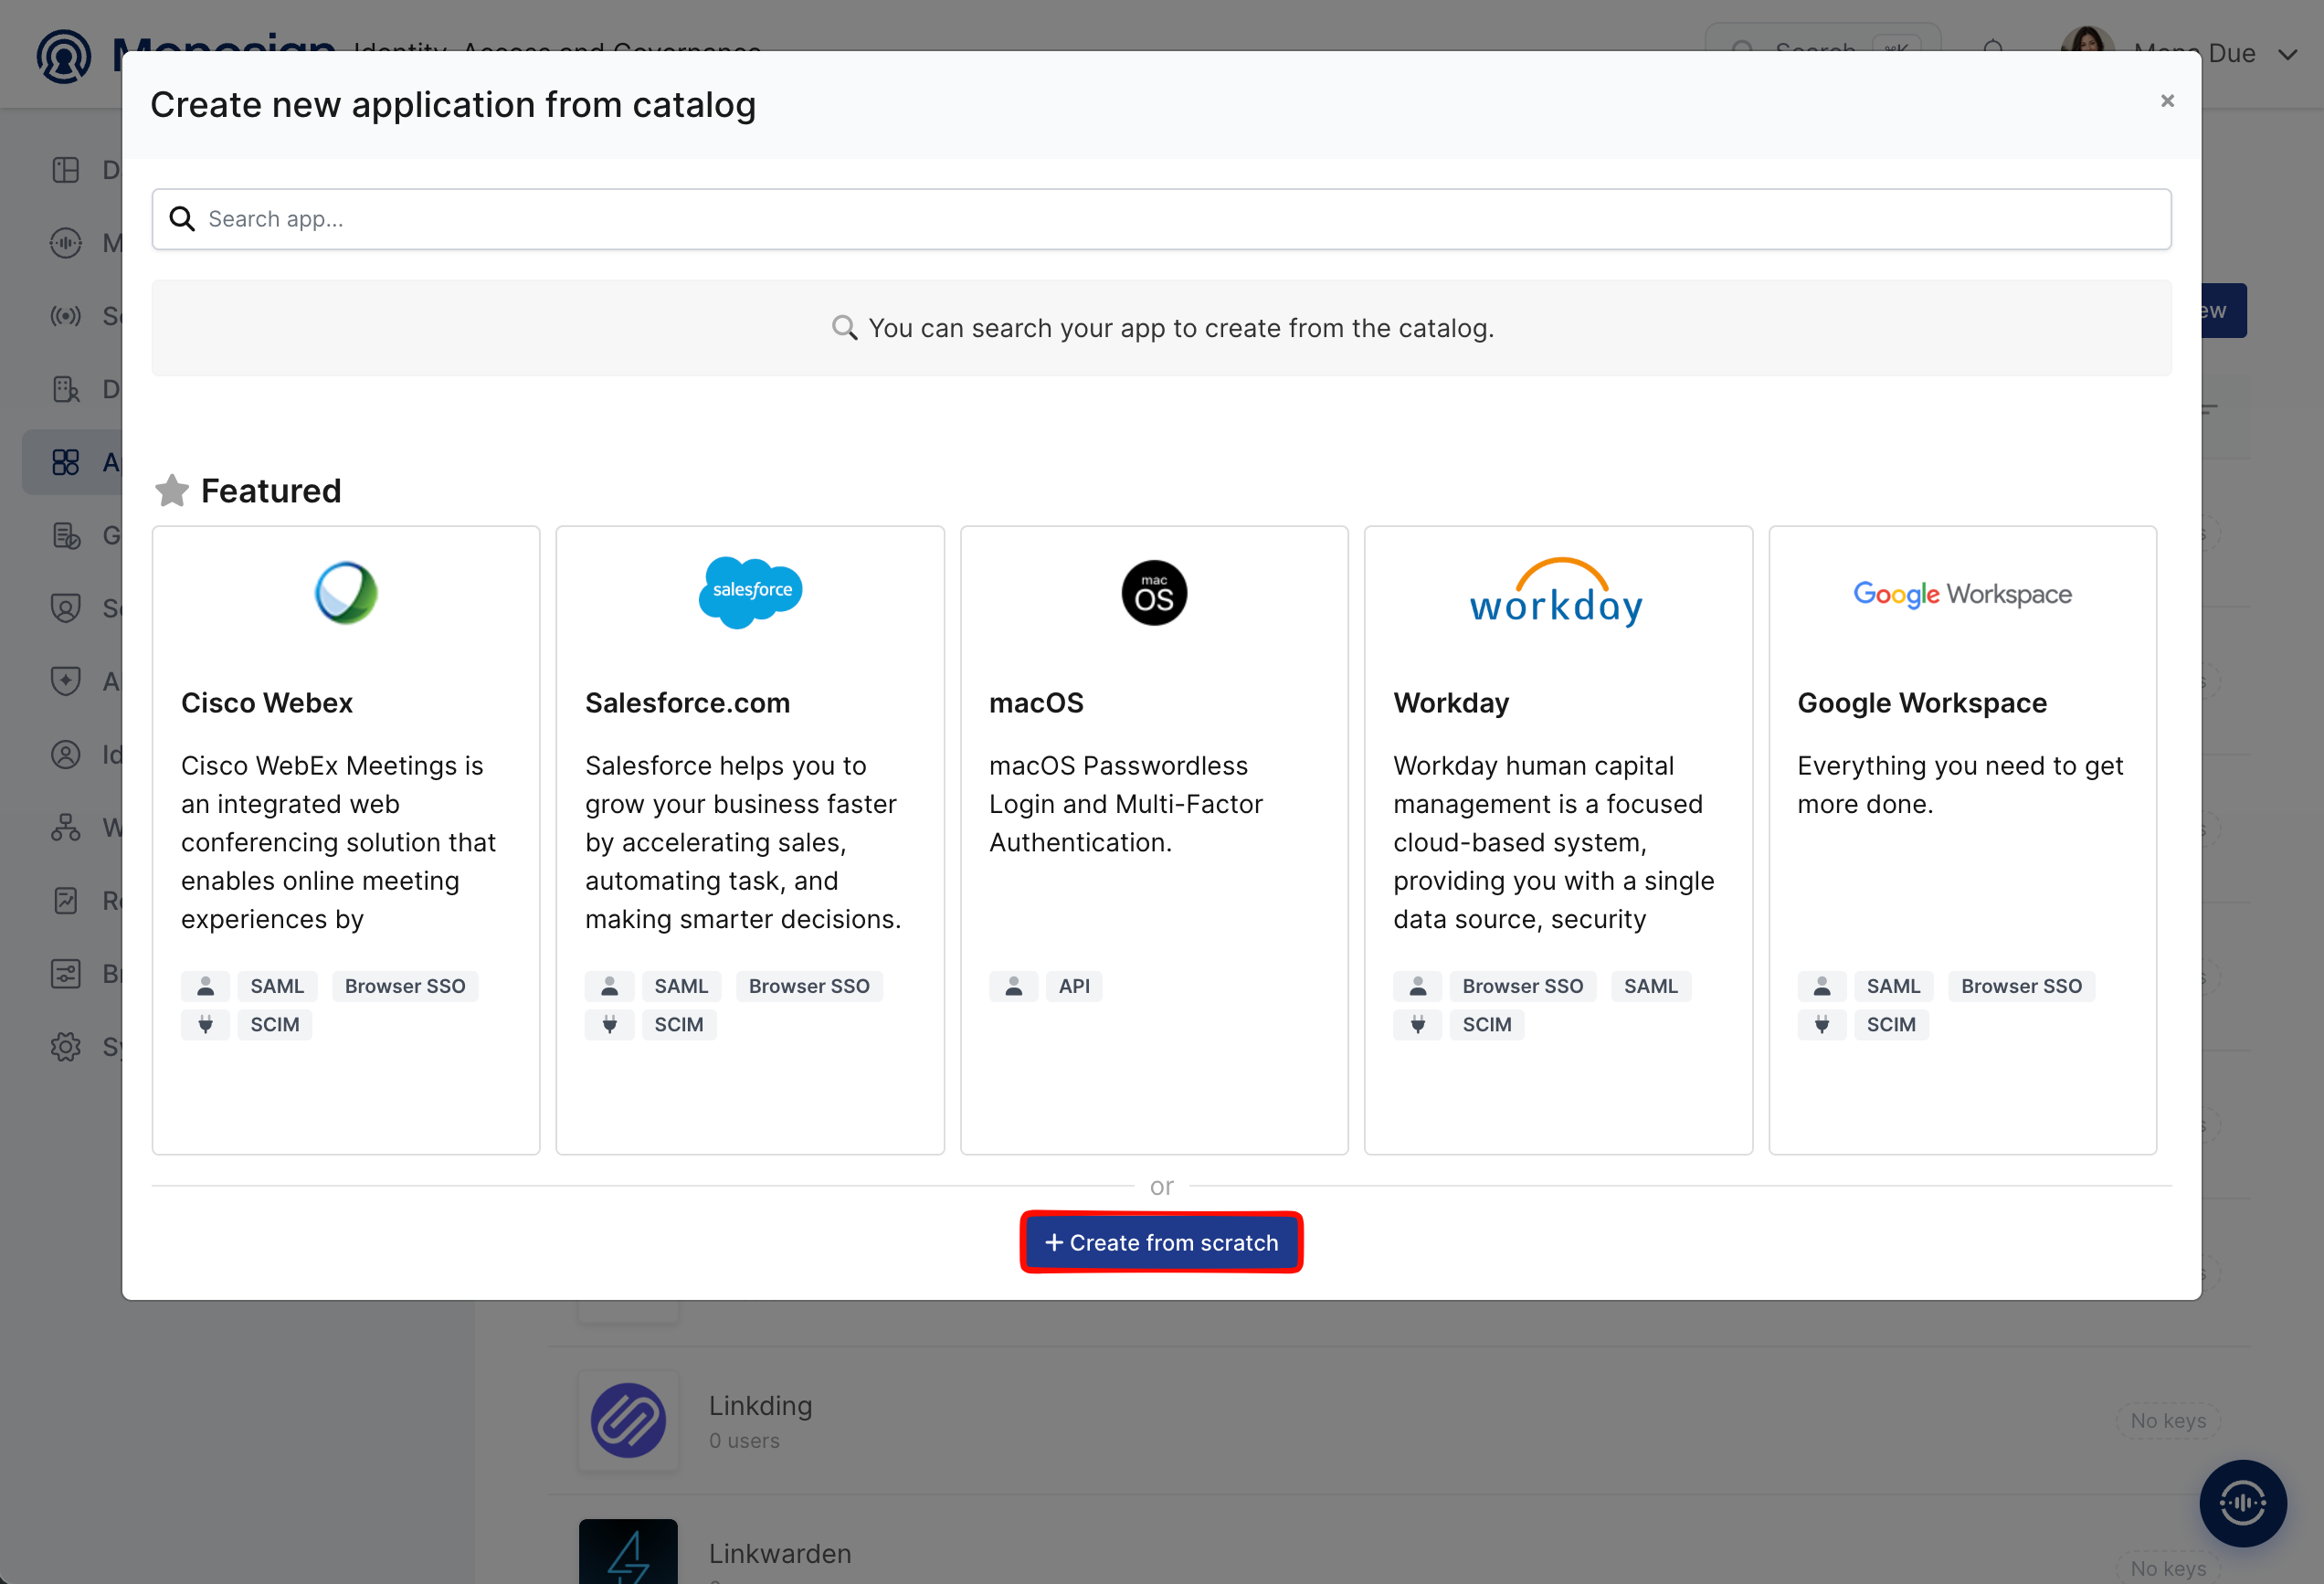
Coral is not in the application catalog, so click Create from scratch.
Fill in the application details on the Application tab and click Next.
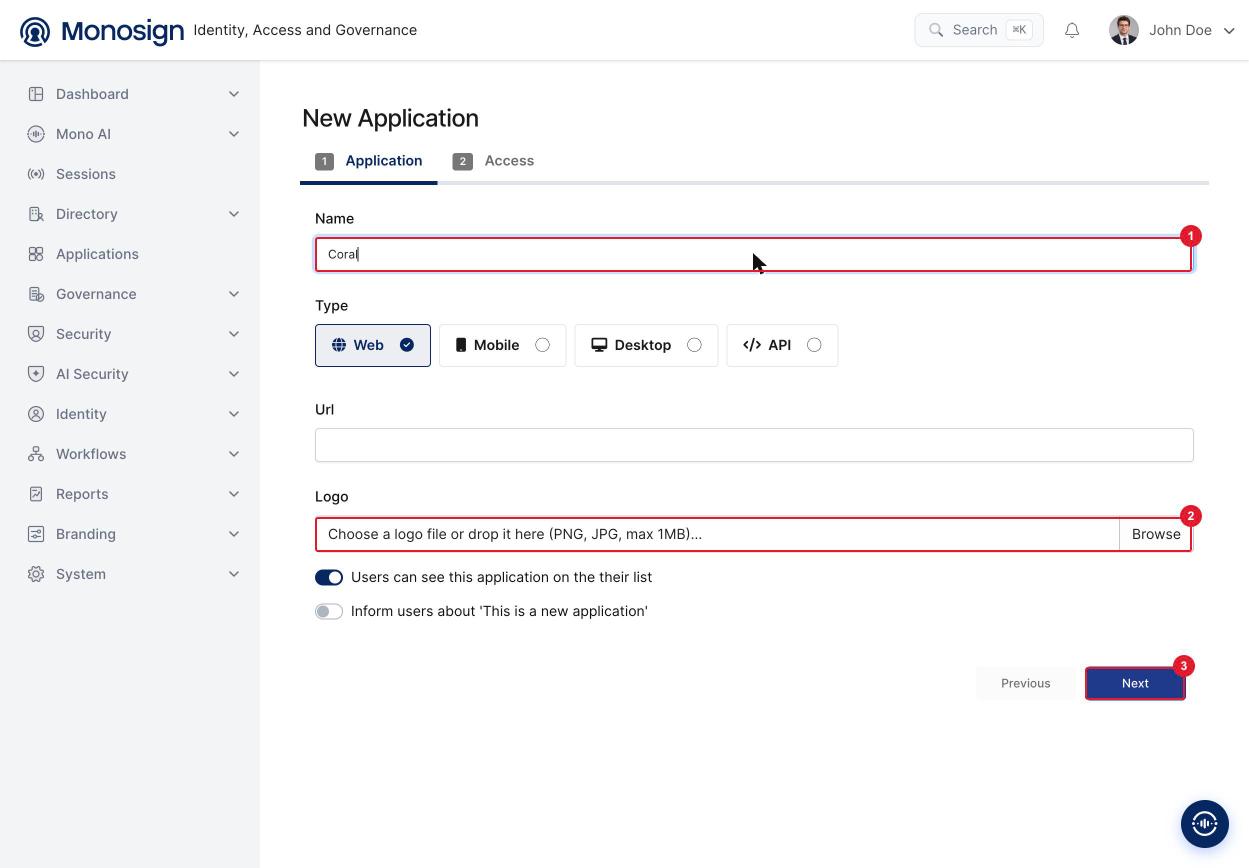
Property | Value | Description |
|---|---|---|
Name |
| Name of the application shown to users on the Monosign portal and on the Monosign sign-in page. |
Type |
| Coral is accessed through a web browser. Options: Web, Mobile, Desktop, API. |
Url | Optional | Leave empty or enter the address of Coral (for example |
Logo | Optional | Browse and upload a logo; it is also shown on the Monosign sign-in page. |
Users can see this application on their list |
| Displays the application on the user portal. |
On the Access tab define who can reach the application and click Create Application.
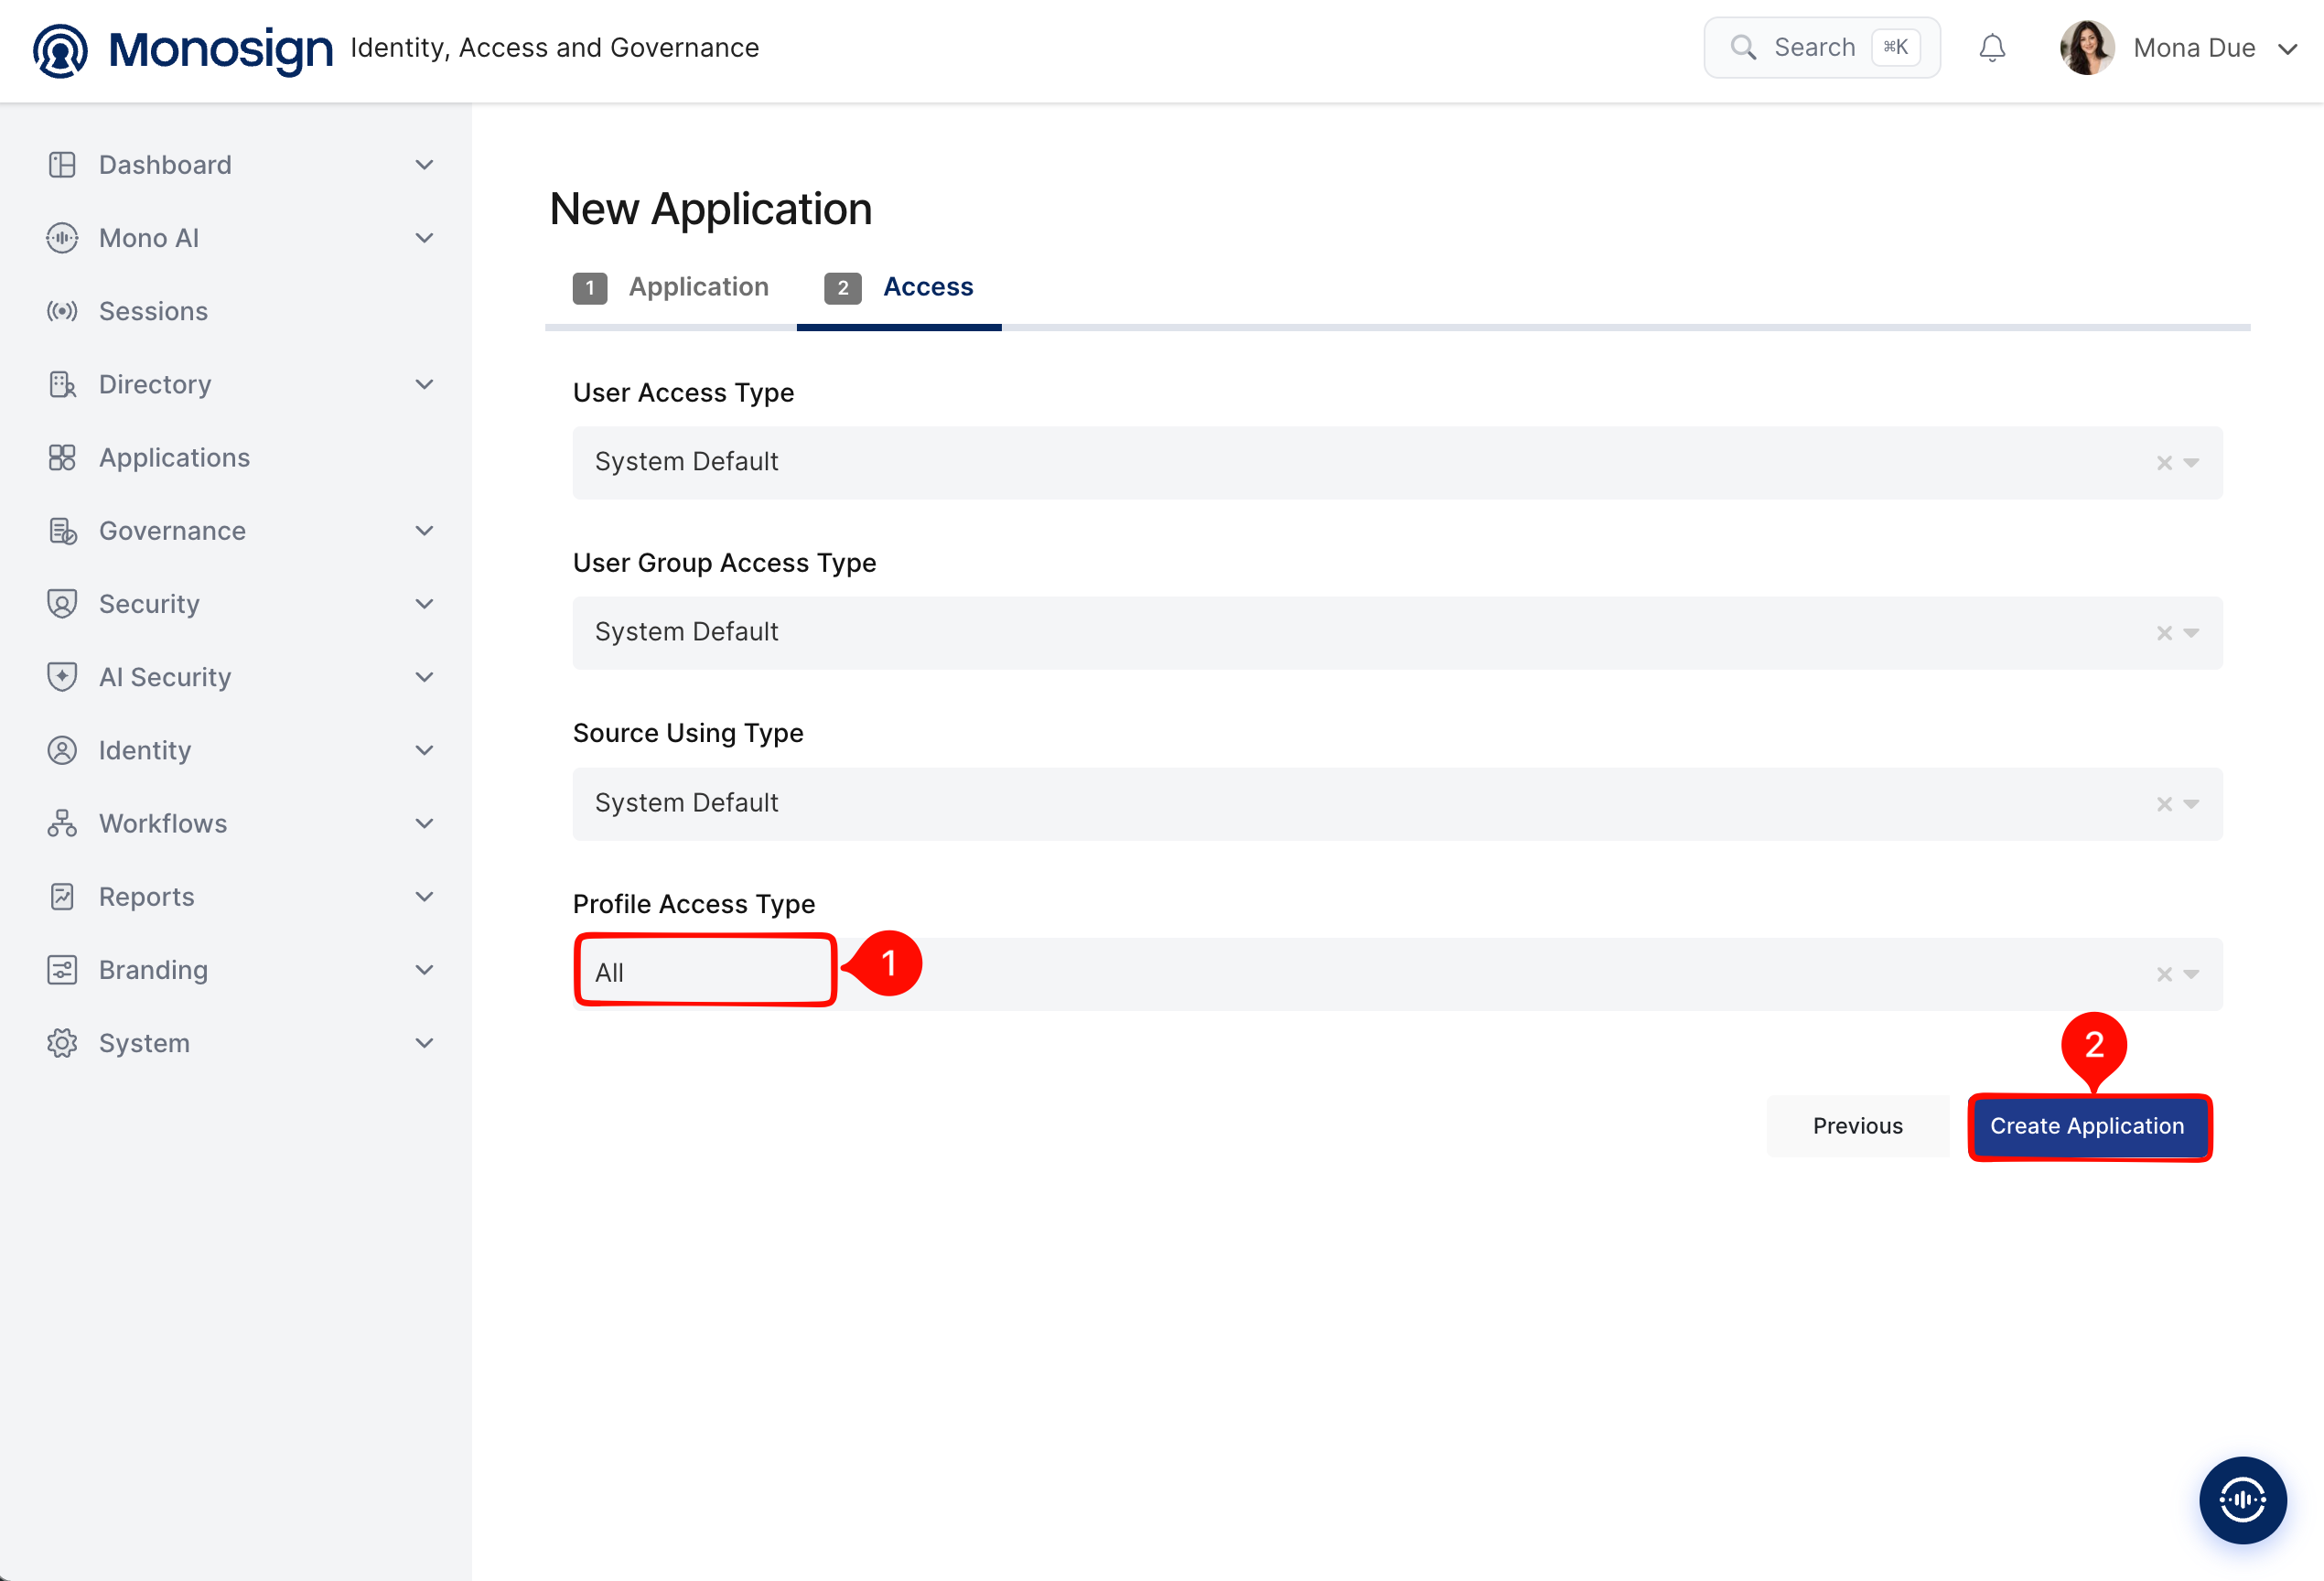
Property | Value | Description |
|---|---|---|
User Access Type |
| Defines which users can access this application. Options: Only Assigned Users, All Users, System Default. |
User Group Access Type |
| Defines the application’s user group access. |
Source Using Type |
| Defines which user sources the application can use. |
Profile Access Type |
| Defines which user profile attributes are available to the application (Options: Restricted, All). Coral needs the e-mail address and the name of the user. |
After the application is created, click Keys and add a new Access Key for OIDC/OpenID access.
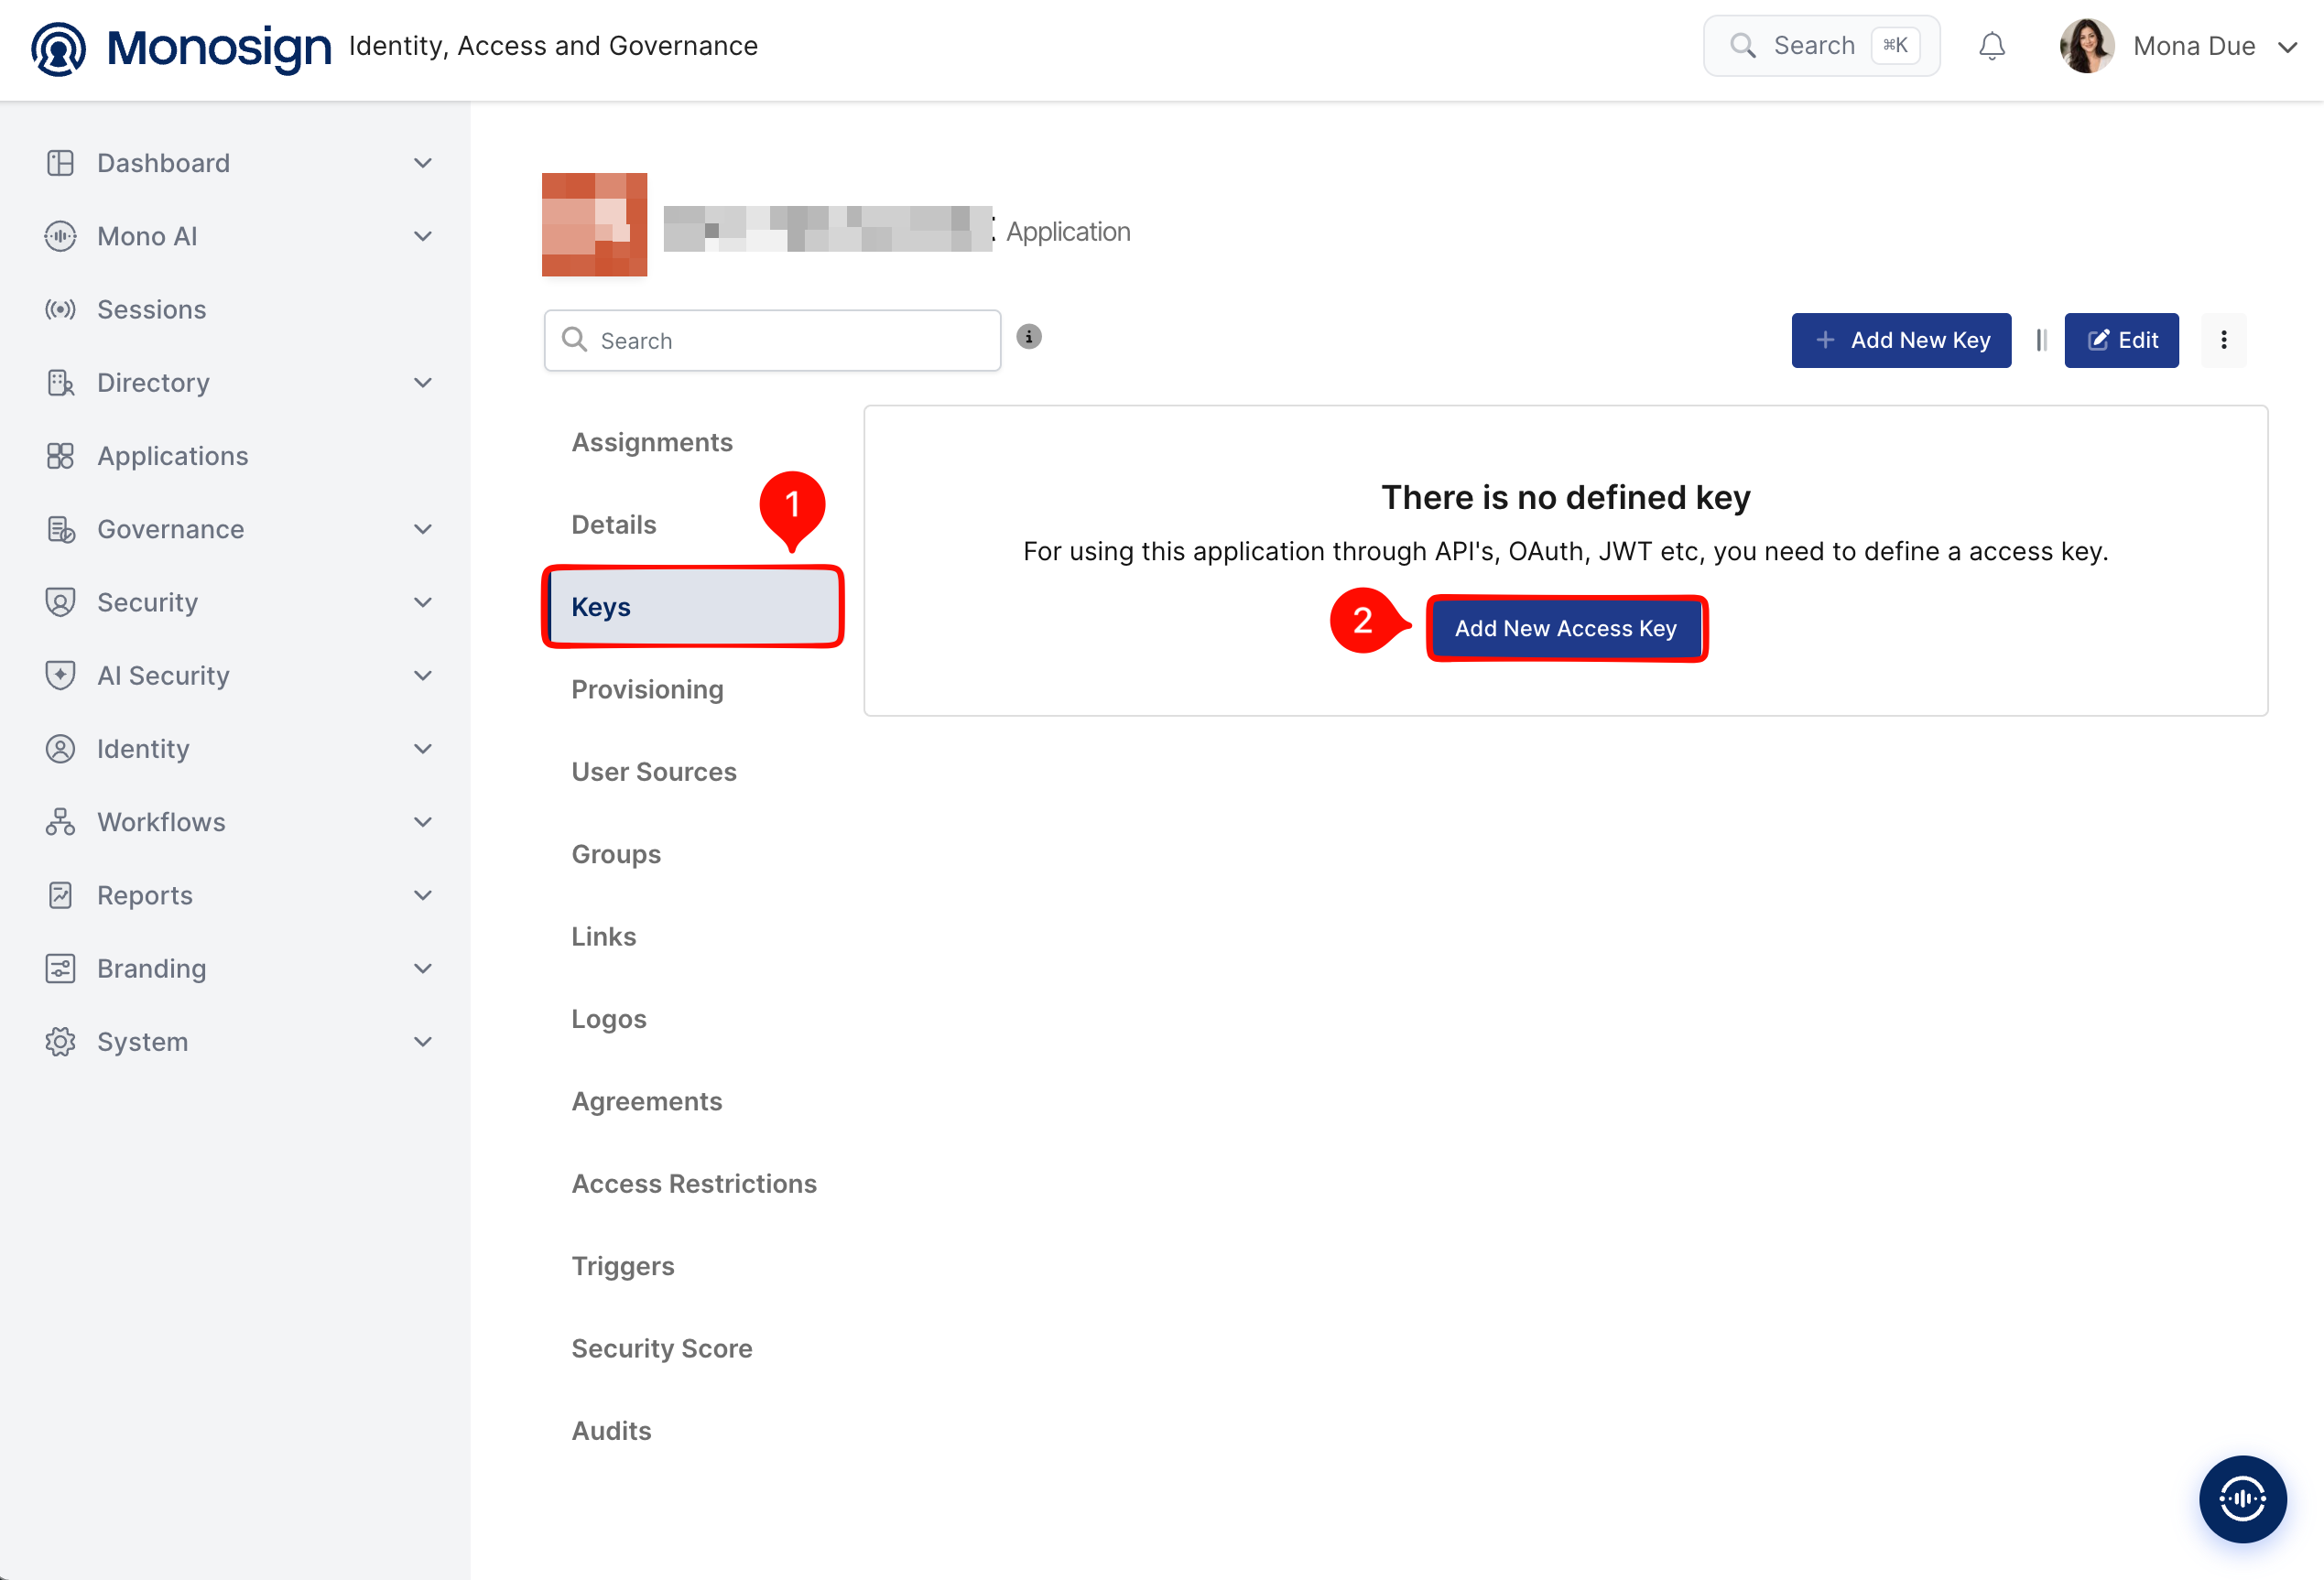
Select OIDC/OpenID as the key type and click Create. Monosign generates the Client Id and Client Secret automatically.
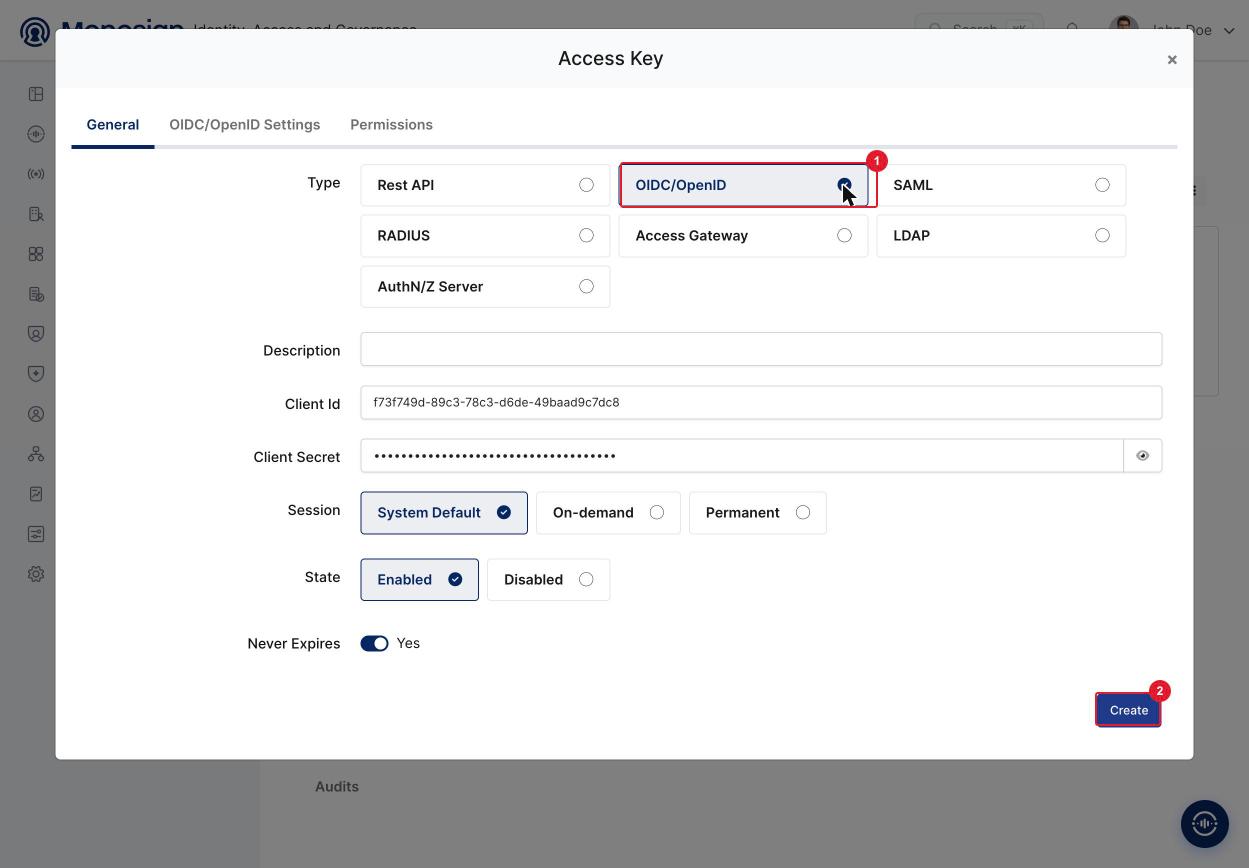
Configuration details for the Coral application are provided as follows:
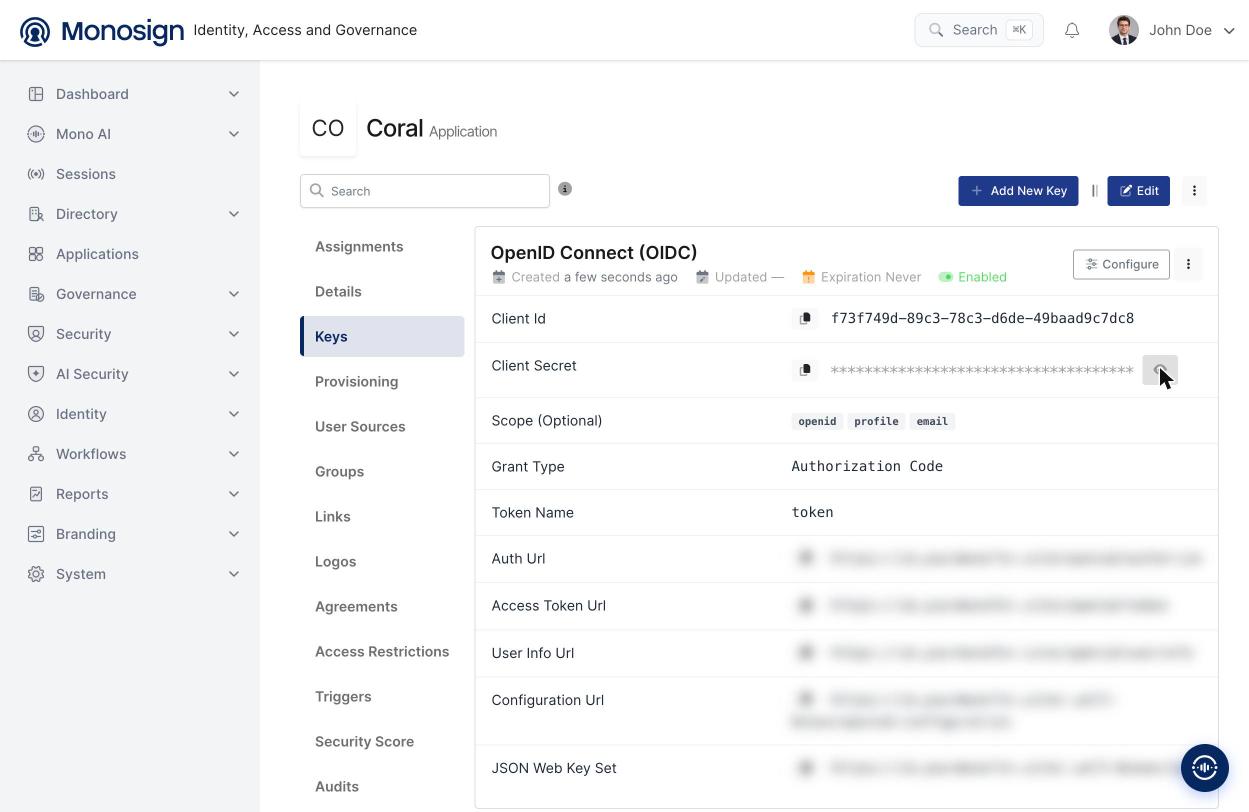
Monosign value | Example | Used in Coral as |
|---|---|---|
Client Id |
| Client ID |
Client Secret |
| Client secret |
Issuer |
| Issuer. Enter the address with the slash at the end; it is the address of the Configuration Url without |
Auth Url |
| Authorization URL (filled by the Discover button) |
Access Token Url |
| Token URL (filled by the Discover button) |
JSON Web Key Set |
| JWKS URI (filled by the Discover button) |
2- Configuring the OIDC/OpenID Settings on Monosign
Open the Keys tab of the application and click the Configure button of the OpenID Connect (OIDC) key to open the OIDC/OpenID settings.
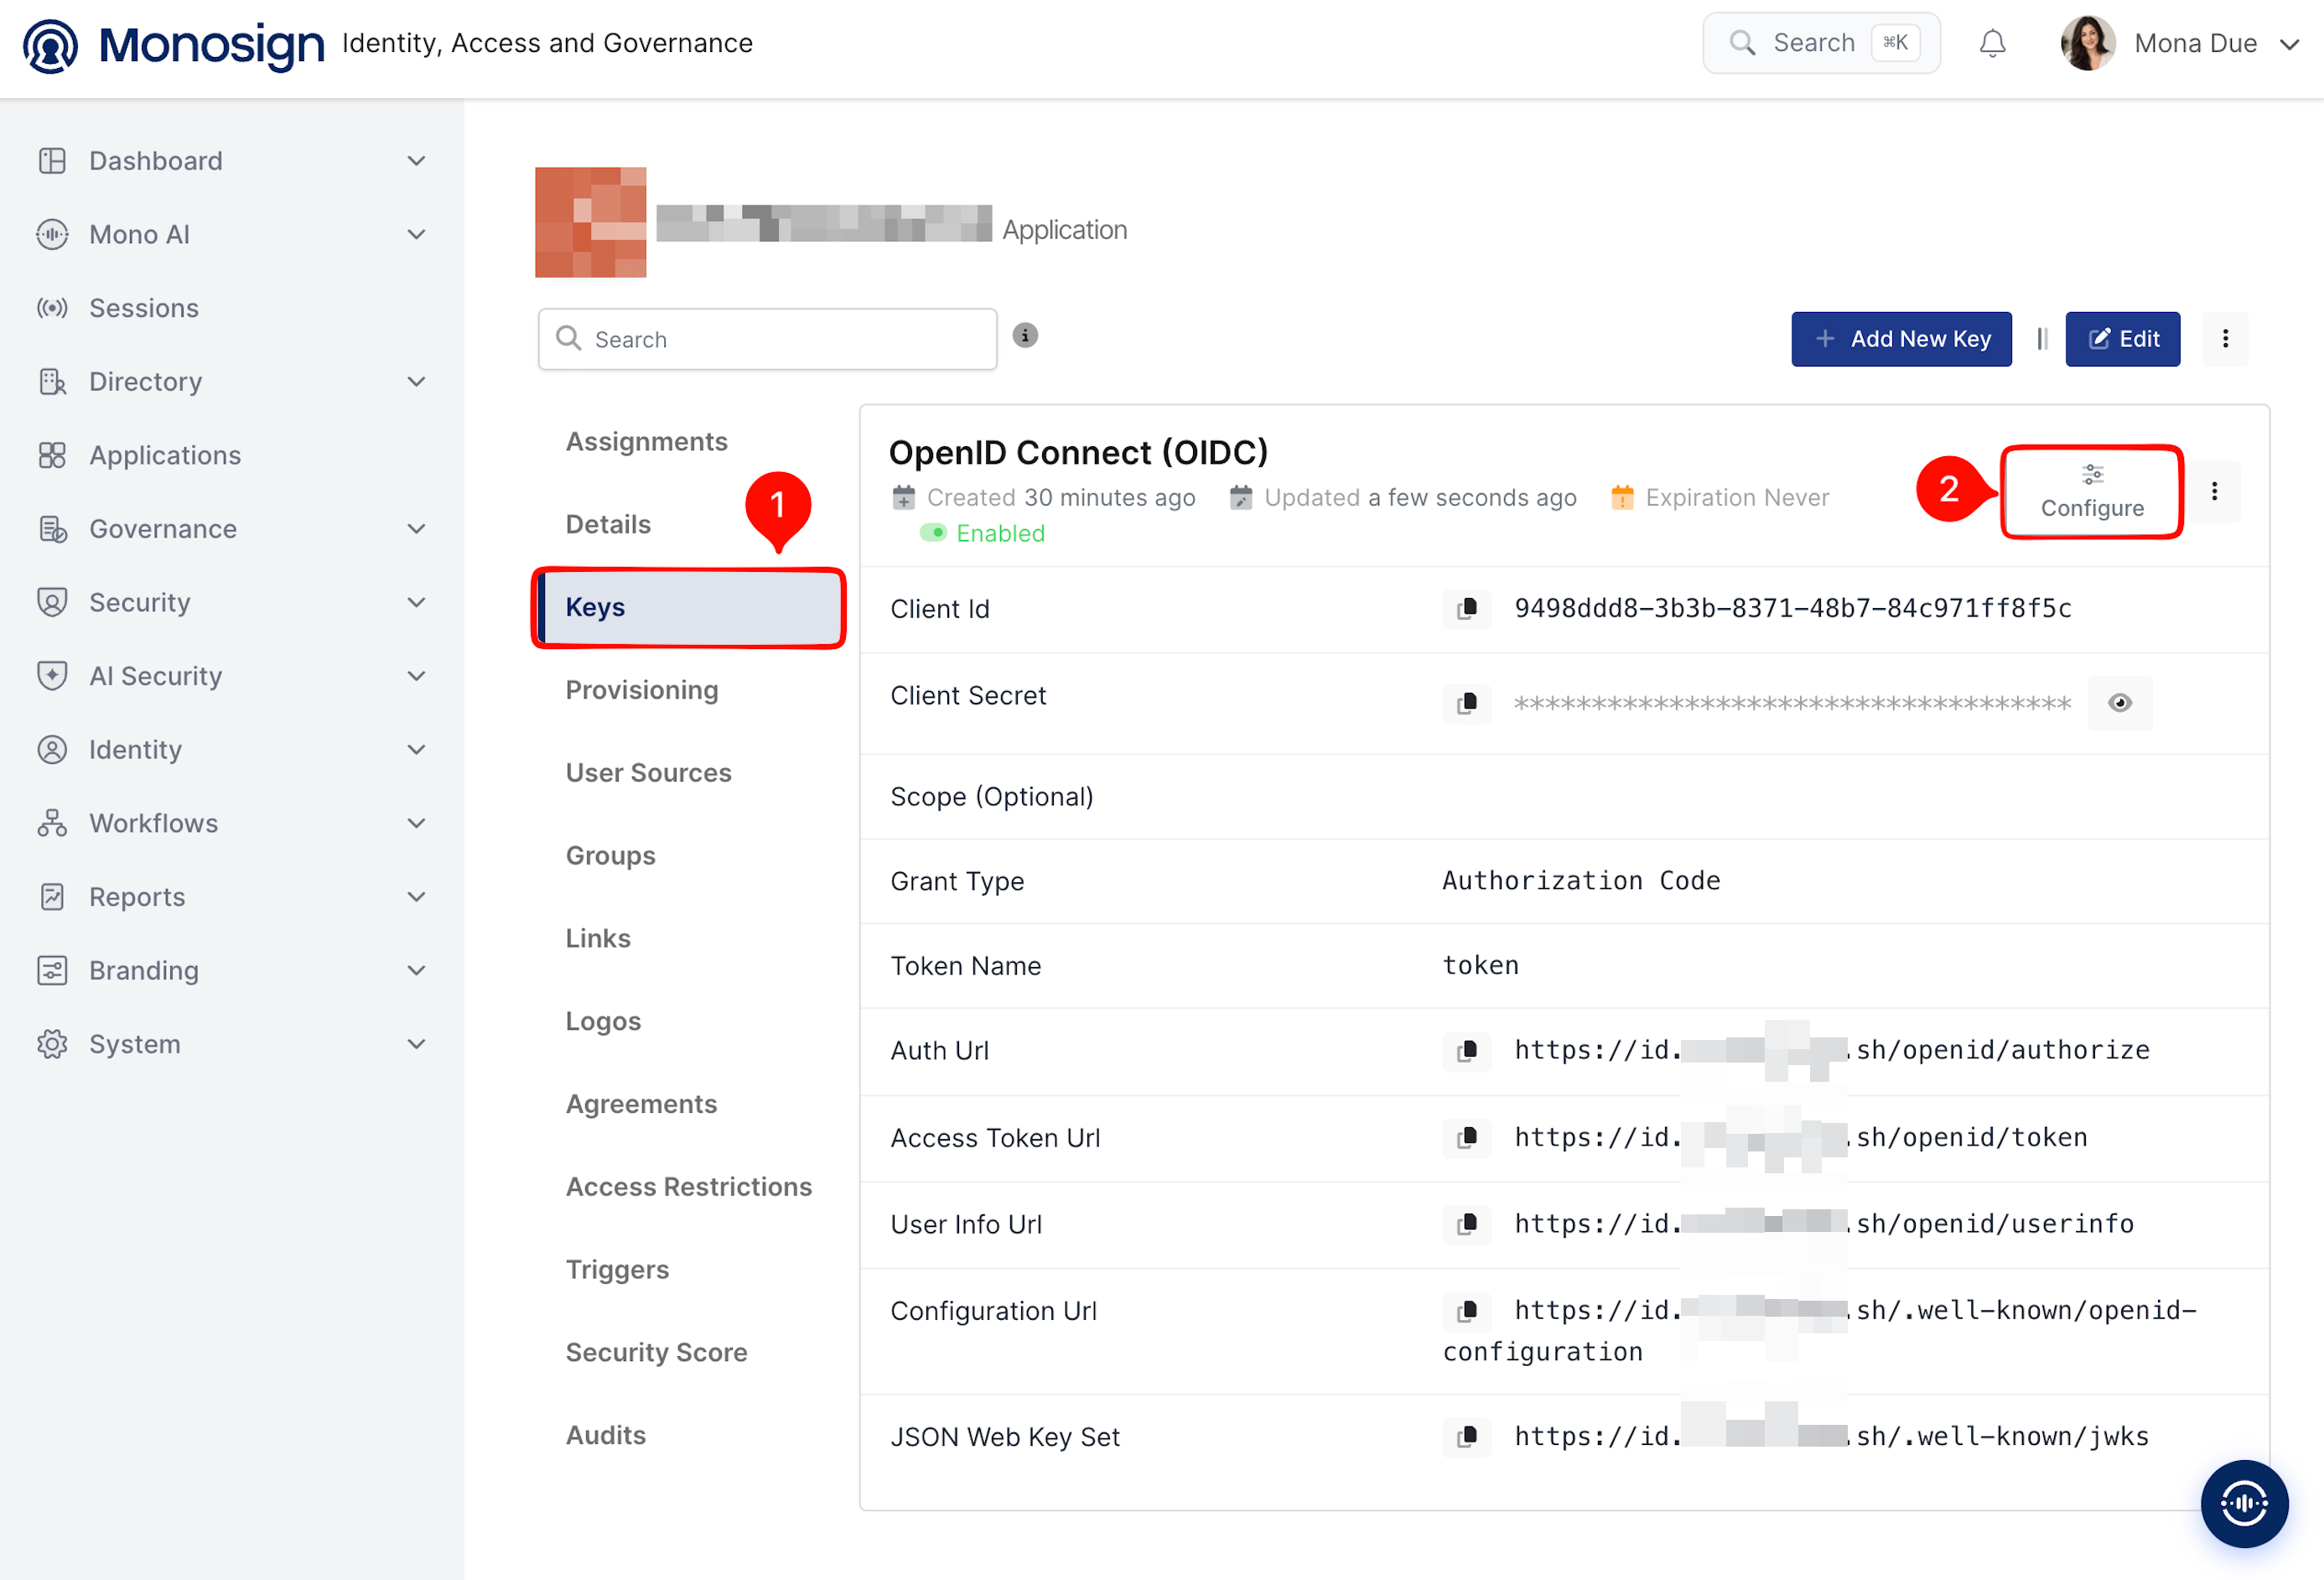
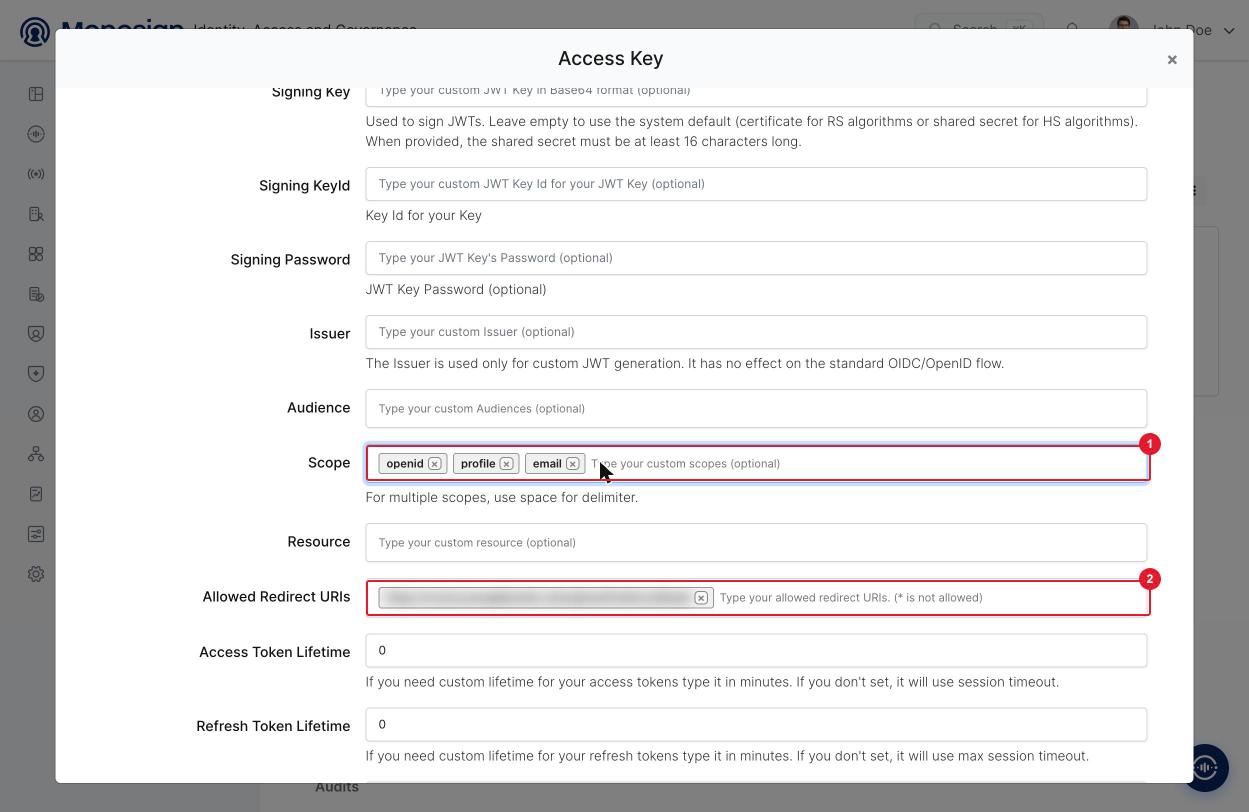
Add the callback address of Coral to Allowed Redirect URIs, enter the scopes in the Scope field, then press Update.
Property | Value | Description |
|---|---|---|
Allowed Redirect URIs |
| The address where Monosign sends the user back after sign-in. Coral shows the same value as Redirect URI in the OpenID Connect settings (step 4). Use the public (HTTPS) address of Coral. |
Scope |
| Enter the three scopes one by one. Coral requests |
Other fields | Empty / default | The other fields (Issuer, Audience, Resource, token lifetimes, CORS) are not needed. |
3- Assign a User to the Coral Application
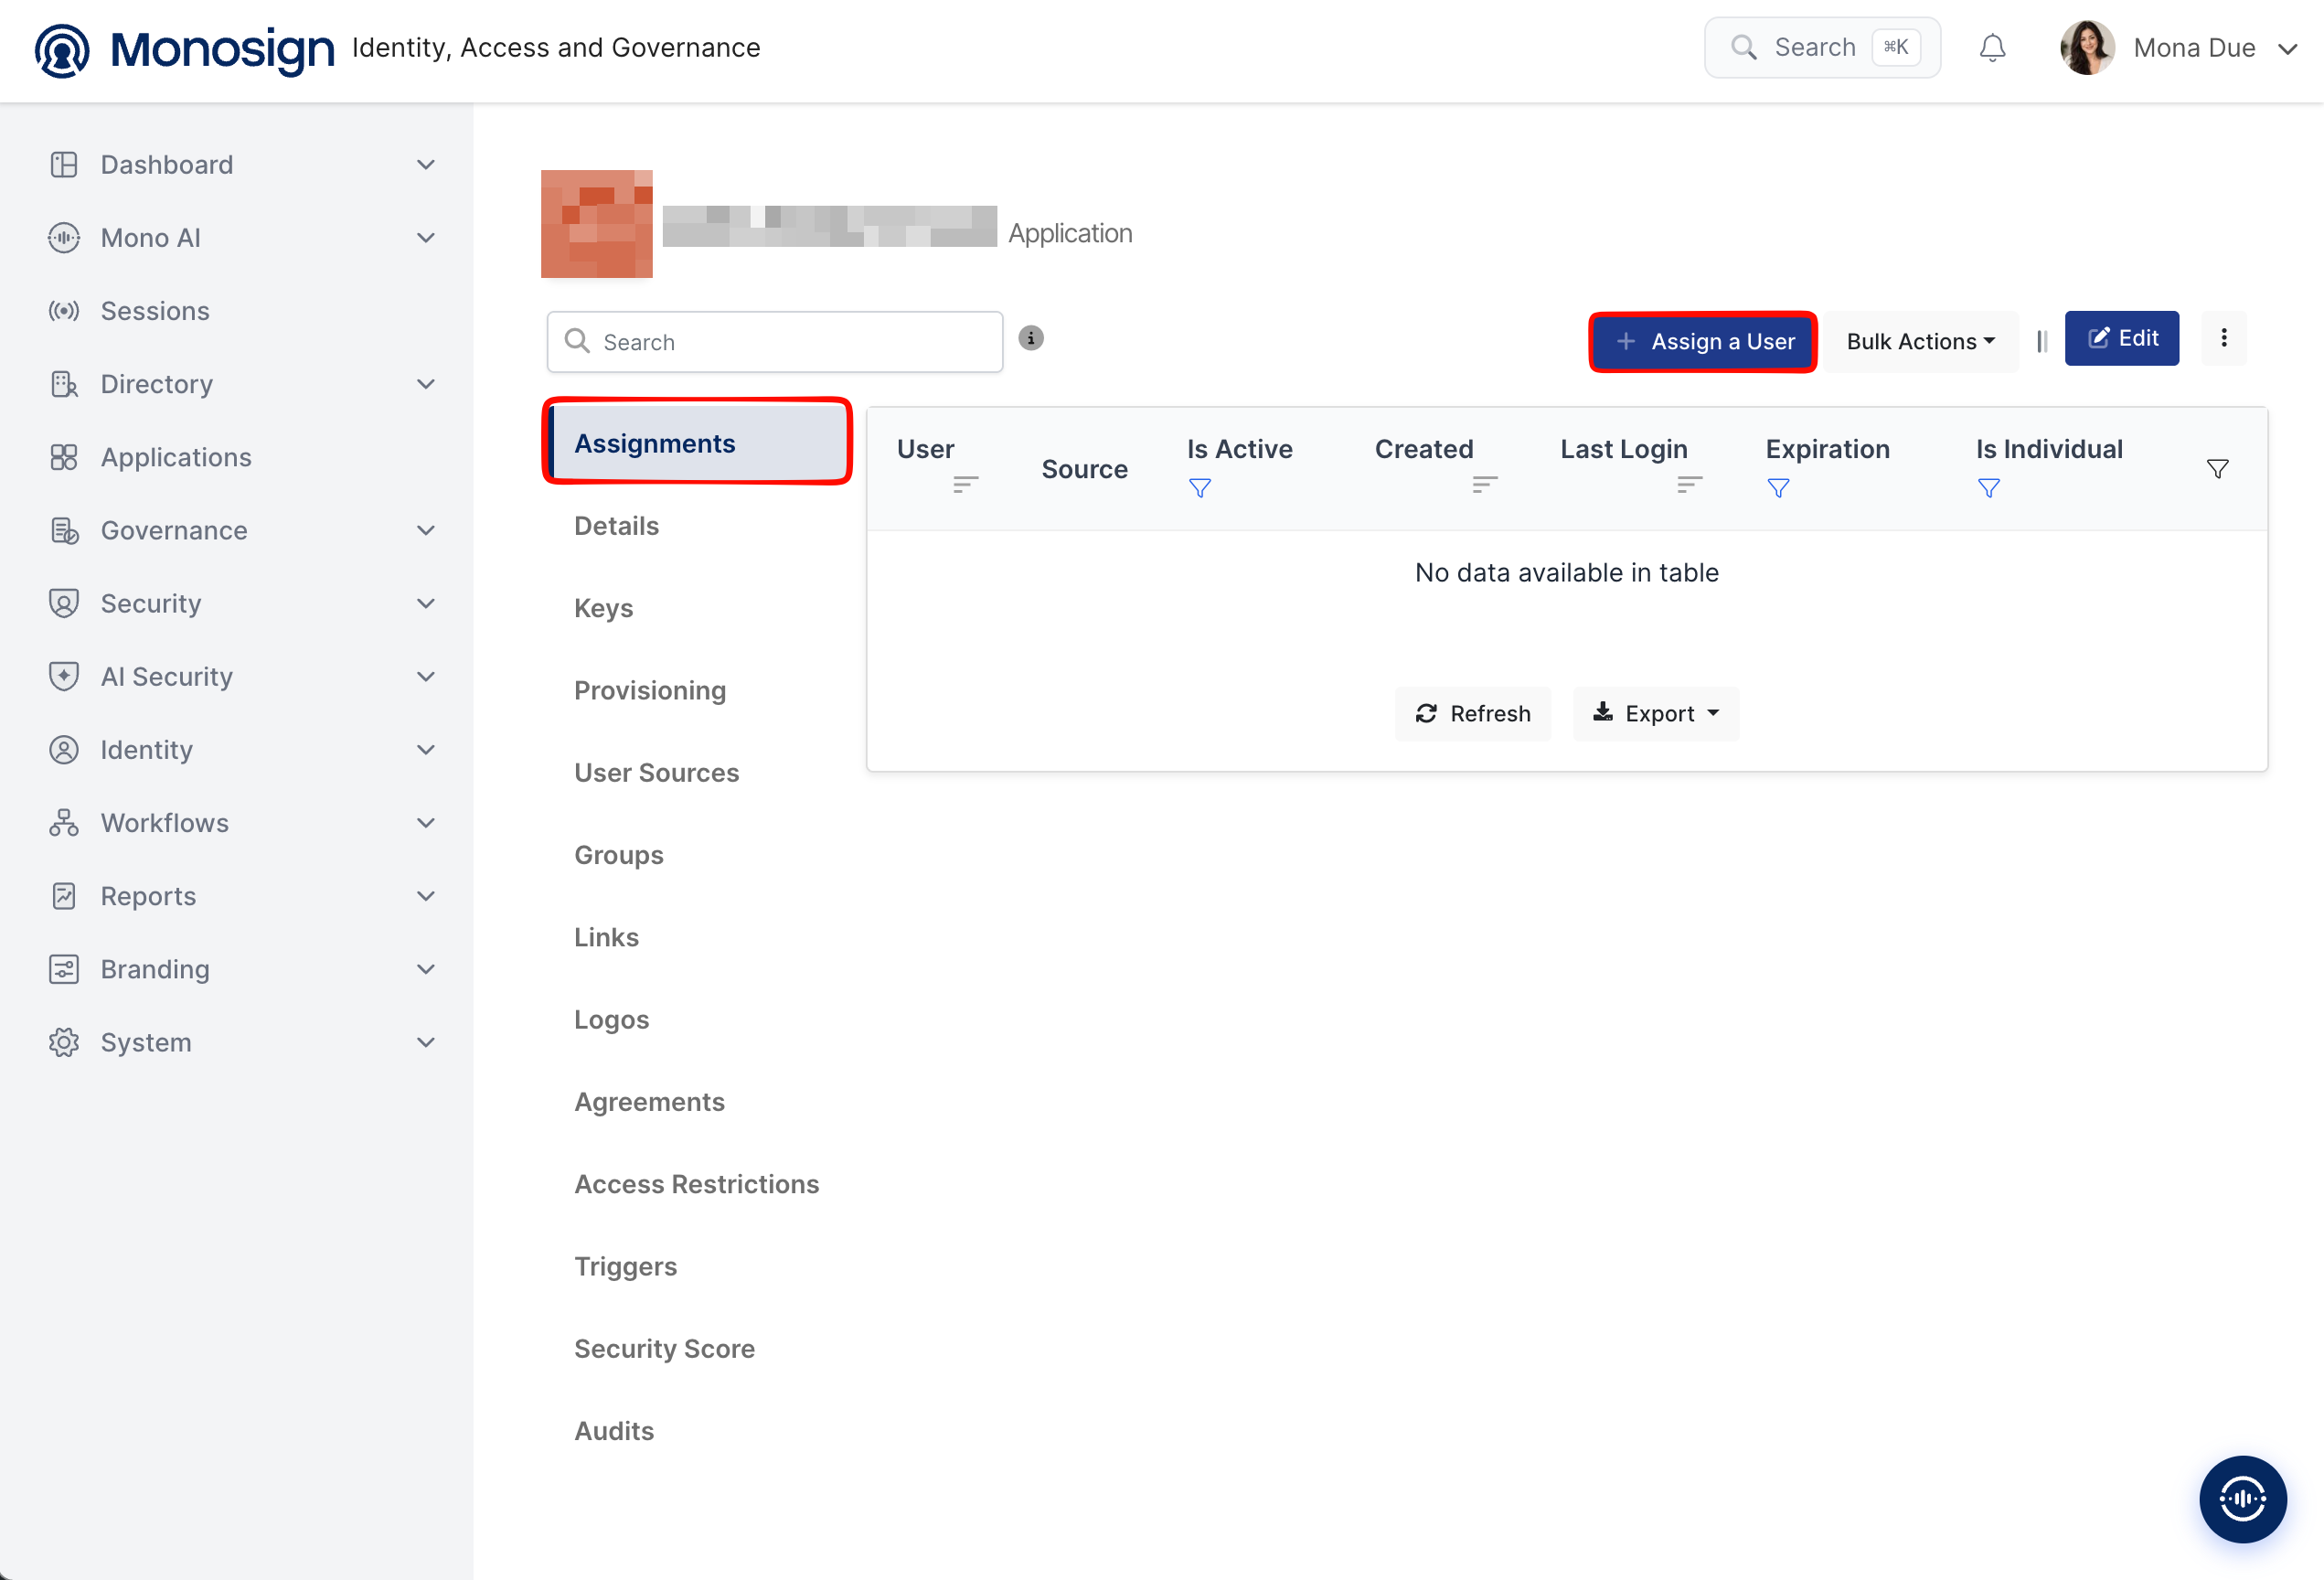
Open the application in Monosign, click the Assignments tab and click Assign a User.
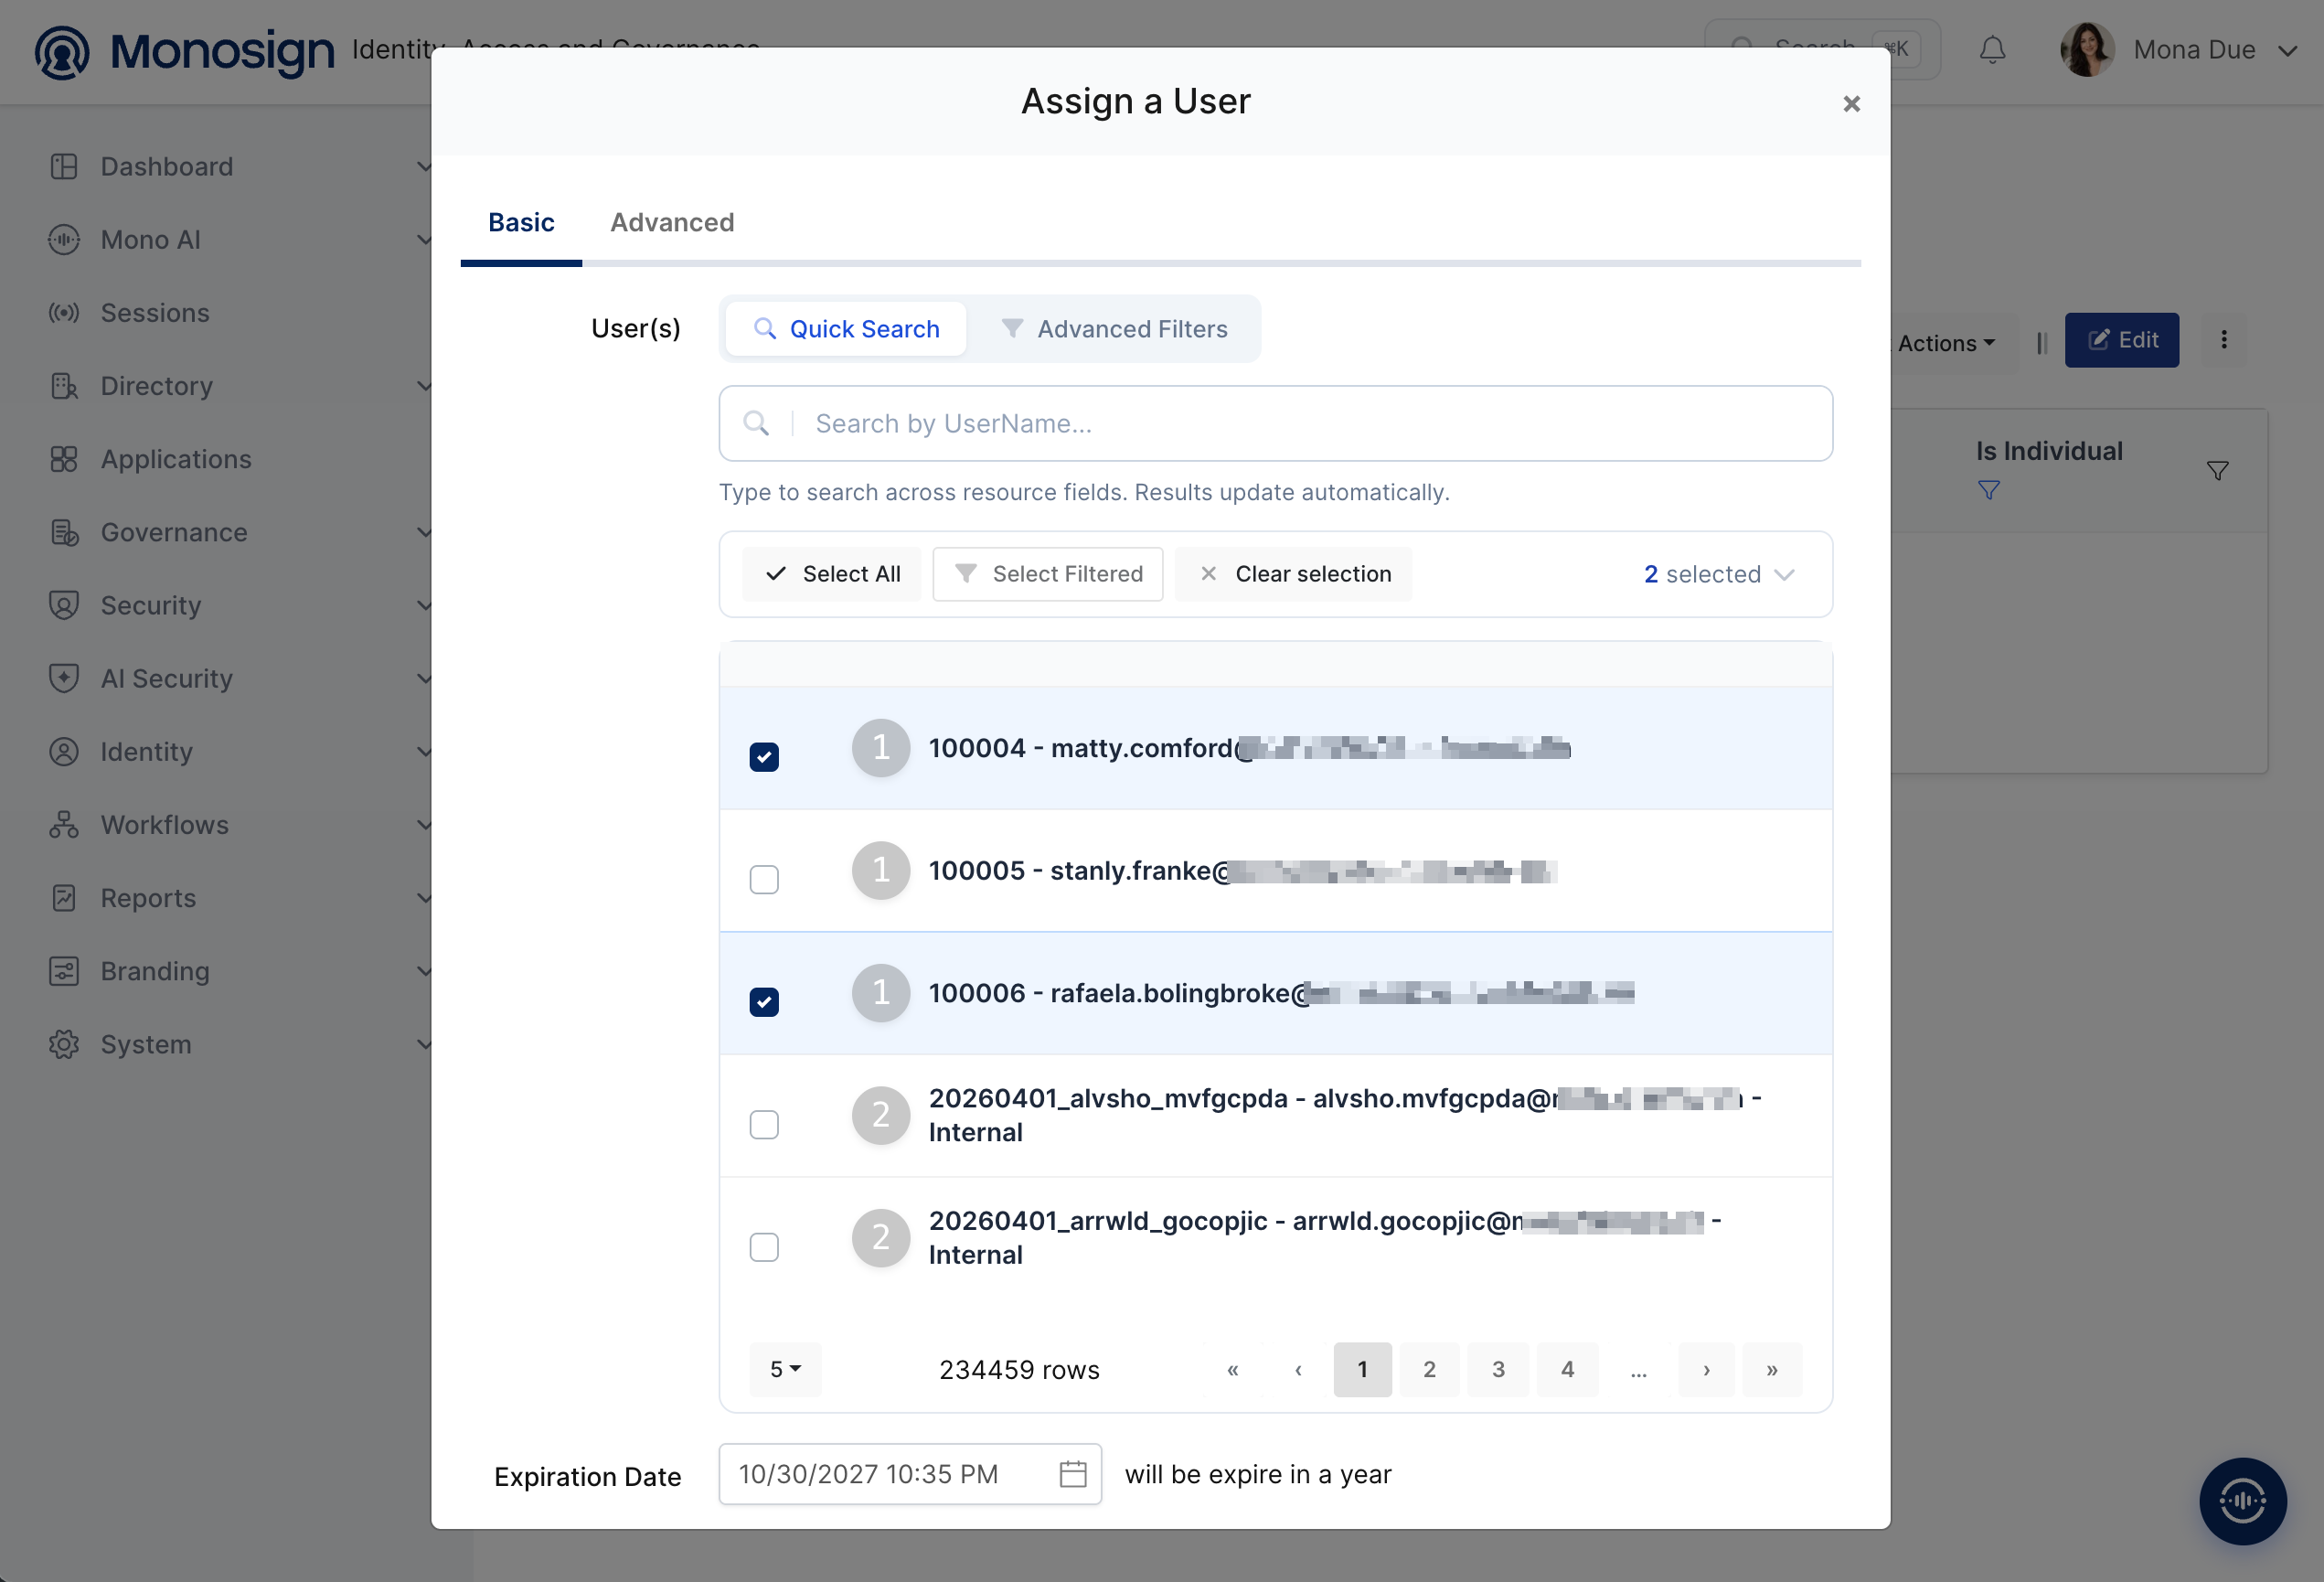
Search and select the users who can sign in to Coral, check the Expiration Date and save. You can select more than one user. Every user needs an e-mail address and a name in Monosign.
4- Configuration Single Sign-On for Coral
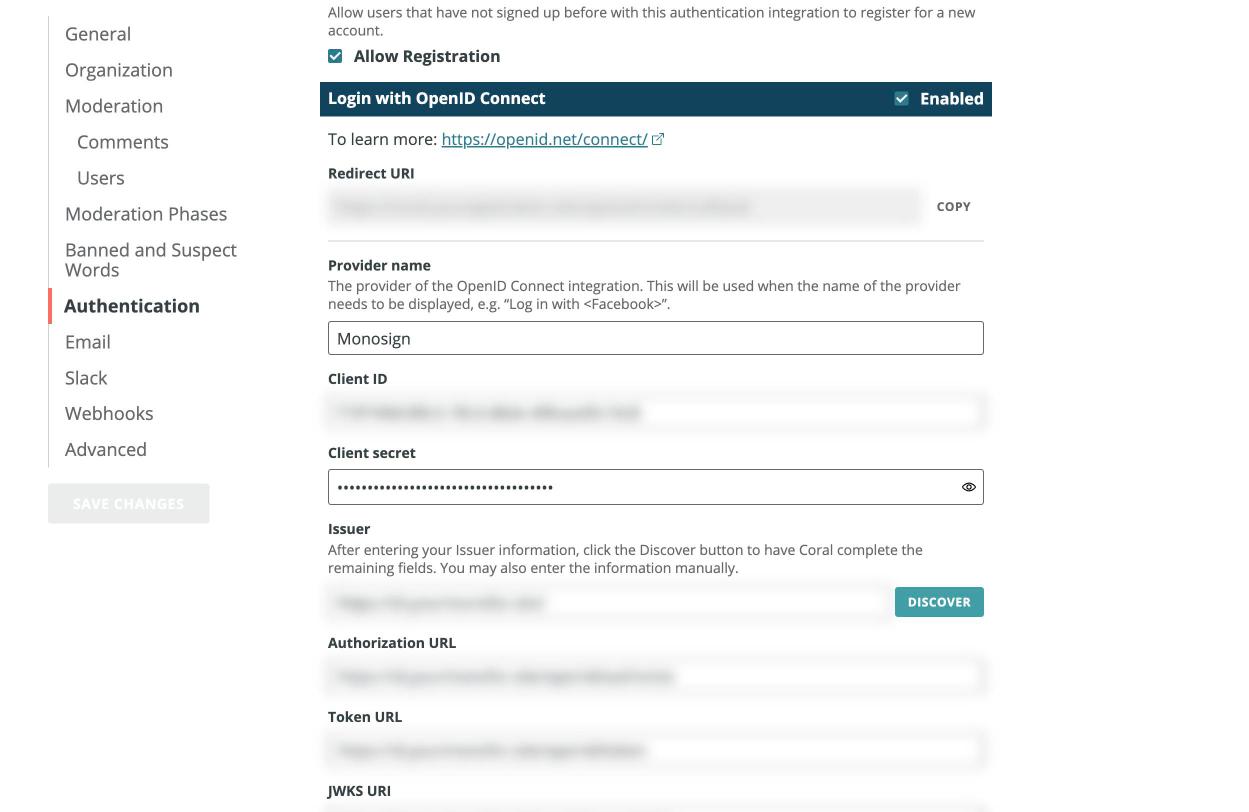
As we mentioned at the start, please check out the Coral documentation first. Log in to the Coral administration interface with an administrator account, open Configure → Authentication, go to the section Login with OpenID Connect, fill in the fields below and click Save changes.
Field | Value | Description |
|---|---|---|
Provider name |
| Name that is shown on the sign-in button (Sign in with Monosign). |
Client ID | Client Id | Copied from the Monosign OIDC/OpenID Access Key Details created in the first step. |
Client secret | Client Secret | Copied from the same page. |
Issuer |
| Address of Monosign with the slash at the end. After you enter it, click Discover; Coral reads the discovery document and fills the three fields below. |
Authorization URL |
| Filled by Discover. |
Token URL |
| Filled by Discover. |
JWKS URI |
| Filled by Discover. Coral verifies the signature of the ID token with these keys. |
Use OpenID Connect login on |
| Where the sign-in with Monosign is offered: the administration interface, the comment stream or both. |
Allow Registration | On | Lets a user who signs in for the first time create an account. Turn it off to allow only users that already exist in Coral. |
Coral takes the user from the ID token: it needs the claim sub and uses email, name or preferred_username and picture when they are present. Coral links the Monosign user to the Coral account by the e-mail address. When Coral is behind a reverse proxy, the proxy must send X-Forwarded-Proto: https and Coral must trust the proxy (TRUST_PROXY), otherwise the callback address starts with http://.
5- Sign In Test
Now try to log in to Coral using Monosign SSO. Open a new browser window (or a private window) and type the address of the Coral administration interface (https://<coral-address>/admin) or open a page with the comment stream. The sign-in page shows the Sign in with Monosign button.
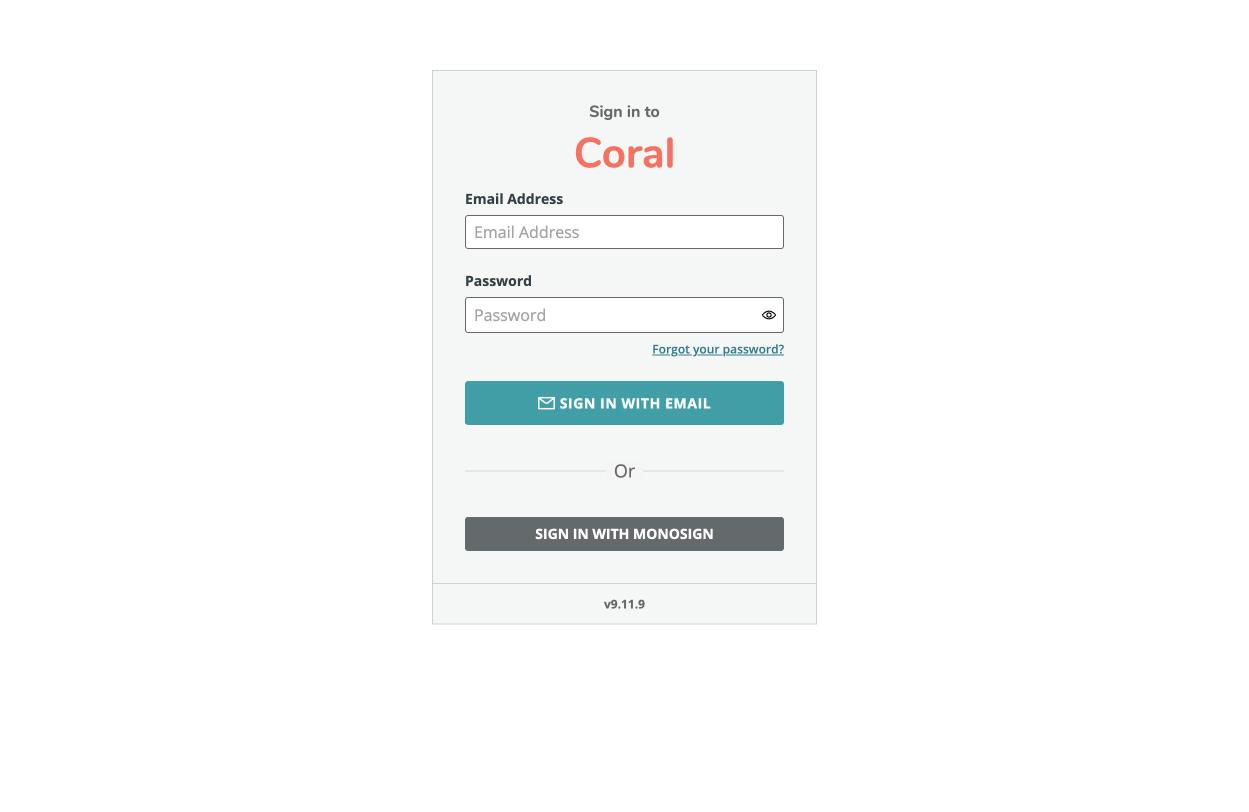
Click the Sign in with Monosign button once.
On the Monosign sign-in page log in passwordless with your QR code (Monofor Identity), with a Passkey or with your user name and password (Sign in with Password). If you are already signed in to Monosign, the page is skipped.
After the sign-in Monosign redirects the browser back to Coral (
/api/auth/oidc/callback). At the first sign-in Coral creates the account with the name and the e-mail address from Monosign and asks the user to create a local password.
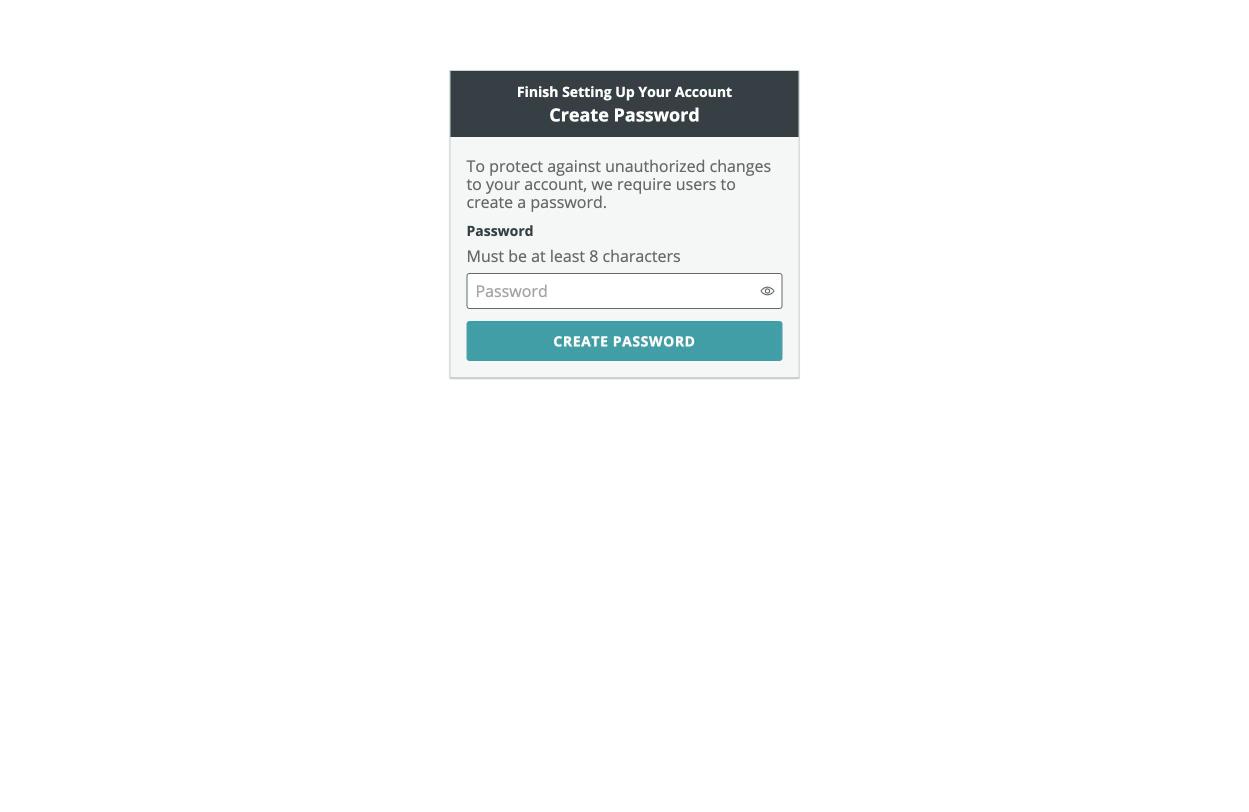
Coral creates the account of a new SSO user with the Commenter role and requires a local password (Create Password screen) even though the user signs in with Monosign. The user can then sign in to the administration interface only after an existing Coral administrator changes the role of the user to Admin (or Moderator) in the Community section. Until then Coral shows You do not have permission to access this page.
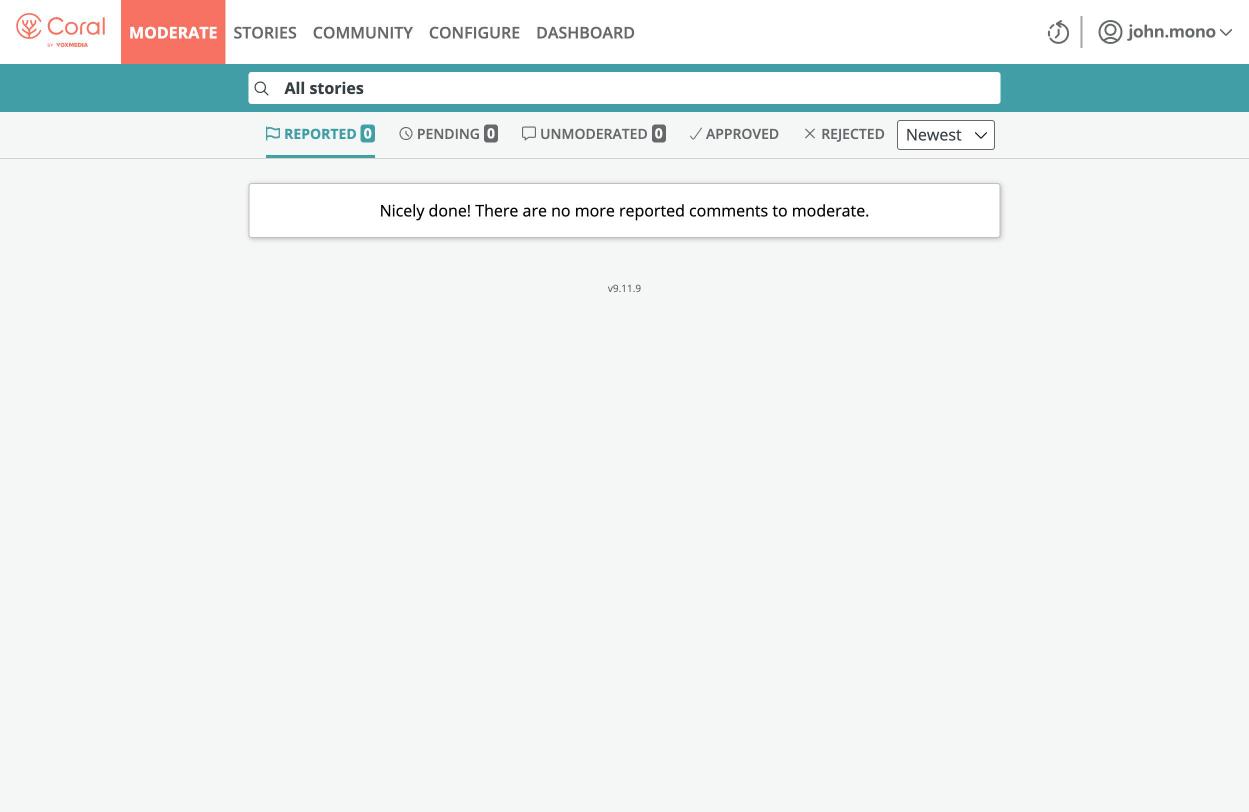
After the role is changed, the user opens the Coral administration interface.
Troubleshooting
Symptom | Cause | Solution |
|---|---|---|
The Sign in with Monosign button is not shown | The OpenID Connect integration is not enabled for the place that you are using (Use OpenID Connect login on) or the settings were not saved. | Check step 4 and save the changes. |
The Discover button shows an error | The Issuer is wrong, or Coral cannot reach Monosign. | Enter the Issuer with the slash at the end and check that the Configuration Url of the key opens from the Coral server. You can also enter the three addresses by hand. |
Monosign shows a redirect URI error | The callback address does not exactly match the Allowed Redirect URIs, for example because it starts with | Use |
An error appears after returning from Monosign | The Client Id or Client Secret is wrong, the ID token cannot be verified (wrong Issuer or JWKS URI), or the ID token does not contain the claim | Copy the values again from the Monosign access key (step 1) and check the Issuer, the Token URL and the JWKS URI. |
A new user cannot sign in | Allow Registration is off and no Coral account exists for the user. | Turn on Allow Registration, or create the account in Coral first. |
A user cannot sign in | The user is not assigned to the application. | Assign the user in step 3. |
Coral shows You do not have permission to access this page. after a successful sign-in | The new account has the Commenter role, which cannot open the administration interface. | Ask a Coral administrator to change the role of the user to Admin or Moderator. |
Coral asks for a password after signing in with Monosign | Coral requires a local password for every account, including accounts created by SSO. | Create the password on the Create Password screen; it is not used for the Monosign sign-in. |
After completing the configuration on Coral and Monosign, it is better to test in a new private browser window if the OIDC SSO doesn’t work, because old session cookies may cause errors.